[Simple Setup] How to Automatically Sync Microsoft Excel Data with Google Calendar
How to Integrate Applications
・
2025-05-08
[Simple Setup] How to Automatically Sync Microsoft Excel Data with Google Calendar
If you manage tasks and schedules using both Microsoft Excel and Google Calendar, you might find it a bit tedious to register the same schedule data in each tool. Double management not only consumes time but also increases the likelihood of transcription errors and missed updates.
The solution to this problem is automation through data integration between Microsoft Excel and Google Calendar! By utilizing this integration, data between Microsoft Excel and Google Calendar is automatically synchronized. This simplifies the input of tasks and schedules, making schedule management easier.
Additionally, by using the no-code tool Yoom, integrating data between Microsoft Excel and Google Calendar can be easily achieved. This method allows even those without programming knowledge to easily connect the two. Give it a try!
For those who want to try it as soon as possible, Yoom allows for easy no-code integration between Microsoft Excel and Google Calendar. Yoom provides templates for integrating Microsoft Excel and Google Calendar, so you can achieve integration immediately by simply registering, without needing any API knowledge.
What You Can Do by Integrating Microsoft Excel and Google Calendar
By integrating the APIs of Microsoft Excel and Google Calendar, you can automatically sync data from Microsoft Excel to Google Calendar!
Simply click "Try it out" on the automation example you're interested in and register an account to immediately experience the integration of Microsoft Excel and Google Calendar. Registration takes just 30 seconds, so feel free to give it a try!
Bulk Register Task Lists from Microsoft Excel to Google Calendar on a Specified Schedule
This flow is recommended for those who manually reflect work schedules and tasks on their calendar or want to receive reminder notifications according to deadlines and due dates.
Let's Create a Flow to Integrate Microsoft Excel and Google Calendar
Let's dive right in and create a flow that integrates Microsoft Excel with Google Calendar!
This time, we'll use Yoom to proceed with the integration of Microsoft Excel and Google Calendar without any coding. If you don't have a Yoom account yet, please issue one from the registration form here.
[What is Yoom]
This time, we will create a flow bot that bulk registers a list of tasks from Microsoft Excel into Google Calendar on a specified schedule!
The creation process can be broadly divided as follows:
Integrate My Apps with Microsoft Excel and Google Calendar
Copy the template
Set up the schedule trigger and integrate Microsoft Excel with Google Calendar
Set the trigger to ON and complete the preparation for flow operation
Step 1: Integrate Microsoft Excel and Google Calendar with My Apps
Click "+ Add" from "My Apps" in the left menu of the Yoom screen.
Enter the name of the app you want to integrate in the search box.
How to Integrate Microsoft Excel with Yoom
When you search for the Microsoft Excel app, a sign-in screen will appear. Once you log in, the integration will be automatically completed.
* There are personal and business plans (Microsoft 365 Business) for "Microsoft 365 (formerly Office 365)". If you do not have a business plan, authentication from Yoom may not work properly, so please be careful.
How to Integrate Google Calendar with Yoom
When you search for the Google Calendar app, a login page will appear. Click "Sign in with Google".
Select the account you want to integrate.
A screen regarding sharing with Yoom will be displayed, so press "Continue".
Select the range Yoom can access and click "Continue" to complete the integration!
Step 2: Copy the Template
Next, copy the template to be used this time.
Press "Try it" on the banner below.
If you have not yet registered with Yoom, please register.
* If you have already completed registration, please log in.
When the template is copied to "My Project", a screen like this will be displayed.
Step 3: Set the Schedule Trigger
Open the copied template
Open the copied template from "My Project" in the menu on the left. (※ If you set it immediately after copying the template, you do not need to open the template. If you interrupt the setting, open it from "My Project" to resume!)
Open the schedule trigger
Click "When the specified schedule is reached".
Specify the execution time
Set the timing when you want to start the flowbot. In the template, the flowbot is set to start at "9:00 every Monday". Change the day of the week and notification time as needed. After confirming the settings, click "Save". ※ In "Cron Settings", detailed settings such as starting at different times depending on the day of the week are possible. ※ For detailed setting methods, please check here.
Step 4: Retrieve Records from Microsoft Excel
Open the Microsoft Excel app
Click "Get multiple records (up to 10)".
Integrate with the database
First, enter the necessary parts. "Title": Can be changed as needed "Account information to integrate with Microsoft Excel": Check if it is correct "Execution action": Select "Retrieve multiple records (up to 10)"
Next, enter the "Sheet information of Microsoft Excel to integrate". This time, as a test, I created a task management sheet (sheet name: Task 2).
Select from "File save location".
"Drive ID" can be easily entered by selecting from the candidates. Click the input field to display the candidates.
Select "Item ID" and "Sheet name" from the candidates.
Enter the "Table range" while looking at the Microsoft Excel sheet. After entering, press "Next".
Set the details of the database operation
Enter the "conditions of the records you want to retrieve".
After entering, press "Test".
Scroll further down to see the output. It will be necessary information for the next setting work, so make sure to check it. After checking, click "Save". ※ For a detailed explanation of the output, please check here.
Step 5: Set the Command Operation
Open the command operation
Click "Command Operation".
Specify the repetition target
Here, create outputs for the four items "Task", "Content", "Start Date", and "Deadline" of the Microsoft Excel sheet that you want to reflect in Google Calendar. ※ For detailed setting methods of "Repeat the same process", please check here. ※ Operations between "Repeat the same process" are only available in the Team Plan and Success Plan. In the case of the Free Plan and Mini Plan, the operations and data connects of the flowbot being set will result in an error, so please be careful. ※ Paid plans such as Team Plan and Success Plan can be tried for free for 2 weeks. During the free trial, you can use restricted apps and functions (operations), so please try it out during this opportunity!
The creation method is simple! "Operation": Select "Retrieve multiple records (up to 10)" "Output": Select "Task"
Create the remaining 3 outputs in the same way. After completing the creation, click "Save".
Step 6: Integrate with Google Calendar
Open the Google Calendar app
Click "Create event".
Select the integration account and action
Enter the necessary parts. "Title": Can be changed as needed "Account information to integrate with Google Calendar": Check if it is correct "Action": Select "Create an event"
Set the API connection
First, enter the "Calendar ID".
Next, enter the "Event title". Use the output obtained in Step 5 to enter. ① Click the input field to display "Output" ② Click "Command Operation" ③ Select "Task loop variable"
Enter "Event start date and time" and "Event end date and time" from the output in the same way. Check the annotation for the date input format. (This time, we are using the format "Month Day Hour Minute" that can be automatically converted!) ※ For detailed automatic conversion of dates, please check here.
Enter the "Description of the content" using the output.
Finally, choose whether participants other than the organizer can change the event. After completing all inputs, press "Test", and if there are no problems, click "Save".
Finally, make sure to check if the event is actually entered in Google Calendar!
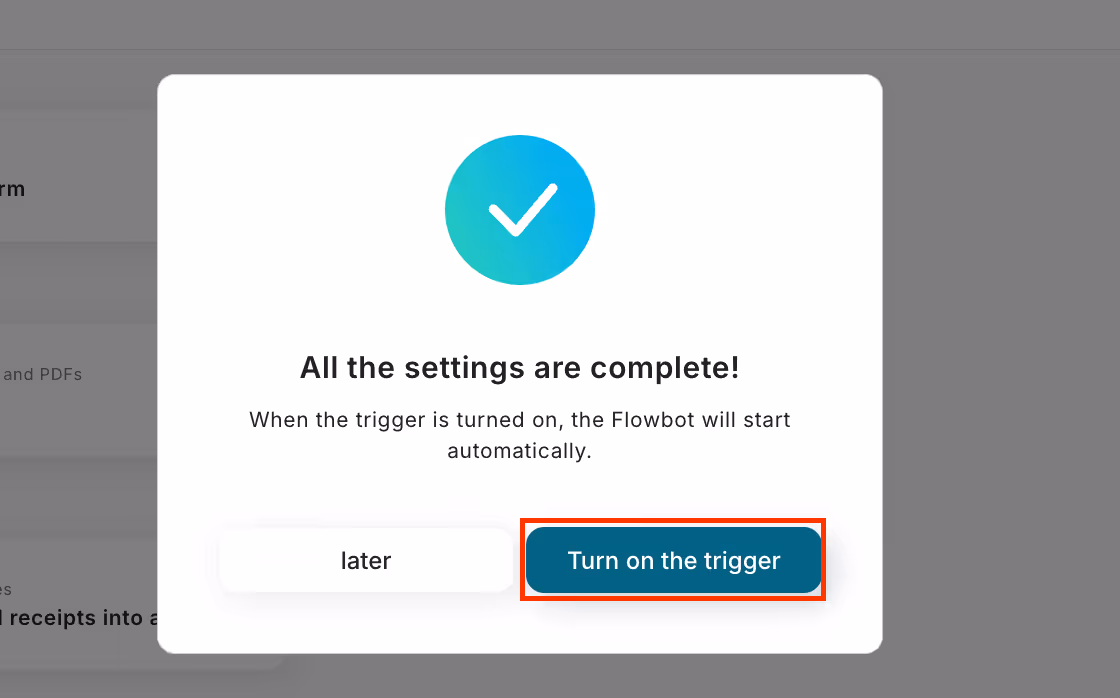
Step 7: Turn on the Trigger and Check the Operation
Finally, click "Turn on the trigger" to complete the automation settings. Check if the flowbot starts correctly. Thank you for your hard work on the settings!
This concludes the integration procedure for bulk registering the task list from Microsoft Excel to Google Calendar on a specified schedule!
If you want to integrate Google Calendar data into Microsoft Excel
This time, we introduced how to integrate data from Microsoft Excel to Google Calendar, but if you want to integrate data from Google Calendar to Microsoft Excel, please also use the following template.
Add to Microsoft Excel when an event is created in Google Calendar
This flow is recommended for those who create reports based on schedule content or manage histories of meetings and appointments in Microsoft Excel.
Add Next Week's Google Calendar Events to Microsoft Excel on a Specified Schedule
This flow is recommended for those who want to organize task priorities based on calendar information or plan their work schedule.
Other Automation Examples Using APIs of Microsoft Excel and Google Calendar
By leveraging the APIs of Microsoft Excel and Google Calendar, various automations can be achieved! How about considering the following automations?
Automation Examples Using Microsoft Excel
By automatically adding data, centralized data management can be realized. Additionally, by integrating with other tools, automatic notifications are also possible, reducing the effort required for information sharing.
Example of Automation Using Google Calendar
You can automate the creation of new schedules and notification tasks. This also helps prevent communication lapses in task assignments.
Conclusion
By integrating Microsoft Excel with Google Calendar, you can expect smoother management of tasks and scheduling that should be shared within the team! This integration simplifies tasks that were previously done manually, allowing you to complete the entire process more quickly than doing it manually. As a result, managing schedules is likely to become easier!
Additionally, Yoom offers many templates beyond the automation introduced this time! If you can easily implement integration between the apps you use regularly, a stress-free workflow might be achievable…!
Furthermore, since no programming is required for integration, it's easy to implement, and you can set it up smoothly without specialized knowledge, which is a great advantage. Take this opportunity to reduce your workload and create a comfortable working environment by registering with Yoom now and implementing automation!
The person who wrote this article
Tags
No items found.
Related Apps
No items found.
App integration
No items found.
What is Yoom hyperautomation?
Conventional RPA can only automate simple repetitive tasks, and the setup process was very complicated. With “hyperautomation,” which combines various technologies such as AI, API, RPA, and OCR, it is possible to automate many tasks that could not be realized until now more easily than before.
Most tools simply connect one app to another, leaving the complex tasks to you. Yoom goes much further: From document creation and browser automation to OCR and generative AI, Yoom handles it all seamlessly in one platform.
Why settle for basic integrations? Streamline your entire workflow with Yoom’s powerful hyperautomation.


.avif)


