How to Send Email from Excel Automatically: No Code Setup
How to Integrate Applications
・
2025-05-28
How to Send Email from Excel Automatically: No Code Setup
s.ougitani
Ever feel like sending emails takes too much time? Whether its customer lists, task reminders, or regular reports, manually checking the data on Microsoft Excel and creating an email can become stressful, time-consuming, and error-prone. . Sending to the wrong email addresses or missing to send emails happen more often than we’d expect.
What if:
you can automate sending emails directly from your Excel data
you can save time and reduce errors
With Yoom, you can make this possible easily without writing a single line of code.
Meet Yoom: No-Code Automation
Yoom is a next-generation no code automation tool that lets you connect and automate tasks between your favorite apps. Yoom makes automation accessible to everyone.
Connect with apps like Microsoft Excel, Microsoft Teams, Outlook and more.
Use automation templates - no technical set up required
Boost productivity and reduce human errors
No need to go through complex set up and IT jargons, Yoom keeps things simple and visual. You can build your automation workflows with just a few clicks, saving hours of time and stress from repetitive work.
In this guide, you’ll learn the step by step process of how to use Yoom to automatically send emails using the data from Microsoft Excel.
For Those Who Want to Try It Right Away
Yoom offers a ready-made template for easy setup for Excel related tasks. Click the “Try it” button to get started now!
We’ll also walk you through the step-by-step process of creating this automation flow later in this article.
What You Can Do with Excel & Yoom
You can use Yoom’s ready-made templates to easily automate email sending using Excel data. Find the template that fits your needs and click the “Try it” button to get started right away :)
Automatically Send Emails Based on Excel Data on a Schedule
Send emails regularly (daily, weekly, or monthly) automatically. The Flowbot retrieves data from Excel at a set time and sends template emails through Outlook.
Recommended for those who handle weekly reports, billing reminders, or any recurring email tasks.
Automatically Send Emails Triggered by Form Responses
Send automated email replies or follow-ups based on form submission. Recommended for event confirmations, application receipt emails or any scenario where timely email responses improve customer satisfaction.
Automatically Send EmailsTriggered by Chat Tools
Automate sending emails triggered by chat messages containing specific keywords. Perfect for teams who want to automatically convert chat messages, instructions, or alerts posted in chat tools into email notifications.
Let's Create a Flowbot to Automatically Send Emails Based on Microsoft Excel Data
Let’s walk through the Flowbot of how to automatically retrieve data from Excel at a set time and send a template email through Outlook.
Setup time: 5 minutes
What You’ll Need
A free Yoom account
Access to Microsoft Excel, and Outlook
If you do not have a Yoom account yet, you can create one using this registration form.
Step 1: Register Excel & Outlook in My Apps
Add Microsoft Excel
In Yoom, go to My Apps tab, and click the “+Add” button.
Search for Microsoft Excel and select it.
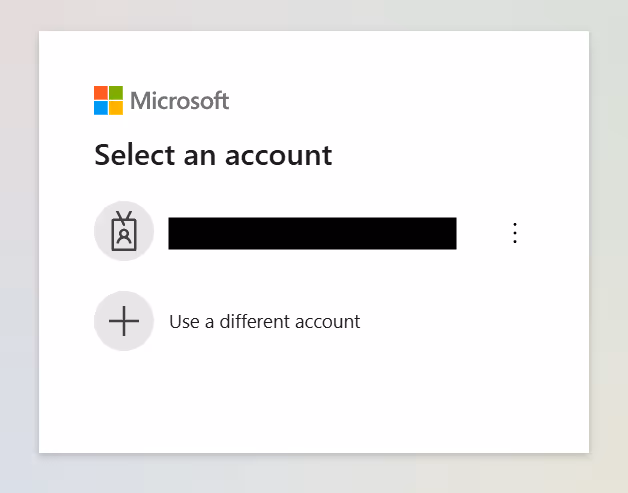
Select the account you want to link.
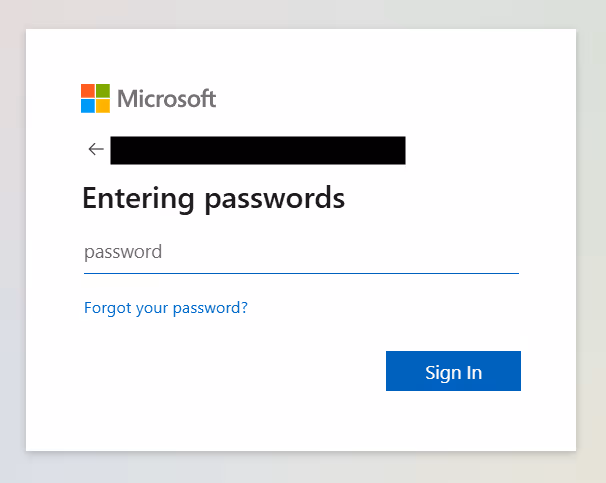
Enter your password and click Sign In.
Note: "Microsoft 365 (formerly Office 365)" includes both personal and business plans. If you’re using a personal plan, Yoom’s authentication may not work properly. We recommend using a Microsoft 365 Business account for stable connection.
Add Outlook
Click on My Apps and select Add.
Search for Outlook, and select it.
Follow the same step as before and select your account.
Enter your password and click Sign In.
Once both apps are connected, you’ll see them listed under “My Apps”.
Step 2: Copy the Template
Click the “Try it” button to copy the pre-built template into your project.
Please click "Try this template".
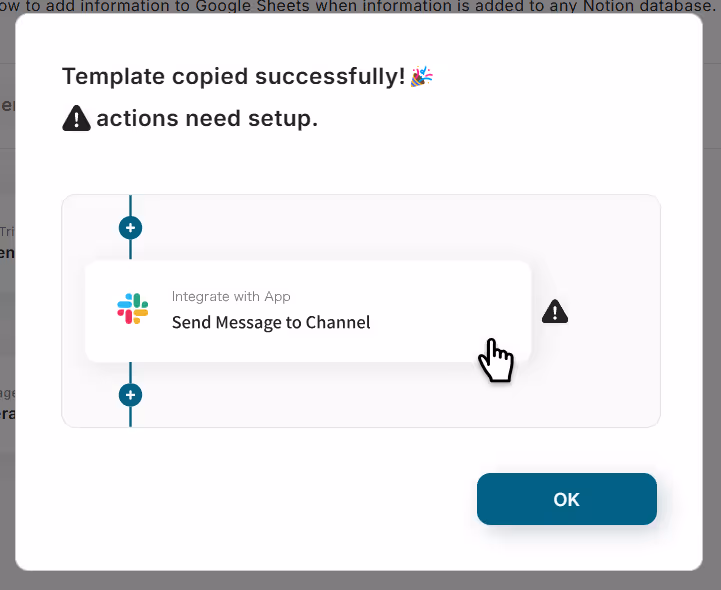
Click "OK" and give this Flowbot a name to recognize.
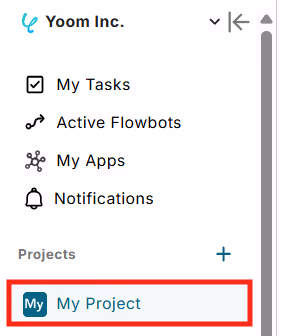
This template will be copied to your “My Project”.
Step 3: Setup the Schedule Trigger
Click on the schedule trigger step labeled, "When the specified schedule is reached".
Choose the date and time you want to activate the Flowbot. (default: 9AM on the 1st of every month).
Customize the schedule to how you want it and click Save.
Reference: You can adjust the timing using Cron settings for more flexibility. For more details, refer to this article.
Step 4: Configure Microsoft Excel Actions to Retrieve Records
Before you connect the database, make sure your Excel file is set up with necessary data. For this example, we’ll use this excel file summarizing customer details. This data will be used to send emails to companies whose contract expires at the end of next month.
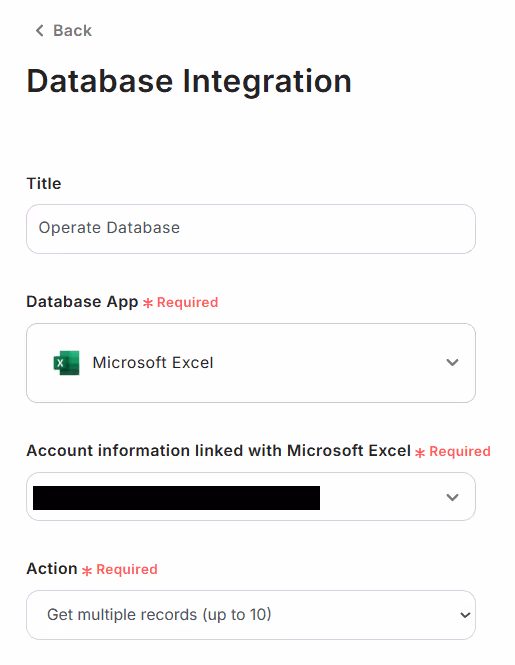
Once ready, return to Yoom page and open the Excel action step, "Retrieve multiple records".
Give your action a name (anything you like). Select your Excel account, and check the default settings. If no issues, click “Next”.
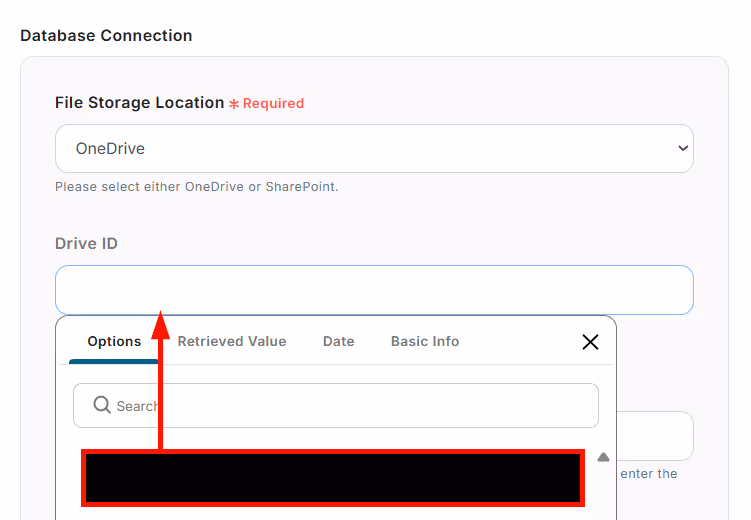
Select the file location. Choose the Drive ID you want to link from the displayed options.
Similarly, select the Item ID (the database) you want to link from the options.
Select the sheet name from the options.
Next, set the table range. For this example, we will set it to the range below.
Reference: For detailed instructions on how to set the table range, check this help page.
Once the settings are done, click “Next”.
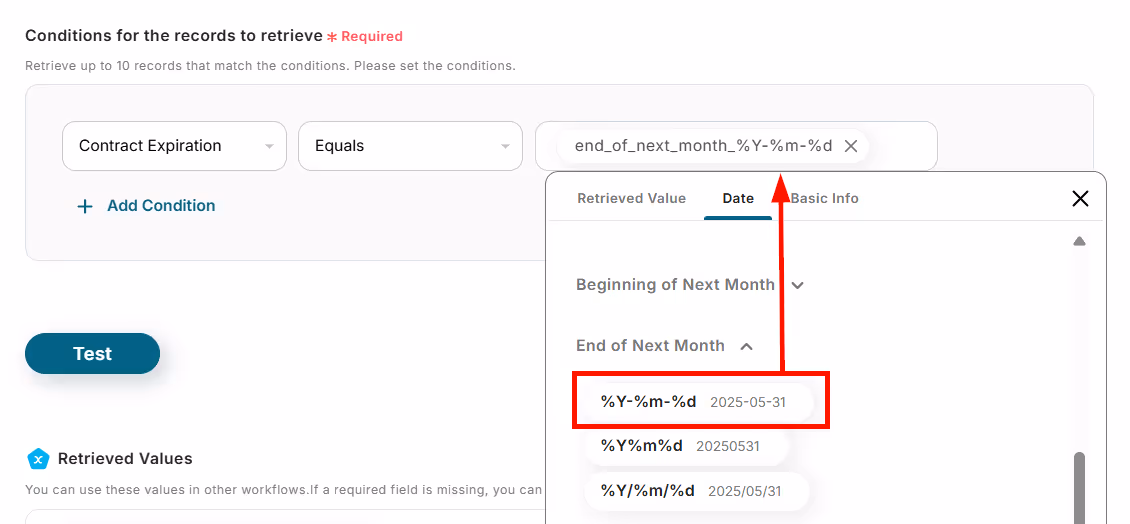
Set the conditions to filter records.
For example, if you want to get the company details whose contracts are expiring, choose "Contract Expiration" "Equals", "End of Next Month".This will pull the relevant data to send emails to companies whose contract expires at the end of next month.
Run a test to make sure the data is being retrieved correctly.
If successful, the data from Excel should appear as retrieved values. You’ll use these data in the following steps, so check the details are correct.
Reference: For more details on retrieved values and how to set it up, see the guide here.
Step 5: Setup Loop Command ( Repeat Process)
Click the repeat process action step, "Retrieve customer information one by one".
Note: The loop command function is only available on Yoom’s Team and Success plan. If you’re using the Free or Mini plan,the Flowbot may face errors due to limited access. But don’t worry - both the Team and Success plan have a 2-week free trial! You can try all features without restrictions. For more info about Yoom and its plans, visit our Yoom Help Center.
In the dropdown, select Company as the retrieved value to identify each record in the loop.
Similarly, add additional fields, such as "Contact Person" and "Email", which will be used in the next step to send emails via Outlook. These items may vary depending on what you've set in your Excel sheet. Feel free to adjust the settings to match your data to automatically send through Outlook. Once the settings are done, click Save.
Step 6: Setup Outlook Actions to Send Email
Click the "Send Email" action.
Select your Outlook account, and check the default settings. If there are no issues, click “Next”.
For the "To" field, select the "Loop Variable for Email".
This will automatically pull the email addresses from the customer records retrieved in the previous step.
This means the Flowbot will send emails only to customers from the Excel file who meet the specified conditions (e.g., contracts expiring at the end of next month).
Customize the email subject and the message content using the retrieved data from Excel.
For example, use retrieved values like “Loop variables for Company Name” and “Loop variable for Contact Person” to personalize each email without manual input.
This will pull the “company name” and “contact person” from excel and include the info in the Outlook email.
If you want to include the contract expiration date in the message, select the date value (e.g., End of Next Month) from the available options as shown in the image. Once the settings are complete, click “Test”. If successful, click “Save” to finalize the setup.
Once the settings are complete, click “Test”.
If the email is successfully received in the specified email, click “Save” to finalize the setup.
Step 7: Activate the Flowbot
Toggle the “Trigger ON” to activate your flow!
Add a test record that matches the conditions you've set, (e.g., customer with a contract expiration at the end of next month) and check if the email is sent to the correct recipient with the right content.
That’s it! Now, your Flowbot will run at a set schedule, using data from Excel to send email through Outlook.
More Automation Ideas Using Microsoft Excel
Automation with Excel goes beyond just sending emails! You can do much more with Excel by connecting it with other tools with Yoom :) Here are some ready-made automation flows you can try out.
Add Data to Microsoft Excel Automatically
Automatically update your Excel when important actions happen in other apps. (e.g., tasks, deals, surveys, and contract being completed or created). Recommended for those who want to keep their data up to date without manual input.
Summary
We walked through how to automate sending emails using Excel without a single line of code. Not only is this effective in reducing time on repetitive tasks but also in preventing mistakes. Yoom offers a wide range of templates, more than just email automation. Whether you need to automate based on schedules, form submissions, or chat notifications, you’ll find options to match your workflow :)
Ready to simplify your workflow? Sign up for Yoom and try it today!
After being in charge of sales and CA at a human resources company for about 5 years, I have been involved in jobs such as creating job advertisements and scouting sentences at companies that hire engineers.
I'm fascinated by Yoom's revolutionary service of “automating office work.”
I would like to write so that I can send out information that can be useful to everyone, even a little bit.
Conventional RPA can only automate simple repetitive tasks, and the setup process was very complicated. With “hyperautomation,” which combines various technologies such as AI, API, RPA, and OCR, it is possible to automate many tasks that could not be realized until now more easily than before.
Most tools simply connect one app to another, leaving the complex tasks to you. Yoom goes much further: From document creation and browser automation to OCR and generative AI, Yoom handles it all seamlessly in one platform.
Why settle for basic integrations? Streamline your entire workflow with Yoom’s powerful hyperautomation.


.avif)
.avif)


