[No Code Required] How to Automatically Sync Miro Data with Notion
How to Integrate Applications
・
2025-04-24
[No Code Required] How to Automatically Sync Miro Data with Notion
"It's a hassle to manually register this data in Notion." "Adding data to Notion after creating a new board in Miro is surprisingly time-consuming," haven't you thought?
By integrating Miro and Notion, you can save the trouble of manual data entry and reduce your working time. For example, when a new project starts and you create a board in Miro, you can register it in Notion. Additionally, you can create a card in Miro and register it in Notion triggered by content from Slack or Discord. This way, since manual input is no longer necessary, you can focus on high-priority tasks.
In this article, we will explain how to integrate Miro and Notion to automate your tasks. With just a little setup, you can significantly reduce manual work, making it very convenient!
For those who want to try it quickly
By using Yoom, you can easily integrate Miro and Notion without any coding.
Yoom provides templates for integrating Miro and Notion, so you can achieve integration immediately without any API knowledge, just by registering.
What You Can Do by Integrating Miro and Notion
By integrating the APIs of Miro and Notion, you can automatically sync Miro's data with Notion! For example, you can automatically perform data synchronization like the following without human intervention.
By clicking "Try it out" on the automation example you're interested in and registering an account, you can immediately experience the integration of Miro and Notion. Registration takes only 30 seconds, so feel free to give it a try!
Create a Board in Miro at the Beginning of the Month and Add a Record to Notion
This is a business workflow that automates the necessary preparatory tasks at the start of each monthly project. This can reduce manual setup and input tasks, enabling a smoother project launch!
Create a card in Miro and add a record to Notion when a message is sent in Slack
By integrating Slack, Miro, and Notion, you can organize information in a single flow. This is recommended for those who want to improve work efficiency while leveraging the strengths of each tool!
Create a board in Miro and add a record in Notion when a message is sent on Discord
A board is automatically created in Miro triggered by a message on Discord, and a related record is added in Notion. This seems to enable smooth information sharing with the team and reduce human errors.
Let's Create a Miro and Notion Integration Flow
Let's get started by creating a flow that integrates Miro and Notion! This time, we'll use Yoom to proceed with the integration of Miro and Notion without any coding. If you don't have a Yoom account yet, please create one from this registration form.
[What is Yoom]
This time, we will create a flow bot that "creates a board in Miro at the beginning of the month and adds a record to Notion"! The creation process is broadly divided into the following steps.
Integrate Miro and Notion with My Apps
Copy the template
Set the schedule trigger and configure actions for Miro and Notion
Set the trigger to ON and complete the preparation for flow operation
Step 1: Register Miro and Notion as My Apps
Please register Miro and Notion as My Apps to connect them to Yoom. By completing the My App registration in advance, you can smoothly proceed with the automation settings.
Register Miro as My App
1. First, let's register Miro as My App. Click "My Apps" → "+ Add" on the left side of the Yoom screen.
Find Miro from the list of apps or use the search function to search for it.
2. On the following screen, click Add.
Register Notion as My App
3. Next, register Notion as My App. Just like in (1), click Notion from the "New Connection List" in Yoom and sign in.
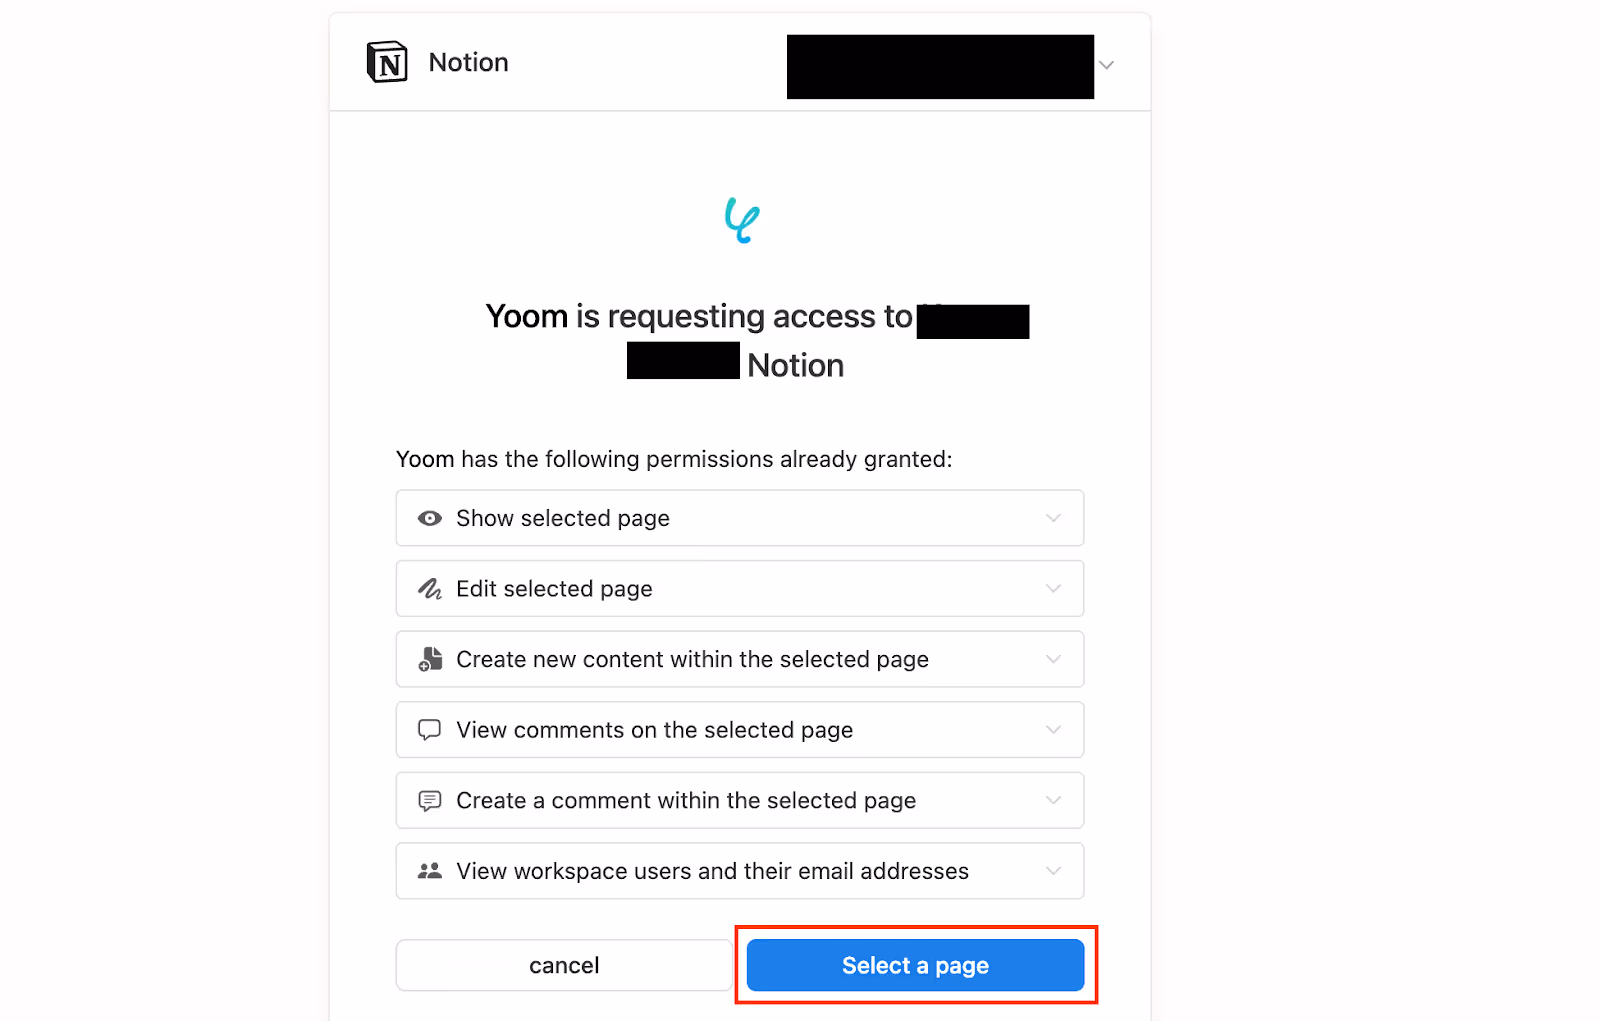
Select the Notion app and click "Select Page" at the bottom right.
4. On the following screen, check the box and select "Allow Access" to complete the registration as My App.
Once each is registered as My App in Yoom, the integration is complete!
Step 2: Copy the Template
1. To set up automation, click "Try it" on the banner below.
2. Read the following screen display and click "OK".
Step 3: Setting the Schedule Trigger
1. Let's start setting up the flow! First, click the red frame below.
2. You can set any schedule on the following screen!
Set the schedule and click "Save". For detailed settings, click here!
Step 4: Setting to Create a Board in Miro
1. Next, click "Create Board".
2. The following screen will be displayed, so check the settings and press "Next".
"Title" → Can be freely changed
"App" → Miro
"Account information linked with Miro" → Check for any discrepancies in the account
"Action" → Create Board
3. Enter the following items according to your needs.
Let's create a board for testing in Miro. After setting, click "Test". If the test is successful, you can obtain the output. Check the obtained content as it will be used in the next setting.
Step 5: Setting to Add a Record in Notion
1. Finally, the last setting item! Click the red frame below as before.
2. The following screen will be displayed, so check the settings.
"Title" → Can be freely changed
"App" → Notion
"Account information linked with Notion" → Check for any discrepancies in the account
"Action" → Add Record
3. Scroll down and select "Database ID" from the candidates.
After setting, click "Next"!
4. Select the output obtained earlier for "Value of the record to be added".
Enter according to your needs.
5. After completing the settings, click "Test". If the test is successful, confirm that the record has been added in Notion!
After confirmation, click "Save".
Step 6: Set the Trigger to ON and Check Operation
Finally, click "Turn on the trigger" to complete the automation setup! Make sure the flowbot starts correctly.
Thank you for your hard work on the setup!
If You Want to Link Notion Data to Miro
This time, we introduced how to link from Miro to Notion, but if you want to link data from Notion to Miro, please also use the template below!
Create a Miro Board When a Page is Created in Notion
Every time a new page is created in Notion, a corresponding Miro board is automatically generated, making it easier to organize information! Additionally, it will save the effort of manually creating boards, allowing you to focus on other important tasks.
Create a sticky note in Miro when a database is updated in Notion
When new data is added or existing data is modified in Notion, a sticky note is automatically created in Miro. This should enable you to easily share information within the team and get an overview of the project progress at a glance!
Other Automation Examples Using Miro and Notion APIs
It is possible to automate various tasks using the APIs of Miro and Notion. If you find something interesting, please give it a try!
Automation Examples Using Miro
You can automatically create cards in Miro based on task information from other systems. After an online meeting, you can create a new board in Miro.
Examples of Automation Using Notion
You can automatically transcribe email content and form responses into Notion. Task information from Notion can be added to a database.
Conclusion
By integrating Miro and Notion, you can proceed with your daily tasks quickly and smoothly. This integration eliminates the hassle of manual data entry, allowing you to focus on other tasks by freeing up the time previously spent on manual work. In particular, the automation of registering in Notion triggered by board creation in Miro should enable seamless project management! Additionally, by integrating with Slack or Discord, you can easily manage data by transferring message content to Miro or Notion.
If you are even slightly interested in Yoom, click here to register for free. Registration takes just 30 seconds!
Utilize the templates introduced this time to reduce manual work and shorten your working hours!
The person who wrote this article
Tags
No items found.
Related Apps
No items found.
App integration
No items found.
What is Yoom hyperautomation?
Conventional RPA can only automate simple repetitive tasks, and the setup process was very complicated. With “hyperautomation,” which combines various technologies such as AI, API, RPA, and OCR, it is possible to automate many tasks that could not be realized until now more easily than before.
Most tools simply connect one app to another, leaving the complex tasks to you. Yoom goes much further: From document creation and browser automation to OCR and generative AI, Yoom handles it all seamlessly in one platform.
Why settle for basic integrations? Streamline your entire workflow with Yoom’s powerful hyperautomation.


.avif)


