SalesforceとMicrosoft SharePointの連携イメージ
How to Integrate Applications

2025-05-21

How to Create a Folder in Microsoft SharePoint When an Account is Registered in Salesforce

n.fukuoka

Salesforce is a powerful tool that allows you to manage everything in one place—from customer details to past interactions.
Likewise, Microsoft SharePoint excels in document and file management.
But let’s face it—manually creating folders in SharePoint every time a new account is registered in Salesforce can be a hassle, right?

This article explains how to integrate Salesforce and Microsoft SharePoint without writing any code, so that a SharePoint folder is automatically created whenever a new account is added in Salesforce!

Recommended for

  • Those using both Salesforce and Microsoft SharePoint in their workflow
  • Anyone who wants to manage account-specific data more efficiently in SharePoint
  • Teams looking to streamline operations by integrating Salesforce and SharePoint

Want to try it right away?

This article walks you through how to do it using the no-code tool Yoom.
There’s no need for complex settings or technical knowledge—even non-engineers can easily get started.
You can begin right away with the template provided below, so be sure to give it a try!

[About Yoom]

How to Create a Flow for Integrating Salesforce and Microsoft SharePoint

This time, we will introduce how to set up the template [Create a folder in Microsoft SharePoint when an account is registered in Salesforce].
This template is convenient as it saves the hassle of starting from scratch.

The setup is simple with just 4 steps!

  1. Register Salesforce and Microsoft SharePoint as My Apps
  2. Set a trigger to activate when a new record is registered in the account object
  3. Set an action to add a record in Microsoft SharePoint
  4. Test and verify

Step 1: Integrate Salesforce and Microsoft SharePoint as My Apps

If you are using it for the first time, please check Getting Started with Yoom.

1. Log in to your Yoom account.

If you do not have an account, please create one on the Yoom account creation page first.

Click "My Apps" and select "New Connection".

2. Click on New Connection.

3. You can search by app name from the red frame. This time, search for Salesforce and Microsoft SharePoint respectively and register them.
Once registration is complete, the icons for Salesforce and Microsoft SharePoint will appear in My Apps. Please confirm.

For registering Salesforce as My App, please refer to the link below.

How to Register Salesforce as My App

Please note the following points regarding the integration of Salesforce and Microsoft SharePoint apps.

Salesforce is an app available only with the Team Plan and Success Plan. If you are on the Free Plan or Mini Plan, the operations and data connections set in the flow bot will result in an error, so please be careful.

・Paid plans such as Team Plan and Success Plan offer a 2-week free trial. During the free trial, you can use the apps that are subject to restrictions.

・Microsoft365 (formerly Office365) has a home plan and a general business plan (Microsoft365 Business). If you are not subscribed to the general business plan, authentication may fail.

If you have any other questions about Yoom, please check the Yoom Help Center.

Selecting a Template and Preparing the Storage Location

Click "Try it" on the banner below to set up automation.

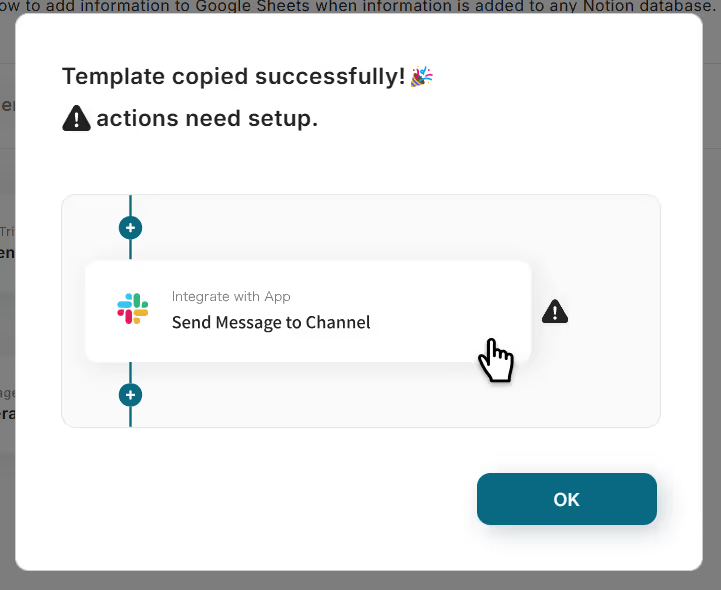
If the following display appears, the template copy was successful.

Step 2: Set up a trigger to activate when a new record is registered in the Account object

1. Click in sequence to set up.
First, click on "When a new record is registered in the Account object" at the top.

2. You can set the title freely.
Enter the account information to integrate with Salesforce.
Select "When a new record is registered in the Account object" as the trigger action.
Once the input is complete, click "Next".

3. Set the trigger activation interval and My Domain ID.
You can choose activation intervals of 5 minutes, 10 minutes, 15 minutes, 30 minutes, or 60 minutes.
Once the setup is complete, click Test.
If no errors occur, save it.

※ Please note that the shortest activation interval varies depending on the plan.

Step 3: Set up an action to create a folder in Microsoft SharePoint

1. Click the "Create Folder" icon.

2. Enter the account information to integrate with Microsoft SharePoint.
Select "Create Folder" as the execution action.

3. Set up the API connection.
Clicking on each item will display outputs and suggestions.
Select the Site ID, Parent Folder Item ID, and Drive ID from the suggestions, and choose the Parent Folder Name and Folder Name from the outputs.
Once the setup is complete, perform a test and save if there are no issues.

4. With this, the flow of [Create a folder in Microsoft SharePoint when an account is registered in Salesforce] is complete.

Step 4: Test and Verify

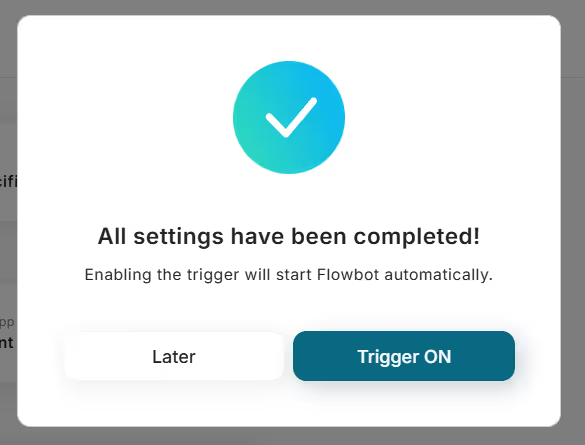
Once the setup is complete, the following screen will be displayed.
Click the "Turn on Trigger" button to activate the flow bot.

Even if you don't understand programming, you can smoothly set it up just by using Yoom's template.
Try this convenient flow from the link below.

Other Automation Examples Using Salesforce and Microsoft SharePoint

In addition to the integrations introduced today, various automations can be achieved by utilizing the APIs of Salesforce and Microsoft SharePoint.

If you find something interesting, please give it a try!

Automation Examples Using Salesforce

Add to Calendar When a Record is Created or Updated in Salesforce

Automatically register events in Google Calendar or Outlook Calendar when a record is created or updated in Salesforce.

Create a Web Meeting and Notify via Email When a Lead is Registered in Salesforce

Automatically create a web meeting in Zoom or Google Meet and notify via email when a lead is registered in Salesforce.

Notify chat tools when records are added or updated in Salesforce

Automatically notify Microsoft Teams, Slack, etc., when records are added or updated in Salesforce.

Automation Example Using Microsoft SharePoint

Store Form Attachments in Microsoft SharePoint

Automatically store files attached in Google Forms, etc., in Microsoft SharePoint.

Store Email Attachments Received in Microsoft SharePoint

Automatically store attachments received in Outlook or Gmail in Microsoft SharePoint.

Create a folder in Microsoft SharePoint when a record is added to the database

Automatically create a folder in Microsoft SharePoint when a record is added to Google Sheets, Notion, or similar platforms.

What Issues Can Be Solved by Integrating Salesforce and Microsoft SharePoint?

Solution 1: Quick Access to Information

By automatically creating folders in Microsoft SharePoint when an account is registered in Salesforce, a system is established to smoothly store related materials and documents for each account.
Access to this centralized folder helps sales representatives quickly find the necessary information, potentially improving the speed of response to accounts.
This can lead to reduced response times to customers, enabling faster and more accurate service delivery.

Solution 2: Prevention of Human Error

Manually creating folders when registering an account places a significant burden on the person responsible, making it easy for human errors such as incorrect folder names or duplicate creations to occur.
Manual folder creation is time-consuming and may cause delays in other tasks while focusing on this work.
However, by automating this process, errors in folder names and structural mistakes can be prevented, maintaining high data quality across the system.
Additionally, reducing the need for corrections in folder management may allow more time to focus on high-value tasks.

Solution 3: Strengthening Interdepartmental Collaboration

By automatically integrating Salesforce and Microsoft SharePoint, information sharing between different departments such as sales, back office, and customer support teams becomes easy.
By consolidating materials related to accounts in SharePoint, members of each department can quickly find the necessary information, significantly reducing search time.
Furthermore, rapid data sharing can increase operational efficiency and strengthen interdepartmental collaboration in account management.
When members of different departments confirm the same information, it leads to improved accuracy and speed of operations.

Specific Use Cases of Using Salesforce and Microsoft SharePoint

Here are some use cases where the introduced template can be effectively utilized.

1. Centralized Management of Sales Activities and Automation of Document Sharing

By automatically creating related document folders in SharePoint whenever a new account is registered in Salesforce, smooth information sharing between the sales team and management department is achieved.
For example, if sales representatives can quickly find necessary contracts or proposal documents, the time spent on tasks can be reduced.
Moreover, this integration centralizes document management for each account, eliminating the hassle of searching for related documents.

2. Efficient Management of Project Materials for Each Account

When a new account is registered in Salesforce, a project-specific folder is automatically generated in SharePoint.
This allows all necessary materials for the project, such as proposals, contracts, and meeting records related to the account, to be stored together.
Furthermore, if all project members can easily access the necessary information, it may prevent omissions and confusion in tasks.

3. Creation of Contract Management Folders When Registering New Customers

When a sales representative registers a new customer in Salesforce, a dedicated folder for that customer is automatically created in SharePoint.
This folder can store all materials related to the customer, such as contracts, proposals, important communication documents, email history, customer hearing content, and notes on past interactions.
As a result, if each department can accurately and quickly share the necessary information, the finance team can smoothly proceed with the billing process by checking contracts, and the support team can quickly understand customer needs and provide appropriate assistance.

Conclusion

By integrating Salesforce and Microsoft SharePoint, the burden of manual folder creation has been significantly reduced for those responsible.
As a result, it is expected that productivity will improve as they can focus on high-priority tasks such as customer response and sales activities.
The introduction of automation using Yoom does not require specialized knowledge or advanced skills.
Since it is explained clearly step by step, simply following the on-screen instructions and proceeding with the input will easily complete the setup.
If you aim to improve operational efficiency, be sure to try app integration!
The person who wrote this article
n.fukuoka
In this day and age where there are more and more tools, it's often hard to know what to use. I would like to deliver useful information that is easy to understand so that everyone's work can be made even a little easier!
Tags
Salesforce
Microsoft SharePoint
Integration
Automation
Automatic
App integration
No items found.
What is Yoom hyperautomation?
Conventional RPA can only automate simple repetitive tasks, and the setup process was very complicated.
With “hyperautomation,” which combines various technologies such as AI, API, RPA, and OCR, it is possible to automate many tasks that could not be realized until now more easily than before.
Don't Just Connect Apps—Automate Everything
Most tools simply connect one app to another, leaving the complex tasks to you. Yoom goes much further: From document creation and browser automation to OCR and generative AI, Yoom handles it all seamlessly in one platform.

Why settle for basic integrations? Streamline your entire workflow with Yoom’s powerful hyperautomation.
Learn more about Yoom
Helpful Materials
I understand Yoom! 3-piece set of materials
Download materials
Understand in 3 minutes! Yoom service introduction materials
Download materials
Find out by Before After! Yoom Case Study Collection
Download materials
See a list of useful materials