[No-Code Solution] How to Automatically Integrate Microsoft Teams Data with Microsoft SharePoint
How to Integrate Applications
・
2025-05-13
[No-Code Solution] How to Automatically Integrate Microsoft Teams Data with Microsoft SharePoint
y.katagiri-
Have you ever created reports based on interactions in Microsoft Teams or shared documents on Microsoft SharePoint? It's a necessary flow for visualizing contract details and figures in customer service, accounting, etc., but if you have a large number or frequency of creations, it can be a bit of a hassle... That said, you probably want to save documents as quickly as possible to share with other members.
The solution to this problem is the API integration between Microsoft Teams and Microsoft SharePoint. By utilizing the API, you can automatically integrate data between Microsoft Teams and Microsoft SharePoint!
In this article, we will specifically introduce the automation flow that can be achieved by integrating Microsoft Teams and Microsoft SharePoint. If you are considering improving work efficiency, be sure to check it out!
For those who want to try it as soon as possible
By using Yoom, you can easily integrate Microsoft Teams and Microsoft SharePoint without any code.
Yoom provides templates for integrating Microsoft Teams and Microsoft SharePoint in advance, so you can achieve integration immediately just by registering, even without API knowledge.
What You Can Do by Integrating Microsoft Teams and Microsoft SharePoint
By integrating the APIs of Microsoft Teams and Microsoft SharePoint, you can automatically link Microsoft Teams data to Microsoft SharePoint!
For example, you can automatically perform data integration like the following without human intervention.
When a message with specific conditions is posted in Microsoft Teams, create a document and save it to Microsoft SharePoint
Since documents are automatically created and saved to Microsoft SharePoint, it leads to improved work efficiency! It is recommended for administrative staff who find document creation cumbersome.
Let's Create a Flow to Integrate Microsoft Teams and Microsoft SharePoint!
Let's get started by creating a flow that integrates Microsoft Teams and Microsoft SharePoint!
This time, we will use Yoom to proceed with the integration of Microsoft Teams and Microsoft SharePoint without any coding. If you do not have a Yoom account yet, please issue one from the Yoom registration form.
[What is Yoom]
This time, we will create a flow bot that "creates a document and saves it to Microsoft SharePoint when a message with specific conditions is posted to Microsoft Teams"!
The creation process is broadly divided into the following steps.
Integrate My Apps of Microsoft Teams and Microsoft SharePoint
Copy the template
Set triggers and actions
Set the trigger to ON and complete the preparation for flow operation
Step 1: Register My Apps
First, register your My Apps for "Microsoft Teams" and "Microsoft SharePoint".
Click "Add" on the right from "My Apps" on the left.
Register My Apps for Microsoft Teams
After clicking "Add", search for "Microsoft Teams" from the list of apps.
When the following screen appears, log in to your Microsoft365 account. If you don't have an account, please create one first.
Microsoft365 (formerly Office365) has plans for home use and general business use (Microsoft365 Business). If you are not subscribed to the general business plan, authentication may fail, so please check.
Let's enter the password.
Once "Microsoft Teams" appears in My Apps, the registration is complete!
Register My Apps for Microsoft SharePoint
After clicking "Add", search for "Microsoft SharePoint" from the list of apps.
When the following screen appears, log in to your Microsoft account just like with "Microsoft Teams".
Let's enter the password.
Once "Microsoft SharePoint" appears in My Apps, the registration is complete!
Step 2: Copy the Template
From here, we will actually create the flow bot!
First, click "Try it" on the banner below to copy the template.
Once the template is copied, the following screen will appear.
Click "OK" to proceed to the next step.
Step 3: Setting Up the App Trigger
This is the app trigger setup.
First, click "When a message is sent to the channel".
When the following screen appears, check the information to be linked and proceed to the next step.
Next, set up the API connection.
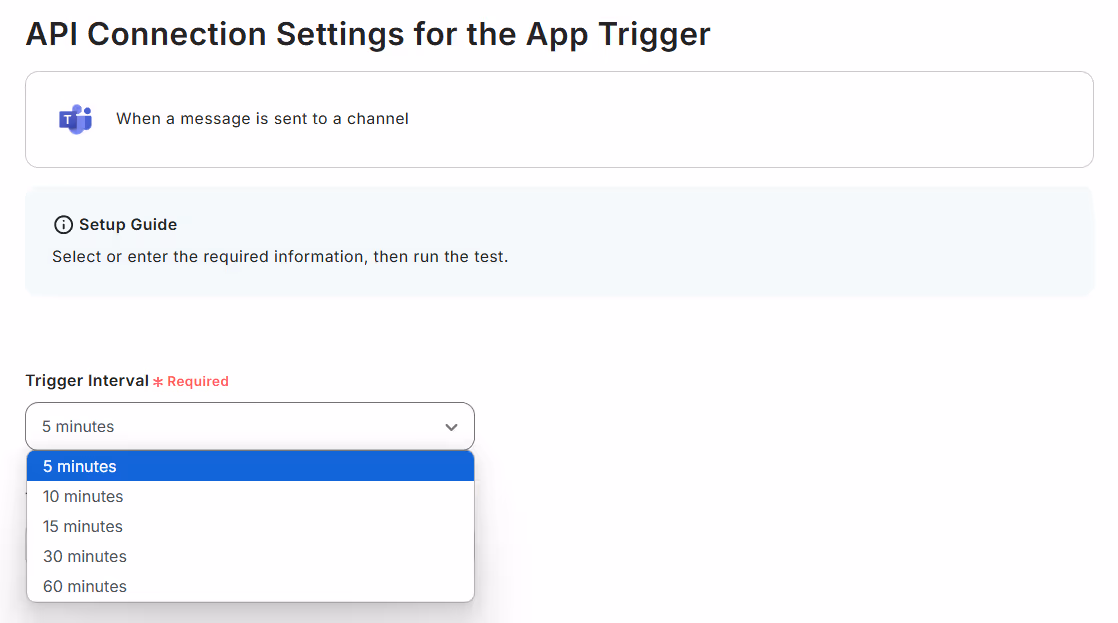
Set the "Trigger Interval" according to your business needs.
The trigger interval can be set to 5 minutes, 10 minutes, 15 minutes, 30 minutes, or 60 minutes. Depending on your plan, the shortest interval for setting the trigger may vary, so be sure to check! It is generally recommended to use the shortest activation interval for your plan.
Select the "Team ID" from the options.
Also, select the "Channel ID" from the options.
When a message is sent to the channel specified here, the flow will start!
Send a test message and try testing!
By quoting the following retrieved value during the subsequent setup, you will achieve data integration between Microsoft Teams and Microsoft SharePoint!
Click "Save" to proceed to the next step.
Step 4: Setting Up Command Operations
Next, click "Command Operation".
Set the branch conditions. First, set the branch target values In the image below, the message content sent to the channel is used as the criterion.
Next, set which words in the message content will determine whether to branch. In the image below, branching occurs only if the word test is in the message. You can also branch based on words like file or report.
Specify the words you want to sort.
The set branch condition will branch as follows.
After setting the branching information, click "Save" at the bottom.
Step 5: Setting Up Document Issuance
Next, click "Issue Document".
Next, proceed with document integration.
When the following screen appears, check the account information to be linked and scroll down.
Select the "Spreadsheet File ID" for the template document integration from the options.
Select the "Destination Google Drive Folder ID" for the issued document integration from the options.
Select the "Exported File Name" from the retrieved values.
Proceed to the next step.
Next, set the replacement conditions.
Create a template document with reference to this article.
On the right side of "After", select "Message Content" from the output.
The part specified as the before can be replaced with the message content.
Let's test it!
If the test is successful, the following screen will appear.
When you check the stored folder, the document creation is complete.
Finally, click "Save".
Step 6: Setting Up File Upload
Next, click "Upload File".
When the following screen appears, check the account information to be linked and proceed to the next step.
This is the API connection setup.
Select the "Site ID" from the options.
Also, select the "Drive ID" from the options.
Enter a keyword for "Destination Folder Name" to narrow down the item ID of the storage folder.
For "File Name", select "Issued Document" from the retrieved value.
Refer to the following for setting "File Attachment Method" and "File".
Conduct a test!
After confirming, click "Save".
Check if it is saved in Microsoft SharePoint.
If the file is saved in the specified folder, it's OK!
Step 7: Confirming Flowbot Automation
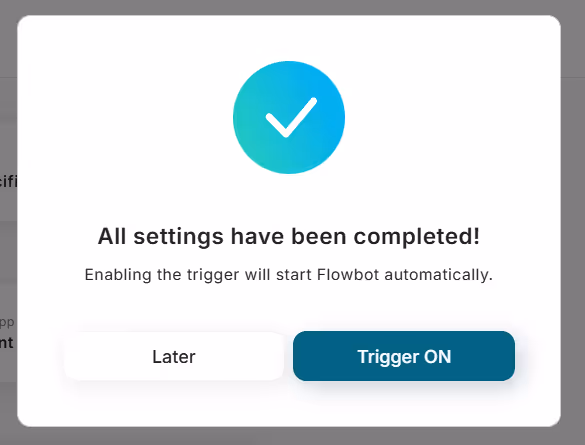
When the following screen appears, click "Trigger ON".
All settings are complete!
Other Automation Examples Using the APIs of Microsoft Teams and Notion
By leveraging the APIs of Microsoft Teams and Notion, a variety of automations can be achieved! How about considering the following automations?
Automation Examples Using Microsoft Teams
By notifying Microsoft Teams of data additions and updates, you can reduce data omissions and improve response speed!
Automation Example Using Microsoft SharePoint
Automatic file saving and folder creation might make data management easier!
Conclusion
By integrating Microsoft Teams data with Microsoft SharePoint, data management and sharing should become smoother than ever before. Additionally, by incorporating document creation actions, you can save the hassle of document creation and increase the possibility of working efficiently! Yoom is packed with such automation ideas, which might make your daily workflows even simpler.
Moreover, data integration using Yoom can be achieved without programming knowledge! It is easy to implement even for beginners in app integration, so register with Yoom now and introduce automation!
The person who wrote this article
y.katagiri-
I've been a writer for 8 years. I like writing. I will do my best to bring the appeal of Yoom to many people!
Tags
No items found.
Related Apps
No items found.
App integration
No items found.
What is Yoom hyperautomation?
Conventional RPA can only automate simple repetitive tasks, and the setup process was very complicated. With “hyperautomation,” which combines various technologies such as AI, API, RPA, and OCR, it is possible to automate many tasks that could not be realized until now more easily than before.
Most tools simply connect one app to another, leaving the complex tasks to you. Yoom goes much further: From document creation and browser automation to OCR and generative AI, Yoom handles it all seamlessly in one platform.
Why settle for basic integrations? Streamline your entire workflow with Yoom’s powerful hyperautomation.


.avif)


.avif)


