[No Programming Required] How to Automatically Integrate Zoom Data into WordPress
How to Integrate Applications
・
2025-05-13
[No Programming Required] How to Automatically Integrate Zoom Data into WordPress
"It's such a hassle to paste the Zoom recording link into WordPress every time..." "I often forget to share the meeting summary..." Do you have these concerns?
Manually integrating Zoom and WordPress data can be time-consuming and increases the risk of errors. However, when you hear about API integration, many might feel it's "too complicated" or think "it's impossible without being an engineer."
That's where the no-code tool Yoom comes in handy. <span class="mark-yellow">In this article, we introduce various workflows that make it easy to integrate Zoom and WordPress, including automatically posting recording links and summaries to WordPress after a Zoom meeting ends.</span>
If you want to proceed with the integration at your own pace, please take a look!
For those who want to try it as soon as possible
By using Yoom, you can easily integrate Zoom and WordPress without any coding. Yoom provides templates for integrating Zoom and WordPress in advance, so you can achieve integration immediately just by signing up, even without any API knowledge.
What You Can Do by Integrating Zoom and WordPress
By integrating the APIs of Zoom and WordPress, you can automatically link Zoom data to WordPress!
You can immediately experience the integration of Zoom and WordPress by simply clicking "Try it out" on the automation example you're interested in and registering an account. Registration takes just 30 seconds, so feel free to give it a try!
Post Recording Links and Summaries to WordPress After Zoom Meetings End
This flow is recommended if you are posting recording links and summaries on an internal site as a record of meetings, or if you are posting recording links and school content on member-only sites like online schools.
Regularly Retrieve Zoom Webinar Registrant List and Post to WordPress
This flow is recommended for those who want to publish webinar participants on their blog or register webinar participant information on an internal site for centralized information management.
Let's Create a Zoom and WordPress Integration Flow
Now, let's go ahead and create a flow that integrates Zoom with WordPress!
This time, we'll use Yoom to proceed with the integration of Zoom and WordPress without any coding. If you don't have a Yoom account yet, please create one from the registration form here.
[What is Yoom]
<span class="mark-yellow">This time, we will create a flow bot that posts the recording link and summary to WordPress once a Zoom meeting ends!</span>
【Points to Note】 ※ To obtain recording information, the meeting data must be "cloud recorded." ※ "Cloud recording" is limited to specific Zoom plans, so please be aware. For more details, please check here.
The creation process can be broadly divided as follows:
Integration of Zoom and WordPress My Apps
Copy the template
Set Zoom triggers and integrate Zoom with WordPress
Set the trigger to ON and complete the preparation for flow operation
Step 1: Integrate Zoom and WordPress with My App
Click "+ Add" from "My App" in the left menu of the Yoom screen.
Enter the name of the app to integrate in the search box.
How to Integrate Zoom and Yoom
When you search for Zoom, a new registration screen like the image will appear. Enter the "Client ID" and "Client secret" to complete the integration! For detailed registration instructions, please check here.
How to Integrate WordPress and Yoom
To post on WordPress, you need to install and activate thisplugin. Please install it in advance.
When you search for WordPress, a new registration screen will appear. Enter "Account Name", "Domain", "Username", and "Password" carefully reading the notes. Once the input is complete, click "Add" to complete the integration!
Step 2: Copy the Template
Next, copy the template to be used this time.
Press "Try it" on the banner below.
If you haven't registered with Yoom yet, please register. If you have already completed registration, please log in.
When the template is copied to "My Project", a screen like this will be displayed.
Step 3: Set Zoom Trigger
Open the copied template
Open the copied template from "My Project" in the menu on the left. (※ After copying the template, if you set it immediately after copying, you do not need to open the template. If you interrupt the setting, open it from "My Project" to resume.!)
Open the app trigger
Click "When the meeting ends".
Select the linked account and action
Enter the necessary parts. "Title": Can be changed as needed "Account information linked with Zoom": Check if it is correct "Trigger action": Select "When a meeting ends"
Set the API connection for the app trigger
Select the "Trigger interval" from 5 minutes, 10 minutes, 15 minutes, 30 minutes, or 60 minutes. If you want to post to WordPress quickly, set it at a short interval! ※ Please note that the selection of the interval varies depending on the plan.
Next, enter the email address of the Zoom account. After entering, press "Test".
Once the settings are complete, record a Zoom meeting for the settings and then click "Test".
If the test is successful, the output will be displayed. These will be necessary information when obtaining the meeting recording information, so make sure to check them. (Although not displayed in the image, the specific values output are actually displayed next to the items.)
After confirming, click "Save". ※ For detailed explanations of the output, please check here.
Step 4: Obtain Zoom Recording Information
Open the settings to link with the app
Click "Get Meeting Recording Info".
Select the linked account and action
Enter the necessary parts. "Title": Can be changed as needed "Account information linked with Zoom": Check if it is correct "Action": Select "Obtain meeting recording information"
Set the API connection
Enter the "Meeting ID". By utilizing the output obtained in Step 3, you can easily enter it! ① Click the input field to display the output ② Click "When the meeting ends" ③ Select "Meeting ID"
After completing the input, press "Test", and if the test is successful, click "Save".
Now, the recording information is output! (Although not displayed in the image, the output values are actually displayed next to the items.)
Step 5: Set to Create a Post on WordPress
Open "Create new post"
Select the linked account and action
Enter the necessary parts. "Title": Can be changed as needed "Account information linked with WordPress": Check if it is correct "Action": Select "Create new post"
Set the API connection
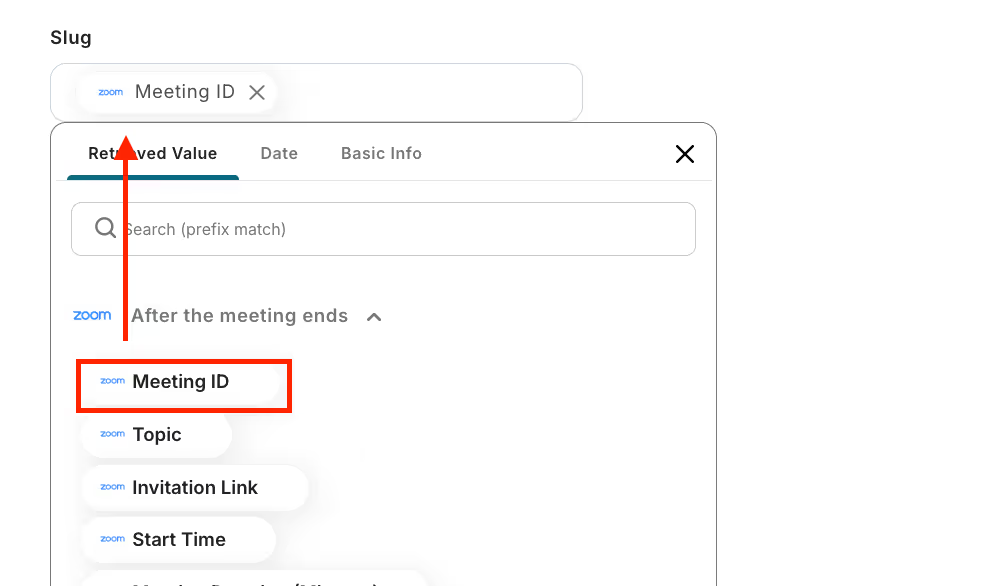
Enter the "Slug". Utilize the output to quote information. This time, the method when using "Meeting ID" as the slug. ① Click the input field to display the output ② Click "When the meeting ends" ③ Select "Meeting ID"
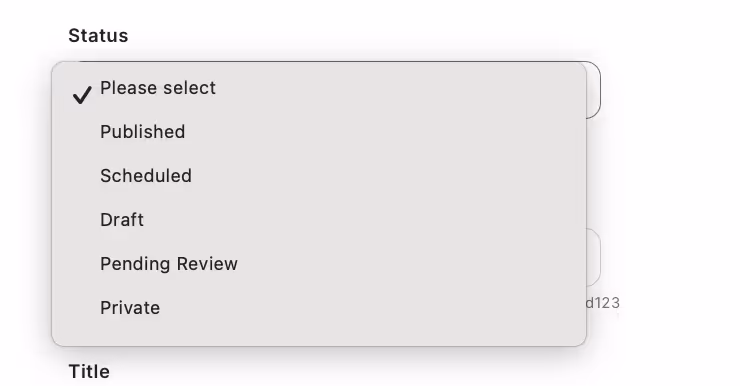
Next, select the "Status". Set whether to publish it as is or save it as a draft!
Fill in the necessary items while utilizing the output in the same manner! Once the input is complete, click "Test".
If the test is successful and the article is posted on WordPress, click "Save".
Step 6: Turn on the Trigger and Check Operation
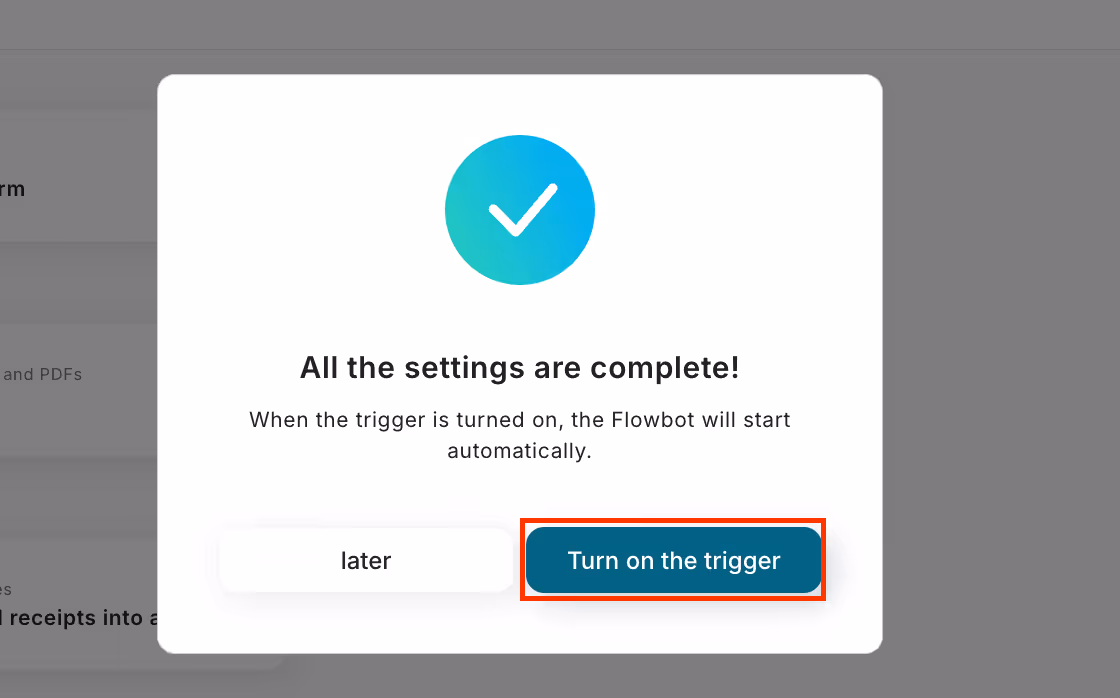
Finally, click "Turn on the trigger" to complete the automation settings. Check if the flowbot is activated and functioning. Thank you for your hard work on the settings!
This concludes the procedure for linking to post the recording link and summary to WordPress when a Zoom meeting ends!
Other Automation Examples Using Zoom and WordPress APIs
In addition to integrating Zoom and WordPress, various automations can be achieved by utilizing each API to streamline operations.
The templates introduced below are ready to use, so please make use of them!
Convenient Automation Examples Using Zoom
You can automate the creation of meeting URLs, the addition of registrants, and even the sending of meeting URLs and saving of recorded data.
Convenient Automation Examples Using WordPress
You can automate the creation, updating, and notification of articles. Additionally, user registration can also be automated, which not only reduces the effort required for registration but also helps prevent mistakes such as registration omissions.
Conclusion
Integrating Zoom with WordPress might have seemed challenging for those without technical expertise. However, with Yoom, you can smoothly manage daily tasks such as posting recording links and organizing webinar information without any programming knowledge.
The integration flow introduced in this article can all be easily started with Yoom. Start with a free registration and incorporate the convenience of Yoom into your work!
The person who wrote this article
Tags
No items found.
Related Apps
No items found.
App integration
No items found.
What is Yoom hyperautomation?
Conventional RPA can only automate simple repetitive tasks, and the setup process was very complicated. With “hyperautomation,” which combines various technologies such as AI, API, RPA, and OCR, it is possible to automate many tasks that could not be realized until now more easily than before.
Most tools simply connect one app to another, leaving the complex tasks to you. Yoom goes much further: From document creation and browser automation to OCR and generative AI, Yoom handles it all seamlessly in one platform.
Why settle for basic integrations? Streamline your entire workflow with Yoom’s powerful hyperautomation.


.avif)


.avif)


