・
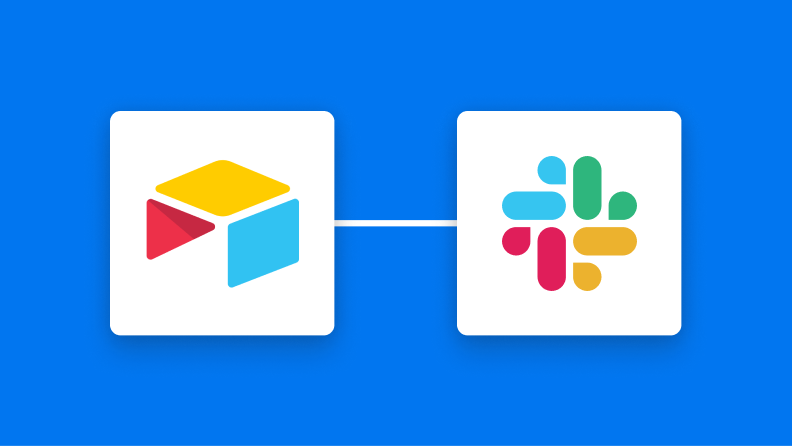
Airtableに新しい情報が登録されたらSlackへ自動で通知する方法
Airtableに情報を追加するたびに、Slackで共有する作業を手間に感じませんか?
AirtableとSlackを連携させることで、Airtableに追加されたデータを自動で共有できます。
また、データの詳細をそのままSlackに送信できるため、情報共有もスムーズになるはずです。
ノーコードで簡単に連携できるので、業務の効率的を図るためにも、ぜひ試してみてくださいね!
こんな方におすすめ
- AirtableとSlackを常用している企業
- Airtableに追加したデータをスムーズに共有したい方
- AirtableのデータについてSlackで連絡を取り合うことが多いチーム
- AirtableとSlackの自動化を導入し効率的なデータ管理を行いたいリーダー
今すぐに試したい方へ
本記事ではノーコードツール「Yoom」を使用した連携方法をご紹介します。
難しい設定や操作は必要なく、非エンジニアの方でも簡単に実現できます。
下記のテンプレートから今すぐに始めることもできるので、ぜひお試しください!
■概要Airtableをデータベースとして活用する中で、新しい情報が登録されるたびに手動でSlackに通知するのは手間がかかる作業ではないでしょうか。重要な更新の見逃しや、関係者への情報共有の遅れに繋がることもあります。このワークフローを活用すれば、Airtableに新しいレコードが登録されたタイミングで、指定したSlackチャンネルへ自動でメッセージを送信できます。これにより、迅速でスムーズな情報共有を実現し、手作業による通知業務を効率化します。
■このテンプレートをおすすめする方- Airtableの追加情報を手作業でSlackに通知している方
- チーム内の情報共有のスピードと正確性を向上させたいプロジェクトマネージャーの方
- AirtableとSlackを連携させ、業務の自動化を推進したいと考えている方
■このテンプレートを使うメリット- Airtableへのレコード登録をトリガーに自動でSlackへ通知するため、手動での確認や通知作業にかかる時間を短縮できます。
- 機械的な処理によって、重要な追加情報の伝達漏れや通知の遅延といったヒューマンエラーを防ぎ、確実な情報共有に繋がります。
■フローボットの流れ- はじめに、AirtableとSlackをYoomと連携します。
- 次に、トリガーでAirtableを選択し、「レコードが登録されたら」というアクションを設定します。
- 最後に、オペレーションでSlackを選択し、「チャンネルにメッセージを送る」アクションを設定し、Airtableから取得した情報を基に通知メッセージを作成します。
※「トリガー」:フロー起動のきっかけとなるアクション、「オペレーション」:トリガー起動後、フロー内で処理を行うアクション
■このワークフローのカスタムポイント- Airtableのトリガー設定では、連携対象としたいベースIDやテーブルID、またレコードの作成を検知するための「Created Time」フィールド名を任意で設定してください。
- Slackのオペレーション設定では、メッセージを送信するチャンネルや、通知するメッセージ内容を自由に設定できます。
■注意事項- Airtable、SlackのそれぞれとYoomを連携してください。
- トリガーは5分、10分、15分、30分、60分の間隔で起動間隔を選択できます。
- プランによって最短の起動間隔が異なりますので、ご注意ください。
- AirtableのアウトプットはJSONPathから取得可能です。取得方法は「『取得する値』を追加する方法」をご参照ください。
■このテンプレートをおすすめする方
- Airtableの追加情報を手作業でSlackに通知している方
- チーム内の情報共有のスピードと正確性を向上させたいプロジェクトマネージャーの方
- AirtableとSlackを連携させ、業務の自動化を推進したいと考えている方
■このテンプレートを使うメリット
- Airtableへのレコード登録をトリガーに自動でSlackへ通知するため、手動での確認や通知作業にかかる時間を短縮できます。
- 機械的な処理によって、重要な追加情報の伝達漏れや通知の遅延といったヒューマンエラーを防ぎ、確実な情報共有に繋がります。
■フローボットの流れ
- はじめに、AirtableとSlackをYoomと連携します。
- 次に、トリガーでAirtableを選択し、「レコードが登録されたら」というアクションを設定します。
- 最後に、オペレーションでSlackを選択し、「チャンネルにメッセージを送る」アクションを設定し、Airtableから取得した情報を基に通知メッセージを作成します。
■このワークフローのカスタムポイント
- Airtableのトリガー設定では、連携対象としたいベースIDやテーブルID、またレコードの作成を検知するための「Created Time」フィールド名を任意で設定してください。
- Slackのオペレーション設定では、メッセージを送信するチャンネルや、通知するメッセージ内容を自由に設定できます。
■注意事項
- Airtable、SlackのそれぞれとYoomを連携してください。
- トリガーは5分、10分、15分、30分、60分の間隔で起動間隔を選択できます。
- プランによって最短の起動間隔が異なりますので、ご注意ください。
- AirtableのアウトプットはJSONPathから取得可能です。取得方法は「『取得する値』を追加する方法」をご参照ください。
[Yoomとは]
それでは「Airtableに情報が登録されたらSlackに通知する」という自動化を、下記のテンプレートを用いて行います。
AirtableとSlackの連携フローの作り方
今回の連携フローは大きく分けて以下のプロセスの通りです。
・AirtableとSlackをマイアプリ連携
・Airtableの起動設定
・Slackへデータを送信する設定
・トリガーボタンをONにして、AirtableとSlackの連携動作を確認
ステップ1:AirtableとSlackをマイアプリ連携
Yoomの登録完了後、左側にあるメニューから「マイアプリ」を選択してください。
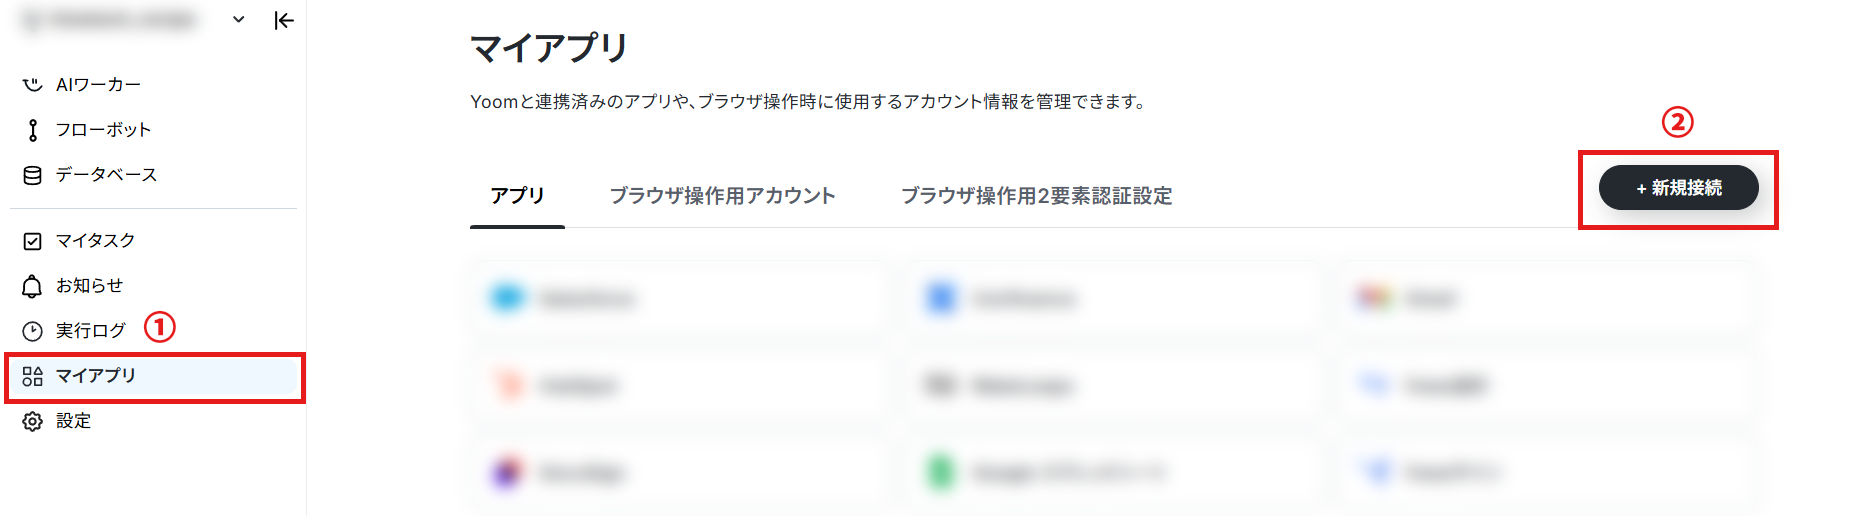
次に、右上の新規接続ボタンをクリックします。
AirtableとYoomの連携
1.Airtableの準備

使用するAirtableを現段階で用意します。
今回は面談や商談などのスケジュール管理を想定したデータベースを用意しました。
この際、必ず・Created Time(作成時間)のフィールドを作成しましょう。

2.検索する
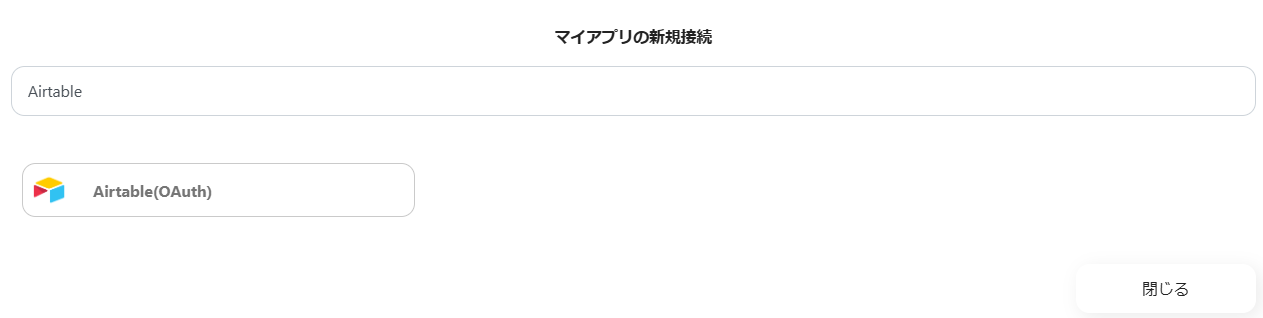
Airtableの準備ができたら、検索ボックスにAirtableと入力し、Airtableのアイコンをクリックします。
3.ログイン
まずはAirtableにログインします。
Airtableのサインイン画面が表示されます。Yoomと連携したいアカウントでサインインを行いましょう。
4.ベースを追加する
サインインをすると、上記の画面へ移行します。
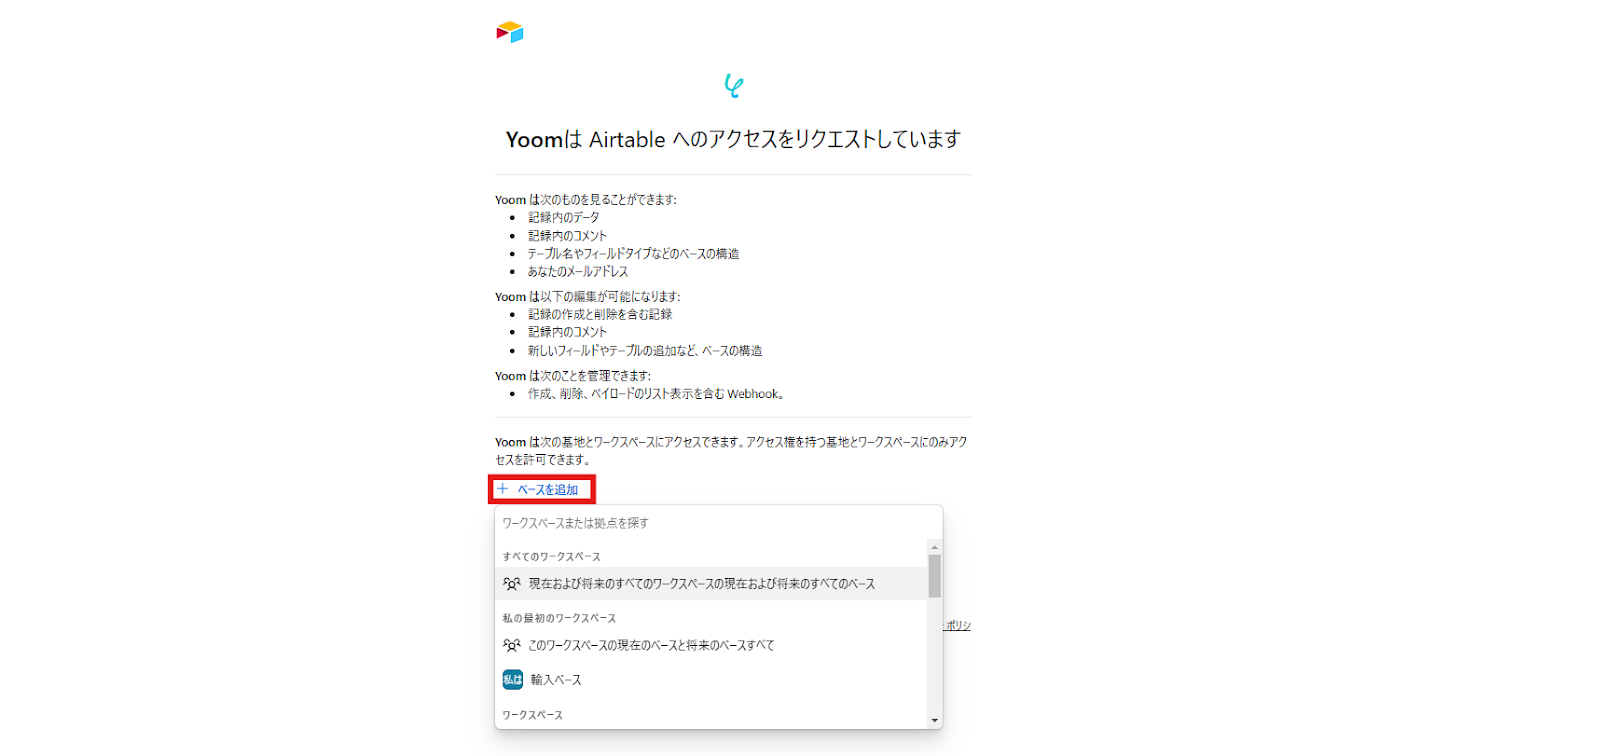
赤枠部分の「ベースを追加」をクリックし、クラウドサインのデータを追記したいベースを選択してください。
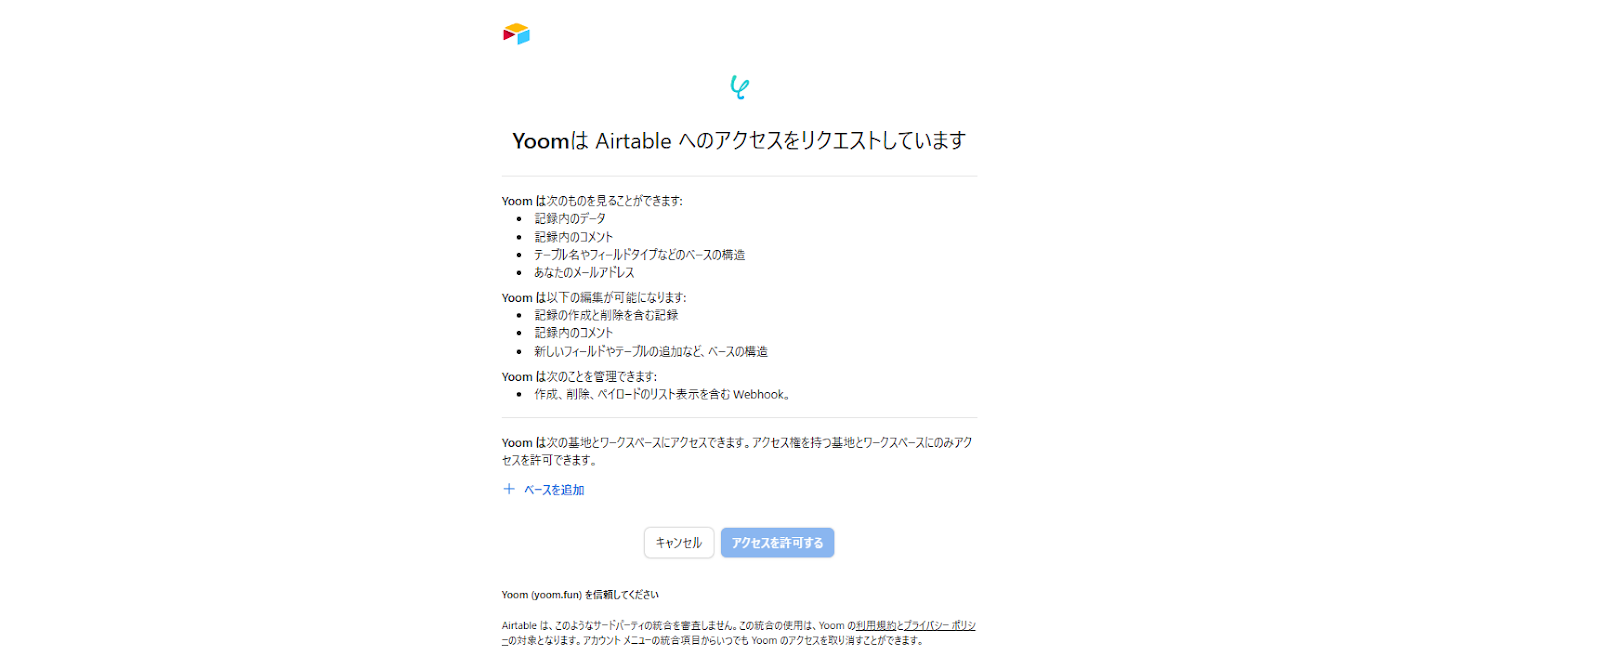
5.アクセスを許可
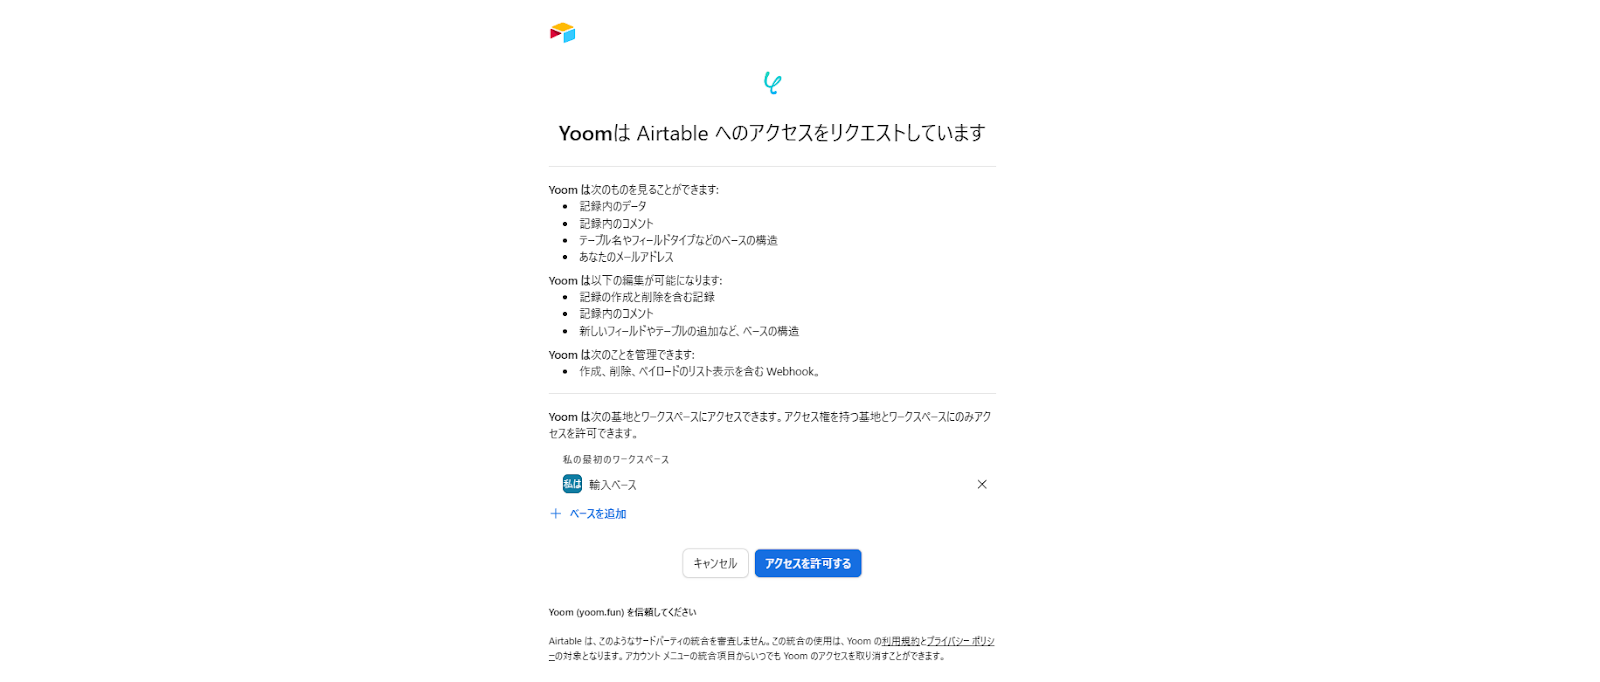
ベースの追加が完了したら「アクセスを許可する」を押します。

Yoomの画面に戻り、上記の表示が出たら連携完了です。
SlackとYoomの連携
1.検索する
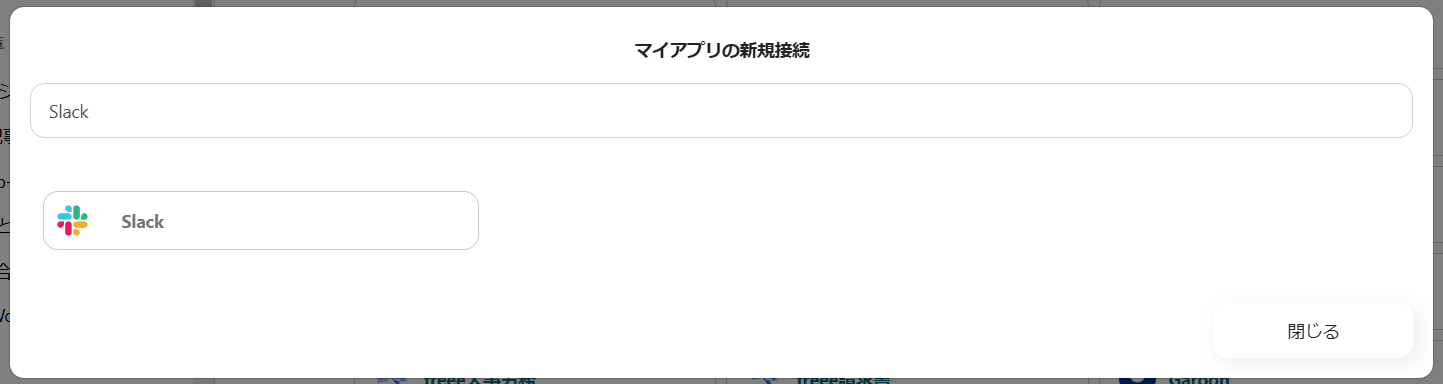
Slackと入力し、Slackのアイコンをクリックします。
2.必須項目の入力
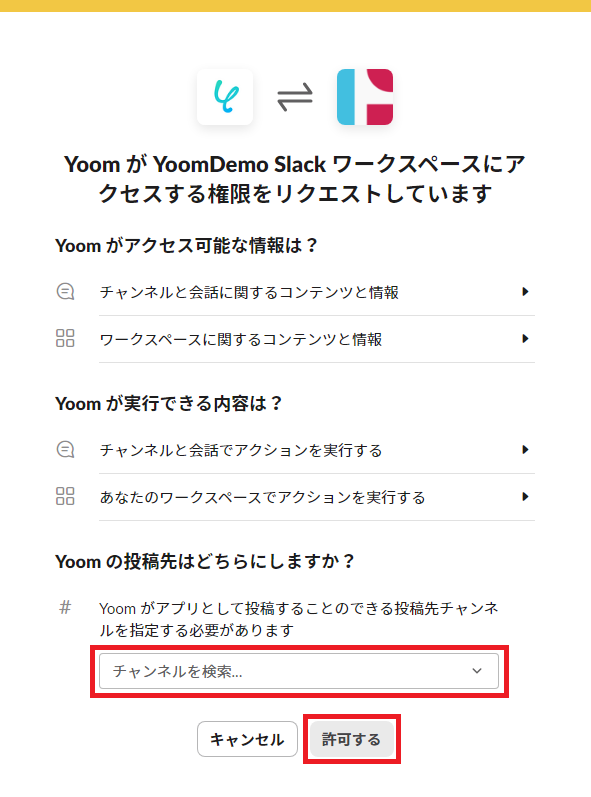
上記のような画面が表示されるので、Airtableのデータを投稿したいチャンネルをプルダウンから選択します。
その後、「許可する」を押しましょう。

Yoomの画面に自動で切り替わり、上記の表示がされれば連携完了です。
ステップ2:テンプレートのコピー
次に、今回使用するテンプレートをコピーしてください。
■概要Airtableをデータベースとして活用する中で、新しい情報が登録されるたびに手動でSlackに通知するのは手間がかかる作業ではないでしょうか。重要な更新の見逃しや、関係者への情報共有の遅れに繋がることもあります。このワークフローを活用すれば、Airtableに新しいレコードが登録されたタイミングで、指定したSlackチャンネルへ自動でメッセージを送信できます。これにより、迅速でスムーズな情報共有を実現し、手作業による通知業務を効率化します。
■このテンプレートをおすすめする方- Airtableの追加情報を手作業でSlackに通知している方
- チーム内の情報共有のスピードと正確性を向上させたいプロジェクトマネージャーの方
- AirtableとSlackを連携させ、業務の自動化を推進したいと考えている方
■このテンプレートを使うメリット- Airtableへのレコード登録をトリガーに自動でSlackへ通知するため、手動での確認や通知作業にかかる時間を短縮できます。
- 機械的な処理によって、重要な追加情報の伝達漏れや通知の遅延といったヒューマンエラーを防ぎ、確実な情報共有に繋がります。
■フローボットの流れ- はじめに、AirtableとSlackをYoomと連携します。
- 次に、トリガーでAirtableを選択し、「レコードが登録されたら」というアクションを設定します。
- 最後に、オペレーションでSlackを選択し、「チャンネルにメッセージを送る」アクションを設定し、Airtableから取得した情報を基に通知メッセージを作成します。
※「トリガー」:フロー起動のきっかけとなるアクション、「オペレーション」:トリガー起動後、フロー内で処理を行うアクション
■このワークフローのカスタムポイント- Airtableのトリガー設定では、連携対象としたいベースIDやテーブルID、またレコードの作成を検知するための「Created Time」フィールド名を任意で設定してください。
- Slackのオペレーション設定では、メッセージを送信するチャンネルや、通知するメッセージ内容を自由に設定できます。
■注意事項- Airtable、SlackのそれぞれとYoomを連携してください。
- トリガーは5分、10分、15分、30分、60分の間隔で起動間隔を選択できます。
- プランによって最短の起動間隔が異なりますので、ご注意ください。
- AirtableのアウトプットはJSONPathから取得可能です。取得方法は「『取得する値』を追加する方法」をご参照ください。
■このテンプレートをおすすめする方
- Airtableの追加情報を手作業でSlackに通知している方
- チーム内の情報共有のスピードと正確性を向上させたいプロジェクトマネージャーの方
- AirtableとSlackを連携させ、業務の自動化を推進したいと考えている方
■このテンプレートを使うメリット
- Airtableへのレコード登録をトリガーに自動でSlackへ通知するため、手動での確認や通知作業にかかる時間を短縮できます。
- 機械的な処理によって、重要な追加情報の伝達漏れや通知の遅延といったヒューマンエラーを防ぎ、確実な情報共有に繋がります。
■フローボットの流れ
- はじめに、AirtableとSlackをYoomと連携します。
- 次に、トリガーでAirtableを選択し、「レコードが登録されたら」というアクションを設定します。
- 最後に、オペレーションでSlackを選択し、「チャンネルにメッセージを送る」アクションを設定し、Airtableから取得した情報を基に通知メッセージを作成します。
■このワークフローのカスタムポイント
- Airtableのトリガー設定では、連携対象としたいベースIDやテーブルID、またレコードの作成を検知するための「Created Time」フィールド名を任意で設定してください。
- Slackのオペレーション設定では、メッセージを送信するチャンネルや、通知するメッセージ内容を自由に設定できます。
■注意事項
- Airtable、SlackのそれぞれとYoomを連携してください。
- トリガーは5分、10分、15分、30分、60分の間隔で起動間隔を選択できます。
- プランによって最短の起動間隔が異なりますので、ご注意ください。
- AirtableのアウトプットはJSONPathから取得可能です。取得方法は「『取得する値』を追加する方法」をご参照ください。
1.上のバナーを開いて「詳細を見る」をクリック
2.移行した画面下部の「このテンプレートを試してみる」をクリック
3.Yoomの登録がまだの場合は、登録を行う
※既に登録が完了している場合はログイン画面が表示されるので、ログインしましょう。
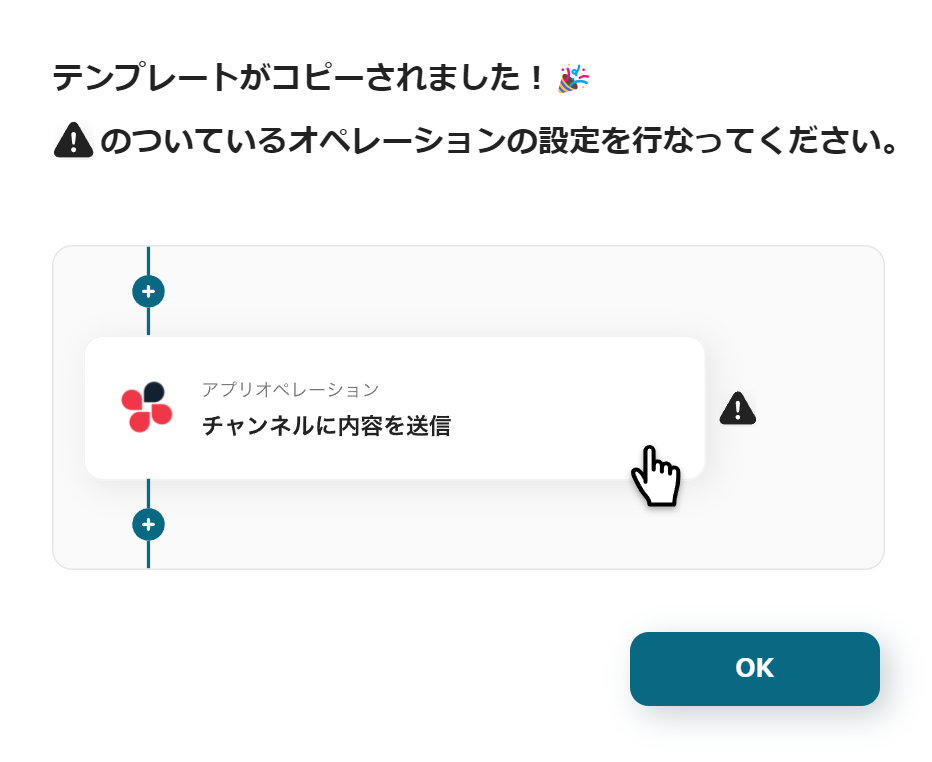
フローボットのテンプレートが「マイプロジェクト」にコピーされると、上記の表示がされます。
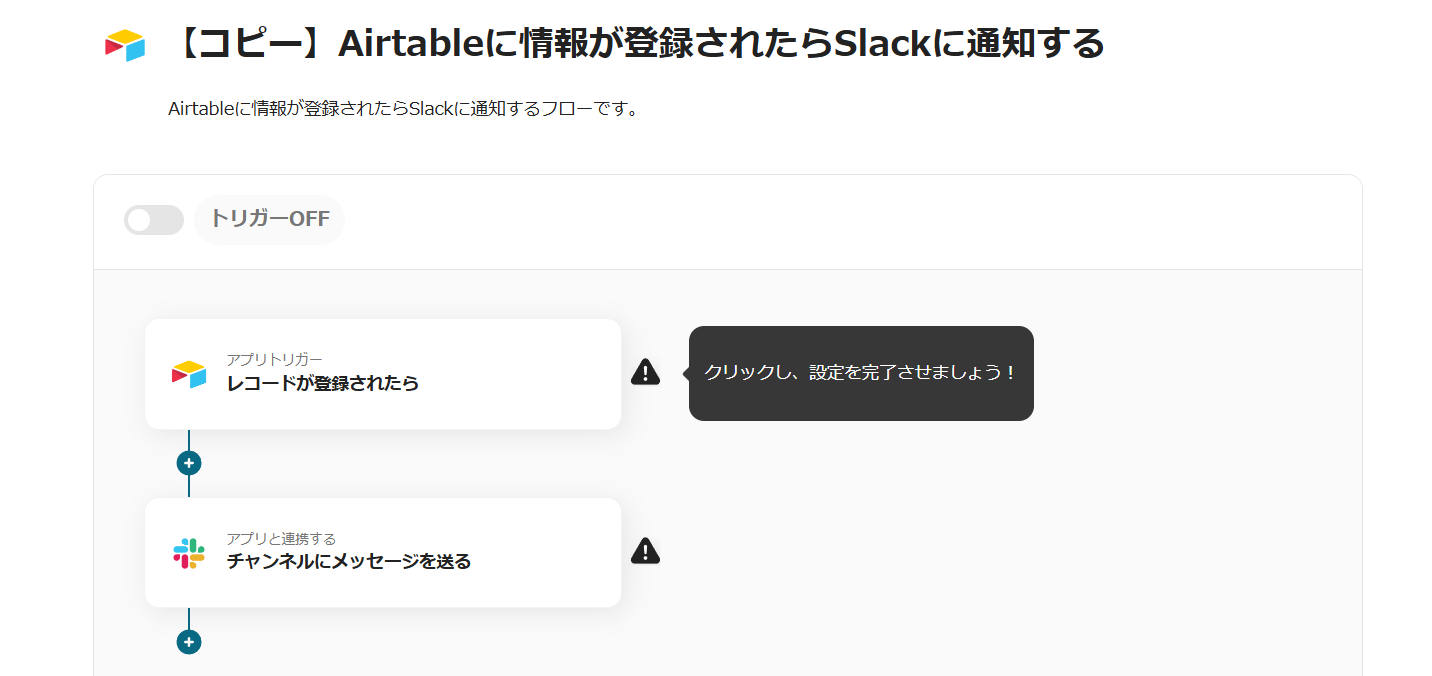
画像のようなページに移行するので、詳細な設定を行っていきましょう。
ステップ3:Airtableの起動とステータスデータを取得する設定
1.フローボットを開く
画面左側のメニューから「フローボット」を開きましょう。
2.コピーしたテンプレートを開く
「【コピー】Airtableに情報が登録されたらSlackに通知する」をクリックします。
3.アプリトリガーを選択
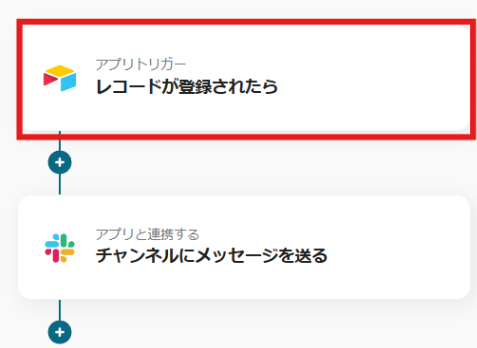
Airtableのアイコンの「レコードが登録されたら」をクリックします。
タイトルなどの設定は完了しているため、次へを押しましょう。
4.トリガーの起動間隔の設定
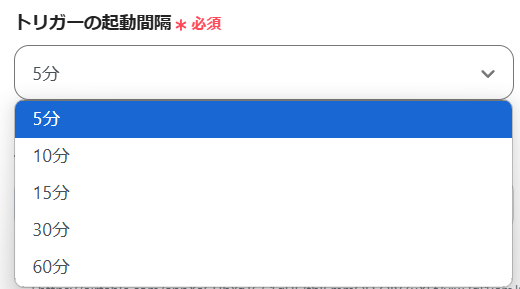
起動間隔を設定しましょう。
トリガーは5分、10分、15分、30分、60分の間隔で起動間隔を選択できます。基本的に短い設定がおすすめです。
プランによって最短の起動間隔が異なりますので、ご注意ください。
5.IDの入力
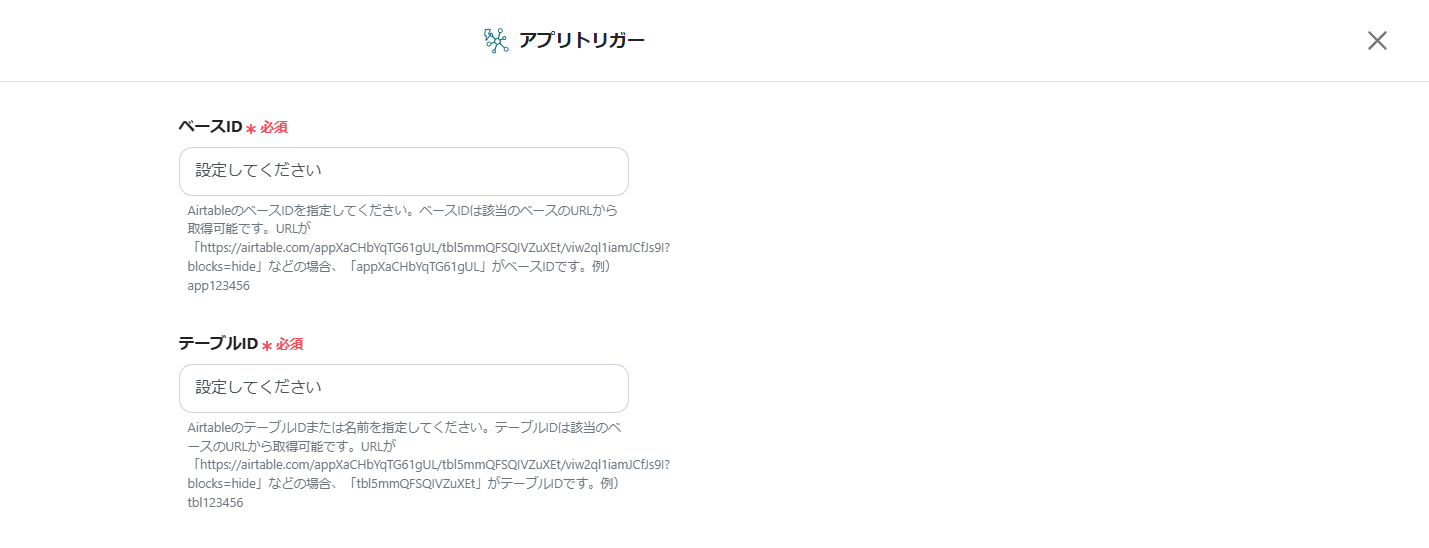
ボックス下部の補足に従い、AirtableのURLからコピー&ペーストしましょう。
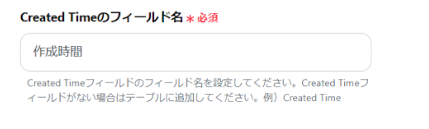
6.Created Timeのフィールド名の入力

Airtableに設定したフィールド名を入力してください。

今回は「作成時間」としたため、作成時間と入力します。
今回は「更新時間」としているため、画像のように設定しました。
7.テストの実行

設定が完了したらテストボタンを押してください。
テスト成功と表示が出たら完了です。完了をクリックします。
ステップ4: Slackへ通知する設定
1.アプリと連携する
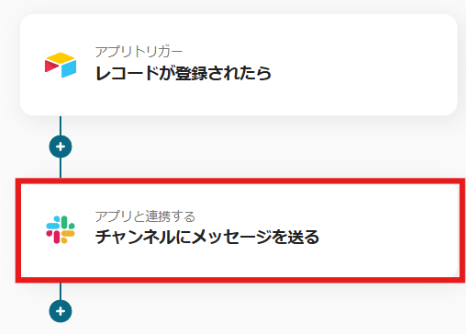
Slackのアイコンの「チャンネルにメッセージを送る」をクリックします。
タイトルなどの設定は完了しているため、次へを押しましょう。
2.投稿先のチャンネルIDを設定する
どのチャンネルにAirtableのデータを投稿するのか設定します。
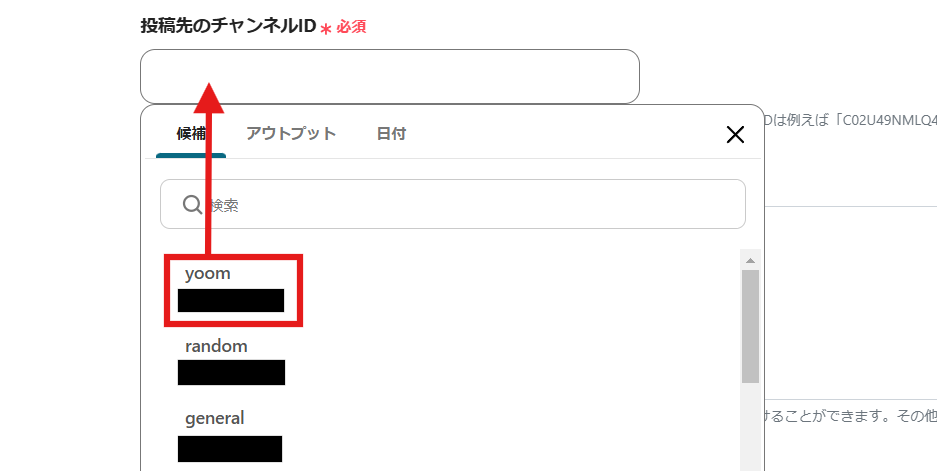
ボックスをクリックするとチャンネルが一覧表示されるので、Airtableのデータを受け取りたいチャンネルを選択しましょう。
選択することでボックスに挿入され、設定が完了します。
3.メッセージ内容の設定
次はSlackに投稿するメッセージを設定します。
ボックスをクリックしましょう。
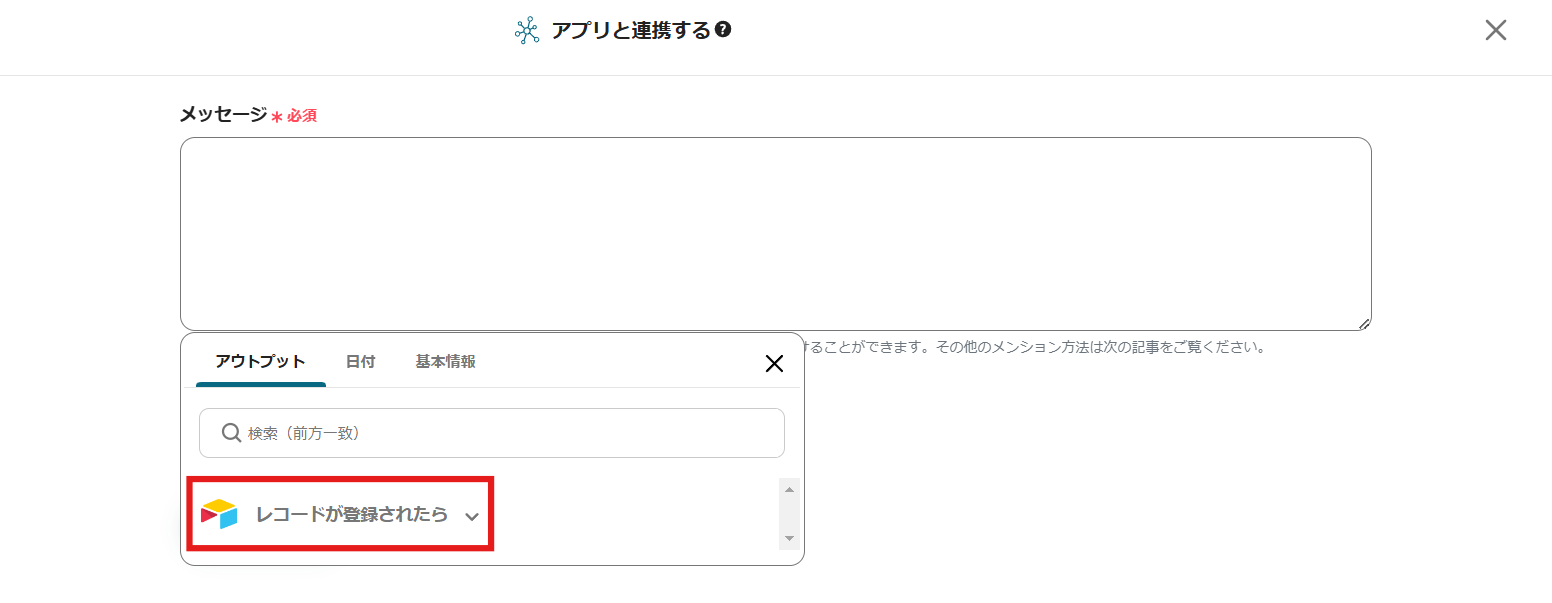
赤枠を選択します。
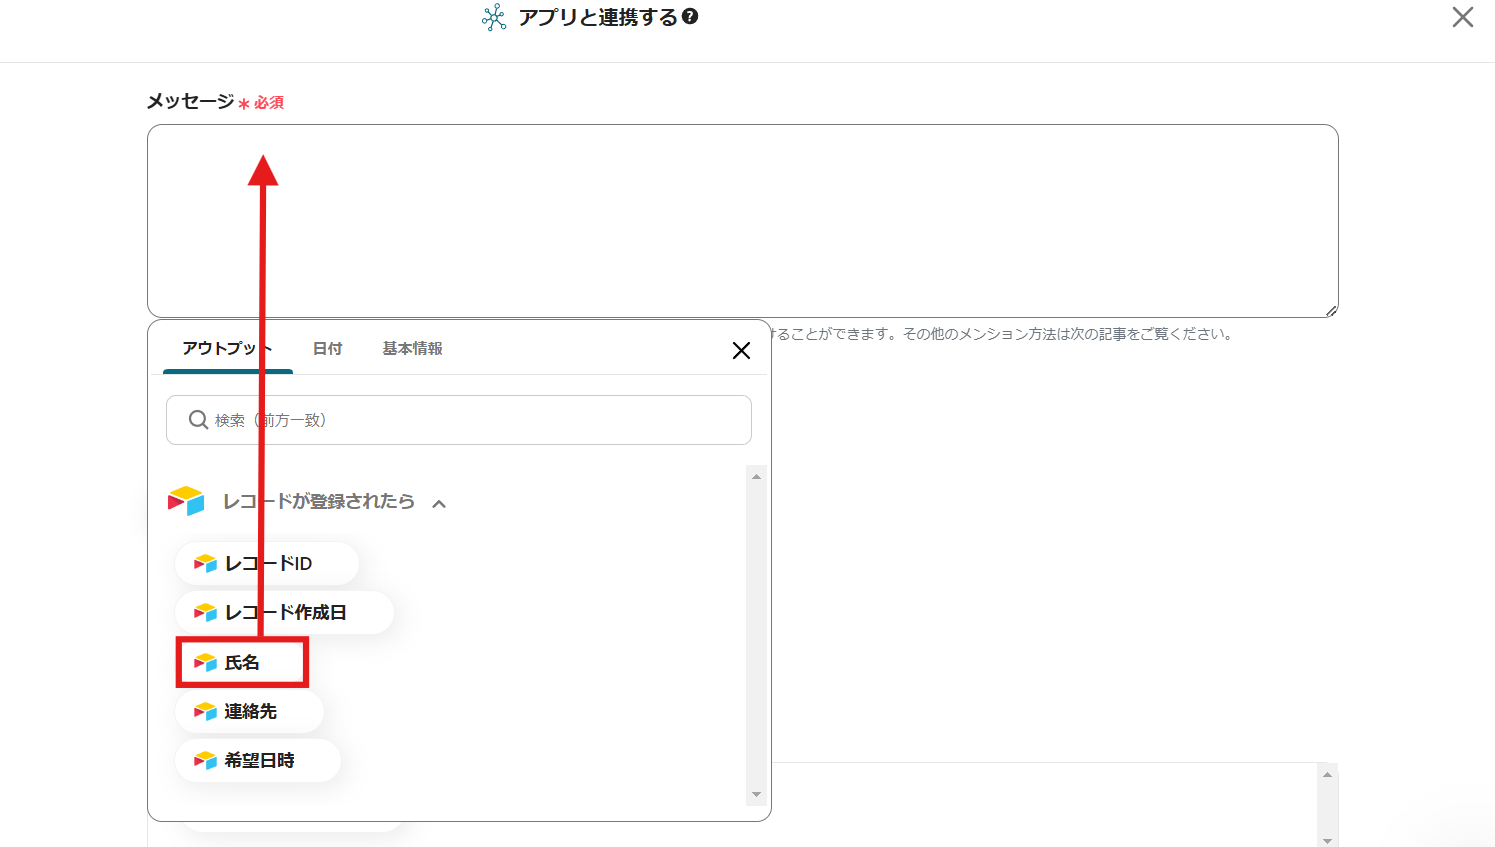
テスト送信したAirtableのデータが画像のように表示されます。
通知したい内容をクリックで挿入しましょう。
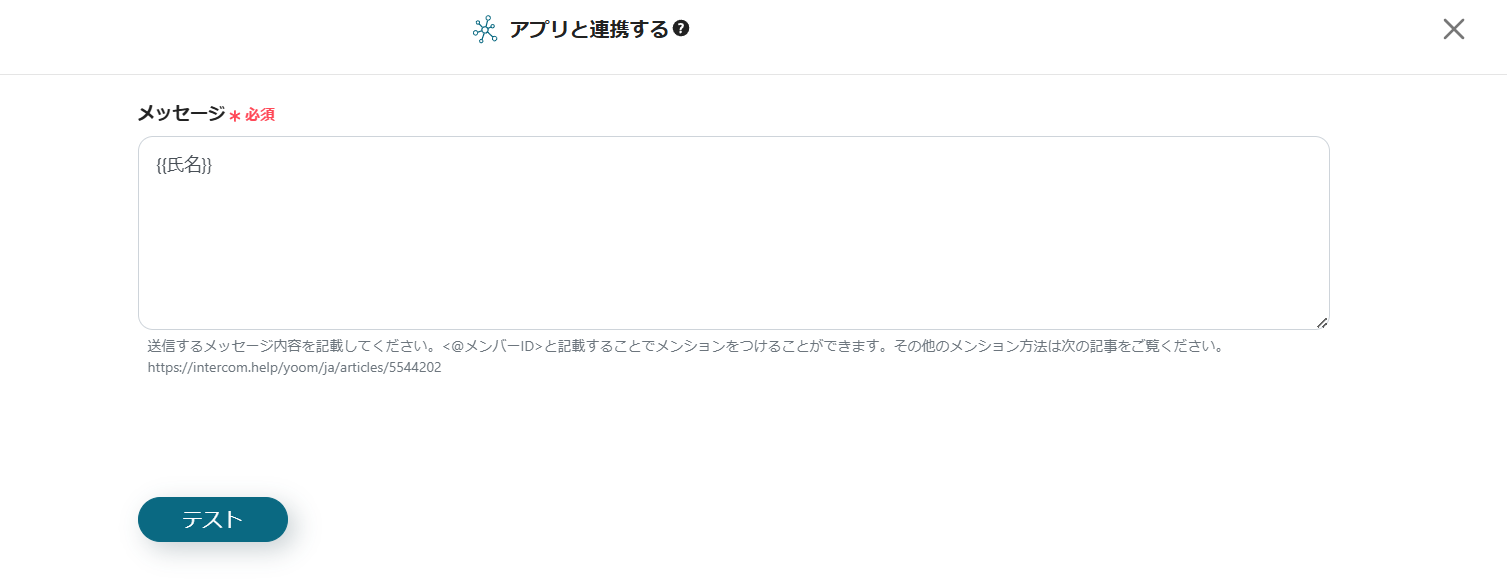
データが挿入できると画像のようになります。
他にも必要なデータがある場合、同じように挿入していきましょう。
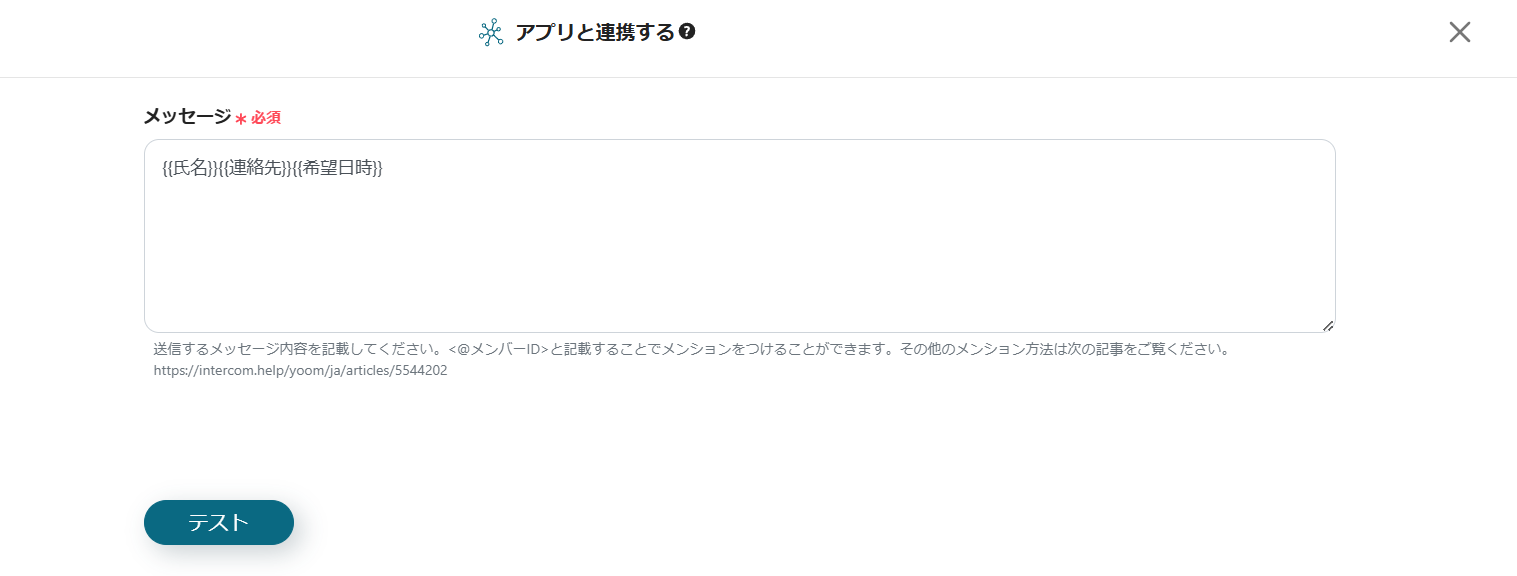
4.レイアウトを整える
見やすくするために、レイアウトを整えましょう。
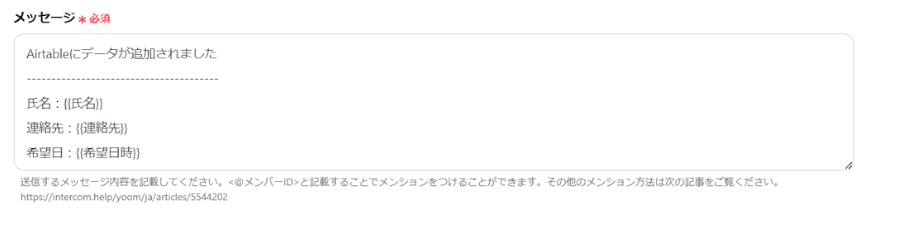
今回は画像のようにしました。
改行や記号を用いることで見やすくなるため、好みのレイアウトに変更しましょう。
また、メンションを付けることも可能です。詳しくはボックス下部の補足をご確認ください。
5.テストの実行
レイアウトを整えたら、画面下にあるテストボタンを押します。
テスト成功の表示がされたら、設定は完了です。完了をしましょう。
6.トリガーをONにする

フローボットの作成が完了すると、上記のような表示がされます。トリガーは初期設定ではOFFの状態なので、ONにしましょう。
今回使用したフローボットテンプレート
Airtableに情報が登録されたらSlackに通知する
■概要Airtableをデータベースとして活用する中で、新しい情報が登録されるたびに手動でSlackに通知するのは手間がかかる作業ではないでしょうか。重要な更新の見逃しや、関係者への情報共有の遅れに繋がることもあります。このワークフローを活用すれば、Airtableに新しいレコードが登録されたタイミングで、指定したSlackチャンネルへ自動でメッセージを送信できます。これにより、迅速でスムーズな情報共有を実現し、手作業による通知業務を効率化します。
■このテンプレートをおすすめする方- Airtableの追加情報を手作業でSlackに通知している方
- チーム内の情報共有のスピードと正確性を向上させたいプロジェクトマネージャーの方
- AirtableとSlackを連携させ、業務の自動化を推進したいと考えている方
■このテンプレートを使うメリット- Airtableへのレコード登録をトリガーに自動でSlackへ通知するため、手動での確認や通知作業にかかる時間を短縮できます。
- 機械的な処理によって、重要な追加情報の伝達漏れや通知の遅延といったヒューマンエラーを防ぎ、確実な情報共有に繋がります。
■フローボットの流れ- はじめに、AirtableとSlackをYoomと連携します。
- 次に、トリガーでAirtableを選択し、「レコードが登録されたら」というアクションを設定します。
- 最後に、オペレーションでSlackを選択し、「チャンネルにメッセージを送る」アクションを設定し、Airtableから取得した情報を基に通知メッセージを作成します。
※「トリガー」:フロー起動のきっかけとなるアクション、「オペレーション」:トリガー起動後、フロー内で処理を行うアクション
■このワークフローのカスタムポイント- Airtableのトリガー設定では、連携対象としたいベースIDやテーブルID、またレコードの作成を検知するための「Created Time」フィールド名を任意で設定してください。
- Slackのオペレーション設定では、メッセージを送信するチャンネルや、通知するメッセージ内容を自由に設定できます。
■注意事項- Airtable、SlackのそれぞれとYoomを連携してください。
- トリガーは5分、10分、15分、30分、60分の間隔で起動間隔を選択できます。
- プランによって最短の起動間隔が異なりますので、ご注意ください。
- AirtableのアウトプットはJSONPathから取得可能です。取得方法は「『取得する値』を追加する方法」をご参照ください。
■このテンプレートをおすすめする方
- Airtableの追加情報を手作業でSlackに通知している方
- チーム内の情報共有のスピードと正確性を向上させたいプロジェクトマネージャーの方
- AirtableとSlackを連携させ、業務の自動化を推進したいと考えている方
■このテンプレートを使うメリット
- Airtableへのレコード登録をトリガーに自動でSlackへ通知するため、手動での確認や通知作業にかかる時間を短縮できます。
- 機械的な処理によって、重要な追加情報の伝達漏れや通知の遅延といったヒューマンエラーを防ぎ、確実な情報共有に繋がります。
■フローボットの流れ
- はじめに、AirtableとSlackをYoomと連携します。
- 次に、トリガーでAirtableを選択し、「レコードが登録されたら」というアクションを設定します。
- 最後に、オペレーションでSlackを選択し、「チャンネルにメッセージを送る」アクションを設定し、Airtableから取得した情報を基に通知メッセージを作成します。
■このワークフローのカスタムポイント
- Airtableのトリガー設定では、連携対象としたいベースIDやテーブルID、またレコードの作成を検知するための「Created Time」フィールド名を任意で設定してください。
- Slackのオペレーション設定では、メッセージを送信するチャンネルや、通知するメッセージ内容を自由に設定できます。
■注意事項
- Airtable、SlackのそれぞれとYoomを連携してください。
- トリガーは5分、10分、15分、30分、60分の間隔で起動間隔を選択できます。
- プランによって最短の起動間隔が異なりますので、ご注意ください。
- AirtableのアウトプットはJSONPathから取得可能です。取得方法は「『取得する値』を追加する方法」をご参照ください。
AirtableやSlackを使ったその他の自動化例
本日ご紹介した連携以外にもAirtableやSlackのAPIを活用することで様々な自動化を実現することが可能です。
もし気になるものがあれば、ぜひ試してみてください!
AirtableとSlack
を連携した自動化例
Aietableで情報が更新されたらSlackに通知したり、Airtableに議事録が登録されたらAIで自動要約してslackに通知したりすることもできます。
また、Slackでメッセージが送信されたら投稿内容をAirtableに追加する連携も可能です。
■概要Slackでの連絡は手軽な反面、重要な情報が他のメッセージに埋もれてしまい、後から探し出すのに苦労することはありませんか。議事録やタスク依頼、顧客からのフィードバックなど、資産として残したい情報を手作業で転記するのは手間がかかり、抜け漏れのリスクも伴います。このワークフローを活用すれば、Slackの特定チャンネルにメッセージが投稿されると、その内容が自動でAirtableに追加されるため、情報管理を効率化し、重要なコミュニケーションを確実に蓄積できます。
■このテンプレートをおすすめする方- SlackでのコミュニケーションログをAirtableで管理しており、手入力の手間を省きたい方
- 特定のキーワードを含むメッセージなど、重要な投稿だけをデータベースに蓄積したいチームリーダーの方
- 手作業での情報転記による、抜け漏れや入力ミスなどのヒューマンエラーを防ぎたい方
■このテンプレートを使うメリット- Slackにメッセージが投稿されると自動でAirtableにレコードが作成されるため、これまで手作業での転記に費やしていた時間を短縮できます。
- Slack上の重要な情報がAirtableに一元管理されることで、情報の検索や分析が容易になり、ナレッジの属人化を防ぎます。
■フローボットの流れ- はじめに、SlackとAirtableをYoomと連携します。
- 次に、トリガーでSlackを選択し、「メッセージがチャンネルに投稿されたら(Webhook)」というアクションを設定します。
- 次に、オペレーションで正規表現を使い、投稿されたメッセージの内容から必要な情報を抽出、または整形します。
- 最後に、オペレーションでAirtableの「レコードを作成」アクションを設定し、整形したデータを指定のテーブルに追加します。
※「トリガー」:フロー起動のきっかけとなるアクション、「オペレーション」:トリガー起動後、フロー内で処理を行うアクション
■このワークフローのカスタムポイント- Slackのトリガー設定では、連携の対象としたいチャンネルをIDで任意に指定してください。
- 正規表現によるデータの置換オペレーションでは、メッセージから特定のテキストを抽出したり、不要な部分を削除したりするなど、置換のルールを任意で設定できます。
- Airtableにレコードを作成する際、前段のオペレーションで取得した値を引用し、どのフィールドにどの情報を登録するかを自由に設定できます。
■注意事項- Slack、AirtableのそれぞれとYoomを連携してください。
■このテンプレートをおすすめする方
- SlackでのコミュニケーションログをAirtableで管理しており、手入力の手間を省きたい方
- 特定のキーワードを含むメッセージなど、重要な投稿だけをデータベースに蓄積したいチームリーダーの方
- 手作業での情報転記による、抜け漏れや入力ミスなどのヒューマンエラーを防ぎたい方
■このテンプレートを使うメリット
- Slackにメッセージが投稿されると自動でAirtableにレコードが作成されるため、これまで手作業での転記に費やしていた時間を短縮できます。
- Slack上の重要な情報がAirtableに一元管理されることで、情報の検索や分析が容易になり、ナレッジの属人化を防ぎます。
■フローボットの流れ
- はじめに、SlackとAirtableをYoomと連携します。
- 次に、トリガーでSlackを選択し、「メッセージがチャンネルに投稿されたら(Webhook)」というアクションを設定します。
- 次に、オペレーションで正規表現を使い、投稿されたメッセージの内容から必要な情報を抽出、または整形します。
- 最後に、オペレーションでAirtableの「レコードを作成」アクションを設定し、整形したデータを指定のテーブルに追加します。
■このワークフローのカスタムポイント
- Slackのトリガー設定では、連携の対象としたいチャンネルをIDで任意に指定してください。
- 正規表現によるデータの置換オペレーションでは、メッセージから特定のテキストを抽出したり、不要な部分を削除したりするなど、置換のルールを任意で設定できます。
- Airtableにレコードを作成する際、前段のオペレーションで取得した値を引用し、どのフィールドにどの情報を登録するかを自由に設定できます。
■注意事項
- Slack、AirtableのそれぞれとYoomを連携してください。
Airtableを活用した自動化例
フォームで回答が送信されたらAirtableに追加する
GoogleフォームやJotformなどで回答が送信されたら、Airtableに自動で追加します。
■概要Googleフォームで集めたアンケートや問い合わせの回答を、手作業でAirtableに転記する作業は手間がかかる上に、入力ミスも起こりがちではないでしょうか。このワークフローを活用すれば、Googleフォームに新しい回答が送信されるたびに、その内容をAirtableのテーブルへ自動で登録できます。手作業によるデータ入力の負担をなくし、迅速な情報共有やデータ管理を実現します。
■このテンプレートをおすすめする方- Googleフォームで集めた顧客リストやアンケート結果をAirtableで管理している方
- 手作業でのデータ転記に時間がかかり、本来の業務に集中できていない担当者の方
- フォームからの回答を迅速にデータベースに反映させ、対応速度を上げたいチームの方
■このテンプレートを使うメリット- Googleフォームへの回答送信をトリガーにAirtableへ自動でレコードが作成されるため、データ転記にかかる作業時間を短縮できます。
- 手作業によるコピー&ペーストが不要になるため、入力ミスや転記漏れといったヒューマンエラーの発生を防ぎ、データの正確性を保ちます。
■フローボットの流れ- はじめに、GoogleフォームとAirtableをYoomと連携します。
- 次に、トリガーでGoogleフォームを選択し、「フォームに回答が送信されたら」というアクションを設定します。
- 最後に、オペレーションでAirtableを選択し、「レコードを作成」のアクションを設定することで、フォームの回答内容がAirtableに自動で登録されます。
※「トリガー」:フロー起動のきっかけとなるアクション、「オペレーション」:トリガー起動後、フロー内で処理を行うアクション
■このワークフローのカスタムポイント- Googleフォームのトリガー設定では、連携対象としたい任意のフォームIDを設定し、取得したい回答内容を選択することが可能です。
- Airtableのオペレーション設定では、レコードを作成したいテーブルを任意で指定できます。また、各フィールドに登録する値として、固定のテキストを入力したり、トリガーで取得したフォームの回答内容を変数として設定したりするカスタムが可能です。
■注意事項- Googleフォーム、AirtableのそれぞれとYoomを連携してください。
- トリガーは5分、10分、15分、30分、60分の間隔で起動間隔を選択できます。
- プランによって最短の起動間隔が異なりますので、ご注意ください。
- Googleフォームをトリガーとして使用した際の回答内容を取得する方法は「Googleフォームトリガーで、回答内容を取得する方法」を参照ください。
■概要Jotformで集めたアンケートや申し込みフォームの回答を、都度手作業でAirtableに転記していませんか。この作業は時間がかかるだけでなく、コピー&ペーストの際にミスが発生する可能性もあります。このワークフローを活用すれば、Jotformで新しい回答が送信されると、自動でAirtableにレコードが追加されるため、データ入力の手間やヒューマンエラーといった課題を解消し、よりスムーズな情報管理を実現します。
■このテンプレートをおすすめする方- Jotformで集めた顧客情報をAirtableで管理しており、データ移行を手作業で行っている方
- フォームからの問い合わせ対応を迅速化し、リード管理の効率を上げたいと考えている方
- 手作業によるデータ転記のミスをなくし、正確なデータベースを構築したいと考えている方
■このテンプレートを使うメリット- Jotformの回答が自動でAirtableに登録されるため、これまで手作業での転記に費やしていた時間を短縮し、他の重要な業務に集中できます。
- システムが自動でデータを連携するため、手作業によるコピー&ペースト時の入力ミスや転記漏れといったヒューマンエラーを防ぎます。
■フローボットの流れ- はじめに、JotformとAirtableをYoomと連携します。
- 次に、トリガーでJotformを選択し、「フォームが送信されたら」というアクションを設定して、対象のフォームを指定します。
- 次に、オペレーションでJotformの「最新の回答を取得する」アクションを設定し、トリガーで起動したフォームの回答内容を取得します。
- 最後に、オペレーションでAirtableの「レコードを作成」アクションを設定し、取得したJotformの回答をAirtableの任意の項目に登録します。
※「トリガー」:フロー起動のきっかけとなるアクション、「オペレーション」:トリガー起動後、フロー内で処理を行うアクション
■このワークフローのカスタムポイント- Airtableの「レコードを作成」アクションでは、どのベースのどのテーブルに情報を追加するかを任意で設定してください。
- Airtableの各項目には、前のステップで取得したJotformの回答内容を動的に割り当てることが可能です。例えば「氏名」の項目にフォームの氏名情報を紐付けるなど、自由にカスタマイズしてください。
■注意事項- Jotform、AirtableのそれぞれとYoomを連携してください。
- JotformのWebhook設定および回答取得の方法は「JotformのWebhook設定と最新回答取得方法について」をご参照ください。
■概要
オンラインフォームでの情報収集は便利ですが、その後のデータ管理に手間を感じていませんか。Filloutでフォームが送信されるたびに、手作業でAirtableに内容を転記するのは時間がかかるだけでなく、入力ミスや反映漏れの原因にもなりがちです。このワークフローを活用すれば、Filloutでフォームが送信されると同時にAirtableへデータが自動で追加され、こうした課題をスムーズに解消できます。
■このテンプレートをおすすめする方
- Filloutで収集した回答をAirtableで管理しており、手入力に課題を感じている方
- 顧客からの問い合わせやイベント申し込みなどをフォームで受け付け、データベース化している方
- フォームのデータ転記作業を自動化し、本来の業務に集中したいと考えているチームリーダーの方
■このテンプレートを使うメリット
- Filloutのフォーム回答がAirtableに自動でレコードとして追加されるため、これまで手作業で行っていたデータ入力の時間を短縮できます。
- 手作業でのデータのコピー&ペーストが不要になることで、入力間違いや転記漏れといったヒューマンエラーを防ぐことに繋がります。
■フローボットの流れ
- はじめに、FilloutとAirtableをYoomと連携します。
- 次に、トリガーでFilloutを選択し、「フォームが送信されたら」というアクションを設定します。
- 最後に、オペレーションでAirtableの「レコードを作成する」アクションを設定し、Filloutで取得した情報を基にレコードが作成されるようにします。
※「トリガー」:フロー起動のきっかけとなるアクション、「オペレーション」:トリガー起動後、フロー内で処理を行うアクション
■このワークフローのカスタムポイント
- Airtableの「レコードを作成する」アクションで、対象のデータベース(ベース)とテーブルIDを任意で設定してください。
- レコードの各フィールドには、トリガーで取得したFilloutのフォーム回答データを変数として設定し、どの項目をどこに追加するかを指定します。
■注意事項
- Fillout、AirtableのそれぞれとYoomを連携してください。
■このテンプレートをおすすめする方
- Googleフォームで集めた顧客リストやアンケート結果をAirtableで管理している方
- 手作業でのデータ転記に時間がかかり、本来の業務に集中できていない担当者の方
- フォームからの回答を迅速にデータベースに反映させ、対応速度を上げたいチームの方
■このテンプレートを使うメリット
- Googleフォームへの回答送信をトリガーにAirtableへ自動でレコードが作成されるため、データ転記にかかる作業時間を短縮できます。
- 手作業によるコピー&ペーストが不要になるため、入力ミスや転記漏れといったヒューマンエラーの発生を防ぎ、データの正確性を保ちます。
■フローボットの流れ
- はじめに、GoogleフォームとAirtableをYoomと連携します。
- 次に、トリガーでGoogleフォームを選択し、「フォームに回答が送信されたら」というアクションを設定します。
- 最後に、オペレーションでAirtableを選択し、「レコードを作成」のアクションを設定することで、フォームの回答内容がAirtableに自動で登録されます。
■このワークフローのカスタムポイント
- Googleフォームのトリガー設定では、連携対象としたい任意のフォームIDを設定し、取得したい回答内容を選択することが可能です。
- Airtableのオペレーション設定では、レコードを作成したいテーブルを任意で指定できます。また、各フィールドに登録する値として、固定のテキストを入力したり、トリガーで取得したフォームの回答内容を変数として設定したりするカスタムが可能です。
■注意事項
- Googleフォーム、AirtableのそれぞれとYoomを連携してください。
- トリガーは5分、10分、15分、30分、60分の間隔で起動間隔を選択できます。
- プランによって最短の起動間隔が異なりますので、ご注意ください。
- Googleフォームをトリガーとして使用した際の回答内容を取得する方法は「Googleフォームトリガーで、回答内容を取得する方法」を参照ください。
■このテンプレートをおすすめする方
- Jotformで集めた顧客情報をAirtableで管理しており、データ移行を手作業で行っている方
- フォームからの問い合わせ対応を迅速化し、リード管理の効率を上げたいと考えている方
- 手作業によるデータ転記のミスをなくし、正確なデータベースを構築したいと考えている方
■このテンプレートを使うメリット
- Jotformの回答が自動でAirtableに登録されるため、これまで手作業での転記に費やしていた時間を短縮し、他の重要な業務に集中できます。
- システムが自動でデータを連携するため、手作業によるコピー&ペースト時の入力ミスや転記漏れといったヒューマンエラーを防ぎます。
■フローボットの流れ
- はじめに、JotformとAirtableをYoomと連携します。
- 次に、トリガーでJotformを選択し、「フォームが送信されたら」というアクションを設定して、対象のフォームを指定します。
- 次に、オペレーションでJotformの「最新の回答を取得する」アクションを設定し、トリガーで起動したフォームの回答内容を取得します。
- 最後に、オペレーションでAirtableの「レコードを作成」アクションを設定し、取得したJotformの回答をAirtableの任意の項目に登録します。
■このワークフローのカスタムポイント
- Airtableの「レコードを作成」アクションでは、どのベースのどのテーブルに情報を追加するかを任意で設定してください。
- Airtableの各項目には、前のステップで取得したJotformの回答内容を動的に割り当てることが可能です。例えば「氏名」の項目にフォームの氏名情報を紐付けるなど、自由にカスタマイズしてください。
■注意事項
- Jotform、AirtableのそれぞれとYoomを連携してください。
- JotformのWebhook設定および回答取得の方法は「JotformのWebhook設定と最新回答取得方法について」をご参照ください。
■概要
オンラインフォームでの情報収集は便利ですが、その後のデータ管理に手間を感じていませんか。Filloutでフォームが送信されるたびに、手作業でAirtableに内容を転記するのは時間がかかるだけでなく、入力ミスや反映漏れの原因にもなりがちです。このワークフローを活用すれば、Filloutでフォームが送信されると同時にAirtableへデータが自動で追加され、こうした課題をスムーズに解消できます。
■このテンプレートをおすすめする方
- Filloutで収集した回答をAirtableで管理しており、手入力に課題を感じている方
- 顧客からの問い合わせやイベント申し込みなどをフォームで受け付け、データベース化している方
- フォームのデータ転記作業を自動化し、本来の業務に集中したいと考えているチームリーダーの方
■このテンプレートを使うメリット
- Filloutのフォーム回答がAirtableに自動でレコードとして追加されるため、これまで手作業で行っていたデータ入力の時間を短縮できます。
- 手作業でのデータのコピー&ペーストが不要になることで、入力間違いや転記漏れといったヒューマンエラーを防ぐことに繋がります。
■フローボットの流れ
- はじめに、FilloutとAirtableをYoomと連携します。
- 次に、トリガーでFilloutを選択し、「フォームが送信されたら」というアクションを設定します。
- 最後に、オペレーションでAirtableの「レコードを作成する」アクションを設定し、Filloutで取得した情報を基にレコードが作成されるようにします。
※「トリガー」:フロー起動のきっかけとなるアクション、「オペレーション」:トリガー起動後、フロー内で処理を行うアクション
■このワークフローのカスタムポイント
- Airtableの「レコードを作成する」アクションで、対象のデータベース(ベース)とテーブルIDを任意で設定してください。
- レコードの各フィールドには、トリガーで取得したFilloutのフォーム回答データを変数として設定し、どの項目をどこに追加するかを指定します。
■注意事項
- Fillout、AirtableのそれぞれとYoomを連携してください。
メールで受信した内容をAirtableに追加する
GmailやOutlookで受信した内容をAirtableに自動で追加します。
■概要Gmailで受信するお問い合わせの管理に、手間や時間を取られていませんか。手作業でAirtableなどの管理ツールに情報を転記していると、入力ミスや対応漏れのリスクも伴います。このワークフローを活用すれば、Gmailで特定のお問い合わせメールを受信するだけで、AIが自動で内容を解析し、Airtableのデータベースへ情報を登録します。手作業による転記作業から解放され、顧客対応の迅速化と管理業務の効率化を実現します。
■このテンプレートをおすすめする方- Gmailで受信したお問い合わせ情報をAirtableへ手動で転記しているご担当者の方
- お問い合わせ管理の自動化によって、対応漏れなどのヒューマンエラーを防ぎたいチームリーダーの方
- 顧客対応の初動を早め、データ管理を一元化したいと考えている方
■このテンプレートを使うメリット- Gmailでメールを受信すると自動でAirtableへ情報が登録されるため、これまで手作業で行っていた転記業務の時間を短縮できます。
- 手作業での転記が不要になるため、コピー&ペーストのミスや登録漏れといったヒューマンエラーの防止に繋がります。
■フローボットの流れ- はじめに、GmailとAirtableをYoomと連携します。
- トリガーでGmailを選択し、「特定のラベルのメールを受信したら」を設定します。
- 次に、オペレーションでAI機能を設定し、受信したメール本文から氏名や会社名、お問い合わせ内容などの必要な情報を抽出します。
- 最後に、Airtableの「レコードを作成」アクションを設定し、AI機能で抽出した情報をもとに新しいレコードを作成します。
※「トリガー」:フロー起動のきっかけとなるアクション、「オペレーション」:トリガー起動後、フロー内で処理を行うアクション
■このワークフローのカスタムポイント- Gmailのトリガー設定では、自動化の対象とするメールを識別するためのラベルを任意で設定してください。
- AI機能のテキスト抽出では、受信したメールの本文や件名などから、抽出したい項目(例:氏名、会社名、連絡先など)を任意で設定可能です。
- Airtableにレコードを作成する際、どのフィールドにどの情報を登録するかを自由に設定できます。AI機能で抽出した値を、対応するフィールドに割り当ててください。
■注意事項- Gmail、AirtableのそれぞれとYoomを連携してください。
- トリガーは5分、10分、15分、30分、60分の間隔で起動間隔を選択できます。
- プランによって最短の起動間隔が異なりますので、ご注意ください。
■概要Outlookで受信するお問い合わせメールの内容を、都度Airtableへ手作業で転記していませんか?こうした定型的な作業は時間がかかるだけでなく、入力漏れや転記ミスの原因にもなりがちです。このワークフローを活用することで、Outlookで特定のお問い合わせメールを受信した際に、その内容をAIが自動で読み取り、Airtableへ新規レコードとして登録する一連の流れを自動化し、お問い合わせ管理を効率化します。
■このテンプレートをおすすめする方- Outlookで受信したお問い合わせをAirtableで管理しているカスタマーサポート担当の方
- 手作業でのデータ入力に時間がかかり、対応の迅速化や自動化を進めたいと考えている方
- Airtableを顧客データベースとして活用しており、入力業務の効率化を目指しているチームの方
■このテンプレートを使うメリット- Outlookでメールを受信すると自動でAirtableに情報が登録されるため、これまで手作業での転記に費やしていた時間を短縮することができます。
- 手作業でのデータ転記が不要になることで、入力間違いや記載漏れといったヒューマンエラーのリスクを軽減し、データの正確性を保ちます。
■フローボットの流れ- はじめに、OutlookとAirtableをYoomに連携します。
- 次に、トリガーでOutlookを選択し、「メールを受信したら」というアクションを設定します。
- 次に、オペレーションでAI機能の「テキスト抽出」を設定し、受信したメール本文から必要な情報を抽出します。
- 最後に、オペレーションでAirtableの「レコードを作成」を設定し、抽出した情報を任意のフィールドに格納します。
※「トリガー」:フロー起動のきっかけとなるアクション、「オペレーション」:トリガー起動後、フロー内で処理を行うアクション
■このワークフローのカスタムポイント- Outlookのトリガー設定では、監視対象としたいメールフォルダIDを任意で設定してください。
- AI機能のオペレーションでは、受信したメール本文から抽出したいテキスト項目(会社名、担当者名など)を任意で設定できます。
- Airtableへのレコード作成では、前段のAI機能で抽出した値を引用し、どのフィールドに情報を登録するかを自由に設定可能です。
■注意事項- Outlook、AirtableのそれぞれとYoomを連携してください。
- トリガーは5分、10分、15分、30分、60分の間隔で起動間隔を選択できます。
- プランによって最短の起動間隔が異なりますので、ご注意ください。
- Microsoft365(旧Office365)には、家庭向けプランと一般法人向けプラン(Microsoft365 Business)があり、一般法人向けプランに加入していない場合には認証に失敗する可能性があります。
■このテンプレートをおすすめする方
- Gmailで受信したお問い合わせ情報をAirtableへ手動で転記しているご担当者の方
- お問い合わせ管理の自動化によって、対応漏れなどのヒューマンエラーを防ぎたいチームリーダーの方
- 顧客対応の初動を早め、データ管理を一元化したいと考えている方
■このテンプレートを使うメリット
- Gmailでメールを受信すると自動でAirtableへ情報が登録されるため、これまで手作業で行っていた転記業務の時間を短縮できます。
- 手作業での転記が不要になるため、コピー&ペーストのミスや登録漏れといったヒューマンエラーの防止に繋がります。
■フローボットの流れ
- はじめに、GmailとAirtableをYoomと連携します。
- トリガーでGmailを選択し、「特定のラベルのメールを受信したら」を設定します。
- 次に、オペレーションでAI機能を設定し、受信したメール本文から氏名や会社名、お問い合わせ内容などの必要な情報を抽出します。
- 最後に、Airtableの「レコードを作成」アクションを設定し、AI機能で抽出した情報をもとに新しいレコードを作成します。
■このワークフローのカスタムポイント
- Gmailのトリガー設定では、自動化の対象とするメールを識別するためのラベルを任意で設定してください。
- AI機能のテキスト抽出では、受信したメールの本文や件名などから、抽出したい項目(例:氏名、会社名、連絡先など)を任意で設定可能です。
- Airtableにレコードを作成する際、どのフィールドにどの情報を登録するかを自由に設定できます。AI機能で抽出した値を、対応するフィールドに割り当ててください。
■注意事項
- Gmail、AirtableのそれぞれとYoomを連携してください。
- トリガーは5分、10分、15分、30分、60分の間隔で起動間隔を選択できます。
- プランによって最短の起動間隔が異なりますので、ご注意ください。
■このテンプレートをおすすめする方
- Outlookで受信したお問い合わせをAirtableで管理しているカスタマーサポート担当の方
- 手作業でのデータ入力に時間がかかり、対応の迅速化や自動化を進めたいと考えている方
- Airtableを顧客データベースとして活用しており、入力業務の効率化を目指しているチームの方
■このテンプレートを使うメリット
- Outlookでメールを受信すると自動でAirtableに情報が登録されるため、これまで手作業での転記に費やしていた時間を短縮することができます。
- 手作業でのデータ転記が不要になることで、入力間違いや記載漏れといったヒューマンエラーのリスクを軽減し、データの正確性を保ちます。
■フローボットの流れ
- はじめに、OutlookとAirtableをYoomに連携します。
- 次に、トリガーでOutlookを選択し、「メールを受信したら」というアクションを設定します。
- 次に、オペレーションでAI機能の「テキスト抽出」を設定し、受信したメール本文から必要な情報を抽出します。
- 最後に、オペレーションでAirtableの「レコードを作成」を設定し、抽出した情報を任意のフィールドに格納します。
■このワークフローのカスタムポイント
- Outlookのトリガー設定では、監視対象としたいメールフォルダIDを任意で設定してください。
- AI機能のオペレーションでは、受信したメール本文から抽出したいテキスト項目(会社名、担当者名など)を任意で設定できます。
- Airtableへのレコード作成では、前段のAI機能で抽出した値を引用し、どのフィールドに情報を登録するかを自由に設定可能です。
■注意事項
- Outlook、AirtableのそれぞれとYoomを連携してください。
- トリガーは5分、10分、15分、30分、60分の間隔で起動間隔を選択できます。
- プランによって最短の起動間隔が異なりますので、ご注意ください。
- Microsoft365(旧Office365)には、家庭向けプランと一般法人向けプラン(Microsoft365 Business)があり、一般法人向けプランに加入していない場合には認証に失敗する可能性があります。
Airtableにレコードが登録されたらクラウドストレージにフォルダを作成する
Airtableにレコードが登録されたら、Google DriveやOneDriveなどにフォルダを自動で作成します。
■概要Airtableで管理している取引先や顧客情報が増えるたびに、手作業でGoogle Driveにフォルダを作成するのは手間ではないでしょうか。また、手作業がゆえにフォルダの作成漏れや命名ミスが発生し、後の情報管理に影響を及ぼすこともあります。このワークフローを活用すれば、Airtableに新しいレコードが登録されるだけで、Google Driveに関連フォルダが自動で作成されるため、こうした課題をスムーズに削減できます。
■このテンプレートをおすすめする方- Airtableで顧客や取引先の情報を管理している営業担当者やマネージャーの方
- Google Driveで案件ごとのフォルダ管理をしており、手作業での作成に手間を感じている方
- データベースへの登録とファイル管理の連携を効率化したいと考えている方
■このテンプレートを使うメリット- Airtableへの情報登録が完了すると、自動でGoogle Driveにフォルダが作成されるため、これまで手作業に費やしていた時間を短縮できます。
- 手作業によるフォルダの作成漏れや、フォルダ名の命名ミスといったヒューマンエラーのリスク軽減に繋がります。
■フローボットの流れ- はじめに、AirtableとGoogle DriveをYoomと連携します。
- 次に、トリガーでAirtableを選択し、「新しいレコードが登録されたら」というアクションを設定します。
- 最後に、オペレーションでGoogle Driveの「フォルダを作成する」アクションを設定し、Airtableのレコード情報をもとにフォルダを作成するよう設定します。
※「トリガー」:フロー起動のきっかけとなるアクション、「オペレーション」:トリガー起動後、フロー内で処理を行うアクション
■このワークフローのカスタムポイント- Airtableのトリガー設定では、フローボットを起動させたいデータベースやテーブルを任意で設定してください。
- Google Driveのフォルダ作成オペレーションでは、Airtableのどの情報をフォルダ名に反映させるかなどを任意で設定できます。
■注意事項- Airtable、Google DriveのそれぞれとYoomを連携してください。
- トリガーは5分、10分、15分、30分、60分の間隔で起動間隔を選択できます。
- プランによって最短の起動間隔が異なりますので、ご注意ください。
■概要Airtableで取引先情報を管理しているものの、関連書類を保管するために都度OneDriveにフォルダを手作業で作成する業務に手間を感じていませんか。このワークフローを活用すれば、Airtableに新しい取引先レコードが登録されると、自動でOneDriveに取引先名のフォルダが作成されるため、手作業によるファイル管理の煩雑さを解消し、業務を効率化します。
■このテンプレートをおすすめする方- AirtableとOneDriveを併用し、取引先管理を手作業で行っている方
- データの入力とファイル管理の二度手間をなくし、業務効率を改善したい方
- フォルダの作成忘れや命名規則の揺れといったミスを防ぎたいと考えている方
■このテンプレートを使うメリット- Airtableへのレコード登録だけでOneDriveのフォルダ作成が自動化されるため、これまで手作業に費やしていた時間を短縮できます
- 手作業によるフォルダの作成忘れや命名ミスを防ぎ、Airtableのデータに基づいた正確なフォルダ管理を実現します
■フローボットの流れ- はじめに、AirtableとOneDriveをYoomと連携します
- 次に、トリガーでAirtableを選択し、「レコードが登録されたら」というアクションを設定します
- 最後に、オペレーションでOneDriveの「フォルダを作成」アクションを設定し、Airtableで取得した情報をもとにフォルダが作成されるように設定します
※「トリガー」:フロー起動のきっかけとなるアクション、「オペレーション」:トリガー起動後、フロー内で処理を行うアクション
■このワークフローのカスタムポイント- Airtableのトリガー設定では、フローボットを起動させたい任意のテーブルを設定できます
- OneDriveでフォルダを作成するアクションでは、任意の親フォルダを指定できるほか、フォルダ名に固定のテキストを追加したり、Airtableで取得した取引先名を変数として埋め込んだりすることが可能です
■注意事項- Airtable、OneDriveのそれぞれとYoomを連携してください。
- Microsoft365(旧Office365)には、家庭向けプランと一般法人向けプラン(Microsoft365 Business)があり、一般法人向けプランに加入していない場合には認証に失敗する可能性があります。
- トリガーは5分、10分、15分、30分、60分の間隔で起動間隔を選択できます。
- プランによって最短の起動間隔が異なりますので、ご注意ください。
- AirtableのアウトプットはJSONPathから取得可能です。取得方法は「『取得する値』を追加する方法」をご参照ください。
■概要
Airtableに新しい取引先を登録するたびに、Boxで手動でフォルダを作成する作業は手間がかかるのではないでしょうか。また、手作業によるフォルダの作成漏れや命名規則の間違いは、後の情報管理に影響を及ぼす可能性もあります。このワークフローを活用すれば、Airtableに取引先が登録されると、Boxに自動でフォルダが作成されるため、こうした課題を解消し、スムーズな情報管理を実現します。
■このテンプレートをおすすめする方
- AirtableとBoxを連携させ、取引先情報の管理を効率化したいと考えている方
- 手作業でのフォルダ作成による、入力ミスや作成漏れなどの課題を解消したい方
- 情報管理体制を標準化し、属人化を防ぎたいと考えているチームリーダーの方
■このテンプレートを使うメリット
- Airtableへのレコード登録を起点にフォルダ作成が自動化されるため、これまで手作業に費やしていた時間を短縮することができます。
- フォルダの作成忘れや取引先名の入力間違いといったヒューマンエラーを防ぎ、管理体制の精度向上に繋がります。
■フローボットの流れ
- はじめに、AirtableとBoxをYoomと連携します。
- 次に、トリガーでAirtableを選択し、「レコードが登録されたら」というアクションを設定します。
- 最後に、オペレーションでBoxの「フォルダを作成」アクションを設定し、Airtableで取得した情報を基にフォルダを作成するように設定します。
※「トリガー」:フロー起動のきっかけとなるアクション、「オペレーション」:トリガー起動後、フロー内で処理を行うアクション
■このワークフローのカスタムポイント
- Airtableのトリガー設定では、フローを起動させる対象として任意のテーブルを指定することが可能です。
- Boxのフォルダ作成アクションでは、作成先の親フォルダを任意で指定できるほか、フォルダ名を固定値にしたり、Airtableから取得した取引先名などの動的な値を設定したりできます。
■注意事項
- Airtable、BoxのそれぞれとYoomを連携してください。
- トリガーは5分、10分、15分、30分、60分の間隔で起動間隔を選択できます。
- プランによって最短の起動間隔が異なりますので、ご注意ください。
- Airtableのレコード詳細を取得する方法はこちらをご参照ください。
- Airtableで顧客や取引先の情報を管理している営業担当者やマネージャーの方
- Google Driveで案件ごとのフォルダ管理をしており、手作業での作成に手間を感じている方
- データベースへの登録とファイル管理の連携を効率化したいと考えている方
- Airtableへの情報登録が完了すると、自動でGoogle Driveにフォルダが作成されるため、これまで手作業に費やしていた時間を短縮できます。
- 手作業によるフォルダの作成漏れや、フォルダ名の命名ミスといったヒューマンエラーのリスク軽減に繋がります。
- はじめに、AirtableとGoogle DriveをYoomと連携します。
- 次に、トリガーでAirtableを選択し、「新しいレコードが登録されたら」というアクションを設定します。
- 最後に、オペレーションでGoogle Driveの「フォルダを作成する」アクションを設定し、Airtableのレコード情報をもとにフォルダを作成するよう設定します。
- Airtableのトリガー設定では、フローボットを起動させたいデータベースやテーブルを任意で設定してください。
- Google Driveのフォルダ作成オペレーションでは、Airtableのどの情報をフォルダ名に反映させるかなどを任意で設定できます。
- Airtable、Google DriveのそれぞれとYoomを連携してください。
- トリガーは5分、10分、15分、30分、60分の間隔で起動間隔を選択できます。
- プランによって最短の起動間隔が異なりますので、ご注意ください。
■このテンプレートをおすすめする方
- AirtableとOneDriveを併用し、取引先管理を手作業で行っている方
- データの入力とファイル管理の二度手間をなくし、業務効率を改善したい方
- フォルダの作成忘れや命名規則の揺れといったミスを防ぎたいと考えている方
■このテンプレートを使うメリット
- Airtableへのレコード登録だけでOneDriveのフォルダ作成が自動化されるため、これまで手作業に費やしていた時間を短縮できます
- 手作業によるフォルダの作成忘れや命名ミスを防ぎ、Airtableのデータに基づいた正確なフォルダ管理を実現します
■フローボットの流れ
- はじめに、AirtableとOneDriveをYoomと連携します
- 次に、トリガーでAirtableを選択し、「レコードが登録されたら」というアクションを設定します
- 最後に、オペレーションでOneDriveの「フォルダを作成」アクションを設定し、Airtableで取得した情報をもとにフォルダが作成されるように設定します
■このワークフローのカスタムポイント
- Airtableのトリガー設定では、フローボットを起動させたい任意のテーブルを設定できます
- OneDriveでフォルダを作成するアクションでは、任意の親フォルダを指定できるほか、フォルダ名に固定のテキストを追加したり、Airtableで取得した取引先名を変数として埋め込んだりすることが可能です
■注意事項
- Airtable、OneDriveのそれぞれとYoomを連携してください。
- Microsoft365(旧Office365)には、家庭向けプランと一般法人向けプラン(Microsoft365 Business)があり、一般法人向けプランに加入していない場合には認証に失敗する可能性があります。
- トリガーは5分、10分、15分、30分、60分の間隔で起動間隔を選択できます。
- プランによって最短の起動間隔が異なりますので、ご注意ください。
- AirtableのアウトプットはJSONPathから取得可能です。取得方法は「『取得する値』を追加する方法」をご参照ください。
■概要
Airtableに新しい取引先を登録するたびに、Boxで手動でフォルダを作成する作業は手間がかかるのではないでしょうか。また、手作業によるフォルダの作成漏れや命名規則の間違いは、後の情報管理に影響を及ぼす可能性もあります。このワークフローを活用すれば、Airtableに取引先が登録されると、Boxに自動でフォルダが作成されるため、こうした課題を解消し、スムーズな情報管理を実現します。
■このテンプレートをおすすめする方
- AirtableとBoxを連携させ、取引先情報の管理を効率化したいと考えている方
- 手作業でのフォルダ作成による、入力ミスや作成漏れなどの課題を解消したい方
- 情報管理体制を標準化し、属人化を防ぎたいと考えているチームリーダーの方
■このテンプレートを使うメリット
- Airtableへのレコード登録を起点にフォルダ作成が自動化されるため、これまで手作業に費やしていた時間を短縮することができます。
- フォルダの作成忘れや取引先名の入力間違いといったヒューマンエラーを防ぎ、管理体制の精度向上に繋がります。
■フローボットの流れ
- はじめに、AirtableとBoxをYoomと連携します。
- 次に、トリガーでAirtableを選択し、「レコードが登録されたら」というアクションを設定します。
- 最後に、オペレーションでBoxの「フォルダを作成」アクションを設定し、Airtableで取得した情報を基にフォルダを作成するように設定します。
※「トリガー」:フロー起動のきっかけとなるアクション、「オペレーション」:トリガー起動後、フロー内で処理を行うアクション
■このワークフローのカスタムポイント
- Airtableのトリガー設定では、フローを起動させる対象として任意のテーブルを指定することが可能です。
- Boxのフォルダ作成アクションでは、作成先の親フォルダを任意で指定できるほか、フォルダ名を固定値にしたり、Airtableから取得した取引先名などの動的な値を設定したりできます。
■注意事項
- Airtable、BoxのそれぞれとYoomを連携してください。
- トリガーは5分、10分、15分、30分、60分の間隔で起動間隔を選択できます。
- プランによって最短の起動間隔が異なりますので、ご注意ください。
- Airtableのレコード詳細を取得する方法はこちらをご参照ください。
Slackを活用した自動化例
プロジェクト管理アプリでタスクが完了したらSlackに通知する
AsanaやTrelloなどでタスクが完了したことをSlackに自動で通知します。
■概要Asanaでのタスク管理において、完了報告やチームへの進捗共有を手作業で行うことに手間を感じていませんか?特に複数人が関わるプロジェクトでは、タスクの完了をスムーズに共有することが重要ですが、都度Slackに投稿するのは面倒であり、共有漏れのリスクも伴います。このワークフローを活用すれば、Asanaで特定のタスクが完了した際に、その内容を自動でSlackに通知できるため、チーム内の情報共有を円滑にし、プロジェクトの進行をスムーズにします。
■このテンプレートをおすすめする方- AsanaとSlackを併用し、タスクの進捗報告を効率化したいプロジェクトマネージャーの方
- 手作業によるAsanaからSlackへの完了報告で、共有漏れや遅延を防ぎたいチームリーダーの方
- チーム内の情報共有を円滑にし、プロジェクト管理の生産性を高めたいと考えている方
■このテンプレートを使うメリット- Asanaでタスクが完了すると自動でSlackに通知されるため、手動での報告作業が減り、時間を節約できます。
- 報告漏れや内容の間違いといったヒューマンエラーを防ぎ、チーム全体へ情報をスムーズに共有できます。
■フローボットの流れ- はじめに、AsanaとSlackをYoomに連携します。
- 次に、トリガーでAsanaを選択し、「特定のプロジェクトのタスクが完了したら」というアクションを設定します。
- 最後に、オペレーションでSlackの「slackに通知する」アクションを設定し、Asanaから受け取ったタスク情報を指定のチャンネルに通知します。
※「トリガー」:フロー起動のきっかけとなるアクション、「オペレーション」:トリガー起動後、フロー内で処理を行うアクション
■このワークフローのカスタムポイント- Asanaのトリガー設定では、通知の対象としたいプロジェクトを任意で設定してください。
- Slackへの通知オペレーションでは、タスク名や担当者名など、通知に含める情報を任意で設定できます。
■注意事項- Asana、SlackのそれぞれとYoomを連携してください。
- トリガーは5分、10分、15分、30分、60分の間隔で起動間隔を選択できます。
- プランによって最短の起動間隔が異なりますので、ご注意ください。
■概要Trelloでのタスク進捗や変更点を、その都度Slackでチームに共有するのは手間がかかる作業ではないでしょうか。重要な更新の共有漏れや、報告作業による業務の中断は、チーム全体の生産性に影響を与えかねません。このワークフローを活用すれば、Trelloでカード情報が更新された際に、指定したSlackチャンネルへ自動で通知できるようになり、チーム内の情報共有を円滑にします。
■このテンプレートをおすすめする方- TrelloとSlackを併用しており、タスクの進捗共有を効率化したいと考えている方
- 手作業での報告による連絡漏れや遅延を防ぎ、リアルタイムな情報共有を実現したい方
- プロジェクト管理における定型的な報告業務を自動化し、コア業務に集中したい方
■このテンプレートを使うメリット- Trelloでカード情報が更新されると自動でSlackに通知が送信されるため、手作業での報告にかかっていた時間を削減できます。
- システムが自動で通知を行うことで、重要な更新の伝え忘れや確認漏れといったヒューマンエラーの防止に繋がります。
■フローボットの流れ- はじめに、TrelloとSlackをYoomに連携します。
- 次に、トリガーでTrelloを選択し、「カード情報が更新されたら(Webhook)」というアクションを設定します。
- 最後に、オペレーションでSlackの「チャンネルにメッセージを送る」アクションを設定し、Trelloから受け取った情報を基に通知メッセージを作成します。
※「トリガー」:フロー起動のきっかけとなるアクション、「オペレーション」:トリガー起動後、フロー内で処理を行うアクション
■このワークフローのカスタムポイント- Trelloのトリガー設定では、通知の対象としたいボードのIDや特定のユーザー名を任意で設定できます。
- Slackへの通知オペレーションでは、メッセージを送信するチャンネルや、通知するメッセージの内容を自由にカスタマイズすることが可能です。
■注意事項- Trello、SlackのそれぞれとYoomを連携してください。
- Trelloはミニプラン以上でご利用いただけるアプリとなっております。フリープラン・パーソナルプランの場合は設定しているフローボットのオペレーションやデータコネクトはエラーとなりますので、ご注意ください。
- ミニプラン・チームプラン・サクセスプランなどの有料プランは、2週間の無料トライアルを行うことが可能です。無料トライアル中には制限対象のアプリを使用することができます。
■概要
Backlogの課題更新を都度チームへ共有する際、手作業でのコピー&ペーストやSlackへの投稿に手間を感じていませんか。また、手動での共有は重要な更新の通知漏れや遅延に繋がり、プロジェクトの進行に影響を与えるリスクも伴います。このワークフローを活用すれば、Backlogで課題が更新されると、その内容が自動でSlackに通知されるため、リアルタイムでの情報共有が実現し、こうした課題を円滑に解消できます。
■このテンプレートをおすすめする方
- BacklogとSlackを使い、プロジェクトの進捗管理を行っている開発者やディレクターの方
- チーム内の情報共有を迅速化し、重要な更新の見落としを防ぎたいプロジェクトマネージャーの方
- Backlogの更新通知を手作業で行っており、定型業務の自動化を検討している方
■このテンプレートを使うメリット
- Backlogの課題更新時に自動でSlackへ通知されるため、これまで手作業での共有に費やしていた時間を短縮できます。
- 手作業による通知漏れや共有の遅れといったヒューマンエラーを防ぎ、チームへの確実な情報伝達を実現します。
■フローボットの流れ
- はじめに、BacklogとSlackをYoomと連携します。
- 次に、トリガーでBacklogを選択し、「課題が追加または更新されたら」というアクションを設定します。
- 最後に、オペレーションでSlackの「チャンネルにメッセージを送る」アクションを設定し、Backlogから取得した情報を任意のチャンネルに通知します。
※「トリガー」:フロー起動のきっかけとなるアクション、「オペレーション」:トリガー起動後、フロー内で処理を行うアクション
■このワークフローのカスタムポイント
- Slackへメッセージを送信するアクションでは、通知先のチャンネルを任意で設定できます。
- 通知するメッセージ内容も自由に編集可能であり、Backlogの課題タイトルや担当者、更新内容といった情報を変数として埋め込めます。
■注意事項
- Backlog、SlackのそれぞれとYoomを連携してください。
- トリガーは5分、10分、15分、30分、60分の間隔で起動間隔を選択できます。
- プランによって最短の起動間隔が異なりますので、ご注意ください。
- AsanaとSlackを併用し、タスクの進捗報告を効率化したいプロジェクトマネージャーの方
- 手作業によるAsanaからSlackへの完了報告で、共有漏れや遅延を防ぎたいチームリーダーの方
- チーム内の情報共有を円滑にし、プロジェクト管理の生産性を高めたいと考えている方
- Asanaでタスクが完了すると自動でSlackに通知されるため、手動での報告作業が減り、時間を節約できます。
- 報告漏れや内容の間違いといったヒューマンエラーを防ぎ、チーム全体へ情報をスムーズに共有できます。
- はじめに、AsanaとSlackをYoomに連携します。
- 次に、トリガーでAsanaを選択し、「特定のプロジェクトのタスクが完了したら」というアクションを設定します。
- 最後に、オペレーションでSlackの「slackに通知する」アクションを設定し、Asanaから受け取ったタスク情報を指定のチャンネルに通知します。
■このワークフローのカスタムポイント
- Asanaのトリガー設定では、通知の対象としたいプロジェクトを任意で設定してください。
- Slackへの通知オペレーションでは、タスク名や担当者名など、通知に含める情報を任意で設定できます。
- Asana、SlackのそれぞれとYoomを連携してください。
- トリガーは5分、10分、15分、30分、60分の間隔で起動間隔を選択できます。
- プランによって最短の起動間隔が異なりますので、ご注意ください。
■このテンプレートをおすすめする方
- TrelloとSlackを併用しており、タスクの進捗共有を効率化したいと考えている方
- 手作業での報告による連絡漏れや遅延を防ぎ、リアルタイムな情報共有を実現したい方
- プロジェクト管理における定型的な報告業務を自動化し、コア業務に集中したい方
■このテンプレートを使うメリット
- Trelloでカード情報が更新されると自動でSlackに通知が送信されるため、手作業での報告にかかっていた時間を削減できます。
- システムが自動で通知を行うことで、重要な更新の伝え忘れや確認漏れといったヒューマンエラーの防止に繋がります。
■フローボットの流れ
- はじめに、TrelloとSlackをYoomに連携します。
- 次に、トリガーでTrelloを選択し、「カード情報が更新されたら(Webhook)」というアクションを設定します。
- 最後に、オペレーションでSlackの「チャンネルにメッセージを送る」アクションを設定し、Trelloから受け取った情報を基に通知メッセージを作成します。
■このワークフローのカスタムポイント
- Trelloのトリガー設定では、通知の対象としたいボードのIDや特定のユーザー名を任意で設定できます。
- Slackへの通知オペレーションでは、メッセージを送信するチャンネルや、通知するメッセージの内容を自由にカスタマイズすることが可能です。
■注意事項
- Trello、SlackのそれぞれとYoomを連携してください。
- Trelloはミニプラン以上でご利用いただけるアプリとなっております。フリープラン・パーソナルプランの場合は設定しているフローボットのオペレーションやデータコネクトはエラーとなりますので、ご注意ください。
- ミニプラン・チームプラン・サクセスプランなどの有料プランは、2週間の無料トライアルを行うことが可能です。無料トライアル中には制限対象のアプリを使用することができます。
■概要
Backlogの課題更新を都度チームへ共有する際、手作業でのコピー&ペーストやSlackへの投稿に手間を感じていませんか。また、手動での共有は重要な更新の通知漏れや遅延に繋がり、プロジェクトの進行に影響を与えるリスクも伴います。このワークフローを活用すれば、Backlogで課題が更新されると、その内容が自動でSlackに通知されるため、リアルタイムでの情報共有が実現し、こうした課題を円滑に解消できます。
■このテンプレートをおすすめする方
- BacklogとSlackを使い、プロジェクトの進捗管理を行っている開発者やディレクターの方
- チーム内の情報共有を迅速化し、重要な更新の見落としを防ぎたいプロジェクトマネージャーの方
- Backlogの更新通知を手作業で行っており、定型業務の自動化を検討している方
■このテンプレートを使うメリット
- Backlogの課題更新時に自動でSlackへ通知されるため、これまで手作業での共有に費やしていた時間を短縮できます。
- 手作業による通知漏れや共有の遅れといったヒューマンエラーを防ぎ、チームへの確実な情報伝達を実現します。
■フローボットの流れ
- はじめに、BacklogとSlackをYoomと連携します。
- 次に、トリガーでBacklogを選択し、「課題が追加または更新されたら」というアクションを設定します。
- 最後に、オペレーションでSlackの「チャンネルにメッセージを送る」アクションを設定し、Backlogから取得した情報を任意のチャンネルに通知します。
※「トリガー」:フロー起動のきっかけとなるアクション、「オペレーション」:トリガー起動後、フロー内で処理を行うアクション
■このワークフローのカスタムポイント
- Slackへメッセージを送信するアクションでは、通知先のチャンネルを任意で設定できます。
- 通知するメッセージ内容も自由に編集可能であり、Backlogの課題タイトルや担当者、更新内容といった情報を変数として埋め込めます。
■注意事項
- Backlog、SlackのそれぞれとYoomを連携してください。
- トリガーは5分、10分、15分、30分、60分の間隔で起動間隔を選択できます。
- プランによって最短の起動間隔が異なりますので、ご注意ください。
今日の予定や今日が期日のタスクをSlackに通知する
Googleカレンダーの今日の予定やNotionで期日が今日のタスクなどをSlackに自動で通知します。
■概要
毎朝、今日の予定を確認するためにGoogleカレンダーを開き、チームに共有するためにSlackへ手入力する作業は、日々の小さな手間ではないでしょうか。この単純な繰り返し作業は、入力ミスや共有漏れといったヒューマンエラーの原因になることもあります。このワークフローを活用すれば、毎朝決まった時間にGoogleカレンダーからその日の予定を自動で取得しSlackへ通知できるため、こうした課題を解消し、スムーズな情報共有を実現します。
■このテンプレートをおすすめする方
- GoogleカレンダーとSlackで予定を共有しており、手作業での転記に非効率を感じている方
- チームメンバーの予定共有を円滑にし、全体の生産性を向上させたいと考えているチームリーダーの方
- 毎日のルーティンワークを自動化し、より重要なコア業務に集中する時間を確保したい方
■このテンプレートを使うメリット
- 毎朝自動でその日の予定がSlackに通知されるため、これまで予定の確認や転記に費やしていた時間を短縮し、他の業務に充てることが可能になります。
- 手作業による転記ミスや共有漏れがなくなることで、チーム内に正確なスケジュール情報が共有され、認識の齟齬を防ぐことに繋がります。
■フローボットの流れ
- はじめに、GoogleカレンダーとSlackをYoomと連携します。
- 次に、トリガーでスケジュールトリガー機能を選択し、「毎日9時になったら」フローが起動するように設定します。
- 次に、オペレーションでGoogleカレンダーの「予定の一覧を取得する」アクションを設定し、その日の予定を取得します。
- 続いて、オペレーションでAI機能の「テキストからデータを抽出する」アクションを設定し、取得した予定情報から必要なデータのみを抽出します。
- 最後に、オペレーションでSlackの「チャンネルにメッセージを送る」アクションを設定し、抽出した予定を指定のチャンネルに通知します。
※「トリガー」:フロー起動のきっかけとなるアクション、「オペレーション」:トリガー起動後、フロー内で処理を行うアクション
■このワークフローのカスタムポイント
- AI機能のオペレーションでは、予定のタイトルや時間など、具体的にどのような情報を抽出したいか、その項目や抽出の指示内容を任意で設定することが可能です。
- Slackの「チャンネルにメッセージを送る」アクションでは、通知を送信するチャンネルや、通知するメッセージの本文を任意で設定してください。
■注意事項
- Googleカレンダー、SlackとYoomを連携してください。
■概要Notionでタスク管理を行っているものの、毎日期限を確認し、チームメンバーへSlackでリマインドする作業に手間を感じてはいないでしょうか。また、人の手による確認作業では、タスクの見落としや通知漏れといったミスが発生することもあります。このワークフローを活用すれば、毎日決まった時間にNotionデータベースから当日が期限のタスクを自動で抽出し、Slackへ通知できるため、こうした課題を解消し、タスク管理を効率化します。
■このテンプレートをおすすめする方- NotionとSlackを連携させて、毎日のタスクリマインドを自動化したい方
- 手作業でのタスク確認や通知による抜け漏れや手間に課題を感じている方
- チームのタスク管理を効率化し、生産性を高めたいプロジェクトリーダーの方
■このテンプレートを使うメリット- 毎日決まった時間にNotionから期限のタスクを自動抽出しSlackへ通知するため、これまで手作業で行っていた確認・連絡業務の時間を短縮できます。
- 手作業によるタスクの確認漏れや通知忘れといったヒューマンエラーを防ぎ、確実なタスク管理を実現します。
■フローボットの流れ- はじめに、NotionとSlackをYoomと連携します。
- 次に、トリガーでスケジュールトリガー機能を選択し、「スケジュールトリガー」アクションで毎日通知したい時刻を設定します。
- 次に、オペレーションでNotionの「 複数のレコードを取得する(最大100件) 」アクションを設定し、データベースから本日が期限のタスクを抽出します。
- 最後に、オペレーションでSlackの「チャンネルにメッセージを送る」アクションを設定し、取得したタスク情報を指定のチャンネルに通知します。
※「トリガー」:フロー起動のきっかけとなるアクション、「オペレーション」:トリガー起動後、フロー内で処理を行うアクション
■このワークフローのカスタムポイント- スケジュールトリガー機能では、通知を実行する日時を毎日、平日のみ、特定の日時など、業務に合わせて自由に設定できます。
- Notionからタスクを抽出する際の検索条件は、「本日が期限」以外にも「担当者」や「ステータス」など、任意の項目で絞り込むように変更が可能です。
- Slackへの通知先チャンネルやメッセージ本文は自由にカスタマイズできます。Notionから取得したタスク名や期限などを本文に含めることで、より分かりやすい通知を作成できます。
■注意事項- Notion、SlackのそれぞれとYoomを連携してください。
■概要Asanaでのタスク管理において、毎日チームメンバーのタスク期日を確認し、リマインドすることに手間を感じていないでしょうか。手動での確認作業は時間がかかるだけでなく、重要なタスクの見落としにつながる可能性もあります。このワークフローを活用すれば、毎日決まった時間にAsanaから期日が今日までのタスクを自動で抽出し、Slackに通知することが可能になるため、こうしたタスク管理の課題を削減し、業務を効率化します。
■このテンプレートをおすすめする方- AsanaとSlackを連携させ、チームのタスク管理をより円滑に進めたいプロジェクトマネージャーの方
- 毎日のタスク確認やリマインド業務を手作業で行っており、負担に感じているチームリーダーの方
- タスクの確認漏れや伝達ミスを防ぎ、生産性を向上させたいと考えているすべてのビジネスパーソンの方
■このテンプレートを使うメリット- 毎日決まった時間に自動でタスクを抽出し通知するため、手動での確認やリマインド作業に費やしていた時間を短縮できます。
- システムが自動でタスク情報を通知することで、確認漏れや伝達ミスといったヒューマンエラーを防ぎ、情報共有を実現します。
■フローボットの流れ- はじめに、AsanaとSlackをYoomと連携します。
- 次に、トリガーでスケジュールトリガーを選択し、「毎日10時に起動」など、通知したい任意の時間を設定します。
- 次に、オペレーションでAsanaを選択し、「期日が今日までのタスクの一覧を取得」アクションを設定します。
- 最後に、オペレーションでSlackを選択し、「Slackに通知する」アクションを設定し、Asanaから取得したタスク情報を指定のチャンネルに通知するように設定します。
※「トリガー」:フロー起動のきっかけとなるアクション、「オペレーション」:トリガー起動後、フロー内で処理を行うアクション
■このワークフローのカスタムポイント- スケジュールトリガーでは、通知を実行する時間帯を業務開始時間など、チームの状況に合わせて任意で設定してください。
- Asanaからタスクを取得する際に、通知対象としたいプロジェクトを任意で設定することが可能です。
- Slackに通知するメッセージには、タスク名や担当者など、Asanaから取得した情報を自由に組み合わせて設定できます。
■注意事項- Asana、SlackのそれぞれとYoomを連携してください。
■概要
毎朝、今日の予定を確認するためにGoogleカレンダーを開き、チームに共有するためにSlackへ手入力する作業は、日々の小さな手間ではないでしょうか。この単純な繰り返し作業は、入力ミスや共有漏れといったヒューマンエラーの原因になることもあります。このワークフローを活用すれば、毎朝決まった時間にGoogleカレンダーからその日の予定を自動で取得しSlackへ通知できるため、こうした課題を解消し、スムーズな情報共有を実現します。
■このテンプレートをおすすめする方
- GoogleカレンダーとSlackで予定を共有しており、手作業での転記に非効率を感じている方
- チームメンバーの予定共有を円滑にし、全体の生産性を向上させたいと考えているチームリーダーの方
- 毎日のルーティンワークを自動化し、より重要なコア業務に集中する時間を確保したい方
■このテンプレートを使うメリット
- 毎朝自動でその日の予定がSlackに通知されるため、これまで予定の確認や転記に費やしていた時間を短縮し、他の業務に充てることが可能になります。
- 手作業による転記ミスや共有漏れがなくなることで、チーム内に正確なスケジュール情報が共有され、認識の齟齬を防ぐことに繋がります。
■フローボットの流れ
- はじめに、GoogleカレンダーとSlackをYoomと連携します。
- 次に、トリガーでスケジュールトリガー機能を選択し、「毎日9時になったら」フローが起動するように設定します。
- 次に、オペレーションでGoogleカレンダーの「予定の一覧を取得する」アクションを設定し、その日の予定を取得します。
- 続いて、オペレーションでAI機能の「テキストからデータを抽出する」アクションを設定し、取得した予定情報から必要なデータのみを抽出します。
- 最後に、オペレーションでSlackの「チャンネルにメッセージを送る」アクションを設定し、抽出した予定を指定のチャンネルに通知します。
※「トリガー」:フロー起動のきっかけとなるアクション、「オペレーション」:トリガー起動後、フロー内で処理を行うアクション
■このワークフローのカスタムポイント
- AI機能のオペレーションでは、予定のタイトルや時間など、具体的にどのような情報を抽出したいか、その項目や抽出の指示内容を任意で設定することが可能です。
- Slackの「チャンネルにメッセージを送る」アクションでは、通知を送信するチャンネルや、通知するメッセージの本文を任意で設定してください。
■注意事項
- Googleカレンダー、SlackとYoomを連携してください。
■このテンプレートをおすすめする方
- NotionとSlackを連携させて、毎日のタスクリマインドを自動化したい方
- 手作業でのタスク確認や通知による抜け漏れや手間に課題を感じている方
- チームのタスク管理を効率化し、生産性を高めたいプロジェクトリーダーの方
■このテンプレートを使うメリット
- 毎日決まった時間にNotionから期限のタスクを自動抽出しSlackへ通知するため、これまで手作業で行っていた確認・連絡業務の時間を短縮できます。
- 手作業によるタスクの確認漏れや通知忘れといったヒューマンエラーを防ぎ、確実なタスク管理を実現します。
■フローボットの流れ
- はじめに、NotionとSlackをYoomと連携します。
- 次に、トリガーでスケジュールトリガー機能を選択し、「スケジュールトリガー」アクションで毎日通知したい時刻を設定します。
- 次に、オペレーションでNotionの「 複数のレコードを取得する(最大100件) 」アクションを設定し、データベースから本日が期限のタスクを抽出します。
- 最後に、オペレーションでSlackの「チャンネルにメッセージを送る」アクションを設定し、取得したタスク情報を指定のチャンネルに通知します。
■このワークフローのカスタムポイント
- スケジュールトリガー機能では、通知を実行する日時を毎日、平日のみ、特定の日時など、業務に合わせて自由に設定できます。
- Notionからタスクを抽出する際の検索条件は、「本日が期限」以外にも「担当者」や「ステータス」など、任意の項目で絞り込むように変更が可能です。
- Slackへの通知先チャンネルやメッセージ本文は自由にカスタマイズできます。Notionから取得したタスク名や期限などを本文に含めることで、より分かりやすい通知を作成できます。
■注意事項
- Notion、SlackのそれぞれとYoomを連携してください。
- AsanaとSlackを連携させ、チームのタスク管理をより円滑に進めたいプロジェクトマネージャーの方
- 毎日のタスク確認やリマインド業務を手作業で行っており、負担に感じているチームリーダーの方
- タスクの確認漏れや伝達ミスを防ぎ、生産性を向上させたいと考えているすべてのビジネスパーソンの方
- 毎日決まった時間に自動でタスクを抽出し通知するため、手動での確認やリマインド作業に費やしていた時間を短縮できます。
- システムが自動でタスク情報を通知することで、確認漏れや伝達ミスといったヒューマンエラーを防ぎ、情報共有を実現します。
- はじめに、AsanaとSlackをYoomと連携します。
- 次に、トリガーでスケジュールトリガーを選択し、「毎日10時に起動」など、通知したい任意の時間を設定します。
- 次に、オペレーションでAsanaを選択し、「期日が今日までのタスクの一覧を取得」アクションを設定します。
- 最後に、オペレーションでSlackを選択し、「Slackに通知する」アクションを設定し、Asanaから取得したタスク情報を指定のチャンネルに通知するように設定します。
■このワークフローのカスタムポイント
- スケジュールトリガーでは、通知を実行する時間帯を業務開始時間など、チームの状況に合わせて任意で設定してください。
- Asanaからタスクを取得する際に、通知対象としたいプロジェクトを任意で設定することが可能です。
- Slackに通知するメッセージには、タスク名や担当者など、Asanaから取得した情報を自由に組み合わせて設定できます。
- Asana、SlackのそれぞれとYoomを連携してください。
Web会議の終了後に会議内容を要約してSlackへ投稿する
Google MeetやZoomでWeb会議が終了したら、内容を文字起こしして要約し、Slackに自動で通知します。
■概要Google Meetでの会議後、録画内容を確認しながら議事録を作成し、Slackで共有する作業に時間を取られていませんか。
重要な会議ほど、この手作業での情報共有は手間がかかるだけでなく、他の業務を圧迫することもあります。
このワークフローを活用すれば、Google Meetの会議終了をきっかけに、録画データの文字起こしからAIによる要約、そしてSlackへの投稿までを自動化し、議事録作成と共有にかかる手間を削減できます。
■このテンプレートをおすすめする方- Google Meetでの会議が多く、議事録の作成や情報共有に手間を感じている方
- 会議の要点を素早くチームに共有し、業務のスピードを向上させたいマネージャーの方
- 手作業による議事録の要約や転記作業の負担を軽減したいと考えているすべての方
■このテンプレートを使うメリット- 会議終了から議事録共有までが自動化されるため、これまで手作業に費やしていた時間を短縮し、コア業務に集中できます。
- AIが自動で要約と共有を行うので、共有漏れや遅延を防ぎ、チーム全体の情報共有を迅速化・標準化することに繋がります。
■フローボットの流れ- はじめに、Google MeetとSlackをYoomと連携します。
- 次に、トリガーでGoogle Meetを選択し、「会議が終了したら」というアクションを設定します。
- 続いて、オペレーションでGoogle Meetの「レコーディング情報を取得」アクションを設定し、終了した会議の録画情報を取得します。
- 次に、同じくGoogle Meetの「ファイルをダウンロードする」アクションを設定し、取得した情報をもとに録画ファイルをダウンロードします。
- その後、オペレーションでAI機能の「音声データを文字起こしする」アクションを設定し、ダウンロードした音声データをテキスト化します。
- 続いて、AI機能の「要約する」アクションで、文字起こししたテキストを要約します。
- 最後に、オペレーションでSlackの「チャンネルにメッセージを送る」アクションを設定し、要約した内容を指定のチャンネルに投稿します。
※「トリガー」:フロー起動のきっかけとなるアクション、「オペレーション」:トリガー起動後、フロー内で処理を行うアクション
■このワークフローのカスタムポイント- トリガー設定で、自動化の対象としたいGoogle Meetの会議IDを任意で指定してください。
- Google Meetからファイルをダウンロードする際に、前のオペレーションで取得したレコーディング情報のファイルIDを指定してください。
- 音声データを文字起こしするアクションで、ダウンロードした音声ファイルを指定してください。
- AIによる要約アクションでは、要約対象のテキスト、出力する文字数、箇条書きなどの要約形式を任意で設定できます。
- Slackにメッセージを投稿するアクションで、投稿先のチャンネルIDを指定し、会議名や要約結果などを含めたメッセージ内容を自由にカスタマイズしてください。
■注意事項- Google Meet、SlackのそれぞれとYoomを連携してください。
- トリガーは5分、10分、15分、30分、60分の間隔で起動間隔を選択できます。
- プランによって最短の起動間隔が異なりますので、ご注意ください。
- OCRデータは6,500文字以上のデータや文字が小さい場合などは読み取れない場合があるので、ご注意ください。
- 要約はミニプラン以上でご利用いただけるアプリとなっております。フリープラン・パーソナルプランの場合は設定しているフローボットのオペレーションやデータコネクトはエラーとなりますので、ご注意ください。
- パーソナルプラン・ミニプラン・チームプラン・サクセスプランなどの有料プランは、2週間の無料トライアルを行うことが可能です。無料トライアル中には制限対象のアプリを使用することができます。
- 「待機する」オペレーションは、パーソナルプラン以上のプランでご利用いただける機能となっております。フリープランの場合は設定しているフローボットのオペレーションやデータコネクトはエラーとなりますので、ご注意ください。
- パーソナルプランなどの有料プランは、2週間の無料トライアルを行うことが可能です。無料トライアル中には制限対象のアプリや機能(オペレーション)を使用することができます。
- ダウンロード可能なファイル容量は最大300MBまでです。アプリの仕様によっては300MB未満になる可能性があるので、ご注意ください。
- トリガー、各オペレーションでの取り扱い可能なファイル容量の詳細は「ファイルの容量制限について」をご参照ください。
■概要
Zoomでミーティングが終了したら自動的に会議内容を自動で文字起こしと要約をして、文字起こしの結果をSlackに通知するフローです。
■このテンプレートをおすすめする方
1.Zoomミーティングを頻繁に利用してSlackで情報共有するチーム
・ミーティングの内容を文字起こしして記録に残したい方
・議事録作成の手間を省いて業務効率を向上させたい方
・会議の内容をSlackでチームメンバーに共有したい方
2.会議の内容を分析・活用したい方
・文字起こしデータを分析して発言内容や議論の傾向を把握したい方
・自動要約機能で会議の要点を素早く把握して次のアクションに繋げたい方
■このテンプレートを使うメリット
Zoomはオンライン会議を効率的するツールですが、ミーティング終了後に議事録を作成するのは作成担当者は時間と手間がかかってしまい情報共有の遅れに繋がる可能性があります。
このフローを活用すれば、Zoomミーティングが終了後に内容をAIで文字起こしと要約して議事録化したものをSlackに通知します。これによって作成担当者の手間を省くことができます。また、会議を欠席したメンバーもSlackで共有された情報を確認することで、議論の内容を把握してプロジェクトにスムーズに参加することができます。
■注意事項
・Zoom、SlackのそれぞれとYoomを連携してください。
・AIオペレーションはチームプラン・サクセスプランでのみご利用いただける機能となっております。フリープラン・ミニプランの場合は設定しているフローボットのオペレーションはエラーとなりますので、ご注意ください。
・チームプランやサクセスプランなどの有料プランは、2週間の無料トライアルを行うことが可能です。無料トライアル中には制限対象のアプリやAI機能(オペレーション)を使用することができます。
・Zoomのレコーディング情報を取得するためには、ミーティングデータがクラウドレコーディングされている必要があります。・クラウドレコーディングはZoomの特定プランに限定されるためご注意ください。詳細はこちらをご参照ください。
重要な会議ほど、この手作業での情報共有は手間がかかるだけでなく、他の業務を圧迫することもあります。
このワークフローを活用すれば、Google Meetの会議終了をきっかけに、録画データの文字起こしからAIによる要約、そしてSlackへの投稿までを自動化し、議事録作成と共有にかかる手間を削減できます。
■このテンプレートをおすすめする方
- Google Meetでの会議が多く、議事録の作成や情報共有に手間を感じている方
- 会議の要点を素早くチームに共有し、業務のスピードを向上させたいマネージャーの方
- 手作業による議事録の要約や転記作業の負担を軽減したいと考えているすべての方
■このテンプレートを使うメリット
- 会議終了から議事録共有までが自動化されるため、これまで手作業に費やしていた時間を短縮し、コア業務に集中できます。
- AIが自動で要約と共有を行うので、共有漏れや遅延を防ぎ、チーム全体の情報共有を迅速化・標準化することに繋がります。
■フローボットの流れ
- はじめに、Google MeetとSlackをYoomと連携します。
- 次に、トリガーでGoogle Meetを選択し、「会議が終了したら」というアクションを設定します。
- 続いて、オペレーションでGoogle Meetの「レコーディング情報を取得」アクションを設定し、終了した会議の録画情報を取得します。
- 次に、同じくGoogle Meetの「ファイルをダウンロードする」アクションを設定し、取得した情報をもとに録画ファイルをダウンロードします。
- その後、オペレーションでAI機能の「音声データを文字起こしする」アクションを設定し、ダウンロードした音声データをテキスト化します。
- 続いて、AI機能の「要約する」アクションで、文字起こししたテキストを要約します。
- 最後に、オペレーションでSlackの「チャンネルにメッセージを送る」アクションを設定し、要約した内容を指定のチャンネルに投稿します。
■このワークフローのカスタムポイント
- トリガー設定で、自動化の対象としたいGoogle Meetの会議IDを任意で指定してください。
- Google Meetからファイルをダウンロードする際に、前のオペレーションで取得したレコーディング情報のファイルIDを指定してください。
- 音声データを文字起こしするアクションで、ダウンロードした音声ファイルを指定してください。
- AIによる要約アクションでは、要約対象のテキスト、出力する文字数、箇条書きなどの要約形式を任意で設定できます。
- Slackにメッセージを投稿するアクションで、投稿先のチャンネルIDを指定し、会議名や要約結果などを含めたメッセージ内容を自由にカスタマイズしてください。
■注意事項
- Google Meet、SlackのそれぞれとYoomを連携してください。
- トリガーは5分、10分、15分、30分、60分の間隔で起動間隔を選択できます。
- プランによって最短の起動間隔が異なりますので、ご注意ください。
- OCRデータは6,500文字以上のデータや文字が小さい場合などは読み取れない場合があるので、ご注意ください。
- 要約はミニプラン以上でご利用いただけるアプリとなっております。フリープラン・パーソナルプランの場合は設定しているフローボットのオペレーションやデータコネクトはエラーとなりますので、ご注意ください。
- パーソナルプラン・ミニプラン・チームプラン・サクセスプランなどの有料プランは、2週間の無料トライアルを行うことが可能です。無料トライアル中には制限対象のアプリを使用することができます。
- 「待機する」オペレーションは、パーソナルプラン以上のプランでご利用いただける機能となっております。フリープランの場合は設定しているフローボットのオペレーションやデータコネクトはエラーとなりますので、ご注意ください。
- パーソナルプランなどの有料プランは、2週間の無料トライアルを行うことが可能です。無料トライアル中には制限対象のアプリや機能(オペレーション)を使用することができます。
- ダウンロード可能なファイル容量は最大300MBまでです。アプリの仕様によっては300MB未満になる可能性があるので、ご注意ください。
- トリガー、各オペレーションでの取り扱い可能なファイル容量の詳細は「ファイルの容量制限について」をご参照ください。
■概要
Zoomでミーティングが終了したら自動的に会議内容を自動で文字起こしと要約をして、文字起こしの結果をSlackに通知するフローです。
■このテンプレートをおすすめする方
1.Zoomミーティングを頻繁に利用してSlackで情報共有するチーム
・ミーティングの内容を文字起こしして記録に残したい方
・議事録作成の手間を省いて業務効率を向上させたい方
・会議の内容をSlackでチームメンバーに共有したい方
2.会議の内容を分析・活用したい方
・文字起こしデータを分析して発言内容や議論の傾向を把握したい方
・自動要約機能で会議の要点を素早く把握して次のアクションに繋げたい方
■このテンプレートを使うメリット
Zoomはオンライン会議を効率的するツールですが、ミーティング終了後に議事録を作成するのは作成担当者は時間と手間がかかってしまい情報共有の遅れに繋がる可能性があります。
このフローを活用すれば、Zoomミーティングが終了後に内容をAIで文字起こしと要約して議事録化したものをSlackに通知します。これによって作成担当者の手間を省くことができます。また、会議を欠席したメンバーもSlackで共有された情報を確認することで、議論の内容を把握してプロジェクトにスムーズに参加することができます。
■注意事項
・Zoom、SlackのそれぞれとYoomを連携してください。
・AIオペレーションはチームプラン・サクセスプランでのみご利用いただける機能となっております。フリープラン・ミニプランの場合は設定しているフローボットのオペレーションはエラーとなりますので、ご注意ください。
・チームプランやサクセスプランなどの有料プランは、2週間の無料トライアルを行うことが可能です。無料トライアル中には制限対象のアプリやAI機能(オペレーション)を使用することができます。
・Zoomのレコーディング情報を取得するためには、ミーティングデータがクラウドレコーディングされている必要があります。・クラウドレコーディングはZoomの特定プランに限定されるためご注意ください。詳細はこちらをご参照ください。
AirtableとSlackの連携メリットと具体例
メリット1: 素早い情報共有
今回の連携により、Airtableに新しく追加されたデータがSlackに自動で通知されるため、Slackを使用しているメンバーが最新情報を認識しやすくなります。
例えば、営業チームが新しい商談情報をAirtableに入力したら、自動で通知が共有されることで、サポートチームは必要な準備を迅速に始められますよね。
通常であればAirtableに追加されたデータの確認にタイムラグが発生しがちですが、今回の連携によりそのような時間のロスを抑えられるはずです。
メリット2: Slackのみで行える効率的な業務
新しく追加されたデータをSlackで確認できるようになれば、Airtableにアクセスして内容をチェックをする頻度が減り、ツール間の移動を最小限に抑えられるかもしれません。
また、Airtableのフィールド情報がそのまま通知されるようになるので、Slackだけでデータチェックとコミュニケーションを完結させるこもできます。
例えば、Slackに通知されたデータに対してスレッドを作成したり、ハドルミーティングをしたりしてコミュニケーションを取れます。
これにより、Slackだけで効率的に作業をこなせるようになるかもしれません。
メリット3: 通知業務の簡素化
Airtableに新しいデータを追加した際、その旨を手動で通知していませんか?
今回の連携を行えばこのようなフローを削減できます。
例えば、タスク管理や商品在庫など、なるべく素早く共有した方がいいデータを追加した場合には、メンバーへのスムーズな共有が大切ですよね。
しかし、Airtableにデータを追加する度にSlackへメッセージを送信するのは少々手間がかかります。
そこで今回の自動化を導入すれば通知作業を削減でき、業務フローが簡易化されます。
これにより、通知作業の負担を軽減できるので、業務もスムーズに進めやすくなるのではないでしょうか。
まとめ
AirtableとSlackの連携は業務をスムーズにするだけではなく、メンバーとの連携を強化するためにも有益ではないでしょうか。
今回の連携を導入することでデータの追加に素早く気が付きやすくなり、業務を円滑に進められるはずです。
Yoomはプログラミング不要でアプリ連携が可能です。
今まで自動化の導入を諦めていた方でも取り入れやすいので、ぜひこの機会にお試しください。
プログラミング知識なしで手軽に構築できます。