・
Google Meetの会議を自動で文字起こしした後、議事録をNotionに追加する方法
昨今リモートワークを導入している企業が増え、Web会議を行うことも多いのではないでしょうか?
Web会議は録画機能を使えば、会議に参加できなかった人も後から見返すことができるので、とても便利ですよね。
この記事では、Google Meetのレコーディング内容をAI機能で議事録化し、Notionのデータベースに保存する、更に便利な方法をご紹介します。
Google MeetとNotionを連携して、Web会議の可能性を広げてみませんか?
ぜひ、ご覧ください。
こんな方におすすめ
- Google MeetとNotionを業務で活用している方
- 議事録作成や会議の文字起こしに手間を感じている方
- 会議の内容を正確に残したい方
今すぐに試したい方へ
本記事ではノーコードツール「Yoom」を使用した連携方法をご紹介します。
難しい設定や操作は必要なく、非エンジニアの方でも簡単に実現できます。
下記のテンプレートから今すぐに始めることもできますので、ぜひお試しください!
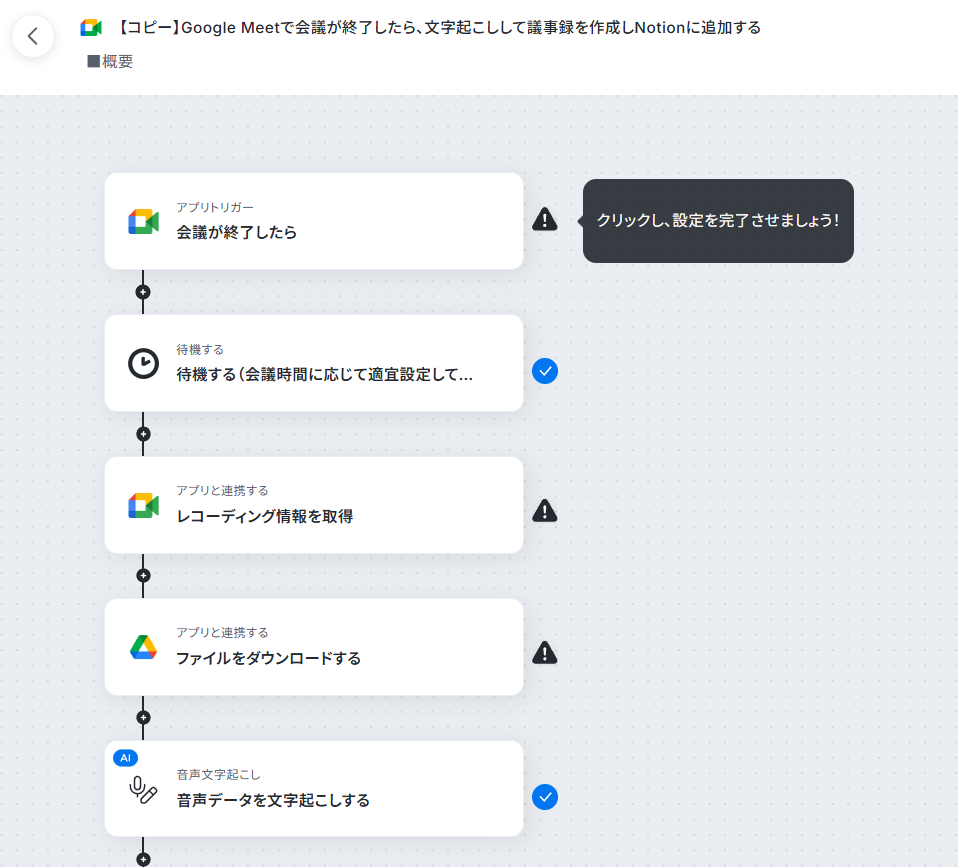
■概要
Google Meetでの会議後、録画データを聞き返しながら手作業で文字起こしを行い、議事録を作成してNotionに転記する作業に手間を感じていませんか。このワークフローを活用すれば、Google Meetでの会議終了をトリガーとして、音声の文字起こしから要約の作成、Notionへの議事録追加までの一連のプロセスを自動化し、これらの定型業務を効率化できます。
■このテンプレートをおすすめする方
- Google Meetでの会議が多く、議事録作成の工数を削減したいと考えている方
- Notionで議事録を管理しており、情報の転記作業の手間を省きたい方
- 会議内容の記録や共有の精度とスピードを高めたいプロジェクトマネージャーの方
■このテンプレートを使うメリット
- 会議終了後の文字起こしや要約作成、Notionへの登録が自動化されるため、議事録作成にかかる時間を短縮し、より重要な業務に集中できます。
- 手作業による文字の転記ミスや、Notionへの登録漏れといったヒューマンエラーのリスクを軽減し、議事録の正確性を保つことに繋がります。
■フローボットの流れ
- はじめに、Google MeetとNotionをYoomと連携します。
- トリガーでGoogle Meetを選択し、「会議が終了したら」というアクションを設定します。
- オペレーションで待機機能を設定し、レコーディング処理が完了するまでフローを待機させます。
- 次に、Google Meetの「レコーディング情報を取得する」アクションで、会議の録画情報を取得します。
- Google Driveの「音声ファイルをダウンロードする」アクションで、録画データをダウンロードします。
- 音声文字起こし機能で、ダウンロードした音声データをテキストに変換します。
- 要約機能で、文字起こししたテキストから議事録の要約を作成します。
- 最後に、Notionの「レコードを追加する」アクションで、文字起こし結果や要約内容をデータベースに登録します。
※「トリガー」:フロー起動のきっかけとなるアクション、「オペレーション」:トリガー起動後、フロー内で処理を行うアクション
■このワークフローのカスタムポイント
- Google Meetのトリガー設定では、会議の終了をチェックする間隔を任意で設定できます。
- 待機機能では、レコーディング処理の完了を待つ時間を任意で設定することが可能です。
- 音声文字起こし機能では、話者の分離など、文字起こしに関する条件を自由に設定できます。
- 要約機能では、どのような要約を作成するかをプロンプトなどで自由に設定することが可能です。
- Notionにレコードを追加する際、会議名や文字起こし結果、要約など、どの情報をどのフィールドに登録するかを自由に設定できます。
■注意事項
- Googleスプレッドシート、Google Drive、NotionのそれぞれとYoomを連携してください。
- OCRまたは音声を文字起こしするAIオペレーションはチームプラン・サクセスプランでのみご利用いただける機能となっております。フリープラン・ミニプランの場合は設定しているフローボットのオペレーションはエラーとなりますので、ご注意ください。
- チームプランやサクセスプランなどの有料プランは、2週間の無料トライアルを行うことが可能です。無料トライアル中には制限対象のアプリやAI機能(オペレーション)を使用することができます。
- ダウンロード可能なファイル容量は最大300MBまでです。アプリの仕様によっては300MB未満になる可能性があるので、ご注意ください。
- トリガー、各オペレーションでの取り扱い可能なファイル容量の詳細は下記をご参照ください。
- https://intercom.help/yoom/ja/articles/9413924
[Yoomとは]
今回ご紹介するテンプレート以外にも、Notionがもっと便利になる実践的な自動化例を掲載した資料をご用意しています。
⇒Notionを使った業務自動化事例資料をダウンロード(無料)
Google MeetとNotionの連携フローの作り方
それでは「Google Meetの会議を自動で文字起こしし、議事録をNotionに追加する」の作成方法をご紹介します。
少し長いフローですが、わかりやすく解説します。画面を見ながら一緒に挑戦してみましょう!
注)OCRや音声を文字起こしするAIオペレーションは、チームプラン・サクセスプラン限定の機能です。フリープランやミニプランでセットするとエラーになってしまうので、ご注意ください。チームプランやサクセスプランなどの有料プランは、2週間の無料トライアルが可能です。トライアル期間中は、通常だと制限があるアプリやAIオペレーションもすべて使えるので、気になる機能をぜひお試しください。
ステップ1:マイアプリ登録
フローボットを作成する前に、Yoomとアプリの連携を行います。
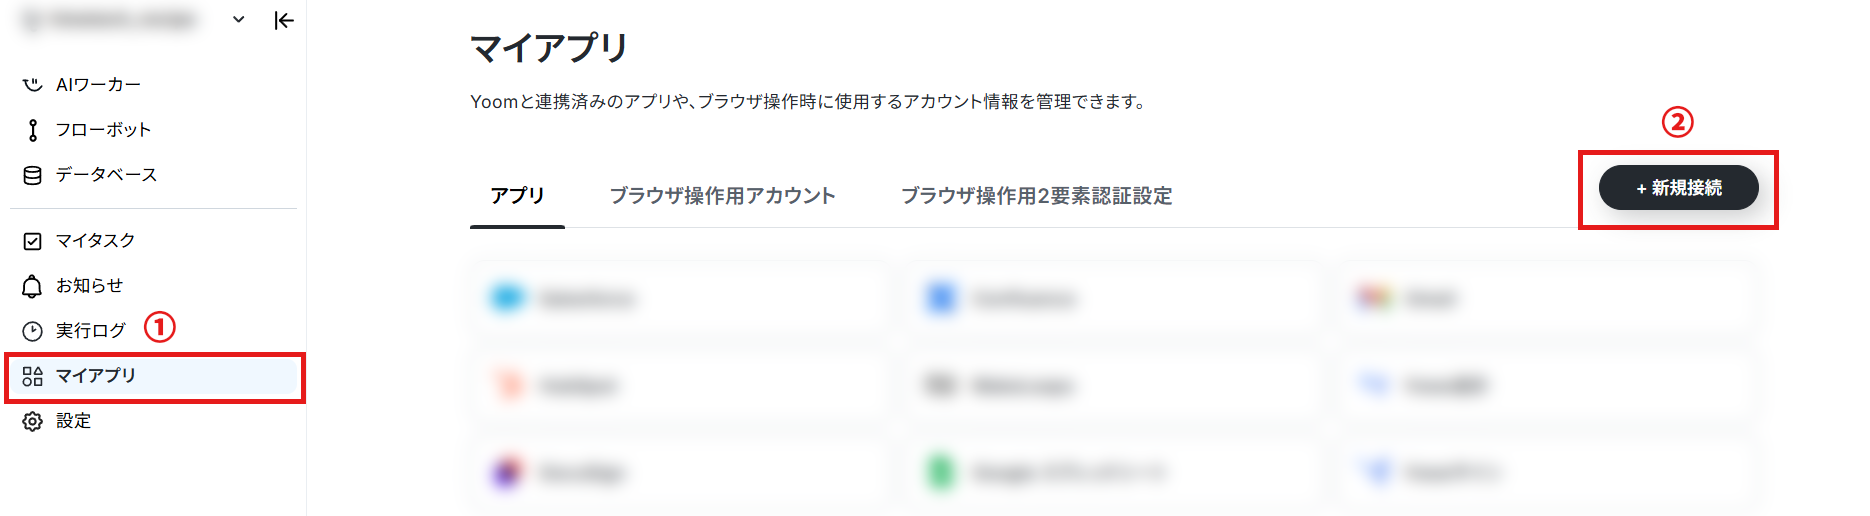
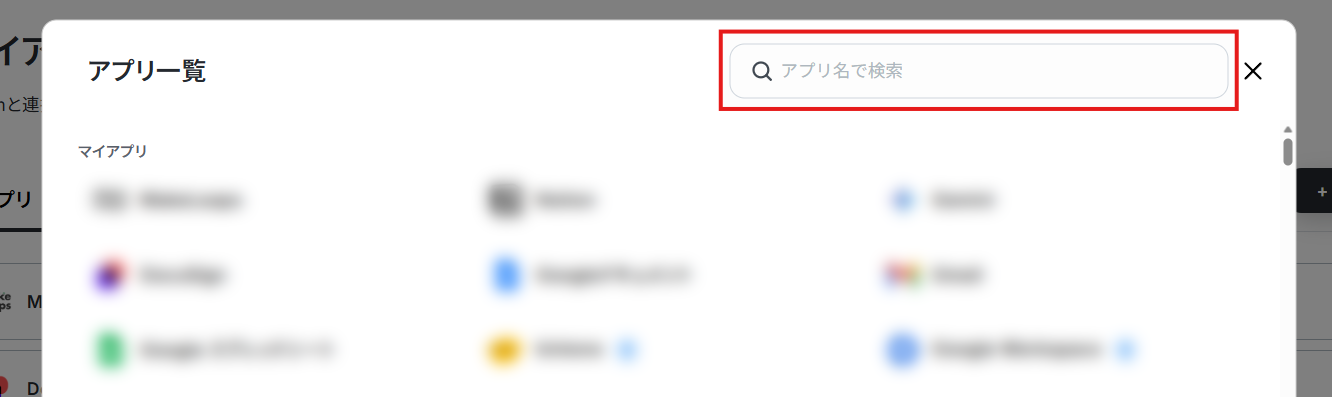
Yoomのワークスペースにログインしたら、画面左上に表示されている「マイアプリ」→「新規接続」の順番でクリックします。
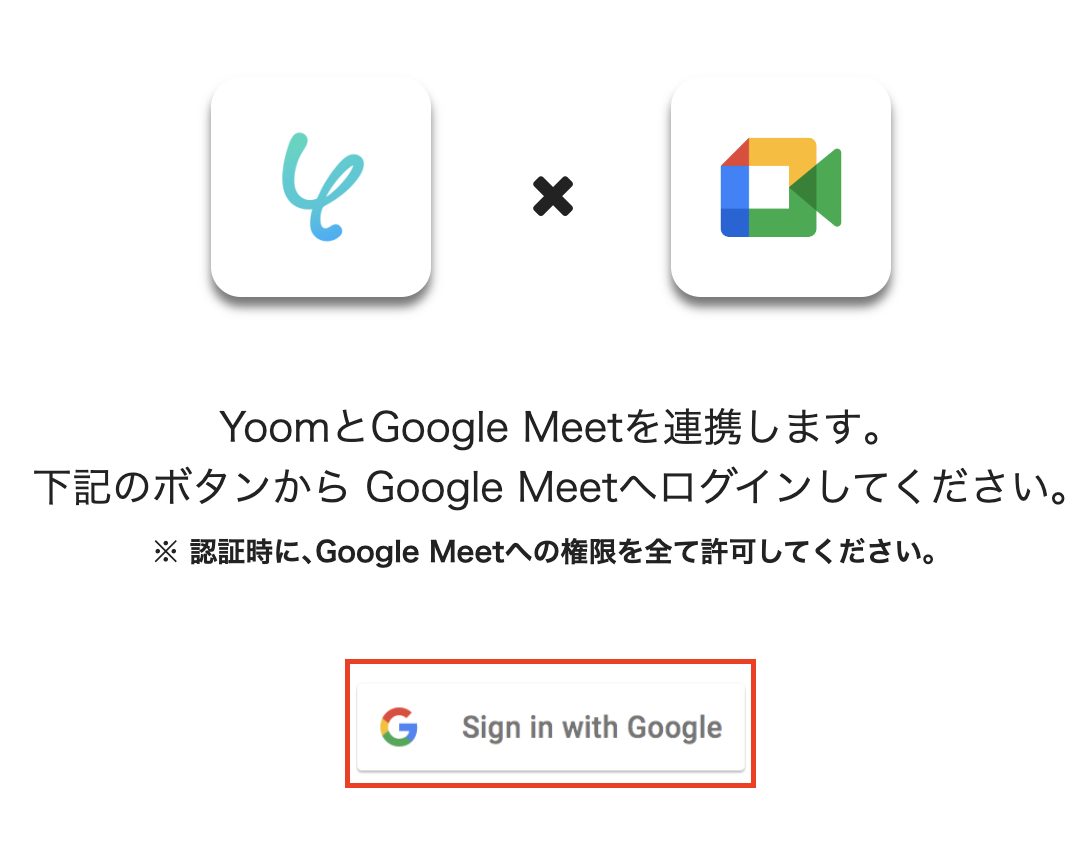
まずは、Google Meetを検索して選択しましょう。
Sign in with Googleをクリックします。
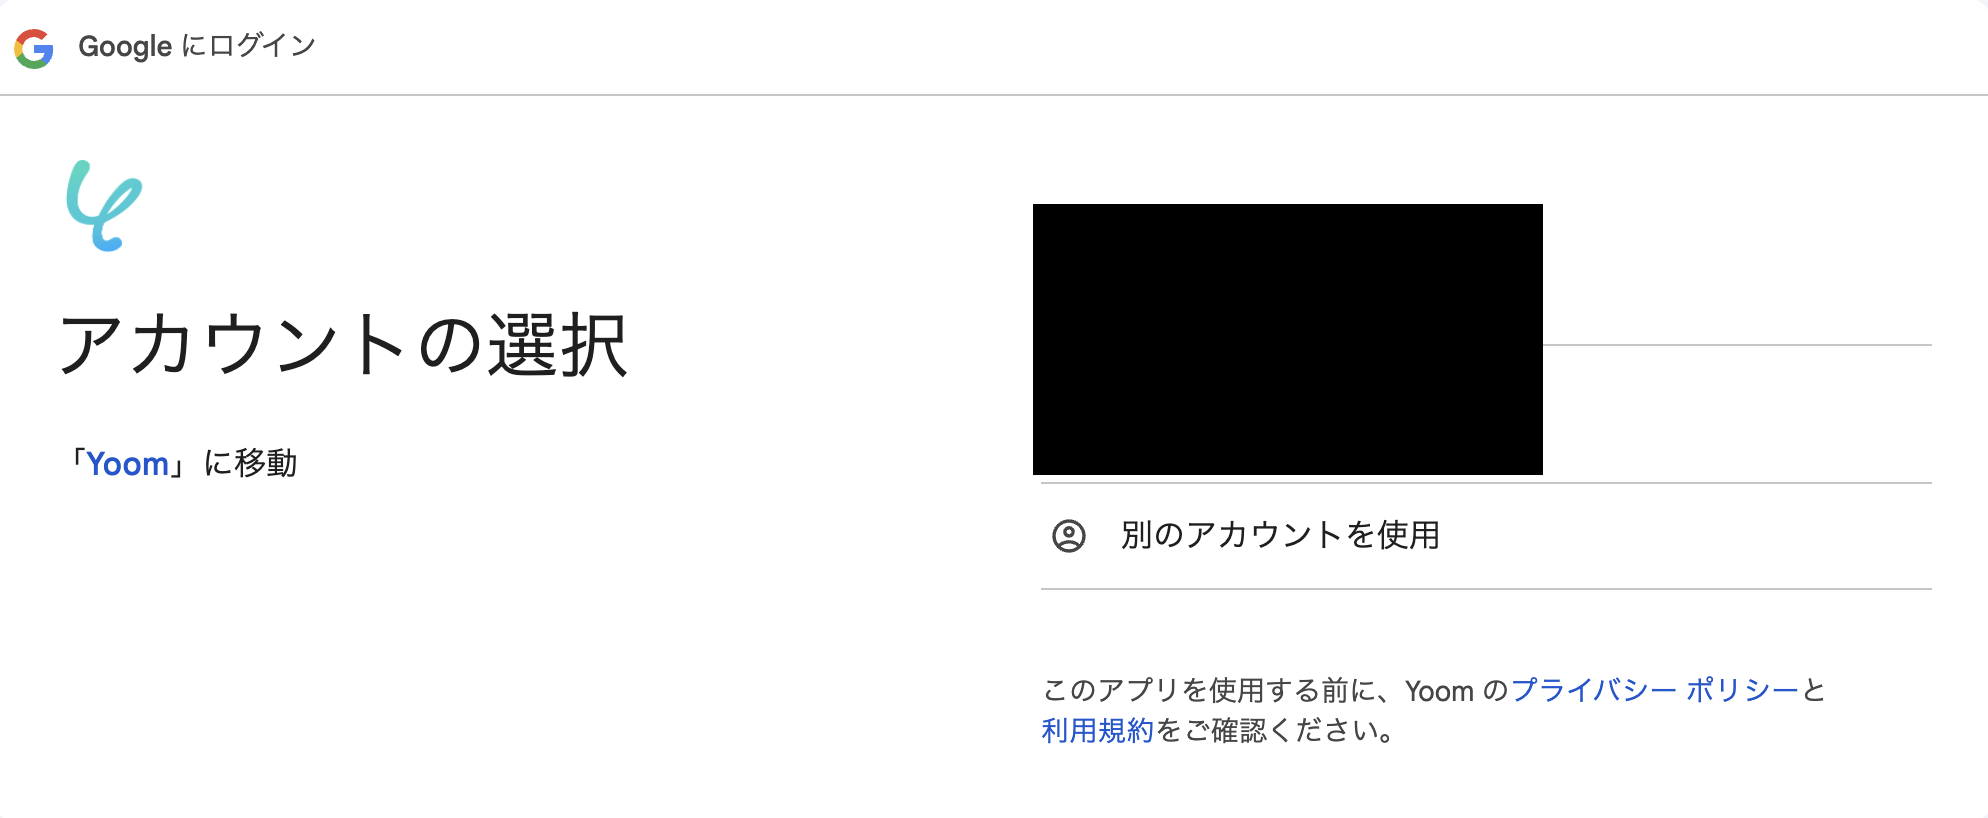
連携したいアカウントを選択しましょう。
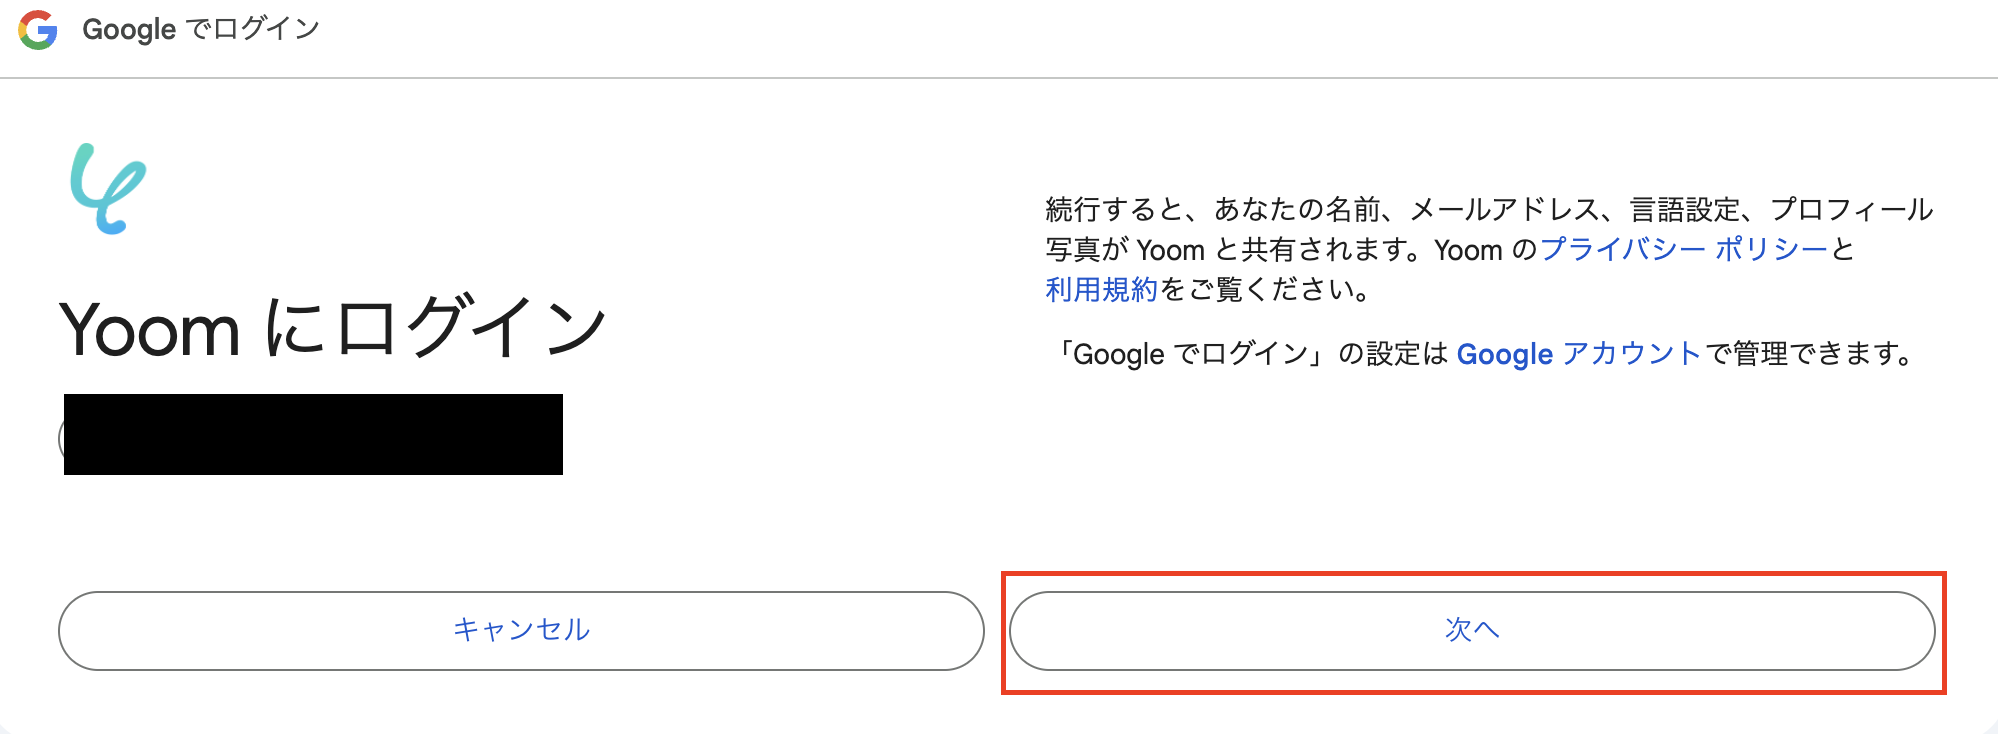
次へをクリックしましょ。
すべて選択にチェックをいれて、続行をクリックします。
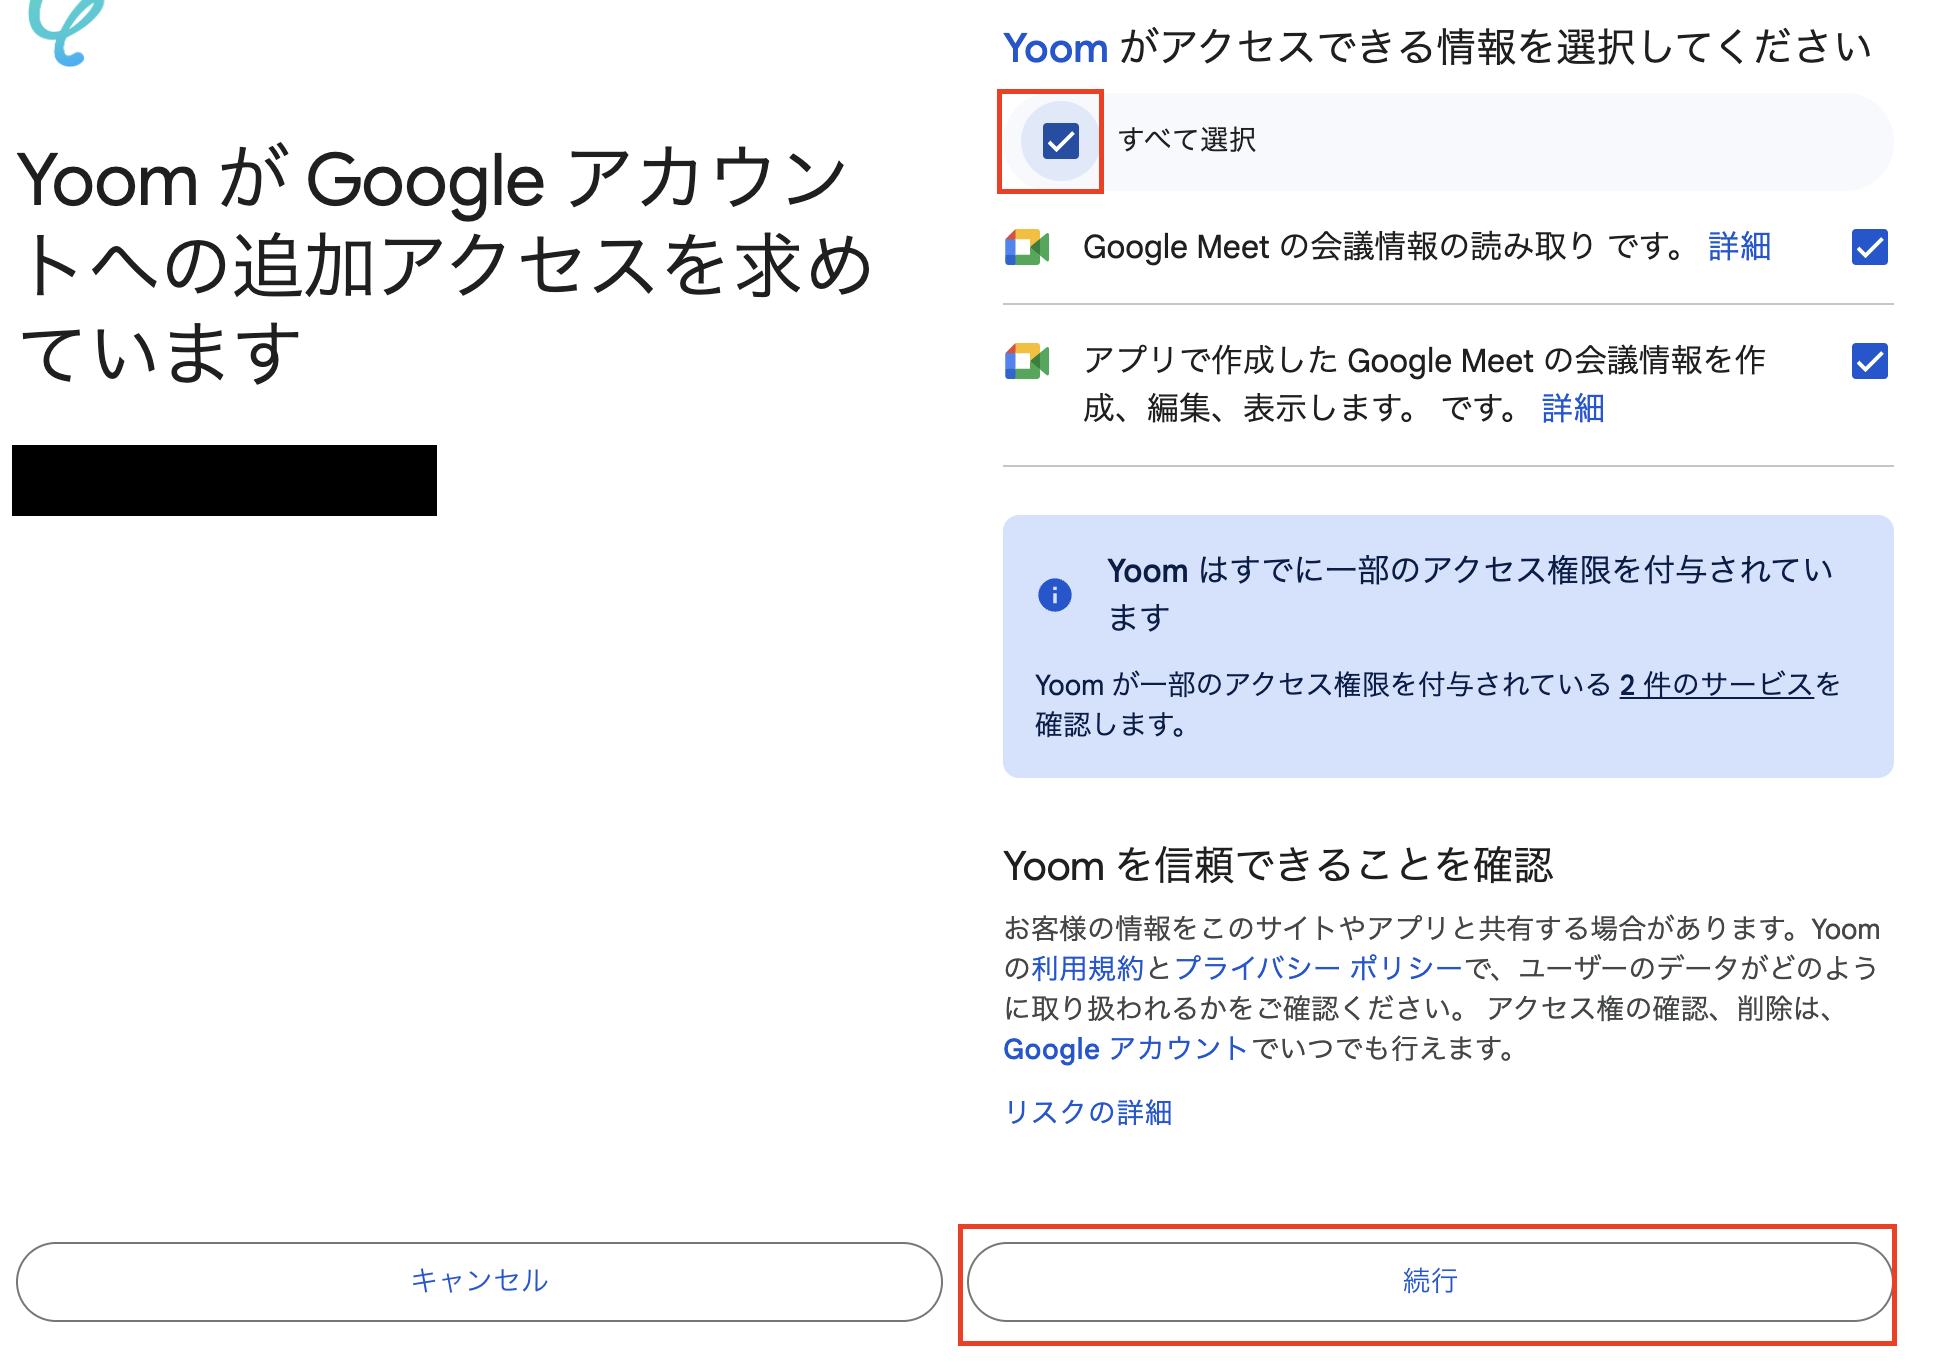
これでGoogle MeetとYoomの連携ができました!
続いて、NotionとYoomを連携しましょう。
Notionは、マイアプリ登録前に、連携したいデータベースを作成しておく必要がありますので、ご注意ください!
それでは先程と同様に、Yoomのワークスペースの画面左上に表示されている「マイアプリ」→「新規接続」からNotionを選択します。
ページを選択するをクリックしましょう。
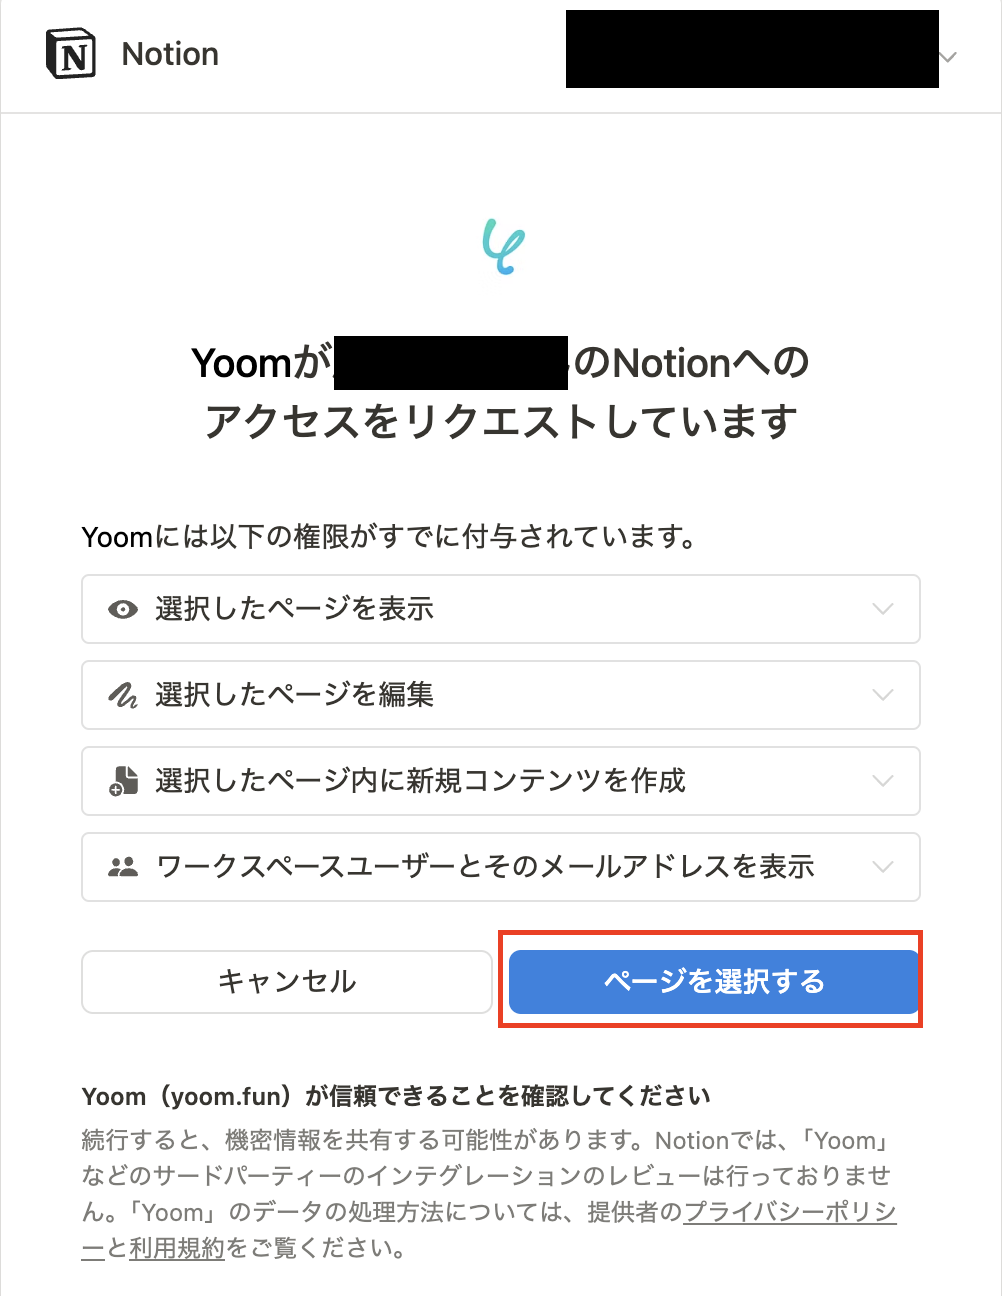
アクセスを許可するをクリックします。

これでNotionのマイアプリ登録が完了です。
今回はGoogle Meet の会議が終了すると、録画ファイル(音声を含む)は自動的にGoogle Drive のフォルダに保存されるので、Google Driveのマイアプリ登録も行いましょう。
先程と同様に、画面左上に表示されている「マイアプリ」→「新規接続」→Google Driveを選択。
「sign in with Google」をクリックします。
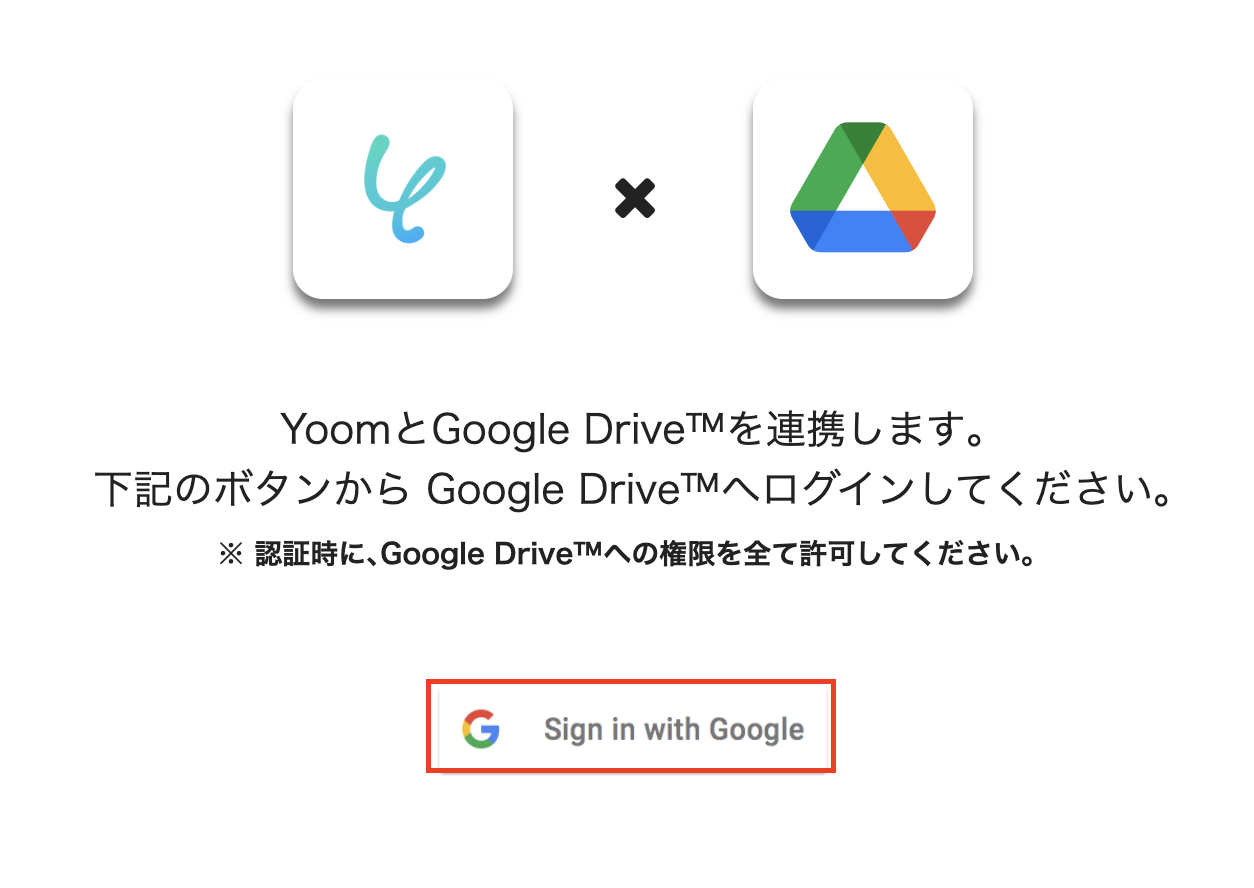
以降はGoogle Meetと同じ手順です。
これでGoogle Driveのマイアプリ登録が完了しました。
マイアプリ登録が完了したら、以下バナーの「試してみる」をクリックしてください。
■概要
Google Meetでの会議後、録画データを聞き返しながら手作業で文字起こしを行い、議事録を作成してNotionに転記する作業に手間を感じていませんか。このワークフローを活用すれば、Google Meetでの会議終了をトリガーとして、音声の文字起こしから要約の作成、Notionへの議事録追加までの一連のプロセスを自動化し、これらの定型業務を効率化できます。
■このテンプレートをおすすめする方
- Google Meetでの会議が多く、議事録作成の工数を削減したいと考えている方
- Notionで議事録を管理しており、情報の転記作業の手間を省きたい方
- 会議内容の記録や共有の精度とスピードを高めたいプロジェクトマネージャーの方
■このテンプレートを使うメリット
- 会議終了後の文字起こしや要約作成、Notionへの登録が自動化されるため、議事録作成にかかる時間を短縮し、より重要な業務に集中できます。
- 手作業による文字の転記ミスや、Notionへの登録漏れといったヒューマンエラーのリスクを軽減し、議事録の正確性を保つことに繋がります。
■フローボットの流れ
- はじめに、Google MeetとNotionをYoomと連携します。
- トリガーでGoogle Meetを選択し、「会議が終了したら」というアクションを設定します。
- オペレーションで待機機能を設定し、レコーディング処理が完了するまでフローを待機させます。
- 次に、Google Meetの「レコーディング情報を取得する」アクションで、会議の録画情報を取得します。
- Google Driveの「音声ファイルをダウンロードする」アクションで、録画データをダウンロードします。
- 音声文字起こし機能で、ダウンロードした音声データをテキストに変換します。
- 要約機能で、文字起こししたテキストから議事録の要約を作成します。
- 最後に、Notionの「レコードを追加する」アクションで、文字起こし結果や要約内容をデータベースに登録します。
※「トリガー」:フロー起動のきっかけとなるアクション、「オペレーション」:トリガー起動後、フロー内で処理を行うアクション
■このワークフローのカスタムポイント
- Google Meetのトリガー設定では、会議の終了をチェックする間隔を任意で設定できます。
- 待機機能では、レコーディング処理の完了を待つ時間を任意で設定することが可能です。
- 音声文字起こし機能では、話者の分離など、文字起こしに関する条件を自由に設定できます。
- 要約機能では、どのような要約を作成するかをプロンプトなどで自由に設定することが可能です。
- Notionにレコードを追加する際、会議名や文字起こし結果、要約など、どの情報をどのフィールドに登録するかを自由に設定できます。
■注意事項
- Googleスプレッドシート、Google Drive、NotionのそれぞれとYoomを連携してください。
- OCRまたは音声を文字起こしするAIオペレーションはチームプラン・サクセスプランでのみご利用いただける機能となっております。フリープラン・ミニプランの場合は設定しているフローボットのオペレーションはエラーとなりますので、ご注意ください。
- チームプランやサクセスプランなどの有料プランは、2週間の無料トライアルを行うことが可能です。無料トライアル中には制限対象のアプリやAI機能(オペレーション)を使用することができます。
- ダウンロード可能なファイル容量は最大300MBまでです。アプリの仕様によっては300MB未満になる可能性があるので、ご注意ください。
- トリガー、各オペレーションでの取り扱い可能なファイル容量の詳細は下記をご参照ください。
- https://intercom.help/yoom/ja/articles/9413924
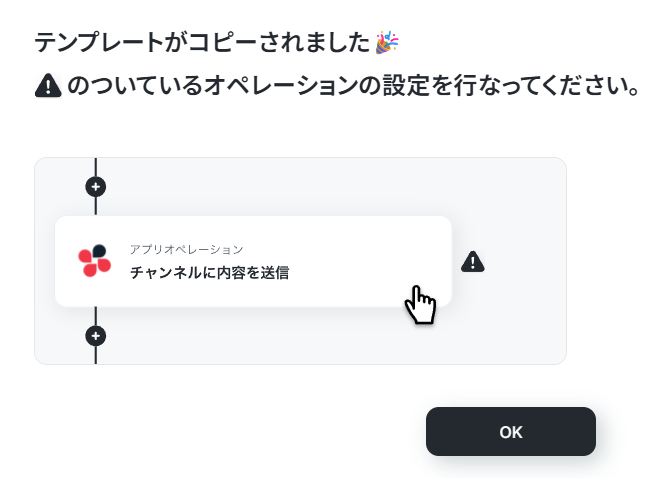
「テンプレートがコピーされました」と表示されるので「OK」をクリックします。
ステップ2:トリガー設定
それでは上の項目から順番に、フローボット設定を進めましょう!
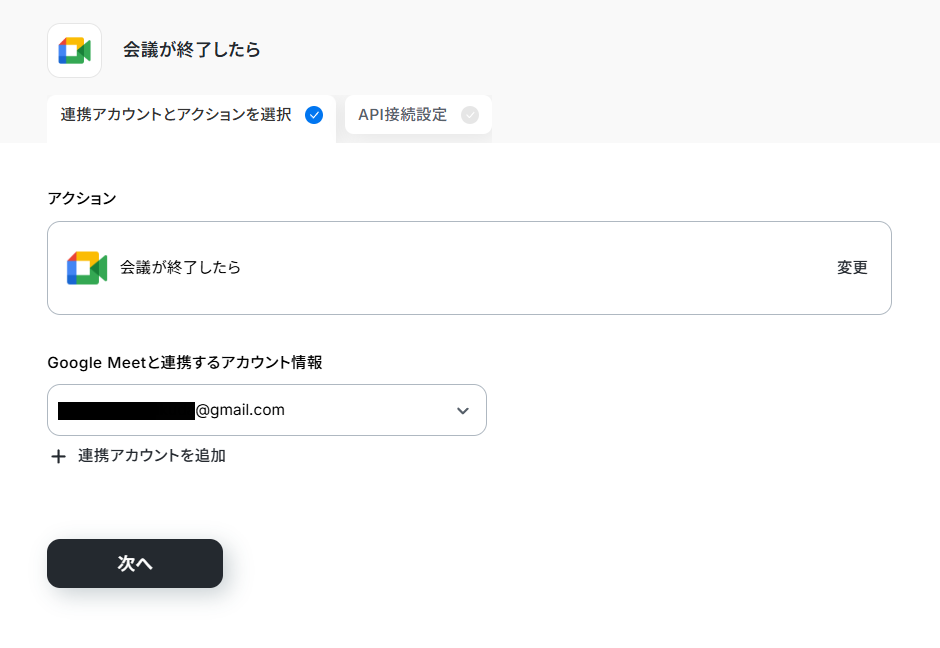
まずは「会議が終了したら」をクリックしましょう!
連携アカウントとアクションを選択
こちらのページは設定済みですので、アカウント名が正しいか確認して次へをクリックしましょう。
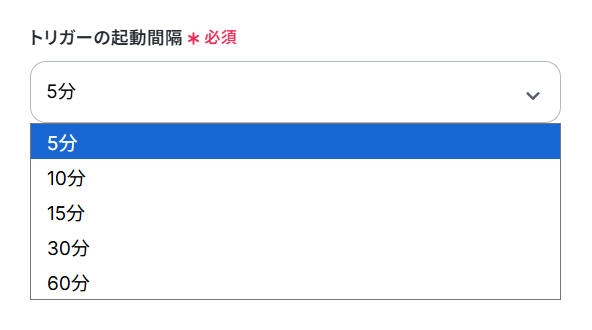
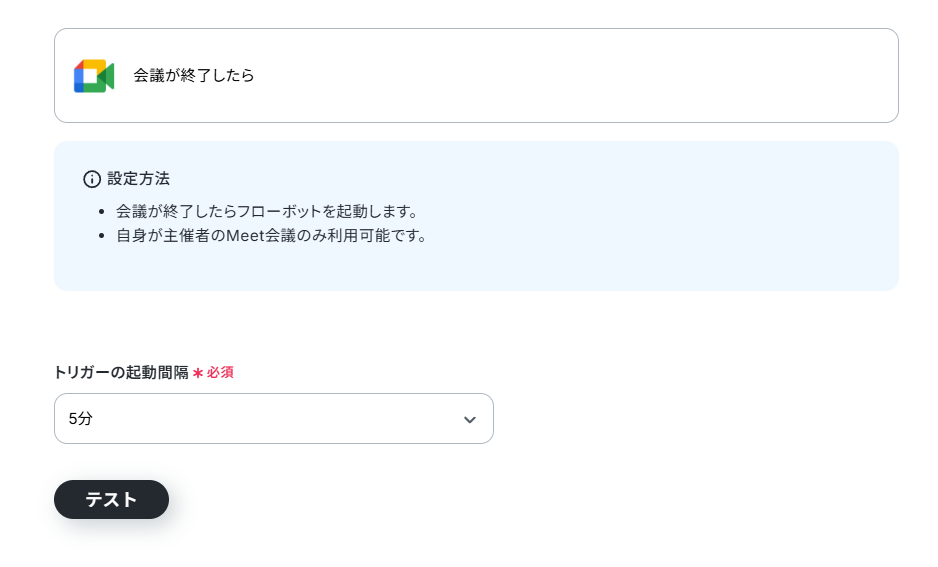
アプリトリガーのAPI接続設定
トリガーの起動間隔を選択します。
そして、トリガーとなるアクションを実行し、テストをクリックしましょう。
注)トリガーの起動タイミングは、5分、10分、15分、30分、60分のいずれかで設定できます。ご利用プランによって、設定できるトリガーの最短間隔が違うので、その点は要チェックです。なお、基本的にはそのプランの最短の起動間隔にしてお使いいただくことをおすすめします。
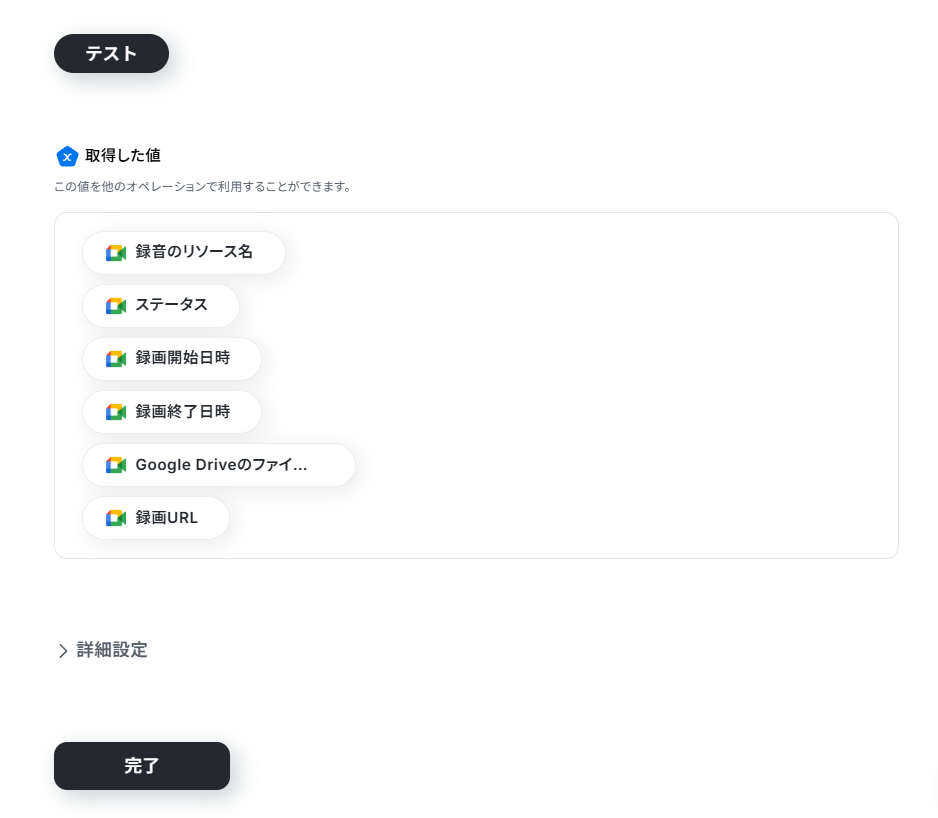
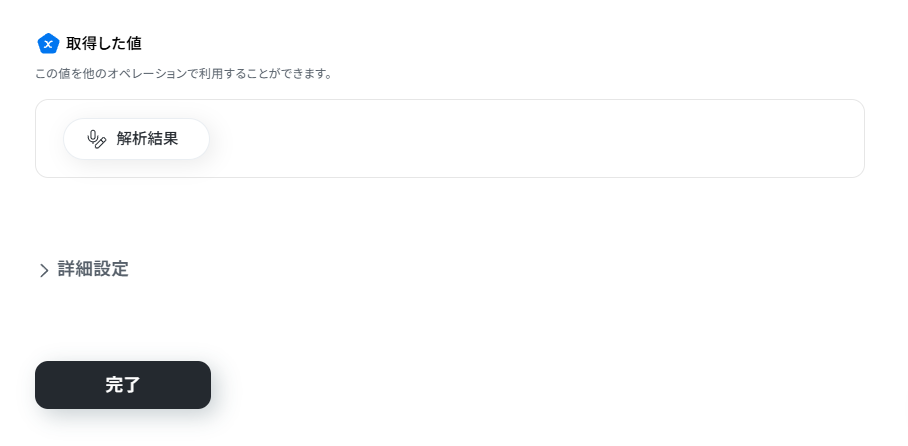
テストが成功し、Google Meetの情報が「取得した値」に入ったら「完了」をクリックしてください。
※下図は値が入っていない状態です。テストに成功すれば値が入ります。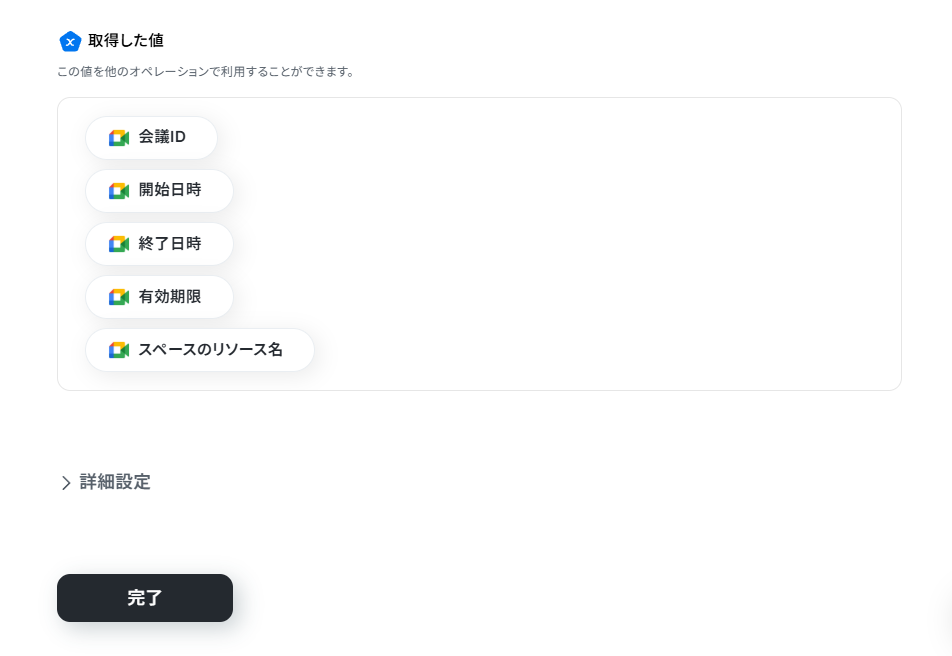
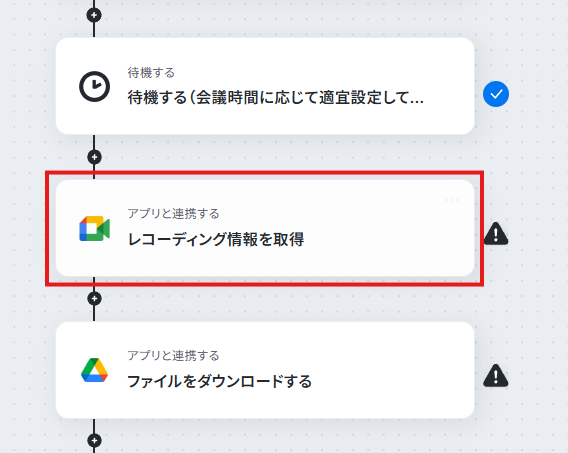
ステップ3:待機とレコーディング情報の取得
ミーティングが終了してからレコーディングが取得できる状態になるまで「待機」するアクションが入っています。
このアクションでは待機時間を変更できます。ここではテンプレートで設定されている待機時間のまま進めましょう。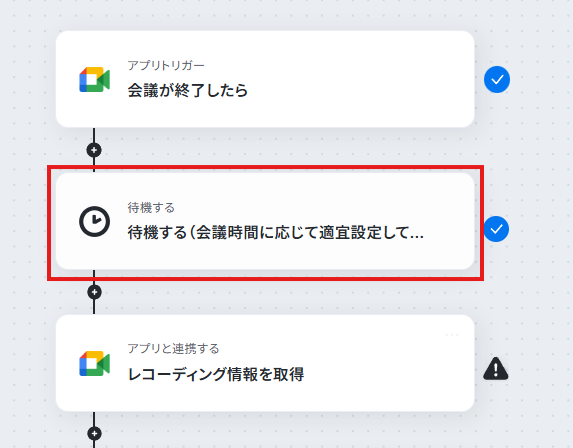
連携アカウントとアクションを選択
こちらのページは設定済みですので次へをクリックします。

API接続設定
会議IDには、「会議が終了したら」の項目で取得した「会議ID」をアウトプットから選択します。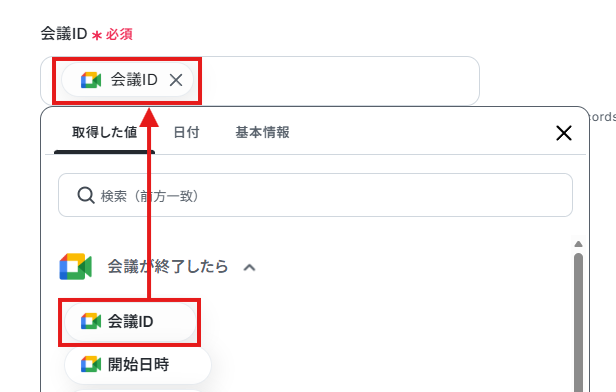
入力が終わったら、テストをして、成功したら保存しましょう。
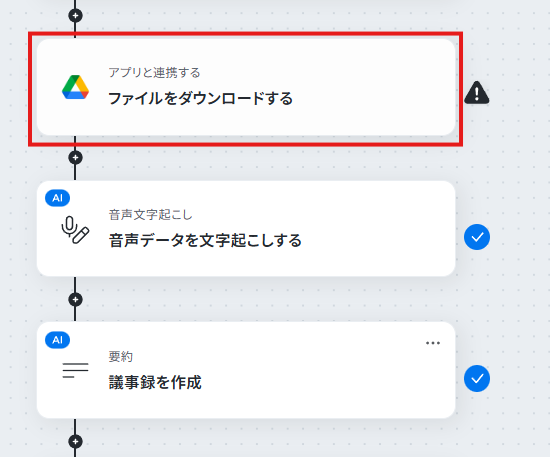
ステップ4:Google Driveのアプリ連携
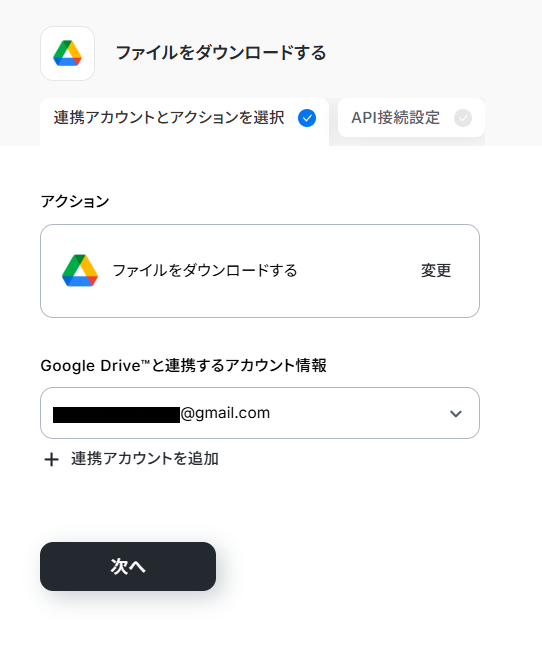
次に「ファイルをダウンロードする」をクリックしましょう。
連携アカウントとアクションを選択
こちらの画面も設定が済んでいるので、このまま次へをクリックします。
API接続設定
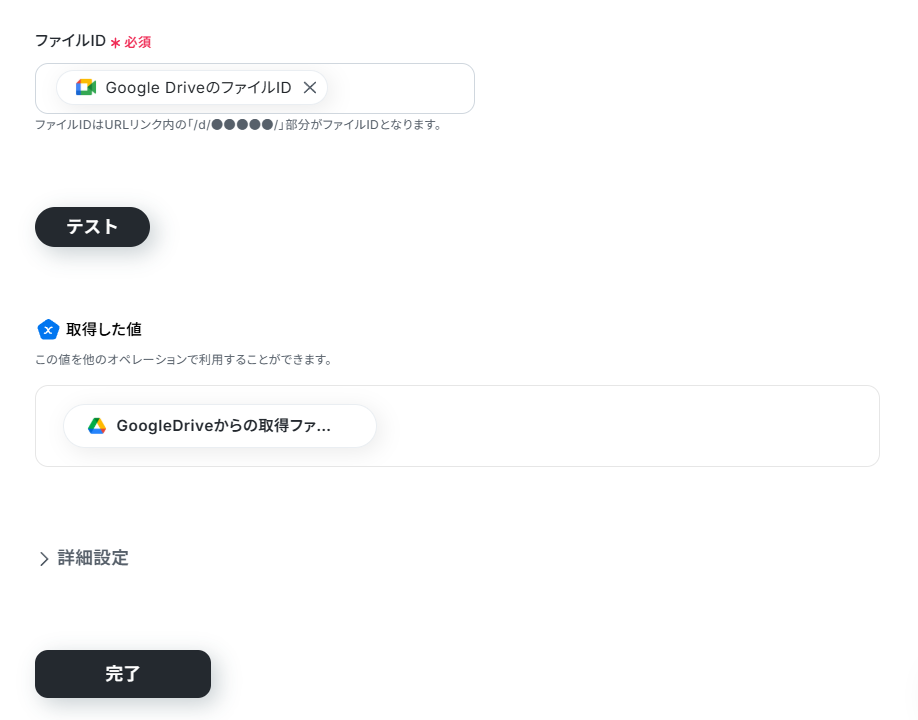
ファイルIDについては、アウトプットの「レコーディング情報を取得」の項目にある「Google DriveのファイルID」を選択しましょう。
設定できたら、テストしてください。
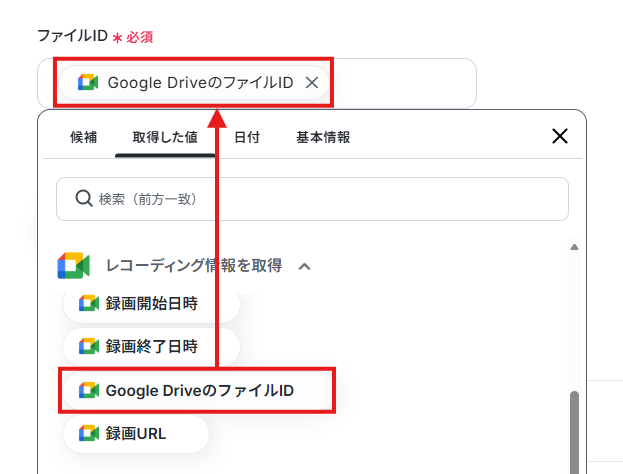
テストが成功したら「完了」をクリックします。
※ダウンロード可能なファイル容量は最大300MBまでです。アプリの仕様によっては300MB未満になる可能性があるので、ご注意ください。
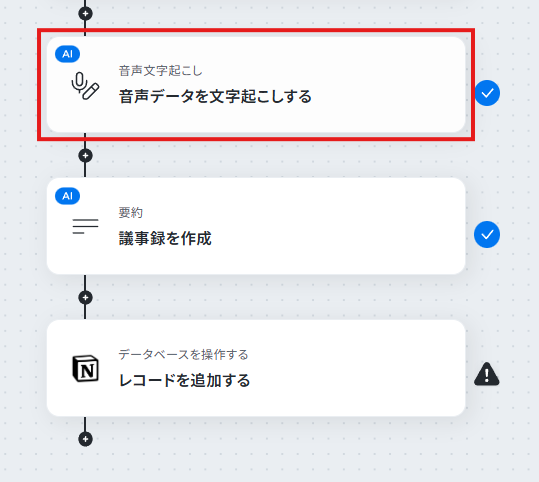
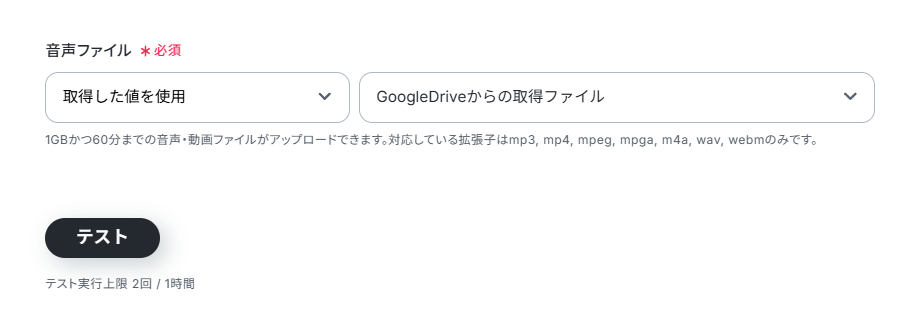
ステップ5:音声データを文字起こしする
次に「音声データを文字起こしする」をクリックしましょう。
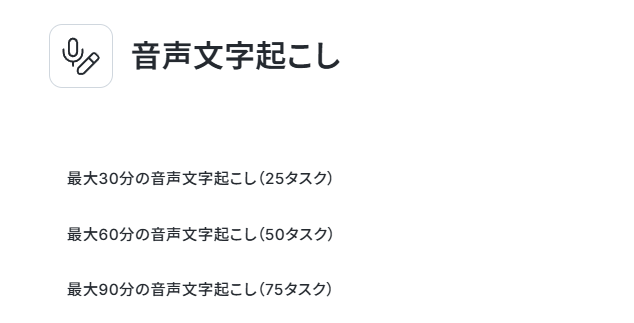
アクションを選択
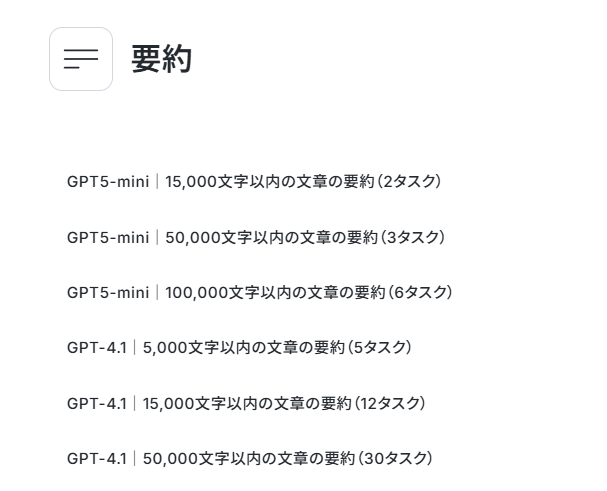
アクションは、項目から選択しましょう。
※テンプレートでは旧アクション(非推奨)のアクションが設定されているため、「変更」から非推奨とついていないアクションを選択してください。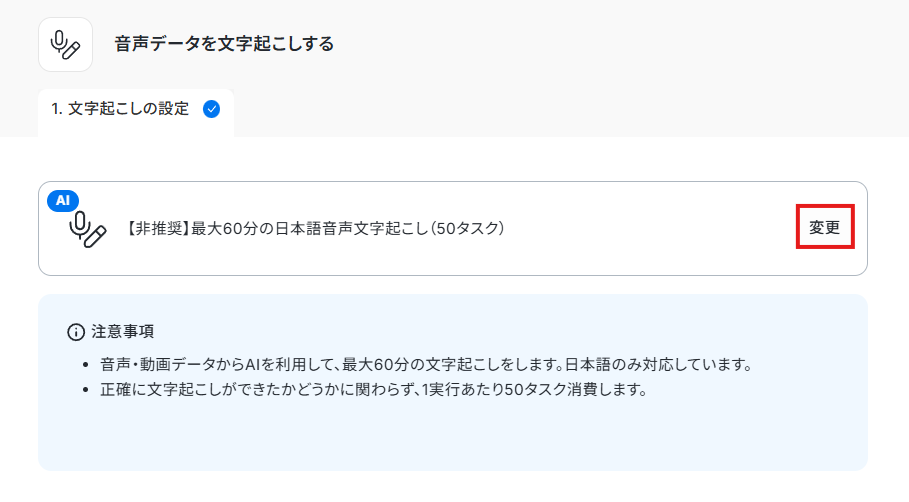
詳細を設定
ファイルの添付方法は設定済みですので、テストをクリックしてください。
テストが成功したら「完了」をクリックして保存しましょう。
ステップ6:要約する
「議事録を作成」をクリックして設定しましょう。
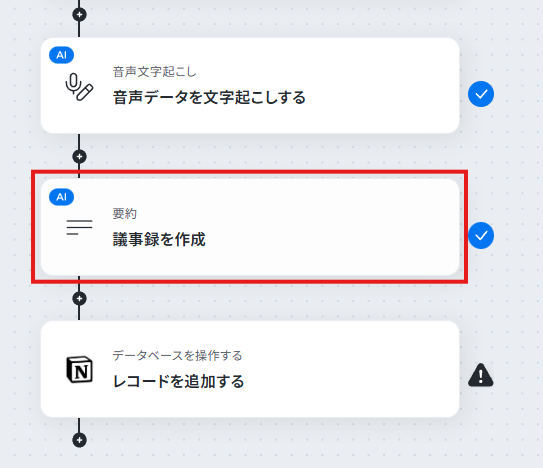
アクションを選択
アクションを項目から選択し、次へをクリックします。
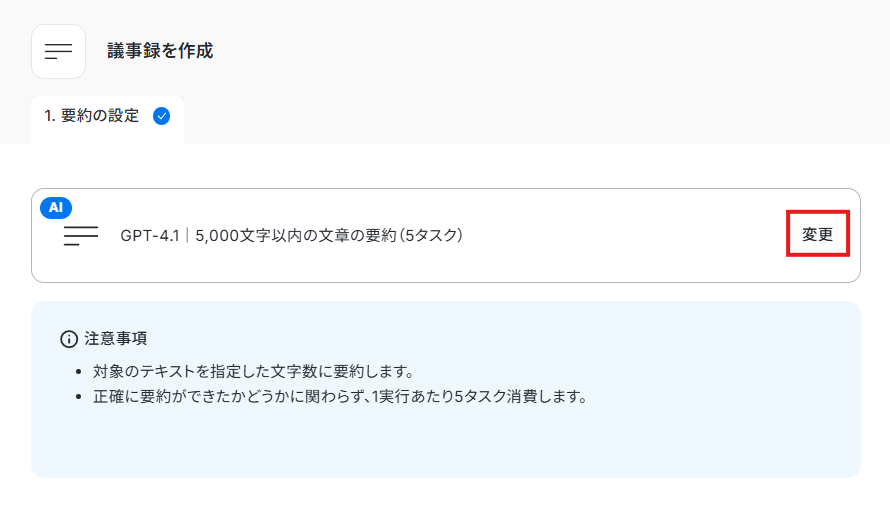
詳細を設定
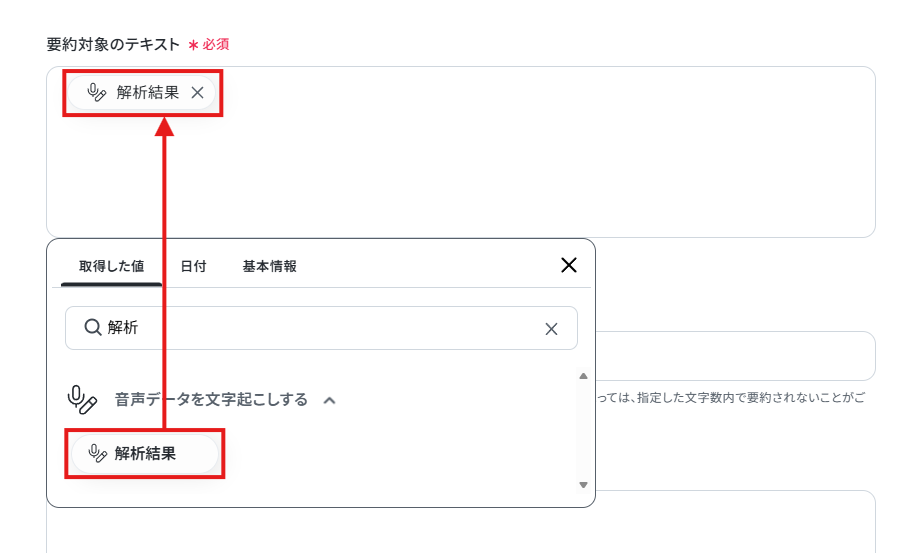
必須項目を入力しましょう。
要約対象のテキストには「音声データを文字起こしする」の解析結果をアウトプットから選択してください。
テストが成功したら「完了」をクリックして保存しましょう。
ステップ7:Notionのアクション設定
いよいよ最後の項目になりました!
「レコードを追加する」をクリックしましょう。

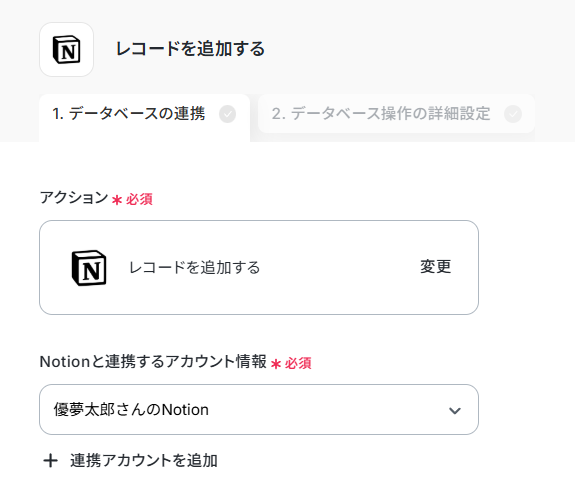
連携アカウントとアクションを選択
アクションや連携アカウントは既に設定されています。
データベースの連携で、レコードを追加したいデータベースを選択します。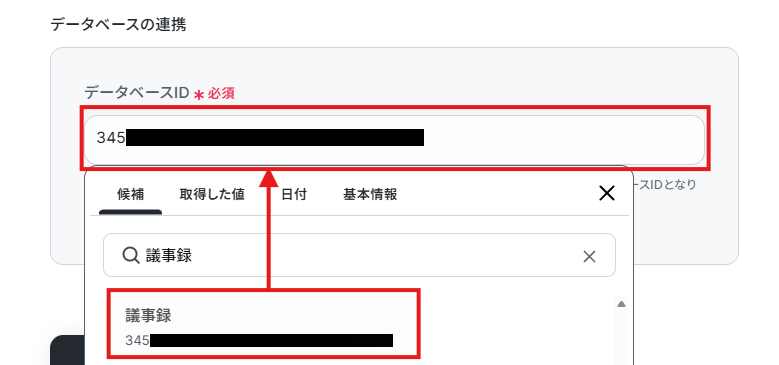
API接続設定
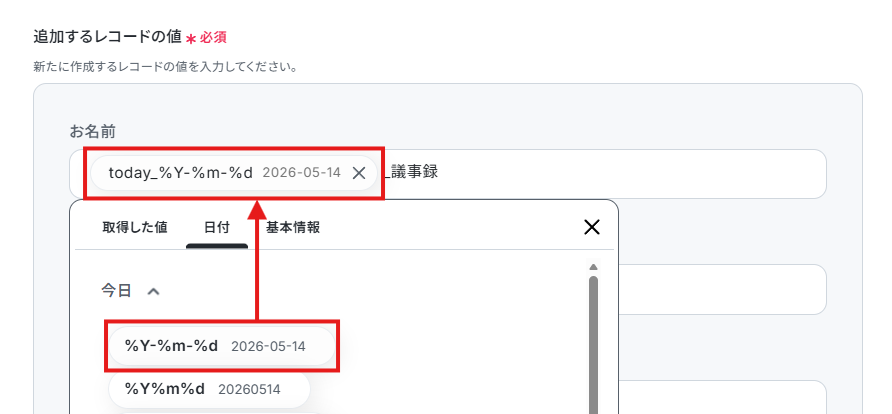
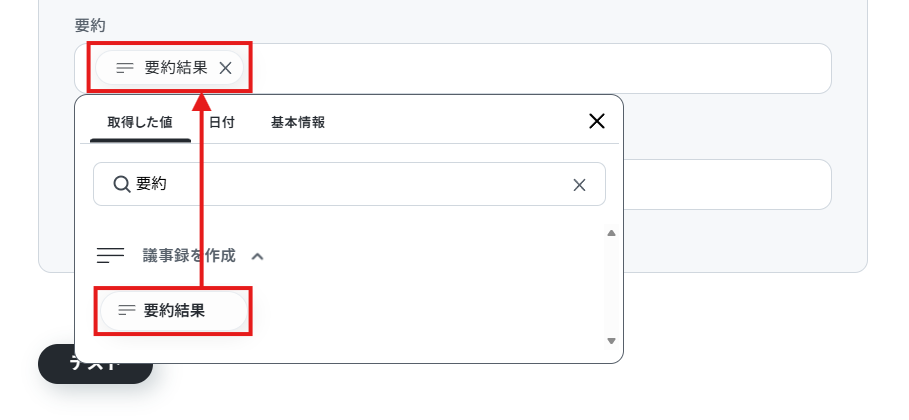
必須項目を入力しましょう。
各項目にはこれまでのアクションで取得した値や、動的な日付を設定しましょう。
テストし、Notionに情報が追加されていたら、「完了」をクリックして保存しましょう!
設定が完了したら、添付画像のポップアップが表示されるので、「トリガーをON」をクリックします。
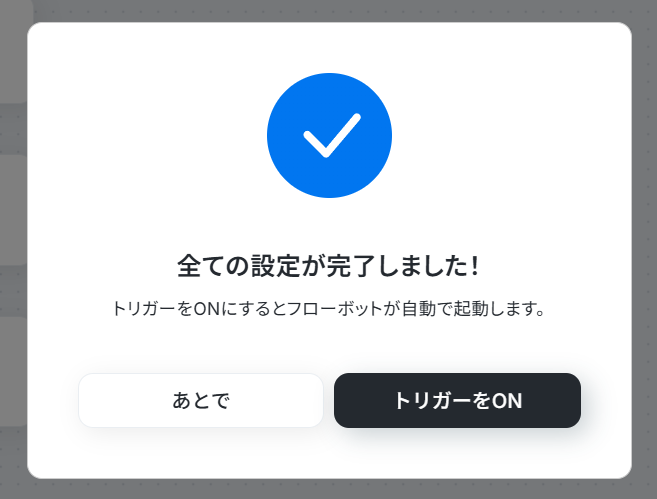
これで設定が完了しました!
Google MeetとNotionのその他の自動化例
今回ご紹介したフロー以外にもGoogle MeetやNotionのAPIを利用すれば、さまざまな業務の自動化を実現することができます。いずれも簡単な設定で利用できるようになりますので、もし気になるものがあれば、ぜひお試しください!
■概要
Google Meetでの会議後、録画データから議事録を作成する作業に手間を感じていませんか。特に、手作業での文字起こしや翻訳、ドキュメントツールへの転記は時間がかかり、本来の業務を圧迫する一因にもなります。このワークフローを活用すれば、Google Meetの会議終了をきっかけに、音声の文字起こしからDeepLによる翻訳、Notionへの情報追加までを自動化し、議事録作成のプロセスを効率化します。
■このテンプレートをおすすめする方
- Google Meetでの会議が多く、議事録作成の工数を削減したいと考えている方
- 海外の取引先やメンバーとの会議があり、文字起こし後の翻訳作業に手間を感じている方
- Notionで議事録やナレッジを管理しており、自動で情報を集約したい方
■このテンプレートを使うメリット
- 会議後の録画ダウンロード、文字起こし、翻訳、転記という一連の作業が自動化されるため、議事録作成にかかる時間を短縮できます。
- 手作業によるコピー&ペーストのミスや転記漏れを防ぎ、情報の正確性を保ったままNotionに議事録を蓄積することが可能です。
■フローボットの流れ
- はじめに、Google Meet、Google Drive、DeepL、NotionをYoomと連携します。
- 次に、トリガーでGoogle Meetを選択し、「会議が終了したら」というアクションを設定します。
- その後、録画データが生成されるのを待つため、オペレーションで待機機能を設定します。
- 続いて、Google Meetの「レコーディング情報を取得する」アクションを設定し、Google Driveから録画ファイルをダウンロードします。
- 次に、音声文字起こし機能のアクションを設定し、ダウンロードした音声ファイルをテキスト化します。
- 最後に、DeepLで翻訳したテキストを、Notionの「レコードを追加する」アクションで指定のデータベースに追加します。
※「トリガー」:フロー起動のきっかけとなるアクション、「オペレーション」:トリガー起動後、フロー内で処理を行うアクション
■このワークフローのカスタムポイント
- Google Meetのトリガー設定では、必要に応じてフローが起動するまでの間隔を任意で設定可能です。
- 待機機能の設定では、会議時間や録画データの生成時間を考慮し、適切な待機時間を設定してください。
- DeepLの設定では、文字起こししたテキストの翻訳先言語や、フォーマル・インフォーマルのトーンなどを任意で選択できます。
- Notionの設定では、レコードを追加したいデータベースIDを指定し、どのプロパティに翻訳後のテキストなどを追加するかを任意で設定してください。
■注意事項
- Google Meet、DeepL、NotionのそれぞれとYoomを連携してください。
- OCRまたは音声を文字起こしするAIオペレーションはチームプラン・サクセスプランでのみご利用いただける機能となっております。フリープラン・ミニプランの場合は設定しているフローボットのオペレーションはエラーとなりますので、ご注意ください。
- チームプランやサクセスプランなどの有料プランは、2週間の無料トライアルを行うことが可能です。無料トライアル中には制限対象のアプリやAI機能(オペレーション)を使用することができます。
- ダウンロード可能なファイル容量は最大300MBまでです。アプリの仕様によっては300MB未満になる可能性があるので、ご注意ください。
- トリガー、各オペレーションでの取り扱い可能なファイル容量の詳細はこちら
■概要オンライン会議の増加に伴い、Google Meetの録画をチームで共有する機会も増えているのではないでしょうか。
しかし、会議後に録画URLを確認し、Notionなどの情報共有ツールに転記して通知する作業は手間がかかり、共有漏れが発生することもあります。
このワークフローを活用すれば、Google Meetの会議終了をきっかけに、録画URLを自動でNotionのデータベースへ追加し、関係者に通知まで行うことができ、こうした課題を円滑に解消します。
■このテンプレートをおすすめする方- Google Meetでの会議が多く、議事録や録画をNotionで管理している方
- 会議後の録画共有作業を忘れがちで、メンバーへの情報展開が遅れてしまう方
- チーム内の情報共有フローを自動化し、生産性を向上させたいと考えている方
■このテンプレートを使うメリット- 会議終了後の録画URL取得からNotionへの追記、共有までを自動化し、これまで手作業に費やしていた時間を削減できます。
- 手動でのURLコピー&ペーストによる記載ミスや、関係者への共有漏れといったヒューマンエラーを防ぎ、確実な情報共有を実現します。
■フローボットの流れ- はじめに、Google Meet、Notion、SlackをYoomと連携します。
- 次に、トリガーでGoogle Meetを選択し、「会議が終了したら」というアクションを設定します。
- 次に、オペレーションで待機機能を選択し、録画データが生成されるまでの時間を考慮して「待機する」アクションを設定します。
- 次に、オペレーションでGoogle Meetの「レコーディング情報を取得」アクションを設定します。
- 次に、オペレーションでNotionの「レコードを追加する」アクションを設定し、取得したレコーディング情報をデータベースに追加します。
- 最後に、オペレーションでSlackの「チャンネルにメッセージを送る」アクションを設定し、関係者にNotionへの追加が完了した旨を通知します。
※「トリガー」:フロー起動のきっかけとなるアクション、「オペレーション」:トリガー起動後、フロー内で処理を行うアクション
■このワークフローのカスタムポイント- 待機機能は、録画データの生成時間を考慮して、待機する時間を任意に設定してください。
- Google Meetの「レコーディング情報を取得」アクションでは、トリガーで取得した値の中から、対象となる会議のIDを選択してください。
- Notionの「レコードを追加する」アクションでは、追加先のデータベースや、Google Meetから取得したレコーディング情報をどのフィールドに格納するかを設定してください。
- Slackで通知するメッセージの内容や通知先のチャンネルは、運用に合わせて自由に設定できます。
■注意事項- Google Meet、NotionのそれぞれとYoomを連携してください。
- トリガーは5分、10分、15分、30分、60分の間隔で起動間隔を選択できます。
- プランによって最短の起動間隔が異なりますので、ご注意ください。
- 「待機する」オペレーションは、パーソナルプラン以上のプランでご利用いただける機能となっております。フリープランの場合は設定しているフローボットのオペレーションやデータコネクトはエラーとなりますので、ご注意ください。
- パーソナルプランなどの有料プランは、2週間の無料トライアルを行うことが可能です。無料トライアル中には制限対象のアプリや機能(オペレーション)を使用することができます。
■概要
Google Meetでの会議後、録画データから議事録を作成する作業に手間を感じていませんか。特に、手作業での文字起こしや翻訳、ドキュメントツールへの転記は時間がかかり、本来の業務を圧迫する一因にもなります。このワークフローを活用すれば、Google Meetの会議終了をきっかけに、音声の文字起こしからDeepLによる翻訳、Notionへの情報追加までを自動化し、議事録作成のプロセスを効率化します。
■このテンプレートをおすすめする方
- Google Meetでの会議が多く、議事録作成の工数を削減したいと考えている方
- 海外の取引先やメンバーとの会議があり、文字起こし後の翻訳作業に手間を感じている方
- Notionで議事録やナレッジを管理しており、自動で情報を集約したい方
■このテンプレートを使うメリット
- 会議後の録画ダウンロード、文字起こし、翻訳、転記という一連の作業が自動化されるため、議事録作成にかかる時間を短縮できます。
- 手作業によるコピー&ペーストのミスや転記漏れを防ぎ、情報の正確性を保ったままNotionに議事録を蓄積することが可能です。
■フローボットの流れ
- はじめに、Google Meet、Google Drive、DeepL、NotionをYoomと連携します。
- 次に、トリガーでGoogle Meetを選択し、「会議が終了したら」というアクションを設定します。
- その後、録画データが生成されるのを待つため、オペレーションで待機機能を設定します。
- 続いて、Google Meetの「レコーディング情報を取得する」アクションを設定し、Google Driveから録画ファイルをダウンロードします。
- 次に、音声文字起こし機能のアクションを設定し、ダウンロードした音声ファイルをテキスト化します。
- 最後に、DeepLで翻訳したテキストを、Notionの「レコードを追加する」アクションで指定のデータベースに追加します。
※「トリガー」:フロー起動のきっかけとなるアクション、「オペレーション」:トリガー起動後、フロー内で処理を行うアクション
■このワークフローのカスタムポイント
- Google Meetのトリガー設定では、必要に応じてフローが起動するまでの間隔を任意で設定可能です。
- 待機機能の設定では、会議時間や録画データの生成時間を考慮し、適切な待機時間を設定してください。
- DeepLの設定では、文字起こししたテキストの翻訳先言語や、フォーマル・インフォーマルのトーンなどを任意で選択できます。
- Notionの設定では、レコードを追加したいデータベースIDを指定し、どのプロパティに翻訳後のテキストなどを追加するかを任意で設定してください。
■注意事項
- Google Meet、DeepL、NotionのそれぞれとYoomを連携してください。
- OCRまたは音声を文字起こしするAIオペレーションはチームプラン・サクセスプランでのみご利用いただける機能となっております。フリープラン・ミニプランの場合は設定しているフローボットのオペレーションはエラーとなりますので、ご注意ください。
- チームプランやサクセスプランなどの有料プランは、2週間の無料トライアルを行うことが可能です。無料トライアル中には制限対象のアプリやAI機能(オペレーション)を使用することができます。
- ダウンロード可能なファイル容量は最大300MBまでです。アプリの仕様によっては300MB未満になる可能性があるので、ご注意ください。
- トリガー、各オペレーションでの取り扱い可能なファイル容量の詳細はこちら
しかし、会議後に録画URLを確認し、Notionなどの情報共有ツールに転記して通知する作業は手間がかかり、共有漏れが発生することもあります。
このワークフローを活用すれば、Google Meetの会議終了をきっかけに、録画URLを自動でNotionのデータベースへ追加し、関係者に通知まで行うことができ、こうした課題を円滑に解消します。
■このテンプレートをおすすめする方
- Google Meetでの会議が多く、議事録や録画をNotionで管理している方
- 会議後の録画共有作業を忘れがちで、メンバーへの情報展開が遅れてしまう方
- チーム内の情報共有フローを自動化し、生産性を向上させたいと考えている方
■このテンプレートを使うメリット
- 会議終了後の録画URL取得からNotionへの追記、共有までを自動化し、これまで手作業に費やしていた時間を削減できます。
- 手動でのURLコピー&ペーストによる記載ミスや、関係者への共有漏れといったヒューマンエラーを防ぎ、確実な情報共有を実現します。
■フローボットの流れ
- はじめに、Google Meet、Notion、SlackをYoomと連携します。
- 次に、トリガーでGoogle Meetを選択し、「会議が終了したら」というアクションを設定します。
- 次に、オペレーションで待機機能を選択し、録画データが生成されるまでの時間を考慮して「待機する」アクションを設定します。
- 次に、オペレーションでGoogle Meetの「レコーディング情報を取得」アクションを設定します。
- 次に、オペレーションでNotionの「レコードを追加する」アクションを設定し、取得したレコーディング情報をデータベースに追加します。
- 最後に、オペレーションでSlackの「チャンネルにメッセージを送る」アクションを設定し、関係者にNotionへの追加が完了した旨を通知します。
■このワークフローのカスタムポイント
- 待機機能は、録画データの生成時間を考慮して、待機する時間を任意に設定してください。
- Google Meetの「レコーディング情報を取得」アクションでは、トリガーで取得した値の中から、対象となる会議のIDを選択してください。
- Notionの「レコードを追加する」アクションでは、追加先のデータベースや、Google Meetから取得したレコーディング情報をどのフィールドに格納するかを設定してください。
- Slackで通知するメッセージの内容や通知先のチャンネルは、運用に合わせて自由に設定できます。
■注意事項
- Google Meet、NotionのそれぞれとYoomを連携してください。
- トリガーは5分、10分、15分、30分、60分の間隔で起動間隔を選択できます。
- プランによって最短の起動間隔が異なりますので、ご注意ください。
- 「待機する」オペレーションは、パーソナルプラン以上のプランでご利用いただける機能となっております。フリープランの場合は設定しているフローボットのオペレーションやデータコネクトはエラーとなりますので、ご注意ください。
- パーソナルプランなどの有料プランは、2週間の無料トライアルを行うことが可能です。無料トライアル中には制限対象のアプリや機能(オペレーション)を使用することができます。
Google Meetを活用した自動化例
Google Meetで会議終了後、データベースに情報を登録する
Google Meetの会議が終了したら、指定のデータベースへ自動で情報を登録・更新します。
■概要
Google Meetでの会議後、録画データを聞き返しながら議事録を作成する作業に、多くの時間を費やしてはいないでしょうか。このワークフローは、Google Meetでの会議終了をきっかけに、録画データから自動で文字起こしと要約を行い、その結果をGoogle スプレッドシートに記録します。手作業による議事録作成の手間を省き、会議内容の迅速な共有と活用を実現します。
■このテンプレートをおすすめする方
- Google Meetでの会議が多く、議事録作成の工数を削減したいと考えている方
- 会議の要点を素早く把握し、関係者への情報共有を効率化したいチームリーダーの方
- 手作業での文字起こしによる聞き逃しや、要約の抜け漏れを防ぎたい担当者の方
■このテンプレートを使うメリット
- 会議終了から記録までが自動化され、これまで議事録作成に費やしていた時間を短縮し、より重要な業務に集中できます。
- AIによる文字起こしと要約により、手作業で発生しがちな聞き間違いや転記ミスを防ぎ、情報の正確性を高めることに繋がります。
■フローボットの流れ
- はじめに、Google Meet、Google Drive、Google スプレッドシートをYoomと連携します。
- 次に、トリガーでGoogle Meetを選択し、「会議が終了したら」というアクションを設定します。
- オペレーションで、録画処理の時間を考慮するため「待機する」アクションを設定します。
- 続いて、Google Meetの「レコーディング情報を取得」し、Google Driveから該当の録画ファイルをダウンロードします。
- ダウンロードしたファイルを、AI機能の「音声データを文字起こしする」アクションでテキスト化します。
- テキスト化された内容をAI機能の「要約する」アクションで簡潔にまとめます。
- 最後に、Google スプレッドシートの「レコードを追加する」アクションで、文字起こしと要約の結果を指定のシートに記録します。
※「トリガー」:フロー起動のきっかけとなるアクション、「オペレーション」:トリガー起動後、フロー内で処理を行うアクション
■このワークフローのカスタムポイント
- AIによる音声文字起こし機能は、チームプラン・サクセスプランでのみご利用いただけます。フリープラン・ミニプランでこのオペレーションを含むフローボットを実行した場合、エラーとなりますのでご注意ください。
- チームプランやサクセスプランで利用可能な機能は、2週間の無料トライアルで全てお試しいただけます。トライアル期間中は、本テンプレートで用いるAI機能も制限なく利用することが可能です。
■概要
「Google Meetで会議終了後、文字起こしとDeepLによる翻訳を行い、結果をAirtableに追加する」ワークフローは、会議内容の記録と共有を効率化したい方におすすめの業務ワークフローです。
海外とのやり取りが多いチームや、議事録作成をシステム化したい方に適しています。
■このテンプレートをおすすめする方
- Google Meetを利用した会議が頻繁で、文字起こしや翻訳の手間を感じている方
- 会議内容をAirtableで管理し、あとからの検索や共有に活用しているチームの方
- 多言語対応が必要な国際的プロジェクトや、外部パートナーとの連携がある方
- 翻訳結果をそのままデータベースに整理して保管したいと考えているバックオフィス担当者の方
- Googleフォームで集めた内容や、テキスト分析を今後活用したいと考えている方
■このテンプレートを使うメリット
- 会議内容の多言語共有がスムーズに:録画→文字起こし→翻訳→データベース登録までを自動化し、情報整理から共有までの流れが明確になります。
- テキスト資産の蓄積と活用:会議ごとの内容がAirtableに整理されることで、翻訳結果の活用も容易になります。
- 作業負担の軽減と品質の安定:一連の処理が自動化されるため、ヒューマンエラーによるミスも防止できます。
■概要
Google Meetでの会議後、録画データを聞き返しながら議事録を作成する作業に、多くの時間を費やしてはいないでしょうか。このワークフローは、Google Meetでの会議終了をきっかけに、録画データから自動で文字起こしと要約を行い、その結果をGoogle スプレッドシートに記録します。手作業による議事録作成の手間を省き、会議内容の迅速な共有と活用を実現します。
■このテンプレートをおすすめする方
- Google Meetでの会議が多く、議事録作成の工数を削減したいと考えている方
- 会議の要点を素早く把握し、関係者への情報共有を効率化したいチームリーダーの方
- 手作業での文字起こしによる聞き逃しや、要約の抜け漏れを防ぎたい担当者の方
■このテンプレートを使うメリット
- 会議終了から記録までが自動化され、これまで議事録作成に費やしていた時間を短縮し、より重要な業務に集中できます。
- AIによる文字起こしと要約により、手作業で発生しがちな聞き間違いや転記ミスを防ぎ、情報の正確性を高めることに繋がります。
■フローボットの流れ
- はじめに、Google Meet、Google Drive、Google スプレッドシートをYoomと連携します。
- 次に、トリガーでGoogle Meetを選択し、「会議が終了したら」というアクションを設定します。
- オペレーションで、録画処理の時間を考慮するため「待機する」アクションを設定します。
- 続いて、Google Meetの「レコーディング情報を取得」し、Google Driveから該当の録画ファイルをダウンロードします。
- ダウンロードしたファイルを、AI機能の「音声データを文字起こしする」アクションでテキスト化します。
- テキスト化された内容をAI機能の「要約する」アクションで簡潔にまとめます。
- 最後に、Google スプレッドシートの「レコードを追加する」アクションで、文字起こしと要約の結果を指定のシートに記録します。
※「トリガー」:フロー起動のきっかけとなるアクション、「オペレーション」:トリガー起動後、フロー内で処理を行うアクション
■このワークフローのカスタムポイント
- AIによる音声文字起こし機能は、チームプラン・サクセスプランでのみご利用いただけます。フリープラン・ミニプランでこのオペレーションを含むフローボットを実行した場合、エラーとなりますのでご注意ください。
- チームプランやサクセスプランで利用可能な機能は、2週間の無料トライアルで全てお試しいただけます。トライアル期間中は、本テンプレートで用いるAI機能も制限なく利用することが可能です。
■概要
「Google Meetで会議終了後、文字起こしとDeepLによる翻訳を行い、結果をAirtableに追加する」ワークフローは、会議内容の記録と共有を効率化したい方におすすめの業務ワークフローです。
海外とのやり取りが多いチームや、議事録作成をシステム化したい方に適しています。
■このテンプレートをおすすめする方
- Google Meetを利用した会議が頻繁で、文字起こしや翻訳の手間を感じている方
- 会議内容をAirtableで管理し、あとからの検索や共有に活用しているチームの方
- 多言語対応が必要な国際的プロジェクトや、外部パートナーとの連携がある方
- 翻訳結果をそのままデータベースに整理して保管したいと考えているバックオフィス担当者の方
- Googleフォームで集めた内容や、テキスト分析を今後活用したいと考えている方
■このテンプレートを使うメリット
- 会議内容の多言語共有がスムーズに:録画→文字起こし→翻訳→データベース登録までを自動化し、情報整理から共有までの流れが明確になります。
- テキスト資産の蓄積と活用:会議ごとの内容がAirtableに整理されることで、翻訳結果の活用も容易になります。
- 作業負担の軽減と品質の安定:一連の処理が自動化されるため、ヒューマンエラーによるミスも防止できます。
Google Meetで会議終了後、チャットツールに通知する
Google Meetの会議が終了した旨や録画URLなどをチャットツールへ通知します。
[[102312,,181474,102358]]
Google Meetで会議終了後、録画データをファイルストレージに格納する
Google Meetの会議が終了したら、録画ファイルを特定のファイルストレージに自動で格納します。
■概要
Google Meetでの会議後、録画データを手動でダウンロードしてBoxへ格納する作業に、手間や時間を取られていないでしょうか。重要な会議の記録を確実に保管したいものの、こうした単純作業は負担になりがちであり、格納漏れなどのミスが発生する可能性もあります。このワークフローを活用すれば、Google Meetの会議終了をきっかけに、録画データを自動でBoxに格納できるため、こうした課題を解消し、確実な情報共有と管理を実現します。
■このテンプレートをおすすめする方
- Google Meetでの会議が多く、録画データをBoxで管理している方
- 会議後の録画データのダウンロードやアップロード作業を効率化したい方
- 手作業によるファイルの格納漏れを防ぎ、情報共有を徹底したいチームのリーダーの方
■このテンプレートを使うメリット
- 会議終了後に自動で録画データがBoxへ格納されるため、これまで手作業に費やしていたダウンロードやアップロードの時間を削減できます。
- 手動での作業で起こりがちなファイルの保存忘れや格納ミスといったヒューマンエラーを防ぎ、確実な情報資産の管理に繋がります。
■フローボットの流れ
- はじめに、Google Meet、Google Drive、BoxをYoomと連携します。
- 次に、トリガーでGoogle Meetのアプリトリガーを設定し、会議の終了をフローボット起動のきっかけとします。
- オペレーションで待機機能を設定し、録画データがGoogle Driveに保存されるまで一定時間待機させます。
- 次に、オペレーションでGoogle Meetのアクションを設定し、終了した会議の情報を取得します。
- 続けて、オペレーションでGoogle Driveのアクションを設定し、会議情報に紐づく録画ファイルをダウンロードします。
- 最後に、オペレーションでBoxのアクションを設定し、ダウンロードしたファイルを指定のフォルダへ格納します。
※「トリガー」:フロー起動のきっかけとなるアクション、「オペレーション」:トリガー起動後、フロー内で処理を行うアクション
■このワークフローのカスタムポイント
- Google Meetのトリガー設定では、会議終了を検知するポーリング(確認)間隔などを任意で設定してください。
- Google Meetのオペレーション設定では、どの会議の録画データを対象とするか、会議IDを指定する必要があります。
- Google Driveのオペレーション設定では、ダウンロードしたい録画データのファイルIDを正しく指定してください。
- Boxにファイルを格納するオペレーションでは、保存する際のファイル名や格納先となるフォルダのコンテンツIDを任意で設定してください。
■注意事項
- Google Meet、Google Drive、BoxのそれぞれとYoomを連携してください。
- 「待機する」オペレーションはチームプラン・サクセスプランでのみご利用いただける機能となっております。フリープラン・ミニプランの場合は設定しているフローボットのオペレーションはエラーとなりますので、ご注意ください。
- チームプランやサクセスプランなどの有料プランは、2週間の無料トライアルを行うことが可能です。無料トライアル中には制限対象のアプリや機能(オペレーション)を使用することができます。
- トリガーは5分、10分、15分、30分、60分の間隔で起動間隔を選択できます。
- プランによって最短の起動間隔が異なりますので、ご注意ください。
- ダウンロード可能なファイル容量は最大300MBまでです。アプリの仕様によっては300MB未満になる可能性があるので、ご注意ください。
- トリガー、各オペレーションでの取り扱い可能なファイル容量の詳細は下記をご参照ください。
■概要
オンラインでの打ち合わせが増える中で、Google Meetの録画データを手作業でDropboxに格納する作業に手間を感じていませんか。単純な作業ですが、会議の数が増えると管理が煩雑になり、他の業務を圧迫することもあります。このワークフローを活用すれば、Google Meetの会議終了をきっかけに、録画データを自動でDropboxの指定フォルダに格納できます。これにより、手作業によるデータ管理の手間や保存漏れといった課題を解消します。
■このテンプレートをおすすめする方
- Google Meetの録画データを日常的にDropboxへ手動で移動させている方
- 会議の録画データをチームで共有しており、管理の手間を効率化したいと考えている方
- 単純作業を自動化することで、本来注力すべきコア業務の時間を確保したい方
■このテンプレートを使うメリット
- 会議終了後、録画データが自動でDropboxに格納されるため、これまで手作業に費やしていたダウンロードやアップロードの時間を短縮できます。
- 手作業によるファイルの移動が不要になるので、保存のし忘れや格納先の指定間違いといったヒューマンエラーの防止に繋がります。
■フローボットの流れ
- はじめに、Google Meet、Google Drive、DropboxをYoomと連携します。
- 次に、トリガーでGoogle Meetを選択し、「会議が終了したら」フローが起動するように設定します。
- オペレーションで待機機能を設定し、Google Driveに録画ファイルが生成されるまで一定時間待機させます。
- 次に、Google Driveから該当の録画ファイルをダウンロードするアクションを設定します。
- 最後に、Dropboxの「ファイルをアップロードする」アクションを設定し、ダウンロードしたファイルを指定のフォルダに格納します。
※「トリガー」:フロー起動のきっかけとなるアクション、「オペレーション」:トリガー起動後、フロー内で処理を行うアクション
■このワークフローのカスタムポイント
- Google Meetの録画データは、お使いのGoogle Driveアカウント内の特定のフォルダに保存されるため、そのフォルダをファイルの取得元として正確に設定してください。
- Dropboxにファイルをアップロードするアクションで、チームの運用ルールなどに合わせて格納先のフォルダを任意で指定してください。
■注意事項
- Google Meet、DropboxのそれぞれとYoomを連携してください。
■概要
Google Meetでの会議後、録画データを手動でダウンロードしてBoxへ格納する作業に、手間や時間を取られていないでしょうか。重要な会議の記録を確実に保管したいものの、こうした単純作業は負担になりがちであり、格納漏れなどのミスが発生する可能性もあります。このワークフローを活用すれば、Google Meetの会議終了をきっかけに、録画データを自動でBoxに格納できるため、こうした課題を解消し、確実な情報共有と管理を実現します。
■このテンプレートをおすすめする方
- Google Meetでの会議が多く、録画データをBoxで管理している方
- 会議後の録画データのダウンロードやアップロード作業を効率化したい方
- 手作業によるファイルの格納漏れを防ぎ、情報共有を徹底したいチームのリーダーの方
■このテンプレートを使うメリット
- 会議終了後に自動で録画データがBoxへ格納されるため、これまで手作業に費やしていたダウンロードやアップロードの時間を削減できます。
- 手動での作業で起こりがちなファイルの保存忘れや格納ミスといったヒューマンエラーを防ぎ、確実な情報資産の管理に繋がります。
■フローボットの流れ
- はじめに、Google Meet、Google Drive、BoxをYoomと連携します。
- 次に、トリガーでGoogle Meetのアプリトリガーを設定し、会議の終了をフローボット起動のきっかけとします。
- オペレーションで待機機能を設定し、録画データがGoogle Driveに保存されるまで一定時間待機させます。
- 次に、オペレーションでGoogle Meetのアクションを設定し、終了した会議の情報を取得します。
- 続けて、オペレーションでGoogle Driveのアクションを設定し、会議情報に紐づく録画ファイルをダウンロードします。
- 最後に、オペレーションでBoxのアクションを設定し、ダウンロードしたファイルを指定のフォルダへ格納します。
※「トリガー」:フロー起動のきっかけとなるアクション、「オペレーション」:トリガー起動後、フロー内で処理を行うアクション
■このワークフローのカスタムポイント
- Google Meetのトリガー設定では、会議終了を検知するポーリング(確認)間隔などを任意で設定してください。
- Google Meetのオペレーション設定では、どの会議の録画データを対象とするか、会議IDを指定する必要があります。
- Google Driveのオペレーション設定では、ダウンロードしたい録画データのファイルIDを正しく指定してください。
- Boxにファイルを格納するオペレーションでは、保存する際のファイル名や格納先となるフォルダのコンテンツIDを任意で設定してください。
■注意事項
- Google Meet、Google Drive、BoxのそれぞれとYoomを連携してください。
- 「待機する」オペレーションはチームプラン・サクセスプランでのみご利用いただける機能となっております。フリープラン・ミニプランの場合は設定しているフローボットのオペレーションはエラーとなりますので、ご注意ください。
- チームプランやサクセスプランなどの有料プランは、2週間の無料トライアルを行うことが可能です。無料トライアル中には制限対象のアプリや機能(オペレーション)を使用することができます。
- トリガーは5分、10分、15分、30分、60分の間隔で起動間隔を選択できます。
- プランによって最短の起動間隔が異なりますので、ご注意ください。
- ダウンロード可能なファイル容量は最大300MBまでです。アプリの仕様によっては300MB未満になる可能性があるので、ご注意ください。
- トリガー、各オペレーションでの取り扱い可能なファイル容量の詳細は下記をご参照ください。
■概要
オンラインでの打ち合わせが増える中で、Google Meetの録画データを手作業でDropboxに格納する作業に手間を感じていませんか。単純な作業ですが、会議の数が増えると管理が煩雑になり、他の業務を圧迫することもあります。このワークフローを活用すれば、Google Meetの会議終了をきっかけに、録画データを自動でDropboxの指定フォルダに格納できます。これにより、手作業によるデータ管理の手間や保存漏れといった課題を解消します。
■このテンプレートをおすすめする方
- Google Meetの録画データを日常的にDropboxへ手動で移動させている方
- 会議の録画データをチームで共有しており、管理の手間を効率化したいと考えている方
- 単純作業を自動化することで、本来注力すべきコア業務の時間を確保したい方
■このテンプレートを使うメリット
- 会議終了後、録画データが自動でDropboxに格納されるため、これまで手作業に費やしていたダウンロードやアップロードの時間を短縮できます。
- 手作業によるファイルの移動が不要になるので、保存のし忘れや格納先の指定間違いといったヒューマンエラーの防止に繋がります。
■フローボットの流れ
- はじめに、Google Meet、Google Drive、DropboxをYoomと連携します。
- 次に、トリガーでGoogle Meetを選択し、「会議が終了したら」フローが起動するように設定します。
- オペレーションで待機機能を設定し、Google Driveに録画ファイルが生成されるまで一定時間待機させます。
- 次に、Google Driveから該当の録画ファイルをダウンロードするアクションを設定します。
- 最後に、Dropboxの「ファイルをアップロードする」アクションを設定し、ダウンロードしたファイルを指定のフォルダに格納します。
※「トリガー」:フロー起動のきっかけとなるアクション、「オペレーション」:トリガー起動後、フロー内で処理を行うアクション
■このワークフローのカスタムポイント
- Google Meetの録画データは、お使いのGoogle Driveアカウント内の特定のフォルダに保存されるため、そのフォルダをファイルの取得元として正確に設定してください。
- Dropboxにファイルをアップロードするアクションで、チームの運用ルールなどに合わせて格納先のフォルダを任意で指定してください。
■注意事項
- Google Meet、DropboxのそれぞれとYoomを連携してください。
Notionを活用した自動化例
Notionのデータをデータベースに連携する
Notion内のデータをSFAやCRMなど、様々なデータベースへ自動で連携します。
■概要Notionで管理しているリード情報を、営業活動のためにSalesforceへ一つひとつ手作業で入力していませんか?この作業は手間がかかるだけでなく、入力ミスや転記漏れといったヒューマンエラーの原因にもなりかねません。このワークフローを活用すれば、Notionのデータベースに新しいリード情報が追加されると、自動でSalesforceにも情報が連携されるため、こうしたリード管理の課題をスムーズに解消できます。■このテンプレートをおすすめする方- Notionで取得したリード情報を手作業でSalesforceに転記している方
- リード情報の入力ミスや反映漏れを防ぎ、データ精度を高めたいと考えている方
- マーケティング部門とセールス部門間のスムーズな情報連携を実現したい方
■このテンプレートを使うメリット- Notionに情報が追加されると自動でSalesforceにリードが作成されるため、これまで手作業で行っていたデータ入力の時間を短縮できます
- 手作業でのデータ転記が不要になることで、入力ミスや反映漏れといったヒューマンエラーを防ぎ、データの正確性を保つことに繋がります
■フローボットの流れ- はじめに、NotionとSalesforceをYoomと連携します
- 次に、トリガーでNotionを選択し、「特定のデータソースのページが作成・更新されたら」というアクションを設定します
- 次に、オペレーションで分岐機能を設定し、新規ページかどうかで後続の処理を分岐させます
- 続いて、オペレーションでNotionの「レコードを取得する(ID検索)」アクションを設定し、トリガーで検知したページの情報を取得します
- 最後に、オペレーションでSalesforceの「リードオブジェクトのレコードを作成」アクションを設定し、Notionから取得した情報を紐付けてリードを作成します
※「トリガー」:フロー起動のきっかけとなるアクション、「オペレーション」:トリガー起動後、フロー内で処理を行うアクション ■このワークフローのカスタムポイント- Notionのトリガー設定では、リード情報を管理している任意のデータベースを監視対象として選択できます
- Salesforceにリードを作成する際、各項目に登録する内容は、Notionから取得した情報を紐付けるだけでなく、固定のテキストを入力するなど自由にカスタマイズが可能です
■注意事項- Notion、SalesforceのそれぞれとYoomを連携してください。
- Salesforceはチームプラン・サクセスプランでのみご利用いただけるアプリとなっております。フリープラン・ミニプランの場合は設定しているフローボットのオペレーションやデータコネクトはエラーとなりますので、ご注意ください。
- 分岐はミニプラン以上のプランでご利用いただける機能(オペレーション)となっております。フリープランの場合は設定しているフローボットのオペレーションはエラーとなりますので、ご注意ください。
- チームプランやサクセスプラン、ミニプランなどの有料プランは、2週間の無料トライアルを行うことが可能です。無料トライアル中には制限対象のアプリや機能(オペレーション)を使用することができます。
- トリガーは5分、10分、15分、30分、60分の間隔で起動間隔を選択できます。
- プランによって最短の起動間隔が異なりますので、ご注意ください。
■概要NotionとHubSpotで顧客情報を管理していると、両方のツールに同じ情報を手作業で入力する手間が発生しがちです。また、手入力による情報の転記ミスや登録漏れは避けたい課題ではないでしょうか。このワークフローを活用すれば、Notionのデータソースに顧客情報を追加するだけで、HubSpotにもコンタクト情報が自動で作成されるため、こうした二重入力の手間やヒューマンエラーのリスクを解消できます。■このテンプレートをおすすめする方- NotionとHubSpotで顧客情報を管理しており、二重入力の手間をなくしたい方
- 手作業による情報登録でのミスや漏れを防ぎ、データ精度を向上させたい方
- 営業やマーケティングにおける定型業務を自動化し、コア業務に集中したい方
■このテンプレートを使うメリット- Notionへの情報追加をきっかけにHubSpotのコンタクトが自動で作成されるため、これまで手作業での転記に費やしていた時間を削減できます。
- システム間で直接データが連携されるので、手入力による登録情報の誤りや更新漏れといったヒューマンエラーの防止に繋がります。
■フローボットの流れ- はじめに、NotionとHubSpotをYoomと連携します。
- 次に、トリガーでNotionを選択し、「特定のデータソースのページが作成・更新されたら」というアクションを設定します。
- 次に、オペレーションで分岐機能を設定し、新規ページかどうかに基づいて後続の処理を分岐させます。
- 続けて、オペレーションでNotionの「レコードを取得する(ID検索)」アクションを設定し、トリガーとなったページの情報を取得します。
- 最後に、オペレーションでHubSpotの「コンタクトの作成」アクションを設定し、Notionから取得した情報を紐づけてコンタクトを作成します。
※「トリガー」:フロー起動のきっかけとなるアクション、「オペレーション」:トリガー起動後、フロー内で処理を行うアクション■このワークフローのカスタムポイント- Notionのトリガー設定では、顧客情報を管理しているデータソースなど、連携の起点としたいデータソースを任意で指定してください。
- HubSpotでコンタクトを作成するオペレーションでは、氏名やメールアドレスなどの各項目に、Notionから取得した情報を変数として設定したり、固定の値を入力したりすることが可能です。
■注意事項- Notion、HubSpotのそれぞれとYoomを連携してください。
- トリガーは5分、10分、15分、30分、60分の間隔で起動間隔を選択できます。
- 分岐はパーソナルプラン以上のプランでご利用いただける機能(オペレーション)となっております。フリープランの場合は設定しているフローボットのオペレーションはエラーとなりますので、ご注意ください。
- パーソナルプランなどの有料プランは、2週間の無料トライアルを行うことが可能です。無料トライアル中には制限対象のアプリや機能(オペレーション)を使用することができます。
■概要Notionでタスクやプロジェクト管理を行い、その情報をGoogle スプレッドシートで集計・分析しているものの、手作業でのデータ転記に手間を感じていませんか?情報の更新漏れや入力ミスが発生する懸念もあります。このワークフローを活用すれば、Notionのデータベースに情報が追加・更新されると、指定したGoogle スプレッドシートへ自動でデータが追加されるため、こうした二重入力の手間を削減できます。
■このテンプレートをおすすめする方- NotionとGoogle スプレッドシートを併用し、二重入力の手間に課題を感じている方
- 手作業によるデータ転記での入力漏れやミスを減らし、業務を効率化したい方
- Notionのデータベース情報を起点に、様々なデータ管理を自動化したいと考えている方
■このテンプレートを使うメリット- Notionのデータベース更新をトリガーに、自動でGoogle スプレッドシートへレコードが追加されるため、データ転記作業の時間を短縮できます。
- 手作業でのデータ移行が減ることで、コピー&ペーストによる入力間違いや更新漏れといったヒューマンエラーの防止に繋がります。
■フローボットの流れ- はじめに、NotionとGoogle スプレッドシートをYoomと連携します。
- 次に、トリガーでNotionを選択し、「データベースが作成または更新されたら」を設定します。
- 最後に、オペレーションでGoogle スプレッドシートを選択し、「レコードを追加する」アクションを設定して、Notionから取得した情報を紐付けます。
※「トリガー」:フロー起動のきっかけとなるアクション、「オペレーション」:トリガー起動後、フロー内で処理を行うアクション
■このワークフローのカスタムポイント- Notionのトリガー設定では、連携の起点としたいデータベースを任意で設定してください。
- Google スプレッドシートにレコードを追加する際に、Notionデータベースのどの情報をどの列に追加するかを任意で設定できます。
■注意事項- Notion、Google スプレッドシートのそれぞれとYoomを連携してください。
- トリガーは5分、10分、15分、30分、60分の間隔で起動間隔を選択できます。
- プランによって最短の起動間隔が異なりますので、ご注意ください。
- Notionで取得したリード情報を手作業でSalesforceに転記している方
- リード情報の入力ミスや反映漏れを防ぎ、データ精度を高めたいと考えている方
- マーケティング部門とセールス部門間のスムーズな情報連携を実現したい方
- Notionに情報が追加されると自動でSalesforceにリードが作成されるため、これまで手作業で行っていたデータ入力の時間を短縮できます
- 手作業でのデータ転記が不要になることで、入力ミスや反映漏れといったヒューマンエラーを防ぎ、データの正確性を保つことに繋がります
- はじめに、NotionとSalesforceをYoomと連携します
- 次に、トリガーでNotionを選択し、「特定のデータソースのページが作成・更新されたら」というアクションを設定します
- 次に、オペレーションで分岐機能を設定し、新規ページかどうかで後続の処理を分岐させます
- 続いて、オペレーションでNotionの「レコードを取得する(ID検索)」アクションを設定し、トリガーで検知したページの情報を取得します
- 最後に、オペレーションでSalesforceの「リードオブジェクトのレコードを作成」アクションを設定し、Notionから取得した情報を紐付けてリードを作成します
- Notionのトリガー設定では、リード情報を管理している任意のデータベースを監視対象として選択できます
- Salesforceにリードを作成する際、各項目に登録する内容は、Notionから取得した情報を紐付けるだけでなく、固定のテキストを入力するなど自由にカスタマイズが可能です
- Notion、SalesforceのそれぞれとYoomを連携してください。
- Salesforceはチームプラン・サクセスプランでのみご利用いただけるアプリとなっております。フリープラン・ミニプランの場合は設定しているフローボットのオペレーションやデータコネクトはエラーとなりますので、ご注意ください。
- 分岐はミニプラン以上のプランでご利用いただける機能(オペレーション)となっております。フリープランの場合は設定しているフローボットのオペレーションはエラーとなりますので、ご注意ください。
- チームプランやサクセスプラン、ミニプランなどの有料プランは、2週間の無料トライアルを行うことが可能です。無料トライアル中には制限対象のアプリや機能(オペレーション)を使用することができます。
- トリガーは5分、10分、15分、30分、60分の間隔で起動間隔を選択できます。
- プランによって最短の起動間隔が異なりますので、ご注意ください。
- NotionとHubSpotで顧客情報を管理しており、二重入力の手間をなくしたい方
- 手作業による情報登録でのミスや漏れを防ぎ、データ精度を向上させたい方
- 営業やマーケティングにおける定型業務を自動化し、コア業務に集中したい方
- Notionへの情報追加をきっかけにHubSpotのコンタクトが自動で作成されるため、これまで手作業での転記に費やしていた時間を削減できます。
- システム間で直接データが連携されるので、手入力による登録情報の誤りや更新漏れといったヒューマンエラーの防止に繋がります。
- はじめに、NotionとHubSpotをYoomと連携します。
- 次に、トリガーでNotionを選択し、「特定のデータソースのページが作成・更新されたら」というアクションを設定します。
- 次に、オペレーションで分岐機能を設定し、新規ページかどうかに基づいて後続の処理を分岐させます。
- 続けて、オペレーションでNotionの「レコードを取得する(ID検索)」アクションを設定し、トリガーとなったページの情報を取得します。
- 最後に、オペレーションでHubSpotの「コンタクトの作成」アクションを設定し、Notionから取得した情報を紐づけてコンタクトを作成します。
- Notionのトリガー設定では、顧客情報を管理しているデータソースなど、連携の起点としたいデータソースを任意で指定してください。
- HubSpotでコンタクトを作成するオペレーションでは、氏名やメールアドレスなどの各項目に、Notionから取得した情報を変数として設定したり、固定の値を入力したりすることが可能です。
- Notion、HubSpotのそれぞれとYoomを連携してください。
- トリガーは5分、10分、15分、30分、60分の間隔で起動間隔を選択できます。
- 分岐はパーソナルプラン以上のプランでご利用いただける機能(オペレーション)となっております。フリープランの場合は設定しているフローボットのオペレーションはエラーとなりますので、ご注意ください。
- パーソナルプランなどの有料プランは、2週間の無料トライアルを行うことが可能です。無料トライアル中には制限対象のアプリや機能(オペレーション)を使用することができます。
- NotionとGoogle スプレッドシートを併用し、二重入力の手間に課題を感じている方
- 手作業によるデータ転記での入力漏れやミスを減らし、業務を効率化したい方
- Notionのデータベース情報を起点に、様々なデータ管理を自動化したいと考えている方
- Notionのデータベース更新をトリガーに、自動でGoogle スプレッドシートへレコードが追加されるため、データ転記作業の時間を短縮できます。
- 手作業でのデータ移行が減ることで、コピー&ペーストによる入力間違いや更新漏れといったヒューマンエラーの防止に繋がります。
- はじめに、NotionとGoogle スプレッドシートをYoomと連携します。
- 次に、トリガーでNotionを選択し、「データベースが作成または更新されたら」を設定します。
- 最後に、オペレーションでGoogle スプレッドシートを選択し、「レコードを追加する」アクションを設定して、Notionから取得した情報を紐付けます。
■このワークフローのカスタムポイント
- Notionのトリガー設定では、連携の起点としたいデータベースを任意で設定してください。
- Google スプレッドシートにレコードを追加する際に、Notionデータベースのどの情報をどの列に追加するかを任意で設定できます。
- Notion、Google スプレッドシートのそれぞれとYoomを連携してください。
- トリガーは5分、10分、15分、30分、60分の間隔で起動間隔を選択できます。
- プランによって最短の起動間隔が異なりますので、ご注意ください。
Notionのデータをチャットツールに通知する
Notionへのデータ登録や更新が行われたら、チャットツールへ通知します。
■概要Notionで作成した議事録やドキュメントの更新情報を、チームメンバーに都度手作業で共有していませんか?この情報共有のひと手間が積み重なると、本来の業務を圧迫するだけでなく、共有漏れや伝達の遅れに繋がることもあります。このワークフローを活用すれば、Notionのページ作成や更新をトリガーにして、Slackへ自動で通知を送ることが可能です。これにより、チーム内の情報共有を円滑にし、スムーズな連携を実現します。■このテンプレートをおすすめする方- Notionを情報共有のハブとして利用し、Slackでコミュニケーションを取っている方
- Notionの更新を手動でSlackに通知しており、手間や共有漏れに課題を感じている方
- チーム内の情報共有を自動化し、見逃しを防ぎたいと考えているすべてのビジネスパーソン
■このテンプレートを使うメリット- Notionでのページ作成・更新と同時にSlackへ自動で通知が飛ぶため、手作業での共有にかかっていた時間を削減し、コア業務に集中できます。
- 通知プロセスが自動化されることで、重要な更新情報の共有漏れや伝達の遅延を防ぎ、チーム内のスムーズな情報連携を促進します。
■フローボットの流れ- はじめに、NotionとSlackをYoomと連携します。
- 次に、トリガーでNotionを選択し、「ページが作成または更新されたら」というアクションを設定します。
- 最後に、オペレーションでSlackを選択し、「チャンネルにメッセージを送る」アクションを設定して、Notionの更新情報を任意のチャンネルに通知します。
※「トリガー」:フロー起動のきっかけとなるアクション、「オペレーション」:トリガー起動後、フロー内で処理を行うアクション
■このワークフローのカスタムポイント- Slackに通知を送るオペレーションでは、通知先のチャンネルやメンション、通知本文を任意の内容で設定することが可能です。プロジェクトやチームに合わせて、最適な通知内容にカスタマイズしてください。
■注意事項- Notion、SlackのそれぞれとYoomを連携してください。
- トリガーは5分、10分、15分、30分、60分の間隔で起動間隔を選択できます。
- プランによって最短の起動間隔が異なりますので、ご注意ください。
■概要Notionでプロジェクト管理や情報集約を行っているものの、新規情報がチームにスムーズに共有されず、確認漏れが発生することはないでしょうか。情報追加のたびに手動で通知するのは手間がかかり、重要な連絡が遅れてしまうこともあります。 このワークフローを活用すれば、Notionのデータベースに情報が追加された際に、自動でMicrosoft Teamsへ通知を送ることが可能になり、情報共有の円滑化を実現します。■このテンプレートをおすすめする方- NotionとMicrosoft Teamsを併用し、情報共有の効率化を図りたいと考えている方
- Notionデータベースの追加情報を手動でコピー&ペーストして、チームに通知している方
- プロジェクトやタスクに関する新規情報を迅速に関係者へ伝えたいマネージャーの方
■このテンプレートを使うメリット- Notionデータベースに新規情報が追加されると、自動でMicrosoft Teamsに通知が飛ぶため、手作業での連絡に費やしていた時間を短縮できます
- 通知の送り忘れや伝達ミスといったヒューマンエラーを防ぎ、チーム内での確実な情報共有をサポートします
■フローボットの流れ- はじめに、NotionとMicrosoft TeamsをYoomと連携します
- 次に、トリガーでNotionを選択し、「特定のデータソースのページが作成・更新されたら」を設定します
- オペレーションの分岐機能を設定し、新規ページの場合のみ後続のアクションが実行されるようにします
- 続いて、オペレーションでNotionの「レコードを取得する(ID検索)」を選択し、作成されたページの詳細情報を取得します
- 最後に、オペレーションでMicrosoft Teamsの「チャネルにメッセージを送る」を設定し、取得した情報を指定のチャネルに通知します
※「トリガー」:フロー起動のきっかけとなるアクション、「オペレーション」:トリガー起動後、フロー内で処理を行うアクション
■このワークフローのカスタムポイント- Notionのトリガー設定では、通知の対象としたいデータソースを任意で指定することが可能です
- Microsoft Teamsでは、通知先を任意で設定できます。また、メッセージ内容は、固定のテキストや前段で取得した情報を使用して、自由にカスタマイズできます。
■注意事項- Notion、Microsoft TeamsのそれぞれとYoomを連携してください。
- 分岐はミニプラン以上のプランでご利用いただける機能(オペレーション)となっております。フリープランの場合は設定しているフローボットのオペレーションはエラーとなりますので、ご注意ください。
- ミニプランなどの有料プランは、2週間の無料トライアルを行うことが可能です。無料トライアル中には制限対象のアプリや機能(オペレーション)を使用することができます。
- トリガーは5分、10分、15分、30分、60分の間隔で起動間隔を選択できます。
- プランによって最短の起動間隔が異なりますので、ご注意ください。
- Microsoft365(旧Office365)には、家庭向けプランと一般法人向けプラン(Microsoft365 Business)があり、一般法人向けプランに加入していない場合には認証に失敗する可能性があります。
■概要Notionでタスク管理や情報共有を行う際、新規データが追加されるたびに手作業でGoogle Chatに通知するのは手間がかかり、通知漏れのリスクも伴います。重要な情報共有が遅れたり、抜け漏れが発生したりすると、業務に支障をきたすことも少なくありません。このワークフローを活用すれば、Notionのデータソースに情報が追加されると、自動でGoogle Chatに通知が送信されるため、こうした情報共有の課題を解消できます。
■このテンプレートをおすすめする方- Notionで管理している情報を、都度手作業でGoogle Chatに通知している方
- 手作業による通知で、連絡漏れや共有の遅延といったミスをなくしたいと考えている方
- チーム内の情報共有をより円滑にし、プロジェクトの進行をスムーズにしたいマネージャーの方
■このテンプレートを使うメリット- Notionのデータソースに情報が追加されると自動で通知されるため、これまで手作業での連絡に費やしていた時間を他の業務に充てることができます
- 手作業による通知漏れや宛先の間違いといったヒューマンエラーを防ぎ、確実な情報共有を実現します
■フローボットの流れ- はじめに、NotionとGoogle ChatをYoomと連携します
- 次に、トリガーでNotionを選択し、「特定のデータソースのページが作成・更新されたら」というアクションを設定します。
- 次に、オペレーションで分岐機能を設定し、新規作成時のみ後続の処理へ進むように分岐させます。
- 続けて、オペレーションでNotionの「レコードを取得する(ID検索)」アクションを設定し、トリガーとなったページの情報を取得します。
- 最後に、オペレーションでGoogle Chatの「スペースにメッセージを送信」アクションを設定し、指定したスペースに通知メッセージを送信します
※「トリガー」:フロー起動のきっかけとなるアクション、「オペレーション」:トリガー起動後、フロー内で処理を行うアクション
■このワークフローのカスタムポイント- Google Chatへの通知設定では、メッセージを送信するスペースを任意で指定することが可能です
- 通知するメッセージの本文は、固定のテキストを設定するだけでなく、トリガーで取得したNotionのページタイトルやプロパティ情報などを変数として埋め込み、動的に変更できます
■注意事項- Notion、Google ChatのそれぞれとYoomを連携してください。
- トリガーは5分、10分、15分、30分、60分の間隔で起動間隔を選択できます。プランによって最短の起動間隔が異なりますので、ご注意ください。
- Google Chatとの連携はGoogle Workspaceの場合のみ可能です。詳細は「Google Chatでスペースにメッセージを送る方法」を参照ください。
- 分岐はパーソナルプラン以上のプランでご利用いただける機能(オペレーション)となっております。フリープランの場合は設定しているフローボットのオペレーションはエラーとなりますので、ご注意ください。
- パーソナルプランなどの有料プランは、2週間の無料トライアルを行うことが可能です。無料トライアル中には制限対象のアプリや機能(オペレーション)を使用することができます。詳しくは、「料金プランのページ」をご参照ください。
- Notionを情報共有のハブとして利用し、Slackでコミュニケーションを取っている方
- Notionの更新を手動でSlackに通知しており、手間や共有漏れに課題を感じている方
- チーム内の情報共有を自動化し、見逃しを防ぎたいと考えているすべてのビジネスパーソン
- Notionでのページ作成・更新と同時にSlackへ自動で通知が飛ぶため、手作業での共有にかかっていた時間を削減し、コア業務に集中できます。
- 通知プロセスが自動化されることで、重要な更新情報の共有漏れや伝達の遅延を防ぎ、チーム内のスムーズな情報連携を促進します。
- はじめに、NotionとSlackをYoomと連携します。
- 次に、トリガーでNotionを選択し、「ページが作成または更新されたら」というアクションを設定します。
- 最後に、オペレーションでSlackを選択し、「チャンネルにメッセージを送る」アクションを設定して、Notionの更新情報を任意のチャンネルに通知します。
■このワークフローのカスタムポイント
- Slackに通知を送るオペレーションでは、通知先のチャンネルやメンション、通知本文を任意の内容で設定することが可能です。プロジェクトやチームに合わせて、最適な通知内容にカスタマイズしてください。
- Notion、SlackのそれぞれとYoomを連携してください。
- トリガーは5分、10分、15分、30分、60分の間隔で起動間隔を選択できます。
- プランによって最短の起動間隔が異なりますので、ご注意ください。
- NotionとMicrosoft Teamsを併用し、情報共有の効率化を図りたいと考えている方
- Notionデータベースの追加情報を手動でコピー&ペーストして、チームに通知している方
- プロジェクトやタスクに関する新規情報を迅速に関係者へ伝えたいマネージャーの方
- Notionデータベースに新規情報が追加されると、自動でMicrosoft Teamsに通知が飛ぶため、手作業での連絡に費やしていた時間を短縮できます
- 通知の送り忘れや伝達ミスといったヒューマンエラーを防ぎ、チーム内での確実な情報共有をサポートします
- はじめに、NotionとMicrosoft TeamsをYoomと連携します
- 次に、トリガーでNotionを選択し、「特定のデータソースのページが作成・更新されたら」を設定します
- オペレーションの分岐機能を設定し、新規ページの場合のみ後続のアクションが実行されるようにします
- 続いて、オペレーションでNotionの「レコードを取得する(ID検索)」を選択し、作成されたページの詳細情報を取得します
- 最後に、オペレーションでMicrosoft Teamsの「チャネルにメッセージを送る」を設定し、取得した情報を指定のチャネルに通知します
■このワークフローのカスタムポイント
- Notionのトリガー設定では、通知の対象としたいデータソースを任意で指定することが可能です
- Microsoft Teamsでは、通知先を任意で設定できます。また、メッセージ内容は、固定のテキストや前段で取得した情報を使用して、自由にカスタマイズできます。
- Notion、Microsoft TeamsのそれぞれとYoomを連携してください。
- 分岐はミニプラン以上のプランでご利用いただける機能(オペレーション)となっております。フリープランの場合は設定しているフローボットのオペレーションはエラーとなりますので、ご注意ください。
- ミニプランなどの有料プランは、2週間の無料トライアルを行うことが可能です。無料トライアル中には制限対象のアプリや機能(オペレーション)を使用することができます。
- トリガーは5分、10分、15分、30分、60分の間隔で起動間隔を選択できます。
- プランによって最短の起動間隔が異なりますので、ご注意ください。
- Microsoft365(旧Office365)には、家庭向けプランと一般法人向けプラン(Microsoft365 Business)があり、一般法人向けプランに加入していない場合には認証に失敗する可能性があります。
■このテンプレートをおすすめする方
- Notionで管理している情報を、都度手作業でGoogle Chatに通知している方
- 手作業による通知で、連絡漏れや共有の遅延といったミスをなくしたいと考えている方
- チーム内の情報共有をより円滑にし、プロジェクトの進行をスムーズにしたいマネージャーの方
■このテンプレートを使うメリット
- Notionのデータソースに情報が追加されると自動で通知されるため、これまで手作業での連絡に費やしていた時間を他の業務に充てることができます
- 手作業による通知漏れや宛先の間違いといったヒューマンエラーを防ぎ、確実な情報共有を実現します
■フローボットの流れ
- はじめに、NotionとGoogle ChatをYoomと連携します
- 次に、トリガーでNotionを選択し、「特定のデータソースのページが作成・更新されたら」というアクションを設定します。
- 次に、オペレーションで分岐機能を設定し、新規作成時のみ後続の処理へ進むように分岐させます。
- 続けて、オペレーションでNotionの「レコードを取得する(ID検索)」アクションを設定し、トリガーとなったページの情報を取得します。
- 最後に、オペレーションでGoogle Chatの「スペースにメッセージを送信」アクションを設定し、指定したスペースに通知メッセージを送信します
■このワークフローのカスタムポイント
- Google Chatへの通知設定では、メッセージを送信するスペースを任意で指定することが可能です
- 通知するメッセージの本文は、固定のテキストを設定するだけでなく、トリガーで取得したNotionのページタイトルやプロパティ情報などを変数として埋め込み、動的に変更できます
■注意事項
- Notion、Google ChatのそれぞれとYoomを連携してください。
- トリガーは5分、10分、15分、30分、60分の間隔で起動間隔を選択できます。プランによって最短の起動間隔が異なりますので、ご注意ください。
- Google Chatとの連携はGoogle Workspaceの場合のみ可能です。詳細は「Google Chatでスペースにメッセージを送る方法」を参照ください。
- 分岐はパーソナルプラン以上のプランでご利用いただける機能(オペレーション)となっております。フリープランの場合は設定しているフローボットのオペレーションはエラーとなりますので、ご注意ください。
- パーソナルプランなどの有料プランは、2週間の無料トライアルを行うことが可能です。無料トライアル中には制限対象のアプリや機能(オペレーション)を使用することができます。詳しくは、「料金プランのページ」をご参照ください。
Notionのデータをもとに書類を作成する
Notion内のデータをもとに見積書や請求書など、様々な書類を自動で発します。
■概要Notionで案件管理をしているものの、見積書の作成はGoogle スプレッドシートで行い、作成後はGmailで手動送付するなど、業務が分断され非効率に感じていないでしょうか。このワークフローを活用すれば、Notionのデータベース情報をトリガーに、Google スプレッドシートで見積書を自動で作成し、Gmailで送信までの一連の流れを自動化できます。転記作業や手動でのメール送信の手間を省き、業務を円滑に進めることが可能です。
Chrome拡張機能を使用したトリガーを使用することで、Notion上から直接トリガーを起動させることができます。
■このテンプレートをおすすめする方- NotionとGoogle スプレッドシートを併用し、見積書作成を手作業で行っている方
- 見積書の作成から顧客へのメール送信までの一連のタスクを効率化したいと考えている方
- 手作業による見積書の宛先や金額の入力ミスをなくし、業務の正確性を高めたい方
■このテンプレートを使うメリット- Notionの情報をもとに、Google スプレッドシートでの書類作成からメール送信までを自動化できるため、これまで手作業に費やしていた時間を削減します。
- 手作業によるデータの転記が不要になるため、見積書の金額や宛名の間違いといったヒューマンエラーの発生を防ぎ、業務の品質向上に繋がります。
■フローボットの流れ- はじめに、Gmail、Google スプレッドシート、NotionをYoomと連携します。
- 次に、トリガーでNotionを選択し、「データベース上でページを選択して起動」するよう設定します。
- オペレーションでは、トリガーで選択したページの情報を取得するために、Notionの「レコードを取得する」アクションを設定します。
- 次に、取得した情報をもとにGoogle スプレッドシートで見積書を発行するため、「書類を発行する」アクションを設定します。
- 最後に、オペレーションでGmailの「メールを送る」アクションを設定し、作成した見積書を添付して顧客に自動でメールを送信します。
※「トリガー」:フロー起動のきっかけとなるアクション、「オペレーション」:トリガー起動後、フロー内で処理を行うアクション
■このワークフローのカスタムポイント- Notionでレコードを取得する際に、対象のデータベースや検索条件などを任意で設定してください。
- 書類発行機能では、テンプレートとして使用するGoogle スプレッドシートの雛形を任意で設定でき、Notionから取得した情報をどのセルに反映させるかを指定できます。
- Gmailの設定では、宛先や件名、本文を自由に設定することが可能です。Notionから取得した顧客名や会社名などの情報を変数として件名や本文に差し込むこともできます。
■注意事項- Gmail、Google スプレッドシート、NotionのそれぞれとYoomを連携してください。
- Chrome拡張機能を使用したトリガーを使用することで、Notion上から直接トリガーを起動させることができます。
- Chrome拡張機能を使ったトリガーの設定方法は「Chrome拡張機能を使ったトリガーの設定方法」をご参照ください。
- 「書類を発行する」アクションでは、任意のGoogle Driveの格納先を設定可能です。
■概要Notionで管理している情報を基に、手作業で見積書や請求書を作成し、Gmailで送付する業務に手間を感じていませんか。転記ミスや送付漏れなどのヒューマンエラーが起こりやすい作業でもあります。このワークフローを活用すれば、Notionのデータベースに情報を追加するだけで、Googleドキュメントを基にしたPDFが自動で発行され、Gmailで送付までを完結できるため、こうした定型業務の効率化を実現します。■このテンプレートをおすすめする方- Notionで顧客情報などを管理し、手作業で書類発行やメール送付を行っている方
- 書類作成時の転記ミスや、Gmailでのメール送信漏れなどの人的ミスを防ぎたい方
- 定型的な書類発行業務を自動化し、コア業務に集中できる環境を整えたい方
■このテンプレートを使うメリット- Notionへの情報追加を起点に、書類発行からGmailでの送付までが自動処理されるため、これまで手作業に費やしていた時間を短縮できます。
- 手作業でのデータ転記による入力間違いや、メールの宛先ミス、ファイルの添付漏れといったヒューマンエラーのリスク軽減に繋がります。
■フローボットの流れ- はじめに、Notion、Googleドキュメント、GmailをYoomと連携します。
- 次に、トリガーでNotionを選択し、「Webhookを受信したら」というアクションを設定します。
- 続いて、オペレーションでNotionの「レコードを取得する」アクションを設定し、トリガーで受信した情報から詳細なデータを取得します。
- 次に、オペレーションでGoogleドキュメントの「書類を発行する」アクションを設定し、取得したデータを用いてPDF書類を生成します。
- 最後に、オペレーションでGmailの「メールを送る」アクションを設定し、生成したPDFファイルを添付して指定の宛先にメールを送信します。
※「トリガー」:フロー起動のきっかけとなるアクション、「オペレーション」:トリガー起動後、フロー内で処理を行うアクション■このワークフローのカスタムポイント- Notionのトリガー設定では、Notion側でどのデータベースへの追加をきっかけにワークフローを起動させるか、任意で設定してください。
- Googleドキュメントの書類発行アクションでは、元となるテンプレートファイルや、書類に差し込む情報を任意で設定してください。
- Gmailでメールを送るアクションでは、送信先のメールアドレスや件名、本文などを任意の内容に設定してください。
■注意事項- Notion、Googleドキュメント、GmailのそれぞれとYoomを連携してください。
Chrome拡張機能を使用したトリガーを使用することで、Notion上から直接トリガーを起動させることができます。
■このテンプレートをおすすめする方
- NotionとGoogle スプレッドシートを併用し、見積書作成を手作業で行っている方
- 見積書の作成から顧客へのメール送信までの一連のタスクを効率化したいと考えている方
- 手作業による見積書の宛先や金額の入力ミスをなくし、業務の正確性を高めたい方
■このテンプレートを使うメリット
- Notionの情報をもとに、Google スプレッドシートでの書類作成からメール送信までを自動化できるため、これまで手作業に費やしていた時間を削減します。
- 手作業によるデータの転記が不要になるため、見積書の金額や宛名の間違いといったヒューマンエラーの発生を防ぎ、業務の品質向上に繋がります。
■フローボットの流れ
- はじめに、Gmail、Google スプレッドシート、NotionをYoomと連携します。
- 次に、トリガーでNotionを選択し、「データベース上でページを選択して起動」するよう設定します。
- オペレーションでは、トリガーで選択したページの情報を取得するために、Notionの「レコードを取得する」アクションを設定します。
- 次に、取得した情報をもとにGoogle スプレッドシートで見積書を発行するため、「書類を発行する」アクションを設定します。
- 最後に、オペレーションでGmailの「メールを送る」アクションを設定し、作成した見積書を添付して顧客に自動でメールを送信します。
■このワークフローのカスタムポイント
- Notionでレコードを取得する際に、対象のデータベースや検索条件などを任意で設定してください。
- 書類発行機能では、テンプレートとして使用するGoogle スプレッドシートの雛形を任意で設定でき、Notionから取得した情報をどのセルに反映させるかを指定できます。
- Gmailの設定では、宛先や件名、本文を自由に設定することが可能です。Notionから取得した顧客名や会社名などの情報を変数として件名や本文に差し込むこともできます。
■注意事項
- Gmail、Google スプレッドシート、NotionのそれぞれとYoomを連携してください。
- Chrome拡張機能を使用したトリガーを使用することで、Notion上から直接トリガーを起動させることができます。
- Chrome拡張機能を使ったトリガーの設定方法は「Chrome拡張機能を使ったトリガーの設定方法」をご参照ください。
- 「書類を発行する」アクションでは、任意のGoogle Driveの格納先を設定可能です。
- Notionで顧客情報などを管理し、手作業で書類発行やメール送付を行っている方
- 書類作成時の転記ミスや、Gmailでのメール送信漏れなどの人的ミスを防ぎたい方
- 定型的な書類発行業務を自動化し、コア業務に集中できる環境を整えたい方
- Notionへの情報追加を起点に、書類発行からGmailでの送付までが自動処理されるため、これまで手作業に費やしていた時間を短縮できます。
- 手作業でのデータ転記による入力間違いや、メールの宛先ミス、ファイルの添付漏れといったヒューマンエラーのリスク軽減に繋がります。
- はじめに、Notion、Googleドキュメント、GmailをYoomと連携します。
- 次に、トリガーでNotionを選択し、「Webhookを受信したら」というアクションを設定します。
- 続いて、オペレーションでNotionの「レコードを取得する」アクションを設定し、トリガーで受信した情報から詳細なデータを取得します。
- 次に、オペレーションでGoogleドキュメントの「書類を発行する」アクションを設定し、取得したデータを用いてPDF書類を生成します。
- 最後に、オペレーションでGmailの「メールを送る」アクションを設定し、生成したPDFファイルを添付して指定の宛先にメールを送信します。
- Notionのトリガー設定では、Notion側でどのデータベースへの追加をきっかけにワークフローを起動させるか、任意で設定してください。
- Googleドキュメントの書類発行アクションでは、元となるテンプレートファイルや、書類に差し込む情報を任意で設定してください。
- Gmailでメールを送るアクションでは、送信先のメールアドレスや件名、本文などを任意の内容に設定してください。
- Notion、Googleドキュメント、GmailのそれぞれとYoomを連携してください。
ご紹介したテンプレート以外にも、Notionがもっと便利になる実践的な自動化例を掲載した資料をご用意しています。
⇒Notionを使った業務自動化事例資料をダウンロード(無料)
Google MeetとNotionを連携するメリット
時間と労力の節約
会議の後に、手作業で議事録を作成していた業務を自動化できます。
議事録の作成が自動化できれば、書き起こししていた時間を大幅に削減でき、事務作業の負担を軽減することが期待できます。
その結果、これまで議事録作成していた人も、本来の重要な業務に時間を費やすことができ、生産性向上が見込めます。
情報の正確性向上
会議の内容を手動で文字起こししていると、内容のズレや情報の漏れが発生することが考えられます。
しかし自動化で書き起こしや要約をすることで、正確な情報を共有することが可能になります。
例えば、チームの決定事項などの重要な情報を記録する際にも、自動化することで、より信頼度の高い情報として提供できるでしょう。
まとめ
Google MeetとNotionの連携は、会議にまつわる事務作業を軽減でき、データの整合性も保つことができます。
結果的に、営業活動など他の重要な業務に時間を活用でき、生産性の向上が期待できます。
さらにYoomを活用することで、プログラミング不要でアプリ連携ができ、業務を自動化できるようになります。
非エンジニアでも試しやすいですね!
ぜひ、この機会にGoogle MeetとNotionを連携して、議事録作成を自動化しませんか?
Yoomのアカウント発行はこちらから。
プログラミング知識なしで手軽に構築できます。