・
Notionのデータベース情報から自動的にGmailを送信する方法

Notionはチームで情報を共有できる便利なツールなので、操作マニュアルや営業先のデータ管理など、幅広いシチュエーションで使用されていると思います。
しかし、新しい情報を追加した際の情報共有方法について、悩んでいる方も多いのではないでしょうか?
本記事では、Notionのデータベース情報を元に、自動的にGmailでメールを送信できる方法をご紹介します。
手作業で行っていた送信業務を軽減できれば、その他の業務に時間を費やすことが可能になり、業務効率も向上するかもしれません!
ノーコードでアプリを連携できるYoomを活用し、送信作業を自動化しましょう!
こんな方におすすめ
- NotionとGmailを活用している方
- NotionとGmailを連携して、業務効率化を考えている方
- NotionとGmailを連携して、顧客への定型メール送信の負担を軽減したい方
- NotionとGmailを連携して、顧客管理や定期配信に活用されている方
今すぐに試したい方へ
本記事ではノーコードツール「Yoom」を使用した連携方法をご紹介します。
難しい設定や操作は必要なく、非エンジニアの方でも簡単に実現できます。
下記のテンプレートから今すぐに始めることもできますので、ぜひお試しください!
■概要Notionで管理している顧客情報やタスク情報を元に、都度メールを作成・送信する作業は手間がかかる上に、コピー&ペーストによるミスも起こりがちではないでしょうか。このワークフローを活用すれば、Notionのデータベースから特定のページを選択するだけで、その情報を用いてGmailのメールを自動で送信できます。これにより、定型的な連絡業務の効率化や、ヒューマンエラーの防止に繋がります。
Chrome拡張機能を使用したトリガーを使用することで、Notion上から直接トリガーを起動させることができます。
■このテンプレートをおすすめする方- Notionで管理している情報を元に、Gmailで定型メールを送付している方
- 手作業でのメール作成や送信に時間がかかり、業務を効率化したいと考えている方
- メール送信時の宛先間違いや内容の転記ミスなどのヒューマンエラーを減らしたい方
■このテンプレートを使うメリット- Notionの情報を都度コピー&ペーストしてメールを作成する手間が省け、定型的な連絡業務にかかる時間を短縮できます。
- 手作業による情報の転記が不要になるため、宛先や内容の間違いといったヒューマンエラーの防止に繋がります。
■フローボットの流れ- はじめに、GmailとNotionをYoomと連携します。
- 次に、トリガーでNotionを選択し、「データベース上でページを選択して起動」アクションを設定します。
- 次に、オペレーションで再度Notionを選択し、トリガーで選択したページの情報を取得するよう設定します。
- 最後に、オペレーションでGmailの「メールを送る」アクションを設定し、Notionから取得した情報を本文などに含めてメールを送信します。
※「トリガー」:フロー起動のきっかけとなるアクション、「オペレーション」:トリガー起動後、フロー内で処理を行うアクション
■このワークフローのカスタムポイント- Gmailでメールを送るアクション設定では、Notionから取得した情報を変数として活用し、宛先(To, Cc, Bcc)、件名、メッセージ内容などを動的に設定することが可能です。
- メッセージ内容には、Notionの情報を差し込むだけでなく、固定のテキストを組み合わせることもできるため、柔軟なメール文面の作成ができます。
■注意事項- Gmail、NotionのそれぞれとYoomを連携してください。
- Chrome拡張機能を使用したトリガーを使用することで、Notion上から直接トリガーを起動させることができます。
- Chrome拡張機能を使ったトリガーの設定方法は「Chrome拡張機能を使ったトリガーの設定方法」をご参照ください。
Chrome拡張機能を使用したトリガーを使用することで、Notion上から直接トリガーを起動させることができます。
■このテンプレートをおすすめする方
- Notionで管理している情報を元に、Gmailで定型メールを送付している方
- 手作業でのメール作成や送信に時間がかかり、業務を効率化したいと考えている方
- メール送信時の宛先間違いや内容の転記ミスなどのヒューマンエラーを減らしたい方
■このテンプレートを使うメリット
- Notionの情報を都度コピー&ペーストしてメールを作成する手間が省け、定型的な連絡業務にかかる時間を短縮できます。
- 手作業による情報の転記が不要になるため、宛先や内容の間違いといったヒューマンエラーの防止に繋がります。
■フローボットの流れ
- はじめに、GmailとNotionをYoomと連携します。
- 次に、トリガーでNotionを選択し、「データベース上でページを選択して起動」アクションを設定します。
- 次に、オペレーションで再度Notionを選択し、トリガーで選択したページの情報を取得するよう設定します。
- 最後に、オペレーションでGmailの「メールを送る」アクションを設定し、Notionから取得した情報を本文などに含めてメールを送信します。
■このワークフローのカスタムポイント
- Gmailでメールを送るアクション設定では、Notionから取得した情報を変数として活用し、宛先(To, Cc, Bcc)、件名、メッセージ内容などを動的に設定することが可能です。
- メッセージ内容には、Notionの情報を差し込むだけでなく、固定のテキストを組み合わせることもできるため、柔軟なメール文面の作成ができます。
■注意事項
- Gmail、NotionのそれぞれとYoomを連携してください。
- Chrome拡張機能を使用したトリガーを使用することで、Notion上から直接トリガーを起動させることができます。
- Chrome拡張機能を使ったトリガーの設定方法は「Chrome拡張機能を使ったトリガーの設定方法」をご参照ください。
[Yoomとは]
NotionとGmailの連携フローの作り方
ここからは「Notionのデータベース情報を用いて、Gmailでメールを自動で送付する」というフローボットの作成方法をご紹介します。
簡単操作で設定できるので、画面を見ながら一緒にチャレンジしてみてください!
ステップ1:マイアプリ登録
はじめに
フローボットを作成する前に、マイアプリ登録を行います!
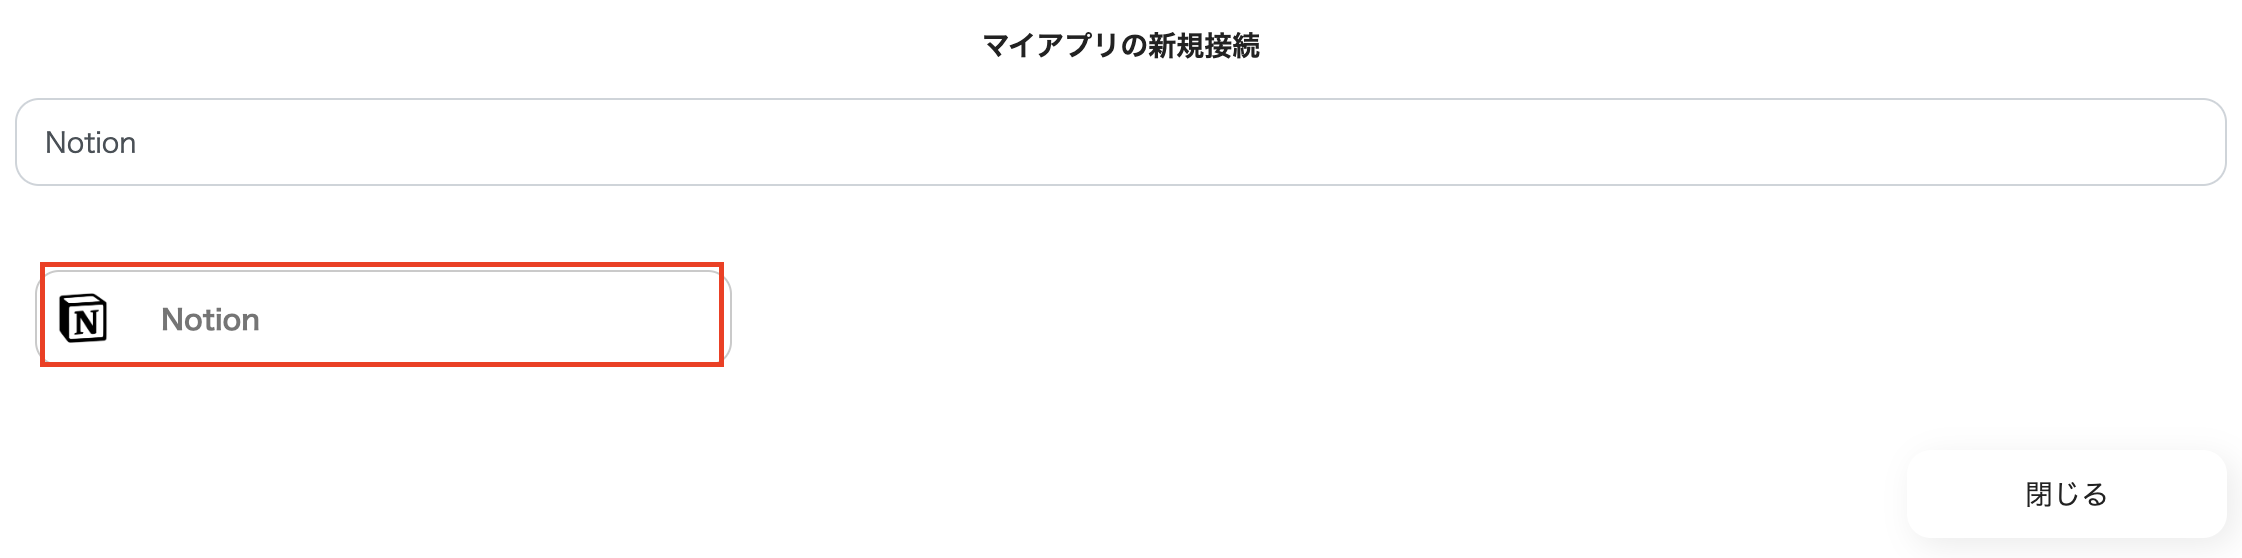
Yoomのワークスペースにログインできたら、画面左上に表示されている「マイアプリ」→「新規接続」→「連携したアプリ名」の順番でクリックします。
NotionとYoomを連携
Notionはマイアプリ登録をする前に、連携したいデータベースを作成する必要がありますので、ご準備ください!
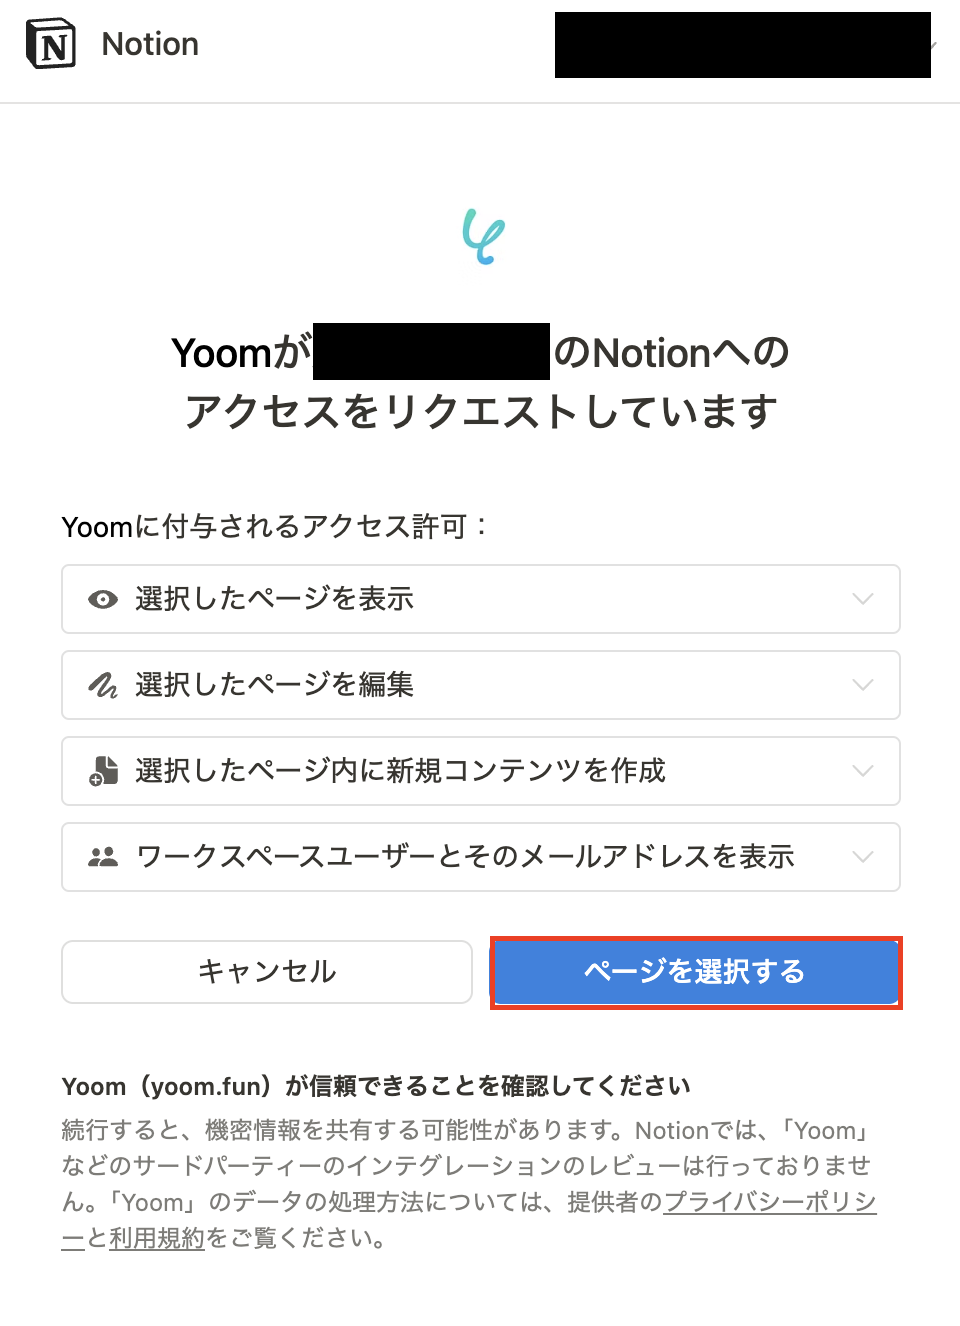
上記に記載の「はじめに」の操作を行い、マイアプリ新規接続の画面で、Notionを選択しましょう。
Notionへのアクセスをリクエストしていますという画面では「ページを選択する」をクリックします。
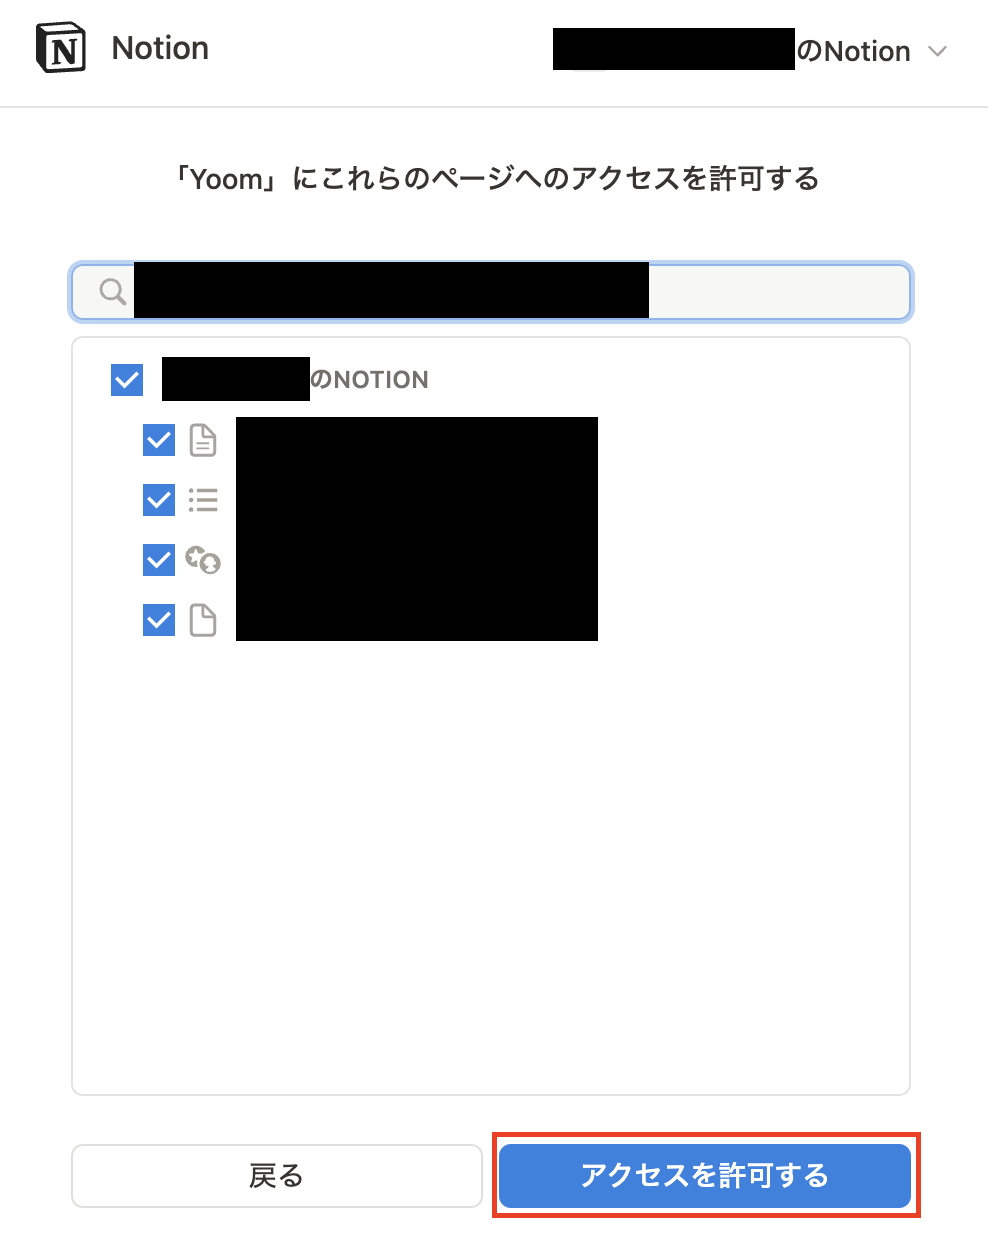
ページへのアクセスを許可する画面では、連携したいページをチェックして「アクセス制限を許可する」をクリックしましょう。
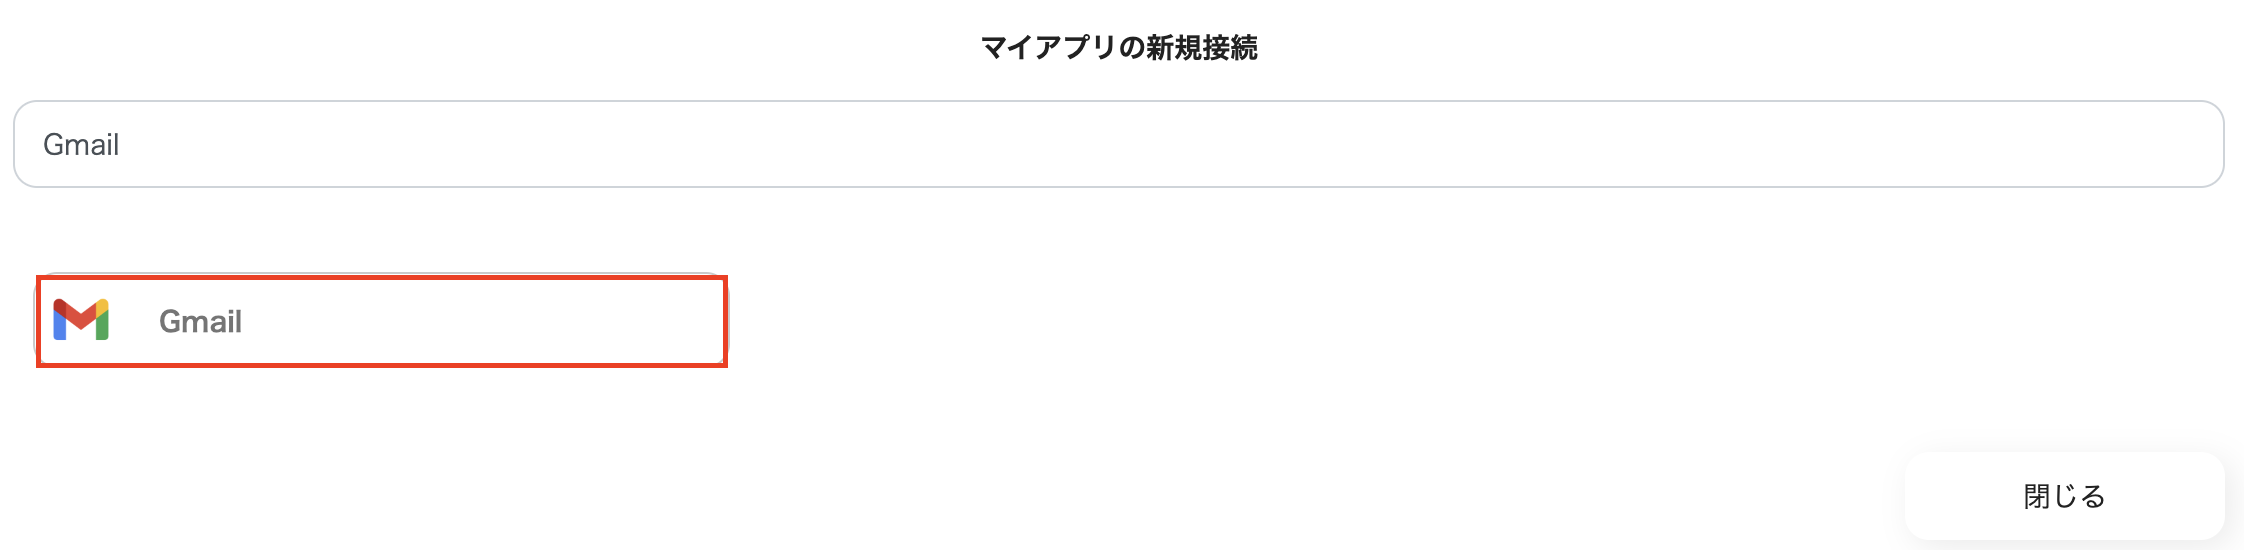
GmailとYoomを連携
先程と同様に、上記に記載の「はじめに」の操作を行い、マイアプリ新規接続の画面で、Gmailを選択しましょう。
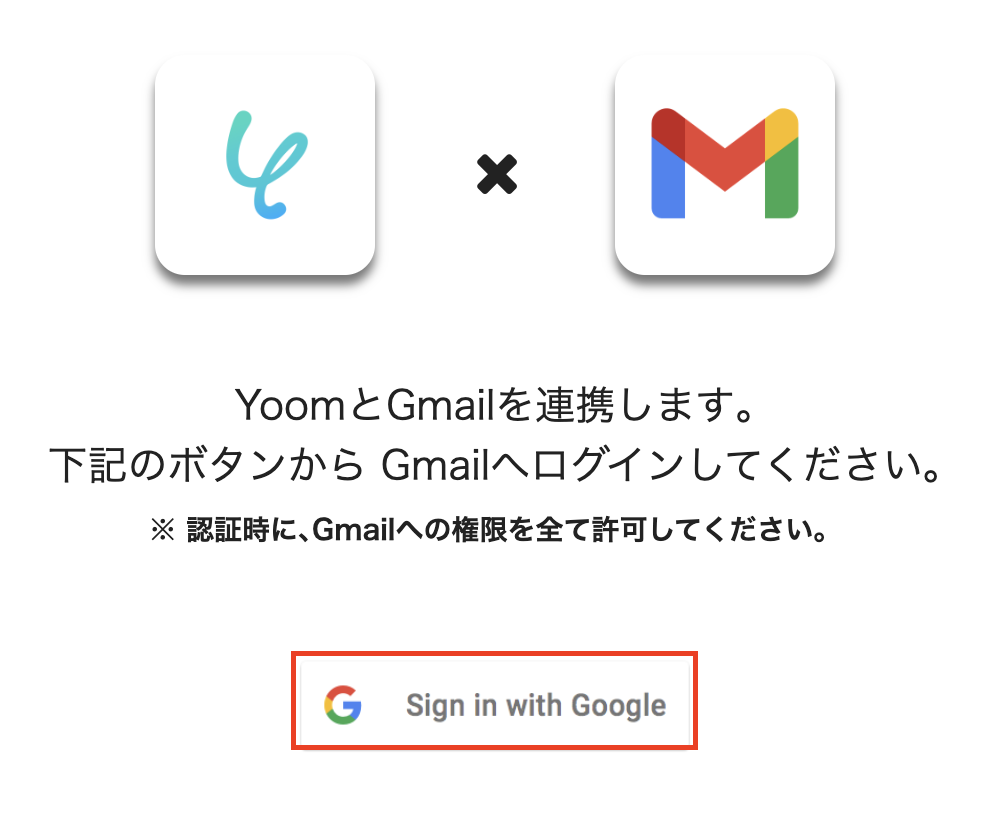
YoomとGmailを連携するという画面の、「Sign in with Google」をクリックしましょう。
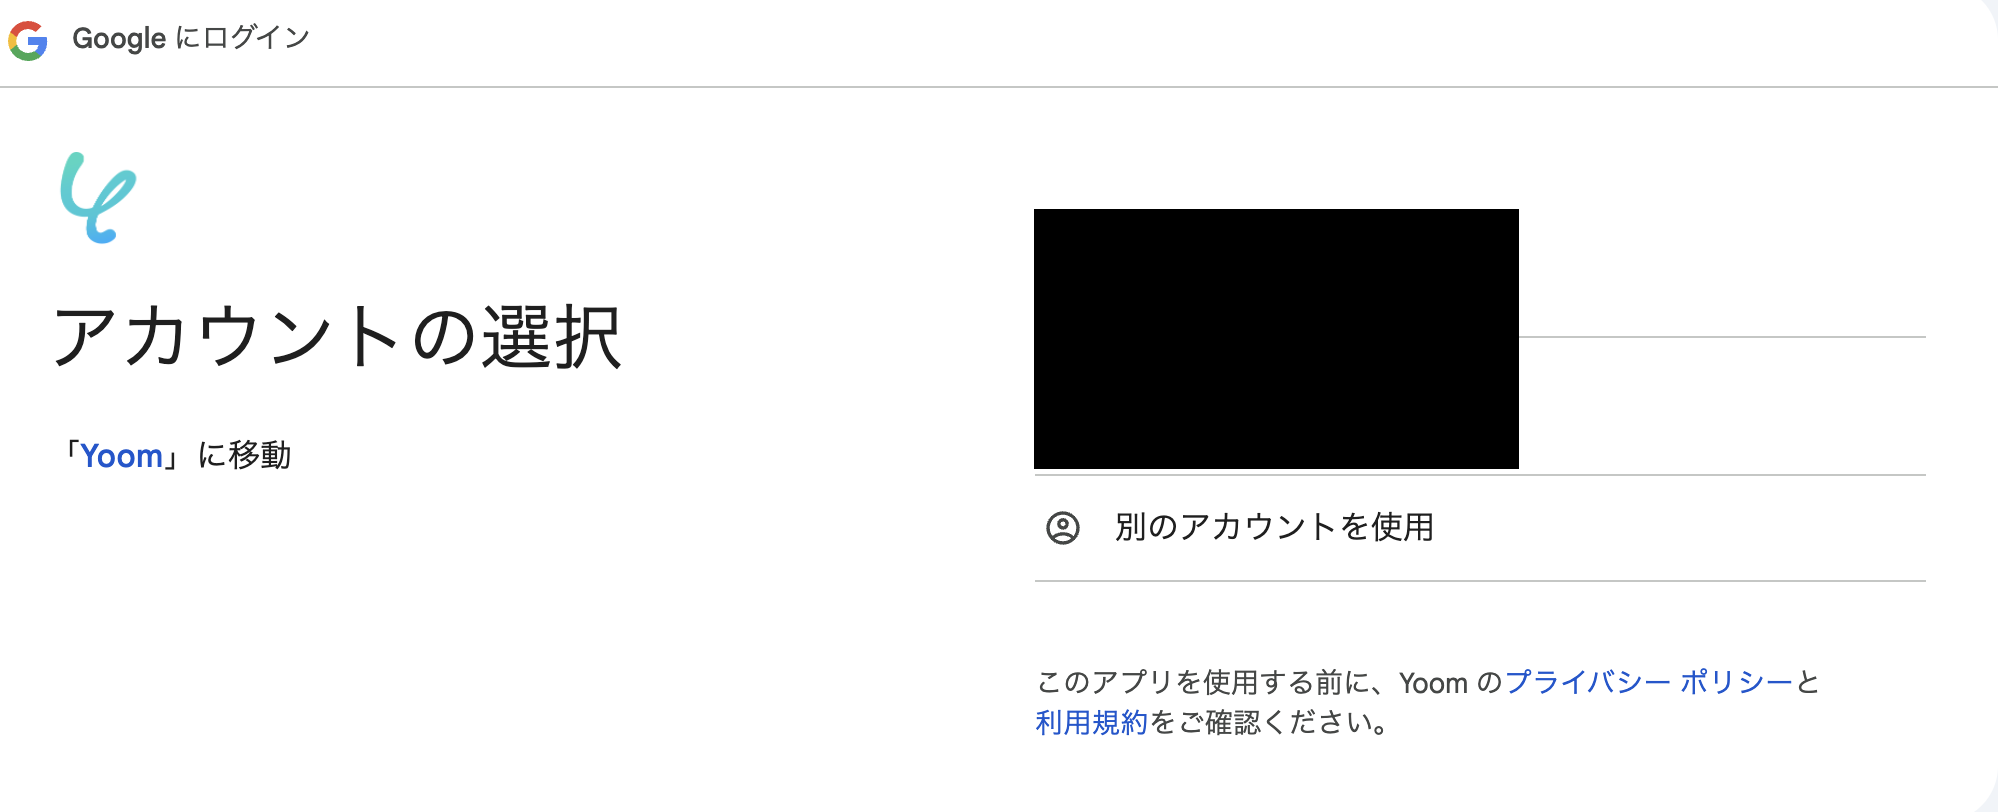
アカウントの選択画面で、連携したいアカウントを選びクリックしてください。
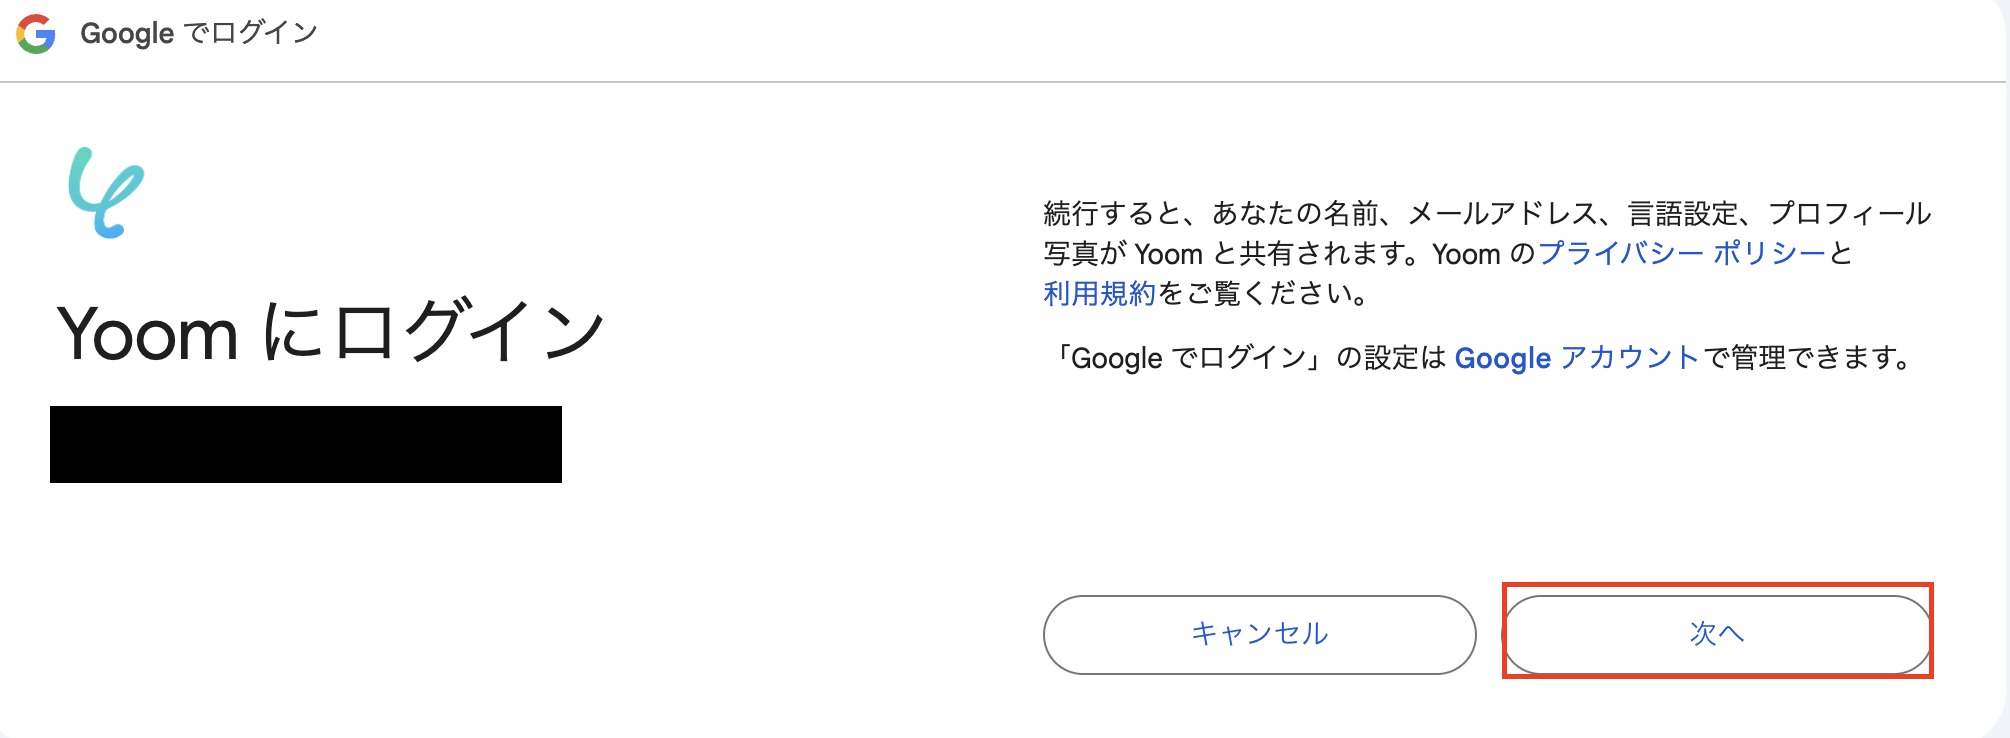
Yoomにログインでは「次へ」を選択しましょう。
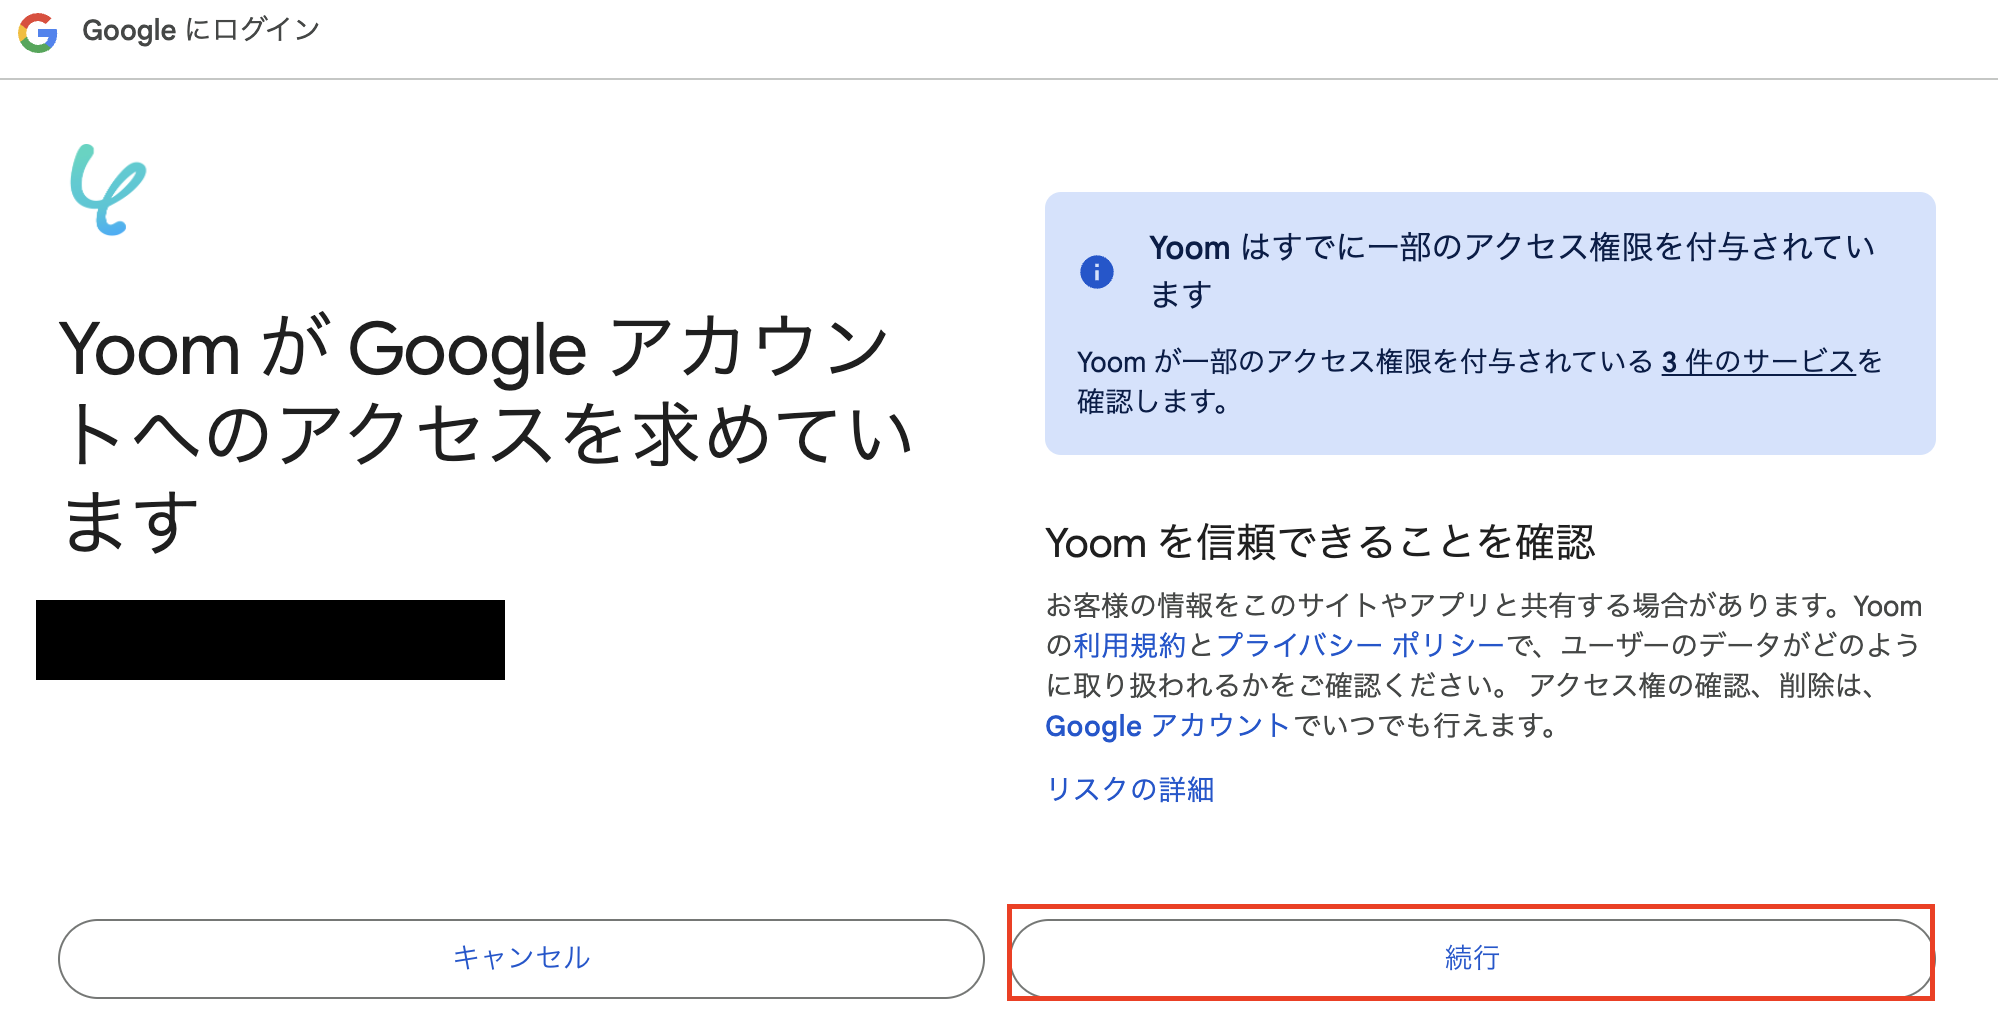
Yoom が Google アカウントへのアクセスを求めていますという画面では、「続行」をクリックしてください。
これでマイアプリ登録が完了しました!
ステップ2:テンプレートのコピー
次に、下に表示されているバナーをクリックして、テンプレートをコピーします。
■概要Notionで管理している顧客情報やタスク情報を元に、都度メールを作成・送信する作業は手間がかかる上に、コピー&ペーストによるミスも起こりがちではないでしょうか。このワークフローを活用すれば、Notionのデータベースから特定のページを選択するだけで、その情報を用いてGmailのメールを自動で送信できます。これにより、定型的な連絡業務の効率化や、ヒューマンエラーの防止に繋がります。
Chrome拡張機能を使用したトリガーを使用することで、Notion上から直接トリガーを起動させることができます。
■このテンプレートをおすすめする方- Notionで管理している情報を元に、Gmailで定型メールを送付している方
- 手作業でのメール作成や送信に時間がかかり、業務を効率化したいと考えている方
- メール送信時の宛先間違いや内容の転記ミスなどのヒューマンエラーを減らしたい方
■このテンプレートを使うメリット- Notionの情報を都度コピー&ペーストしてメールを作成する手間が省け、定型的な連絡業務にかかる時間を短縮できます。
- 手作業による情報の転記が不要になるため、宛先や内容の間違いといったヒューマンエラーの防止に繋がります。
■フローボットの流れ- はじめに、GmailとNotionをYoomと連携します。
- 次に、トリガーでNotionを選択し、「データベース上でページを選択して起動」アクションを設定します。
- 次に、オペレーションで再度Notionを選択し、トリガーで選択したページの情報を取得するよう設定します。
- 最後に、オペレーションでGmailの「メールを送る」アクションを設定し、Notionから取得した情報を本文などに含めてメールを送信します。
※「トリガー」:フロー起動のきっかけとなるアクション、「オペレーション」:トリガー起動後、フロー内で処理を行うアクション
■このワークフローのカスタムポイント- Gmailでメールを送るアクション設定では、Notionから取得した情報を変数として活用し、宛先(To, Cc, Bcc)、件名、メッセージ内容などを動的に設定することが可能です。
- メッセージ内容には、Notionの情報を差し込むだけでなく、固定のテキストを組み合わせることもできるため、柔軟なメール文面の作成ができます。
■注意事項- Gmail、NotionのそれぞれとYoomを連携してください。
- Chrome拡張機能を使用したトリガーを使用することで、Notion上から直接トリガーを起動させることができます。
- Chrome拡張機能を使ったトリガーの設定方法は「Chrome拡張機能を使ったトリガーの設定方法」をご参照ください。
Chrome拡張機能を使用したトリガーを使用することで、Notion上から直接トリガーを起動させることができます。
■このテンプレートをおすすめする方
- Notionで管理している情報を元に、Gmailで定型メールを送付している方
- 手作業でのメール作成や送信に時間がかかり、業務を効率化したいと考えている方
- メール送信時の宛先間違いや内容の転記ミスなどのヒューマンエラーを減らしたい方
■このテンプレートを使うメリット
- Notionの情報を都度コピー&ペーストしてメールを作成する手間が省け、定型的な連絡業務にかかる時間を短縮できます。
- 手作業による情報の転記が不要になるため、宛先や内容の間違いといったヒューマンエラーの防止に繋がります。
■フローボットの流れ
- はじめに、GmailとNotionをYoomと連携します。
- 次に、トリガーでNotionを選択し、「データベース上でページを選択して起動」アクションを設定します。
- 次に、オペレーションで再度Notionを選択し、トリガーで選択したページの情報を取得するよう設定します。
- 最後に、オペレーションでGmailの「メールを送る」アクションを設定し、Notionから取得した情報を本文などに含めてメールを送信します。
■このワークフローのカスタムポイント
- Gmailでメールを送るアクション設定では、Notionから取得した情報を変数として活用し、宛先(To, Cc, Bcc)、件名、メッセージ内容などを動的に設定することが可能です。
- メッセージ内容には、Notionの情報を差し込むだけでなく、固定のテキストを組み合わせることもできるため、柔軟なメール文面の作成ができます。
■注意事項
- Gmail、NotionのそれぞれとYoomを連携してください。
- Chrome拡張機能を使用したトリガーを使用することで、Notion上から直接トリガーを起動させることができます。
- Chrome拡張機能を使ったトリガーの設定方法は「Chrome拡張機能を使ったトリガーの設定方法」をご参照ください。
バナークリックしたら、Yoomのテンプレートサイトに移行します。
テンプレートがコピーされたというポップアップが表示されたらコピー完了です。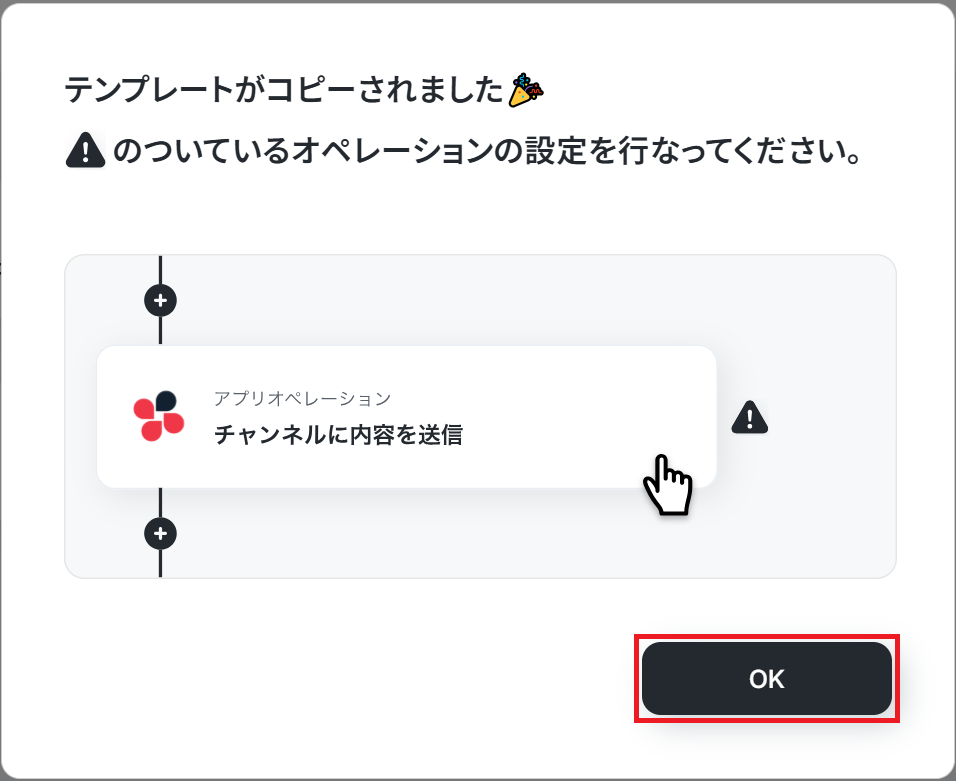
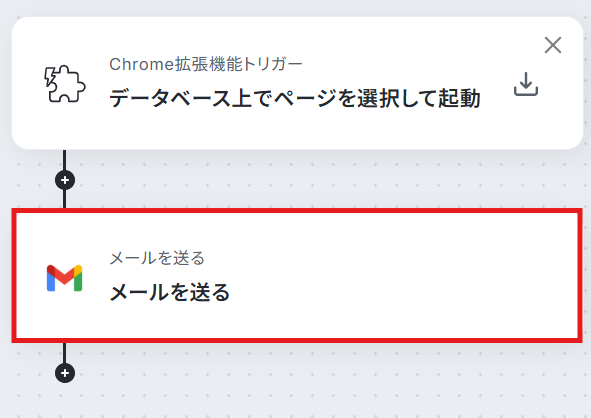
ステップ3:Chrome拡張機能トリガーの設定
「データベース上でページを選択して起動」の項目をクリックして設定していきましょう。
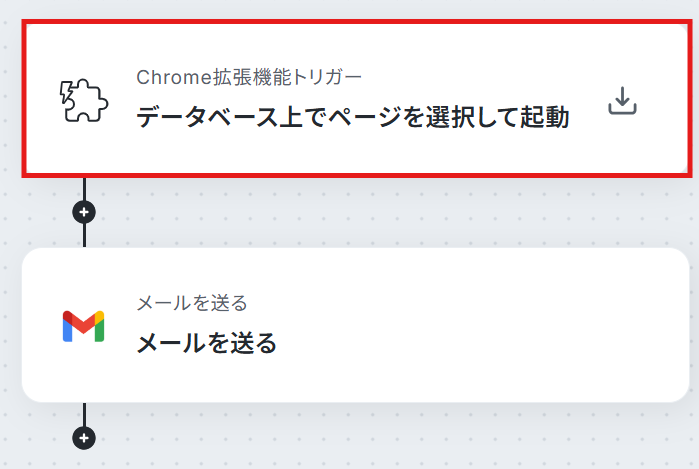
chrome拡張機能を使ったトリガーの設定の詳しい方法はこちらをご確認ください。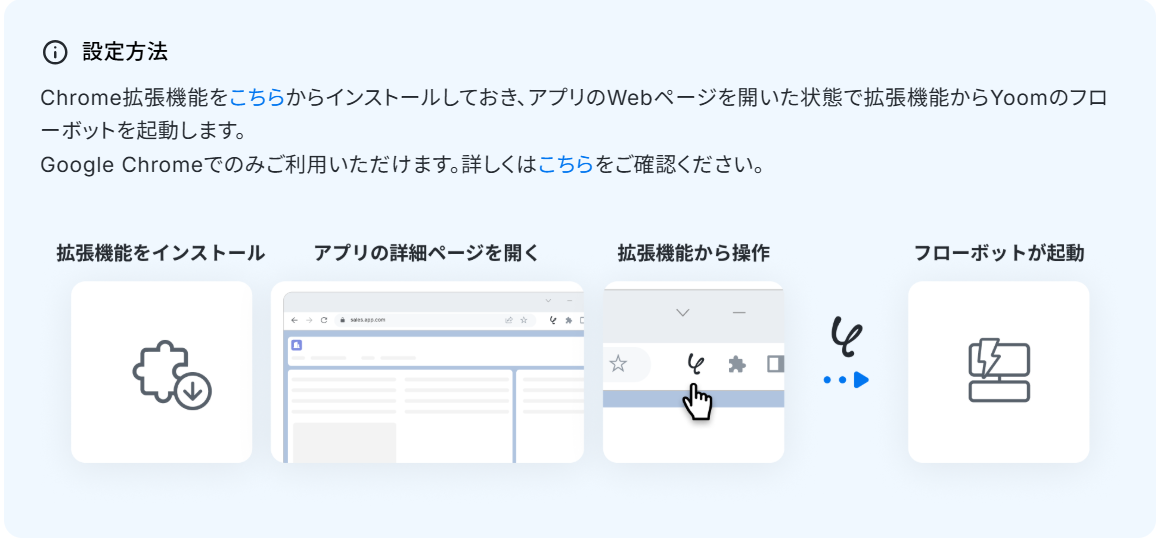
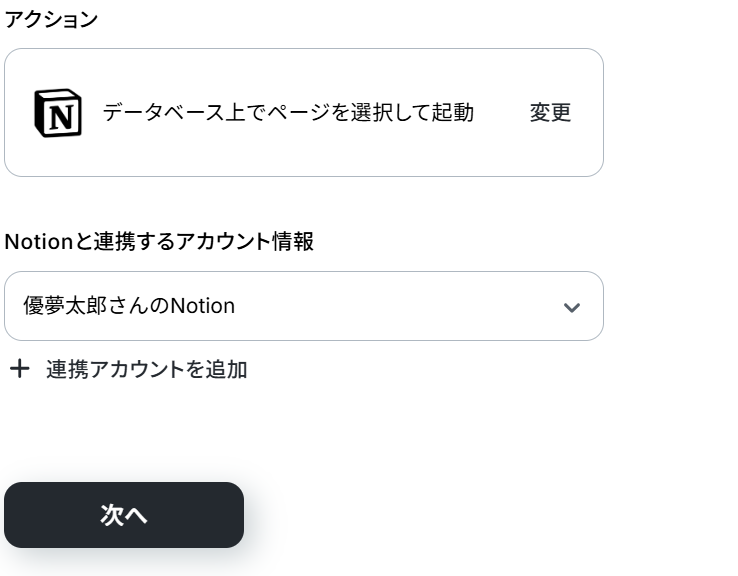
こちらの画面は設定済みですので、連携するアカウントに誤りがないか確認して次へをクリックしましょう。
起動ページのURLサンプルを入力します。テストが成功すると、「取得した値」が表示されます。
ここで取得した値は、次のステップで活用することが可能です。
確認できたら「完了」ボタンをクリックしましょう。
※テストの重要性:「取得した値」のテスト値についてもあわせてご確認ください。
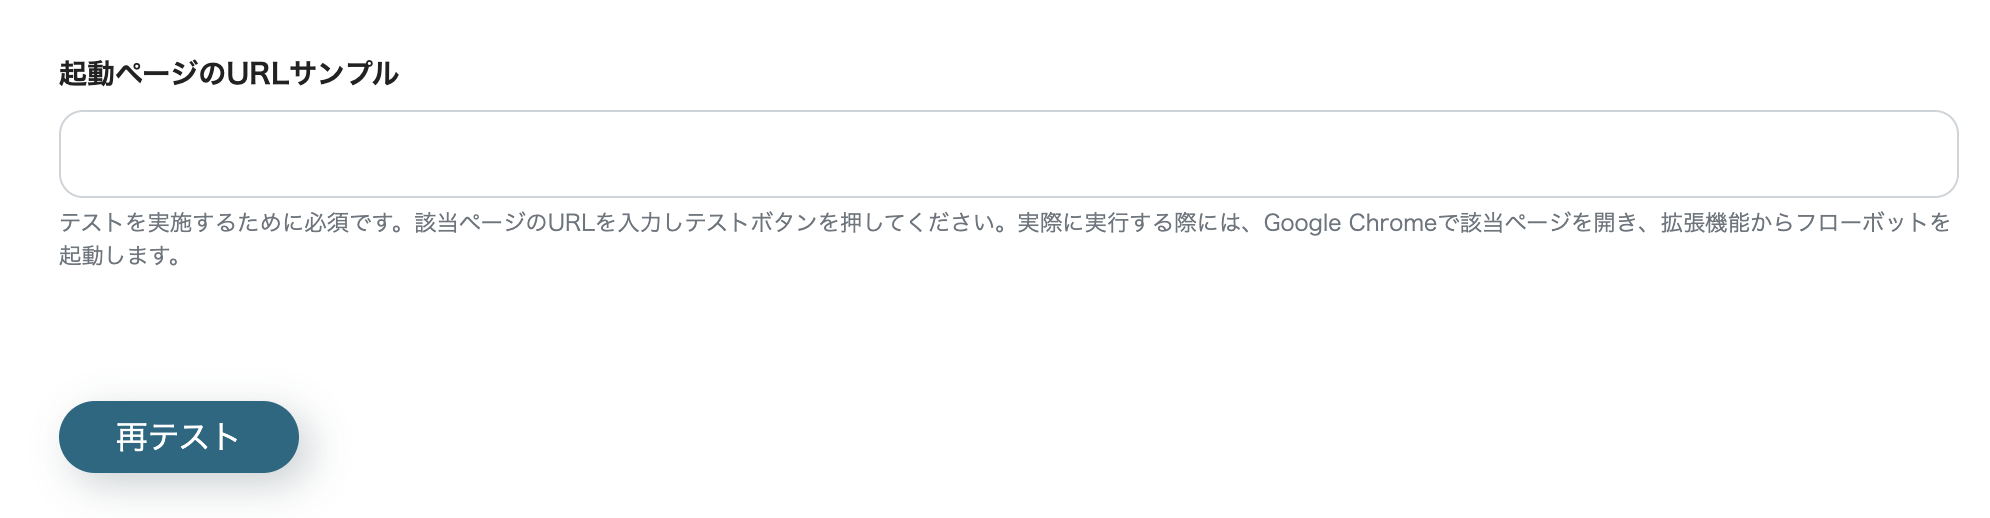
※起動ページのURLの入力方法がわからない方は以下をご確認ください!
起動ページのURLを表示させる為に、Notionを開き、連携したいページをフルサイズで表示させます。

・サイドピークで開くをクリックし、ページを表示します。
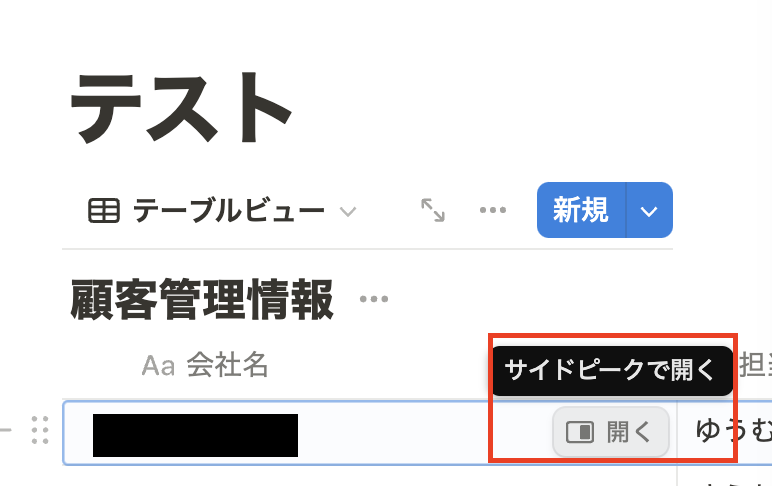
・そこで表示されたURLを起動URLページサンプルに入力しましょう!

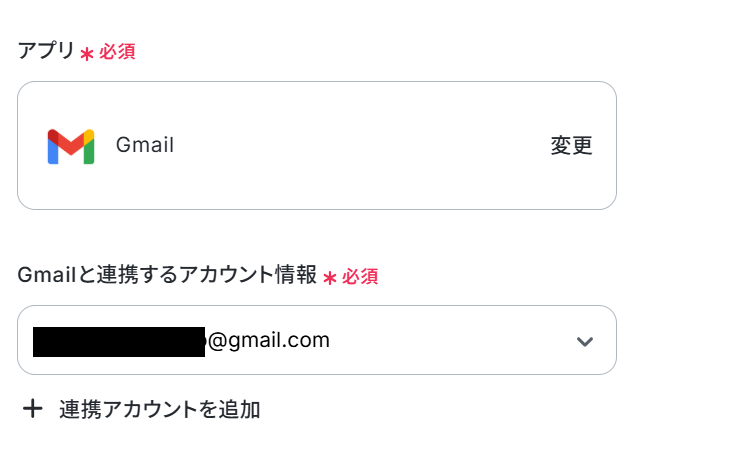
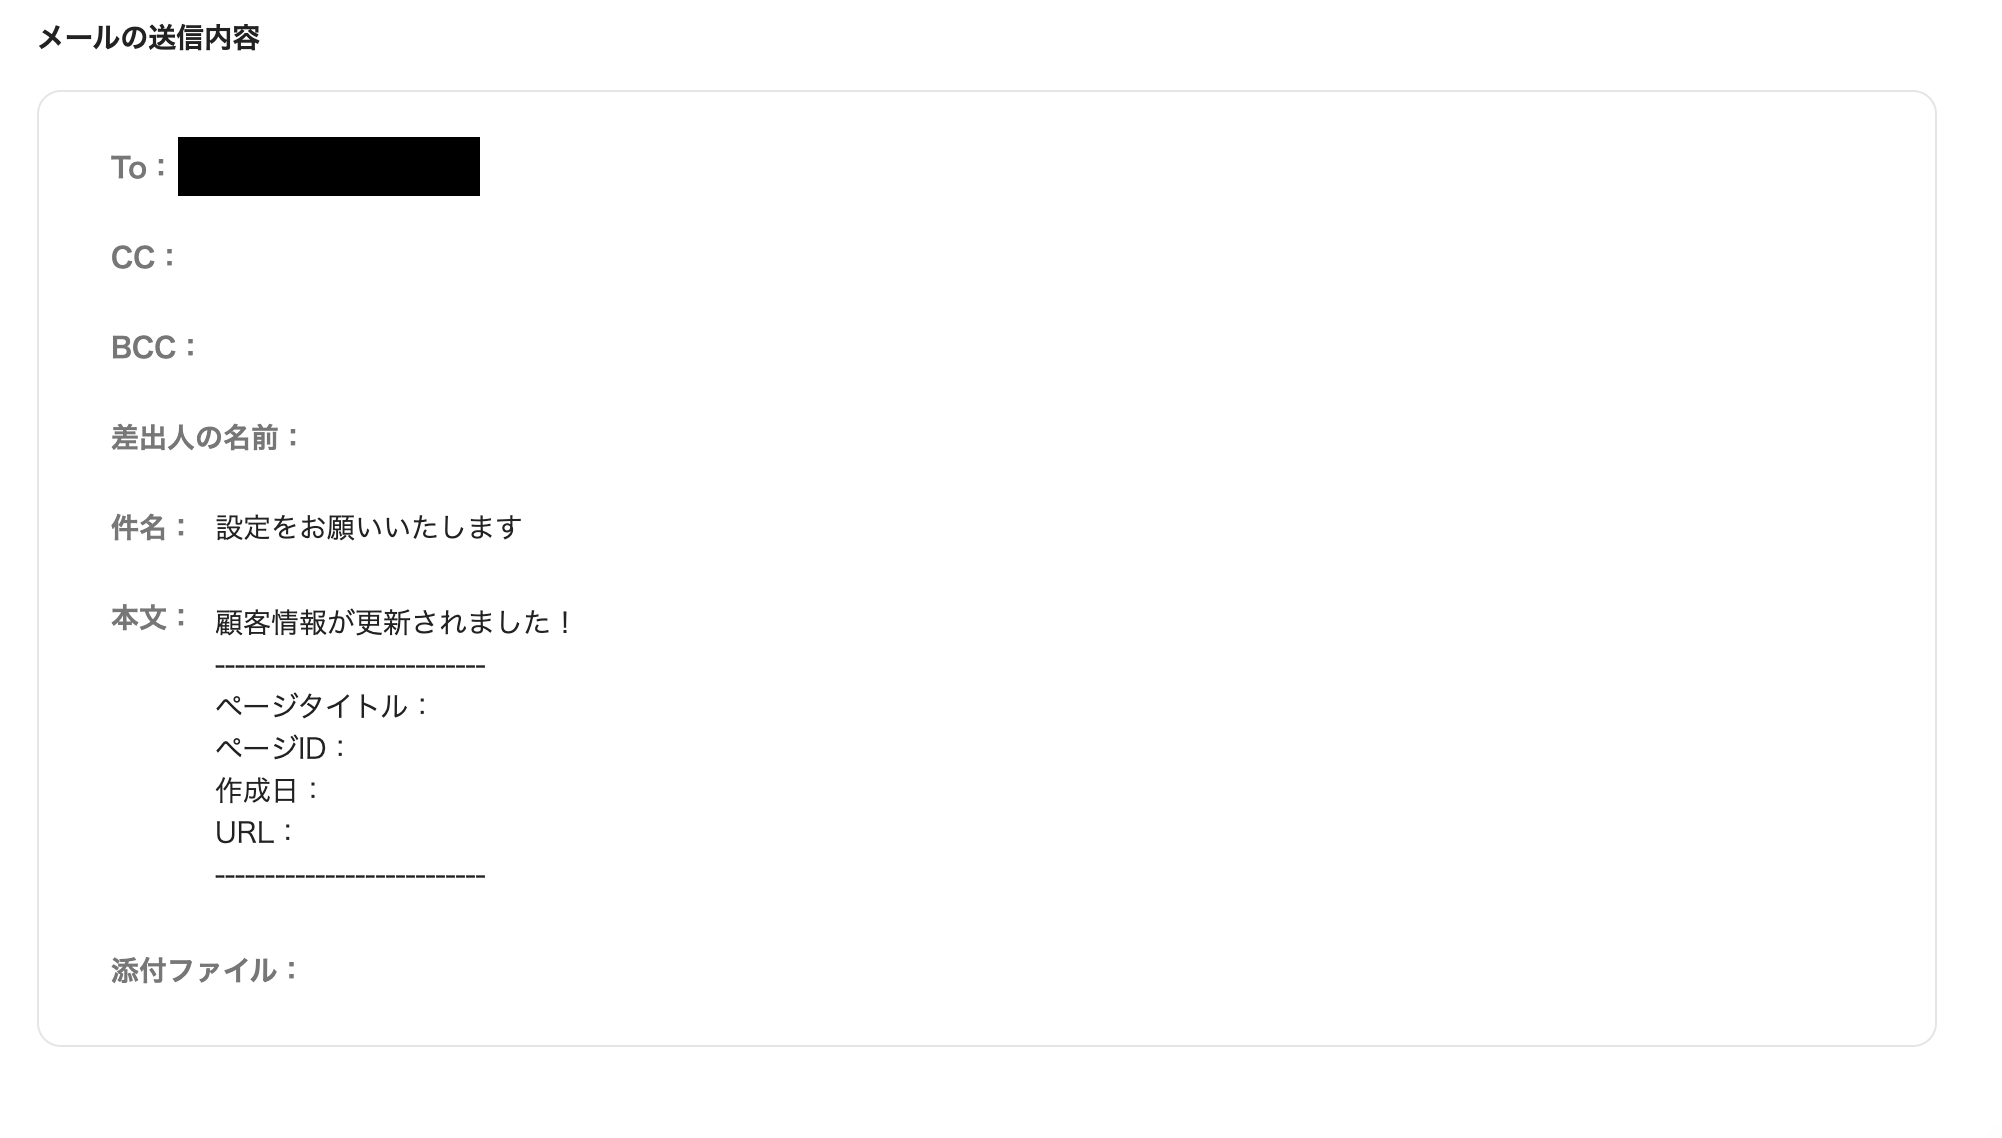
ステップ4:Gmailのアクション設定
次に「メールを送る」をクリックして設定しましょう。
連携するアカウント情報を確認し、下にスクロールします。
本文はNotionで取得した値を埋め込みながらメッセージ作成します。
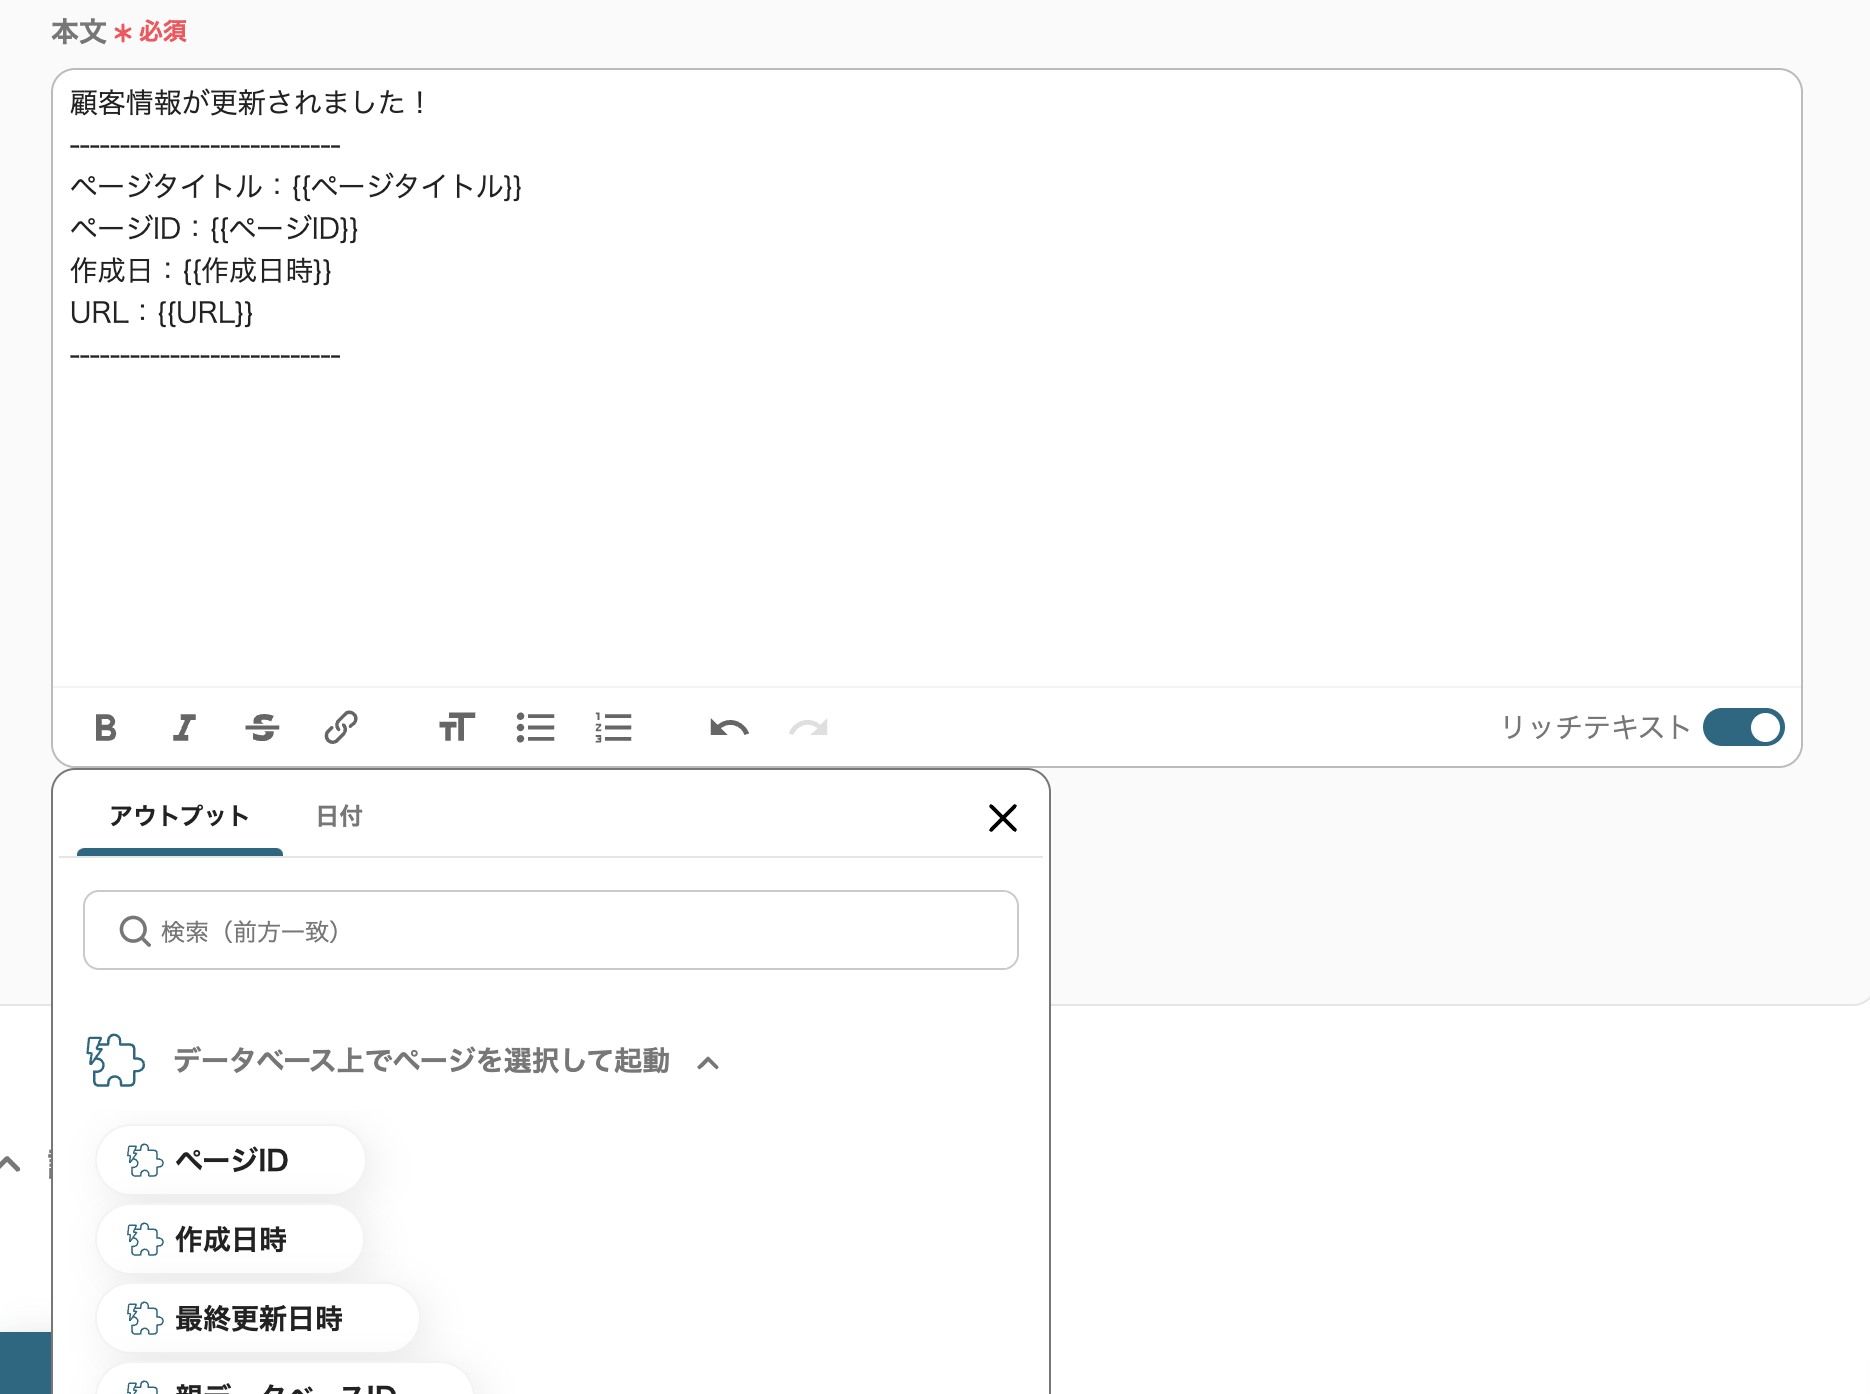
メール内容に間違いがなければテストを行い、メールが届いたら「完了」をクリックしてください。
ステップ5:トリガーをONにする
全ての設定が完了しました!というポップアップが表示されますので、「トリガーON」をクリックしたら作成終了です!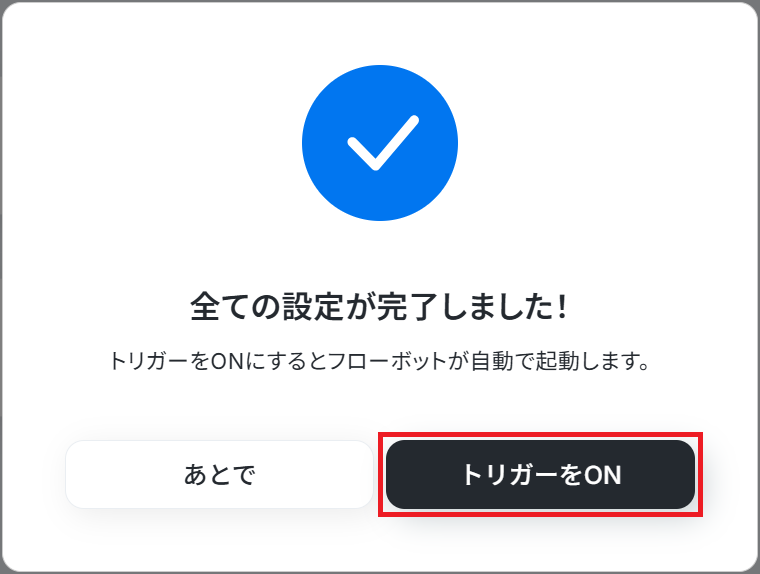
■概要Notionで管理している顧客情報やタスク情報を元に、都度メールを作成・送信する作業は手間がかかる上に、コピー&ペーストによるミスも起こりがちではないでしょうか。このワークフローを活用すれば、Notionのデータベースから特定のページを選択するだけで、その情報を用いてGmailのメールを自動で送信できます。これにより、定型的な連絡業務の効率化や、ヒューマンエラーの防止に繋がります。
Chrome拡張機能を使用したトリガーを使用することで、Notion上から直接トリガーを起動させることができます。
■このテンプレートをおすすめする方- Notionで管理している情報を元に、Gmailで定型メールを送付している方
- 手作業でのメール作成や送信に時間がかかり、業務を効率化したいと考えている方
- メール送信時の宛先間違いや内容の転記ミスなどのヒューマンエラーを減らしたい方
■このテンプレートを使うメリット- Notionの情報を都度コピー&ペーストしてメールを作成する手間が省け、定型的な連絡業務にかかる時間を短縮できます。
- 手作業による情報の転記が不要になるため、宛先や内容の間違いといったヒューマンエラーの防止に繋がります。
■フローボットの流れ- はじめに、GmailとNotionをYoomと連携します。
- 次に、トリガーでNotionを選択し、「データベース上でページを選択して起動」アクションを設定します。
- 次に、オペレーションで再度Notionを選択し、トリガーで選択したページの情報を取得するよう設定します。
- 最後に、オペレーションでGmailの「メールを送る」アクションを設定し、Notionから取得した情報を本文などに含めてメールを送信します。
※「トリガー」:フロー起動のきっかけとなるアクション、「オペレーション」:トリガー起動後、フロー内で処理を行うアクション
■このワークフローのカスタムポイント- Gmailでメールを送るアクション設定では、Notionから取得した情報を変数として活用し、宛先(To, Cc, Bcc)、件名、メッセージ内容などを動的に設定することが可能です。
- メッセージ内容には、Notionの情報を差し込むだけでなく、固定のテキストを組み合わせることもできるため、柔軟なメール文面の作成ができます。
■注意事項- Gmail、NotionのそれぞれとYoomを連携してください。
- Chrome拡張機能を使用したトリガーを使用することで、Notion上から直接トリガーを起動させることができます。
- Chrome拡張機能を使ったトリガーの設定方法は「Chrome拡張機能を使ったトリガーの設定方法」をご参照ください。
Chrome拡張機能を使用したトリガーを使用することで、Notion上から直接トリガーを起動させることができます。
■このテンプレートをおすすめする方
- Notionで管理している情報を元に、Gmailで定型メールを送付している方
- 手作業でのメール作成や送信に時間がかかり、業務を効率化したいと考えている方
- メール送信時の宛先間違いや内容の転記ミスなどのヒューマンエラーを減らしたい方
■このテンプレートを使うメリット
- Notionの情報を都度コピー&ペーストしてメールを作成する手間が省け、定型的な連絡業務にかかる時間を短縮できます。
- 手作業による情報の転記が不要になるため、宛先や内容の間違いといったヒューマンエラーの防止に繋がります。
■フローボットの流れ
- はじめに、GmailとNotionをYoomと連携します。
- 次に、トリガーでNotionを選択し、「データベース上でページを選択して起動」アクションを設定します。
- 次に、オペレーションで再度Notionを選択し、トリガーで選択したページの情報を取得するよう設定します。
- 最後に、オペレーションでGmailの「メールを送る」アクションを設定し、Notionから取得した情報を本文などに含めてメールを送信します。
■このワークフローのカスタムポイント
- Gmailでメールを送るアクション設定では、Notionから取得した情報を変数として活用し、宛先(To, Cc, Bcc)、件名、メッセージ内容などを動的に設定することが可能です。
- メッセージ内容には、Notionの情報を差し込むだけでなく、固定のテキストを組み合わせることもできるため、柔軟なメール文面の作成ができます。
■注意事項
- Gmail、NotionのそれぞれとYoomを連携してください。
- Chrome拡張機能を使用したトリガーを使用することで、Notion上から直接トリガーを起動させることができます。
- Chrome拡張機能を使ったトリガーの設定方法は「Chrome拡張機能を使ったトリガーの設定方法」をご参照ください。
NotionやGmailを使ったその他の自動化例
今回ご紹介したフロー以外にもNotionやGmailのAPIを利用すれば、さまざまな業務の自動化を実現することができます。
いずれも簡単な設定で利用が可能になりますので、もし気になるものがあれば、ぜひお試しください!
NotionとGmailのその他の自動化例
Gmailの受信内容をAIで要約してNotionに追加したり、指定日時に顧客情報を取得して定型文を送信することができます。
さらに、Notionでリードが登録されたらZoomで会議を作成しGmailで会議情報を先方に送信することも可能です。
■概要
日々大量に届くメールの中から重要な情報を探し出し、手作業でNotionに転記する作業に時間を取られていませんか?このような手作業は時間がかかるだけでなく転記ミスや見落としの原因にもなりがちです。このワークフローを活用すれば、Gmailで特定のラベルを付けたメールの受信をきっかけに、AIが自動で内容を要約しNotionにタスクとして追加するため、メールの確認・整理業務を効率化できます。
■このテンプレートをおすすめする方
- Gmailで受信する大量のメールから、重要な情報を効率的に収集したいと考えている方
- Notionを情報集約のハブとして活用しており、手作業でのデータ転記を自動化したい方
- AIを活用して、日々の定型的な情報整理業務の生産性を向上させたいと考えている方
■このテンプレートを使うメリット
- Gmailの受信からNotionへの記録までが自動化されるため、情報収集や転記にかかっていた作業時間を短縮し、コア業務に集中できます。
- 手作業によるコピー&ペーストのミスや、重要な情報の転記漏れといったヒューマンエラーを防ぎ、情報の正確性を高めます。
■フローボットの流れ
- はじめに、GmailとNotionをYoomと連携します。
- 次に、トリガーでGmailを選択し、「特定のラベルのメールを受信したら」というアクションを設定し、対象のラベルを指定します。
- 次に、オペレーションでAI機能の「要約する」アクションを設定し、受信したメールの本文を要約するように指示します。
- 最後に、オペレーションでNotionの「レコードを追加する」アクションを設定し、要約されたテキストを指定のデータベースに追加します。
※「トリガー」:フロー起動のきっかけとなるアクション、「オペレーション」:トリガー起動後、フロー内で処理を行うアクション
■このワークフローのカスタムポイント
- AI機能の「要約する」では、メール本文の内容をどのような形式で要約するかをプロンプトで具体的に指示することが可能です。
- Notionの「レコードを追加する」では、追加先のデータベースや各プロパティに、メールの件名やAIによる要約結果などを動的に割り当てることができます。
■注意事項
- Gmail、NotionのそれぞれとYoomを連携してください。
- トリガーは5分、10分、15分、30分、60分の間隔で起動間隔を選択できます。
- プランによって最短の起動間隔が異なりますので、ご注意ください。
■概要Notionで管理している顧客リストへの定期的な連絡を手作業で行っていませんか。手動でのメール送信は時間がかかるだけでなく、宛先間違いや送信漏れといったミスが発生しやすい業務です。 このワークフローを活用すれば、指定した日時にNotionのデータベースから顧客情報を自動で取得し、Gmailで定型文メールを送信する一連の流れを自動化できます。定期的な連絡業務の効率化を実現し、本来注力すべきコア業務へ時間を使うことが可能になります。
■このテンプレートをおすすめする方- Notionで顧客情報を管理し、定期的にメールを送信しているマーケティング担当者の方
- 手作業でのメール一斉送信に時間がかかり、送信漏れなどのミスをなくしたい方
- 顧客へのフォローアップや案内を自動化し、効率的に関係性を構築したい方
■このテンプレートを使うメリット- 指定した日時に自動でメールが送信されるため、これまで手作業で行っていた顧客への連絡業務にかかる時間を短縮できます。
- 手作業での宛先指定や情報転記が不要になるため、送信先の間違いや記載漏れといったヒューマンエラーの発生を防ぎます。
■フローボットの流れ- はじめに、NotionとGmailをYoomと連携します。
- 次に、トリガーでスケジュールトリガーを選択し、「指定した日時になったら」フローが起動するように設定します。
- 続いて、オペレーションでNotionの「複数のレコードを取得する」アクションを設定し、顧客情報が格納されたデータベースを指定します。
- 次に、ループ機能を設定し、取得した顧客情報をもとに後続の処理を繰り返すようにします。
- 最後に、ループ内のオペレーションでGmailの「メールを送る」アクションを設定し、各顧客宛に定型文メールを送信します。
※「トリガー」:フロー起動のきっかけとなるアクション、「オペレーション」:トリガー起動後、フロー内で処理を行うアクション
■このワークフローのカスタムポイント- スケジュールトリガーでは、メールを送信したい日時(例:毎月1日の午前10時など)を任意で設定してください。
- Notionから情報を取得する際に、対象となる顧客リストが保存されているデータベースのIDを任意で設定してください。
- ループ機能では、前段のNotionで取得したレコードのリストなど、繰り返し処理の対象としたい値を設定します。
- Gmailの送信設定では、宛先や件名、本文を自由に設定でき、Notionから取得した顧客名などを本文に差し込むことも可能です。
■注意事項- Notion、GmailのそれぞれとYoomを連携してください。
- 「同じ処理を繰り返す」オペレーション間の操作は、パーソナルプラン以上でご利用いただける機能となっております。フリープランの場合は設定しているフローボットのオペレーションやデータコネクトはエラーとなりますので、ご注意ください。
- パーソナルプランなどの有料プランは、2週間の無料トライアルを行うことが可能です。無料トライアル中には制限対象のアプリや機能(オペレーション)を使用することができます。
■概要Notionで新しいリード情報を管理する際、手作業でZoom会議を設定し、Gmailで案内メールを送る作業に手間を感じていませんか。この一連の作業は、対応漏れやURLの貼り間違いといったミスが発生しやすい業務でもあります。このワークフローを活用すれば、Notionのデータベースにリードが登録されるだけで、Zoomでの会議作成からGmailでの案内メール送信までが自動で完結し、商談設定業務を効率化できます。■このテンプレートをおすすめする方- Notionでリード情報を管理し、手動でZoom会議を設定している営業担当者の方
- リード獲得後の商談設定から案内メール送信までの一連の流れを効率化したい方
- Gmailでの定型的な会議案内メールの作成・送信の手間を削減したいと考えている方
■このテンプレートを使うメリット- Notionへの情報登録を起点に、会議設定から案内までが自動処理されるため、これまで手作業に費やしていた時間を短縮できます。
- 手作業による会議URLの貼り間違いや宛先ミス、送信漏れといったヒューマンエラーのリスク軽減に繋がります。
■フローボットの流れ- はじめに、Notion、Gmail、Zoom(OAuth)をYoomと連携します。
- 次に、トリガーでNotionを選択し、「特定のデータソースのページが作成・更新されたら」を設定します。
- オペレーションで「分岐機能」を設置し、新規リード登録かどうかで後続の処理を分岐させます。
- 続けて、Notionの「レコードを取得する(ID検索)」アクションで、該当リードの詳細情報を取得します。
- 次に、Zoomの「ミーティングを作成」アクションで、取得した情報をもとにオンライン会議を設定します。
- Gmailの「メールを送る」アクションで、作成された会議情報を記載した案内メールを送信します。
- 最後に、Notionの「レコードを更新する(ID検索)」アクションで、対応状況などをNotionに記録します。
※「トリガー」:フロー起動のきっかけとなるアクション、「オペレーション」:トリガー起動後、フロー内で処理を行うアクション■このワークフローのカスタムポイント- Notionのトリガー設定では、リード情報を管理している任意のデータソースIDを指定してください。
- Gmailで送信するメールは、宛先や件名、本文を自由に設定でき、Notionから取得した顧客名やZoomで作成した会議URLなどを本文に自動で差し込めます。
- Zoomでミーティングを作成する際に、Notionから取得した情報をもとに会議のトピックや議題などを動的に設定することが可能です。
■注意事項- Notion、Zoom、GmailのそれぞれとYoomを連携してください。
- トリガーは5分、10分、15分、30分、60分の間隔で起動間隔を選択できます。
- プランによって最短の起動間隔が異なりますので、ご注意ください。
- 分岐はパーソナルプラン以上のプランでご利用いただける機能(オペレーション)となっております。フリープランの場合は設定しているフローボットのオペレーションはエラーとなりますので、ご注意ください。
- パーソナルプランなどの有料プランは、2週間の無料トライアルを行うことが可能です。無料トライアル中には制限対象のアプリや機能(オペレーション)を使用することができます。
- Zoomのプランによって利用できるアクションとそうでないアクションがあるため、ご注意ください。
- 現時点では以下のアクションはZoomの有料プランのみ利用可能です。
- ミーティングが終了したら
- ミーティングのレコーディング情報を取得する(クラウド上に存在するレコーディングのみ取得可能なため)
- レコーディング情報取得の詳細は「Zoomでミーティングのレコーディング情報を取得する際の注意点」をご参照ください。
■概要
日々大量に届くメールの中から重要な情報を探し出し、手作業でNotionに転記する作業に時間を取られていませんか?このような手作業は時間がかかるだけでなく転記ミスや見落としの原因にもなりがちです。このワークフローを活用すれば、Gmailで特定のラベルを付けたメールの受信をきっかけに、AIが自動で内容を要約しNotionにタスクとして追加するため、メールの確認・整理業務を効率化できます。
■このテンプレートをおすすめする方
- Gmailで受信する大量のメールから、重要な情報を効率的に収集したいと考えている方
- Notionを情報集約のハブとして活用しており、手作業でのデータ転記を自動化したい方
- AIを活用して、日々の定型的な情報整理業務の生産性を向上させたいと考えている方
■このテンプレートを使うメリット
- Gmailの受信からNotionへの記録までが自動化されるため、情報収集や転記にかかっていた作業時間を短縮し、コア業務に集中できます。
- 手作業によるコピー&ペーストのミスや、重要な情報の転記漏れといったヒューマンエラーを防ぎ、情報の正確性を高めます。
■フローボットの流れ
- はじめに、GmailとNotionをYoomと連携します。
- 次に、トリガーでGmailを選択し、「特定のラベルのメールを受信したら」というアクションを設定し、対象のラベルを指定します。
- 次に、オペレーションでAI機能の「要約する」アクションを設定し、受信したメールの本文を要約するように指示します。
- 最後に、オペレーションでNotionの「レコードを追加する」アクションを設定し、要約されたテキストを指定のデータベースに追加します。
※「トリガー」:フロー起動のきっかけとなるアクション、「オペレーション」:トリガー起動後、フロー内で処理を行うアクション
■このワークフローのカスタムポイント
- AI機能の「要約する」では、メール本文の内容をどのような形式で要約するかをプロンプトで具体的に指示することが可能です。
- Notionの「レコードを追加する」では、追加先のデータベースや各プロパティに、メールの件名やAIによる要約結果などを動的に割り当てることができます。
■注意事項
- Gmail、NotionのそれぞれとYoomを連携してください。
- トリガーは5分、10分、15分、30分、60分の間隔で起動間隔を選択できます。
- プランによって最短の起動間隔が異なりますので、ご注意ください。
■このテンプレートをおすすめする方
- Notionで顧客情報を管理し、定期的にメールを送信しているマーケティング担当者の方
- 手作業でのメール一斉送信に時間がかかり、送信漏れなどのミスをなくしたい方
- 顧客へのフォローアップや案内を自動化し、効率的に関係性を構築したい方
■このテンプレートを使うメリット
- 指定した日時に自動でメールが送信されるため、これまで手作業で行っていた顧客への連絡業務にかかる時間を短縮できます。
- 手作業での宛先指定や情報転記が不要になるため、送信先の間違いや記載漏れといったヒューマンエラーの発生を防ぎます。
■フローボットの流れ
- はじめに、NotionとGmailをYoomと連携します。
- 次に、トリガーでスケジュールトリガーを選択し、「指定した日時になったら」フローが起動するように設定します。
- 続いて、オペレーションでNotionの「複数のレコードを取得する」アクションを設定し、顧客情報が格納されたデータベースを指定します。
- 次に、ループ機能を設定し、取得した顧客情報をもとに後続の処理を繰り返すようにします。
- 最後に、ループ内のオペレーションでGmailの「メールを送る」アクションを設定し、各顧客宛に定型文メールを送信します。
■このワークフローのカスタムポイント
- スケジュールトリガーでは、メールを送信したい日時(例:毎月1日の午前10時など)を任意で設定してください。
- Notionから情報を取得する際に、対象となる顧客リストが保存されているデータベースのIDを任意で設定してください。
- ループ機能では、前段のNotionで取得したレコードのリストなど、繰り返し処理の対象としたい値を設定します。
- Gmailの送信設定では、宛先や件名、本文を自由に設定でき、Notionから取得した顧客名などを本文に差し込むことも可能です。
■注意事項
- Notion、GmailのそれぞれとYoomを連携してください。
- 「同じ処理を繰り返す」オペレーション間の操作は、パーソナルプラン以上でご利用いただける機能となっております。フリープランの場合は設定しているフローボットのオペレーションやデータコネクトはエラーとなりますので、ご注意ください。
- パーソナルプランなどの有料プランは、2週間の無料トライアルを行うことが可能です。無料トライアル中には制限対象のアプリや機能(オペレーション)を使用することができます。
- Notionでリード情報を管理し、手動でZoom会議を設定している営業担当者の方
- リード獲得後の商談設定から案内メール送信までの一連の流れを効率化したい方
- Gmailでの定型的な会議案内メールの作成・送信の手間を削減したいと考えている方
- Notionへの情報登録を起点に、会議設定から案内までが自動処理されるため、これまで手作業に費やしていた時間を短縮できます。
- 手作業による会議URLの貼り間違いや宛先ミス、送信漏れといったヒューマンエラーのリスク軽減に繋がります。
- はじめに、Notion、Gmail、Zoom(OAuth)をYoomと連携します。
- 次に、トリガーでNotionを選択し、「特定のデータソースのページが作成・更新されたら」を設定します。
- オペレーションで「分岐機能」を設置し、新規リード登録かどうかで後続の処理を分岐させます。
- 続けて、Notionの「レコードを取得する(ID検索)」アクションで、該当リードの詳細情報を取得します。
- 次に、Zoomの「ミーティングを作成」アクションで、取得した情報をもとにオンライン会議を設定します。
- Gmailの「メールを送る」アクションで、作成された会議情報を記載した案内メールを送信します。
- 最後に、Notionの「レコードを更新する(ID検索)」アクションで、対応状況などをNotionに記録します。
- Notionのトリガー設定では、リード情報を管理している任意のデータソースIDを指定してください。
- Gmailで送信するメールは、宛先や件名、本文を自由に設定でき、Notionから取得した顧客名やZoomで作成した会議URLなどを本文に自動で差し込めます。
- Zoomでミーティングを作成する際に、Notionから取得した情報をもとに会議のトピックや議題などを動的に設定することが可能です。
- Notion、Zoom、GmailのそれぞれとYoomを連携してください。
- トリガーは5分、10分、15分、30分、60分の間隔で起動間隔を選択できます。
- プランによって最短の起動間隔が異なりますので、ご注意ください。
- 分岐はパーソナルプラン以上のプランでご利用いただける機能(オペレーション)となっております。フリープランの場合は設定しているフローボットのオペレーションはエラーとなりますので、ご注意ください。
- パーソナルプランなどの有料プランは、2週間の無料トライアルを行うことが可能です。無料トライアル中には制限対象のアプリや機能(オペレーション)を使用することができます。
- Zoomのプランによって利用できるアクションとそうでないアクションがあるため、ご注意ください。
- 現時点では以下のアクションはZoomの有料プランのみ利用可能です。
- ミーティングが終了したら
- ミーティングのレコーディング情報を取得する(クラウド上に存在するレコーディングのみ取得可能なため)
- レコーディング情報取得の詳細は「Zoomでミーティングのレコーディング情報を取得する際の注意点」をご参照ください。
Notionを活用した自動化例
Notionから情報を取得して契約書を送信する
Notionの詳細ページからフローを起動するため、契約書の送信をシームレスに行うことができ、業務の効率化を図ることが可能です。
■概要
Notionからクラウドサインで契約書を送信するフローです。
Chrome拡張機能を使用したトリガーを使用することで、Notion上から直接トリガーを起動させることができます。
■このテンプレートをおすすめする方
1.クラウドサインを業務に活用している企業
・企業間の契約書類を作成している方
・雇用契約や業務委託契約の書類を作成する方
2Notionで情報の一元管理をしている企業
・企業情報や個人情報を登録している方
■このテンプレートを使うメリット
クラウドサインは帳票を一元管理し、業務効率を上げるために活用できるツールです。
Notionに登録されている情報を基に契約書を作成することで、チーム内に共有する情報に一貫性を持たせることができます。
しかしNotionの登録情報を都度手入力してクラウドサインで契約書を作成するのは、情報の透明性を低下させる可能性があります。
このフローを使用すると、Notionの詳細ページからフローを起動することで契約書の作成・送付を自動化し、手作業を大幅に削減します。
契約書の作成はNotionに登録されている情報を引用するため、手入力による入力ミスや漏れを防ぐことができます。
■注意事項
・クラウドサイン、NotionのそれぞれとYoomを連携してください。
・Chrome拡張機能を使ったトリガーの設定方法はこちらをご参照ください。
■概要
Notionからfreeeサインで契約書を送信するフローです。
Chrome拡張機能を使用したトリガーを使用することで、Notion上から直接トリガーを起動させることができます。
■このテンプレートをおすすめする方
1.freeeサインを使用して、帳票類の作成管理を行なっている方
・企業間の帳票類作成を担当している方
・雇用契約や業務委託契約の書類を作成する方
2Notionで情報の一元管理をしている企業
・企業情報をレコード登録している方
■このテンプレートを使うメリット
freeeサインは帳票に関連する業務を円滑に行うために活用できるツールです。
Notionに登録されている情報を基に契約書を作成することで登録情報と契約書の内容を関連づけ管理できます。
しかしNotionの登録情報を都度手入力してfreeeサインで契約書を作成するのは、他のタスクへの集中を妨げることがあります。
このフローを使用すると、Notionの詳細ページからフローを起動することで契約書の作成・送付を自動化します。
作成する契約書をNotionの登録情報を引用して行うので、手入力による手間を省き業務進行を円滑にします。
また引用した情報を活用して契約書の作成を行い、手作業によるヒューマンエラーを未然に省きます。
■注意事項
・freeeサイン、NotionのそれぞれとYoomを連携してください。
・Chrome拡張機能を使ったトリガーの設定方法はこちらをご参照ください。
■概要Notionで管理している顧客情報をもとに、DocuSignで契約書を作成・送信する際、都度情報を手作業で転記する手間や、送信漏れのリスクに課題を感じていませんか。 このワークフローを活用すれば、Notionのデータベースで特定のステータスに更新されるだけで、DocuSignからの契約書送信までを自動化できます。契約書送信に関連する業務を効率化し、より重要なコア業務に集中できる環境を構築します。
■このテンプレートをおすすめする方- NotionとDocuSignを用いた契約書送信のプロセスに手間を感じている営業や法務担当者の方
- 契約締結までのリードタイムを短縮し、業務プロセスを効率化したいと考えているチームリーダーの方
- Notionをデータベースとして活用し、契約管理業務全体の自動化を推進したいと考えている方
■このテンプレートを使うメリット- Notionのデータベース更新をトリガーに、DocuSignからの契約書送信が自動化されるため、手作業による契約業務の時間を短縮します。
- システムが自動で処理を行うため、宛先や契約内容の転記ミス、送信漏れといったヒューマンエラーの防止に繋がります。
■フローボットの流れ- はじめに、NotionとDocuSignをYoomに連携します。
- 次に、トリガーでNotionを選択し、「特定のデータソースのページが作成・更新されたら」を設定します。
- 次に、オペレーションでNotionの「レコードを取得する(ID検索)」を設定し、契約に必要な詳細情報を取得します。
- 続いて、オペレーションで分岐機能を設定し、特定の条件に合致した場合のみ後続のアクションが実行されるようにします。
- 最後に、オペレーションでDocuSignの「テンプレートからエンベロープを作成・送信」を設定し、Notionから取得した情報を元に契約書を送信します。
※「トリガー」:フロー起動のきっかけとなるアクション、「オペレーション」:トリガー起動後、フロー内で処理を行うアクション
■このワークフローのカスタムポイント- 分岐機能では、契約書を送信する条件を任意に設定できます。例えば、Notionのステータスが「契約準備完了」になったら送信するといったカスタマイズが可能です。
- Notionのトリガーやレコードを取得するオペレーションでは、契約情報を管理しているデータベースを任意で設定してください。
■注意事項- NotionとDocusignのそれぞれとYoomを連携してください。
- トリガーは5分、10分、15分、30分、60分の間隔で起動間隔を選択できます。
- プランによって最短の起動間隔が異なりますので、ご注意ください。
- 分岐はパーソナルプラン以上のプランでご利用いただける機能(オペレーション)となっております。フリープランの場合は設定しているフローボットのオペレーションはエラーとなりますので、ご注意ください。
- パーソナルプランなどの有料プランは、2週間の無料トライアルを行うことが可能です。無料トライアル中には制限対象のアプリや機能(オペレーション)を使用することができます。
■概要
Notionからクラウドサインで契約書を送信するフローです。
Chrome拡張機能を使用したトリガーを使用することで、Notion上から直接トリガーを起動させることができます。
■このテンプレートをおすすめする方
1.クラウドサインを業務に活用している企業
・企業間の契約書類を作成している方
・雇用契約や業務委託契約の書類を作成する方
2Notionで情報の一元管理をしている企業
・企業情報や個人情報を登録している方
■このテンプレートを使うメリット
クラウドサインは帳票を一元管理し、業務効率を上げるために活用できるツールです。
Notionに登録されている情報を基に契約書を作成することで、チーム内に共有する情報に一貫性を持たせることができます。
しかしNotionの登録情報を都度手入力してクラウドサインで契約書を作成するのは、情報の透明性を低下させる可能性があります。
このフローを使用すると、Notionの詳細ページからフローを起動することで契約書の作成・送付を自動化し、手作業を大幅に削減します。
契約書の作成はNotionに登録されている情報を引用するため、手入力による入力ミスや漏れを防ぐことができます。
■注意事項
・クラウドサイン、NotionのそれぞれとYoomを連携してください。
・Chrome拡張機能を使ったトリガーの設定方法はこちらをご参照ください。
■概要
Notionからfreeeサインで契約書を送信するフローです。
Chrome拡張機能を使用したトリガーを使用することで、Notion上から直接トリガーを起動させることができます。
■このテンプレートをおすすめする方
1.freeeサインを使用して、帳票類の作成管理を行なっている方
・企業間の帳票類作成を担当している方
・雇用契約や業務委託契約の書類を作成する方
2Notionで情報の一元管理をしている企業
・企業情報をレコード登録している方
■このテンプレートを使うメリット
freeeサインは帳票に関連する業務を円滑に行うために活用できるツールです。
Notionに登録されている情報を基に契約書を作成することで登録情報と契約書の内容を関連づけ管理できます。
しかしNotionの登録情報を都度手入力してfreeeサインで契約書を作成するのは、他のタスクへの集中を妨げることがあります。
このフローを使用すると、Notionの詳細ページからフローを起動することで契約書の作成・送付を自動化します。
作成する契約書をNotionの登録情報を引用して行うので、手入力による手間を省き業務進行を円滑にします。
また引用した情報を活用して契約書の作成を行い、手作業によるヒューマンエラーを未然に省きます。
■注意事項
・freeeサイン、NotionのそれぞれとYoomを連携してください。
・Chrome拡張機能を使ったトリガーの設定方法はこちらをご参照ください。
■このテンプレートをおすすめする方
- NotionとDocuSignを用いた契約書送信のプロセスに手間を感じている営業や法務担当者の方
- 契約締結までのリードタイムを短縮し、業務プロセスを効率化したいと考えているチームリーダーの方
- Notionをデータベースとして活用し、契約管理業務全体の自動化を推進したいと考えている方
■このテンプレートを使うメリット
- Notionのデータベース更新をトリガーに、DocuSignからの契約書送信が自動化されるため、手作業による契約業務の時間を短縮します。
- システムが自動で処理を行うため、宛先や契約内容の転記ミス、送信漏れといったヒューマンエラーの防止に繋がります。
■フローボットの流れ
- はじめに、NotionとDocuSignをYoomに連携します。
- 次に、トリガーでNotionを選択し、「特定のデータソースのページが作成・更新されたら」を設定します。
- 次に、オペレーションでNotionの「レコードを取得する(ID検索)」を設定し、契約に必要な詳細情報を取得します。
- 続いて、オペレーションで分岐機能を設定し、特定の条件に合致した場合のみ後続のアクションが実行されるようにします。
- 最後に、オペレーションでDocuSignの「テンプレートからエンベロープを作成・送信」を設定し、Notionから取得した情報を元に契約書を送信します。
■このワークフローのカスタムポイント
- 分岐機能では、契約書を送信する条件を任意に設定できます。例えば、Notionのステータスが「契約準備完了」になったら送信するといったカスタマイズが可能です。
- Notionのトリガーやレコードを取得するオペレーションでは、契約情報を管理しているデータベースを任意で設定してください。
■注意事項
- NotionとDocusignのそれぞれとYoomを連携してください。
- トリガーは5分、10分、15分、30分、60分の間隔で起動間隔を選択できます。
- プランによって最短の起動間隔が異なりますので、ご注意ください。
- 分岐はパーソナルプラン以上のプランでご利用いただける機能(オペレーション)となっております。フリープランの場合は設定しているフローボットのオペレーションはエラーとなりますので、ご注意ください。
- パーソナルプランなどの有料プランは、2週間の無料トライアルを行うことが可能です。無料トライアル中には制限対象のアプリや機能(オペレーション)を使用することができます。
登録された会社情報をNotionに追加する
新しい情報が登録されたら、Notionのデータベースに追加するフローボットです。
ツールの行き来をなくすことで、作業時間の短縮につなげます。
■概要HubSpotに新しいコンタクト情報が登録されるたびに、手動でNotionのデータベースに転記する作業に手間を感じていませんか? この作業は時間がかかるだけでなく、コピー&ペーストのミスや転記漏れといったヒューマンエラーの原因にもなり得ます。 このワークフローを活用すれば、HubSpotにコンタクトが作成されると同時に、指定したNotionデータベースへ情報を自動で格納するため、こうした課題をスムーズに削減し、顧客情報管理を効率化できます。■このテンプレートをおすすめする方- HubSpotとNotionを併用し、コンタクト情報の手入力に手間を感じている方
- 営業チームで登録された顧客情報を、Notion上でスムーズに全社共有したいと考えている方
- 手作業による情報転記を減らし、顧客データベースの正確性を高めたい方
■このテンプレートを使うメリット- HubSpotへのコンタクト登録をトリガーに自動でNotionへ情報が連携されるため、データ入力にかかる時間を短縮できます。
- 手作業による情報転記が減ることで、入力ミスや更新漏れといったヒューマンエラーの防止に繋がります。
■フローボットの流れ- はじめに、HubSpotとNotionをYoomと連携します。
- 次に、トリガーでHubSpotを選択し、「新しいコンタクトが作成されたら」というアクションを設定します。
- 最後に、オペレーションでNotionの「レコードを追加する」アクションを設定し、HubSpotから取得した情報を任意のデータベースに格納します。
※「トリガー」:フロー起動のきっかけとなるアクション、「オペレーション」:トリガー起動後、フロー内で処理を行うアクション■このワークフローのカスタムポイント- Notionにレコードを追加する際、HubSpotから取得したコンタクト情報のうち、どの項目(氏名、会社名、メールアドレスなど)をNotionデータベースに格納するかを任意で設定できます。
■注意事項- HubSpot、NotionのそれぞれとYoomを連携してください。
- トリガーは5分、10分、15分、30分、60分の間隔で起動間隔を選択できます。
- プランによって最短の起動間隔が異なりますので、ご注意ください。
■概要SalesforceとNotionで取引先情報をそれぞれ管理しており、情報の二重入力や転記作業に手間を感じていませんか?手作業での更新は、入力ミスや反映漏れの原因にもなりかねません。このワークフローを活用すれば、Salesforceに新しい取引先を登録するだけで、Notionのデータベースにも自動で情報が追加されるため、こうした連携の手間を解消し、データ管理を効率化します。
■このテンプレートをおすすめする方- SalesforceとNotionで取引先情報を管理しており、二重入力の手間をなくしたい方
- Salesforceで管理する顧客情報を、Notionでのタスク管理や情報共有に活用したい方
- 手作業によるデータ移行でのミスを防ぎ、情報の正確性を担保したいと考えている方
■このテンプレートを使うメリット- Salesforceに取引先が追加されると、自動でNotionへ情報が同期されるため、これまで手作業に費やしていたデータ入力の時間を短縮できます。
- 手作業でのデータ転記が不要になるため、入力間違いや更新漏れといったヒューマンエラーのリスク軽減に繋がります。
■フローボットの流れ- はじめに、SalesforceとNotionをYoomと連携します。
- 次に、トリガーでSalesforceを選択し、「取引先オブジェクトに新規レコードが登録されたら」というアクションを設定します。
- 最後に、オペレーションでNotionの「レコードを追加する」アクションを設定し、トリガーで取得した取引先の情報を指定のデータベースに追加します。
※「トリガー」:フロー起動のきっかけとなるアクション、「オペレーション」:トリガー起動後、フロー内で処理を行うアクション
■このワークフローのカスタムポイント- Salesforceとの連携設定では、ご利用の環境に応じたマイドメインURLを設定してください。
- Notionのオペレーションでは、データベースの各プロパティ(項目)に対して、Salesforceから取得したどの情報を割り当てるかを自由にカスタマイズできます。
■注意事項・Salesforce、NotionのそれぞれとYoomを連携してください。
・Salesforceはチームプラン・サクセスプランでのみご利用いただけるアプリとなっております。フリープラン・ミニプランの場合は設定しているフローボットのオペレーションやデータコネクトはエラーとなりますので、ご注意ください。
・チームプランやサクセスプランなどの有料プランは、2週間の無料トライアルを行うことが可能です。無料トライアル中には制限対象のアプリを使用することができます。
・トリガーは5分、10分、15分、30分、60分の間隔で起動間隔を選択できます。
・プランによって最短の起動間隔が異なりますので、ご注意ください。
■概要
Sansanに新しい名刺の情報が登録されたら、Notionのデータベースにレコードを追加するフローです。
SansanとNotionを連携することで、新しい名刺情報が自動的にNotionに追加されるので、手作業による入力の手間が省けたり、情報管理の抜けや漏れをなくすことができます。
■このテンプレートをおすすめする方
・SansanとNotionを普段から業務で利用しており、2つのアプリケーション間での転記や操作日常的に発生している方。
・Sansan上の顧客情報とNotion上の顧客情報を連携することで、営業効率を向上したい方。
■このテンプレートを使うメリット
連絡先などの顧客情報はSansan上で管理しているが、議事録や共有物などの情報はNotionで管理をしているといった
方にはSansan上二登録された顧客情報を瞬時にNotionに連携が可能なため業務に自動化・効率化が期待できます。また転記作業による転記ミスを防止することも期待できます。
■注意事項
・Sansan、NotionそれぞれとYoomを連携してください。
・Sansanはチームプラン・サクセスプランでのみご利用いただけるアプリとなっております。フリープラン・ミニプランの場合は設定しているフローボットのオペレーションやデータコネクトはエラーとなりますので、ご注意ください。
・チームプランやサクセスプランなどの有料プランは、2週間の無料トライアルを行うことが可能です。無料トライアル中には制限対象のアプリを使用することができます。
- HubSpotとNotionを併用し、コンタクト情報の手入力に手間を感じている方
- 営業チームで登録された顧客情報を、Notion上でスムーズに全社共有したいと考えている方
- 手作業による情報転記を減らし、顧客データベースの正確性を高めたい方
- HubSpotへのコンタクト登録をトリガーに自動でNotionへ情報が連携されるため、データ入力にかかる時間を短縮できます。
- 手作業による情報転記が減ることで、入力ミスや更新漏れといったヒューマンエラーの防止に繋がります。
- はじめに、HubSpotとNotionをYoomと連携します。
- 次に、トリガーでHubSpotを選択し、「新しいコンタクトが作成されたら」というアクションを設定します。
- 最後に、オペレーションでNotionの「レコードを追加する」アクションを設定し、HubSpotから取得した情報を任意のデータベースに格納します。
- Notionにレコードを追加する際、HubSpotから取得したコンタクト情報のうち、どの項目(氏名、会社名、メールアドレスなど)をNotionデータベースに格納するかを任意で設定できます。
- HubSpot、NotionのそれぞれとYoomを連携してください。
- トリガーは5分、10分、15分、30分、60分の間隔で起動間隔を選択できます。
- プランによって最短の起動間隔が異なりますので、ご注意ください。
■このテンプレートをおすすめする方
- SalesforceとNotionで取引先情報を管理しており、二重入力の手間をなくしたい方
- Salesforceで管理する顧客情報を、Notionでのタスク管理や情報共有に活用したい方
- 手作業によるデータ移行でのミスを防ぎ、情報の正確性を担保したいと考えている方
■このテンプレートを使うメリット
- Salesforceに取引先が追加されると、自動でNotionへ情報が同期されるため、これまで手作業に費やしていたデータ入力の時間を短縮できます。
- 手作業でのデータ転記が不要になるため、入力間違いや更新漏れといったヒューマンエラーのリスク軽減に繋がります。
■フローボットの流れ
- はじめに、SalesforceとNotionをYoomと連携します。
- 次に、トリガーでSalesforceを選択し、「取引先オブジェクトに新規レコードが登録されたら」というアクションを設定します。
- 最後に、オペレーションでNotionの「レコードを追加する」アクションを設定し、トリガーで取得した取引先の情報を指定のデータベースに追加します。
■このワークフローのカスタムポイント
- Salesforceとの連携設定では、ご利用の環境に応じたマイドメインURLを設定してください。
- Notionのオペレーションでは、データベースの各プロパティ(項目)に対して、Salesforceから取得したどの情報を割り当てるかを自由にカスタマイズできます。
■注意事項
・Salesforceはチームプラン・サクセスプランでのみご利用いただけるアプリとなっております。フリープラン・ミニプランの場合は設定しているフローボットのオペレーションやデータコネクトはエラーとなりますので、ご注意ください。
・チームプランやサクセスプランなどの有料プランは、2週間の無料トライアルを行うことが可能です。無料トライアル中には制限対象のアプリを使用することができます。
・トリガーは5分、10分、15分、30分、60分の間隔で起動間隔を選択できます。
・プランによって最短の起動間隔が異なりますので、ご注意ください。
■概要
Sansanに新しい名刺の情報が登録されたら、Notionのデータベースにレコードを追加するフローです。
SansanとNotionを連携することで、新しい名刺情報が自動的にNotionに追加されるので、手作業による入力の手間が省けたり、情報管理の抜けや漏れをなくすことができます。
■このテンプレートをおすすめする方
・SansanとNotionを普段から業務で利用しており、2つのアプリケーション間での転記や操作日常的に発生している方。
・Sansan上の顧客情報とNotion上の顧客情報を連携することで、営業効率を向上したい方。
■このテンプレートを使うメリット
連絡先などの顧客情報はSansan上で管理しているが、議事録や共有物などの情報はNotionで管理をしているといった
方にはSansan上二登録された顧客情報を瞬時にNotionに連携が可能なため業務に自動化・効率化が期待できます。また転記作業による転記ミスを防止することも期待できます。
■注意事項
・Sansan、NotionそれぞれとYoomを連携してください。
・Sansanはチームプラン・サクセスプランでのみご利用いただけるアプリとなっております。フリープラン・ミニプランの場合は設定しているフローボットのオペレーションやデータコネクトはエラーとなりますので、ご注意ください。
・チームプランやサクセスプランなどの有料プランは、2週間の無料トライアルを行うことが可能です。無料トライアル中には制限対象のアプリを使用することができます。
Notionでページが作成または更新されたら通知する
Notionでページが作成または更新されたことをコミュニケーションツールに通知するため、情報共有プロセスの迅速化が見込めるでしょう。
■概要Notionでドキュメントやタスクを管理しているものの、チームメンバーによるページの作成や更新に気づくのが遅れてしまう、といった課題はありませんか?情報の確認漏れは、業務の停滞や認識のズレを引き起こす原因にもなりかねません。このワークフローは、Notionでページが作成または更新された際に、その情報をLINE WORKSへ自動で通知するものです。情報共有を実現し、チームの連携をスムーズにします。■このテンプレートをおすすめする方- NotionとLINE WORKSを日常的に利用し、情報共有を効率化したいと考えている方
- チームでNotionを活用しており、ページの更新を手動で周知している情報管理担当者の方
- Notionでの情報更新の見逃しを防ぎ、プロジェクトを円滑に進めたいチームリーダーの方
■このテンプレートを使うメリット- Notionのページ更新をトリガーに自動で通知が送信されるため、重要な情報の確認漏れや共有の遅れを防ぐことができます。
- これまで手作業で行っていた更新内容の連絡が削減されるため、本来注力すべきコア業務に時間を充てることが可能になります。
■フローボットの流れ- はじめに、NotionとLINE WORKSをYoomと連携します。
- 次に、トリガーでNotionを選択し、「ページが作成または更新されたら」というアクションを設定します。
- 最後に、オペレーションでLINE WORKSの「トークルームにメッセージを送信」アクションを設定し、通知したい内容と送信先のトークルームを指定します。
※「トリガー」:フロー起動のきっかけとなるアクション、「オペレーション」:トリガー起動後、フロー内で処理を行うアクション
■このワークフローのカスタムポイント- LINE WORKSに送信する通知メッセージは、Notionから取得したページのタイトルやURL、更新者といった情報を組み合わせて、任意の内容に設定してください。
■注意事項- Notion、LINE WORKSのそれぞれとYoomを連携してください。
- トリガーは5分、10分、15分、30分、60分の間隔で起動間隔を選択できます。
- プランによって最短の起動間隔が異なりますので、ご注意ください。
- LINE WORKS(API2.0)のCallback設定方法は「LINE WORKS(API2.0)のCallback設定方法について」をご参照ください。
■概要Notionで作成した議事録やドキュメントの更新情報を、チームメンバーに都度手作業で共有していませんか?この情報共有のひと手間が積み重なると、本来の業務を圧迫するだけでなく、共有漏れや伝達の遅れに繋がることもあります。このワークフローを活用すれば、Notionのページ作成や更新をトリガーにして、Slackへ自動で通知を送ることが可能です。これにより、チーム内の情報共有を円滑にし、スムーズな連携を実現します。■このテンプレートをおすすめする方- Notionを情報共有のハブとして利用し、Slackでコミュニケーションを取っている方
- Notionの更新を手動でSlackに通知しており、手間や共有漏れに課題を感じている方
- チーム内の情報共有を自動化し、見逃しを防ぎたいと考えているすべてのビジネスパーソン
■このテンプレートを使うメリット- Notionでのページ作成・更新と同時にSlackへ自動で通知が飛ぶため、手作業での共有にかかっていた時間を削減し、コア業務に集中できます。
- 通知プロセスが自動化されることで、重要な更新情報の共有漏れや伝達の遅延を防ぎ、チーム内のスムーズな情報連携を促進します。
■フローボットの流れ- はじめに、NotionとSlackをYoomと連携します。
- 次に、トリガーでNotionを選択し、「ページが作成または更新されたら」というアクションを設定します。
- 最後に、オペレーションでSlackを選択し、「チャンネルにメッセージを送る」アクションを設定して、Notionの更新情報を任意のチャンネルに通知します。
※「トリガー」:フロー起動のきっかけとなるアクション、「オペレーション」:トリガー起動後、フロー内で処理を行うアクション
■このワークフローのカスタムポイント- Slackに通知を送るオペレーションでは、通知先のチャンネルやメンション、通知本文を任意の内容で設定することが可能です。プロジェクトやチームに合わせて、最適な通知内容にカスタマイズしてください。
■注意事項- Notion、SlackのそれぞれとYoomを連携してください。
- トリガーは5分、10分、15分、30分、60分の間隔で起動間隔を選択できます。
- プランによって最短の起動間隔が異なりますので、ご注意ください。
- NotionとLINE WORKSを日常的に利用し、情報共有を効率化したいと考えている方
- チームでNotionを活用しており、ページの更新を手動で周知している情報管理担当者の方
- Notionでの情報更新の見逃しを防ぎ、プロジェクトを円滑に進めたいチームリーダーの方
- Notionのページ更新をトリガーに自動で通知が送信されるため、重要な情報の確認漏れや共有の遅れを防ぐことができます。
- これまで手作業で行っていた更新内容の連絡が削減されるため、本来注力すべきコア業務に時間を充てることが可能になります。
- はじめに、NotionとLINE WORKSをYoomと連携します。
- 次に、トリガーでNotionを選択し、「ページが作成または更新されたら」というアクションを設定します。
- 最後に、オペレーションでLINE WORKSの「トークルームにメッセージを送信」アクションを設定し、通知したい内容と送信先のトークルームを指定します。
■このワークフローのカスタムポイント
- LINE WORKSに送信する通知メッセージは、Notionから取得したページのタイトルやURL、更新者といった情報を組み合わせて、任意の内容に設定してください。
- Notion、LINE WORKSのそれぞれとYoomを連携してください。
- トリガーは5分、10分、15分、30分、60分の間隔で起動間隔を選択できます。
- プランによって最短の起動間隔が異なりますので、ご注意ください。
- LINE WORKS(API2.0)のCallback設定方法は「LINE WORKS(API2.0)のCallback設定方法について」をご参照ください。
- Notionを情報共有のハブとして利用し、Slackでコミュニケーションを取っている方
- Notionの更新を手動でSlackに通知しており、手間や共有漏れに課題を感じている方
- チーム内の情報共有を自動化し、見逃しを防ぎたいと考えているすべてのビジネスパーソン
- Notionでのページ作成・更新と同時にSlackへ自動で通知が飛ぶため、手作業での共有にかかっていた時間を削減し、コア業務に集中できます。
- 通知プロセスが自動化されることで、重要な更新情報の共有漏れや伝達の遅延を防ぎ、チーム内のスムーズな情報連携を促進します。
- はじめに、NotionとSlackをYoomと連携します。
- 次に、トリガーでNotionを選択し、「ページが作成または更新されたら」というアクションを設定します。
- 最後に、オペレーションでSlackを選択し、「チャンネルにメッセージを送る」アクションを設定して、Notionの更新情報を任意のチャンネルに通知します。
■このワークフローのカスタムポイント
- Slackに通知を送るオペレーションでは、通知先のチャンネルやメンション、通知本文を任意の内容で設定することが可能です。プロジェクトやチームに合わせて、最適な通知内容にカスタマイズしてください。
- Notion、SlackのそれぞれとYoomを連携してください。
- トリガーは5分、10分、15分、30分、60分の間隔で起動間隔を選択できます。
- プランによって最短の起動間隔が異なりますので、ご注意ください。
Gmailを活用した自動化例
指定日時に顧客情報を取得し、Gmailで定型文を送信する
指定したスケジュールでGmailの定型文が自動的に送信されるので、手動での情報取得やメール作成・送信が不要になり、宛先誤りや送信忘れを防ぐことができます。
■概要顧客リストをもとに、定期的に案内メールなどを送信する業務に手間を感じていませんか。手作業でのメール送信は、時間がかかるだけでなく、宛先間違いや送信漏れなどのミスも発生しがちです。このワークフローを活用すれば、指定した日時にGoogle スプレッドシートから顧客情報を自動で取得し、Gmailで定型文メールを送信する一連の流れを自動化し、これらの課題を解消できます。
■このテンプレートをおすすめする方- Google スプレッドシートのリストを元に、手作業でメールを送信している方
- 定期的なメール送信業務の工数を削減し、コア業務に集中したいと考えている方
- 手作業によるメールの送信漏れや、宛先間違いなどのミスをなくしたい方
■このテンプレートを使うメリット- 指定した日時に自動でメールが送信されるため、これまで手作業での送信業務に費やしていた時間を短縮できます。
- 手作業による宛先の設定ミスや、対応漏れといったヒューマンエラーのリスク軽減に繋がります。
■フローボットの流れ- はじめに、Google スプレッドシートとGmailをYoomに連携します
- 次に、トリガーで「スケジュールトリガー」を選択し、ワークフローを起動したい日時(毎日9時など)を設定します
- 次に、オペレーションでGoogle スプレッドシートの「複数のレコードを取得する」アクションを設定し、顧客リストが記載されたシートの情報を取得します
- 次に、オペレーションで「ループ機能」を設定し、取得した顧客情報1件ずつに対してメール送信の処理を実行するように設定します
- 最後に、ループ処理の中にGmailの「メールを送る」アクションを設定し、取得した顧客情報をもとにメールを送信します
※「トリガー」:フロー起動のきっかけとなるアクション、「オペレーション」:トリガー起動後、フロー内で処理を行うアクション
■このワークフローのカスタムポイント- スケジュールトリガーは、毎日、毎週、毎月など、ワークフローを起動したいタイミングを任意で設定可能です。
- Google スプレッドシートのオペレーションでは、対象のスプレッドシートIDやシート名を任意で設定してください。
- ループ機能では、前段のGoogle スプレッドシートで取得した情報のうち、どの情報を後続の処理で利用するかを任意で設定できます。
- Gmailの宛先や本文は自由に設定でき、Google スプレッドシートから取得した顧客名などを本文に埋め込むといったカスタムも可能です。
■注意事項- Google スプレッドシート、GmailのそれぞれとYoomを連携してください。
- 「同じ処理を繰り返す」オペレーション間の操作は、パーソナルプラン以上でご利用いただける機能となっております。フリープランの場合は設定しているフローボットのオペレーションやデータコネクトはエラーとなりますので、ご注意ください。
- パーソナルプランなどの有料プランは、2週間の無料トライアルを行うことが可能です。無料トライアル中には制限対象のアプリや機能(オペレーション)を使用することができます。
■概要Notionで管理している顧客リストへの定期的な連絡を手作業で行っていませんか。手動でのメール送信は時間がかかるだけでなく、宛先間違いや送信漏れといったミスが発生しやすい業務です。 このワークフローを活用すれば、指定した日時にNotionのデータベースから顧客情報を自動で取得し、Gmailで定型文メールを送信する一連の流れを自動化できます。定期的な連絡業務の効率化を実現し、本来注力すべきコア業務へ時間を使うことが可能になります。
■このテンプレートをおすすめする方- Notionで顧客情報を管理し、定期的にメールを送信しているマーケティング担当者の方
- 手作業でのメール一斉送信に時間がかかり、送信漏れなどのミスをなくしたい方
- 顧客へのフォローアップや案内を自動化し、効率的に関係性を構築したい方
■このテンプレートを使うメリット- 指定した日時に自動でメールが送信されるため、これまで手作業で行っていた顧客への連絡業務にかかる時間を短縮できます。
- 手作業での宛先指定や情報転記が不要になるため、送信先の間違いや記載漏れといったヒューマンエラーの発生を防ぎます。
■フローボットの流れ- はじめに、NotionとGmailをYoomと連携します。
- 次に、トリガーでスケジュールトリガーを選択し、「指定した日時になったら」フローが起動するように設定します。
- 続いて、オペレーションでNotionの「複数のレコードを取得する」アクションを設定し、顧客情報が格納されたデータベースを指定します。
- 次に、ループ機能を設定し、取得した顧客情報をもとに後続の処理を繰り返すようにします。
- 最後に、ループ内のオペレーションでGmailの「メールを送る」アクションを設定し、各顧客宛に定型文メールを送信します。
※「トリガー」:フロー起動のきっかけとなるアクション、「オペレーション」:トリガー起動後、フロー内で処理を行うアクション
■このワークフローのカスタムポイント- スケジュールトリガーでは、メールを送信したい日時(例:毎月1日の午前10時など)を任意で設定してください。
- Notionから情報を取得する際に、対象となる顧客リストが保存されているデータベースのIDを任意で設定してください。
- ループ機能では、前段のNotionで取得したレコードのリストなど、繰り返し処理の対象としたい値を設定します。
- Gmailの送信設定では、宛先や件名、本文を自由に設定でき、Notionから取得した顧客名などを本文に差し込むことも可能です。
■注意事項- Notion、GmailのそれぞれとYoomを連携してください。
- 「同じ処理を繰り返す」オペレーション間の操作は、パーソナルプラン以上でご利用いただける機能となっております。フリープランの場合は設定しているフローボットのオペレーションやデータコネクトはエラーとなりますので、ご注意ください。
- パーソナルプランなどの有料プランは、2週間の無料トライアルを行うことが可能です。無料トライアル中には制限対象のアプリや機能(オペレーション)を使用することができます。
■概要
定期的な顧客への連絡で、kintoneから情報を確認してGmailでメールを作成・送信する作業は、手間がかかる定型業務ではないでしょうか。この手作業は、対応漏れや宛先間違いといったミスの原因にもなりかねません。このワークフローを活用すれば、指定した日時にkintoneから顧客情報を自動で取得し、Gmailでの定型文送信までを自動化できるため、こうした課題を円滑に解消します。
■このテンプレートをおすすめする方
- kintoneとGmailを使い、顧客への定期連絡を手作業で行っている方
- 定型的なフォローアップメールの送信に時間がかかり、効率化したいと考えている方
- 手作業によるメールの送信漏れや誤送信などのヒューマンエラーを防止したい方
■このテンプレートを使うメリット
- 指定した日時にkintoneからの情報取得とGmailでのメール送信が自動で実行されるため、これまで手作業に費やしていた時間を短縮できます。
- 手作業による情報の転記ミスやメールの送信漏れといったヒューマンエラーのリスク軽減に繋がります。
■フローボットの流れ
- はじめに、kintoneとGmailをYoomと連携します。
- 次に、トリガーでスケジュールトリガー機能を選択し、ワークフローを起動したい日時や頻度を設定します。
- 次に、オペレーションでkintoneの「データベースを操作する」アクションを設定し、送信対象となる顧客情報を取得します。
- 次に、オペレーションで分岐機能の「処理の繰り返し」を設定し、取得した顧客リストの件数分、メール送信処理を繰り返すように設定します。
- 最後に、オペレーションでGmailの「メールを送る」アクションを設定し、kintoneから取得した情報をもとに定型文のメールを送信します。
※「トリガー」:フロー起動のきっかけとなるアクション、「オペレーション」:トリガー起動後、フロー内で処理を行うアクション
■このワークフローのカスタムポイント
- スケジュールトリガー設定では、ワークフローを起動させたい日時や繰り返し頻度を任意で設定してください。
- kintoneのオペレーション設定では、情報を取得したいアプリのIDを任意で設定してください。
- 分岐機能では、繰り返し対象を最大15件まで設定可能です。
- Gmailのオペレーションでは、送信するメールの件名や本文の内容を自由にカスタマイズできます。
■注意事項
- kintone、GmailのそれぞれとYoomを連携してください。
- 「同じ処理を繰り返す」オペレーション間の操作は、チームプラン・サクセスプランでのみご利用いただける機能となっております。フリープラン・ミニプランの場合は設定しているフローボットのオペレーションやデータコネクトはエラーとなりますので、ご注意ください。
- チームプランやサクセスプランなどの有料プランは、2週間の無料トライアルを行うことが可能です。無料トライアル中には制限対象のアプリや機能(オペレーション)を使用することができます。
■このテンプレートをおすすめする方
- Google スプレッドシートのリストを元に、手作業でメールを送信している方
- 定期的なメール送信業務の工数を削減し、コア業務に集中したいと考えている方
- 手作業によるメールの送信漏れや、宛先間違いなどのミスをなくしたい方
■このテンプレートを使うメリット
- 指定した日時に自動でメールが送信されるため、これまで手作業での送信業務に費やしていた時間を短縮できます。
- 手作業による宛先の設定ミスや、対応漏れといったヒューマンエラーのリスク軽減に繋がります。
■フローボットの流れ
- はじめに、Google スプレッドシートとGmailをYoomに連携します
- 次に、トリガーで「スケジュールトリガー」を選択し、ワークフローを起動したい日時(毎日9時など)を設定します
- 次に、オペレーションでGoogle スプレッドシートの「複数のレコードを取得する」アクションを設定し、顧客リストが記載されたシートの情報を取得します
- 次に、オペレーションで「ループ機能」を設定し、取得した顧客情報1件ずつに対してメール送信の処理を実行するように設定します
- 最後に、ループ処理の中にGmailの「メールを送る」アクションを設定し、取得した顧客情報をもとにメールを送信します
■このワークフローのカスタムポイント
- スケジュールトリガーは、毎日、毎週、毎月など、ワークフローを起動したいタイミングを任意で設定可能です。
- Google スプレッドシートのオペレーションでは、対象のスプレッドシートIDやシート名を任意で設定してください。
- ループ機能では、前段のGoogle スプレッドシートで取得した情報のうち、どの情報を後続の処理で利用するかを任意で設定できます。
- Gmailの宛先や本文は自由に設定でき、Google スプレッドシートから取得した顧客名などを本文に埋め込むといったカスタムも可能です。
■注意事項
- Google スプレッドシート、GmailのそれぞれとYoomを連携してください。
- 「同じ処理を繰り返す」オペレーション間の操作は、パーソナルプラン以上でご利用いただける機能となっております。フリープランの場合は設定しているフローボットのオペレーションやデータコネクトはエラーとなりますので、ご注意ください。
- パーソナルプランなどの有料プランは、2週間の無料トライアルを行うことが可能です。無料トライアル中には制限対象のアプリや機能(オペレーション)を使用することができます。
■このテンプレートをおすすめする方
- Notionで顧客情報を管理し、定期的にメールを送信しているマーケティング担当者の方
- 手作業でのメール一斉送信に時間がかかり、送信漏れなどのミスをなくしたい方
- 顧客へのフォローアップや案内を自動化し、効率的に関係性を構築したい方
■このテンプレートを使うメリット
- 指定した日時に自動でメールが送信されるため、これまで手作業で行っていた顧客への連絡業務にかかる時間を短縮できます。
- 手作業での宛先指定や情報転記が不要になるため、送信先の間違いや記載漏れといったヒューマンエラーの発生を防ぎます。
■フローボットの流れ
- はじめに、NotionとGmailをYoomと連携します。
- 次に、トリガーでスケジュールトリガーを選択し、「指定した日時になったら」フローが起動するように設定します。
- 続いて、オペレーションでNotionの「複数のレコードを取得する」アクションを設定し、顧客情報が格納されたデータベースを指定します。
- 次に、ループ機能を設定し、取得した顧客情報をもとに後続の処理を繰り返すようにします。
- 最後に、ループ内のオペレーションでGmailの「メールを送る」アクションを設定し、各顧客宛に定型文メールを送信します。
■このワークフローのカスタムポイント
- スケジュールトリガーでは、メールを送信したい日時(例:毎月1日の午前10時など)を任意で設定してください。
- Notionから情報を取得する際に、対象となる顧客リストが保存されているデータベースのIDを任意で設定してください。
- ループ機能では、前段のNotionで取得したレコードのリストなど、繰り返し処理の対象としたい値を設定します。
- Gmailの送信設定では、宛先や件名、本文を自由に設定でき、Notionから取得した顧客名などを本文に差し込むことも可能です。
■注意事項
- Notion、GmailのそれぞれとYoomを連携してください。
- 「同じ処理を繰り返す」オペレーション間の操作は、パーソナルプラン以上でご利用いただける機能となっております。フリープランの場合は設定しているフローボットのオペレーションやデータコネクトはエラーとなりますので、ご注意ください。
- パーソナルプランなどの有料プランは、2週間の無料トライアルを行うことが可能です。無料トライアル中には制限対象のアプリや機能(オペレーション)を使用することができます。
■概要
定期的な顧客への連絡で、kintoneから情報を確認してGmailでメールを作成・送信する作業は、手間がかかる定型業務ではないでしょうか。この手作業は、対応漏れや宛先間違いといったミスの原因にもなりかねません。このワークフローを活用すれば、指定した日時にkintoneから顧客情報を自動で取得し、Gmailでの定型文送信までを自動化できるため、こうした課題を円滑に解消します。
■このテンプレートをおすすめする方
- kintoneとGmailを使い、顧客への定期連絡を手作業で行っている方
- 定型的なフォローアップメールの送信に時間がかかり、効率化したいと考えている方
- 手作業によるメールの送信漏れや誤送信などのヒューマンエラーを防止したい方
■このテンプレートを使うメリット
- 指定した日時にkintoneからの情報取得とGmailでのメール送信が自動で実行されるため、これまで手作業に費やしていた時間を短縮できます。
- 手作業による情報の転記ミスやメールの送信漏れといったヒューマンエラーのリスク軽減に繋がります。
■フローボットの流れ
- はじめに、kintoneとGmailをYoomと連携します。
- 次に、トリガーでスケジュールトリガー機能を選択し、ワークフローを起動したい日時や頻度を設定します。
- 次に、オペレーションでkintoneの「データベースを操作する」アクションを設定し、送信対象となる顧客情報を取得します。
- 次に、オペレーションで分岐機能の「処理の繰り返し」を設定し、取得した顧客リストの件数分、メール送信処理を繰り返すように設定します。
- 最後に、オペレーションでGmailの「メールを送る」アクションを設定し、kintoneから取得した情報をもとに定型文のメールを送信します。
※「トリガー」:フロー起動のきっかけとなるアクション、「オペレーション」:トリガー起動後、フロー内で処理を行うアクション
■このワークフローのカスタムポイント
- スケジュールトリガー設定では、ワークフローを起動させたい日時や繰り返し頻度を任意で設定してください。
- kintoneのオペレーション設定では、情報を取得したいアプリのIDを任意で設定してください。
- 分岐機能では、繰り返し対象を最大15件まで設定可能です。
- Gmailのオペレーションでは、送信するメールの件名や本文の内容を自由にカスタマイズできます。
■注意事項
- kintone、GmailのそれぞれとYoomを連携してください。
- 「同じ処理を繰り返す」オペレーション間の操作は、チームプラン・サクセスプランでのみご利用いただける機能となっております。フリープラン・ミニプランの場合は設定しているフローボットのオペレーションやデータコネクトはエラーとなりますので、ご注意ください。
- チームプランやサクセスプランなどの有料プランは、2週間の無料トライアルを行うことが可能です。無料トライアル中には制限対象のアプリや機能(オペレーション)を使用することができます。
Gmailで受信した内容をデータベースに登録する
Gmailで受信した内容をもとに様々なデータベースを自動で更新することができます。
■概要Gmailに届くお問い合わせや資料請求などの重要なメールを、一件ずつ確認してGoogle スプレッドシートに手作業で転記していませんか?この作業は時間がかかるだけでなく、入力ミスや転記漏れの原因にもなりかねません。このワークフローを活用すれば、Gmailで特定のラベルが付いたメールを受信した際に、AIが自動で内容を抽出し、要約した上でGoogle スプレッドシートへ追加することが可能です。手作業によるメール管理を自動化し、業務を効率化できます。
■このテンプレートをおすすめする方- Gmailで受信した問い合わせや注文メールの管理を効率化したい方
- Google スプレッドシートへの手作業でのデータ転記に手間を感じている方
- メール対応業務を自動化し、ヒューマンエラーを減らしたいと考えている方
■このテンプレートを使うメリット- Gmailでメールを受信すると、自動で内容を抽出しGoogle スプレッドシートへ記録するため、手作業での転記にかかっていた時間を短縮できます。
- 人の手によるコピー&ペースト作業がなくなることで、転記ミスや記載漏れといったヒューマンエラーの防止に繋がります。
■フローボットの流れ- はじめに、GmailとGoogle スプレッドシートをYoomと連携します。
- 次に、トリガーでGmailを選択し、「特定のラベルのメールを受信したら」というアクションを設定します。
- 次に、オペレーションでAI機能の「テキスト抽出」を設定し、メール本文から必要な情報を抽出します。
- 続けて、オペレーションで要約機能の「要約する」を設定し、前のステップで抽出したテキストを要約します。
- 最後に、オペレーションでGoogle スプレッドシートの「レコードを追加する」を設定し、指定のスプレッドシートに情報を追加します。
※「トリガー」:フロー起動のきっかけとなるアクション、「オペレーション」:トリガー起動後、フロー内で処理を行うアクション
■このワークフローのカスタムポイント- Gmailのトリガー設定では、フローボットを起動させたいメールに付与するラベルを任意で設定してください。
- AI機能では、受信したメールの本文や件名などから、抽出したいテキスト項目を任意で設定できます。
- 要約機能では、要約の対象としたいテキストや、要約後の文字数を任意で設定することが可能です。
- Google スプレッドシートでレコードを追加する際に、対象のスプレッドシートIDやシート名を任意で設定してください。
■注意事項- Gmail、Google スプレッドシートのそれぞれとYoomを連携してください。
- トリガーは5分、10分、15分、30分、60分の間隔で起動間隔を選択できます。
- プランによって最短の起動間隔が異なりますので、ご注意ください。
- 書類を発行する機能についての詳細は、下記の「「書類を発行する」の設定方法」をご参照ください。
■概要
「Gmailで受信したお問い合わせメールを自動的にSalesforceに登録する」ワークフローは、GmailとSalesforceの連携を活用し、お問い合わせメールを自動的にSalesforceに登録する業務ワークフローです。
■このテンプレートをおすすめする方
- Gmailで多数のお問い合わせメールを管理している営業・サポート担当者の方
- Salesforceを活用して顧客データを一元管理したいIT担当者の方
- 手動でのデータ入力に時間を取られ、業務効率の改善を求めている企業の管理職の方
- データの正確性を高め、ヒューマンエラーを減らしたいと考えているチームリーダーの方
■このテンプレートを使うメリット
Gmailで受信したメールの内容を一件ずつ手作業でSalesforceに登録するのは、業務の進行を滞らせます。
このフローでは、Gmailで受信した内容を用いて、Salesforceに自動で登録されるため、手作業を大幅に省くことができます。
また、自動化によりヒューマンエラーを削減し、Salesforce上の顧客データの一貫性を保ちます。
これらにより、手動でのデータ入力を省略し、迅速かつ正確な顧客管理を実現し、業務効率の向上とデータの一貫性が期待できます。
■概要Webサイト経由で届く商談希望のメールに、一件ずつ手動で対応していませんか。HubSpotなどのSFA/CRMを利用している場合、メールの内容を確認して取引情報を手入力する作業は手間がかかるだけでなく、対応漏れや入力ミスの原因にもなり得ます。このワークフローは、Gmailで特定のメールを受信したことをトリガーにして、メールの内容からHubSpotの取引を自動で作成するため、こうした定型業務を効率化し、スムーズな顧客対応を実現します。
■このテンプレートをおすすめする方- Gmailで受信した問い合わせから、HubSpotへの取引登録を手作業で行っている営業担当者の方
- HubSpotを活用した顧客管理で、初期対応のスピードアップと入力漏れ防止を目指しているチームの方
- 見込み顧客からの商談希望への対応プロセスを自動化し、営業活動の効率化を図りたいと考えている方
■このテンプレートを使うメリット- Gmailで商談希望メールを受信後、自動でHubSpotに取引が作成されるため、これまで手作業に費やしていたデータ入力の時間を短縮することができます。
- メールからの情報転記が不要になることで、入力間違いや対応漏れといったヒューマンエラーを防ぎ、データの正確性を保つことに繋がります。
■フローボットの流れ- はじめに、GmailとHubSpotをYoomと連携します
- 次に、トリガーでGmailを選択し、「特定のラベルのメールを受信したら」というアクションを設定します
- 次に、オペレーションでHubSpotの「コンタクトを検索(キーワード検索)」を設定し、受信したメールの送信者情報などから既存コンタクトを検索します
- 最後に、オペレーションでHubSpotの「取引の作成」アクションを設定し、メールの内容や検索したコンタクト情報を紐付けて取引を作成します
※「トリガー」:フロー起動のきっかけとなるアクション、「オペレーション」:トリガー起動後、フロー内で処理を行うアクション
■このワークフローのカスタムポイント- Gmailのトリガー設定では、起動のきっかけとしたいメールに付与するラベルを任意で設定してください。
- HubSpotでコンタクトを検索する際に、キーとなる情報(メールアドレスなど)を、トリガーで受信したメールの情報から動的に指定できます。
- HubSpotで取引を作成する際、取引名や担当者などの各項目に、メールの件名や本文の内容、または固定のテキストなどを自由に設定することが可能です。
■注意事項- Gmail、HubSpotのそれぞれとYoomを連携してください。
- トリガーは5分、10分、15分、30分、60分の間隔で起動間隔を選択できます。
- プランによって最短の起動間隔が異なりますので、ご注意ください。
■このテンプレートをおすすめする方
- Gmailで受信した問い合わせや注文メールの管理を効率化したい方
- Google スプレッドシートへの手作業でのデータ転記に手間を感じている方
- メール対応業務を自動化し、ヒューマンエラーを減らしたいと考えている方
■このテンプレートを使うメリット
- Gmailでメールを受信すると、自動で内容を抽出しGoogle スプレッドシートへ記録するため、手作業での転記にかかっていた時間を短縮できます。
- 人の手によるコピー&ペースト作業がなくなることで、転記ミスや記載漏れといったヒューマンエラーの防止に繋がります。
■フローボットの流れ
- はじめに、GmailとGoogle スプレッドシートをYoomと連携します。
- 次に、トリガーでGmailを選択し、「特定のラベルのメールを受信したら」というアクションを設定します。
- 次に、オペレーションでAI機能の「テキスト抽出」を設定し、メール本文から必要な情報を抽出します。
- 続けて、オペレーションで要約機能の「要約する」を設定し、前のステップで抽出したテキストを要約します。
- 最後に、オペレーションでGoogle スプレッドシートの「レコードを追加する」を設定し、指定のスプレッドシートに情報を追加します。
■このワークフローのカスタムポイント
- Gmailのトリガー設定では、フローボットを起動させたいメールに付与するラベルを任意で設定してください。
- AI機能では、受信したメールの本文や件名などから、抽出したいテキスト項目を任意で設定できます。
- 要約機能では、要約の対象としたいテキストや、要約後の文字数を任意で設定することが可能です。
- Google スプレッドシートでレコードを追加する際に、対象のスプレッドシートIDやシート名を任意で設定してください。
■注意事項
- Gmail、Google スプレッドシートのそれぞれとYoomを連携してください。
- トリガーは5分、10分、15分、30分、60分の間隔で起動間隔を選択できます。
- プランによって最短の起動間隔が異なりますので、ご注意ください。
- 書類を発行する機能についての詳細は、下記の「「書類を発行する」の設定方法」をご参照ください。
■概要
「Gmailで受信したお問い合わせメールを自動的にSalesforceに登録する」ワークフローは、GmailとSalesforceの連携を活用し、お問い合わせメールを自動的にSalesforceに登録する業務ワークフローです。
■このテンプレートをおすすめする方
- Gmailで多数のお問い合わせメールを管理している営業・サポート担当者の方
- Salesforceを活用して顧客データを一元管理したいIT担当者の方
- 手動でのデータ入力に時間を取られ、業務効率の改善を求めている企業の管理職の方
- データの正確性を高め、ヒューマンエラーを減らしたいと考えているチームリーダーの方
■このテンプレートを使うメリット
Gmailで受信したメールの内容を一件ずつ手作業でSalesforceに登録するのは、業務の進行を滞らせます。
このフローでは、Gmailで受信した内容を用いて、Salesforceに自動で登録されるため、手作業を大幅に省くことができます。
また、自動化によりヒューマンエラーを削減し、Salesforce上の顧客データの一貫性を保ちます。
これらにより、手動でのデータ入力を省略し、迅速かつ正確な顧客管理を実現し、業務効率の向上とデータの一貫性が期待できます。
■このテンプレートをおすすめする方
- Gmailで受信した問い合わせから、HubSpotへの取引登録を手作業で行っている営業担当者の方
- HubSpotを活用した顧客管理で、初期対応のスピードアップと入力漏れ防止を目指しているチームの方
- 見込み顧客からの商談希望への対応プロセスを自動化し、営業活動の効率化を図りたいと考えている方
■このテンプレートを使うメリット
- Gmailで商談希望メールを受信後、自動でHubSpotに取引が作成されるため、これまで手作業に費やしていたデータ入力の時間を短縮することができます。
- メールからの情報転記が不要になることで、入力間違いや対応漏れといったヒューマンエラーを防ぎ、データの正確性を保つことに繋がります。
■フローボットの流れ
- はじめに、GmailとHubSpotをYoomと連携します
- 次に、トリガーでGmailを選択し、「特定のラベルのメールを受信したら」というアクションを設定します
- 次に、オペレーションでHubSpotの「コンタクトを検索(キーワード検索)」を設定し、受信したメールの送信者情報などから既存コンタクトを検索します
- 最後に、オペレーションでHubSpotの「取引の作成」アクションを設定し、メールの内容や検索したコンタクト情報を紐付けて取引を作成します
■このワークフローのカスタムポイント
- Gmailのトリガー設定では、起動のきっかけとしたいメールに付与するラベルを任意で設定してください。
- HubSpotでコンタクトを検索する際に、キーとなる情報(メールアドレスなど)を、トリガーで受信したメールの情報から動的に指定できます。
- HubSpotで取引を作成する際、取引名や担当者などの各項目に、メールの件名や本文の内容、または固定のテキストなどを自由に設定することが可能です。
■注意事項
- Gmail、HubSpotのそれぞれとYoomを連携してください。
- トリガーは5分、10分、15分、30分、60分の間隔で起動間隔を選択できます。
- プランによって最短の起動間隔が異なりますので、ご注意ください。
NotionとGmailを連携するメリット
メリット1: 送信業務を自動化できる
例えば、Notionで操作マニュアルを管理しており、情報が更新・追加された際に手作業で送信業務を行っていたとします。
そこで、NotionとGmailを連携しておけば、送信作業を軽減することができ、事務作業の効率向上が目指せそうです。
自動化することで、情報の更新頻度が高く通知が頻繁な場合、作業時間を大幅に短縮できそうですね。
メリット2: 情報共有が容易にできる
NotionとGmailを連携することで、チーム内で簡単に情報共有することが期待できます。
情報に変更があれば、Gmailに通知が届くので、全員で最新の情報を取得できるようになります。
自動でメールが届くので、情報の確認がしやすくなるだけでなく、情報共有の漏れ自体も防止され、チーム間でのコミュニケーションもスムーズになるかもしれません。
リモートワークなど直接会話できない環境では特に効果を発揮しそうですね!
まとめ
いかがでしたか?NotionとGmailを連携することで、通知作業を自動化し、情報共有が簡単に行えるようになりました!
手作業の業務を軽減することで、他の重要な業務に時間を割くことができ、生産性の向上が期待できそうです。
また、ノーコードでアプリ連携ができるYoomを活用することで、非エンジニアでも簡単に業務フローボットを作成できました。
ぜひこの機会に、NotionとGmailを連携させて、通知業務を自動化してみましょう!
プログラミング知識なしで手軽に構築できます。