・
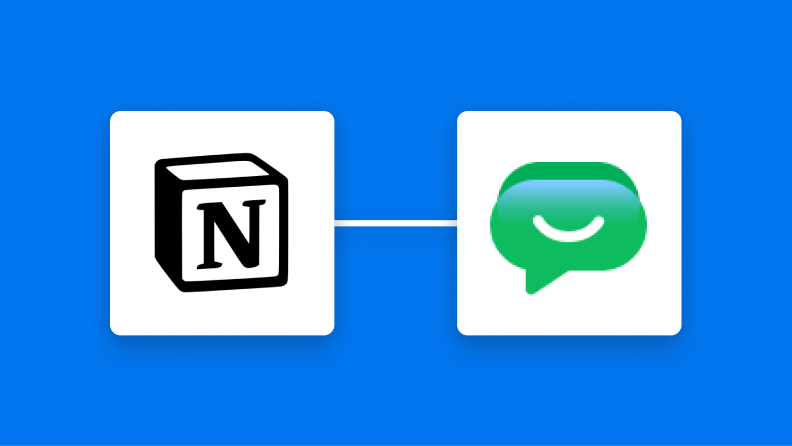
Notionの任意のデータベースに情報が追加されたら、Google Chatに通知する方法
チームでNotionを活用していると、データベースに情報が追加された際に、メンバー全員へスムーズに共有したいと感じることはありませんか?
手動での連絡は手間がかかり、伝達ミスが発生することもあります。
このような課題を解決するのが、Yoomを活用したNotionとGoogle Chatの連携です。
Notionに情報が追加されると、自動でGoogle Chatに通知されるため、手作業が減り情報共有の効率を高めることが期待できます。
これにより、メンバーが最新の情報を確実に把握し、適切な対応を取りやすくなるでしょう。
本記事では、ノーコードツールのYoomを使ってフローを設定する方法をご紹介します。業務の効率化を図りたい方は、ぜひ最後までご覧ください。
今すぐに試したい方へ
本記事ではノーコードツール「Yoom」を使用した連携方法をご紹介します。
難しい設定や操作は必要なく、非エンジニアの方でも簡単に実現できます。
下記のテンプレートから今すぐに始めることもできますので、ぜひお試しください!
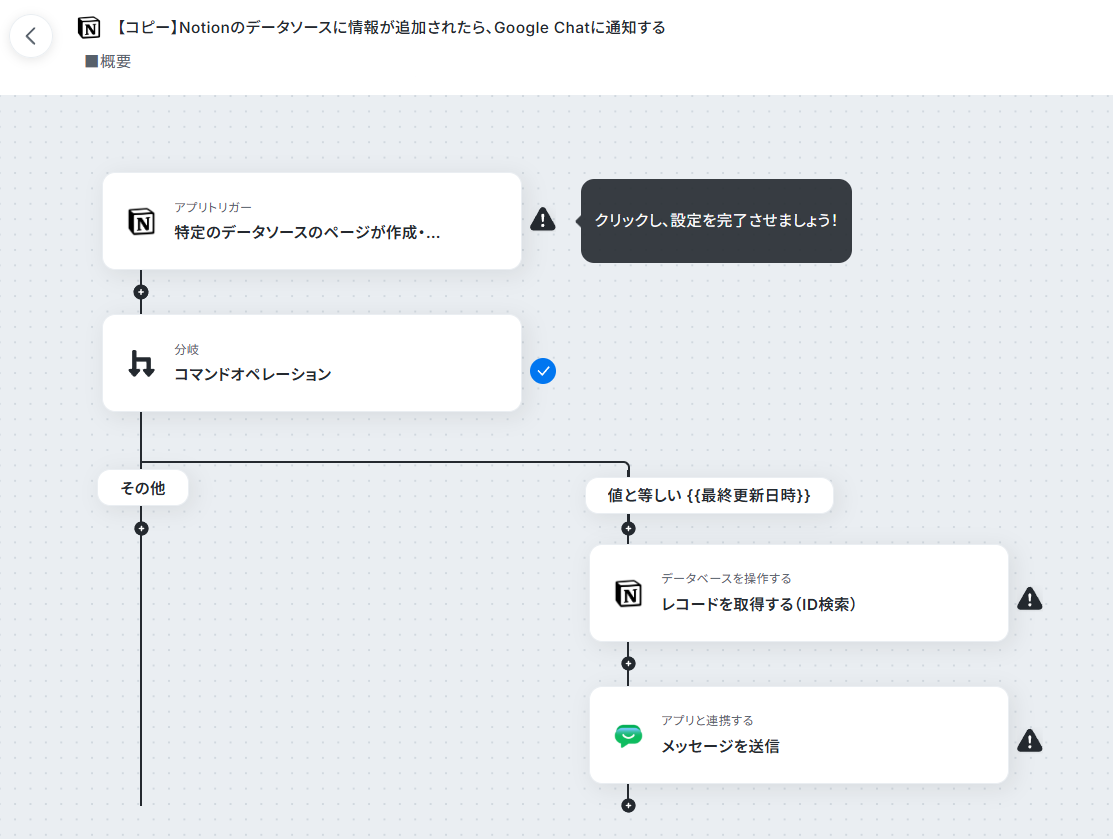
■概要Notionでタスク管理や情報共有を行う際、新規データが追加されるたびに手作業でGoogle Chatに通知するのは手間がかかり、通知漏れのリスクも伴います。重要な情報共有が遅れたり、抜け漏れが発生したりすると、業務に支障をきたすことも少なくありません。このワークフローを活用すれば、Notionのデータソースに情報が追加されると、自動でGoogle Chatに通知が送信されるため、こうした情報共有の課題を解消できます。
■このテンプレートをおすすめする方- Notionで管理している情報を、都度手作業でGoogle Chatに通知している方
- 手作業による通知で、連絡漏れや共有の遅延といったミスをなくしたいと考えている方
- チーム内の情報共有をより円滑にし、プロジェクトの進行をスムーズにしたいマネージャーの方
■このテンプレートを使うメリット- Notionのデータソースに情報が追加されると自動で通知されるため、これまで手作業での連絡に費やしていた時間を他の業務に充てることができます
- 手作業による通知漏れや宛先の間違いといったヒューマンエラーを防ぎ、確実な情報共有を実現します
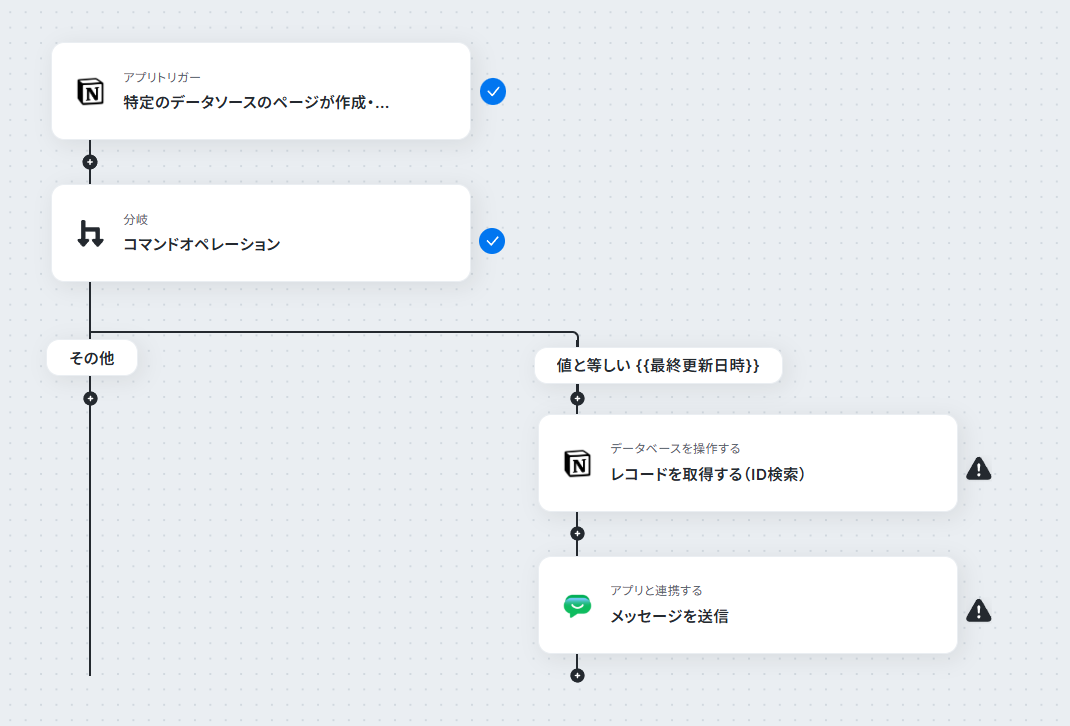
■フローボットの流れ- はじめに、NotionとGoogle ChatをYoomと連携します
- 次に、トリガーでNotionを選択し、「特定のデータソースのページが作成・更新されたら」というアクションを設定します。
- 次に、オペレーションで分岐機能を設定し、新規作成時のみ後続の処理へ進むように分岐させます。
- 続けて、オペレーションでNotionの「レコードを取得する(ID検索)」アクションを設定し、トリガーとなったページの情報を取得します。
- 最後に、オペレーションでGoogle Chatの「スペースにメッセージを送信」アクションを設定し、指定したスペースに通知メッセージを送信します
※「トリガー」:フロー起動のきっかけとなるアクション、「オペレーション」:トリガー起動後、フロー内で処理を行うアクション
■このワークフローのカスタムポイント- Google Chatへの通知設定では、メッセージを送信するスペースを任意で指定することが可能です
- 通知するメッセージの本文は、固定のテキストを設定するだけでなく、トリガーで取得したNotionのページタイトルやプロパティ情報などを変数として埋め込み、動的に変更できます
■注意事項- Notion、Google ChatのそれぞれとYoomを連携してください。
- トリガーは5分、10分、15分、30分、60分の間隔で起動間隔を選択できます。プランによって最短の起動間隔が異なりますので、ご注意ください。
- Google Chatとの連携はGoogle Workspaceの場合のみ可能です。詳細は「Google Chatでスペースにメッセージを送る方法」を参照ください。
- 分岐はパーソナルプラン以上のプランでご利用いただける機能(オペレーション)となっております。フリープランの場合は設定しているフローボットのオペレーションはエラーとなりますので、ご注意ください。
- パーソナルプランなどの有料プランは、2週間の無料トライアルを行うことが可能です。無料トライアル中には制限対象のアプリや機能(オペレーション)を使用することができます。詳しくは、「料金プランのページ」をご参照ください。
■このテンプレートをおすすめする方
- Notionで管理している情報を、都度手作業でGoogle Chatに通知している方
- 手作業による通知で、連絡漏れや共有の遅延といったミスをなくしたいと考えている方
- チーム内の情報共有をより円滑にし、プロジェクトの進行をスムーズにしたいマネージャーの方
■このテンプレートを使うメリット
- Notionのデータソースに情報が追加されると自動で通知されるため、これまで手作業での連絡に費やしていた時間を他の業務に充てることができます
- 手作業による通知漏れや宛先の間違いといったヒューマンエラーを防ぎ、確実な情報共有を実現します
■フローボットの流れ
- はじめに、NotionとGoogle ChatをYoomと連携します
- 次に、トリガーでNotionを選択し、「特定のデータソースのページが作成・更新されたら」というアクションを設定します。
- 次に、オペレーションで分岐機能を設定し、新規作成時のみ後続の処理へ進むように分岐させます。
- 続けて、オペレーションでNotionの「レコードを取得する(ID検索)」アクションを設定し、トリガーとなったページの情報を取得します。
- 最後に、オペレーションでGoogle Chatの「スペースにメッセージを送信」アクションを設定し、指定したスペースに通知メッセージを送信します
■このワークフローのカスタムポイント
- Google Chatへの通知設定では、メッセージを送信するスペースを任意で指定することが可能です
- 通知するメッセージの本文は、固定のテキストを設定するだけでなく、トリガーで取得したNotionのページタイトルやプロパティ情報などを変数として埋め込み、動的に変更できます
■注意事項
- Notion、Google ChatのそれぞれとYoomを連携してください。
- トリガーは5分、10分、15分、30分、60分の間隔で起動間隔を選択できます。プランによって最短の起動間隔が異なりますので、ご注意ください。
- Google Chatとの連携はGoogle Workspaceの場合のみ可能です。詳細は「Google Chatでスペースにメッセージを送る方法」を参照ください。
- 分岐はパーソナルプラン以上のプランでご利用いただける機能(オペレーション)となっております。フリープランの場合は設定しているフローボットのオペレーションはエラーとなりますので、ご注意ください。
- パーソナルプランなどの有料プランは、2週間の無料トライアルを行うことが可能です。無料トライアル中には制限対象のアプリや機能(オペレーション)を使用することができます。詳しくは、「料金プランのページ」をご参照ください。
Notionに追加した内容をGoogle Chatに通知する方法
Notionのデータベースにレコードが追加されたことをNotionのAPIを利用して検知し、Google Chatの提供するAPIを用いて指定のスペースに通知を送ることで実現が可能です。
一般的に実現にはプログラミングの知識が必要ですが、ノーコードツールのYoomを用いることでプログラミングの知識がなくても簡単に実現できます。
※今回連携するアプリの公式サイト:Notion/Google Chat
[Yoomとは]
- YoomとNotion、Google Chatをマイアプリ連携
- テンプレートをコピー
- フローの詳細設定
- トリガーをON
Yoomを利用していない方は、こちらの登録フォームから無料登録してください。すでにYoomを利用している方はログインしましょう。
■概要Notionでタスク管理や情報共有を行う際、新規データが追加されるたびに手作業でGoogle Chatに通知するのは手間がかかり、通知漏れのリスクも伴います。重要な情報共有が遅れたり、抜け漏れが発生したりすると、業務に支障をきたすことも少なくありません。このワークフローを活用すれば、Notionのデータソースに情報が追加されると、自動でGoogle Chatに通知が送信されるため、こうした情報共有の課題を解消できます。
■このテンプレートをおすすめする方- Notionで管理している情報を、都度手作業でGoogle Chatに通知している方
- 手作業による通知で、連絡漏れや共有の遅延といったミスをなくしたいと考えている方
- チーム内の情報共有をより円滑にし、プロジェクトの進行をスムーズにしたいマネージャーの方
■このテンプレートを使うメリット- Notionのデータソースに情報が追加されると自動で通知されるため、これまで手作業での連絡に費やしていた時間を他の業務に充てることができます
- 手作業による通知漏れや宛先の間違いといったヒューマンエラーを防ぎ、確実な情報共有を実現します
■フローボットの流れ- はじめに、NotionとGoogle ChatをYoomと連携します
- 次に、トリガーでNotionを選択し、「特定のデータソースのページが作成・更新されたら」というアクションを設定します。
- 次に、オペレーションで分岐機能を設定し、新規作成時のみ後続の処理へ進むように分岐させます。
- 続けて、オペレーションでNotionの「レコードを取得する(ID検索)」アクションを設定し、トリガーとなったページの情報を取得します。
- 最後に、オペレーションでGoogle Chatの「スペースにメッセージを送信」アクションを設定し、指定したスペースに通知メッセージを送信します
※「トリガー」:フロー起動のきっかけとなるアクション、「オペレーション」:トリガー起動後、フロー内で処理を行うアクション
■このワークフローのカスタムポイント- Google Chatへの通知設定では、メッセージを送信するスペースを任意で指定することが可能です
- 通知するメッセージの本文は、固定のテキストを設定するだけでなく、トリガーで取得したNotionのページタイトルやプロパティ情報などを変数として埋め込み、動的に変更できます
■注意事項- Notion、Google ChatのそれぞれとYoomを連携してください。
- トリガーは5分、10分、15分、30分、60分の間隔で起動間隔を選択できます。プランによって最短の起動間隔が異なりますので、ご注意ください。
- Google Chatとの連携はGoogle Workspaceの場合のみ可能です。詳細は「Google Chatでスペースにメッセージを送る方法」を参照ください。
- 分岐はパーソナルプラン以上のプランでご利用いただける機能(オペレーション)となっております。フリープランの場合は設定しているフローボットのオペレーションはエラーとなりますので、ご注意ください。
- パーソナルプランなどの有料プランは、2週間の無料トライアルを行うことが可能です。無料トライアル中には制限対象のアプリや機能(オペレーション)を使用することができます。詳しくは、「料金プランのページ」をご参照ください。
■このテンプレートをおすすめする方
- Notionで管理している情報を、都度手作業でGoogle Chatに通知している方
- 手作業による通知で、連絡漏れや共有の遅延といったミスをなくしたいと考えている方
- チーム内の情報共有をより円滑にし、プロジェクトの進行をスムーズにしたいマネージャーの方
■このテンプレートを使うメリット
- Notionのデータソースに情報が追加されると自動で通知されるため、これまで手作業での連絡に費やしていた時間を他の業務に充てることができます
- 手作業による通知漏れや宛先の間違いといったヒューマンエラーを防ぎ、確実な情報共有を実現します
■フローボットの流れ
- はじめに、NotionとGoogle ChatをYoomと連携します
- 次に、トリガーでNotionを選択し、「特定のデータソースのページが作成・更新されたら」というアクションを設定します。
- 次に、オペレーションで分岐機能を設定し、新規作成時のみ後続の処理へ進むように分岐させます。
- 続けて、オペレーションでNotionの「レコードを取得する(ID検索)」アクションを設定し、トリガーとなったページの情報を取得します。
- 最後に、オペレーションでGoogle Chatの「スペースにメッセージを送信」アクションを設定し、指定したスペースに通知メッセージを送信します
■このワークフローのカスタムポイント
- Google Chatへの通知設定では、メッセージを送信するスペースを任意で指定することが可能です
- 通知するメッセージの本文は、固定のテキストを設定するだけでなく、トリガーで取得したNotionのページタイトルやプロパティ情報などを変数として埋め込み、動的に変更できます
■注意事項
- Notion、Google ChatのそれぞれとYoomを連携してください。
- トリガーは5分、10分、15分、30分、60分の間隔で起動間隔を選択できます。プランによって最短の起動間隔が異なりますので、ご注意ください。
- Google Chatとの連携はGoogle Workspaceの場合のみ可能です。詳細は「Google Chatでスペースにメッセージを送る方法」を参照ください。
- 分岐はパーソナルプラン以上のプランでご利用いただける機能(オペレーション)となっております。フリープランの場合は設定しているフローボットのオペレーションはエラーとなりますので、ご注意ください。
- パーソナルプランなどの有料プランは、2週間の無料トライアルを行うことが可能です。無料トライアル中には制限対象のアプリや機能(オペレーション)を使用することができます。詳しくは、「料金プランのページ」をご参照ください。
ステップ1:NotionとGoogle Chatをマイアプリ連携
ここではYoomとそれぞれのアプリを連携して、操作を行えるようにしていきます。
NotionとYoomのマイアプリ登録
以下の手順をご参照ください。
Google ChatとYoomのマイアプリ登録
以下の手順をご参照ください。Google Chat(OAuth)のマイアプリ登録方法も併せて確認しておきましょう。
※Google Chatとの連携はGoogle Workspaceの場合のみ可能です。詳細はGoogle Chatでスペースにメッセージを送る方法を参照ください。
続いて、フローの詳細設定に移ります。
下のバナーから「試してみる」をクリックしてテンプレートをコピーしておきましょう。
■概要Notionでタスク管理や情報共有を行う際、新規データが追加されるたびに手作業でGoogle Chatに通知するのは手間がかかり、通知漏れのリスクも伴います。重要な情報共有が遅れたり、抜け漏れが発生したりすると、業務に支障をきたすことも少なくありません。このワークフローを活用すれば、Notionのデータソースに情報が追加されると、自動でGoogle Chatに通知が送信されるため、こうした情報共有の課題を解消できます。
■このテンプレートをおすすめする方- Notionで管理している情報を、都度手作業でGoogle Chatに通知している方
- 手作業による通知で、連絡漏れや共有の遅延といったミスをなくしたいと考えている方
- チーム内の情報共有をより円滑にし、プロジェクトの進行をスムーズにしたいマネージャーの方
■このテンプレートを使うメリット- Notionのデータソースに情報が追加されると自動で通知されるため、これまで手作業での連絡に費やしていた時間を他の業務に充てることができます
- 手作業による通知漏れや宛先の間違いといったヒューマンエラーを防ぎ、確実な情報共有を実現します
■フローボットの流れ- はじめに、NotionとGoogle ChatをYoomと連携します
- 次に、トリガーでNotionを選択し、「特定のデータソースのページが作成・更新されたら」というアクションを設定します。
- 次に、オペレーションで分岐機能を設定し、新規作成時のみ後続の処理へ進むように分岐させます。
- 続けて、オペレーションでNotionの「レコードを取得する(ID検索)」アクションを設定し、トリガーとなったページの情報を取得します。
- 最後に、オペレーションでGoogle Chatの「スペースにメッセージを送信」アクションを設定し、指定したスペースに通知メッセージを送信します
※「トリガー」:フロー起動のきっかけとなるアクション、「オペレーション」:トリガー起動後、フロー内で処理を行うアクション
■このワークフローのカスタムポイント- Google Chatへの通知設定では、メッセージを送信するスペースを任意で指定することが可能です
- 通知するメッセージの本文は、固定のテキストを設定するだけでなく、トリガーで取得したNotionのページタイトルやプロパティ情報などを変数として埋め込み、動的に変更できます
■注意事項- Notion、Google ChatのそれぞれとYoomを連携してください。
- トリガーは5分、10分、15分、30分、60分の間隔で起動間隔を選択できます。プランによって最短の起動間隔が異なりますので、ご注意ください。
- Google Chatとの連携はGoogle Workspaceの場合のみ可能です。詳細は「Google Chatでスペースにメッセージを送る方法」を参照ください。
- 分岐はパーソナルプラン以上のプランでご利用いただける機能(オペレーション)となっております。フリープランの場合は設定しているフローボットのオペレーションはエラーとなりますので、ご注意ください。
- パーソナルプランなどの有料プランは、2週間の無料トライアルを行うことが可能です。無料トライアル中には制限対象のアプリや機能(オペレーション)を使用することができます。詳しくは、「料金プランのページ」をご参照ください。
■このテンプレートをおすすめする方
- Notionで管理している情報を、都度手作業でGoogle Chatに通知している方
- 手作業による通知で、連絡漏れや共有の遅延といったミスをなくしたいと考えている方
- チーム内の情報共有をより円滑にし、プロジェクトの進行をスムーズにしたいマネージャーの方
■このテンプレートを使うメリット
- Notionのデータソースに情報が追加されると自動で通知されるため、これまで手作業での連絡に費やしていた時間を他の業務に充てることができます
- 手作業による通知漏れや宛先の間違いといったヒューマンエラーを防ぎ、確実な情報共有を実現します
■フローボットの流れ
- はじめに、NotionとGoogle ChatをYoomと連携します
- 次に、トリガーでNotionを選択し、「特定のデータソースのページが作成・更新されたら」というアクションを設定します。
- 次に、オペレーションで分岐機能を設定し、新規作成時のみ後続の処理へ進むように分岐させます。
- 続けて、オペレーションでNotionの「レコードを取得する(ID検索)」アクションを設定し、トリガーとなったページの情報を取得します。
- 最後に、オペレーションでGoogle Chatの「スペースにメッセージを送信」アクションを設定し、指定したスペースに通知メッセージを送信します
■このワークフローのカスタムポイント
- Google Chatへの通知設定では、メッセージを送信するスペースを任意で指定することが可能です
- 通知するメッセージの本文は、固定のテキストを設定するだけでなく、トリガーで取得したNotionのページタイトルやプロパティ情報などを変数として埋め込み、動的に変更できます
■注意事項
- Notion、Google ChatのそれぞれとYoomを連携してください。
- トリガーは5分、10分、15分、30分、60分の間隔で起動間隔を選択できます。プランによって最短の起動間隔が異なりますので、ご注意ください。
- Google Chatとの連携はGoogle Workspaceの場合のみ可能です。詳細は「Google Chatでスペースにメッセージを送る方法」を参照ください。
- 分岐はパーソナルプラン以上のプランでご利用いただける機能(オペレーション)となっております。フリープランの場合は設定しているフローボットのオペレーションはエラーとなりますので、ご注意ください。
- パーソナルプランなどの有料プランは、2週間の無料トライアルを行うことが可能です。無料トライアル中には制限対象のアプリや機能(オペレーション)を使用することができます。詳しくは、「料金プランのページ」をご参照ください。
ステップ2:アプリトリガー設定
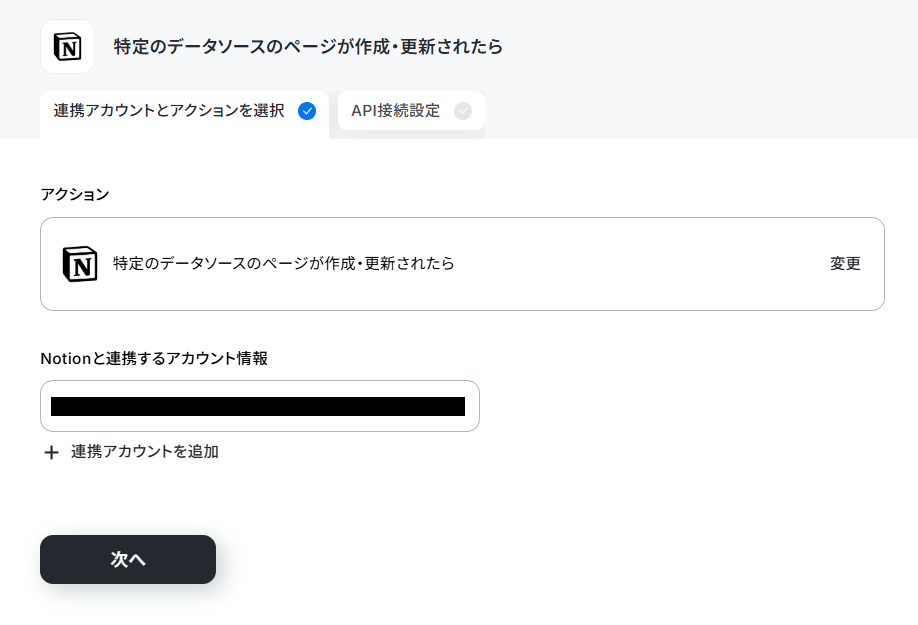
まずはNotionのトリガー設定をしていきます。「特定のデータソースのページが作成・更新されたら」をクリックしましょう。
1ページ目は、マイアプリ連携をしたNotionのアカウント情報が反映されています。
アカウント情報を確認したら、次に進みます。
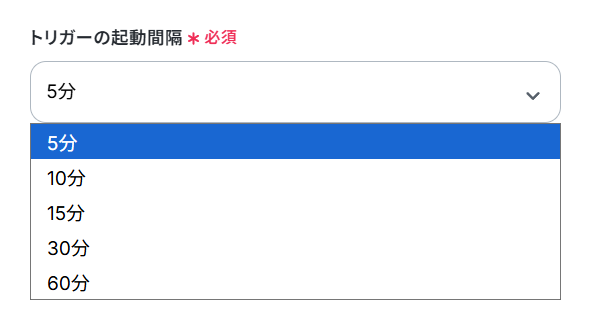
次の画面で「トリガーの起動間隔」を設定しましょう。
※トリガーの起動タイミングは、5分、10分、15分、30分、60分のいずれかで設定できます。
ご利用プランによって、設定できるトリガーの最短間隔が違うので、その点は要チェックです。
なお、基本的にはそのプランの最短の起動間隔にしてお使いいただくことをおすすめします。
「データソースID」に、注釈にそって情報を入力します。
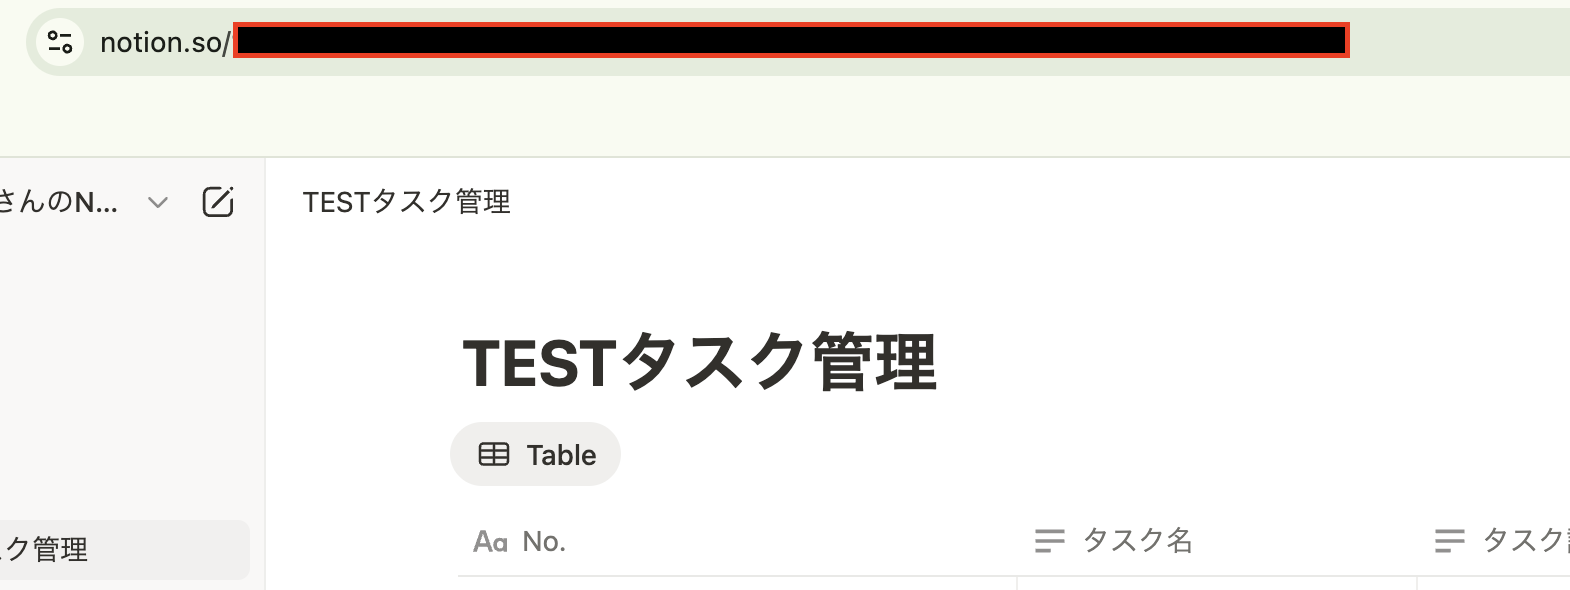
入力バークリック後の『候補』から情報を選択することも可能です。
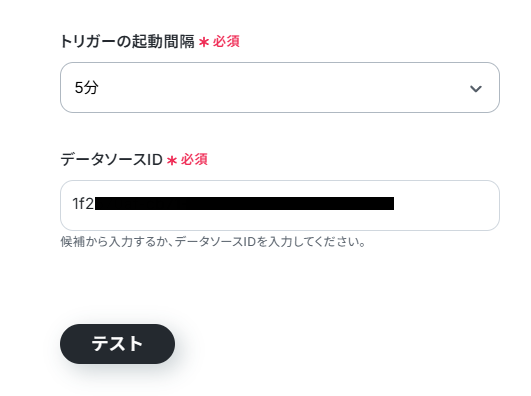
両方とも入力をしたら、指定したデータソースを更新(作成した場合はそのまま)してから「テスト」をクリックしてください。
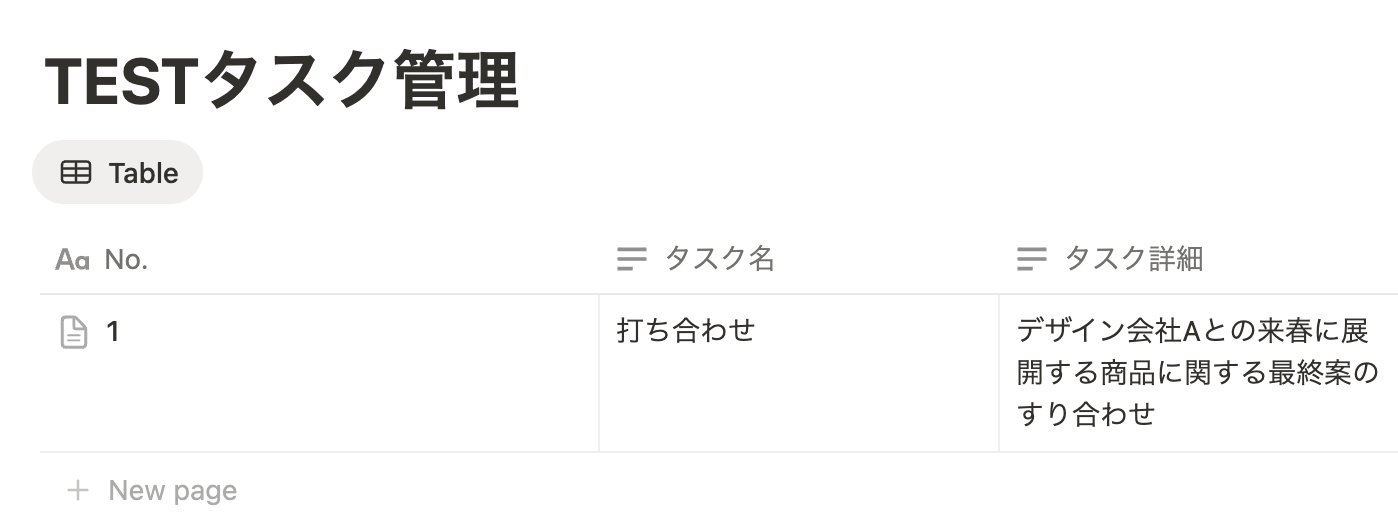
今回はタスクに関するページのデータベースを使用して、テストを行いました。
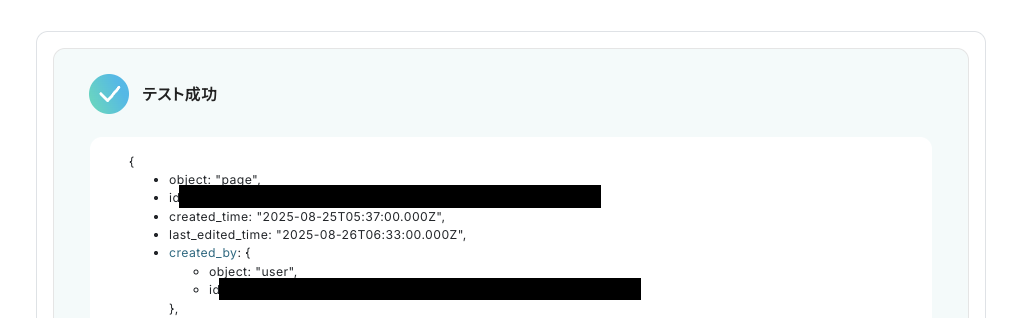
以下のようにテストに成功し、取得した情報が確認できたら、『完了』を押しましょう。取得した値は、この後のステップで引用・活用できます。
※取得した値とは?
トリガーやオペレーション設定時に「テスト」を実行して取得した値のことです。
後続のオペレーション設定時の値として利用でき、フローボットを起動する度に変動した値となります。

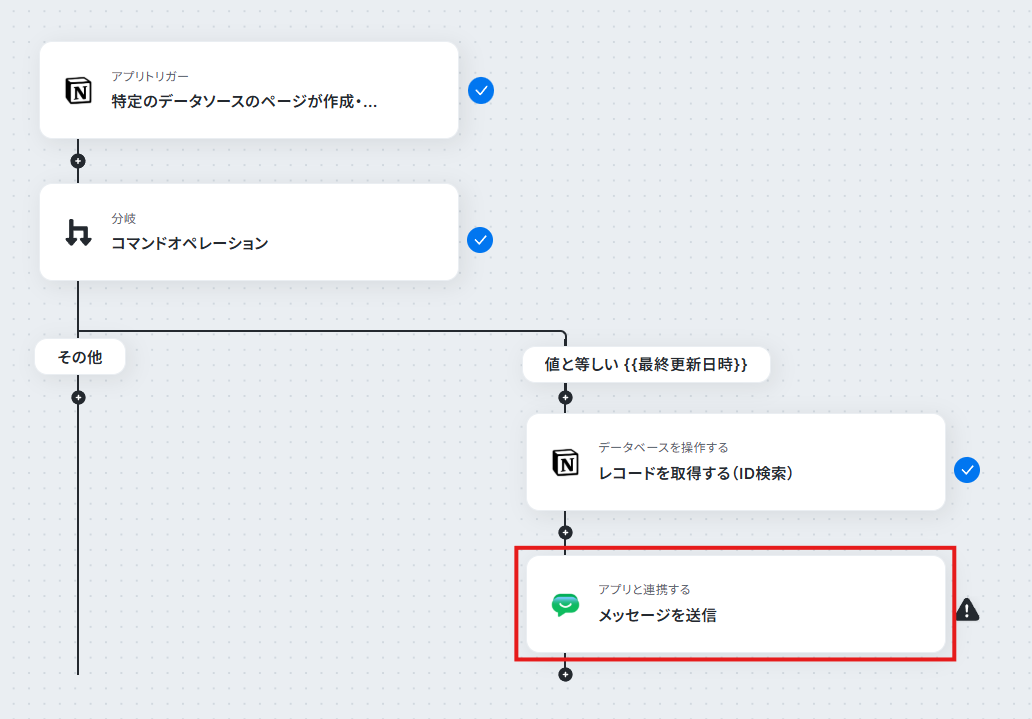
ステップ3:条件に合わせて分岐する設定
続いて、2つ目の「分岐:コマンドオペレーション」をクリックしましょう。
ここでは、指定した条件に応じて後続のアクションに進むか否かを設定します。
※「分岐する」オペレーションは、ミニプラン以上でご利用いただけます。フリープランで利用するとエラーになってしまうのでご注意ください。
※ミニプランなどの有料プランは2週間の無料トライアルが可能です。無料トライアル中なら、普段制限されているアプリや機能も自由にお試しいただけますので、ぜひ活用してみてください。
「分岐対象の取得した値」は、プルダウンから選択できます。
今回は、トリガーのアクションを対象とします。
また、「分岐条件」は運用状況に合わせて、複数設定可能です。追加する際は【+分岐条件を追加】をクリックして値を設定してくださいね。
今回のフローでは、作成日時と最終更新日時の値が等しいと、後続アクションに進むように設定しました。(以下は取得した値からの引用の一例です。)
このように設定することで、新規作成・更新に該当しない場合は後続アクションに進まないことになるので、既存情報を誤って共有するミスがなくなりそうですね。
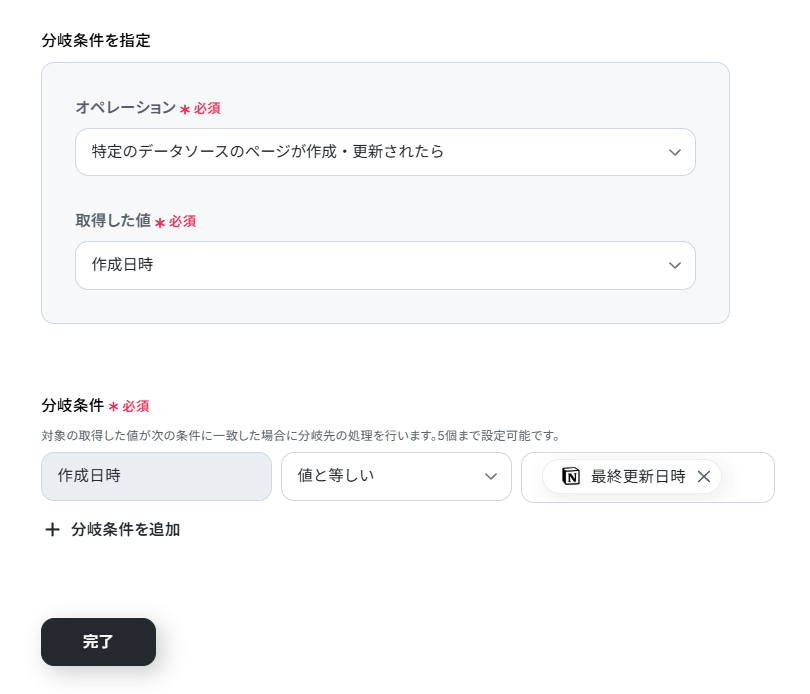
設定後、『完了』をクリックしましょう。
ステップ4:レコード情報を取得する設定
続いて、Notionのテーブルから情報を取得する設定を行います。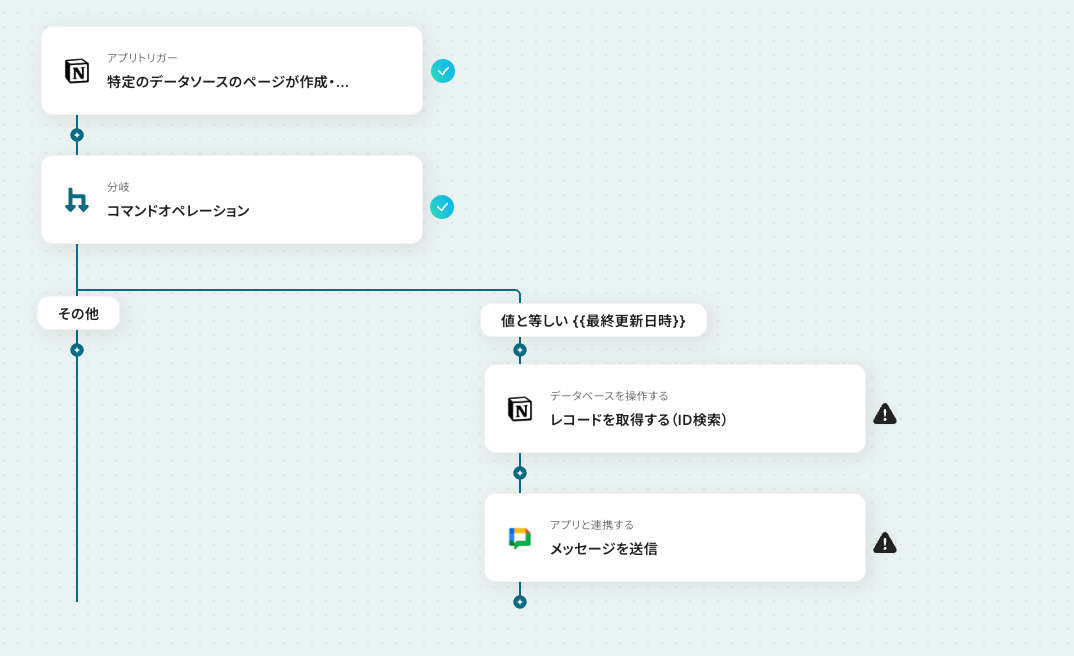
データベースは『候補』から対象のIDを選択し、次に進みましょう。(基本的にトリガーアクションで選択したIDと同じものを設定してください。)
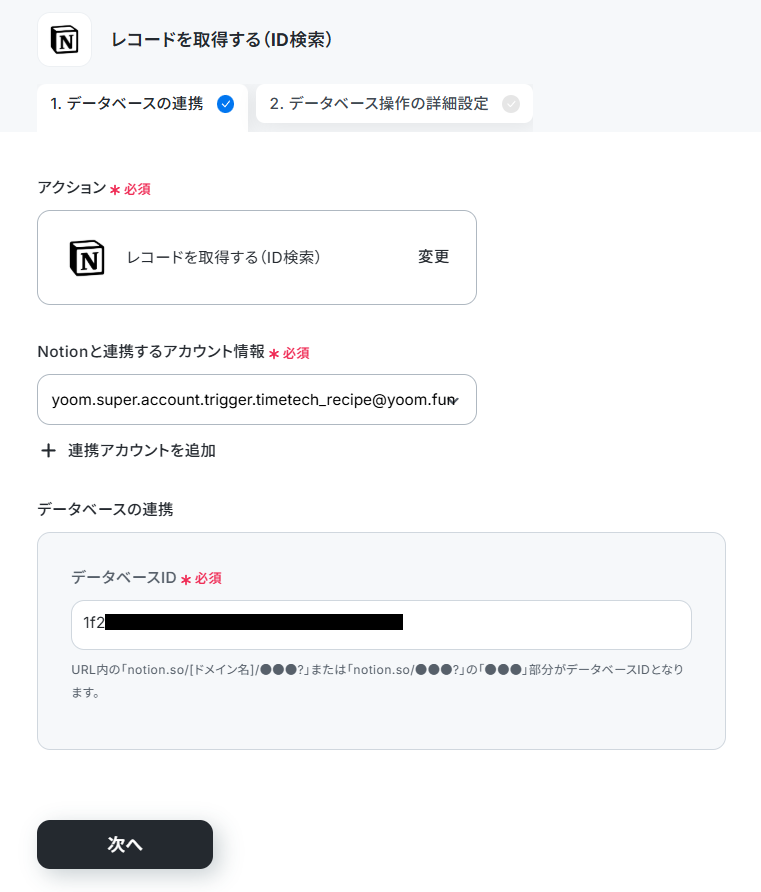
今回は、レコードIDと等しいIDの情報を取得するように設定しました。
このように取得値を引用することで、フローボット起動ごとに異なる値を参照できるようになります。
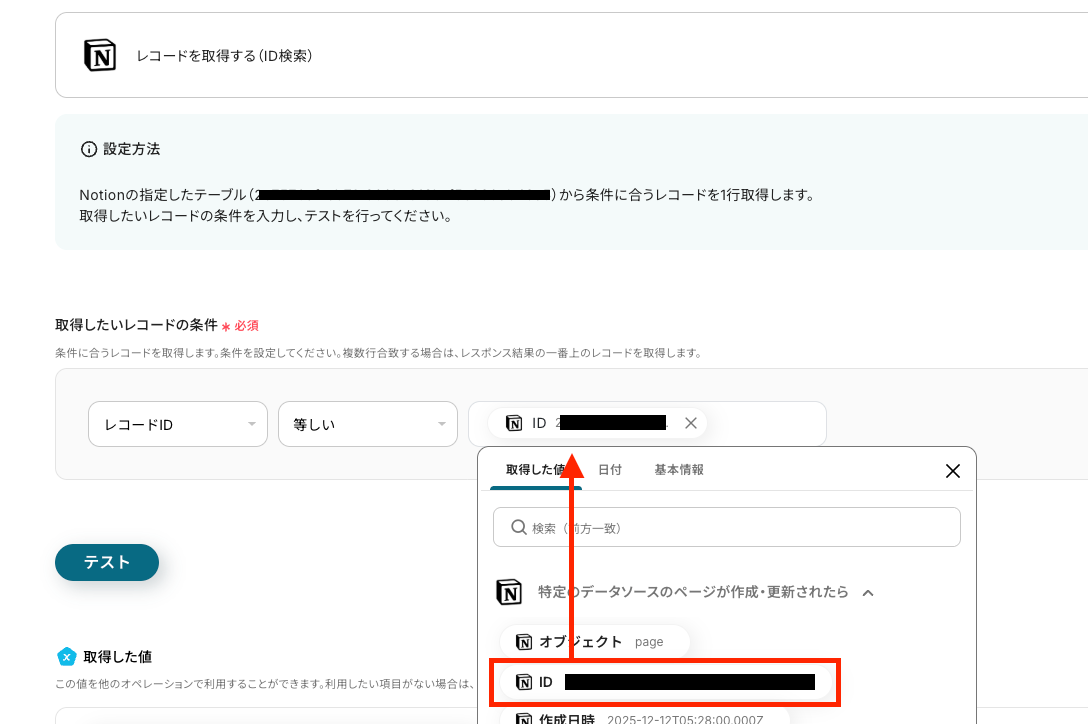
テストに成功し、取得した情報が確認できたら、『完了』を押しましょう。
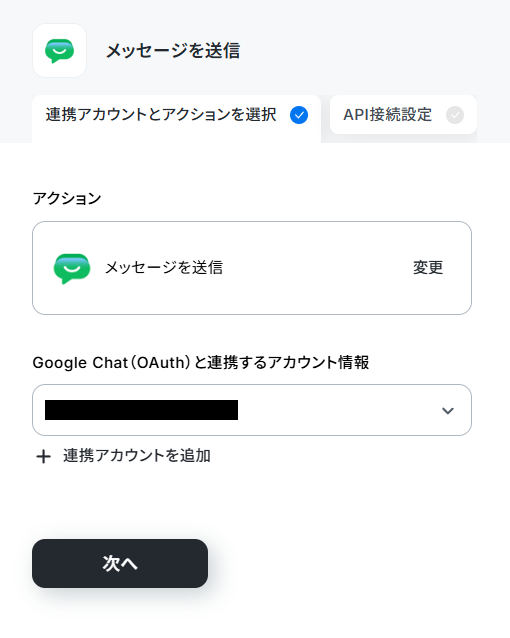
ステップ5:Google Chatに通知する設定
最後に、Notionの情報をGoogle Chatに通知するための設定を行います。
アカウント情報を確認したら、次に進みましょう。
次の画面の「スペースのリソース名」は、入力バーをクリックすると連携したアカウントに基づいた内容が『候補』に表示されるので、運用に沿った情報を選択できます。
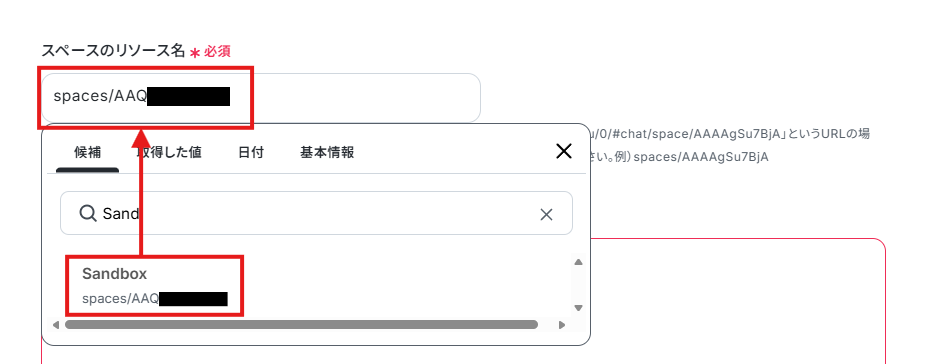
次に、「メッセージ内容」を設定していきます。
以下の画像のように取得した値を活用しながら、通知させたい内容を指定していきましょう。
固定のテキストや「:」などの記号も使って、全体を見やすく整えるのもおすすめです。

すべて設定ができたら「テスト」をクリックして、Google Chatの通知を確認しましょう。
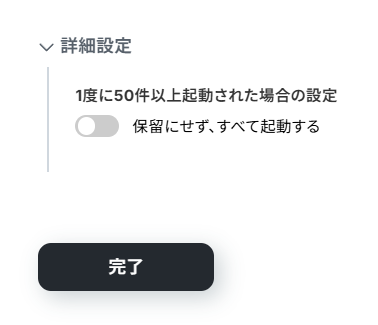
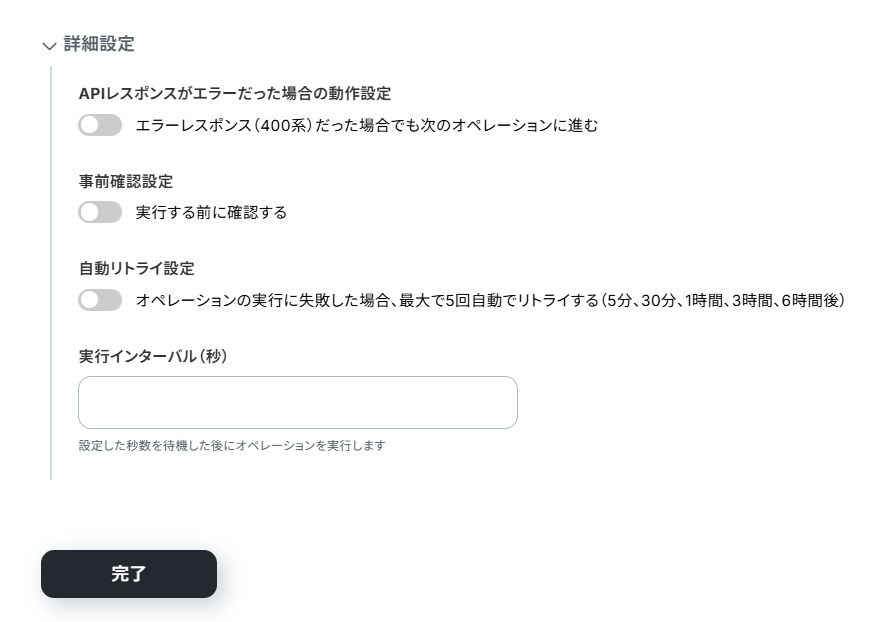
また、詳細設定では以下の項目が設定可能です。
- APIレスポンスがエラーだった場合の動作設定:エラーレスポンス(400系)だった場合でも次のオペレーションに進む
- 事前確認設定:実行する前に確認する
- 自動リトライ設定:オペレーションの実行に失敗した場合、最大で5回自動でリトライする(5分、30分、1時間、3時間、6時間後)
- 実行インターバル(秒):設定した秒数を待機した後にオペレーションを実行します。
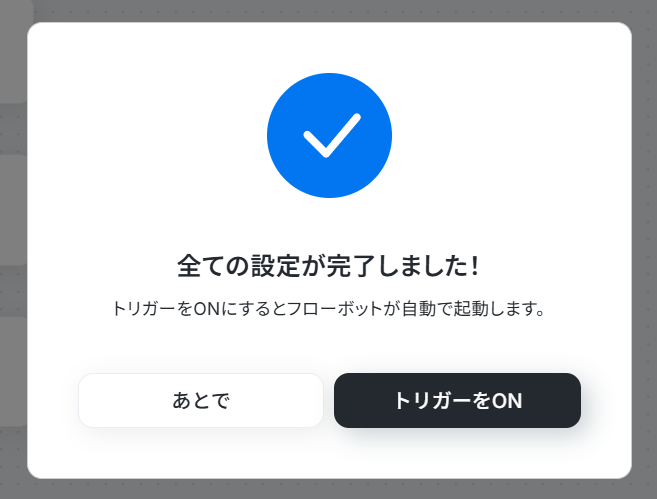
指定通りの通知が届けば『保存する』をクリックして、すべての設定は完了です。
最後にトリガーをONにしましょう。
NotionやGoogle Chatを使ったその他の自動化例
今回ご紹介したフロー以外にもNotionやGoogle ChatのAPIを利用すれば、さまざまな業務の自動化を実現することができます。
いずれも簡単な設定で利用が可能になりますので、もし気になるものがあれば、ぜひお試しください!Notionを使ったその他の便利な自動化例
メール内容やフォーム回答をNotionに追加したり、Notionのデータ変化を他ツールに通知できます。
- Gmailで受信した情報をNotionで管理しており、手入力に手間を感じている方
- メールからの情報転記ミスを減らし、データ管理の正確性を向上させたいチームの方
- 問い合わせ対応やタスク管理の初動を自動化し、コア業務に集中したい方
- 特定のGmailを受信するだけでNotionに情報が自動で追加されるため、これまで手作業での転記に費やしていた時間を短縮することができます。
- 手作業による転記作業がなくなることで、入力間違いや重要な情報の転記漏れといったヒューマンエラーの防止に繋がります。
- はじめに、GmailとNotionをYoomと連携します。
- 次に、トリガーでGmailを選択し、「特定のラベルのメールを受信したら」というアクションを設定します。
- 次に、オペレーションでAI機能を選択し、「テキストからデータを抽出する」アクションを設定して、受信メール本文から必要な情報を抽出します。
- 最後に、オペレーションでNotionの「レコードを追加する」アクションを設定し、抽出したデータを指定のデータベースに追加します。
- AI機能の「テキストからデータを抽出する」では、受信したメール本文から「会社名」「担当者名」「問い合わせ内容」など、どのような情報を抽出するかを任意で設定してください。
- Notionの「レコードを追加する」では、追加するデータベースや各項目に設定する値を任意で設定できます。固定のテキストを設定したり、前段のAI機能で抽出したデータを動的な値として設定することが可能です。
- Gmail、NotionのそれぞれとYoomを連携してください。
- トリガーは5分、10分、15分、30分、60分の間隔で起動間隔を選択できます。
- プランによって最短の起動間隔が異なりますので、ご注意ください。
- Microsoft365(旧Office365)には、家庭向けプランと一般法人向けプラン(Microsoft365 Business)があり、一般法人向けプランに加入していない場合には認証に失敗する可能性があります。
- GoogleフォームとNotionを利用し、手作業での情報転記に手間を感じている方
- フォームの回答をNotionデータベースで管理しており、連携を自動化したいと考えている方
- 手作業による転記ミスを減らし、情報管理の正確性を向上させたい担当者の方
- Googleフォームに回答が送信されると、Notionへページが作成されるため、これまで手作業に費やしていた時間を短縮できます。
- 手作業でのデータ転記が減るため、入力間違いや項目漏れといったヒューマンエラーの発生を防ぎ、データの正確性を保ちます。
- はじめに、GoogleフォームとNotionをYoomと連携します。
- 次に、トリガーでGoogleフォームを選択し、「フォームに回答が送信されたら」というアクションを設定します。
- 最後に、オペレーションでNotionの「ページを作成」アクションを設定し、フォームの回答内容を反映させます。
■このワークフローのカスタムポイント
- Googleフォームのトリガー設定では、自動化の対象としたいフォームを任意で選択することが可能です。
- Notionにページを作成する際、フォームの回答項目の中からどの情報をページのどこに反映させるか、任意で設定できます。
- Googleフォーム、NotionのそれぞれとYoomを連携してください。
- トリガーは5分、10分、15分、30分、60分の間隔で起動間隔を選択できます。
- プランによって最短の起動間隔が異なりますので、ご注意ください。
- Googleフォームをトリガーとして使用した際の回答内容を取得する方法は「Googleフォームトリガーで、回答内容を取得する方法」を参照ください。
■概要
Salesforceで管理しているリード情報を、情報共有やタスク管理のためにNotionへ手作業で転記していませんか?この定型的な作業は時間がかかるだけでなく、入力ミスなどのヒューマンエラーの原因にもなりがちです。このワークフローを活用すれば、Salesforceに新しいリードが登録された際に、その情報を自動でNotionのデータベースへ追加できるため、手作業による手間をなくし、正確な情報連携を実現します。
■このテンプレートをおすすめする方
- SalesforceとNotionを併用し、リード情報の手動転記に手間を感じている営業担当者の方
- 獲得したリード情報をNotionにも連携し、チーム内での情報共有を円滑にしたいと考えている方
- SalesforceとNotionのデータ連携を自動化し、業務の属人化を防ぎたい業務改善担当者の方
■このテンプレートを使うメリット
- Salesforceにリードが登録されると同時にNotionへ自動で情報が追加されるため、これまで手作業に費やしていた時間を短縮することができます。
- 手作業でのデータ転記が不要になることで、入力間違いや登録漏れといったヒューマンエラーの発生を防ぎ、データの正確性を保ちます。
■フローボットの流れ
- はじめに、SalesforceとNotionをYoomと連携します。
- 次に、トリガーでSalesforceを選択し、「リードオブジェクトに新規レコードが登録されたら」フローが起動するよう設定します。
- 最後に、オペレーションでNotionを選択して「レコードを追加する」アクションを設定し、トリガーで取得したSalesforceのリード情報をNotionのデータベースに追加します。
※「トリガー」:フロー起動のきっかけとなるアクション、「オペレーション」:トリガー起動後、フロー内で処理を行うアクション
■このワークフローのカスタムポイント
- Salesforceのトリガー設定では、Notionに連携したいリード情報の項目などを、運用に合わせて任意で設定することが可能です。
- Notionのオペレーション設定では、レコードを追加する対象のデータベースや、各プロパティに割り当てる情報を任意で設定してください。
■注意事項
- SalesforceとNotionのそれぞれとYoomを連携してください。
- トリガーは5分、10分、15分、30分、60分の間隔で起動間隔を選択できます。
- プランによって最短の起動間隔が異なりますので、ご注意ください。
- Salesforceはチームプラン・サクセスプランでのみご利用いただけるアプリとなっております。フリープラン・ミニプランの場合は設定しているフローボットのオペレーションやデータコネクトはエラーとなりますので、ご注意ください。
- チームプランやサクセスプランなどの有料プランは、2週間の無料トライアルを行うことが可能です。無料トライアル中には制限対象のアプリを使用することができます。
- Notionを情報共有のハブとして利用し、Slackでコミュニケーションを取っている方
- Notionの更新を手動でSlackに通知しており、手間や共有漏れに課題を感じている方
- チーム内の情報共有を自動化し、見逃しを防ぎたいと考えているすべてのビジネスパーソン
- Notionでのページ作成・更新と同時にSlackへ自動で通知が飛ぶため、手作業での共有にかかっていた時間を削減し、コア業務に集中できます。
- 通知プロセスが自動化されることで、重要な更新情報の共有漏れや伝達の遅延を防ぎ、チーム内のスムーズな情報連携を促進します。
- はじめに、NotionとSlackをYoomと連携します。
- 次に、トリガーでNotionを選択し、「ページが作成または更新されたら」というアクションを設定します。
- 最後に、オペレーションでSlackを選択し、「チャンネルにメッセージを送る」アクションを設定して、Notionの更新情報を任意のチャンネルに通知します。
■このワークフローのカスタムポイント
- Slackに通知を送るオペレーションでは、通知先のチャンネルやメンション、通知本文を任意の内容で設定することが可能です。プロジェクトやチームに合わせて、最適な通知内容にカスタマイズしてください。
- Notion、SlackのそれぞれとYoomを連携してください。
- トリガーは5分、10分、15分、30分、60分の間隔で起動間隔を選択できます。
- プランによって最短の起動間隔が異なりますので、ご注意ください。
■このテンプレートをおすすめする方
- Notionでのステータス更新を手作業でDiscordに通知しており、非効率を感じている方
- プロジェクトの進捗共有を自動化し、チーム内の情報伝達を円滑にしたいマネージャーの方
- 手作業による報告漏れや遅延を防ぎ、迅速な情報共有体制を構築したい方
■このテンプレートを使うメリット
- Notionでのステータス更新をトリガーに自動でDiscordへ通知するため、これまで報告に費やしていた時間を短縮し、コア業務に集中できます。
- 手作業による通知漏れや、誤ったチャンネルへの投稿といったヒューマンエラーを防ぎ、確実な情報共有を実現します。
■フローボットの流れ
- はじめに、NotionとDiscordをYoomと連携します。
- 次に、トリガーでNotionを選択し、「ページが作成または更新されたら」アクションを設定します。
- 次に、Notionの「レコードを取得する(ID検索)」を設定し、更新されたページの詳細情報を取得します。
- 次に、「繰り返し条件」を設定し、特定のステータスに更新された場合のみ通知処理が実行されるように条件を指定します。
- 最後に、Discordの「メッセージを送信」を設定し、指定のチャンネルに通知します。
■このワークフローのカスタムポイント
- 繰り返し条件のオペレーションでは、「完了」や「レビュー依頼」など、通知をトリガーしたいNotionの特定のステータスを任意で設定してください。
- Discordへのメッセージ送信アクションでは、通知を送るチャンネルを指定できます。また、本文には固定テキストのほか、Notionから取得したタスク名や担当者などの情報を変数として埋め込み、動的な通知を作成することが可能です。
■注意事項
- NotionとDiscordのそれぞれとYoomを連携してください。
- トリガーは5分、10分、15分、30分、60分の間隔で起動間隔を選択できます。
- プランによって最短の起動間隔が異なりますので、ご注意ください。
- 分岐はパーソナルプラン以上のプランでご利用いただける機能(オペレーション)となっております。フリープランの場合は設定しているフローボットのオペレーションはエラーとなりますので、ご注意ください。
- パーソナルプランなどの有料プランは、2週間の無料トライアルを行うことが可能です。無料トライアル中には制限対象のアプリや機能(オペレーション)を使用することができます。
■概要
決済プラットフォームのStripeで新しい商品を作成するたびに、Notionなどのデータベースへ手作業で情報を登録するのは手間がかかる作業ではないでしょうか。このワークフローは、StripeのWebhookを活用して、商品が作成されたタイミングをトリガーに、自動でNotionへレコードを作成します。手動での転記作業やそれに伴う入力ミスといった課題を解消し、商品管理業務を効率化することが可能です。
■このテンプレートをおすすめする方
- StripeとNotionを連携させ、商品情報の手動登録を自動化したい方
- StripeのWebhookをトリガーにした情報連携の仕組みを構築したいと考えている方
- 商品登録後の後続タスクにおける、手作業での入力ミスや対応漏れを防ぎたい方
■このテンプレートを使うメリット
- Stripeで商品が作成されると自動でNotionにレコードが作成されるため、これまで手作業に費やしていたデータ入力の時間を短縮できます。
- 手作業でのデータ転記が不要になるため、商品情報や価格などの入力間違いや登録漏れといったヒューマンエラーの防止に繋がります。
■フローボットの流れ
- はじめに、StripeとNotionをYoomと連携します。
- 次に、トリガーでStripeを選択し、「商品が作成されたら」というアクションを設定します。
- 次に、オペレーションでStripeの「商品情報を取得する」アクションと「商品の価格情報を検索(商品IDで完全一致)」アクションを設定します。
- 最後に、オペレーションでNotionの「レコードを追加する」アクションを設定し、Stripeから取得した情報をNotionの任意の項目に登録します。
※「トリガー」:フロー起動のきっかけとなるアクション、「オペレーション」:トリガー起動後、フロー内で処理を行うアクション
■このワークフローのカスタムポイント
- Stripeの「商品情報を取得する」や「商品の価格情報を検索(商品IDで完全一致)」アクションでは、トリガーで取得した商品IDを変数として設定してください。
- Notionでレコードを追加するアクションでは、対象のオブジェクトを選択し、各フィールドにStripeから取得した商品名や価格などのどの情報を割り当てるかを任意に設定してください。
■注意事項
- Stripe、NotionのそれぞれとYoomを連携してください。
- Stripeはチームプラン・サクセスプランでのみご利用いただけるアプリとなっております。フリープラン・ミニプランの場合は設定しているフローボットのオペレーションやデータコネクトはエラーとなりますので、ご注意ください。
- チームプランやサクセスプランなどの有料プランは、2週間の無料トライアルを行うことが可能です。無料トライアル中には制限対象のアプリを使用することができます。
- Notionで管理しているテキスト情報を、OpenAIを活用して自動で分析・要約したい方
- NotionとOpenAIをそれぞれ利用しており、手作業での情報転記に手間を感じている方
- 情報整理やデータ分類の作業を自動化し、業務の効率化を目指している方
- Notionへの情報追加をきっかけに、OpenAIによる分析とレコードの更新が自動で実行されるため、手作業に費やしていた時間を短縮できます
- 手作業による転記ミスや更新漏れといったヒューマンエラーを防ぎ、Notion上で管理するデータの正確性を維持することに繋がります
- はじめに、NotionとOpenAIをYoomと連携します
- 次に、トリガーでNotionを選択し、「特定のデータソースのページが作成されたら」というアクションを設定します
- 次に、オペレーションで分岐機能を設定し、特定の条件を満たした場合のみ後続の処理が実行されるようにします
- 次に、オペレーションでNotionの「レコードを取得する」アクションを設定し、更新されたページの詳細情報を取得します
- 次に、取得した情報をもとに、OpenAIの「テキストの生成」アクションで内容の分析や要約などを行います
- 最後に、オペレーションでNotionの「レコードを更新する」アクションを設定し、OpenAIが生成したテキストで対象のレコードを更新します
- OpenAIでテキストを生成するアクションでは、プロンプトを自由に設定できます。Notionから取得した情報(変数)を埋め込み、「この文章を要約して」「ポジティブかネガティブか判定して」といった指示を出すことが可能です
- Notionのレコードを更新するアクションでは、更新対象のページやプロパティを任意で指定できます。OpenAIが生成したテキストを、特定のプロパティに反映させるように設定してください
- Notion、OpenAIのそれぞれとYoomを連携してください。
- トリガーは5分、10分、15分、30分、60分の間隔で起動間隔を選択できます。
- プランによって最短の起動間隔が異なりますので、ご注意ください。
- ChatGPT(OpenAI)のアクションを実行するには、OpenAIのAPI有料プランの契約が必要です。(APIが使用されたときに支払いができる状態)
- ChatGPTのAPI利用はOpenAI社が有料で提供しており、API疎通時のトークンにより従量課金される仕組みとなっています。そのため、API使用時にお支払いが行える状況でない場合エラーが発生しますのでご注意ください。
- 分岐はミニプラン以上のプランでご利用いただける機能(オペレーション)となっております。フリープランの場合は設定しているフローボットのオペレーションはエラーとなりますので、ご注意ください。
- ミニプランなどの有料プランは、2週間の無料トライアルを行うことが可能です。無料トライアル中には制限対象のアプリや機能(オペレーション)を使用することができます。
このワークフローを活用すれば、Notionのデータベースに情報が追加されると、AIが自動で内容を要約しMemへノートとして保存するため、情報連携の手間を省き、スムーズなナレッジ活用を実現します。
- Notionで収集した情報を、思考ツールであるMemで活用したいと考えている方
- NotionとMem間の情報連携を手作業で行っており、非効率だと感じている方
- AIを活用して、Notionに蓄積された情報の要約作業を自動化したい方
- Notionに情報を追加するだけで、AIによる要約からMemへのノート作成までが自動で実行されるため、転記や要約作業の時間を短縮できます
- 手作業によるコピー&ペーストのミスや、要約内容の漏れといったヒューマンエラーを防ぎ、情報の正確性を保つことに繋がります
- はじめに、NotionとMemをYoomと連携します
- 次に、トリガーでNotionを選択し、「特定のデータソースのページが作成・更新されたら」というアクションを設定します
- 次に、オペレーションで再度Notionを選択し、トリガーで取得したIDを基にレコード情報を取得します
- 次に、分岐機能を設定し、取得した情報に基づいて後続の処理を行うかどうかの条件を設定します
- 次に、オペレーションでAI機能を選択し、Notionから取得した情報を基に文章を要約します
- 最後に、オペレーションでMemを選択し、「Create Note」アクションでAIが要約したテキストを基にノートを作成します
- Notionのトリガー設定では、連携の起点としたいデータベースのIDを任意で設定してください
- 分岐機能では、Notionから取得した特定のプロパティ情報などを基に、後続のオペレーションを実行する条件を自由に設定できます
- AIによる要約機能では、要約対象とする文章をNotionから取得した情報の中から任意で指定し、要約の条件もカスタマイズできます
- Memへのノート作成では、本文にNotionの情報やAIの要約結果などを変数として自由に組み合わせて設定できます
- Notion、MemのそれぞれとYoomを連携してください。
- トリガーは5分、10分、15分、30分、60分の間隔で起動間隔を選択できます。
- プランによって最短の起動間隔が異なりますので、ご注意ください。
- 分岐はミニプラン以上のプランでご利用いただける機能(オペレーション)となっております。フリープランの場合は設定しているフローボットのオペレーションはエラーとなりますので、ご注意ください。
- ミニプランなどの有料プランは、2週間の無料トライアルを行うことが可能です。無料トライアル中には制限対象のアプリや機能(オペレーション)を使用することができます。
- NotionとGoogle Meetを連携させ、会議設定の手間をなくしたいと考えている方
- 手作業によるGoogle MeetのURL発行と転記作業に非効率を感じている方
- チームの会議準備プロセスを自動化し、生産性の向上を目指しているマネージャーの方
- Notionへのページ作成をトリガーにGoogle MeetのURLが自動で発行・反映されるため、これまで手作業で行っていた会議設定の時間を短縮することができます
- URLのコピー&ペースト作業が不要になるため、貼り間違いや更新漏れといったヒューマンエラーを防ぎ、確実な情報共有を実現します
- はじめに、NotionとGoogle MeetをYoomと連携します
- 次に、トリガーでNotionを選択し、「特定のデータソースのページが作成・更新されたら」というアクションを設定します
- 次に、オペレーションで分岐機能を設定し、特定の条件(例:ページのステータスが「会議予定」など)の場合のみ、後続の処理に進むように設定します
- 次に、オペレーションでGoogle Meetの「会議スペースを作成」アクションを設定します
- 最後に、オペレーションでNotionの「レコードを更新する(ID検索)」アクションを設定し、作成されたGoogle MeetのURLを該当ページに反映させます
- Notionのトリガー設定では、連携の対象としたいデータソースのIDを任意で設定してください
- 分岐機能では、Notionから取得したページのプロパティ(例:ステータスが「会議予定」の場合など)をもとに、ワークフローを起動する条件を自由にカスタマイズできます
- Notion、Google MeetのそれぞれとYoomを連携してください。
- トリガーは5分、10分、15分、30分、60分の間隔で起動間隔を選択できます。
- プランによって最短の起動間隔が異なりますので、ご注意ください。
- 分岐はミニプラン以上のプランでご利用いただける機能(オペレーション)となっております。フリープランの場合は設定しているフローボットのオペレーションはエラーとなりますので、ご注意ください。
- ミニプランなどの有料プランは、2週間の無料トライアルを行うことが可能です。無料トライアル中には制限対象のアプリや機能(オペレーション)を使用することができます。
Google Chatを使ったその他の便利な自動化例
フォームの回答やメールの内容、データベースの更新などを見逃さず共有できます。これにより、作業の手間を省きつつ重要な情報をすぐに確認できる環境が整います。
- BacklogとGoogle Chatを併用し、プロジェクトの進捗管理を行っている方
- 課題追加のたびに手動で通知する作業に、手間や煩わしさを感じている方
- チームへの情報伝達を自動化し、タスクの対応漏れをなくしたいマネージャーの方
- Backlogへの課題追加が自動で通知されるため、これまで手作業で行っていた情報共有の時間を短縮することができます。
- 手動での通知によるメッセージの送信漏れや遅延を防ぎ、確実な情報伝達によって、迅速なタスク対応を促進します。
- はじめに、BacklogとGoogle ChatをYoomと連携します。
- 次に、トリガーでBacklogを選択し、「新しい課題が追加されたら」というアクションを設定します。
- 最後に、オペレーションでGoogle Chatの「メッセージを送信」アクションを設定し、Backlogの課題情報を本文に含めることで、指定したスペースへの通知が完了します。
- Backlogのトリガー設定では、通知の対象としたいドメインとプロジェクトIDを任意で設定してください。
- Google Chatのオペレーションでは、通知を送信するスペースのリソース名やメッセージの本文を任意で設定可能です。
- Backlog、Google ChatのそれぞれとYoomを連携してください。
- Google Chatとの連携はGoogle Workspaceの場合のみ可能です。詳細は「Google Chatでスペースにメッセージを送る方法」を参照ください。
- トリガーは5分、10分、15分、30分、60分の間隔で起動間隔を選択できます。
- プランによって最短の起動間隔が異なりますので、ご注意ください。
■このテンプレートをおすすめする方
- Googleフォームで受け付けた面接の日程調整を手作業で行っている採用担当者の方
- 採用候補者や面接官への情報共有を、より迅速かつ正確に行いたいチームリーダーの方
- Googleツールを活用して、採用に関する一連の業務を自動化したいと考えている方
■このテンプレートを使うメリット
- フォームへの回答があると自動でカレンダーに予約が作成されるため、これまで手作業での転記に費やしていた時間を短縮できます。
- 手作業によるカレンダーへの情報登録が不要になるため、日時の入力間違いや通知漏れといったヒューマンエラーの防止に繋がります。
■フローボットの流れ
- はじめに、Googleフォーム、Googleカレンダー、Google ChatをYoomと連携します。
- 次に、トリガーでGoogleフォームを選択し、「フォームに回答が送信されたら」というアクションを設定します。
- オペレーションでは、まず「日時・日付の加算減算」を設定し、面接の終了時刻などを算出します。
- 続いて、Googleカレンダーの「予約を作成する」アクションを設定し、フォームの回答情報や算出した時刻をもとに予定を作成します。
- 最後に、Google Chatの「メッセージを送信」アクションを設定し、作成された予約情報を指定のスペースに通知します。
■このワークフローのカスタムポイント
- Googleフォームのトリガー設定では、連携の対象としたいフォームのIDを任意で設定してください。
- Googleカレンダーの予定作成では、フォームの回答で取得した候補者名や希望日時などの値を引用し、予定のタイトルや詳細欄を自由に設定できます。
- Google Chatへの通知設定では、メッセージを送信するスペースや、本文の内容を任意でカスタマイズすることが可能です。
■注意事項
- Googleフォーム、Googleカレンダー、Google ChatのそれぞれとYoomを連携してください。
- トリガーは5分、10分、15分、30分、60分の間隔で起動間隔を選択できます。
- プランによって最短の起動間隔が異なりますので、ご注意ください。
- Googleフォームをトリガーとして使用した際の回答内容を取得する方法は「Googleフォームトリガーで、回答内容を取得する方法」を参照ください。
- Google Chatとの連携はGoogle Workspaceの場合のみ可能です。詳細は「Google Chatでスペースにメッセージを送る方法」を参照ください。
- 履歴書の情報を手作業でデータベースに入力している採用担当者の方
- 応募者情報をGoogle スプレッドシートで管理しており、入力の手間を減らしたい方
- AIを活用して採用プロセスを効率化し、コア業務に集中したいと考えている方
■このテンプレートを使うメリット
- 履歴書がアップロードされるとAIが自動で文字を読み取り転記するため、これまで手作業に費やしていたデータ入力の時間を短縮できます。
- 手作業でのデータ転記が減ることで、入力間違いや漏れといったヒューマンエラーのリスクを軽減し、データの正確性を保ちます。
■フローボットの流れ
- はじめに、Google スプレッドシートとGoogle ChatをYoomと連携します。
- 次に、トリガーでフォームを選択し、履歴書がアップロードされたらフローが起動するように設定します。
- 次に、オペレーションでOCR機能を設定し、アップロードされた履歴書ファイルから文字情報を自動で読み取ります。
- 続いて、オペレーションで「担当者へ対応を依頼する」を設定し、AIが読み取った内容に間違いがないかを確認する工程を挟みます。
- 次に、オペレーションでGoogle スプレッドシートの「レコードを追加する」アクションを設定し、確認済みの情報を指定のシートに書き込みます。
- 最後に、オペレーションでGoogle Chatを設定し、指定のスペースに応募があった旨を通知します。
■このワークフローのカスタムポイント
- トリガーに設定するフォームでは、履歴書アップロード欄の他に、応募職種などの質問項目を任意で追加・編集することが可能です。
- Google スプレッドシートへのレコード追加では、情報を格納したいファイルやシートを任意で設定してください。
- Google Chatへの通知設定では、通知を送信したいスペースや、応募者名などを含めた通知本文を任意でカスタマイズできます。
■注意事項
- Google スプレッドシート、Google ChatのそれぞれとYoomを連携してください。
- トリガー、各オペレーションでの取り扱い可能なファイル容量の詳細は「ファイルの容量制限について」をご参照ください。
- OCRデータは6,500文字以上のデータや文字が小さい場合などは読み取れない場合があるので、ご注意ください。
- OCRまたは音声を文字起こしするAIオペレーションはチームプラン・サクセスプランでのみご利用いただける機能となっております。フリープラン・ミニプランの場合は設定しているフローボットのオペレーションはエラーとなりますので、ご注意ください。
- チームプランやサクセスプランなどの有料プランは、2週間の無料トライアルを行うことが可能です。無料トライアル中には制限対象のアプリやAI機能(オペレーション)を使用することができます。
- Google Chatとの連携はGoogle Workspaceの場合のみ可能です。詳細は「Google Chatでスペースにメッセージを送る方法」を参照ください。
- ダウンロード可能なファイル容量は最大300MBまでです。アプリの仕様によっては300MB未満になる可能性があるので、ご注意ください。
- トリガー、各オペレーションでの取り扱い可能なファイル容量の詳細は「ファイルの容量制限について」をご参照ください。
- Outlookに届く問い合わせメールの内容を、手作業でGoogle Chatに共有している方
- AIを活用してメールから特定の情報を自動で抽出し、業務を効率化したいと考えている方
- メールの見落としやチームへの共有漏れを防ぎ、迅速な対応体制を構築したいチームリーダーの方
- Outlookのメール受信をトリガーに、AIによる情報抽出からGoogle Chatへの通知までが自動化されるため、手作業での転記時間を削減できます。
- 手作業による情報の転記ミスや共有漏れといったヒューマンエラーのリスクを軽減し、情報の正確性を保ちながら迅速な共有を実現します。
- はじめに、OutlookとGoogle ChatをYoomと連携します。
- 次に、トリガーでOutlookを選択し、「メールを受信したら」というアクションを設定します。
- 次に、オペレーションでAI機能を選択し、「メール本文から情報を抽出」アクションで、メール本文から必要な情報を抽出するよう設定します。
- 最後に、オペレーションでGoogle Chatの「メッセージを送信」アクションを設定し、AIが抽出した情報を指定のスペースに送信します。
■このワークフローのカスタムポイント
- Outlookのトリガー設定で、メールを検知するフォルダを受信トレイ全体だけでなく、特定のフォルダに限定することが可能です。
- Google Chatに通知するメッセージの内容は、AIが抽出した情報の中から必要な項目だけを選んで自由にカスタマイズできます。
- Outlook、Google ChatのそれぞれとYoomを連携してください。
- トリガーは5分、10分、15分、30分、60分の間隔で起動間隔を選択できます。
- プランによって最短の起動間隔が異なりますので、ご注意ください。
- Microsoft365(旧Office365)には、家庭向けプランと一般法人向けプラン(Microsoft365 Business)があり、一般法人向けプランに加入していない場合には認証に失敗する可能性があります。
- Google Chatとの連携はGoogle Workspaceの場合のみ可能です。詳細は「Google Chatでスペースにメッセージを送る方法」を参照ください。
■このテンプレートをおすすめする方
- Google Adsのレポート取得と共有を手作業で行っている広告運用担当者の方
- 毎日の広告パフォーマンスをチームで手軽に確認したいマーケティングチームの方
- 定型的なレポーティング業務を自動化し、よりコアな業務に集中したいと考えている方
■このテンプレートを使うメリット
- 毎日決まった時間にGoogle Adsのレポートが自動で取得・通知されるため、これまで手作業に費やしていた時間を短縮することができます。
- 手作業によるレポートの取得漏れや、数値を転記する際の入力ミスといったヒューマンエラーの発生を防ぐことに繋がります。
■フローボットの流れ
- はじめに、Google AdsとGoogle ChatをYoomと連携します。
- トリガーでスケジュールトリガー機能を設定し、毎日レポートを取得したい時刻などを指定します。
- 次に、オペレーションでGoogle Adsの「アカウントレポートの取得」アクションを設定し、必要なパフォーマンスデータを取得します。
- 次に、オペレーションで計算機能を追加し、取得した指標を元にクリック率(CTR)などの数値を算出します。
- 最後に、オペレーションでGoogle Chatの「メッセージを送信」アクションを設定し、取得・計算したレポート内容を指定のスペースに通知します。
■このワークフローのカスタムポイント
- スケジュールトリガー機能では、レポートを取得したい曜日や時間などを任意に設定してください。
- Google Adsのアクションでは、レポートを取得する対象の広告アカウントIDや、取得するデータの期間(昨日、過去7日間など)を任意に設定してください。
- 計算機能を利用する際、Google Adsから取得した値を変数として使用し、クリック率(CTR)などを算出するよう独自の計算式を設定できます。
- Google Chatへの通知先スペースは任意に設定可能です。また、通知するメッセージ本文には、Google Adsなどから取得したレポート結果を変数として埋め込むことができます。
■注意事項
- Google Ads、Google ChatのそれぞれとYoomを連携してください。
- Google Chatとの連携はGoogle Workspaceの場合のみ可能です。詳細は「Google Chatでスペースにメッセージを送る方法」を参照ください。
- HubSpotのフォームで獲得したリードをGoogle Chatでチームに共有しているマーケティング担当者の方
- フォームからの問い合わせに迅速な対応が求められるインサイドセールスや営業担当者の方
- チーム内の情報共有を自動化し、対応の抜け漏れを防ぎたいと考えているマネージャーの方
- HubSpotフォームへの送信をトリガーに、Google Chatへ自動で通知されるため、手作業による情報共有や確認の手間を削減できます。
- 手動での通知で起こりがちな連絡漏れや共有の遅延を防ぎ、リードへの迅速な対応と機会損失のリスク軽減に繋がります。
- はじめに、HubSpotとGoogle ChatをYoomと連携します。
- 次に、トリガーでHubSpotを選択し、「フォームが送信されたら」というアクションを設定します。
- 最後に、オペレーションでGoogle Chatの「メッセージを送信」アクションを設定し、フォームで送信された情報をもとに通知メッセージを作成します。
■このワークフローのカスタムポイント
- HubSpotのトリガー設定では、通知の対象としたいフォームを任意で指定することが可能です。
- Google Chatに通知するメッセージは、フォームで送信された情報(氏名や会社名、問い合わせ内容など)を組み合わせて自由に設定できます。
- HubSpot、Google ChatのそれぞれとYoomを連携してください。
- トリガーは5分、10分、15分、30分、60分の間隔で起動間隔を選択できます。
- プランによって最短の起動間隔が異なりますので、ご注意ください。
- Google Chatとの連携はGoogle Workspaceの場合のみ可能です。詳細は「Google Chatでスペースにメッセージを送る方法」を参照ください。
重要な情報が会話に埋もれてしまい、手作業での転記は抜け漏れの原因にもなりがちです。
このワークフローを活用すれば、Google Chatに特定のメッセージが送信されると、その内容を自動でGoogleドキュメントに追記できます。
面倒な転記作業から解放され、情報の集約と管理を効率化します。
■このテンプレートをおすすめする方
- Google Chatでの議論を手作業でGoogleドキュメントに転記している方
- チーム内の情報共有を円滑にし、ナレッジを効率的に蓄積したいと考えている方
- チャットツールの情報が流れてしまうことに課題を感じている方
■このテンプレートを使うメリット
- Google Chatへの投稿をトリガーに自動で内容が記録されるため、これまで手作業での転記に費やしていた時間を短縮できます。
- 手作業によるコピー&ペーストが不要になることで、転記漏れや内容の間違いといったヒューマンエラーの発生を防ぎます。
■フローボットの流れ
- はじめに、Google ChatとGoogleドキュメントをYoomと連携します。
- トリガーで、Google Chatの「スペースにメッセージが送信されたら」というアクションを設定します。
- 次に、AI機能「要約する」を設定し、トリガーで取得したメッセージ内容を要約します。
- 最後に、オペレーションでGoogleドキュメントの「文末にテキストを追加」アクションを設定し、要約したテキストを指定のドキュメントに追記します。
■このワークフローのカスタムポイント
- 「要約する」では、Google Chatから取得した投稿者や投稿日時などの動的な情報を変数として埋め込み、要約テキストを作成することが可能です。
- 「文末にテキストを追加」では、前段のAI機能で生成した要約結果を変数として埋め込むなどのカスタムができます。
■注意事項
- Google Chat、GoogleドキュメントのそれぞれとYoomを連携してください。
- Google Chatとの連携はGoogle Workspaceの場合のみ可能です。詳細は「Google Chatでスペースにメッセージを送る方法」を参照ください。
- トリガーは5分、10分、15分、30分、60分の間隔で起動間隔を選択できます。
- プランによって最短の起動間隔が異なりますので、ご注意ください。
■概要
Google Chatでの問い合わせ対応に、多くの時間を費やしていませんか?同じような質問に繰り返し回答するのは、担当者にとって大きな負担となります。このワークフローを活用すれば、Google ChatでFAQボットを簡単に構築し、メンション付きの質問に対してOpenAIが自動で回答を作成・返信するため、こうした問い合わせ対応業務の効率化を実現できます。
■このテンプレートをおすすめする方
- Google Chatでの社内問い合わせ対応に、日々多くの時間を割いている情報システムや総務担当者の方
- Google ChatでFAQボットを構築し、社内のナレッジ共有や問い合わせ対応を効率化したいと考えている方
- OpenAIを活用して定型的な質問への回答を自動化し、業務効率を改善したいと考えているDX推進担当者の方
■このテンプレートを使うメリット
- Google ChatでのFAQボット運用により、定型的な質問への回答を自動化でき、担当者が本来のコア業務に集中できる時間を創出します。
- 担当者によって回答内容がばらつくといった課題を解消し、OpenAIが生成する回答によって対応品質の標準化を図ることができます。
■フローボットの流れ
- はじめに、Google ChatとOpenAIをYoomと連携します。
- 次に、トリガーでGoogle Chatを選択し、「ボットにメンション付きのメッセージを送信したら」というアクションを設定します。
- 続いて、オペレーションでOpenAIの「スレッドを作成」アクションを設定し、会話のスレッドを開始します。
- 次に、OpenAIの「スレッドにメッセージを追加」アクションで、Google Chatで受信した質問内容を追加します。
- 続いて、OpenAIの「アシスタントを実行」アクションで、追加されたメッセージに対する回答生成を指示します。
- 回答の生成には時間がかかる場合があるため、「待機する」アクションを挟み、処理が完了するまで待ちます。
- 次に、OpenAIの「スレッドの最新の会話を取得」アクションで、生成された回答を取得します。
- 最後に、Google Chatの「スレッドにメッセージを送信」アクションを設定し、取得した回答を元のスレッドに返信します。
※「トリガー」:フロー起動のきっかけとなるアクション、「オペレーション」:トリガー起動後、フロー内で処理を行うアクション
■このワークフローのカスタムポイント
- Google Chatで回答を返信するアクションでは、メッセージを送信するスペース(スレッド)を任意で設定できます。
- 返信するメッセージ本文は、OpenAIが生成した回答を変数として埋め込むだけでなく、「回答はAIによって生成されています」などの固定テキストを追加するカスタムも可能です。
■注意事項
- Google Chat、OpenAIのそれぞれとYoomを連携してください。
- Google Chatとの連携はGoogle Workspaceの場合のみ可能です。詳細は下記を参照ください。
https://intercom.help/yoom/ja/articles/6647336 - ChatGPT(OpenAI)のアクションを実行するには、OpenAIのAPI有料プランの契約が必要です。(APIが使用されたときに支払いができる状態)
https://openai.com/ja-JP/api/pricing/ - ChatGPTのAPI利用はOpenAI社が有料で提供しており、API疎通時のトークンにより従量課金される仕組みとなっています。そのため、API使用時にお支払いが行える状況でない場合エラーが発生しますのでご注意ください。
■概要
Google Chatで受け取ったタスク依頼や連絡事項を、手作業でAsanaに転記する際に手間を感じたり、対応が漏れてしまったりすることはないでしょうか。このような手作業は、重要なタスクの見落としや入力ミスの原因にもなり得ます。このワークフローは、Google Chatの自動化を実現し、Google Chatのメッセージ受信をきっかけとしてAsanaへのタスク作成と別スペースへの完了通知までを自動化するため、タスク管理の抜け漏れ防止と効率化に貢献します。
■このテンプレートをおすすめする方
- Google Chatで受けた依頼を、手作業でAsanaのタスクに登録している方
- タスクの登録漏れや転記ミスを防ぎ、管理の確実性を高めたいチームリーダーの方
- Google Chatの自動化を活用し、チーム全体の生産性を向上させたい方
■このテンプレートを使うメリット
- Google Chat上のメッセージが自動でAsanaのタスクになるため、これまで手作業での転記に費やしていた時間を別の業務に充てることができます
- 手動での対応によるタスクの登録漏れや、内容の転記ミスといったヒューマンエラーを防ぎ、タスク管理の精度を高めることに繋がります
■フローボットの流れ
- はじめに、Google ChatとAsanaをYoomと連携します
- 次に、トリガーでGoogle Chatを選択し、「スペースにメッセージが送信されたら」というアクションを設定します
- 次に、オペレーションでAI機能の「テキストからデータを抽出する」を設定し、メッセージ内容からタスク名などの情報を抽出します
- 次に、オペレーションでAsanaの「タスクを追加」を設定し、抽出した情報をもとにタスクを作成します
- 最後に、オペレーションでGoogle Chatの「メッセージを送信」を設定し、タスクが作成された旨を任意のスペースに通知します
※「トリガー」:フロー起動のきっかけとなるアクション、「オペレーション」:トリガー起動後、フロー内で処理を行うアクション
■このワークフローのカスタムポイント
- Google Chatのトリガー設定では、どのスペースのメッセージを検知の対象とするか、リソース名を任意で設定してください
- AI機能によるテキスト抽出では、Google Chatで受信したメッセージ内容を基に、タスク名や担当者、期限など抽出したい項目を自由にカスタマイズできます
- Asanaへのタスク追加では、登録先のプロジェクトや担当者などを固定値で指定したり、前段のAI機能で抽出した情報を変数として設定したりすることが可能です
- 最後のGoogle Chatへの通知では、通知先のスペースを任意で指定できるほか、本文にAsanaで作成されたタスクURLなどを含めるよう自由にカスタマイズできます
■注意事項
- Google Chat、AsanaのそれぞれとYoomを連携してください。
- Google Chatとの連携はGoogle Workspaceの場合のみ可能です。詳細は下記を参照ください。
https://intercom.help/yoom/ja/articles/6647336 - トリガーは5分、10分、15分、30分、60分の間隔で起動間隔を選択できます。
- プランによって最短の起動間隔が異なりますので、ご注意ください。
■概要
Google Chatでの問い合わせや社内からの依頼などを、Zendeskへ手作業で転記する業務に手間を感じていませんか?この作業は時間がかかるだけでなく、対応漏れや入力ミスといったヒューマンエラーの原因にもなり得ます。このワークフローを活用すれば、Google Chatの特定投稿をトリガーに、Zendeskのチケットが自動で作成されるため、迅速かつ正確な顧客対応や社内業務の管理を実現できます。
■このテンプレートをおすすめする方
- Google Chat経由の問い合わせをZendeskに手入力しており、作業を効率化したい方
- ZendeskとGoogle Chatを連携させ、迅速なチケット作成の仕組みを構築したい方
- 社内からの依頼をGoogle Chatで受け付け、Zendeskで管理している情報システム部門の方
■このテンプレートを使うメリット
- Google Chatの投稿からZendeskのチケットが自動で作成されるため、手作業での転記時間がなくなり、対応の初動を早めることができます。
- 手動でのチケット作成時に発生しがちな、コピー&ペーストのミスや対応漏れといったヒューマンエラーを防ぎ、対応品質の向上に繋がります。
■フローボットの流れ
- はじめに、Google ChatとZendeskをYoomと連携します。
- 次に、トリガーでGoogle Chatを選択し、「スペースにメッセージが送信されたら」というアクションを設定します。
- 次に、オペレーションで分岐機能を設定し、特定の条件に合致したメッセージのみを処理対象とします。
- 次に、オペレーションでAI機能を設定し、メッセージ本文からチケット作成に必要な情報を抽出します。
- 最後に、オペレーションでZendeskの「チケットを作成(リクエスターを指定)」アクションを設定し、抽出した情報をもとにチケットを作成します。
※「トリガー」:フロー起動のきっかけとなるアクション、「オペレーション」:トリガー起動後、フロー内で処理を行うアクション
■このワークフローのカスタムポイント
- Google Chatのトリガーでは、通知を監視したいスペースを任意で設定してください。
- 分岐機能では、「#依頼」といった特定のキーワードが含まれるメッセージのみを処理の対象にするなど、フローが作動する条件を任意で設定できます。
- AIによるテキスト抽出では、Google Chatのメッセージ本文から「依頼者」や「依頼内容」など、チケットに登録したい情報を自由に抽出するよう設定できます。
- Zendeskでチケットを作成する際に、件名や詳細、リクエスターなどを固定値で設定したり、前のステップで取得した情報を変数として動的に設定したりすることが可能です。
■注意事項
- Google Chat、ZendeskのそれぞれとYoomを連携してください。
- Google Chatとの連携はGoogle Workspaceの場合のみ可能です。詳細はこちらを参照ください。
- 分岐するオペレーションはミニプラン以上、Zendeskとの連携はチームプラン・サクセスプランでのみご利用いただけます。その他のプランの場合は設定しているフローボットのオペレーションやデータコネクトはエラーとなりますので、ご注意ください。
- ミニプランなどの有料プランは、2週間の無料トライアルを行うことが可能です。無料トライアル中には制限対象の機能(オペレーション)やアプリを使用することができます。
- トリガーは5分、10分、15分、30分、60分の間隔で起動間隔を選択できます。
- プランによって最短の起動間隔が異なりますので、ご注意ください。
NotionとGoogle Chatを連携するメリットと具体的な利用シーン
メリット1:チーム内での情報共有の迅速化
Notionに情報が追加されると、Google Chatを通じてチーム全員に通知が届くため、メンバーが最新の情報を把握しやすくなります。
手動での連絡や情報共有にかかる手間が削減され、業務の効率が向上するでしょう。
また、通知を見たメンバーが適切なアクションを取ることで、チーム全体の作業スピードを維持しやすくなります。
たとえば、社内のFAQや業務手順をまとめたNotionのデータベースに新しい項目が追加された場合、それをGoogle Chatに通知することで、全員が変更点を認識できます。
これにより、必要な情報が適切に行き渡り、無駄な質問や確認作業を減らすことにつながるでしょう。
メリット2:タスク管理の効率化
タスク管理でNotionを使用している場合、新しいタスクが追加されたことをGoogle Chatで通知できるため、担当者が見落とすリスクを軽減できます。
タスクの追加や変更に気付かず対応が遅れると、業務全体の進行に影響を及ぼす可能性がありますが、この仕組みによって適切なタイミングで行動を起こしやすくなります。
たとえば、プロジェクトの進行状況を管理するNotionのデータベースに、新たなタスクが追加された際にGoogle Chatへ通知することで、関係者が次に何をすべきかを把握しやすくなります。
これにより、タスクの優先度や担当者の認識を揃え、スムーズな業務進行をサポートするでしょう。
メリット3:プロジェクトの透明性向上
Notionのデータベースに記録された情報がGoogle Chatへ通知されることで、プロジェクトの進捗状況や変更点を関係者全員が把握しやすくなります。
これにより、認識のズレや情報の行き違いを防ぎ、スムーズな業務運営につながります。
たとえば、開発チームがNotionで進捗管理を行っている場合、各タスクのステータス変更をGoogle Chatに通知することで、マネージャーや他部署のメンバーも現在の状況を正確に把握できます。
これにより、適切なサポートやリソース調整がしやすくなり、プロジェクト全体の円滑な進行が期待できます。
まとめ
NotionとGoogle Chatの連携をYoomで実現することで、チーム内の情報共有がスムーズになり、業務の効率化が期待できます。
手作業での通知が不要になるため、情報の伝達ミスを減らし、チーム全員が適切なタイミングで必要な情報を把握しやすくなるでしょう。
さらに、Yoomはプログラミングの知識がなくても簡単に使えるノーコードツールなので、誰でも直感的に設定できます。
まずは2週間の無料登録をして、NotionとGoogle Chatの自動連携を試してみませんか?
よくあるご質問
Q:ページ作成ではなくコメントをトリガーにする設定方法は?
A:
連携アカウントとアクションを選択する画面で「コメントが作成されたら(Webhook)」や「コメントが更新されたら(Webhook)」などに変更してください。

Q:特定の条件で通知先やメンションを変えたい
A:
進行先の切り替え設定を追加することで可能です。例えば「オブジェクトタイプがpage(特定のオブジェクトタイプ)と等しい場合」などと設定することで進行先の切り替えができます。あとはそれぞれの切り替え先で別の通知先を指定し、メンション相手などを設定してください。
※「進行先を切り替える」はミニプラン以上のプランでご利用いただける機能(オペレーション)となっております。フリープランの場合は設定しているフローボットのオペレーションはエラーとなりますので、ご注意ください。
※ミニプランなどの有料プランは、2週間の無料トライアルを行うことが可能です。無料トライアル中には制限対象のアプリや機能(オペレーション)を使用することができます。

Q:通知メッセージの見た目をリッチにできますか?
A:
可能です。kintoneから取得した値などの変数や、固定のテキストを組み合わせてカスタマイズできます。
プログラミング知識なしで手軽に構築できます。