・
ShopifyとGoogle Chatを連携して、Shopifyに注文が発生したら、Google Chatに通知する方法

ECサイトを運営している企業では商品管理は重要な業務の1つだと思います。
例えば、Shopifyで発注があった時、どのように情報を確認していますか?
ここではShopifyとGoogle Chatを連携して、「Shopifyに注文が発生したら、Google Chatに自動通知する」方法についてご紹介します。
このフローを自動化すれば、手動で通知する手間が省け、確認漏れも防げるかもしれません。
これまでアプリの連携やフローボットを作成する際、プログラミングの知識などが必要でしたが、Yoomを使えばノーコードで簡単に行えます!
詳しい操作手順も解説するので、ぜひご覧ください。
こんな方におすすめ
以下の方はShopifyとGoogle Chatを連携することをおすすめします!
- ShopifyとGoogle Chatを活用しているEC事業者の方
- 在庫管理を効率化したいShopify利用者の方
- Google Chatを活用しながら業務の自動化を進めたい方
- 小規模ECサイトを運営しており、業務の効率化を図りたい方
それでは、ここからノーコードツールYoomを使って、「Shopifyに注文が発生したら、Google Chatに通知する」方法をご紹介します。
[Yoomとは]
Shopifyに注文が発生したら、Google Chatに通知する方法
Shopifyで注文が発生したことをShopifyのAPIを利用して受け取り、Google Chatの提供するAPIを用いてGoogle Chatに通知することで実現が可能です。
一般的に実現にはプログラミングの知識が必要ですが、ノーコードツールのYoomを用いることでプログラミング知識がなくても簡単に実現できます。
今回のフローは大きくわけて以下のプロセスで構成されています。
- ShopifyとGoogle Chatのマイアプリ登録
- テンプレートをコピー
- トリガーとアクションを設定
- トリガーをONにして動作チェック
Yoomのアカウント発行はこちらから。
すでにアカウントをお持ちの方はログインしておきましょう!
■概要
Shopifyに注文が発生したら、Google Chatに通知するフローです。
■このテンプレートをおすすめする方
・Shopifyプラットフォーム上でECサイトを運営する事業者
・複数名でサイト運営を行い、情報共有の効率化を必要とするチーム
・顧客満足度向上のため、迅速な注文対応を目指す企業
■このテンプレートを使うメリット
・手作業による注文確認・通知作業を自動化し、人的リソースを削減します。
・迅速な注文対応により、顧客満足度向上に貢献します。
■注意事項
・Shopify、Google ChatのそれぞれとYoomを連携させてください。
・Shopifyはチームプラン・サクセスプランでのみご利用いただけるアプリとなっております。フリープラン・ミニプランの場合は設定しているフローボットのオペレーションやデータコネクトはエラーとなりますので、ご注意ください。
・チームプランやサクセスプランなどの有料プランは、2週間の無料トライアルを行うことが可能です。無料トライアル中には制限対象のアプリを使用することができます。
・Google Chatとの連携はGoogle Workspaceの場合のみ可能です。詳細はこちらをご参照ください。https://intercom.help/yoom/ja/articles/6647336
ステップ1:ShopifyとGoogle Chatをマイアプリ連携
フローボットを設定する前に、まずYoomとアプリを連携しましょう。
1.Shopifyのマイアプリ登録
Yoomのワークスペースにログインしたら、マイアプリを選択して、新規接続をクリックしましょう。

マイアプリ一覧でShopifyを選択しましょう。

APIキー、APIシークレット、サブドメインを入力してください。
Shopifyの詳しいマイアプリ登録方法はこちらをご確認ください。
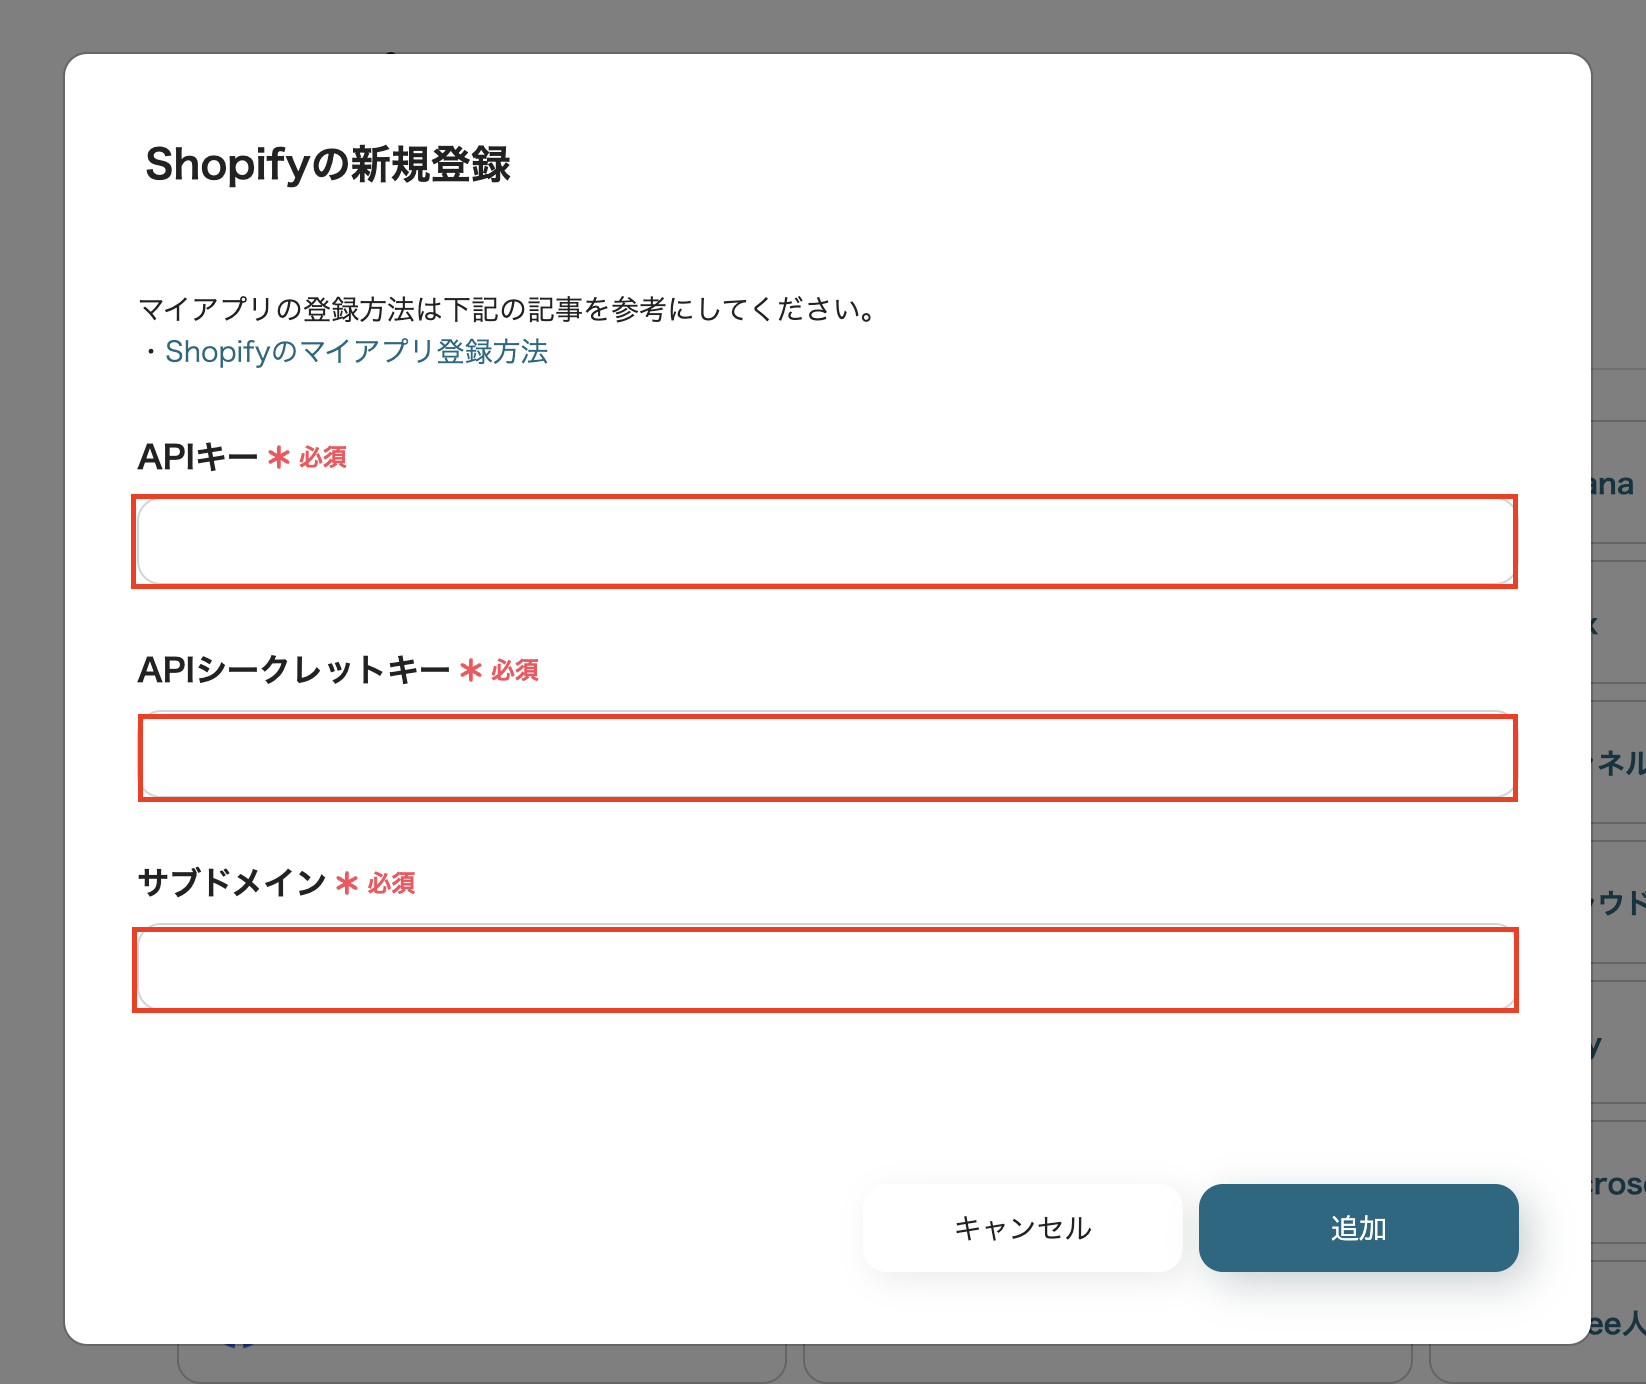
以上でShopifyのマイアプリ登録ができました。
2.Google Chatのマイアプリ登録
先ほどと同様の手順で、マイアプリを選択後、新規接続をクリックしましょう。

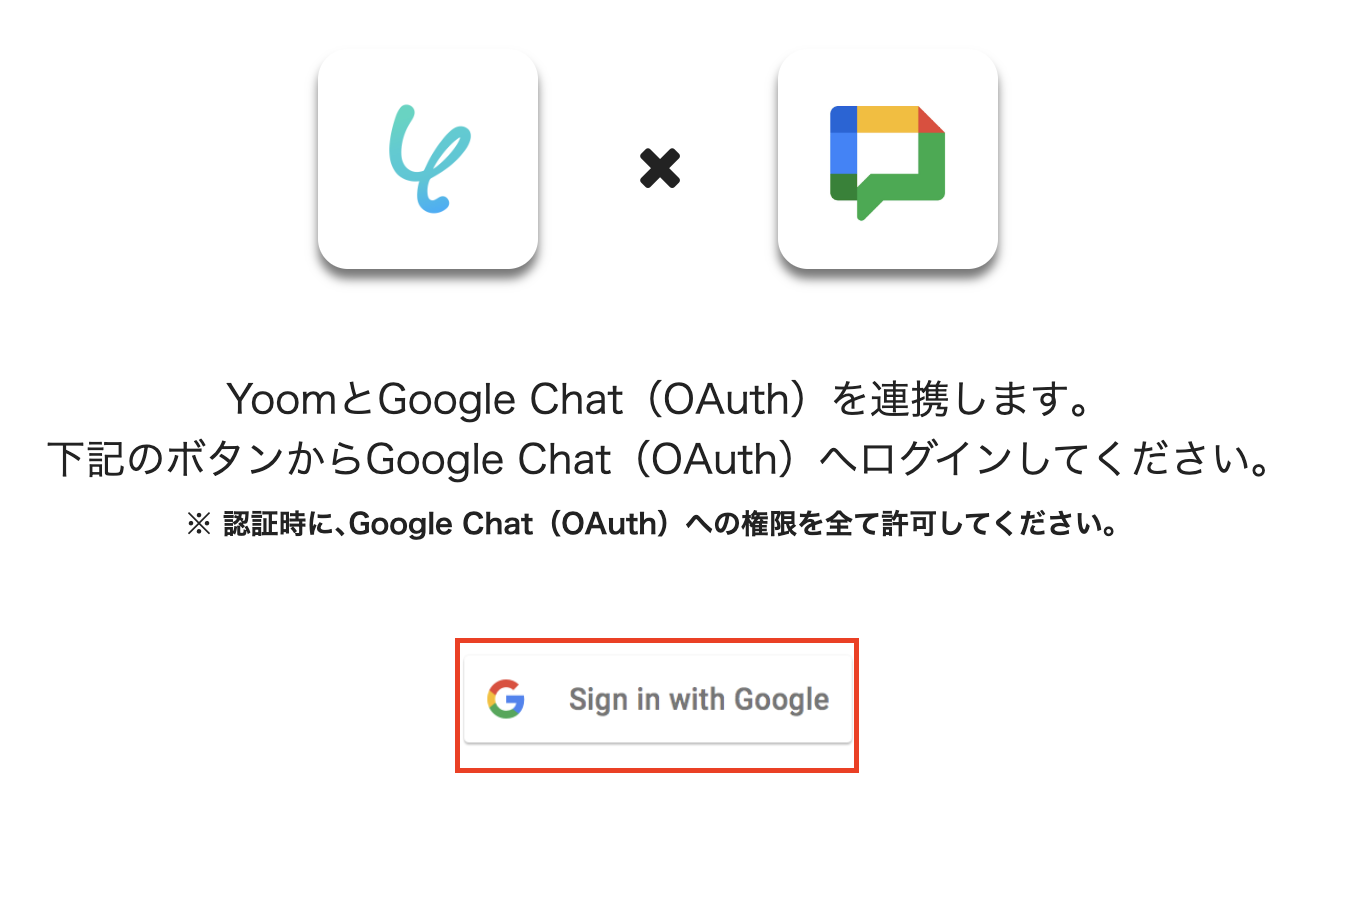
マイアプリ一覧でGoogle Chat(OAuth)を選択しましょう。

「Sign in with Google」をクリックしましょう。
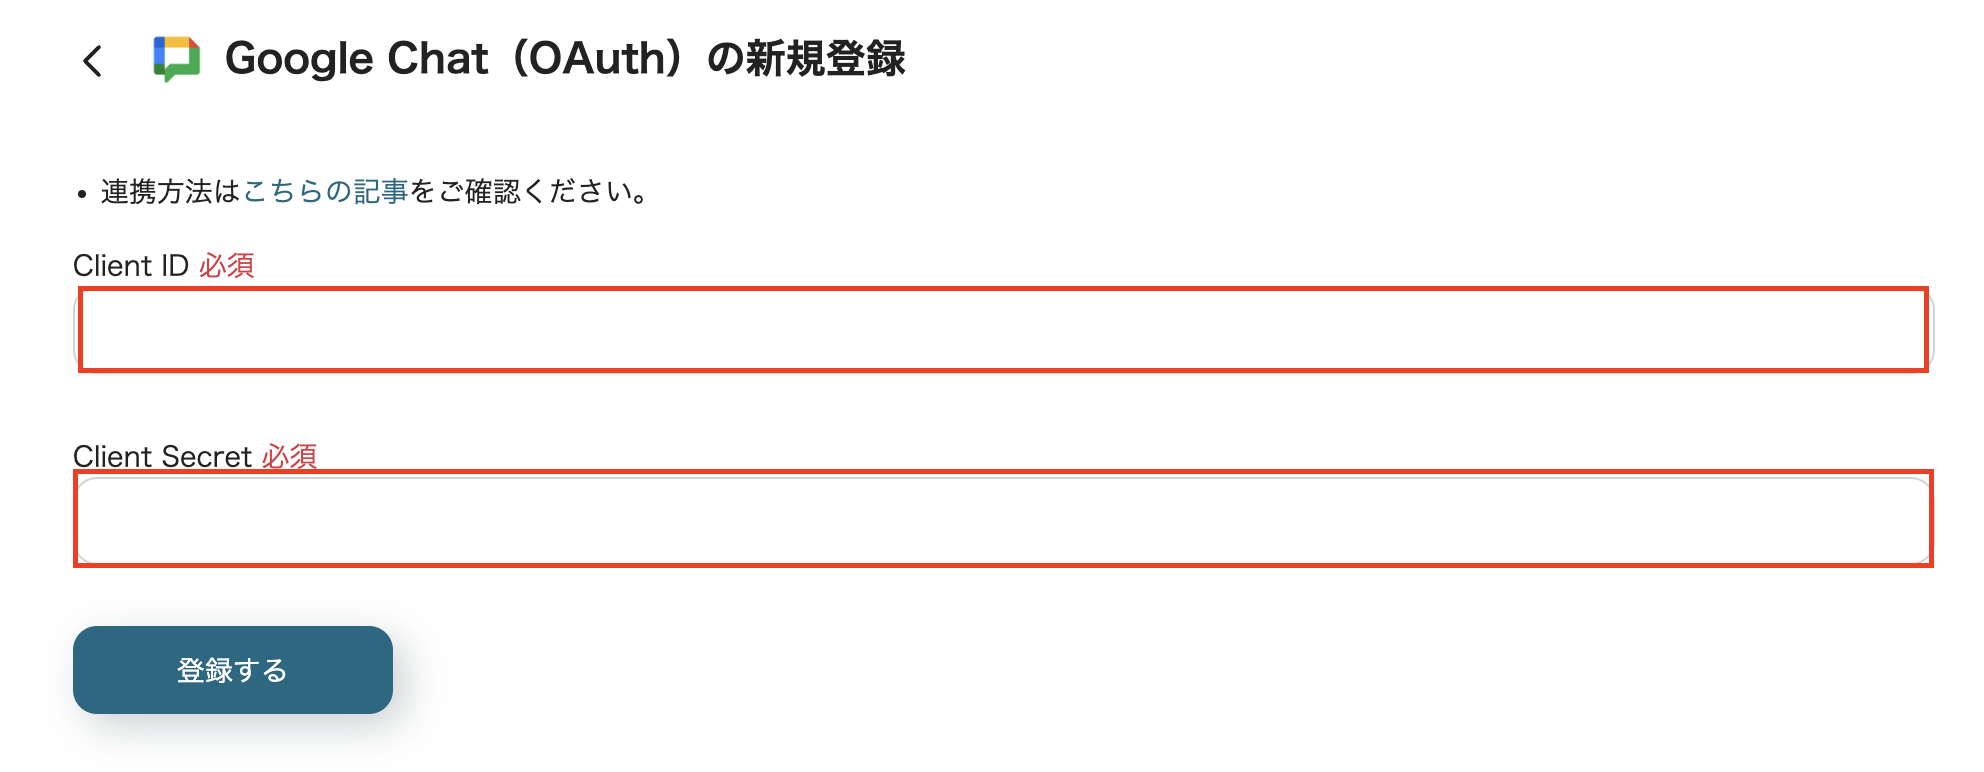
Client IDとClient Secretを入力しましょう。
Google Chatの詳しいマイアプリ登録方法は、こちらをご確認ください。
Google Chatとの連携はGoogle Workspaceでのみ使用できます。
詳細はこちらをご確認ください。
以上でGoogle Chatのマイアプリ登録ができました。
ステップ2:テンプレートをコピーする
続いてテンプレートをコピーしましょう。
すぐ下のバナーをクリックしてください。
↓こちら
■概要
Shopifyに注文が発生したら、Google Chatに通知するフローです。
■このテンプレートをおすすめする方
・Shopifyプラットフォーム上でECサイトを運営する事業者
・複数名でサイト運営を行い、情報共有の効率化を必要とするチーム
・顧客満足度向上のため、迅速な注文対応を目指す企業
■このテンプレートを使うメリット
・手作業による注文確認・通知作業を自動化し、人的リソースを削減します。
・迅速な注文対応により、顧客満足度向上に貢献します。
■注意事項
・Shopify、Google ChatのそれぞれとYoomを連携させてください。
・Shopifyはチームプラン・サクセスプランでのみご利用いただけるアプリとなっております。フリープラン・ミニプランの場合は設定しているフローボットのオペレーションやデータコネクトはエラーとなりますので、ご注意ください。
・チームプランやサクセスプランなどの有料プランは、2週間の無料トライアルを行うことが可能です。無料トライアル中には制限対象のアプリを使用することができます。
・Google Chatとの連携はGoogle Workspaceの場合のみ可能です。詳細はこちらをご参照ください。https://intercom.help/yoom/ja/articles/6647336
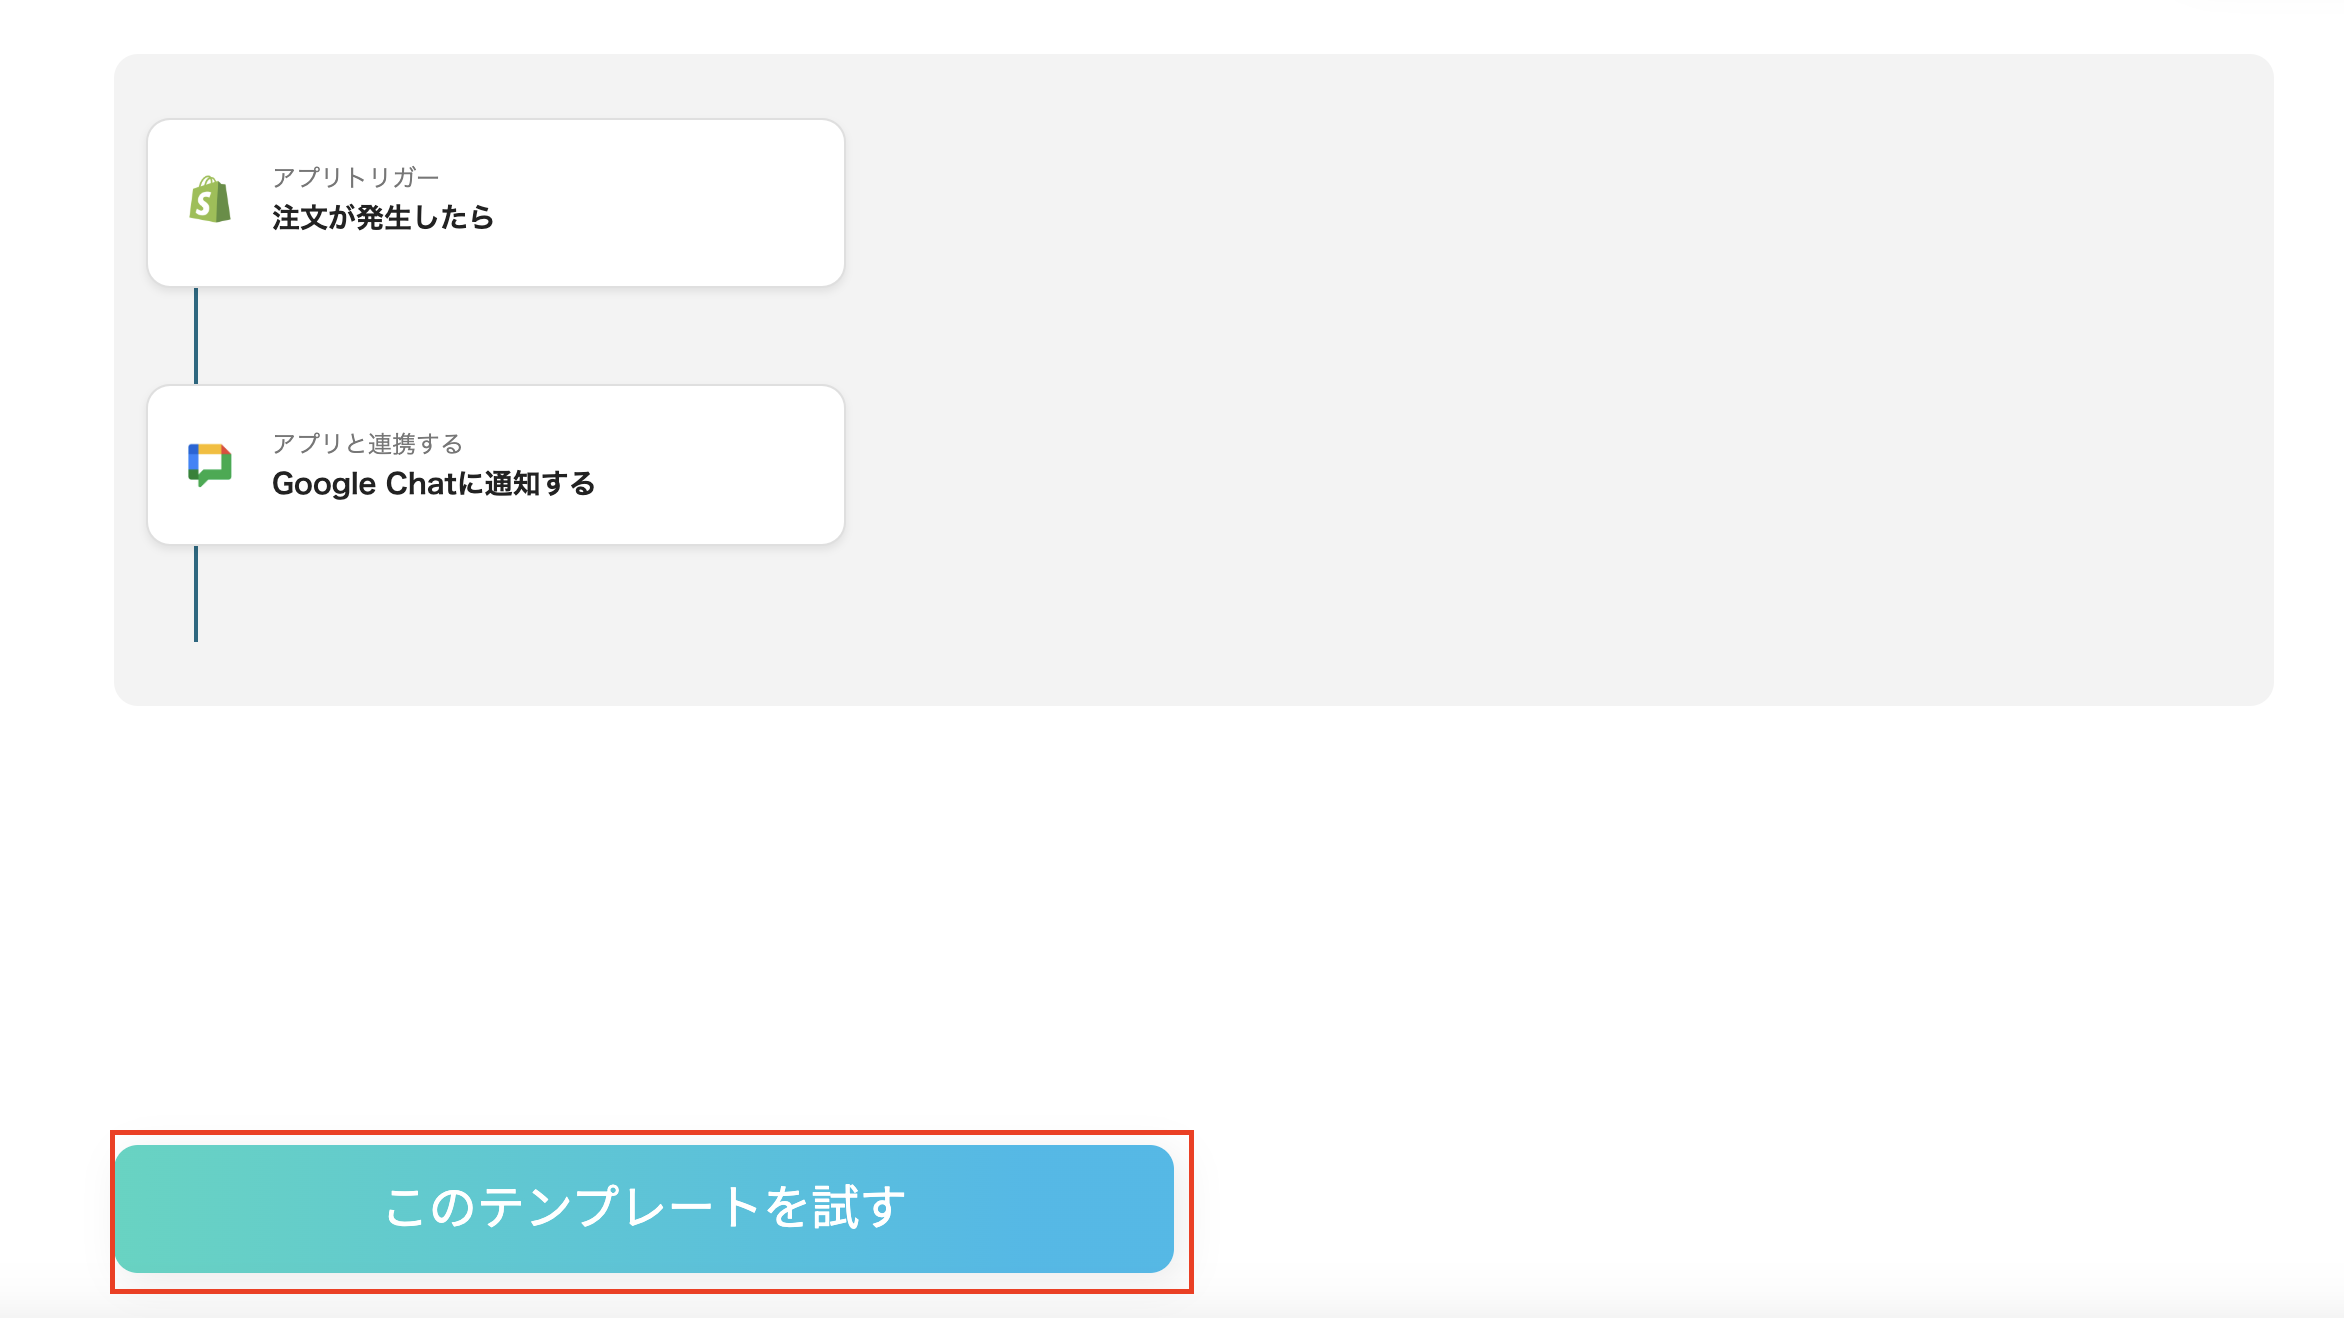
クリック後、Yoomのテンプレートサイトに移動したら、「このテンプレートを試す」をクリックしましょう。
テンプレートのコピーができたと表示されたら、「OK」をクリックしてください。
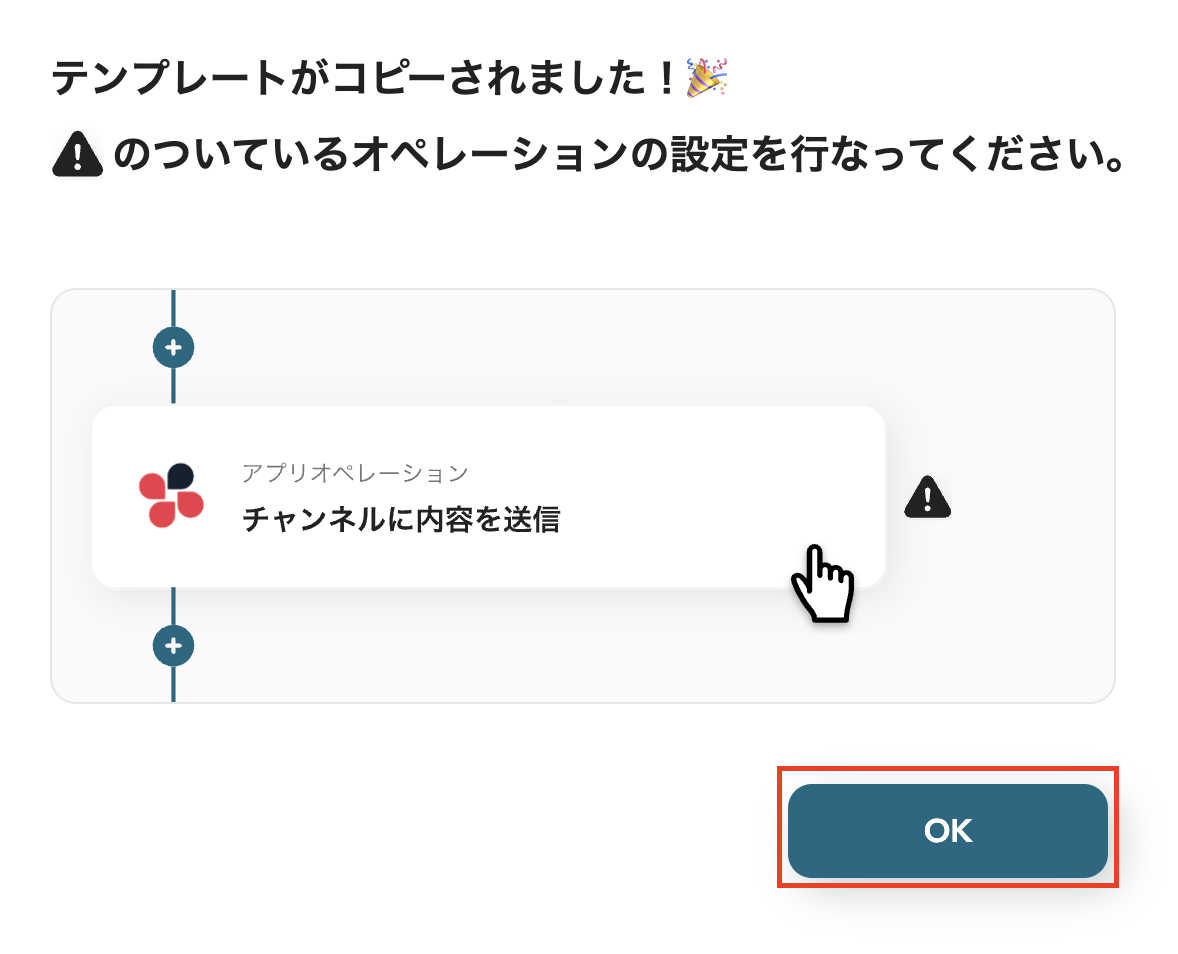
以上でテンプレートのコピーができました。
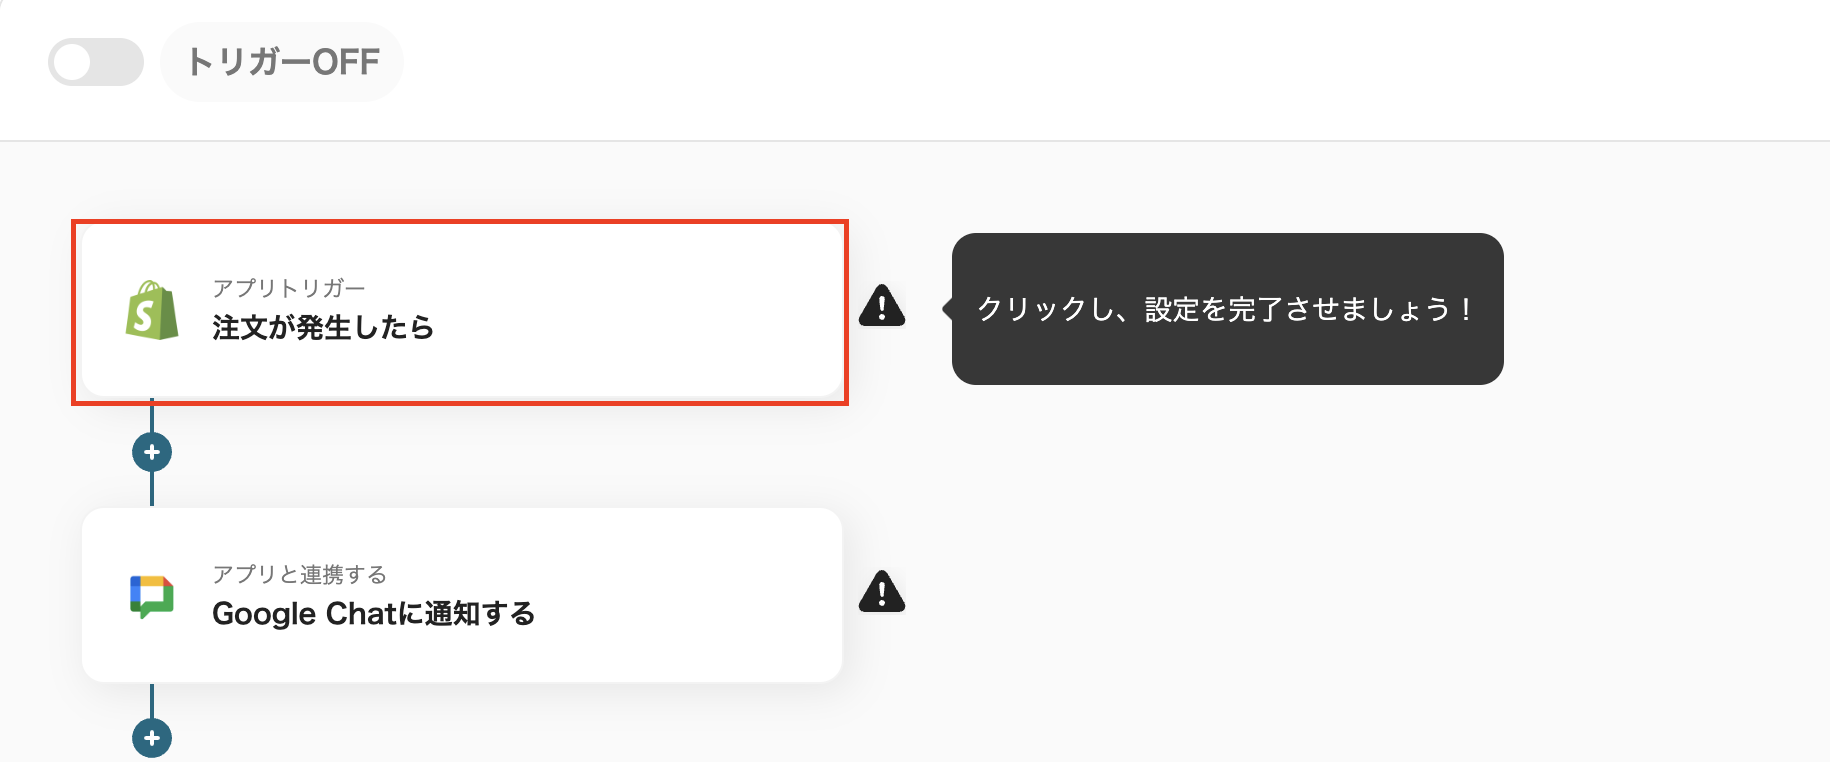
ステップ3:Shopifyのトリガーを設定
次にフローボットを設定しましょう。
先ほどコピーしたテンプレートの「注文が発生したら」をクリックしてください。
注)Shopifyは一部有料プランで利用できるアプリです。
有料プランには2週間の無料トライアルがあり、その期間中は制限対象のアプリも使用できます。
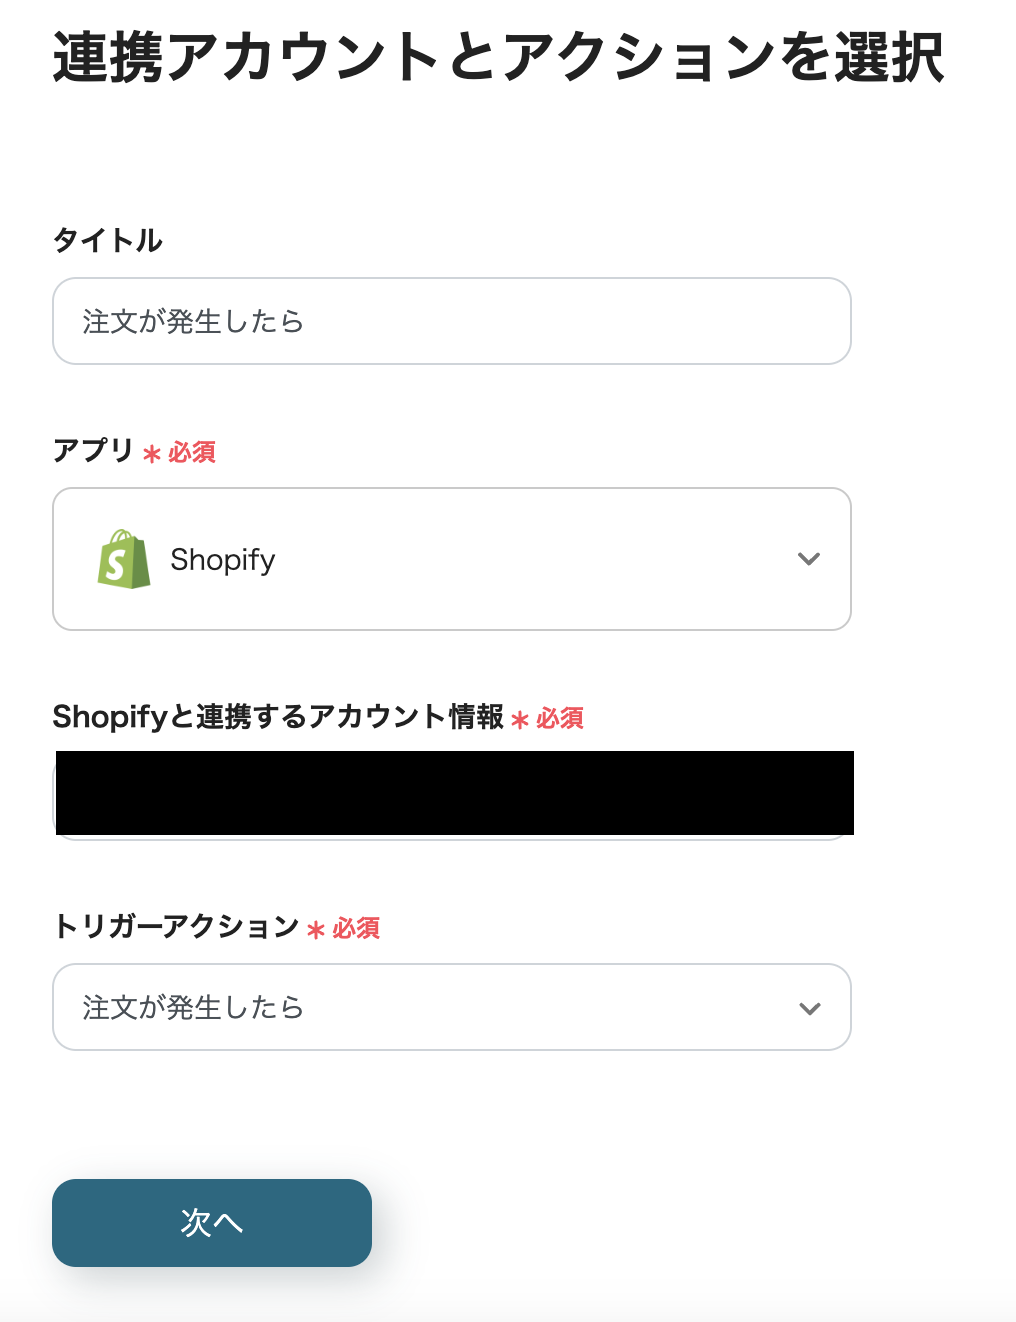
1.連携アカウントとアクションを選択
タイトルは事前に入力されていますが、変更できます。
Shopifyと連携するアカウント情報を確認してください。
トリガーアクションは「注文が発生したら」を選択しましょう。
設定したら、「次へ」をクリックしてください。
2.アプリトリガーのAPI接続設定
トリガーの起動間隔を選択しましょう。
起動間隔の選べる時間については、契約プランによって異なります。
サブドメインを入力してください。
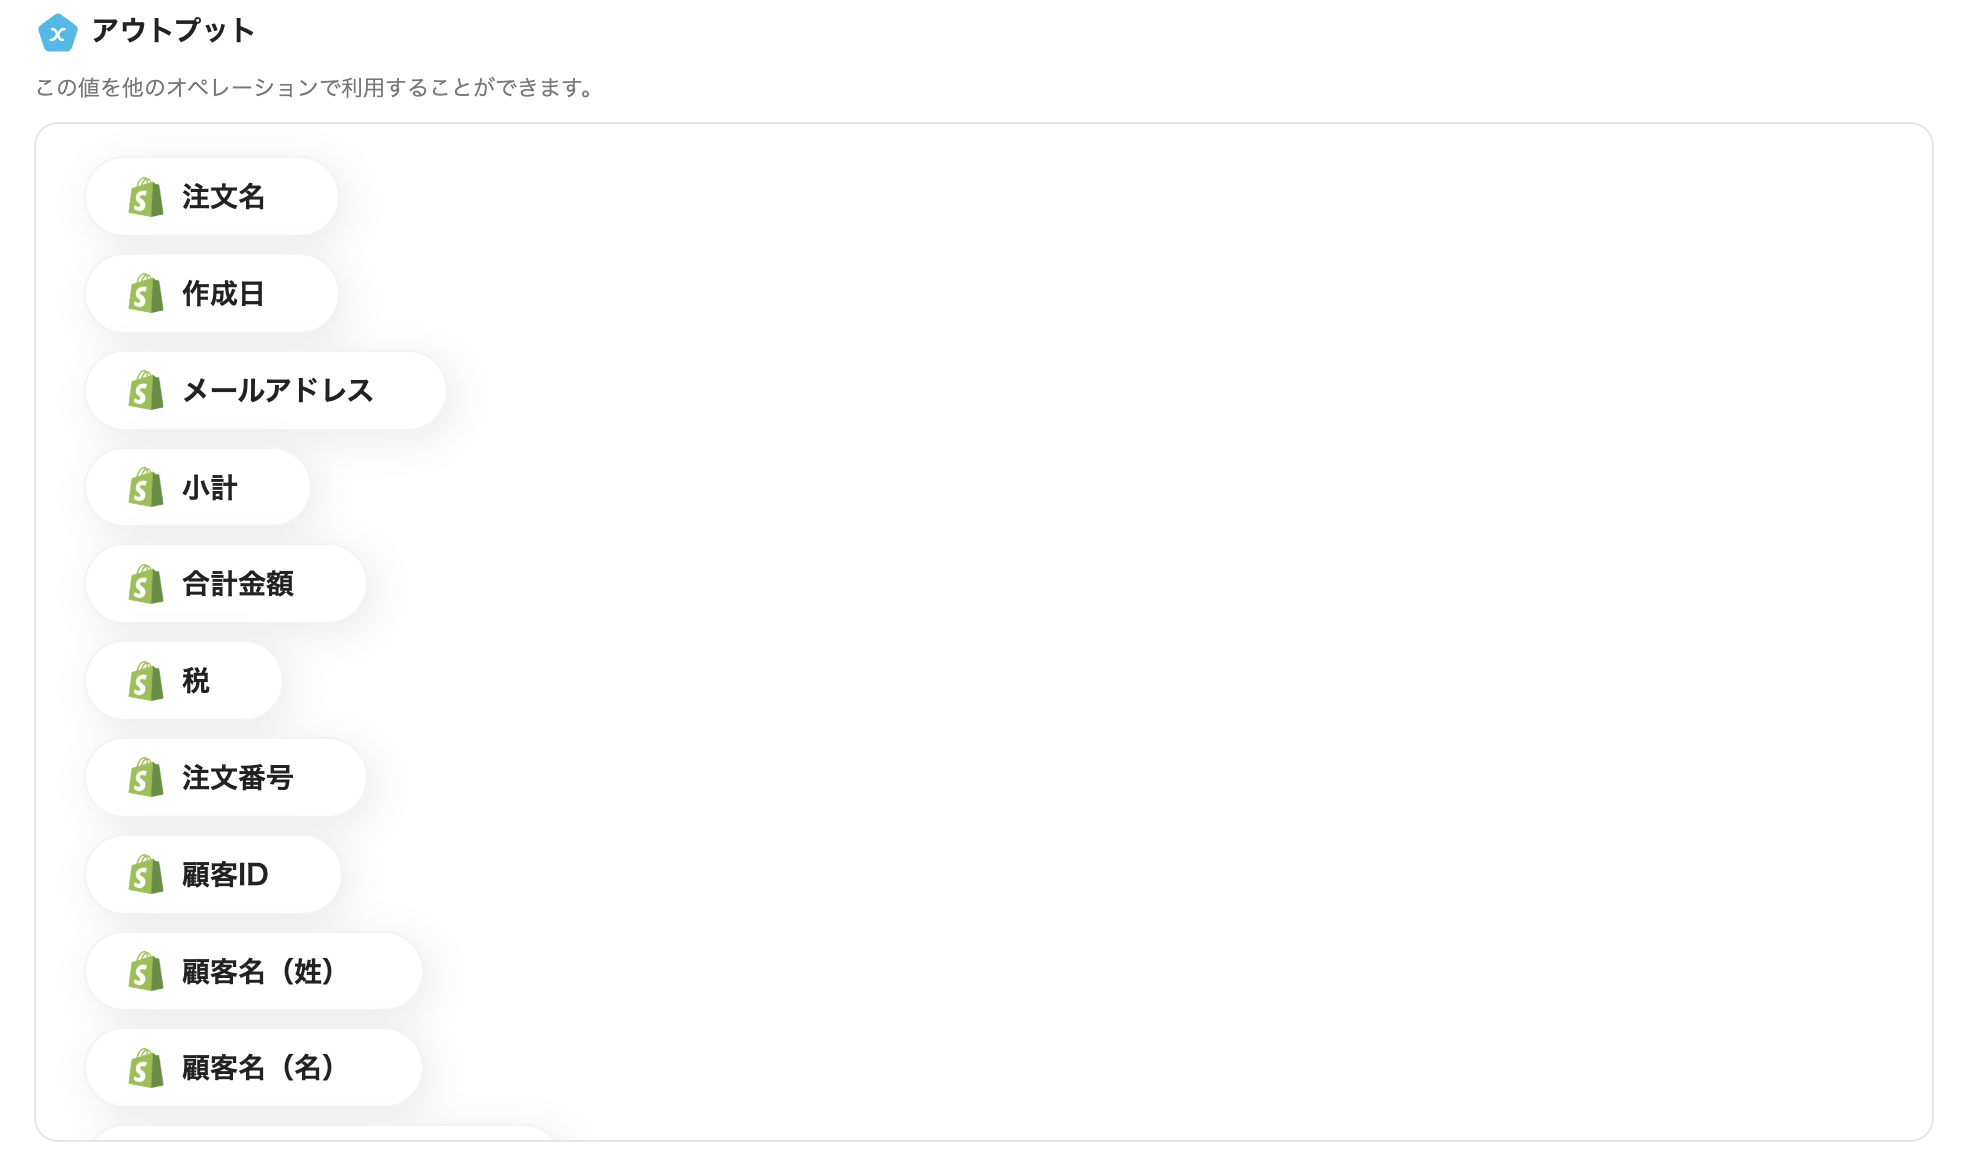
設定後、トリガーとなるイベント(注文が発生したら)を実行し、テストをクリックしましょう。
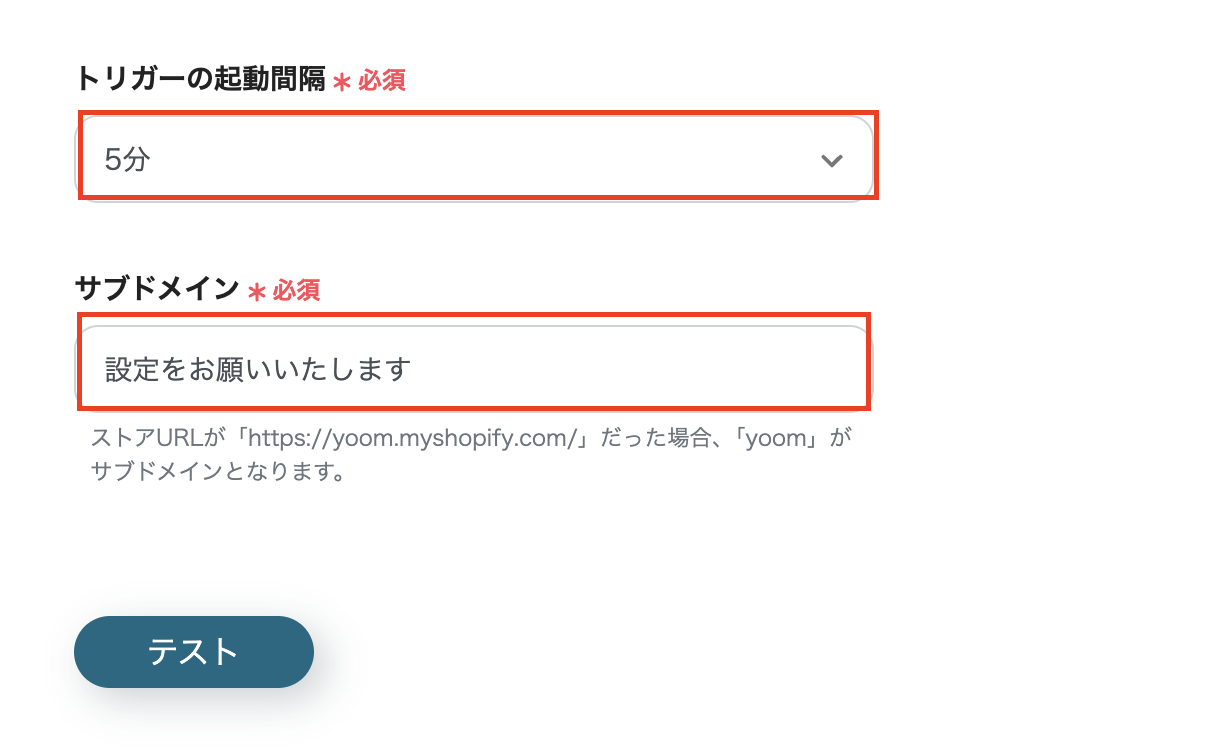
Shopifyのアウトプットが取得できたら保存してください。
ステップ4:Google Chatのアクションを設定
最後の設定ステップとなります。
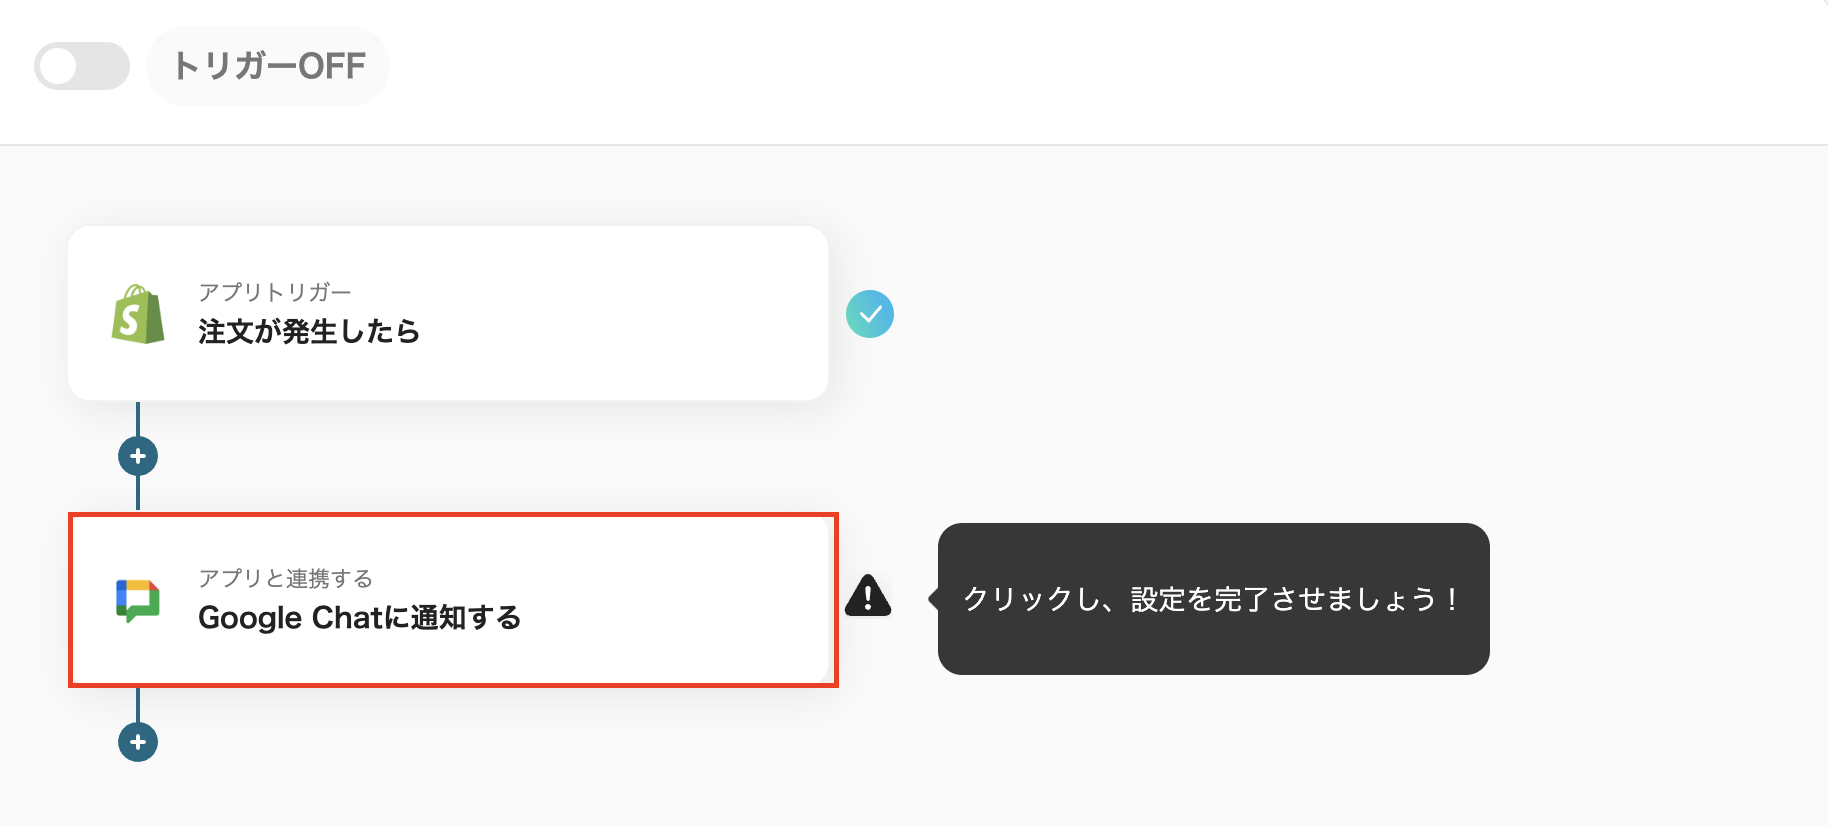
「Google Chatに通知する」をクリックしてください。
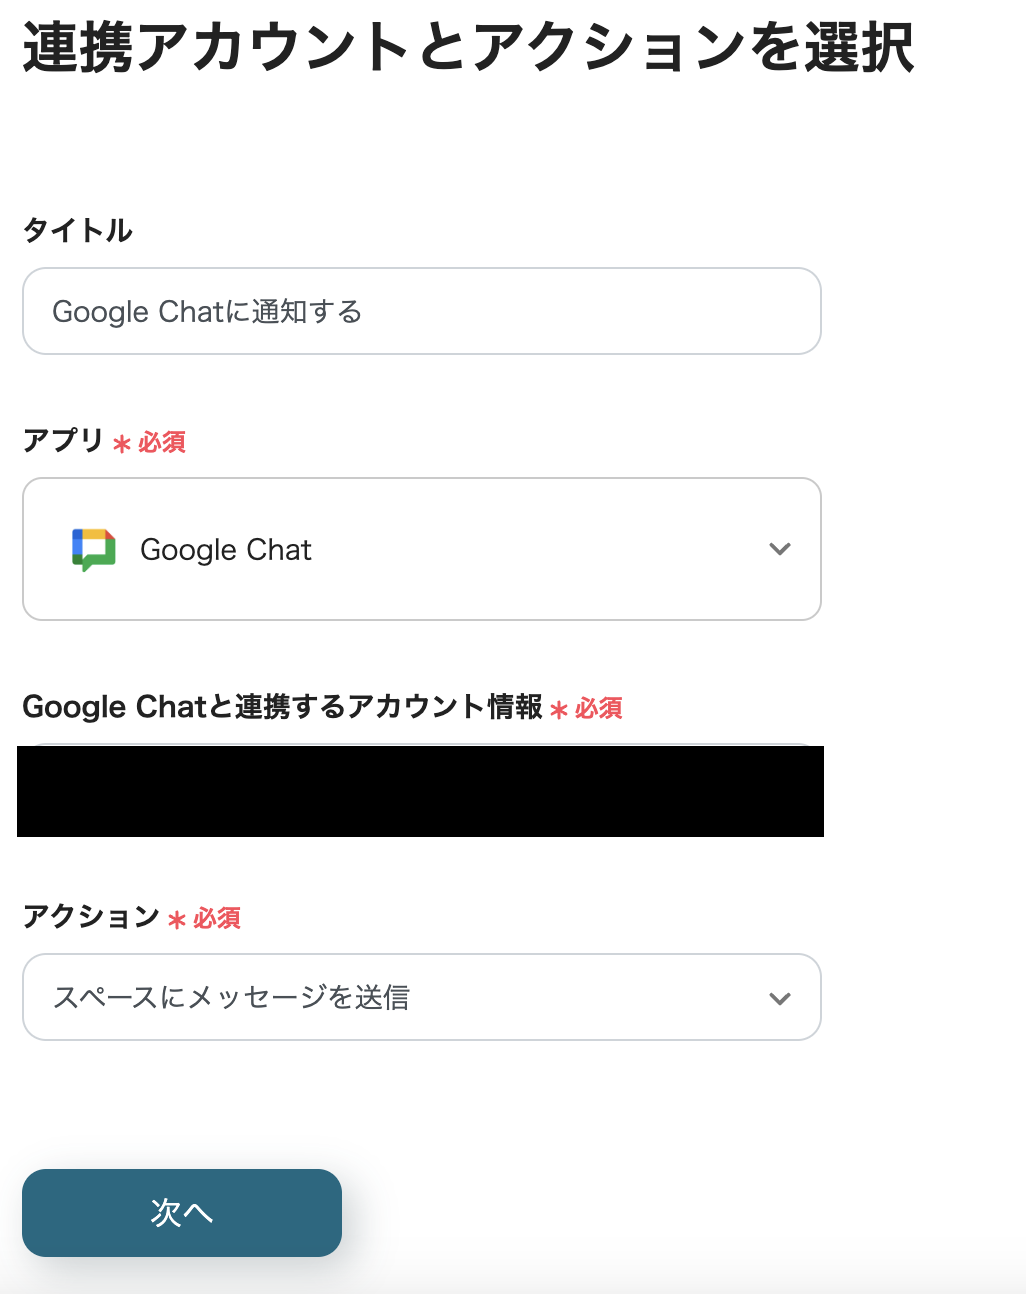
1.連携アカウントとアクションを選択
タイトルは変更できます。
Google Chatと連携するアカウント情報を確認しましょう。
アクションは「スペースにメッセージを送信」を選択してください。
設定後、「次へ」をクリックします。
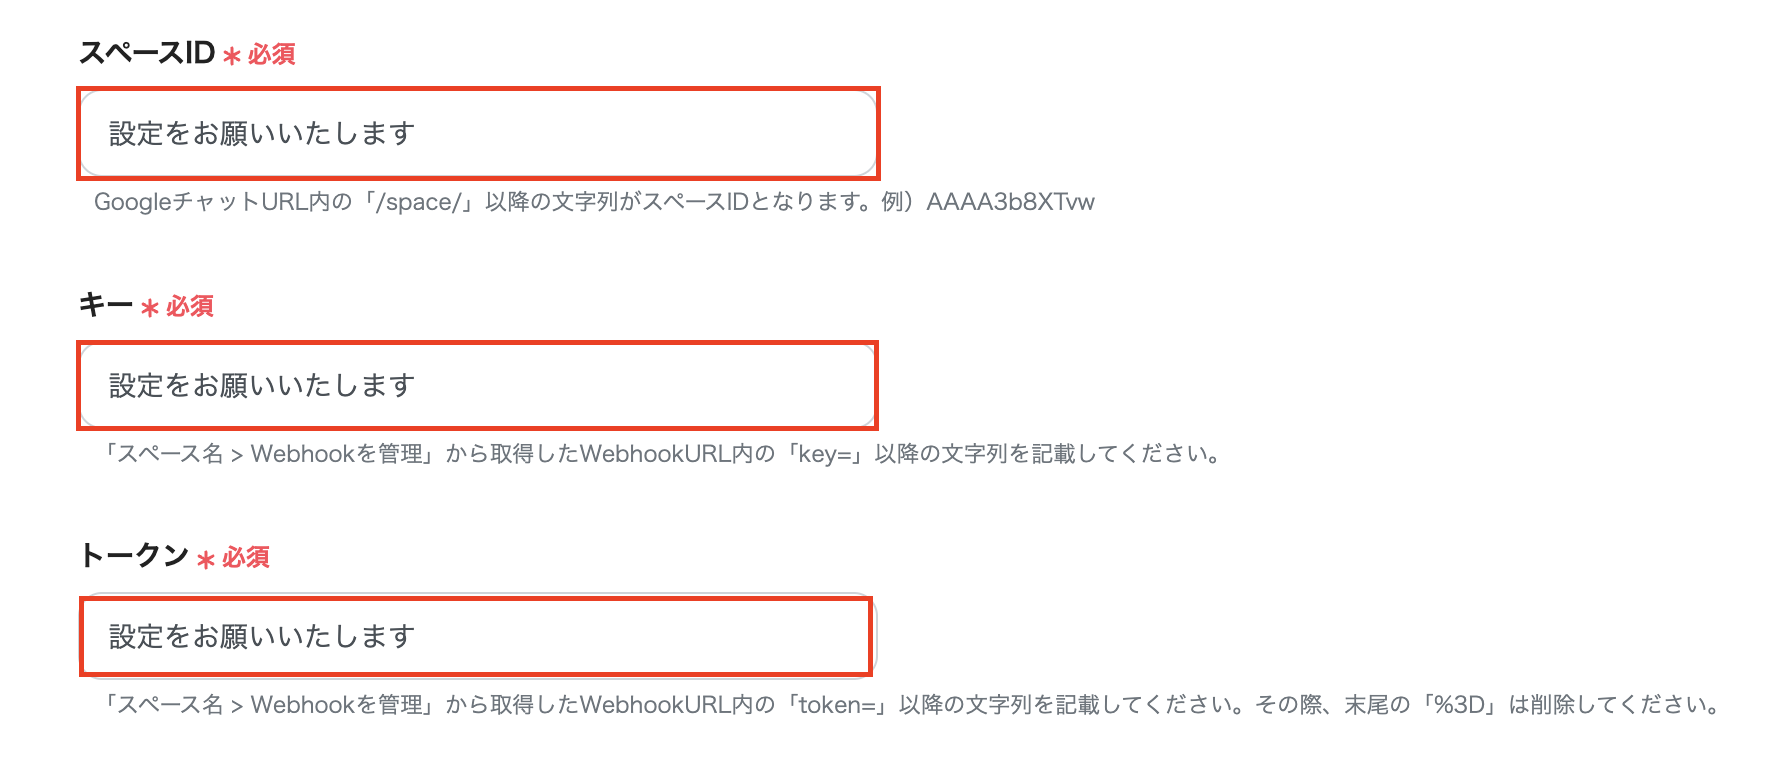
2.API接続設定
スペースID、キー、トークンを設定しましょう。
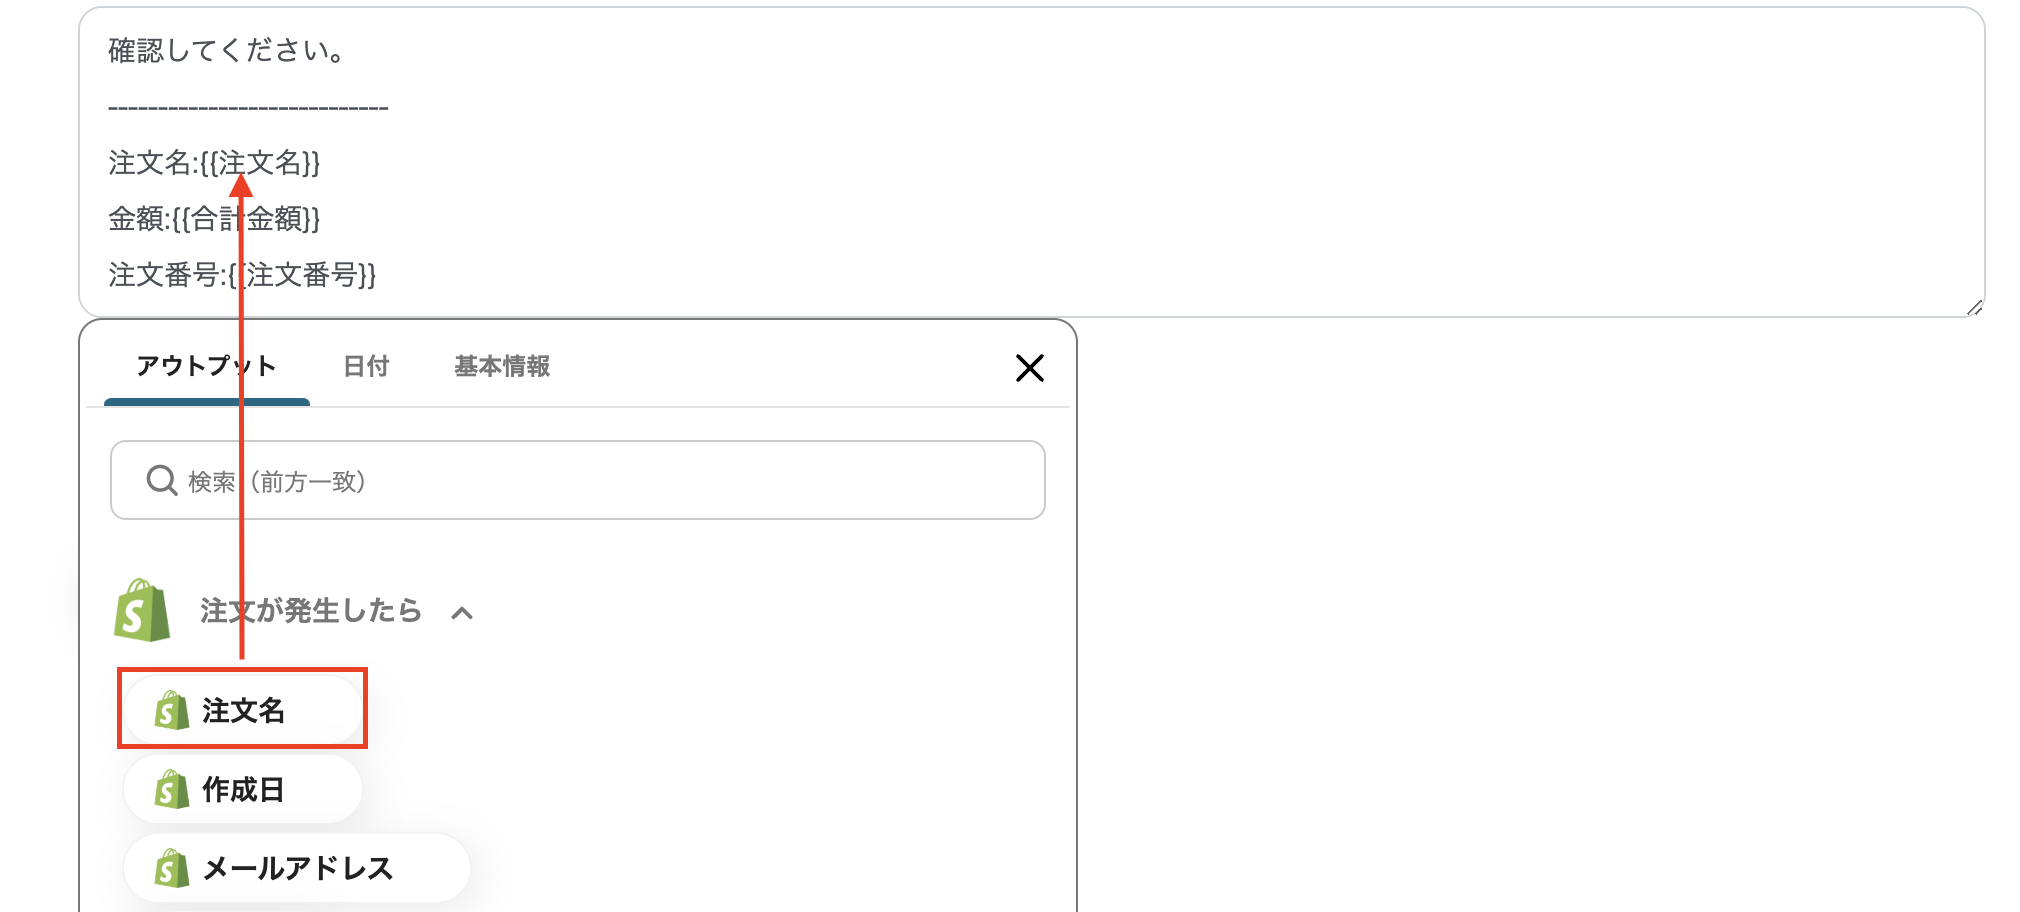
メッセージは、添付画像のようにShopifyのアウトプットを活用して作成しましょう。
すべて設定したら、テストを実行して、Google Chatに通知できたら保存してください。
保存後、設定完了と表示されたら、「トリガーをON」にして動作チェックを行いましょう。
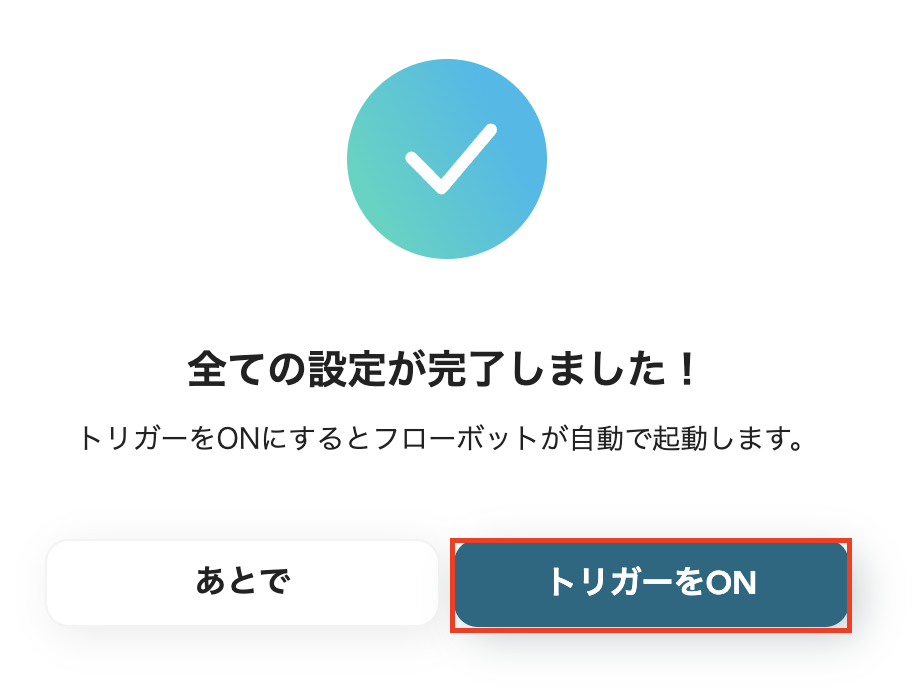
以上でフローボットの設定ができました。
■概要
Shopifyに注文が発生したら、Google Chatに通知するフローです。
■このテンプレートをおすすめする方
・Shopifyプラットフォーム上でECサイトを運営する事業者
・複数名でサイト運営を行い、情報共有の効率化を必要とするチーム
・顧客満足度向上のため、迅速な注文対応を目指す企業
■このテンプレートを使うメリット
・手作業による注文確認・通知作業を自動化し、人的リソースを削減します。
・迅速な注文対応により、顧客満足度向上に貢献します。
■注意事項
・Shopify、Google ChatのそれぞれとYoomを連携させてください。
・Shopifyはチームプラン・サクセスプランでのみご利用いただけるアプリとなっております。フリープラン・ミニプランの場合は設定しているフローボットのオペレーションやデータコネクトはエラーとなりますので、ご注意ください。
・チームプランやサクセスプランなどの有料プランは、2週間の無料トライアルを行うことが可能です。無料トライアル中には制限対象のアプリを使用することができます。
・Google Chatとの連携はGoogle Workspaceの場合のみ可能です。詳細はこちらをご参照ください。https://intercom.help/yoom/ja/articles/6647336
もっと自動化するには
Yoomにはご紹介した自動化以外にも便利な機能があります。
さらに作業の効率化を図れるので、ぜひ試してみてください。
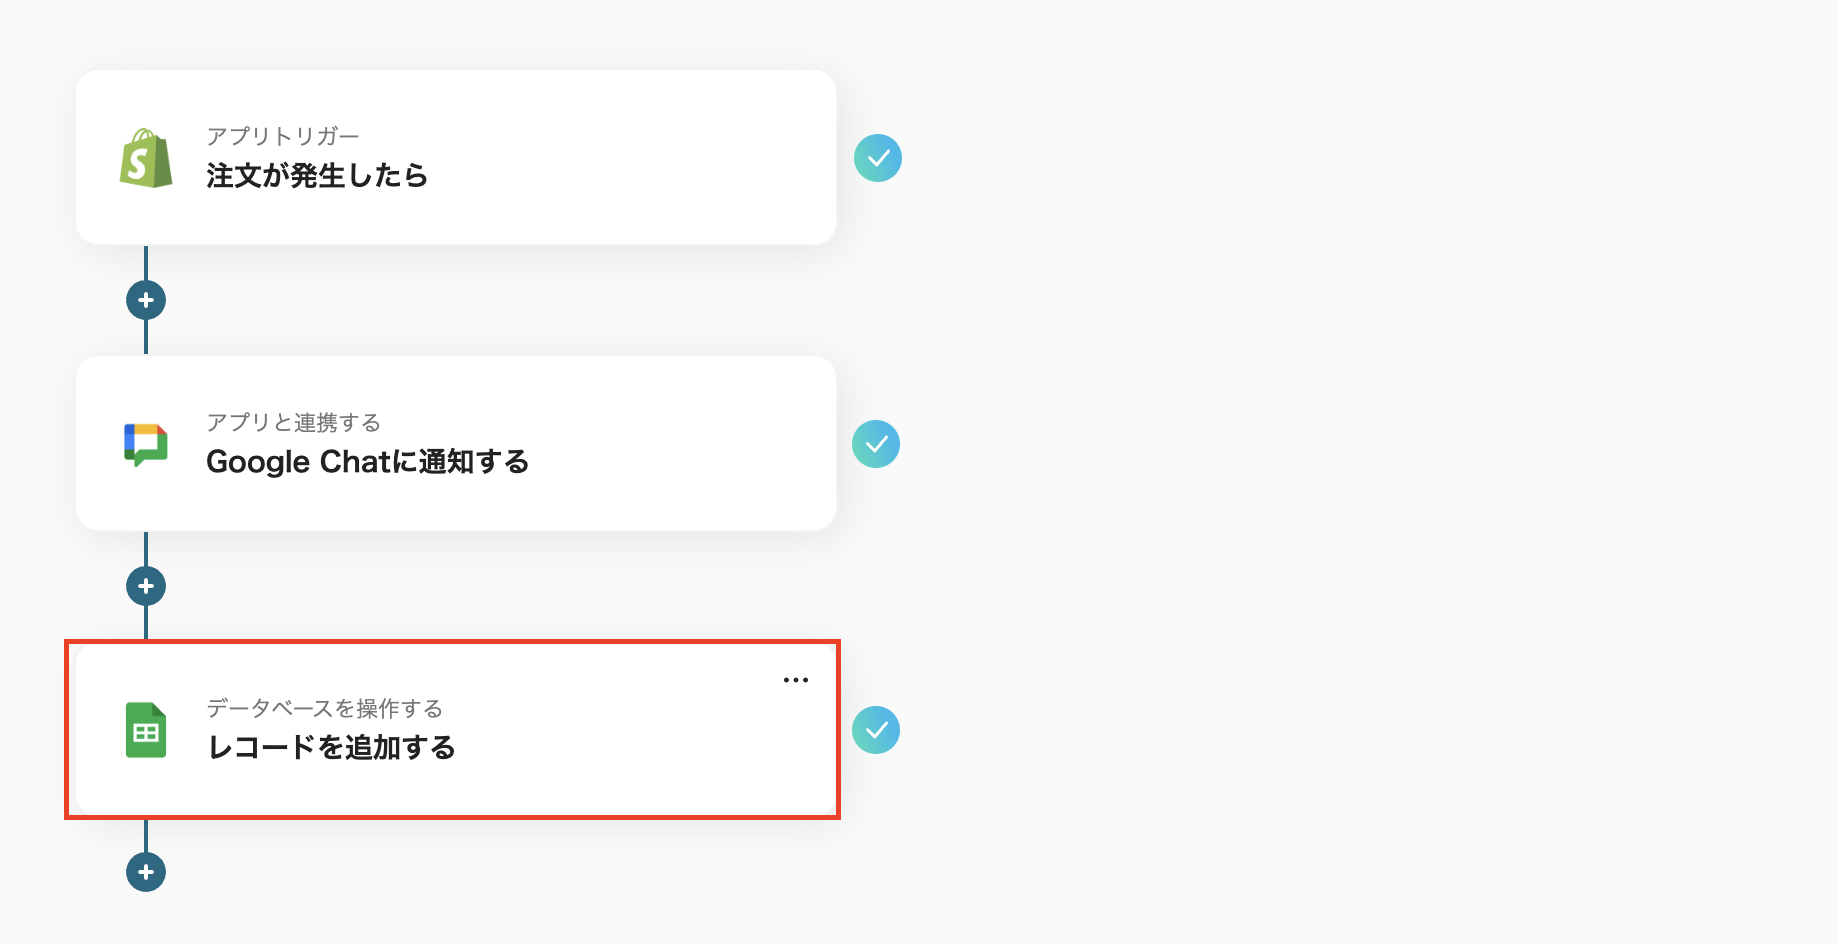
事例1:データベースと連携
データベースアプリと連携してみるのはいかがでしょうか?
ここではGoogle スプレッドシートと連携しましたが、Microsoft Excelなどとも連携可能です。
これにより、チーム内外を問わず、情報共有しやすくなり、Shopifyの情報を一元管理できるでしょう。
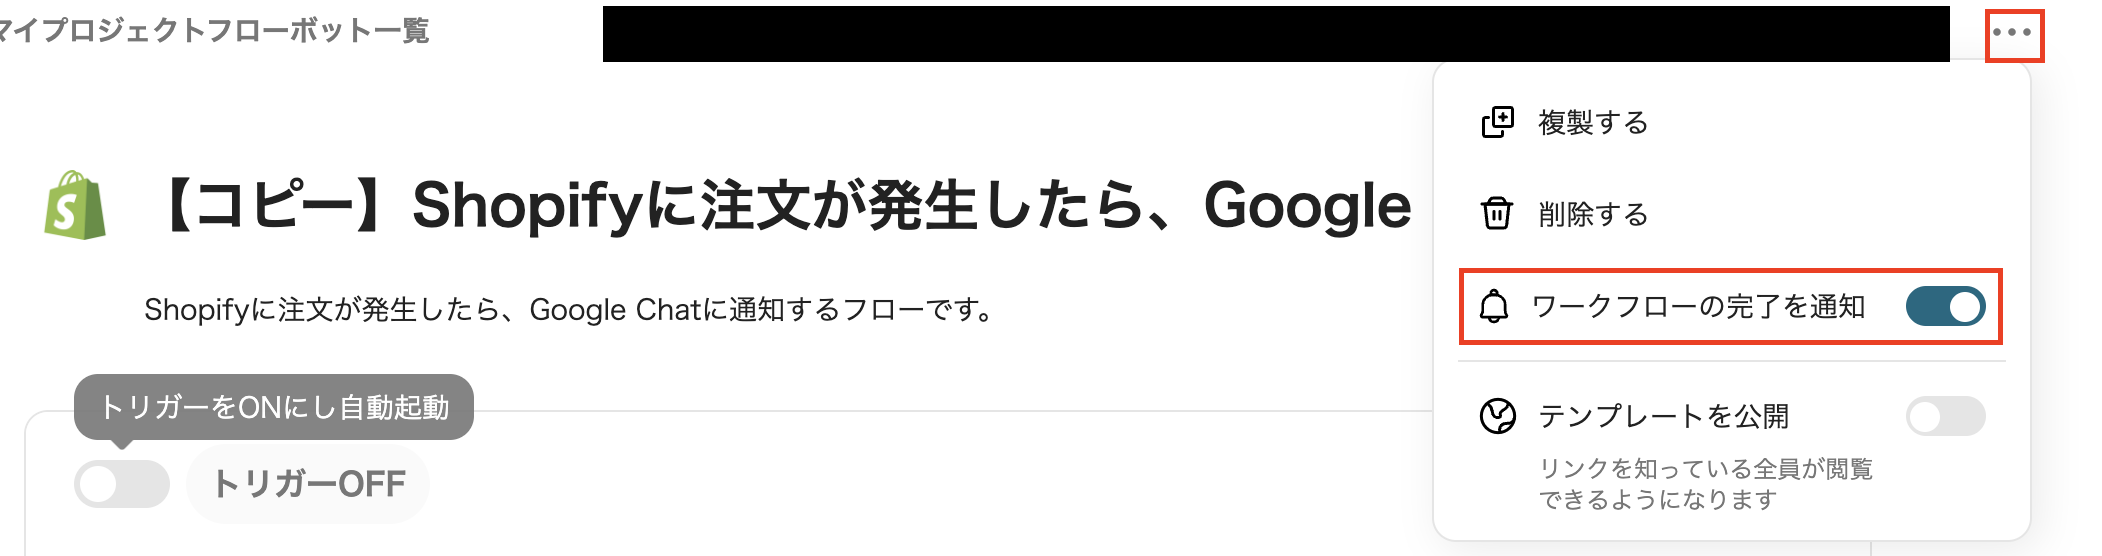
事例2:ワークフローの完了通知を受け取る
テンプレート作成ページの右上の3点リーダーをクリックして、ワークフローの完了通知をONにしてみましょう。
これにより、フローボットが起動した際にメールで通知が届くようになります。
Yoomを開かなくても、正常に作動したことを通知してくれるため、とても便利ですね。
Shopifyを使ったその他の自動化例
Yoomには多数のテンプレートがあります。
ここではShopifyを活用した自動例を3つご紹介します。
1.Shopifyで特定の商品の注文が発生したらGmailでクーポン情報を送信するテンプレートです。
手動でクーポンを送信する作業を自動化できます。
これにより、事務作業の手間を省き、時間を短縮できるため、他の重要な業務に集中できるでしょう。
■概要
Shopifyで特定商品を購入いただいたお客様へのクーポン送付など、手作業で行っていませんか?
手動での対応は時間がかかるうえ、送信漏れや誤送信のリスクも伴います。
このワークフローを活用すれば、Shopifyでの注文発生をきっかけに、対象のお客様へGmailからクーポン情報を自動で送信できます。
手作業による手間をなくし、効率的な販促活動を実現します。
■このテンプレートをおすすめする方
- Shopifyでの注文後の顧客対応を手作業で行い、手間を感じているEC担当者の方
- クーポン配布などの販促活動を自動化し、リピート率向上を目指すマーケティング担当者の方
- 手作業によるメール送信でのミスをなくし、顧客満足度を高めたいと考えている方
■このテンプレートを使うメリット
- Shopifyで特定商品の注文が入ると自動でメールが送信されるため、これまで手作業で行っていた顧客対応の時間を短縮できます。
- 手動でのメール作成や送信時に起こりがちな、宛先間違いや送信漏れといったヒューマンエラーの防止に繋がります。
■フローボットの流れ
- はじめに、ShopifyとGmailをYoomと連携します。
- 次に、トリガーでShopifyを選択し、「注文情報が作成されたら(Webhook)」アクションを設定します。
- 続いて、オペレーションでShopifyの「注文情報を取得」アクションを設定し、トリガーで検知した注文の詳細情報を取得します。
- 次に、オペレーションで分岐機能を設定し、特定の商品が購入された場合のみ後続の処理に進むよう条件を設定します。
- 最後に、オペレーションでGmailの「メールを送る」アクションを設定し、対象のお客様にクーポン情報を記載したメールを送信します。
※「トリガー」:フロー起動のきっかけとなるアクション、「オペレーション」:トリガー起動後、フロー内で処理を行うアクション
■このワークフローのカスタムポイント
- Shopifyの「注文情報を取得」アクションで、ご利用のサブドメインや取得対象の注文IDを設定してください。
- 分岐機能では、どの商品が購入された場合にメールを送るかなど、クーポンの送付条件を任意で設定してください。
- Gmailで送信するメールの宛先や件名、本文に記載するクーポン情報などを任意の内容に設定してください。
■注意事項
- Shopify、GmailのそれぞれとYoomを連携してください。
- 分岐機能(オペレーション)はミニプラン以上、Shopifyとの連携はチームプラン以上でご利用いただけます。対象外のプランの場合は設定しているオペレーションやデータコネクトはエラーとなりますので、ご注意ください。
- 有料プランは、2週間の無料トライアルを行うことが可能です。無料トライアル中には制限対象のアプリや機能(オペレーション)を使用できます。
2.Notionの商品情報が更新されたらShopifyの商品情報も更新するテンプレートです。
手動で情報を更新している場合、入力ミスや漏れが発生するかもしれません。
このテンプレートを活用すれば、ヒューマンエラーを防止できます。
ミスが軽減されることにより、正確な情報をもとに業務を進めることが期待できます。
■概要Notionで管理している商品情報を、ECサイトのShopifyへ手作業で転記するのは手間がかかり、更新漏れや入力ミスの原因にもなりがちではないでしょうか。特に頻繁に商品情報が更新される場合、その負担は大きくなります。 このワークフローを活用すれば、Notionのデータベースで商品情報が更新されるだけで、Shopifyの商品情報も自動で更新されるため、こうした課題を解消し、正確な情報管理を実現できます。■このテンプレートをおすすめする方- NotionとShopifyで商品情報を管理しており、二重入力の手間をなくしたい方
- 手作業での情報更新によるミスや反映漏れを防ぎ、業務品質を高めたいEC担当者の方
- 商品マスタの管理とECサイトへの情報反映を効率化したいと考えている方
■このテンプレートを使うメリット- Notionの商品データベースを更新するだけで、Shopifyの商品情報が自動で更新されるため、手作業での転記にかかっていた時間を削減できます
- 手作業による情報の転記が不要になることで、入力ミスや更新漏れといったヒューマンエラーを防ぎ、常に正確な商品情報を維持することに繋がります
■フローボットの流れ- はじめに、NotionとShopifyをYoomと連携します
- 次に、トリガーでNotionを選択し、「特定のデータソースのページが作成・更新されたら」というアクションを設定します
- 次に、オペレーションで「分岐機能」を設定し、更新時のみ後続の処理が行われるように分岐させます
- 続いて、オペレーションでNotionの「レコードを取得する(ID検索)」アクションを設定し、対象ページの情報を取得します
- 最後に、オペレーションでShopifyの「商品情報を更新」アクションを設定し、取得した情報をもとにShopifyの商品データを更新します
※「トリガー」:フロー起動のきっかけとなるアクション、「オペレーション」:トリガー起動後、フロー内で処理を行うアクション
■このワークフローのカスタムポイント- Notionのトリガー設定では、監視の対象としたいデータベース(データソース)を任意で選択することが可能です
- Shopifyの商品情報を更新するオペレーションでは、各登録項目に固定値を入力したり、前段で取得した値を埋め込んだりするなどのカスタムができます
■注意事項- Notion、ShopifyのそれぞれとYoomを連携してください。
- Shopifyはチームプラン・サクセスプランでのみご利用いただけるアプリとなっております。フリープラン・ミニプランの場合は設定しているフローボットのオペレーションやデータコネクトはエラーとなりますので、ご注意ください。
- 分岐はミニプラン以上のプランでご利用いただける機能(オペレーション)となっております。フリープランの場合は設定しているフローボットのオペレーションはエラーとなりますので、ご注意ください。
- チームプランやサクセスプラン、ミニプランなどの有料プランは、2週間の無料トライアルを行うことが可能です。無料トライアル中には制限対象のアプリや機能(オペレーション)を使用することができます。
- トリガーは5分、10分、15分、30分、60分の間隔で起動間隔を選択できます。
- プランによって最短の起動間隔が異なりますので、ご注意ください。
- NotionとShopifyで商品情報を管理しており、二重入力の手間をなくしたい方
- 手作業での情報更新によるミスや反映漏れを防ぎ、業務品質を高めたいEC担当者の方
- 商品マスタの管理とECサイトへの情報反映を効率化したいと考えている方
- Notionの商品データベースを更新するだけで、Shopifyの商品情報が自動で更新されるため、手作業での転記にかかっていた時間を削減できます
- 手作業による情報の転記が不要になることで、入力ミスや更新漏れといったヒューマンエラーを防ぎ、常に正確な商品情報を維持することに繋がります
- はじめに、NotionとShopifyをYoomと連携します
- 次に、トリガーでNotionを選択し、「特定のデータソースのページが作成・更新されたら」というアクションを設定します
- 次に、オペレーションで「分岐機能」を設定し、更新時のみ後続の処理が行われるように分岐させます
- 続いて、オペレーションでNotionの「レコードを取得する(ID検索)」アクションを設定し、対象ページの情報を取得します
- 最後に、オペレーションでShopifyの「商品情報を更新」アクションを設定し、取得した情報をもとにShopifyの商品データを更新します
■このワークフローのカスタムポイント
- Notionのトリガー設定では、監視の対象としたいデータベース(データソース)を任意で選択することが可能です
- Shopifyの商品情報を更新するオペレーションでは、各登録項目に固定値を入力したり、前段で取得した値を埋め込んだりするなどのカスタムができます
- Notion、ShopifyのそれぞれとYoomを連携してください。
- Shopifyはチームプラン・サクセスプランでのみご利用いただけるアプリとなっております。フリープラン・ミニプランの場合は設定しているフローボットのオペレーションやデータコネクトはエラーとなりますので、ご注意ください。
- 分岐はミニプラン以上のプランでご利用いただける機能(オペレーション)となっております。フリープランの場合は設定しているフローボットのオペレーションはエラーとなりますので、ご注意ください。
- チームプランやサクセスプラン、ミニプランなどの有料プランは、2週間の無料トライアルを行うことが可能です。無料トライアル中には制限対象のアプリや機能(オペレーション)を使用することができます。
- トリガーは5分、10分、15分、30分、60分の間隔で起動間隔を選択できます。
- プランによって最短の起動間隔が異なりますので、ご注意ください。
3.Google スプレッドシートで行が更新されたらShopifyの顧客情報も更新するテンプレートです。
Google スプレッドシートとShopifyを連携すれば、両ツールの整合性を保つことが可能です。
手動の場合、情報のズレが発生し、最新データではないかもしれません。
このテンプレートを活用すると、正確性の高い情報管理ができそうです。
■概要
Google スプレッドシートで行が更新されたらShopifyに顧客情報を登録するフローです。
■このテンプレートをおすすめする方
1.Google スプレッドシートを業務で活用している方
・情報の蓄積を共有シート行うプロジェクトチーム
・同時にシートを編集し常に最新情報を共有したいチームの責任者
2.Shopifyを使用した業務を行う方
・Shopifyでショップを運営している小売業の方
・商品の在庫数などを管理している統括部門の方
■このテンプレートを使うメリット
Google スプレッドシートは編集内容が即反映するため、チーム内の情報の共有に適しているツールです。
しかしShopifyにもその編集を反映させるために手作業を行うのは、業務効率化の妨げとなります。
チーム内の業務効率化を促進したいと考える方に、このフローは適しています。
Google スプレッドシート上で編集された情報を引用して、Shopifyの顧客情報を更新することで、手作業による手間を省き、業務を効率化します。
■注意事項
・Google スプレッドシート、ShopifyのそれぞれとYoomを連携してください。
・Shopifyはチームプラン・サクセスプランでのみご利用いただけるアプリとなっております。フリープラン・ミニプランの場合は設定しているフローボットのオペレーションやデータコネクトはエラーとなりますので、ご注意ください。
・チームプランやサクセスプランなどの有料プランは、2週間の無料トライアルを行うことが可能です。無料トライアル中には制限対象のアプリを使用することができます。
ShopifyとGoogle Chatを連携するメリットと具体例
メリット1:人的エラーを防止できる
Shopifyの発注情報をGoogle Chatに自動通知できるため、通知ミスや漏れを軽減できます。
例えば、ShopifyとGoogle Chatを活用してECサイトを運営しているとしましょう。
手動で通知していると、「発注数の通知ミス」や「通知し忘れていた」というリスクが考えられます。
ShopifyとGoogle Chatを連携すれば、ヒューマンエラーの防止が期待できます。
また、いつも使用しているチャットツールに自動通知することで、情報の確認漏れを防ぐことができそうです。
これにより、正確性が高い発注情報を確認できるため、スピーディーに発注業務を行えるでしょう。
メリット2:通知作業を自動化できる
Google Chatに自動通知できるため、手動で行う業務を削減できそうです。
例えば、商品管理部でShopifyで発注情報を、手作業でGoogle Chatに通知しているとしましょう。
発注件数が増える繁忙時期に手動で通知していると、事務作業の負担が増えて、業務が逼迫するかもしれません。
ShopifyとGoogle Chatを連携すれば、手間と労力を省くことが可能です。
これにより、通知にかかる時間を短縮でき、業務をスムーズに進められます。
メリット3:最新の発注情報を共有できる
Shopifyで注文があったらすぐに、Google Chatに自動通知できるため、いつでも最新情報をチームで把握することが可能です。
例えば、リモートワークでECサイトを運営しているとしましょう。
離れた場所で業務を行っている場合にも、通常使用しているチャットツールに通知できるため、情報共有しやすくなります。
また最新の注文情報がすぐに確認できるため、在庫切れなどのリスクを減らし、効率的な在庫管理が期待できます。
これにより、発注管理が円滑に行える環境が整い、業務の生産性向上に繋がるかもしれません。
まとめ
ShopifyとGoogle Chatを連携すると、通知作業を自動化でき、ヒューマンエラーの防止が期待できます。
常に最新の発注情報をチームで確認できるため、スムーズに発注対応を行うことができそうです。
Yoomを使って、アプリ連携やフローボットの作成手順をご紹介しました。
マイアプリ登録をすれば、自由にカスタマイズし、自動化できるフローボットを作成できるため、プログラミングの知識がなくても操作できます。
ぜひこの機会に、ShopifyとGoogle Chatを連携して、発注情報を自動通知してみませんか?
プログラミング知識なしで手軽に構築できます。