・
YouTubeとNotionを連携して、YouTubeに動画が公開されたら、Notionにページを作成する方法
SNSやYouTubeを活用して広告を打ち出すなど、マーケティングとして業務に取り入れている企業は多いと言えます。ここで大切なのは、いいねの数やコメント数、視聴回数などの把握ではないでしょうか。
これらの数を分析することで今後の方針を決める場合もあるため、重要なデータと言えます。
そこで今回はYouTubeとNotionを連携して、YouTubeにアップロードした動画データを管理しやすくなるアプリ連携を紹介します。
ネットマーケティングの手助けとなるかもしれません。この機会にぜひご活用ください。
こんな方におすすめ
- YouTubeに公開した動画データをNotionに格納している方
- 動画ごとの分析ページをNotionに作成している方
- 動画分析チームの作業効率を向上したいリーダー
YouTubeとNotionの連携メリットと具体例
メリット1:ページ作成の手間を省く
今回の連携を行うことで、YouTubeに動画が公開されたら、Notionに新しいページを自動で作成します。これにより動画ごとの分析ページが自然に確保され、ページを作成する手間が省けるはずです。
例えば、これまでは公開した日時や動画のタイトルなどを確認した後、Notionにアクセスしてページタイトルなどを公開した動画と同じネーミングにするといった一連のフローが必要でした。
今回の連携によりこれらのフローが自動化される上、ページタイトルを公開した動画と同じネーミングにすることも自動化できるため、作業負担が軽減する可能性があります。
メリット2:動画の公開が把握しやすくなる
YouTubeに動画を公開するとNotionに自動でページが作成されるため、動画が公開されたことが把握しやすくなるかもしれません。
例えば、Notionに分析ページを作成しようとしても、まずは動画が公開されたのか確認する必要があり、1アクション挟むこととなります。
しかし今回の連携を導入すれば、動画を公開したらスムーズにページが作成されるため、ページの作成が自動化するだけではなく動画の公開も把握しやすくなるでしょう。
これにより、動画公開からデータ格納までの時間が短縮できれば、全体的な作業時間を短くすることも夢ではありません。
メリット3:チーム連携の強化が期待できる
今回の連携を導入すると、データ分析の基盤が自然と構築できる可能性が高まるでしょう。これにより、チームの連携強化が期待できます。
例えば、動画作成チームが動画を公開した後、その旨をマーケティングチームに知らせずともNotionにページが作成されれば、マーケティングチームがデータの格納をスムーズに行えます。
一連の連携が流れるように取れることでチーム全体の生産性が強化され、業務の効率向上となるかもしれません。
それではここからノーコードツールYoomを使って、「YouTubeに動画が公開されたら、Notionにページを作成する」方法をご説明します。
[Yoomとは]
YouTubeに動画が公開されたら、Notionにページを作成する方法
まず、YouTubeに新しい動画が公開されると、YouTubeのAPIを利用してそのデータを取得します。
そして、NotionのAPIを用いてデータを受け取り、公開された動画と連動するページを作成することが可能です。
このような連携の実現には、一般的にはプログラミングの知識が必要ですが、ノーコードツールのYoomを用いることでプログラミング知識がなくても簡単に実現できます。
今回の連携フローは大きく分けて以下のプロセスの通りです。
- YouTubeとNotionをマイアプリ連携
- YouTubeを起動する設定
- Notionに新しいページを作成する設定
- トリガーボタンをONにして、YouTubeとNotionの連携動作を確認
まずはじめに、Yoomの登録を行いましょう。
Yoomは2週間のトライアルが可能です。実際に操作をして使用感を確かめることができます。
■概要YouTubeチャンネルで新しい動画を公開した際、その情報をチームへ共有したり、Notionで管理したりする作業に手間を感じていませんか。動画公開のたびに手作業でNotionのページを作成していると、時間もかかり、共有漏れのリスクも発生します。このワークフローを活用すれば、指定したYouTubeチャンネルに動画が公開されたタイミングで、自動的にNotionへページを作成できるため、動画コンテンツの管理や情報共有を効率化することが可能です。■このテンプレートをおすすめする方- YouTubeチャンネルを運用しており、動画公開後の情報管理を効率化したいと考えている方
- Notionでコンテンツ管理を行っており、手作業でのページ作成に手間を感じている方
- チーム内のナレッジ共有を円滑にし、YouTubeの更新情報をスムーズに共有したい方
■このテンプレートを使うメリット- YouTubeに動画が公開されると自動でNotionにページが作成されるため、手作業による情報転記やページ作成にかかる時間を短縮できます
- 手動での作業で起こりうるページの作成漏れや、タイトル・URLなどの転記ミスといったヒューマンエラーを防ぎ、情報共有の確実性を高めます
■フローボットの流れ- はじめに、YouTube Data APIとNotionをYoomと連携します
- 次に、トリガーでYouTube Data APIを選択し、「YouTubeチャンネルで最新の動画が公開されたら」というアクションを設定します
- 最後に、オペレーションでNotionの「ページを作成」アクションを設定し、公開された動画の情報をもとにページが作成されるように設定します
※「トリガー」:フロー起動のきっかけとなるアクション、「オペレーション」:トリガー起動後、フロー内で処理を行うアクション
■このワークフローのカスタムポイント- YouTube Data APIのトリガー設定では、動画公開を検知したいYouTubeチャンネルのIDを任意で設定してください
- Notionでページを作成するアクションでは、作成先のデータベースやページのタイトル、プロパティに設定する内容(動画のタイトルやURLなど)を任意で設定できます
■注意事項- YouTube Data API、NotionのそれぞれとYoomを連携してください
- トリガーは5分、10分、15分、30分、60分の間隔で起動間隔を選択できます
- プランによって最短の起動間隔が異なりますので、ご注意ください
- YouTubeチャンネルを運用しており、動画公開後の情報管理を効率化したいと考えている方
- Notionでコンテンツ管理を行っており、手作業でのページ作成に手間を感じている方
- チーム内のナレッジ共有を円滑にし、YouTubeの更新情報をスムーズに共有したい方
- YouTubeに動画が公開されると自動でNotionにページが作成されるため、手作業による情報転記やページ作成にかかる時間を短縮できます
- 手動での作業で起こりうるページの作成漏れや、タイトル・URLなどの転記ミスといったヒューマンエラーを防ぎ、情報共有の確実性を高めます
- はじめに、YouTube Data APIとNotionをYoomと連携します
- 次に、トリガーでYouTube Data APIを選択し、「YouTubeチャンネルで最新の動画が公開されたら」というアクションを設定します
- 最後に、オペレーションでNotionの「ページを作成」アクションを設定し、公開された動画の情報をもとにページが作成されるように設定します
■このワークフローのカスタムポイント
- YouTube Data APIのトリガー設定では、動画公開を検知したいYouTubeチャンネルのIDを任意で設定してください
- Notionでページを作成するアクションでは、作成先のデータベースやページのタイトル、プロパティに設定する内容(動画のタイトルやURLなど)を任意で設定できます
- YouTube Data API、NotionのそれぞれとYoomを連携してください
- トリガーは5分、10分、15分、30分、60分の間隔で起動間隔を選択できます
- プランによって最短の起動間隔が異なりますので、ご注意ください
ステップ1:YouTubeとNotionをマイアプリ連携
ここでは、Yoomとそれぞれのアプリを連携して、操作が行えるようにしていきます。
まずは基本的な設定方法を解説しているナビをご覧ください!
それではここから今回のフローで使用するアプリのマイアプリ登録方法を解説します。
YouTubeとYoomの連携
以下の手順をご参照ください。
NotionとYoomの連携
1.Notionの準備
NotionとYoomを連携するにあたり、現段階でNotionの準備をしておく必要があります。

今回はシンプルに上記のような設定にしました。

動画の説明などの詳細データも自動格納可能です。
2.検索する
左側にあるメニューから「マイアプリ」を選択してください。
次に、右上の新規接続ボタンをクリックします。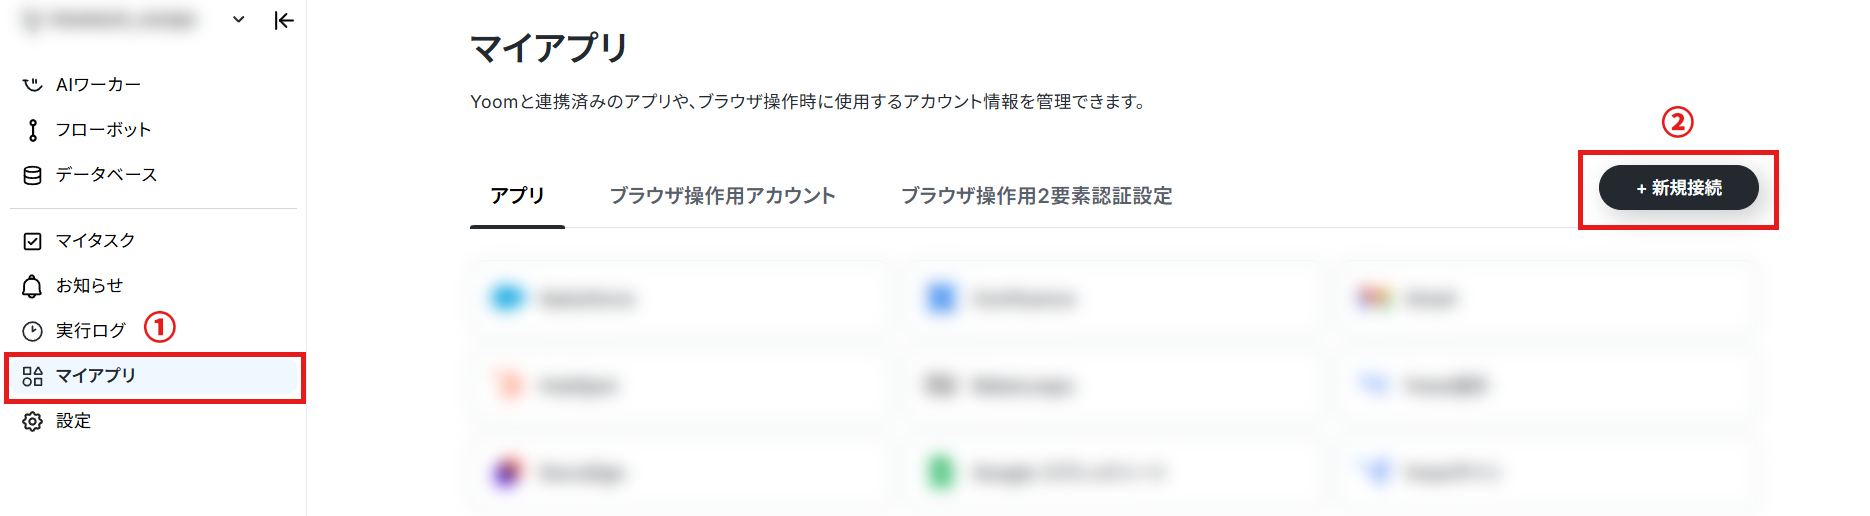
Notionを検索し、Notionのアイコンをクリックします。

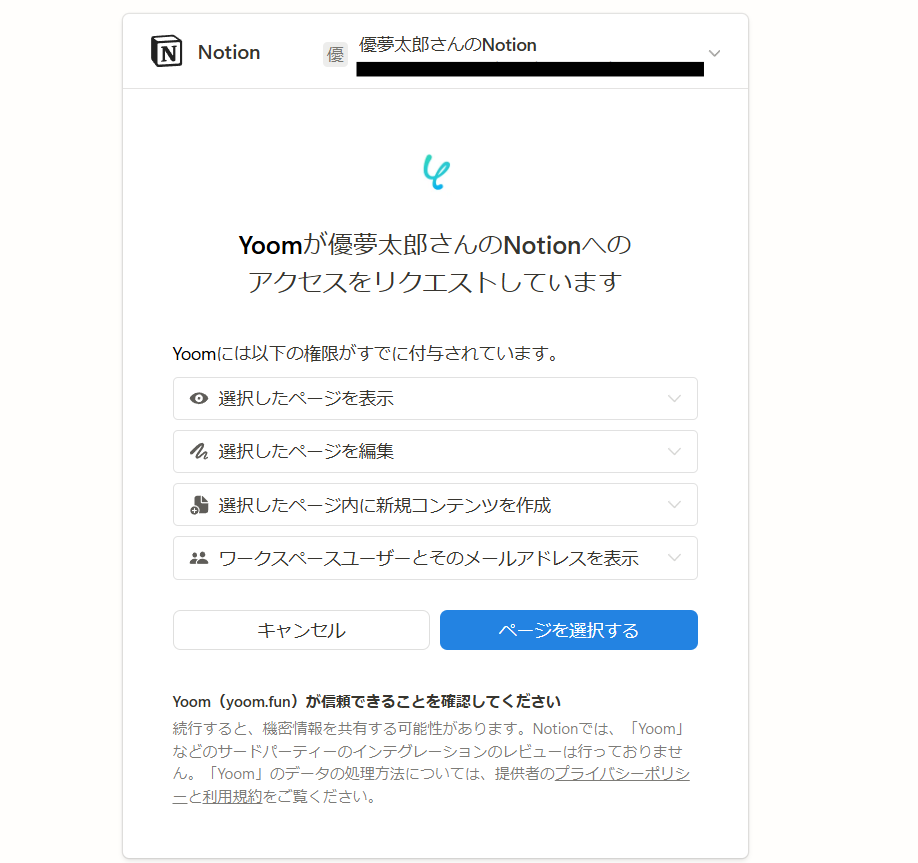
3.アクセスリクエスト
画像のようにアクセスのリクエストについて表示がされます。
確認し、「ページを選択する」をクリックしてください。
4.ページを選択する
Notionで作成済みのページが表示されます。
先ほど用意したページを選択し、「アクセスを許可する」を押しましょう。

これでNotionのマイアプリ連携が完了です!
ステップ2:テンプレートのコピー
次に、今回使用するテンプレートをコピーしてください。
■概要YouTubeチャンネルで新しい動画を公開した際、その情報をチームへ共有したり、Notionで管理したりする作業に手間を感じていませんか。動画公開のたびに手作業でNotionのページを作成していると、時間もかかり、共有漏れのリスクも発生します。このワークフローを活用すれば、指定したYouTubeチャンネルに動画が公開されたタイミングで、自動的にNotionへページを作成できるため、動画コンテンツの管理や情報共有を効率化することが可能です。■このテンプレートをおすすめする方- YouTubeチャンネルを運用しており、動画公開後の情報管理を効率化したいと考えている方
- Notionでコンテンツ管理を行っており、手作業でのページ作成に手間を感じている方
- チーム内のナレッジ共有を円滑にし、YouTubeの更新情報をスムーズに共有したい方
■このテンプレートを使うメリット- YouTubeに動画が公開されると自動でNotionにページが作成されるため、手作業による情報転記やページ作成にかかる時間を短縮できます
- 手動での作業で起こりうるページの作成漏れや、タイトル・URLなどの転記ミスといったヒューマンエラーを防ぎ、情報共有の確実性を高めます
■フローボットの流れ- はじめに、YouTube Data APIとNotionをYoomと連携します
- 次に、トリガーでYouTube Data APIを選択し、「YouTubeチャンネルで最新の動画が公開されたら」というアクションを設定します
- 最後に、オペレーションでNotionの「ページを作成」アクションを設定し、公開された動画の情報をもとにページが作成されるように設定します
※「トリガー」:フロー起動のきっかけとなるアクション、「オペレーション」:トリガー起動後、フロー内で処理を行うアクション
■このワークフローのカスタムポイント- YouTube Data APIのトリガー設定では、動画公開を検知したいYouTubeチャンネルのIDを任意で設定してください
- Notionでページを作成するアクションでは、作成先のデータベースやページのタイトル、プロパティに設定する内容(動画のタイトルやURLなど)を任意で設定できます
■注意事項- YouTube Data API、NotionのそれぞれとYoomを連携してください
- トリガーは5分、10分、15分、30分、60分の間隔で起動間隔を選択できます
- プランによって最短の起動間隔が異なりますので、ご注意ください
- YouTubeチャンネルを運用しており、動画公開後の情報管理を効率化したいと考えている方
- Notionでコンテンツ管理を行っており、手作業でのページ作成に手間を感じている方
- チーム内のナレッジ共有を円滑にし、YouTubeの更新情報をスムーズに共有したい方
- YouTubeに動画が公開されると自動でNotionにページが作成されるため、手作業による情報転記やページ作成にかかる時間を短縮できます
- 手動での作業で起こりうるページの作成漏れや、タイトル・URLなどの転記ミスといったヒューマンエラーを防ぎ、情報共有の確実性を高めます
- はじめに、YouTube Data APIとNotionをYoomと連携します
- 次に、トリガーでYouTube Data APIを選択し、「YouTubeチャンネルで最新の動画が公開されたら」というアクションを設定します
- 最後に、オペレーションでNotionの「ページを作成」アクションを設定し、公開された動画の情報をもとにページが作成されるように設定します
■このワークフローのカスタムポイント
- YouTube Data APIのトリガー設定では、動画公開を検知したいYouTubeチャンネルのIDを任意で設定してください
- Notionでページを作成するアクションでは、作成先のデータベースやページのタイトル、プロパティに設定する内容(動画のタイトルやURLなど)を任意で設定できます
- YouTube Data API、NotionのそれぞれとYoomを連携してください
- トリガーは5分、10分、15分、30分、60分の間隔で起動間隔を選択できます
- プランによって最短の起動間隔が異なりますので、ご注意ください
1.上のバナーの「詳細を見る」をクリック
2.移行した画面下部の「このテンプレートを試す」をクリック
3.Yoomの登録がまだの場合は、登録を行う
※既に登録が完了している場合はログイン画面が表示されるので、ログインしましょう。

フローボットのテンプレートが「マイプロジェクト」にコピーされると、 以下ページに移行するので、詳細な設定を行っていきましょう。
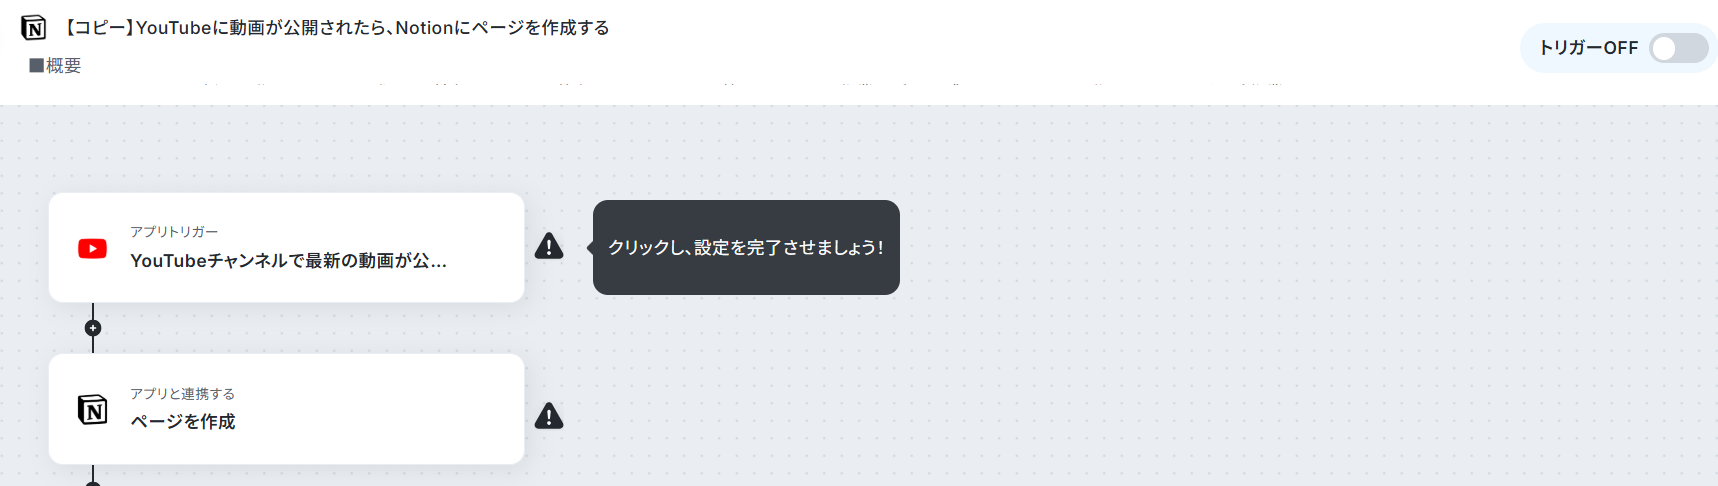
ステップ3:YouTubeの起動設定
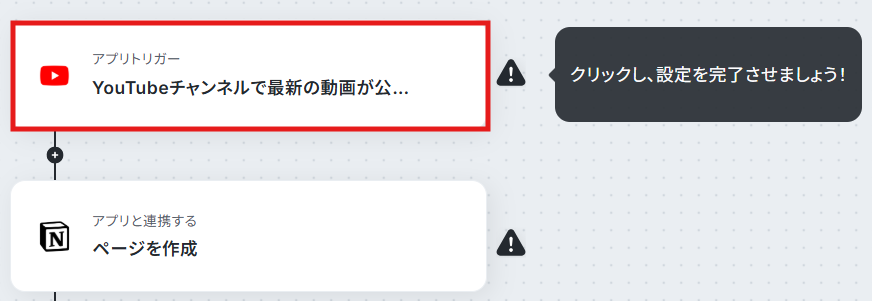
1.アプリトリガーを選択
YouTubeのアイコンの「YouTubeチャンネルで最新の動画が公開されたら」をクリックします。
2.トリガーの起動間隔の設定
起動間隔を設定しましょう。
トリガーは5分、10分、15分、30分、60分の間隔で起動間隔を選択できます。
プランによって最短の起動間隔が異なりますので、ご注意ください。 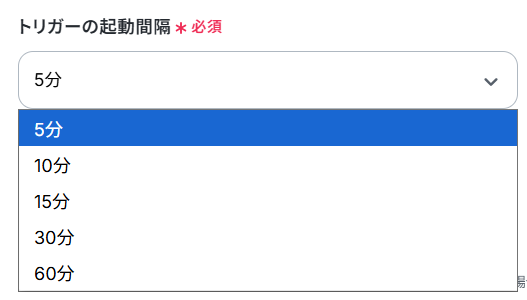
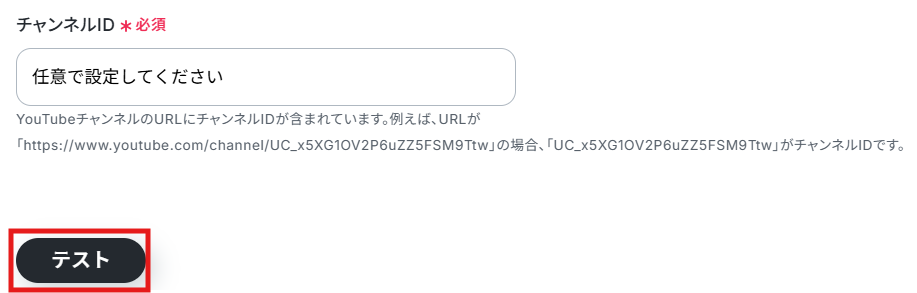
3.チャンネルIDの入力
ボックス下部の補足に従い設定しましょう。

4.テストの実行
設定が完了したらテストボタンを押してください。
テスト成功と表示が出たら完了です。「完了」をクリックします。
※動画の公開がされていない場合はテストを行えません。可能な限りテスト用の動画などをアップロードすることをおすすめします。
ステップ4: Notionに新しいページを作成する設定
1.アプリ設定
Notionの「ページを作成」をクリックします。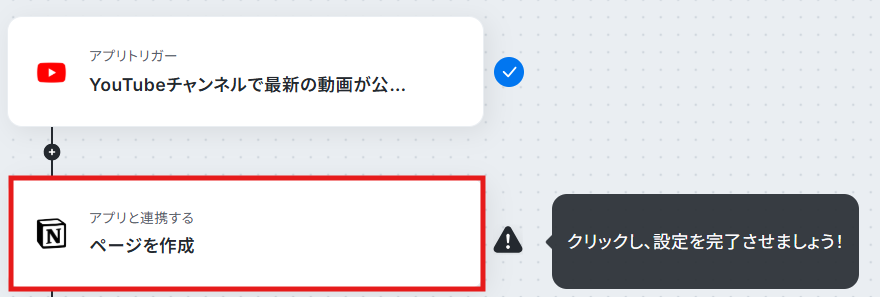
2.必須項目の設定
必須項目の設定を行います。
親コンテンツは、プルダウンから任意で選択してください。
親コンテンツのIDとタイトルプロパティ名に関しては、Notionを確認し入力しましょう。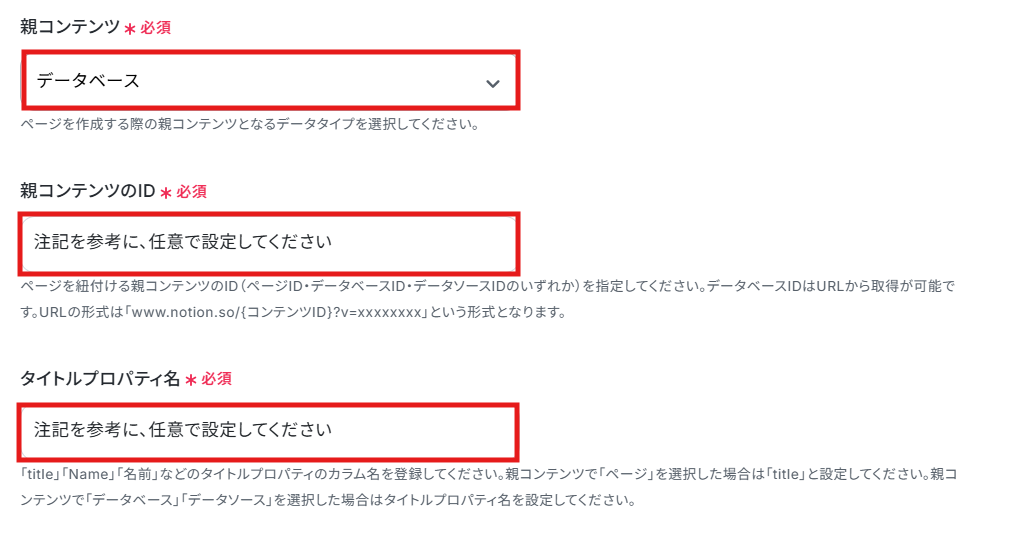
ページタイトルとコンテンツはYouTubeのデータを流用します。
まずはページタイトルのボックスをクリックし、「タイトル」を選択します。
※ステップ3で実際にYouTubeに動画を公開すると、各項目の横にYouTubeに公開した動画の情報が表示されます。 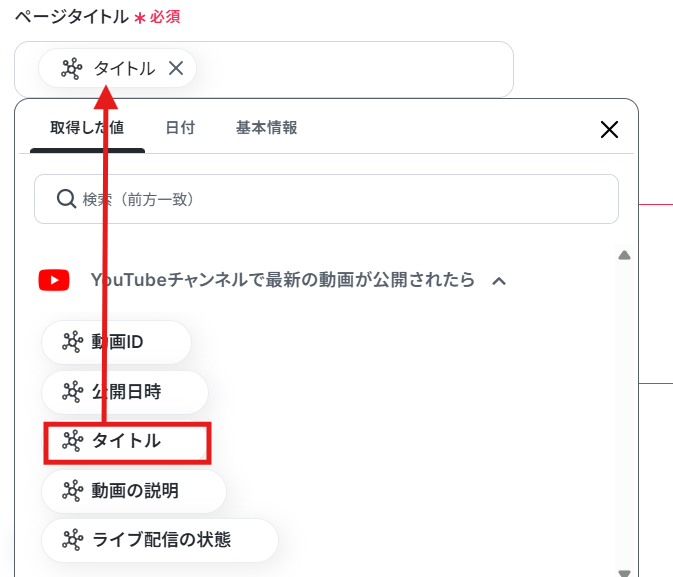
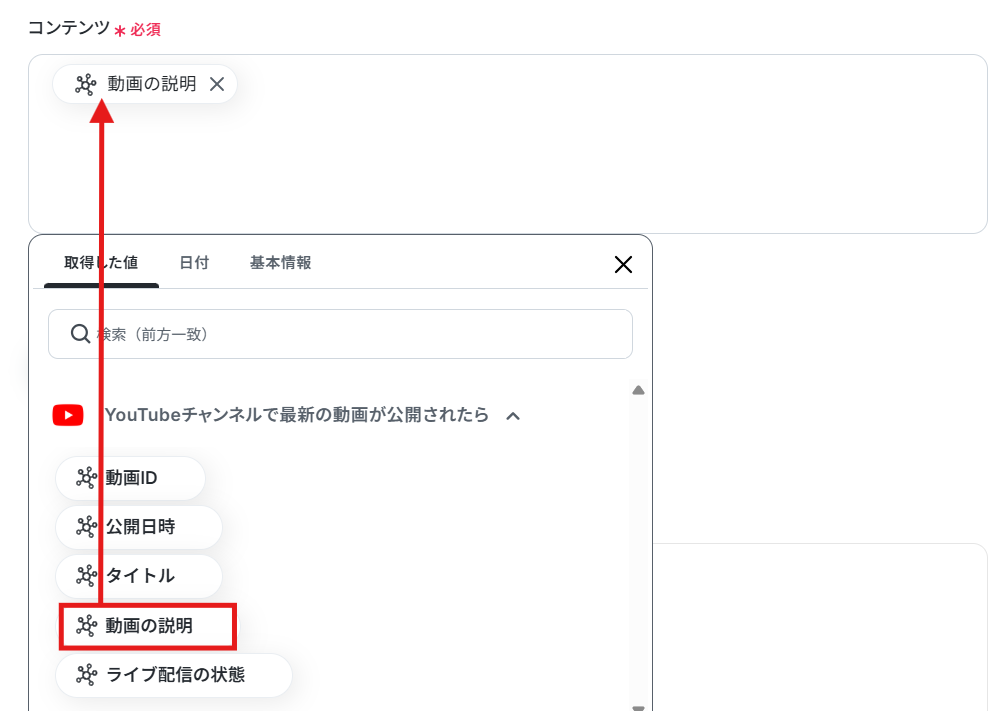
コンテンツ部分も同様に設定しましょう。
3.テストの実行
完了したらテストボタンを押してください。
テスト成功と表示が出たら保存をクリックします。 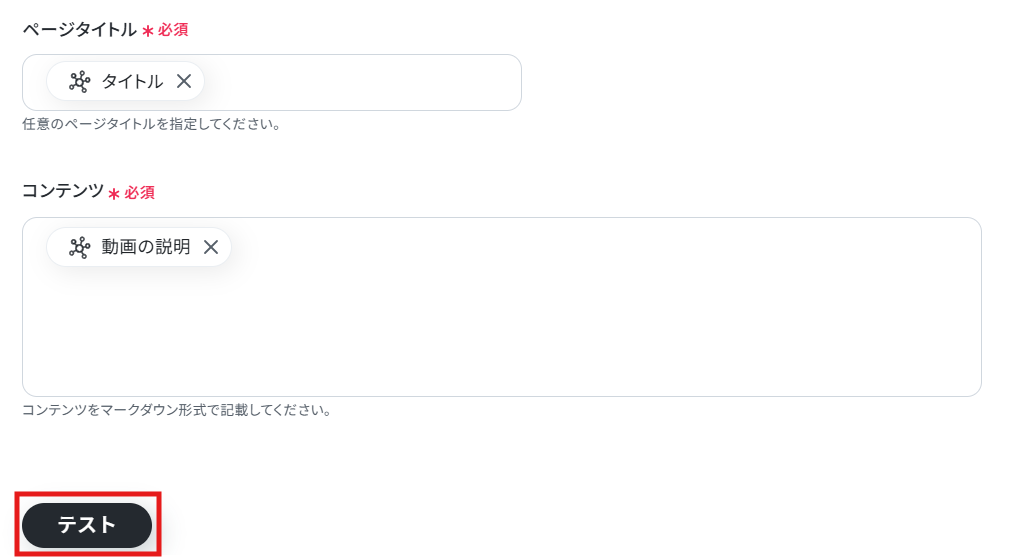
テスト成功と表示が出たら「完了」をクリックします。
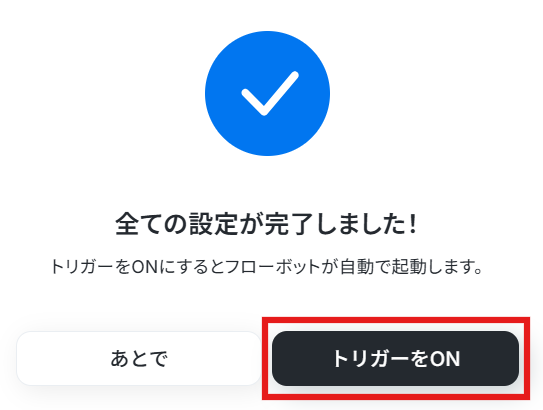
ステップ5:トリガーをONにする
フローボットの作成が完了すると、上記のような表示がされます。トリガーは初期設定ではOFFの状態なので、ONにしましょう。
以上でアプリ連携が完了です。
YouTubeとNotionを使ったその他の自動化例
他にYouTubeとNotionを使った自動化の例があるので、いくつか紹介します。
1.前日のYouTubeのチャンネルレポートをNotionに追加する
前日のデータをNotionに自動格納することもできます。データ管理が簡略化でき、作業負担軽減につながるはずです。
■概要YouTubeチャンネルを運営していると、日々の数値レポートの確認や記録は欠かせない業務ですが、手作業での対応は手間がかかり、つい後回しにしてしまうこともあるかもしれません。このワークフローを活用すれば、毎日指定した時間に前日のYouTubeチャンネルのレポートを自動で取得し、Notionへデータを追加できるため、レポート作成業務を効率化し、分析に集中できます。
■このテンプレートをおすすめする方- YouTubeチャンネルのレポート作成を手作業で行い、手間を感じている方
- Notionを活用してチャンネルのパフォーマンスデータを一元管理したい方
- 日々の定型的なレポート業務を自動化し、より戦略的な分析に時間を割きたい方
■このテンプレートを使うメリット- 毎日自動でYouTubeのレポートがNotionに記録されるため、手作業でのデータ取得や転記にかけていた時間を削減できます。
- 手作業による数値の入力ミスや記録漏れを防ぎ、正確なデータをNotion上で管理、蓄積していくことが可能になります。
■フローボットの流れ- はじめに、YouTube Analytics APIとNotionをYoomと連携します。
- 次に、トリガーでスケジュールトリガーを選択し、「指定したスケジュールになったら」というアクションを設定します。
- 次に、オペレーションでYouTube Analytics APIを選択し、「チャンネルレポートを取得」アクションで前日のレポートを取得するよう設定します。
- 最後に、オペレーションでNotionの「レコードを追加する」アクションを設定し、取得したレポート内容を指定のデータベースに追加します。
※「トリガー」:フロー起動のきっかけとなるアクション、「オペレーション」:トリガー起動後、フロー内で処理を行うアクション
■このワークフローのカスタムポイント- スケジュールトリガーの設定では、レポートを自動取得したい曜日や時間帯を任意で設定してください。
- Notionへ追加する際、対象のデータベースや、視聴回数や登録者数など記録したいレポート項目を任意で選択し、設定することが可能です。
■注意事項- YouTube Analytics API、NotionのそれぞれとYoomを連携させてください。
- YouTubeチャンネルのレポート作成を手作業で行い、手間を感じている方
- Notionを活用してチャンネルのパフォーマンスデータを一元管理したい方
- 日々の定型的なレポート業務を自動化し、より戦略的な分析に時間を割きたい方
- 毎日自動でYouTubeのレポートがNotionに記録されるため、手作業でのデータ取得や転記にかけていた時間を削減できます。
- 手作業による数値の入力ミスや記録漏れを防ぎ、正確なデータをNotion上で管理、蓄積していくことが可能になります。
- はじめに、YouTube Analytics APIとNotionをYoomと連携します。
- 次に、トリガーでスケジュールトリガーを選択し、「指定したスケジュールになったら」というアクションを設定します。
- 次に、オペレーションでYouTube Analytics APIを選択し、「チャンネルレポートを取得」アクションで前日のレポートを取得するよう設定します。
- 最後に、オペレーションでNotionの「レコードを追加する」アクションを設定し、取得したレポート内容を指定のデータベースに追加します。
■このワークフローのカスタムポイント
- スケジュールトリガーの設定では、レポートを自動取得したい曜日や時間帯を任意で設定してください。
- Notionへ追加する際、対象のデータベースや、視聴回数や登録者数など記録したいレポート項目を任意で選択し、設定することが可能です。
- YouTube Analytics API、NotionのそれぞれとYoomを連携させてください。
2.Notionにページが作成されたら、YouTubeのレポートを追加する
Notionにページを作成することでYouTubeのデータを取得可能です。自分のタイミングでレポートを追加したい場合におすすめです。
■概要YouTubeチャンネルの運用において、日々のパフォーマンス分析は欠かせない重要な業務ですが、そのレポートを手作業でNotionに転記するのは手間がかかる作業ではないでしょうか。このワークフローを活用すれば、Notionに新しいページを作成するだけで、指定したYouTubeチャンネルのレポートが自動で取得され、ページ内にテキストが追加されます。これによりレポート作成業務を効率化し、分析やコンテンツ企画といったコア業務に集中する時間を創出します。
■このテンプレートをおすすめする方- YouTubeチャンネルを運営しており、Notionでパフォーマンス管理を行っている方
- 毎日のYouTubeレポート作成とデータ転記作業を自動化し、手間を削減したいと考えている方
- 手作業によるデータの入力ミスを防ぎ、正確なチャンネル分析を行いたいマーケティング担当者の方
■このテンプレートを使うメリット- Notionにページを作成するだけでYouTubeのレポートが自動で追加されるため、これまで手作業で行っていたデータ収集や転記の時間を短縮できます。
- 手作業での数値のコピー&ペーストが削減されるため、入力間違いや転記漏れといったヒューマンエラーを防ぎ、データの正確性を保つことに繋がります。
■フローボットの流れ- はじめに、NotionとYouTube Analytics APIをYoomと連携します。
- 次に、トリガーでNotionを選択し、「ページが作成または更新されたら」というアクションを設定します。
- 次に、オペレーションでYouTube Analytics APIを選択し、「チャンネルレポートを取得」アクションを設定します。
- 最後に、Notionの「ページにテキストを追加」アクションを設定し、取得したレポート情報をトリガーで指定したページに追加します。
※「トリガー」:フロー起動のきっかけとなるアクション、「オペレーション」:トリガー起動後、フロー内で処理を行うアクション
■このワークフローのカスタムポイント- Notionのトリガー設定では、起動のきっかけとしたいデータベースを任意で設定してください。
- YouTube Analytics APIでレポートを取得する際に、対象とするチャンネルやレポートの集計期間などを任意で設定できます。
- Notionにテキストを追加するオペレーションでは、YouTubeから取得したレポート情報のうち、どの項目を連携するかを任意で選択してください。
■注意事項- Notion、YouTube Analytics APIのそれぞれとYoomを連携してください。
- トリガーは5分、10分、15分、30分、60分の間隔で起動間隔を選択できます。
- プランによって最短の起動間隔が異なりますので、ご注意ください。
- YouTubeチャンネルを運営しており、Notionでパフォーマンス管理を行っている方
- 毎日のYouTubeレポート作成とデータ転記作業を自動化し、手間を削減したいと考えている方
- 手作業によるデータの入力ミスを防ぎ、正確なチャンネル分析を行いたいマーケティング担当者の方
- Notionにページを作成するだけでYouTubeのレポートが自動で追加されるため、これまで手作業で行っていたデータ収集や転記の時間を短縮できます。
- 手作業での数値のコピー&ペーストが削減されるため、入力間違いや転記漏れといったヒューマンエラーを防ぎ、データの正確性を保つことに繋がります。
- はじめに、NotionとYouTube Analytics APIをYoomと連携します。
- 次に、トリガーでNotionを選択し、「ページが作成または更新されたら」というアクションを設定します。
- 次に、オペレーションでYouTube Analytics APIを選択し、「チャンネルレポートを取得」アクションを設定します。
- 最後に、Notionの「ページにテキストを追加」アクションを設定し、取得したレポート情報をトリガーで指定したページに追加します。
■このワークフローのカスタムポイント
- Notionのトリガー設定では、起動のきっかけとしたいデータベースを任意で設定してください。
- YouTube Analytics APIでレポートを取得する際に、対象とするチャンネルやレポートの集計期間などを任意で設定できます。
- Notionにテキストを追加するオペレーションでは、YouTubeから取得したレポート情報のうち、どの項目を連携するかを任意で選択してください。
- Notion、YouTube Analytics APIのそれぞれとYoomを連携してください。
- トリガーは5分、10分、15分、30分、60分の間隔で起動間隔を選択できます。
- プランによって最短の起動間隔が異なりますので、ご注意ください。
3.Notionでページが作成または更新されたらSlackに通知する
Notionの更新に素早く気が付きたいのであれば、こちらのテンプレートはいかがでしょうか。今回のフローとの併用もおすすめです。
■概要Notionで作成した議事録やドキュメントの更新情報を、チームメンバーに都度手作業で共有していませんか?この情報共有のひと手間が積み重なると、本来の業務を圧迫するだけでなく、共有漏れや伝達の遅れに繋がることもあります。このワークフローを活用すれば、Notionのページ作成や更新をトリガーにして、Slackへ自動で通知を送ることが可能です。これにより、チーム内の情報共有を円滑にし、スムーズな連携を実現します。■このテンプレートをおすすめする方- Notionを情報共有のハブとして利用し、Slackでコミュニケーションを取っている方
- Notionの更新を手動でSlackに通知しており、手間や共有漏れに課題を感じている方
- チーム内の情報共有を自動化し、見逃しを防ぎたいと考えているすべてのビジネスパーソン
■このテンプレートを使うメリット- Notionでのページ作成・更新と同時にSlackへ自動で通知が飛ぶため、手作業での共有にかかっていた時間を削減し、コア業務に集中できます。
- 通知プロセスが自動化されることで、重要な更新情報の共有漏れや伝達の遅延を防ぎ、チーム内のスムーズな情報連携を促進します。
■フローボットの流れ- はじめに、NotionとSlackをYoomと連携します。
- 次に、トリガーでNotionを選択し、「ページが作成または更新されたら」というアクションを設定します。
- 最後に、オペレーションでSlackを選択し、「チャンネルにメッセージを送る」アクションを設定して、Notionの更新情報を任意のチャンネルに通知します。
※「トリガー」:フロー起動のきっかけとなるアクション、「オペレーション」:トリガー起動後、フロー内で処理を行うアクション
■このワークフローのカスタムポイント- Slackに通知を送るオペレーションでは、通知先のチャンネルやメンション、通知本文を任意の内容で設定することが可能です。プロジェクトやチームに合わせて、最適な通知内容にカスタマイズしてください。
■注意事項- Notion、SlackのそれぞれとYoomを連携してください。
- トリガーは5分、10分、15分、30分、60分の間隔で起動間隔を選択できます。
- プランによって最短の起動間隔が異なりますので、ご注意ください。
- Notionを情報共有のハブとして利用し、Slackでコミュニケーションを取っている方
- Notionの更新を手動でSlackに通知しており、手間や共有漏れに課題を感じている方
- チーム内の情報共有を自動化し、見逃しを防ぎたいと考えているすべてのビジネスパーソン
- Notionでのページ作成・更新と同時にSlackへ自動で通知が飛ぶため、手作業での共有にかかっていた時間を削減し、コア業務に集中できます。
- 通知プロセスが自動化されることで、重要な更新情報の共有漏れや伝達の遅延を防ぎ、チーム内のスムーズな情報連携を促進します。
- はじめに、NotionとSlackをYoomと連携します。
- 次に、トリガーでNotionを選択し、「ページが作成または更新されたら」というアクションを設定します。
- 最後に、オペレーションでSlackを選択し、「チャンネルにメッセージを送る」アクションを設定して、Notionの更新情報を任意のチャンネルに通知します。
■このワークフローのカスタムポイント
- Slackに通知を送るオペレーションでは、通知先のチャンネルやメンション、通知本文を任意の内容で設定することが可能です。プロジェクトやチームに合わせて、最適な通知内容にカスタマイズしてください。
- Notion、SlackのそれぞれとYoomを連携してください。
- トリガーは5分、10分、15分、30分、60分の間隔で起動間隔を選択できます。
- プランによって最短の起動間隔が異なりますので、ご注意ください。
まとめ
今回の連携を導入すれば、今まで手動で行っていたNotionのページの作成やYouTubeの動画データなどの格納が自動化され、データ管理の手間が削減可能になるはずです。また、入力そのものも簡略化できるため、他の業務に集中しやすくなるかもしれません。
ページが自動作成され動画データが格納しやすくなれば、今よりもスムーズなデータ分析が実現できる可能性もあるはずです。
ぜひこの機会にYoomを活用し、業務改善を図ってみませんか?
プログラミング知識なしで手軽に構築できます。