・
Zoomとkintoneを連携して、指定の日時になったらZoomにミーティングを作成し、ミーティング情報をkintoneに登録する方法

オンライン会議が一般的になってきた中で、Zoomでミーティングを行う際に発生するミーティングの設定や参加メンバーへの共有などに、時間と労力を奪われている方は多いのではないでしょうか。
今回は、指定の日時になったら自動的にZoomにミーティングを作成し、そのミーティング情報をkintoneで管理する方法をご紹介します。
この自動化により、ミーティング設定や情報共有の手間を省き、業務効率を向上させることが可能です。
ぜひご参考にしてみてください。
とにかく早く試したい方へ
本記事ではノーコードツール「Yoom」を使用した連携方法をご紹介します。難しい設定や操作は必要なく、非エンジニアの方でも簡単に設定可能です。
下記のテンプレートから今すぐに始めることもできるので、ぜひお試しください!
■概要
定期的なミーティングの設定は、毎回手動でZoomに予定を作成し、その内容をkintoneに転記する手間のかかる作業ではないでしょうか。このワークフローを活用すれば、あらかじめ指定したスケジュールで自動的にZoomミーティングが作成され、その情報がkintoneにも登録されるため、こうした定型業務から解放され、入力ミスなどのヒューマンエラーも防ぎます。
■このテンプレートをおすすめする方
- 定期的にZoomミーティングを設定し、その情報をkintoneで管理している方
- 手作業でのミーティング設定や情報転記の工数を削減したいと考えている方
- 会議情報の共有漏れや入力ミスを防ぎ、業務の正確性を高めたいと考えている方
■このテンプレートを使うメリット
- スケジュールに基づいてZoomミーティングの作成とkintoneへの登録が自動で行われるため、これまで手作業に費やしていた時間を短縮できます。
- 手作業によるZoomのミーティング情報やkintoneへのデータ転記が不要になるため、入力間違いや登録漏れといったヒューマンエラーのリスクを軽減します。
■フローボットの流れ
- はじめに、ZoomとkintoneをYoomと連携します。
- 次に、トリガーでスケジュールトリガー機能を選択し、「指定したスケジュールになったら」というアクションを設定します。
- 次に、オペレーションで「担当者へ対応を依頼する」アクションを設定し、ミーティング作成に関する通知や確認などを依頼します。
- 続けて、オペレーションでZoomの「ミーティングを作成」アクションを設定します。
- 最後に、オペレーションでkintoneの「レコードを追加する」アクションを設定し、作成されたZoomミーティングの情報をkintoneに登録します。
※「トリガー」:フロー起動のきっかけとなるアクション、「オペレーション」:トリガー起動後、フロー内で処理を行うアクション
■このワークフローのカスタムポイント
- スケジュールトリガーの設定では、フローを起動させたい曜日や日付、時刻などを自由にカスタマイズできます。
- 担当者への対応依頼では、依頼を送る担当者や、依頼メッセージの内容を任意で設定することが可能です。
- Zoomでミーティングを作成するアクションでは、ミーティングのホストとなるメールアドレス、トピック、日時や時間などを指定できます。
- kintoneにレコードを追加するアクションでは、登録先のアプリIDを指定し、どのフィールドに何の情報を登録するかを自由に設定できます。
■設定方法
- Zoom、kintoneそれぞれとYoomを連携してください。
こんな方におすすめ
・日頃からZoomとkintoneをそれぞれ利用しているが、ミーティングを手作業で設定し、手動でkintoneに情報連携を行う中で、作業自体が手間だと感じている方
・頻繁にZoomミーティングを開催している企業で、参加メンバーへの情報共有などの準備に時間を取られてしまい、効率化を図りたいと考えている方
・ミーティングの管理だけでなく、ミーティング後の進捗状況なども含めてプロジェクト全体を一元管理したいと考えているプロジェクトマネージャー
・伝達漏れや情報共有のミスなどを削減し、作業の正確性と効率化を向上したいと考えている方
・業務の自動化のために、APIの活用に興味がある(検討している)IT担当者
Zoomとkintoneを連携するメリットと具体例
メリット1:ミーティング作成の時間と労力を削減
Zoomでのミーティング作成を自動化することで、これに費やす時間と労力を削減できます。
特に、頻繁にミーティングを開催する場合、手動での設定は担当者にとってとても大きな負担となります。
例えば、定期的な社内ミーティングを自動作成し、参加者に自動通知設定をすることで手間を省きつつ、参加メンバーへ確実な情報共有を行うことが可能です。
メリット2:ミーティングの進行管理の効率化
Zoomとkintoneを連携することで、Zoomのミーティング作成の自動化だけでなく、必要な情報を自動でkintoneに登録することが可能です。
そのため、すでにミーティングに関する情報をkintoneで管理している場合、ミーティングの進行管理を含む一元管理の効率化を図ることが期待できます。
例えば、ミーティングを作成する時点で入力する会議の日時はもちろんのこと、会議の目的や議題などもZoomからkintoneへ自動登録することができます。
また、ミーティング後の議事録やタスク管理もkintoneで行うことで、プロジェクト全体の管理を一括的に行うことも可能です。
メリット3:人的ミスの削減
ミーティング情報の自動登録により、手作業での情報共有に比べて人的ミスを削減することができます。
例えば、ミーティングの日時や参加者情報が自動的に共有されるよう設定することで、伝達漏れや入力ミスを防ぐことが可能です。
また、kintoneの通知機能を活用して自動リマインドを送信することで、参加者全員が必要な情報を必要なタイミングで入手でき、結果的に遅刻や欠席などのトラブルを未然に防ぐことに繋がります。
[Yoomとは]
Zoomとkintoneを連携してできること
ZoomとkintoneのAPIを連携させることで、ミーティングの作成から進行管理、情報共有までを自動化し、業務の効率化を実現できます。特に、頻繁にオンラインミーティングを行う企業やチームにとって、時間と手間の大幅な削減が期待できます。
ここでは、具体的な自動化の例をいくつかご紹介しますので、気になる内容があれば、ぜひクリックしてみてください!
指定の日時になったらZoomにミーティングを作成し、ミーティング情報をkintoneに登録する
あらかじめ設定した日時になると、Zoomで自動的にミーティングを作成し、そのミーティングID・URL・開始時刻などをkintoneの指定アプリへ登録するフローです。手動での作業を省けるため、スケジュール管理や社内共有がより扱いやすくなります。
■概要
定期的なミーティングの設定は、毎回手動でZoomに予定を作成し、その内容をkintoneに転記する手間のかかる作業ではないでしょうか。このワークフローを活用すれば、あらかじめ指定したスケジュールで自動的にZoomミーティングが作成され、その情報がkintoneにも登録されるため、こうした定型業務から解放され、入力ミスなどのヒューマンエラーも防ぎます。
■このテンプレートをおすすめする方
- 定期的にZoomミーティングを設定し、その情報をkintoneで管理している方
- 手作業でのミーティング設定や情報転記の工数を削減したいと考えている方
- 会議情報の共有漏れや入力ミスを防ぎ、業務の正確性を高めたいと考えている方
■このテンプレートを使うメリット
- スケジュールに基づいてZoomミーティングの作成とkintoneへの登録が自動で行われるため、これまで手作業に費やしていた時間を短縮できます。
- 手作業によるZoomのミーティング情報やkintoneへのデータ転記が不要になるため、入力間違いや登録漏れといったヒューマンエラーのリスクを軽減します。
■フローボットの流れ
- はじめに、ZoomとkintoneをYoomと連携します。
- 次に、トリガーでスケジュールトリガー機能を選択し、「指定したスケジュールになったら」というアクションを設定します。
- 次に、オペレーションで「担当者へ対応を依頼する」アクションを設定し、ミーティング作成に関する通知や確認などを依頼します。
- 続けて、オペレーションでZoomの「ミーティングを作成」アクションを設定します。
- 最後に、オペレーションでkintoneの「レコードを追加する」アクションを設定し、作成されたZoomミーティングの情報をkintoneに登録します。
※「トリガー」:フロー起動のきっかけとなるアクション、「オペレーション」:トリガー起動後、フロー内で処理を行うアクション
■このワークフローのカスタムポイント
- スケジュールトリガーの設定では、フローを起動させたい曜日や日付、時刻などを自由にカスタマイズできます。
- 担当者への対応依頼では、依頼を送る担当者や、依頼メッセージの内容を任意で設定することが可能です。
- Zoomでミーティングを作成するアクションでは、ミーティングのホストとなるメールアドレス、トピック、日時や時間などを指定できます。
- kintoneにレコードを追加するアクションでは、登録先のアプリIDを指定し、どのフィールドに何の情報を登録するかを自由に設定できます。
■設定方法
- Zoom、kintoneそれぞれとYoomを連携してください。
Zoomウェビナーが終了したら、kintoneに参加者情報を追加する
Zoomでウェビナーが終了した際に、参加者の情報を自動的に取得し、kintoneにレコードとして登録します。
この連携により、ウェビナー参加者のデータをリアルタイムで蓄積し、手動での入力作業を省略できるため、情報管理の効率化と正確性の向上が期待できます。
■概要
Zoomウェビナーの開催後、参加者リストを手作業でkintoneに転記する作業に、手間や時間を取られていないでしょうか。この作業は、参加者への迅速なフォローアップのために重要ですが、手作業では入力ミスなどのヒューマンエラーが発生する可能性も伴います。このワークフローを活用すれば、ウェビナー終了と同時に参加者情報をkintoneへ自動で追加でき、こうした課題をスムーズに解消することが可能です。
■このテンプレートをおすすめする方
- Zoomウェビナー後の参加者リスト管理に、手間や課題を感じているマーケティング担当者の方
- kintoneでの顧客管理を効率化し、ウェビナーからのリード情報を迅速に反映させたい方
- 手作業によるデータ入力をなくし、より重要なコア業務にリソースを集中させたい方
■このテンプレートを使うメリット
- ウェビナー終了後、Zoomの参加者情報がkintoneへ自動で追加されるため、これまで手作業での転記に費やしていた時間を削減できます。
- 手作業によるデータ入力で起こりうる、連絡先や氏名の入力間違いや転記漏れといったヒューマンエラーを防ぎ、データの正確性を高めます。
■フローボットの流れ
- はじめに、ZoomとkintoneをYoomと連携します。
- 次に、トリガーでZoomを選択し、「ミーティングが終了したら」というアクションを設定することで、フローが自動で起動するようにします。
- 続いて、オペレーションでZoomの「ウェビナー登録者の一覧を取得」アクションを設定し、対象ウェビナーの参加者情報をすべて取得します。
- 次に、「繰り返し処理」のオペレーションを設定し、取得した複数の参加者情報を1件ずつ処理できるようにします。
- 最後に、繰り返し処理の中でkintoneの「レコードを追加する」アクションを設定し、各参加者の情報をレコードとして追加します。
※「トリガー」:フロー起動のきっかけとなるアクション、「オペレーション」:トリガー起動後、フロー内で処理を行うアクション
■このワークフローのカスタムポイント
- 繰り返し処理を行うアクションでは、前段のZoomで取得した参加者リストを処理の対象として正しく設定してください。
- kintoneのレコード追加アクションでは、kintoneアプリのどのフィールドに、Zoomから取得したどの情報(氏名、メールアドレスなど)を割り当てるか、任意で設定できます。また、リードソースなどを固定値として設定することも可能です。
■注意事項
- ZoomとkintoneのそれぞれとYoomを連携してください。
- トリガーは5分、10分、15分、30分、60分の間隔で起動間隔を選択できます。プランによって最短の起動間隔が異なりますので、ご注意ください。
- 「同じ処理を繰り返す」オペレーション間の操作は、チームプラン・サクセスプランでのみご利用いただける機能となっております。フリープラン・ミニプランの場合は設定しているフローボットのオペレーションやデータコネクトはエラーとなりますので、ご注意ください。
- チームプランやサクセスプランなどの有料プランは、2週間の無料トライアルを行うことが可能です。無料トライアル中には制限対象のアプリや機能(オペレーション)を使用することができます。
- Zoomのレコーディング情報を取得するためには、ミーティングデータがクラウドレコーディングされている必要があります。
- クラウドレコーディングはZoomの特定プランに限定されるためご注意ください。詳細はこちらをご参照ください。
指定の日時になったらZoomにミーティングを作成し、ミーティング情報をkintoneに登録するフローを作ってみよう
今回はYoomのスケジュールトリガーを使用して、ミーティング日時を指定し、その後ZoomのAPIを利用してミーティングを作成します。
また、kintoneが提供するAPIを用いることで、ミーティング情報をkintoneのレコードに追加することで、実現可能となります。
一般的に実現にはプログラミングの知識が必要ですが、ノーコードツールYoomを用いることでプログラミング知識がなくても簡単に実現できます。
まだYoomのアカウントをお持ちでない方は以下からアカウント発行をしてください!登録はすぐに完了できます。
Yoom会員登録フォーム
今回は大きく分けて以下のプロセスで作成していきます。
- Zoomとkintoneをマイアプリ登録
- テンプレートのコピー
- スケジュールトリガーを起動する設定およびZoomとkintoneの連携設定
- トリガーをONにして起動準備完了
■概要
定期的なミーティングの設定は、毎回手動でZoomに予定を作成し、その内容をkintoneに転記する手間のかかる作業ではないでしょうか。このワークフローを活用すれば、あらかじめ指定したスケジュールで自動的にZoomミーティングが作成され、その情報がkintoneにも登録されるため、こうした定型業務から解放され、入力ミスなどのヒューマンエラーも防ぎます。
■このテンプレートをおすすめする方
- 定期的にZoomミーティングを設定し、その情報をkintoneで管理している方
- 手作業でのミーティング設定や情報転記の工数を削減したいと考えている方
- 会議情報の共有漏れや入力ミスを防ぎ、業務の正確性を高めたいと考えている方
■このテンプレートを使うメリット
- スケジュールに基づいてZoomミーティングの作成とkintoneへの登録が自動で行われるため、これまで手作業に費やしていた時間を短縮できます。
- 手作業によるZoomのミーティング情報やkintoneへのデータ転記が不要になるため、入力間違いや登録漏れといったヒューマンエラーのリスクを軽減します。
■フローボットの流れ
- はじめに、ZoomとkintoneをYoomと連携します。
- 次に、トリガーでスケジュールトリガー機能を選択し、「指定したスケジュールになったら」というアクションを設定します。
- 次に、オペレーションで「担当者へ対応を依頼する」アクションを設定し、ミーティング作成に関する通知や確認などを依頼します。
- 続けて、オペレーションでZoomの「ミーティングを作成」アクションを設定します。
- 最後に、オペレーションでkintoneの「レコードを追加する」アクションを設定し、作成されたZoomミーティングの情報をkintoneに登録します。
※「トリガー」:フロー起動のきっかけとなるアクション、「オペレーション」:トリガー起動後、フロー内で処理を行うアクション
■このワークフローのカスタムポイント
- スケジュールトリガーの設定では、フローを起動させたい曜日や日付、時刻などを自由にカスタマイズできます。
- 担当者への対応依頼では、依頼を送る担当者や、依頼メッセージの内容を任意で設定することが可能です。
- Zoomでミーティングを作成するアクションでは、ミーティングのホストとなるメールアドレス、トピック、日時や時間などを指定できます。
- kintoneにレコードを追加するアクションでは、登録先のアプリIDを指定し、どのフィールドに何の情報を登録するかを自由に設定できます。
■設定方法
- Zoom、kintoneそれぞれとYoomを連携してください。
ステップ1:Zoomとkintoneをマイアプリ登録
はじめに、Yoomと各アプリを連携して、操作が行えるように設定します。
ZoomとYoomの連携方法
下記をご確認の上、連携をお試しください。
kintoneとYoomの連携方法
下記をご確認の上、連携をお試しください。
ステップ2:テンプレートのコピー
次に、今回使用するテンプレートをコピーします。
- 上のバナーの「試してみる」を押す。
- 移行したページの「このテンプレートを試す」を押す。
- Yoomの登録がまだの場合は、登録を行う。
※すでに登録が完了している場合は、ログインしてください。
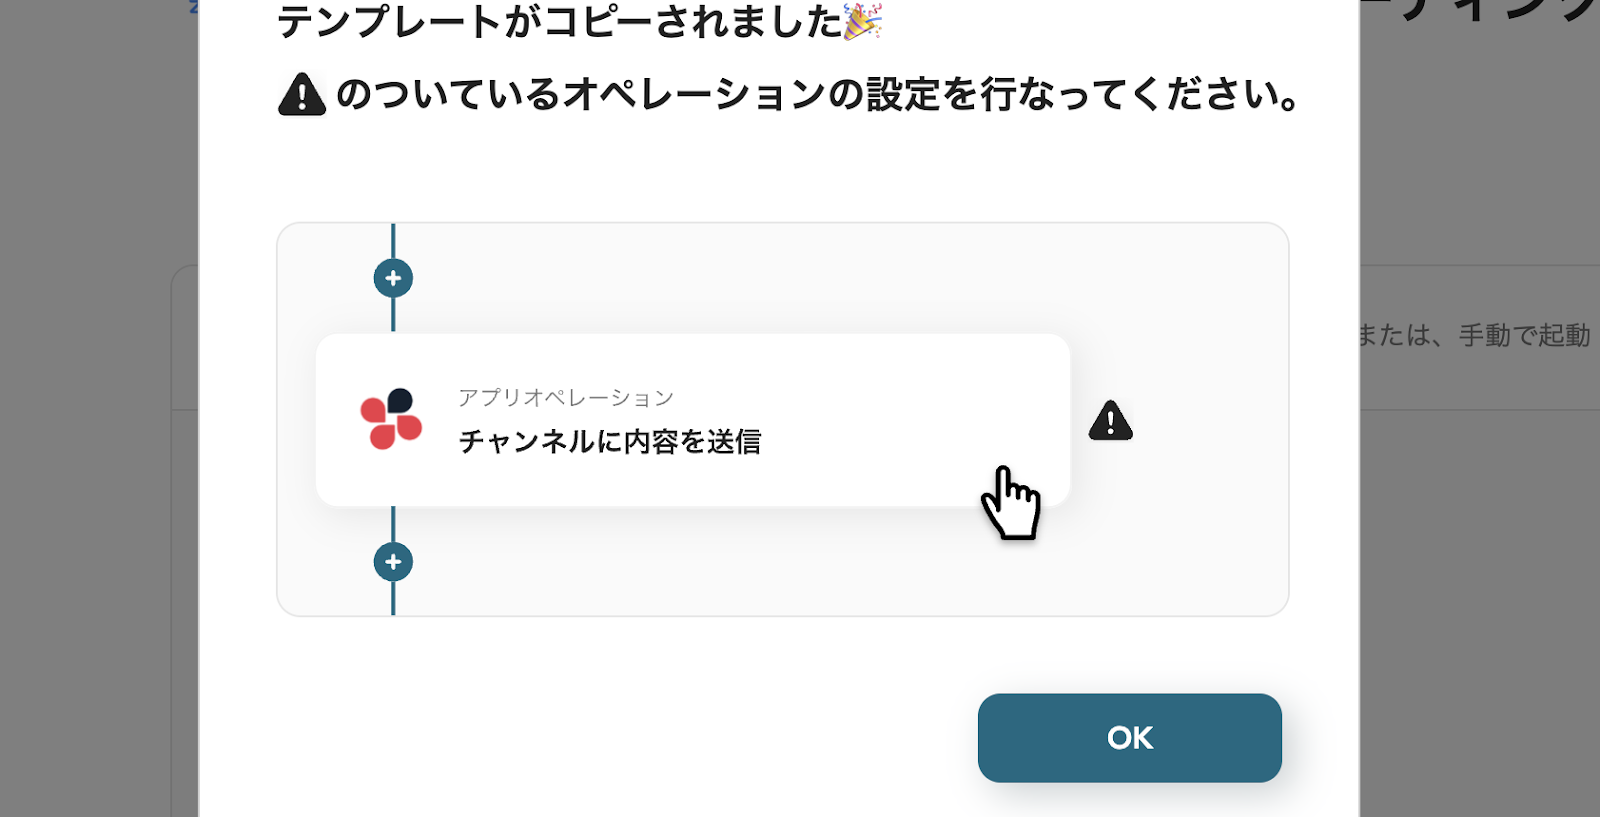
テンプレートが「マイプロジェクト」にコピーされると、このような画面が表示されます。
ステップ3:スケジュールトリガーを起動する設定
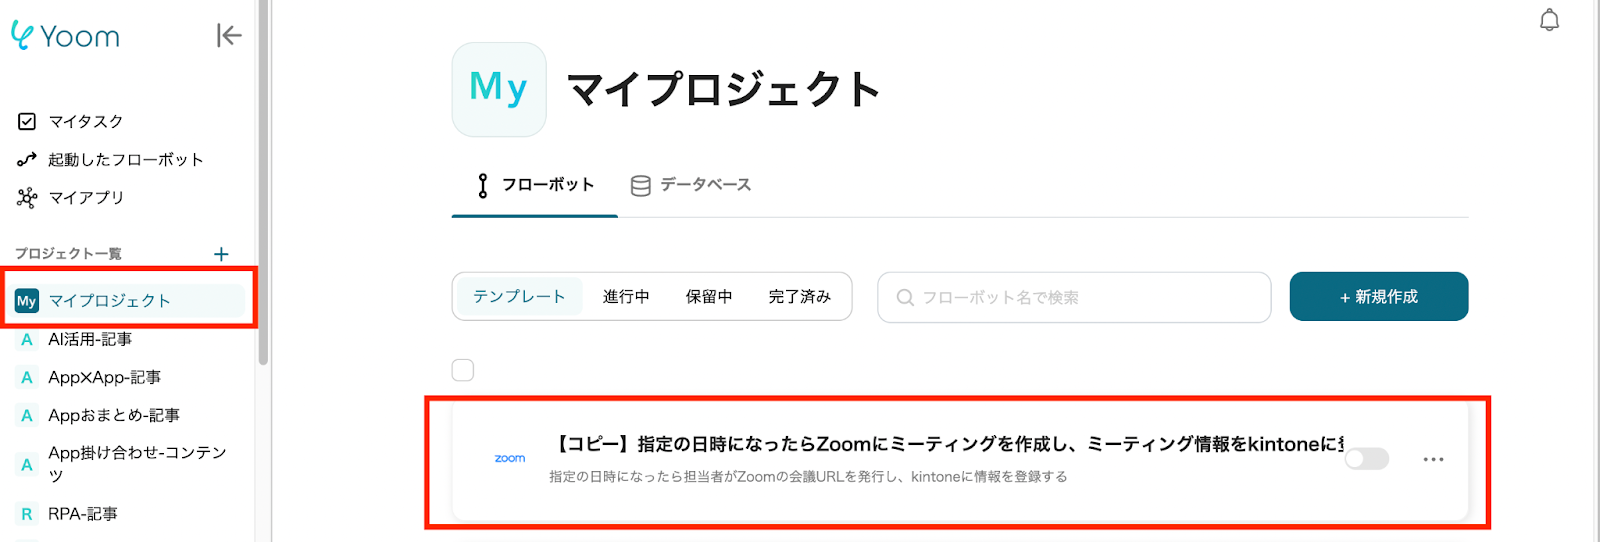
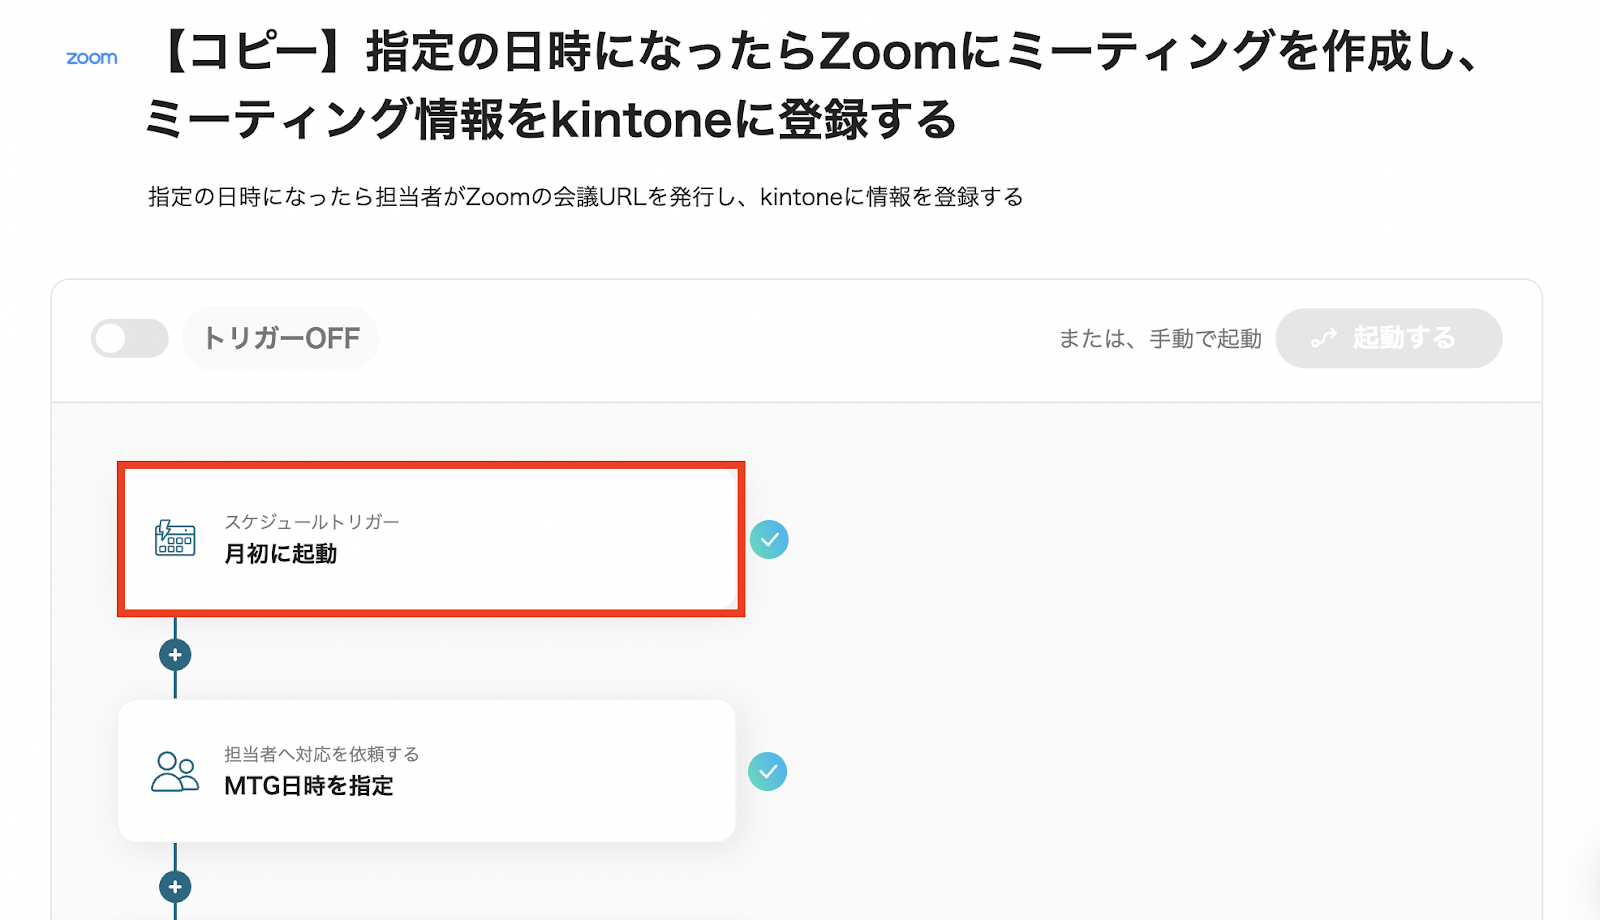
- コピーしたテンプレートを開く
左側にあるメニューの「マイプロジェクト」から、コピーしたテンプレートを開きます。
- アプリトリガーを選択する
「月初に起動」をクリックします。
実行時間の指定を行うことができる画面が出てきます。
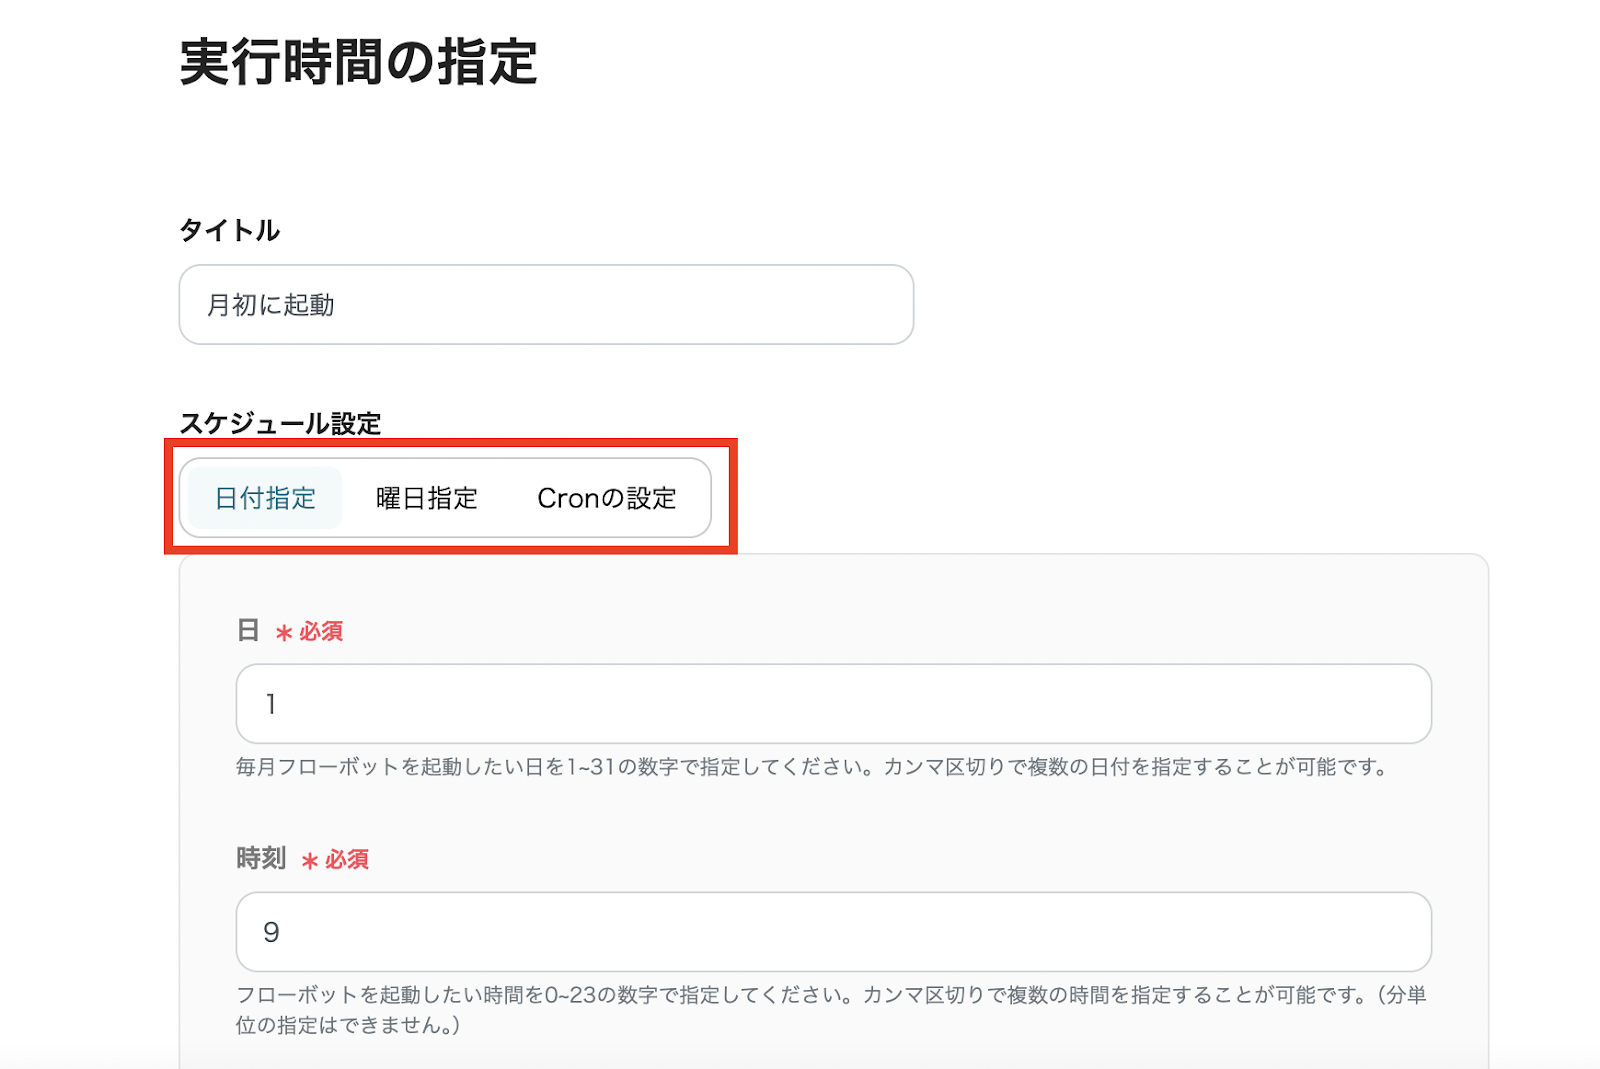
- トリガーの設定を行う
フローボットを起動したいタイミングを設定します。
画像では、毎月1日午前9時に起動する設定となっていますが、日付での指定だけでなく、毎週◯曜日に起動するなどの「曜日指定」も可能です。
設定が完了したら、保存を押します。
※「Cronの設定」では、1日のうちに何度も起動したい場合や、曜日によって別の時間帯に起動したいなどの細かな設定が可能です。
設定の詳しい設定方法はこちらをご確認ください。
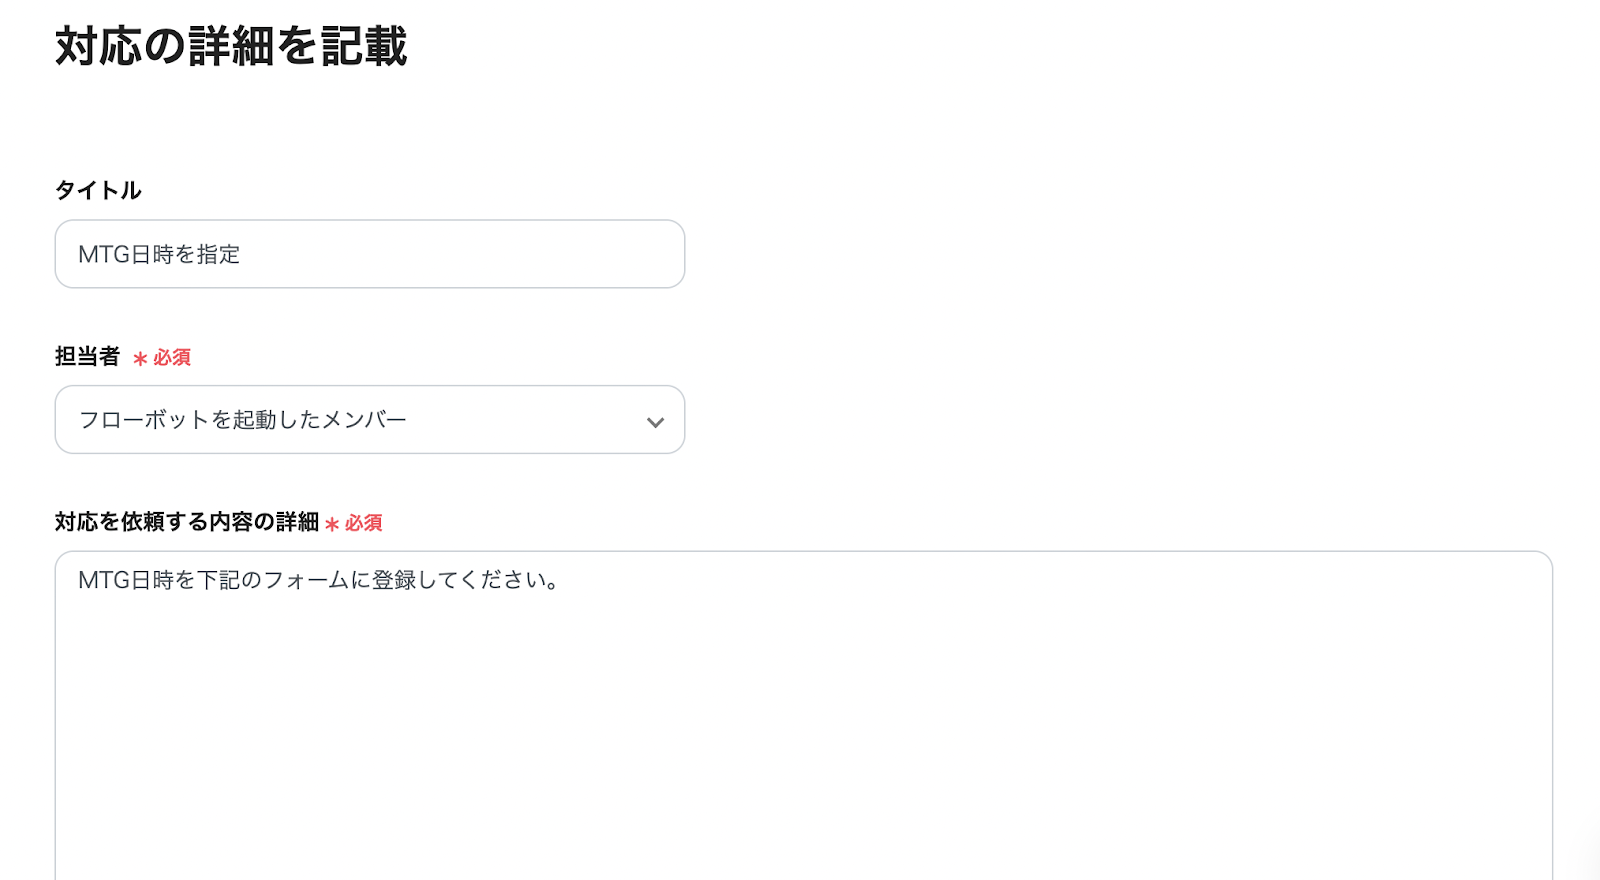
ステップ4:担当者へ対応依頼通知の設定をする
「MTG日時を指定」をクリックします。
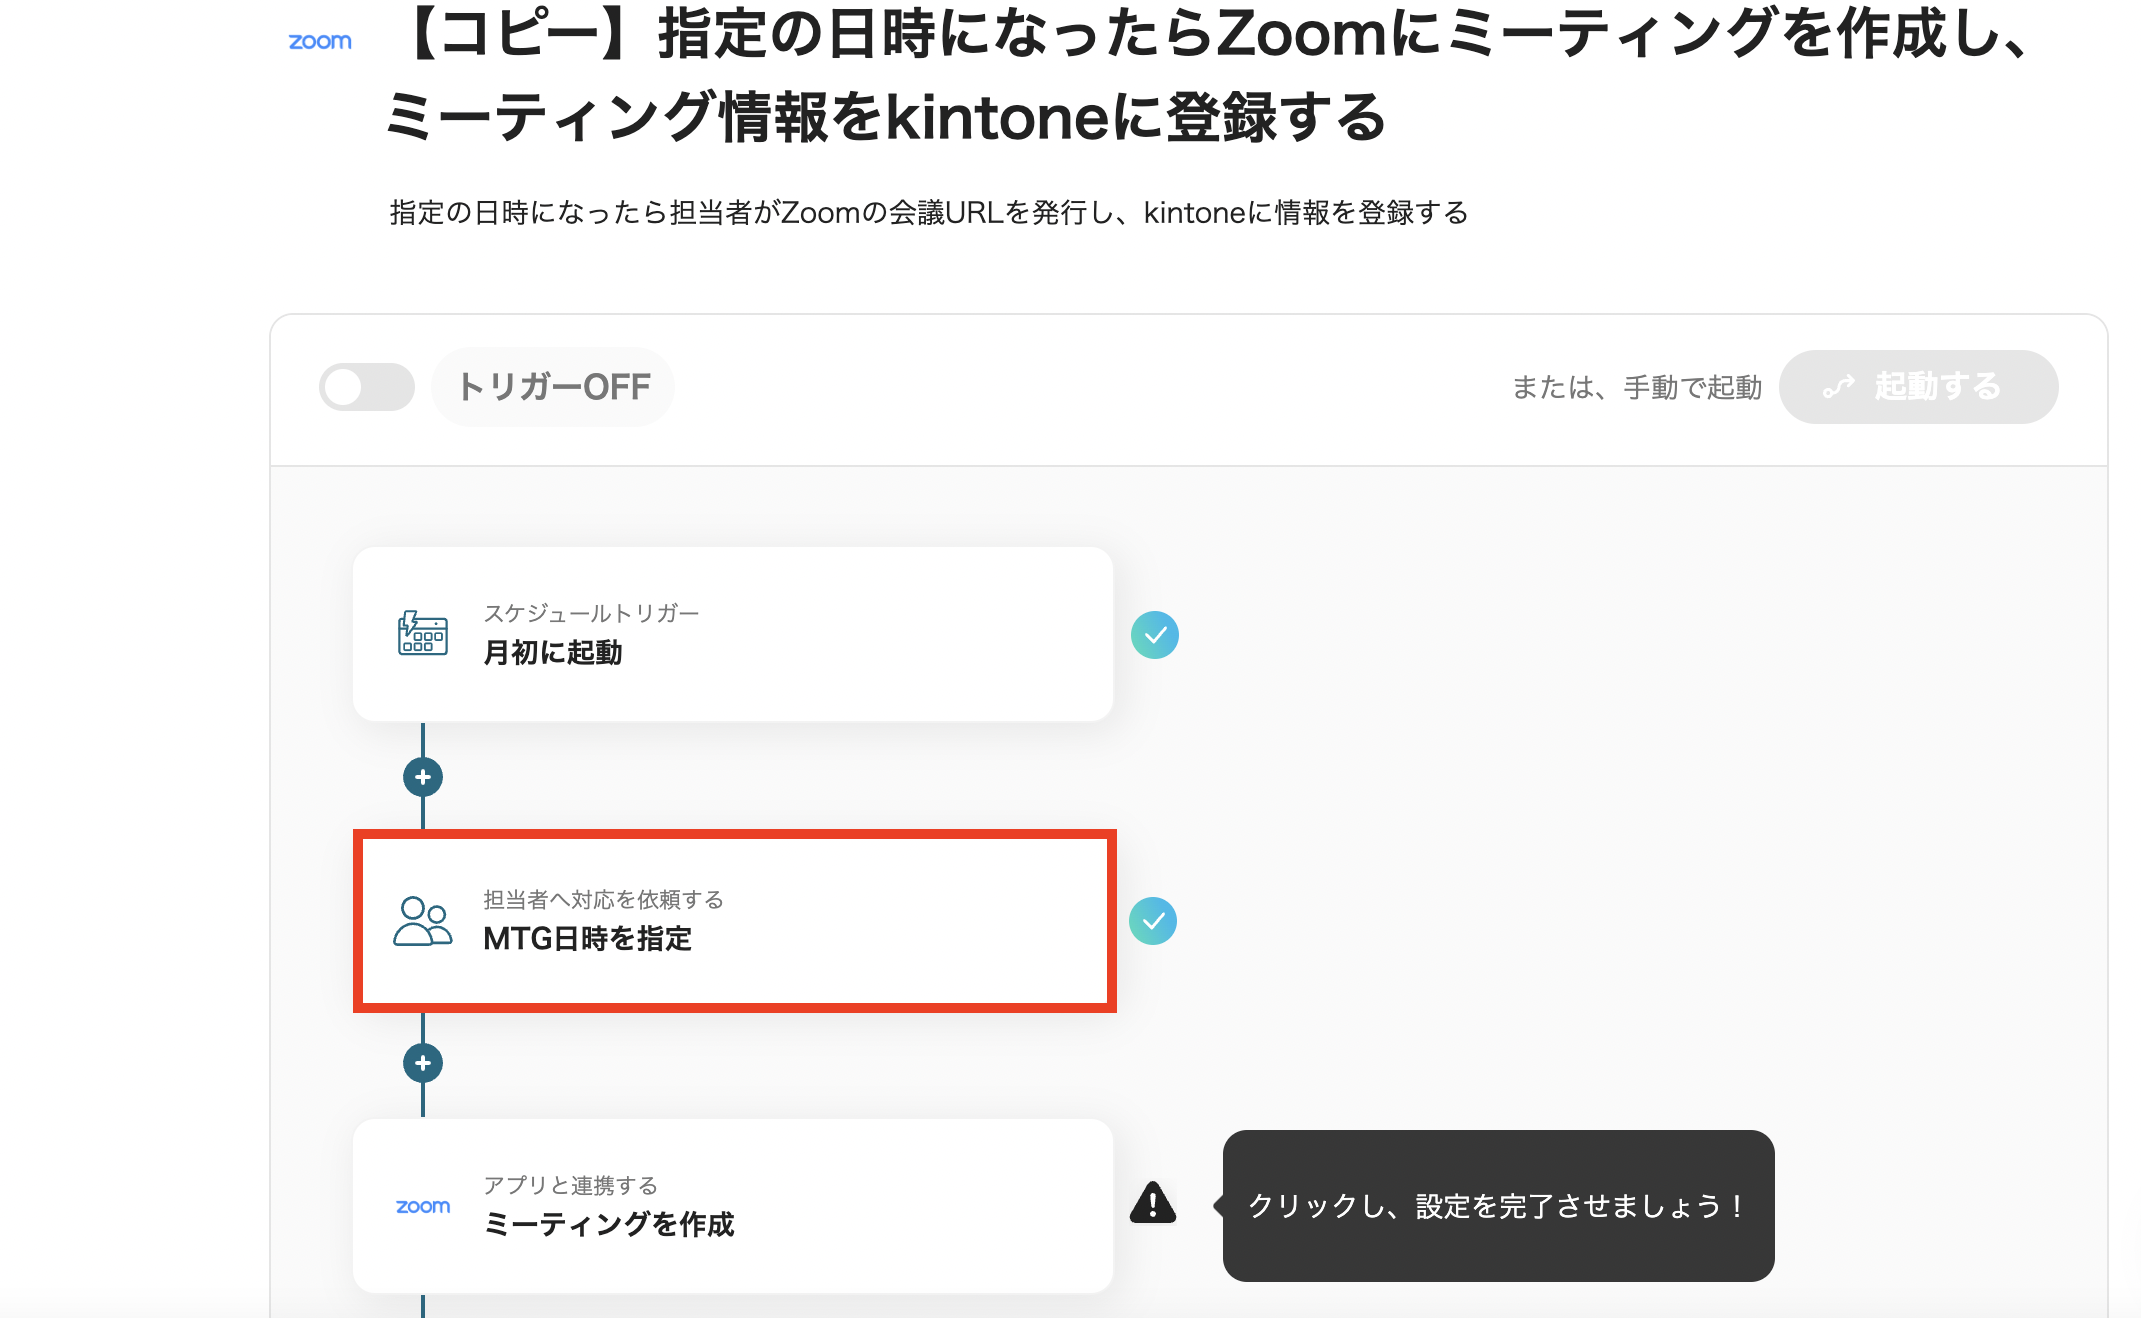
先ほど設定した日時に、誰に対してどのような通知を行うのか設定をします。
詳しい設定方法はこちらをご確認ください。
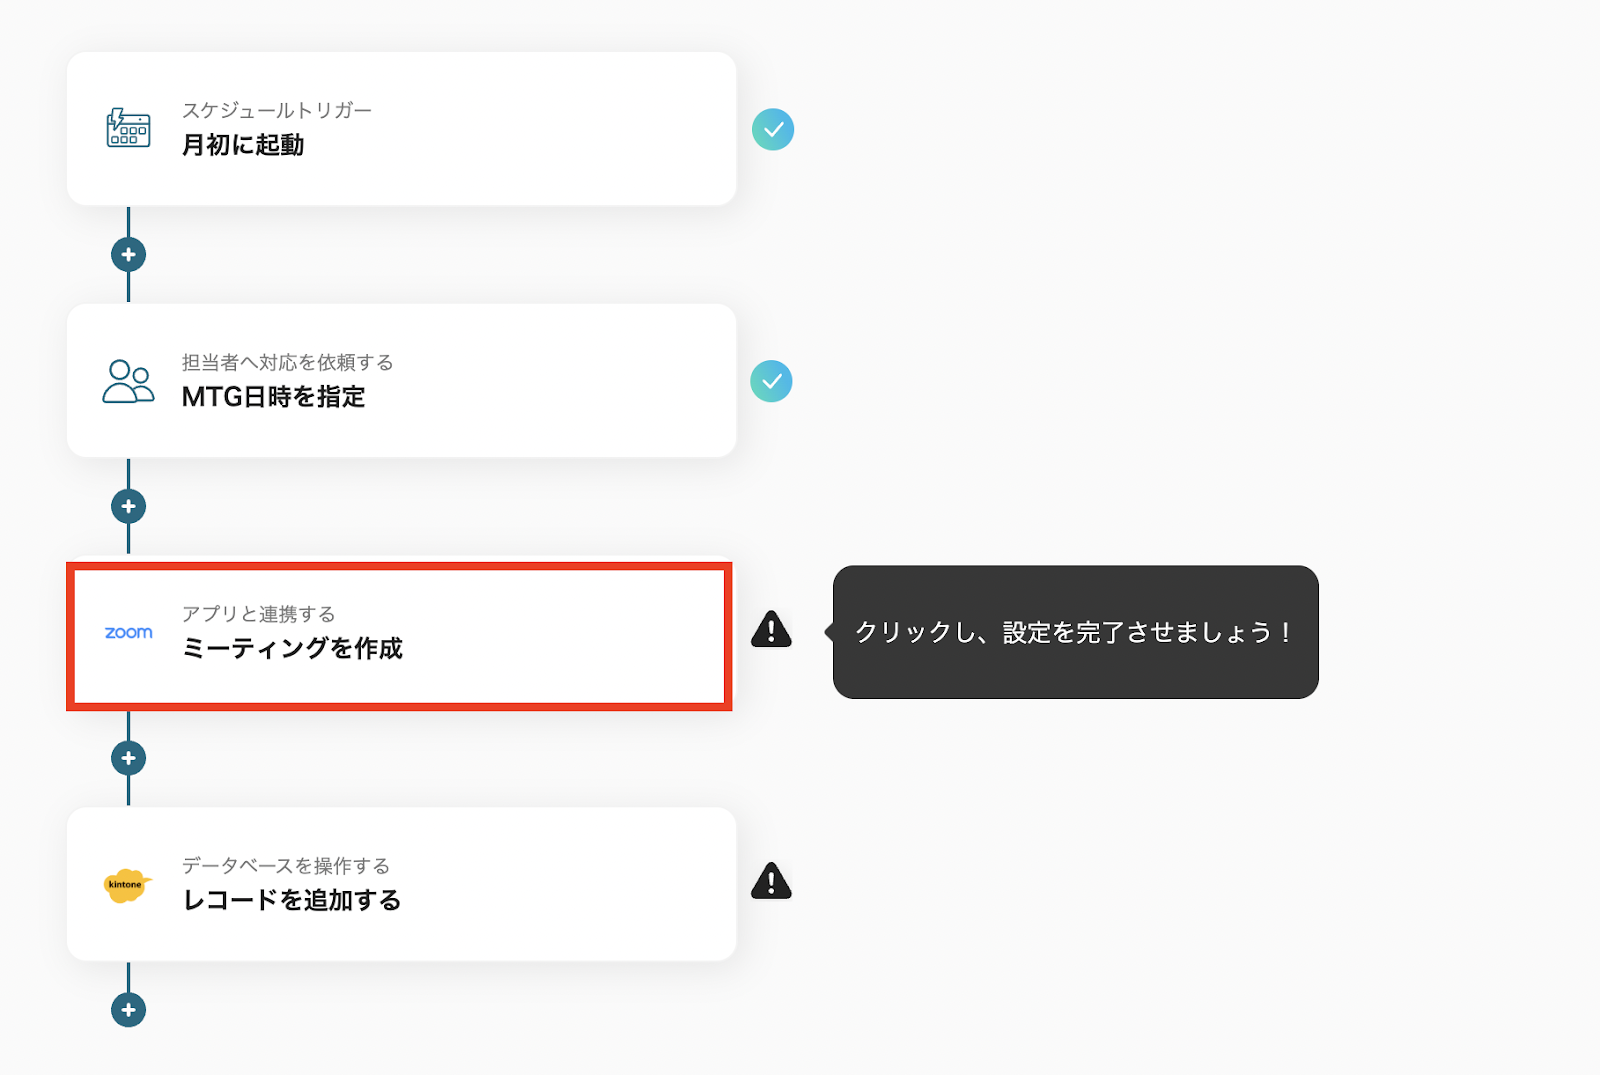
ステップ5:Zoomのミーティングを作成する設定
- アプリと連携をする
「ミーティングを作成する」をクリックします。
- Zoomと連携するアカウント情報を入力する
「Zoomと連携をするアカウント情報」が合っているか確認しましょう。
なお「タイトル」は任意で入力してください。
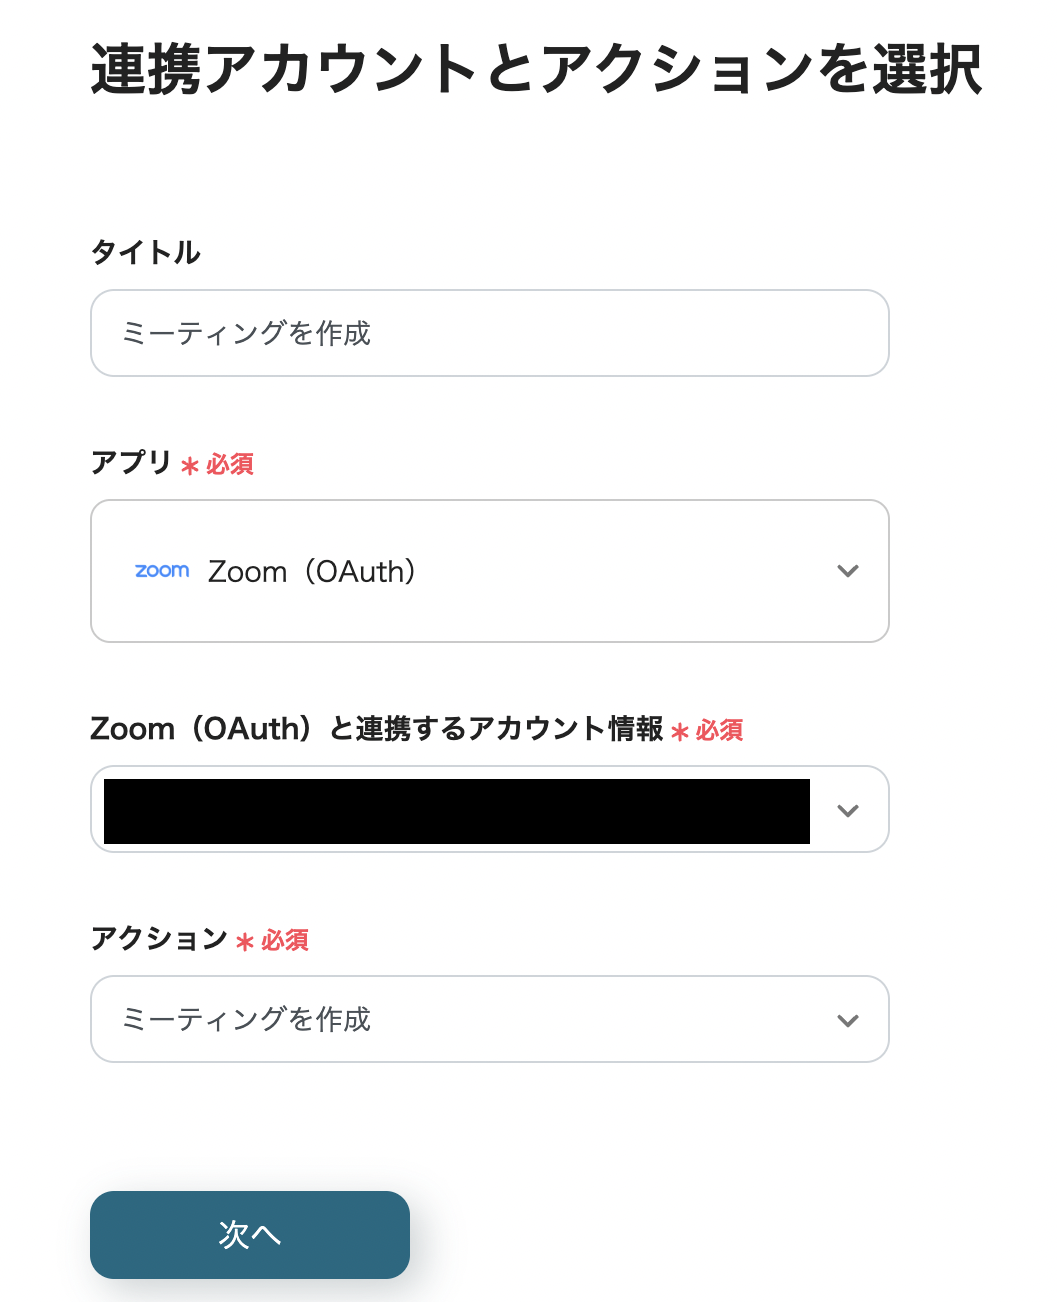
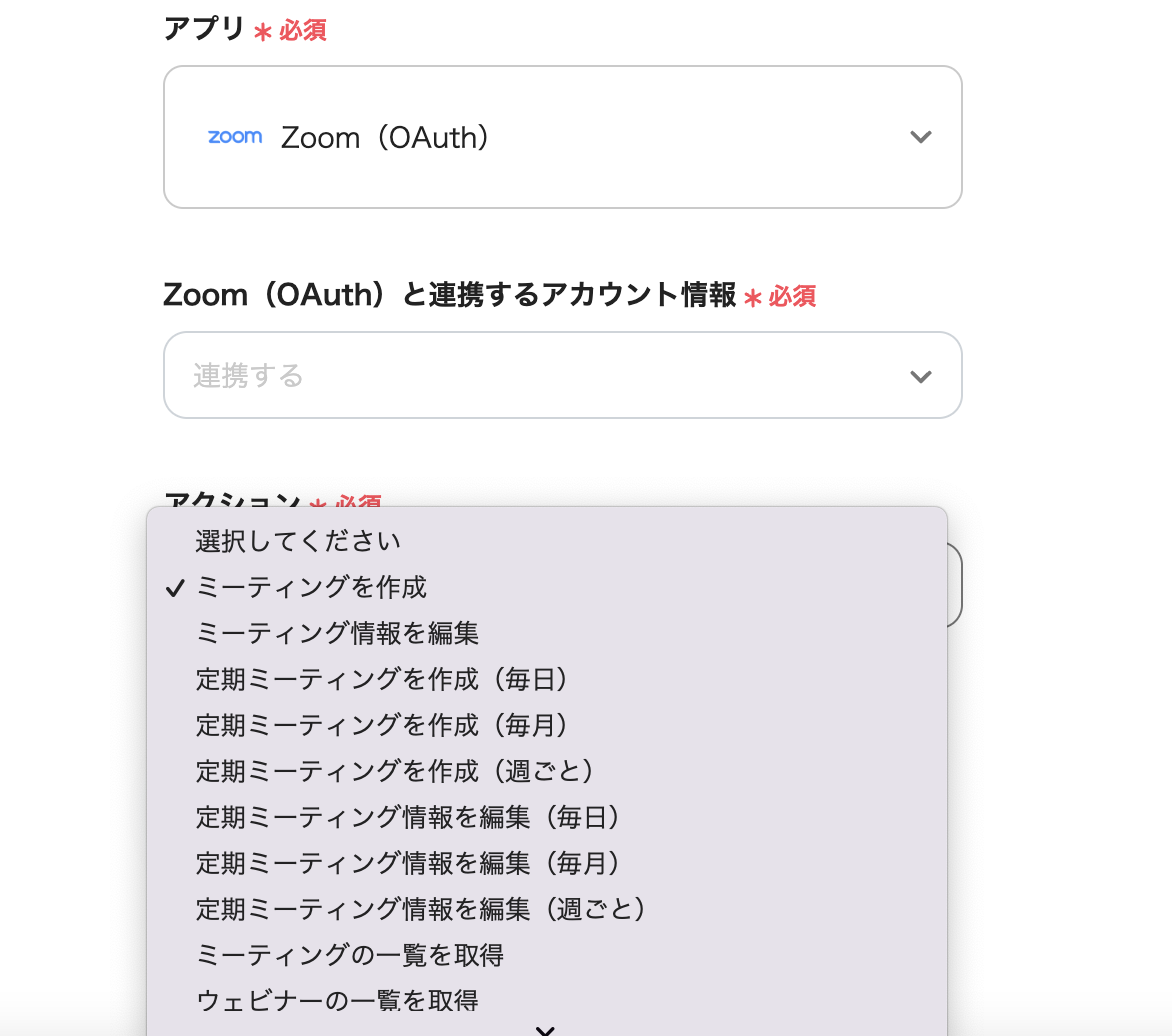
- アクション内容を選択する
全ての項目の入力が終了したら「次へ」を押します。
- API接続設定を行う
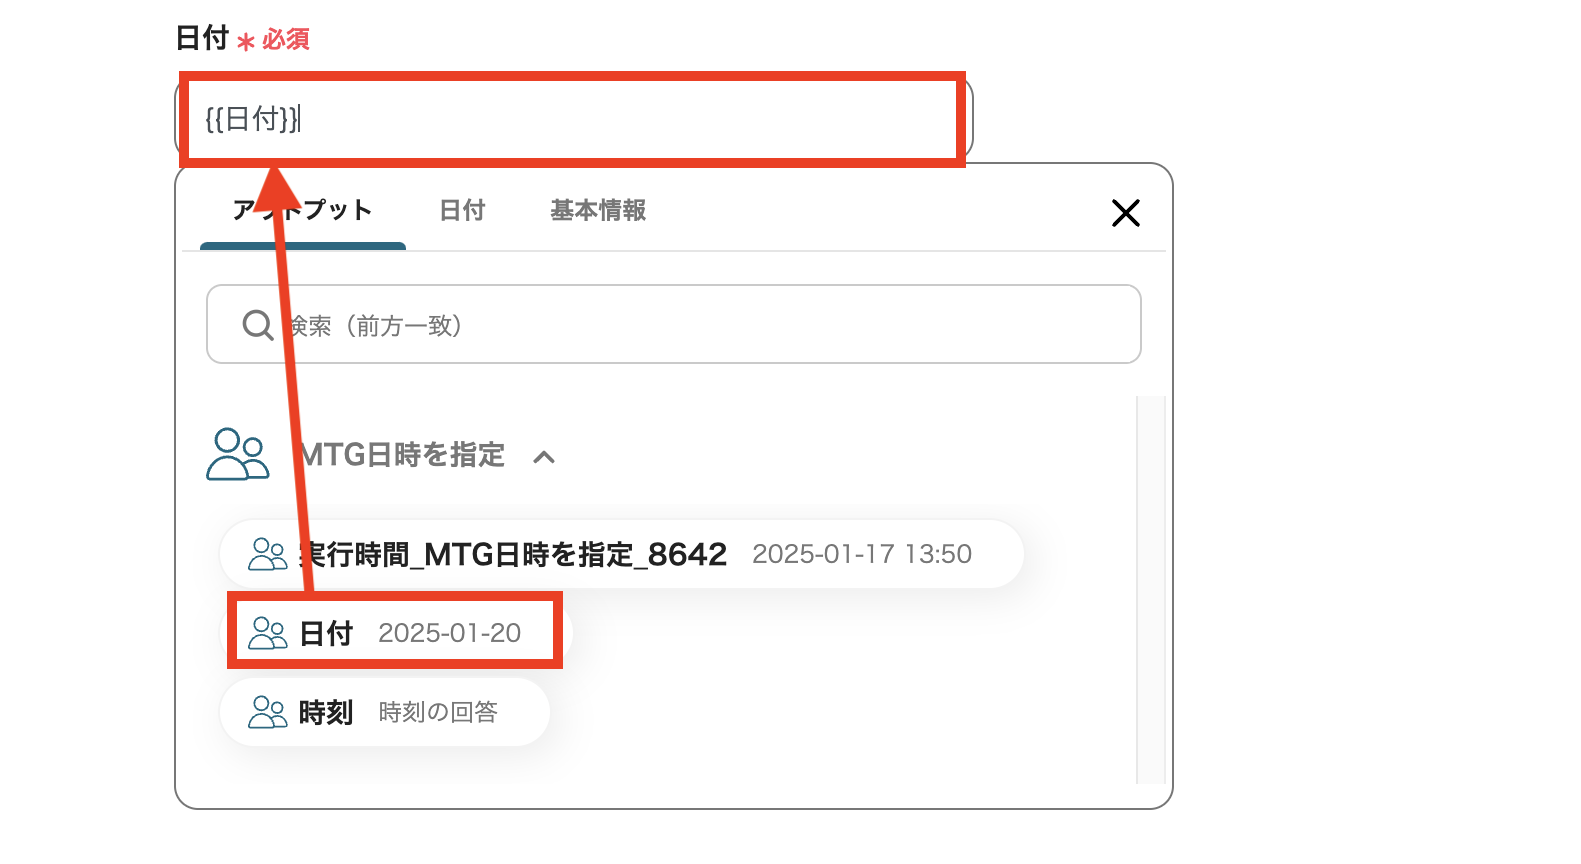
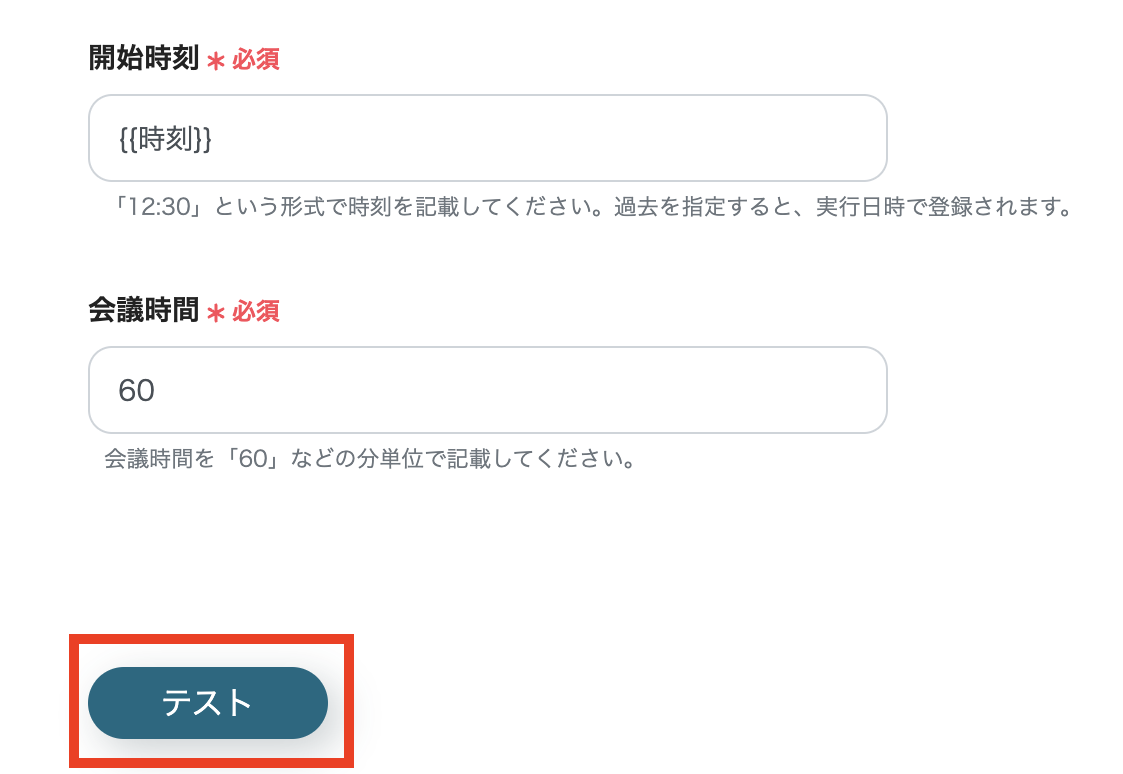
「メールアドレス」や「トピック」など、必要事項を入力していきます。
パスワードを設定する場合は、忘れずに、パスワードも入力しましょう。
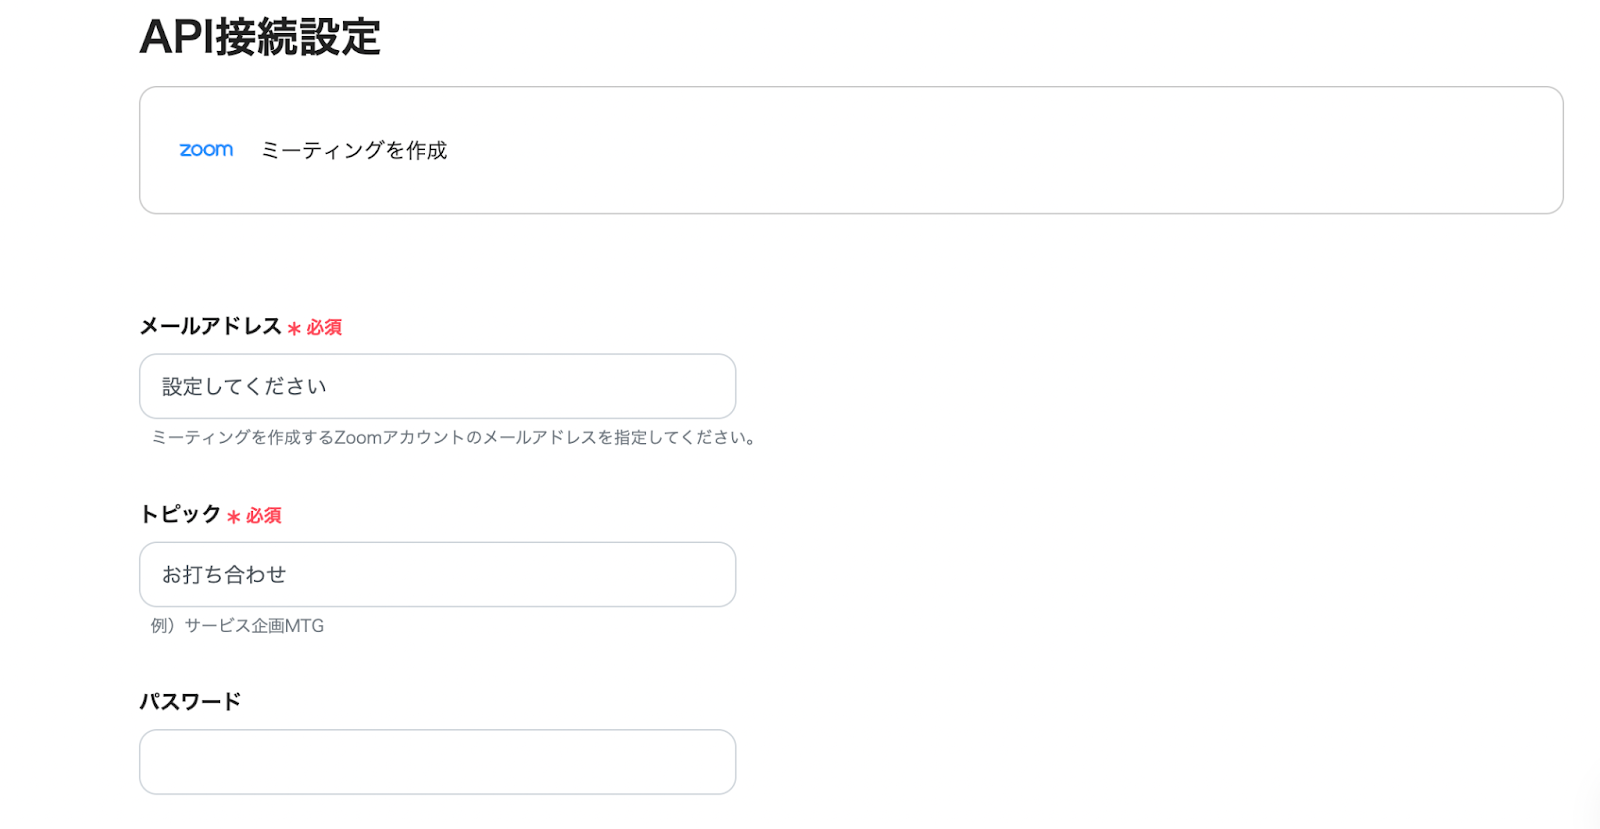
会議の日付、開始時刻、会議時間などは、アウトプット欄から設定可能です。
全ての項目に入力が終了したら、「テスト」をクリックします。
「テスト成功」と表示されれば、「保存」をクリックしてください。
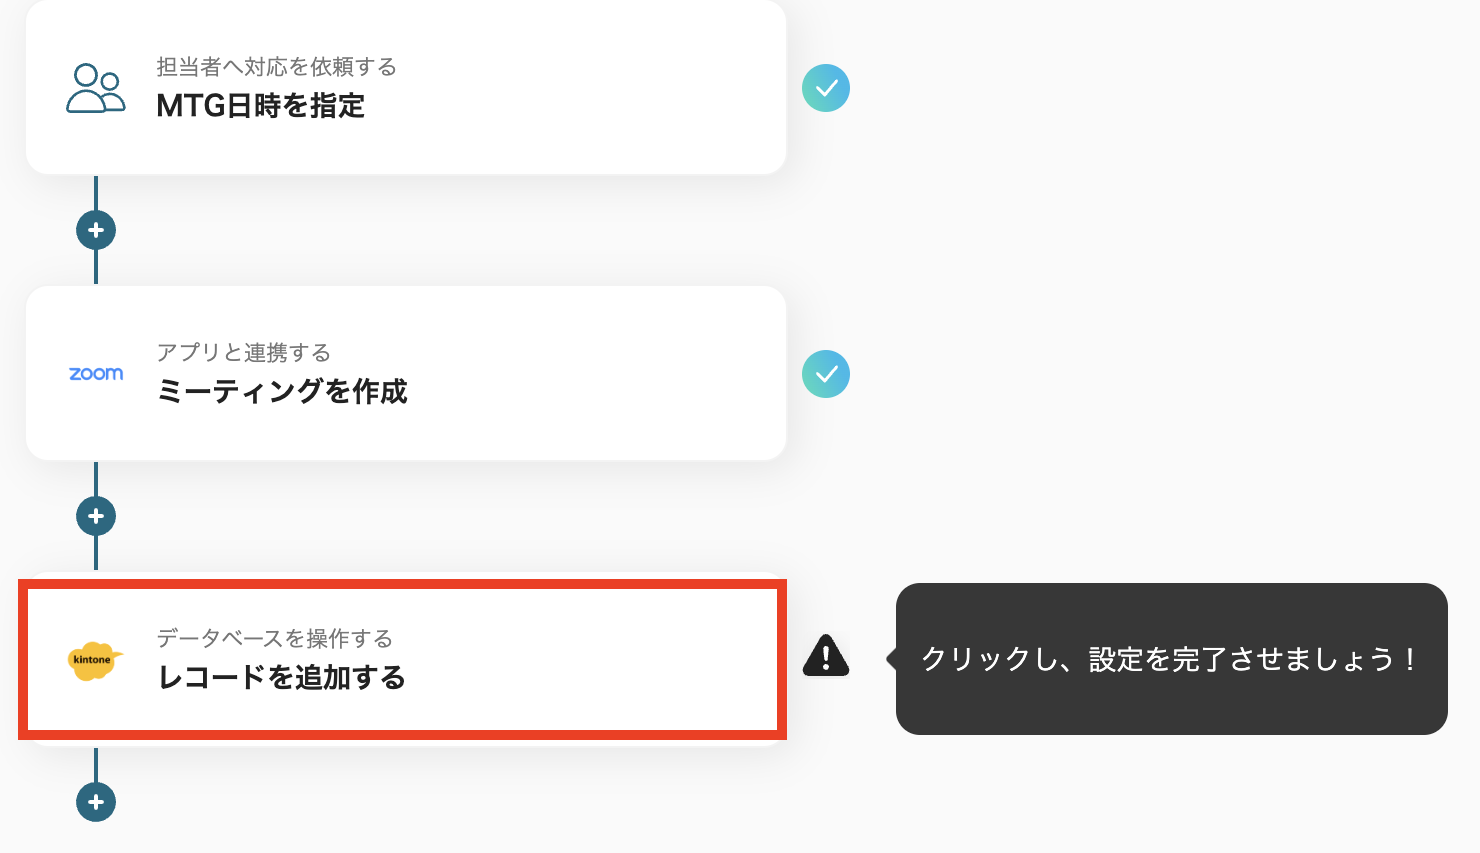
ステップ6:kintoneで情報を管理するための設定
- アプリと連携する
「レコードを追加する」をクリックします。
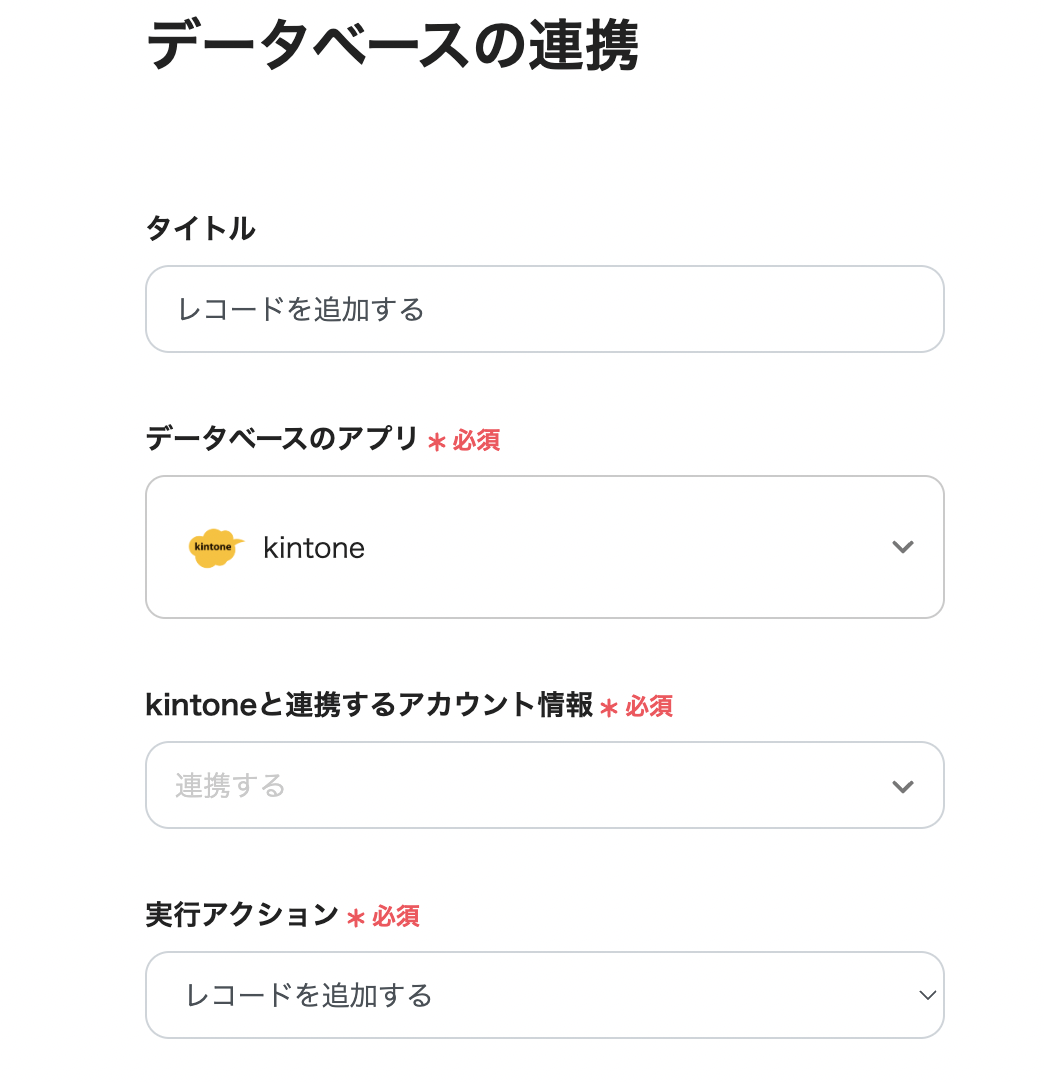
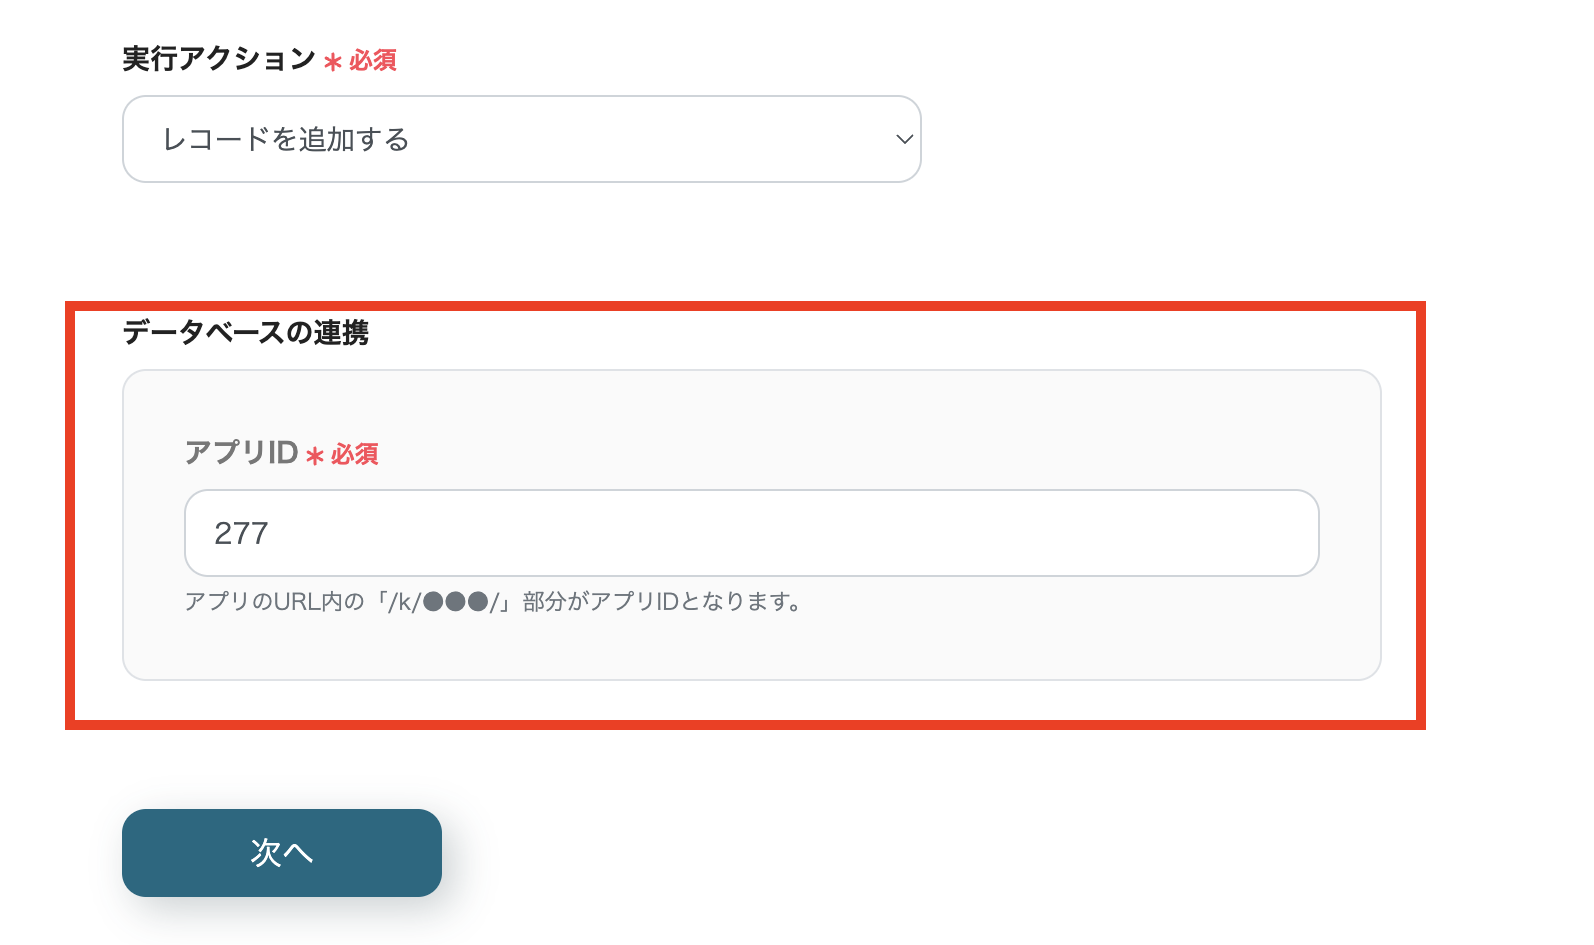
- データベースと連携する
「タイトル」は必要に応じて、変更が可能です。
「実行アクション」は「レコードを追加する」を選択します。
- kintoneにおける追加するアプリを選択する
連携したいkintoneのアプリIDを入力します。
アプリは、あらかじめZoomの管理したい情報に合わせて項目に合わせて設定しておきましょう。
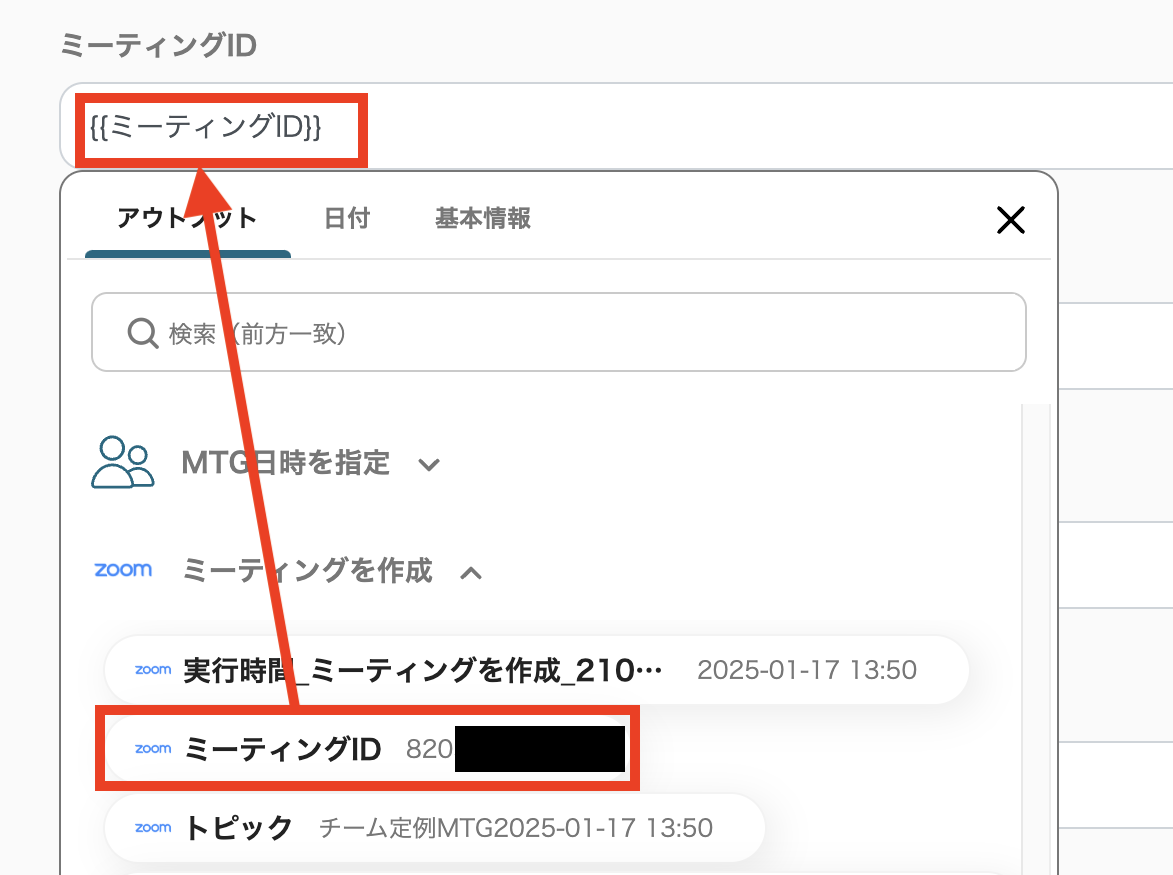
- 追加するレコードの値を設定する
kintoneアプリで設定した項目に、Zoomで取得したアウトプットを設定していきます。
設定完了後は「テスト」を実行し、成功したら「保存する」をクリックします。
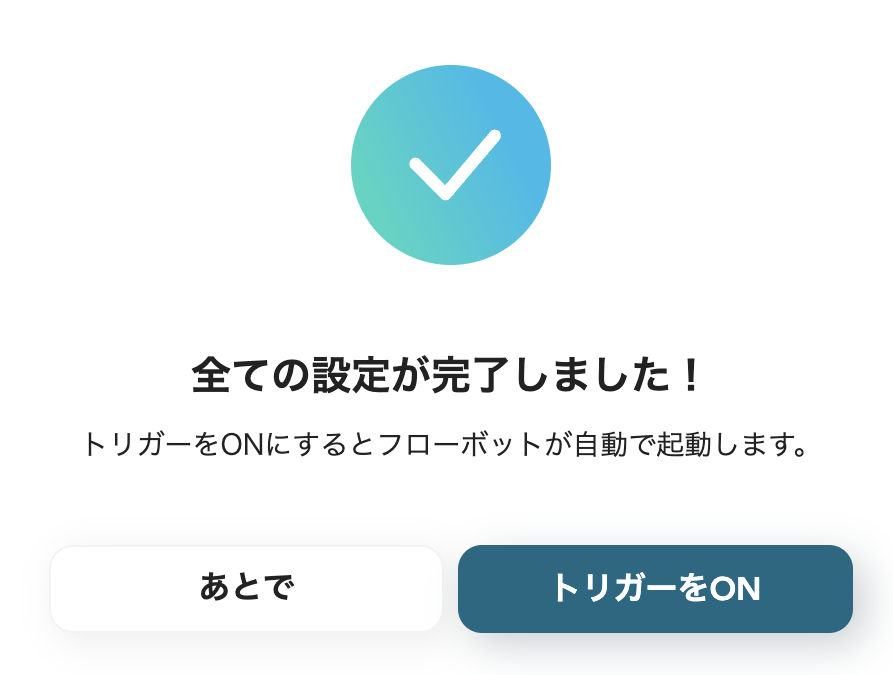
ステップ7:Zoomとkintoneの自動化の動作確認
最後に「トリガーをON」をクリックして、自動化の設定は終了です。
正しくフローボットが起動するか、確認しましょう。
設定、お疲れ様でした!
kintoneをZoomアカウントに連携したい場合
今回はZoomからkintoneへデータを連携する方法をご紹介しましたが、逆にkintoneをZoomへのデータ連携を実施したい場合は、下記のテンプレートも併せてご利用ください。
kintoneのステータスが更新されたらZoomの会議URLを発行し、メールで送付
このフローの活用により、Kintoneのステータスによって会議URLを自動作成することができます。
情報共有を効率化したい方におすすめのフローです!
- kintoneとZoom、Gmailを利用した顧客対応に手間を感じている営業担当者の方
- kintone上のステータスに応じたオンライン会議の設定を効率化したいと考えている方
- 手作業による会議URLの発行やメール送付でのミスを減らしたいチームリーダーの方
- kintoneのステータス更新を起点に、Zoom会議URLの発行とGmailでの送付が自動処理されるため、これまで手作業に費やしていた時間を短縮できます。
- 手動での情報転記が不要になることで、会議URLの貼り間違えや送付漏れなどのヒューマンエラーを防止し、業務品質の向上に繋がります。
- はじめに、kintone、Zoom、GmailをYoomと連携します。
- 次に、トリガーでkintoneを選択し、「レコードのステータスが更新されたら」というアクションを設定します。
- 続いて、オペレーションでZoomの「ミーティングを作成する」アクションを設定し、kintoneから取得した情報を元に会議を作成します。
- 最後に、オペレーションでGmailの「メールで送付する」アクションを設定し、作成したZoomの会議URLを含む案内メールを送付します。
■このワークフローのカスタムポイント
- kintoneのトリガー設定では、特定のステータスに更新された場合にのみフローが起動するよう、条件を任意で設定してください。
- Zoomで作成する会議の議題や、Gmailで送付するメールの件名・本文には、kintoneから取得した顧客名や案件名などの情報を自由に組み込めます。
- kintone、Zoom、GmailのそれぞれとYoomを連携してください。
- kintoneはミニプラン以上でご利用いただけるアプリとなっております。フリープラン・パーソナルプランの場合は設定しているフローボットのオペレーションやデータコネクトはエラーとなりますので、ご注意ください。
- ミニプラン・チームプラン・サクセスプランなどの有料プランは、2週間の無料トライアルを行うことが可能です。無料トライアル中には制限対象のアプリを使用することができます。 詳しくは、料金プランのページをご参照ください。
kintoneでレコードが追加されたら、Zoomミーティングを作成する
このフローの活用により、Kintoneでのレコード作成によってZoomミーティングを自動作成することができます。ミーティング作成の自動化を目指す方におすすめです。
■概要
kintoneで顧客情報や案件を管理する中で、新しいレコードが追加されるたびに手動でZoomミーティングを作成し、URLを発行する作業に手間を感じていないでしょうか。この繰り返し作業は時間を要するだけでなく、情報の転記ミスといったヒューマンエラーの原因にもなり得ます。このワークフローを活用すれば、kintoneにレコードが追加されるだけでZoomミーティングが自動で作成され、こうした課題をスムーズに解消できます。
■このテンプレートをおすすめする方
- kintoneとZoomを連携させ、ミーティング設定の手間をなくしたいと考えている営業担当者の方
- 手作業による情報入力のミスを減らし、業務の正確性を高めたいチームリーダーの方
- 定型業務を自動化することで、より生産性の高いコア業務に集中したいと考えているすべての方
■このテンプレートを使うメリット
- kintoneへのレコード追加をきっかけに、Zoomミーティングが自動で作成されるため、これまで手作業に費やしていた時間を短縮することができます。
- 手作業によるミーティング情報の入力や転記がなくなるため、日時や参加者の設定間違いといったヒューマンエラーの防止に繋がります。
■フローボットの流れ
- はじめに、kintoneとZoomをYoomと連携します。
- 次に、トリガーでkintoneを選択し、「レコードが登録されたら(Webhook起動)」というアクションを設定します。
- 続いて、オペレーションでkintoneの「レコードを取得する」アクションを設定し、トリガーで反応したレコードの詳細情報を取得します。
- 最後に、オペレーションでZoomの「ミーティングを作成」アクションを設定し、取得したレコードの情報をもとにミーティングを作成します。
※「トリガー」:フロー起動のきっかけとなるアクション、「オペレーション」:トリガー起動後、フロー内で処理を行うアクション
■このワークフローのカスタムポイント
- Zoomのミーティング作成アクションでは、会議のトピック(件名)や説明文に、kintoneから取得した顧客名や案件名といった情報を動的に割り当てることが可能です。
- ミーティングの開始時刻や所要時間も、kintoneのフィールド情報を基に設定するか、あるいは固定の値を指定するかなど、運用に合わせて柔軟にカスタマイズできます。
■注意事項
- kintoneとZoomのそれぞれとYoomを連携してください。
まとめ
Zoomとkintoneを連携させることで、Zoomのミーティングの作成から管理までを自動化し、業務効率を向上させることが可能です。
自動化させることは、手作業で行っていた事務処理を減らすだけでなく、情報伝達ミスや漏れを防ぐことが期待できます。
さらに、kintone上で情報を一元管理することで、チーム内での情報共有がスムーズになり、会社全体における業務の透明性や効率性の向上にも寄与するのです。
日々の業務を効率化し、さらに生産性を高めたいと考えている企業にYoomの仕組みがピッタリではないでしょうか。
この情報が皆さまの業務改善に役立つことを願っています。
よくあるご質問
Q:Googleカレンダーの予定を元に連携できますか?
A:
今回のテンプレートでは難しいですが、以下のテンプレートを使用すると可能です。お試しください。
■このテンプレートをおすすめする方
- GoogleカレンダーとZoomを日常的に利用し、会議設定の手間を省きたい方
- 会議URLのコピー&ペーストミスや、予定への記載漏れなどのミスを防ぎたい方
- スケジュール調整にかかる時間を減らし、本来のコア業務に集中したいと考えている方
■このテンプレートを使うメリット
- Googleカレンダーへの予定登録を起点に、Zoom会議の作成からURLの共有までが自動化されるため、手作業で対応していた時間を短縮できます。
- 手作業によるURLの転記ミスや、予定への記載漏れといったヒューマンエラーのリスクを軽減し、業務の正確性を向上させます。
■フローボットの流れ
- はじめに、GoogleカレンダーとZoomをYoomと連携します。
- 次に、トリガーでGoogleカレンダーを選択し、「予定が作成されたら」というアクションを設定します。
- オペレーションでAI機能を選択し、「テキストからデータを抽出する」アクションで、予定の情報から会議名などの必要なデータを抽出します。
- 続いて、オペレーションでZoomの「ミーティングを作成」アクションを設定し、抽出したデータをもとに会議を作成します。
- 最後に、オペレーションでGoogleカレンダーの「予定を更新」アクションを設定し、作成されたZoomの会議URLを元の予定に追記します。
■このワークフローのカスタムポイント
- AI機能のテキスト抽出では、トリガーで取得した予定の件名や説明文などを変数として設定し、Zoomの会議名など抽出したい項目を自由にカスタマイズできます。
- Zoomのミーティング作成では、会議のホストや代替ホストに設定したいユーザーのメールアドレスを任意で指定することが可能です。
- Googleカレンダーの予定更新では、特定のカレンダーIDを指定でき、予定の説明欄にZoomのURLだけでなく、固定の文章や変数として取得した値を埋め込めます。
■注意事項
- Googleカレンダー、ZoomのそれぞれとYoomを連携してください。
- トリガーは5分、10分、15分、30分、60分の間隔で起動間隔を選択できます。
- プランによって最短の起動間隔が異なりますので、ご注意ください。
- Zoomのプランによって利用できるアクションとそうでないアクションがあるため、ご注意ください。
- 現時点では以下のアクションはZoomの有料プランのみ利用可能です。
- ミーティングが終了したら
- ミーティングのレコーディング情報を取得する(クラウド上に存在するレコーディングのみ取得可能なため)
- 詳細は「Zoomでミーティングのレコーディング情報を取得する際の注意点」をご参照ください。
Q:作成した会議URLをSlackなどにも通知できますか?
A:
はい、可能です。
その場合はフロー上の「+」ボタンより、Slackへ通知するフローを追加するなどしましょう。

Q:連携が失敗したらどうなりますか?
A:
連携が一時的に失敗した際、メールでその旨の通知が行われます。
また、自動での再実行(リトライ)は行われないため、エラー発生時は手動で再実行が必要です。詳しくは、以下のヘルプページをご参照ください。
もし、それでも解決しない場合は以下お問い合わせ窓口よりご連絡ください。
プログラミング知識なしで手軽に構築できます。