

.avif)
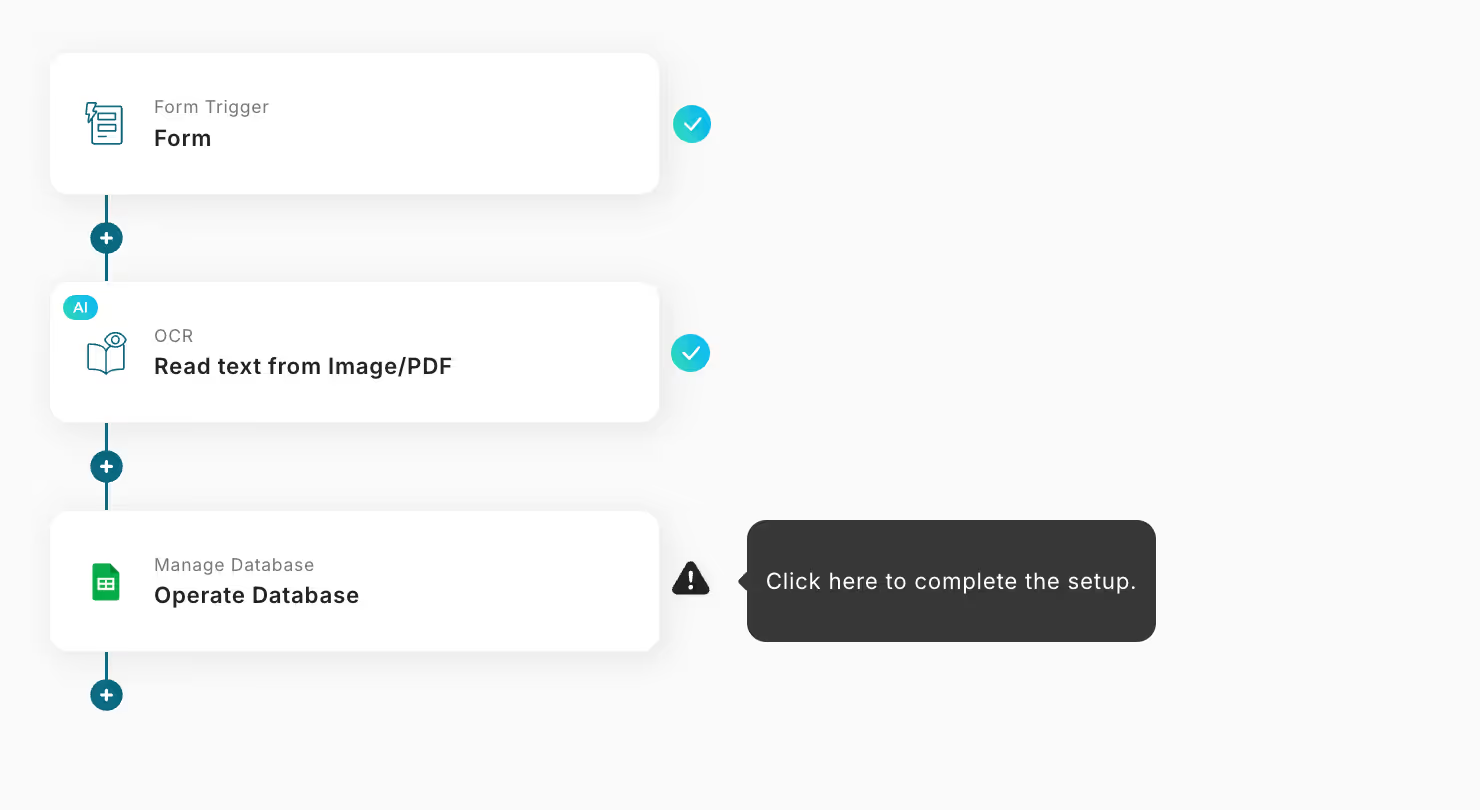
Step 2: Set Up Form Trigger
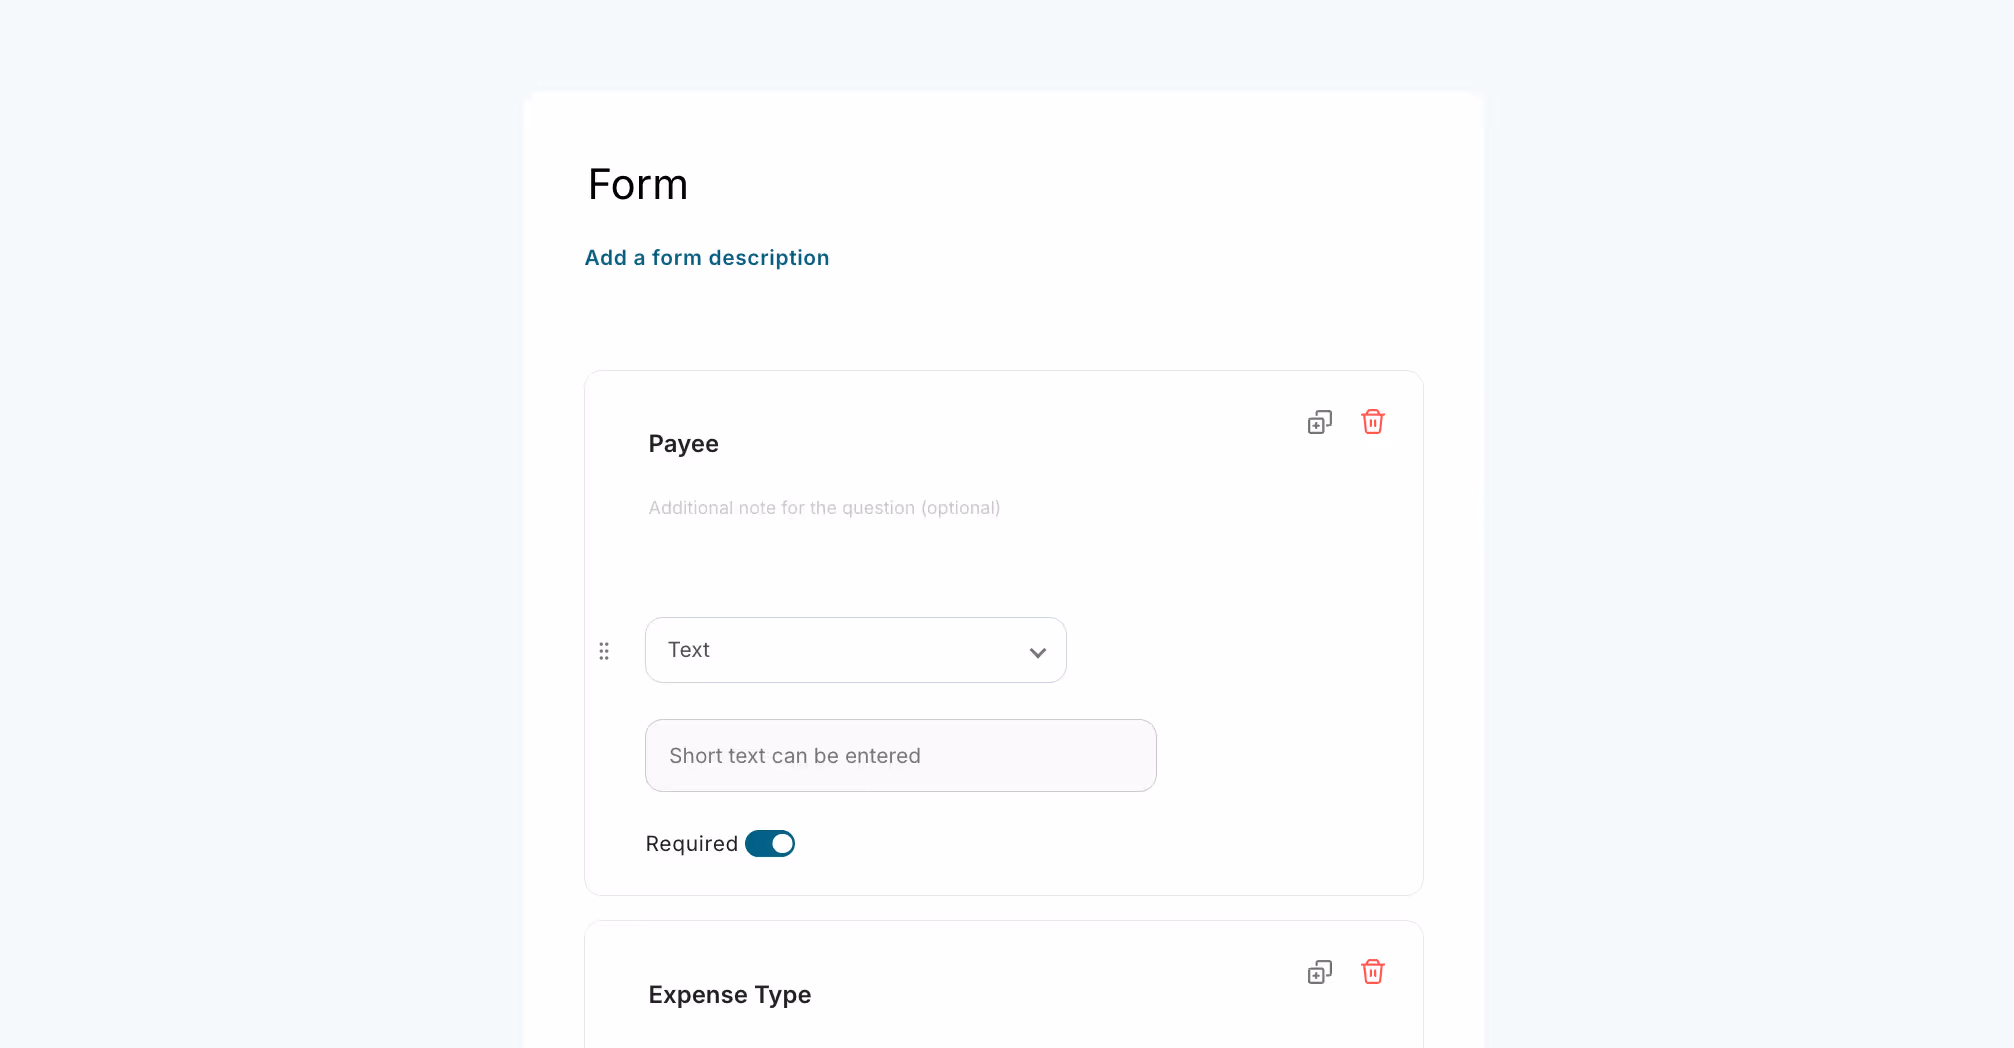
Click on "Receipt Upload Form".
Modify or add form content and fields as needed.
Click "Next" to check the form display and set details.
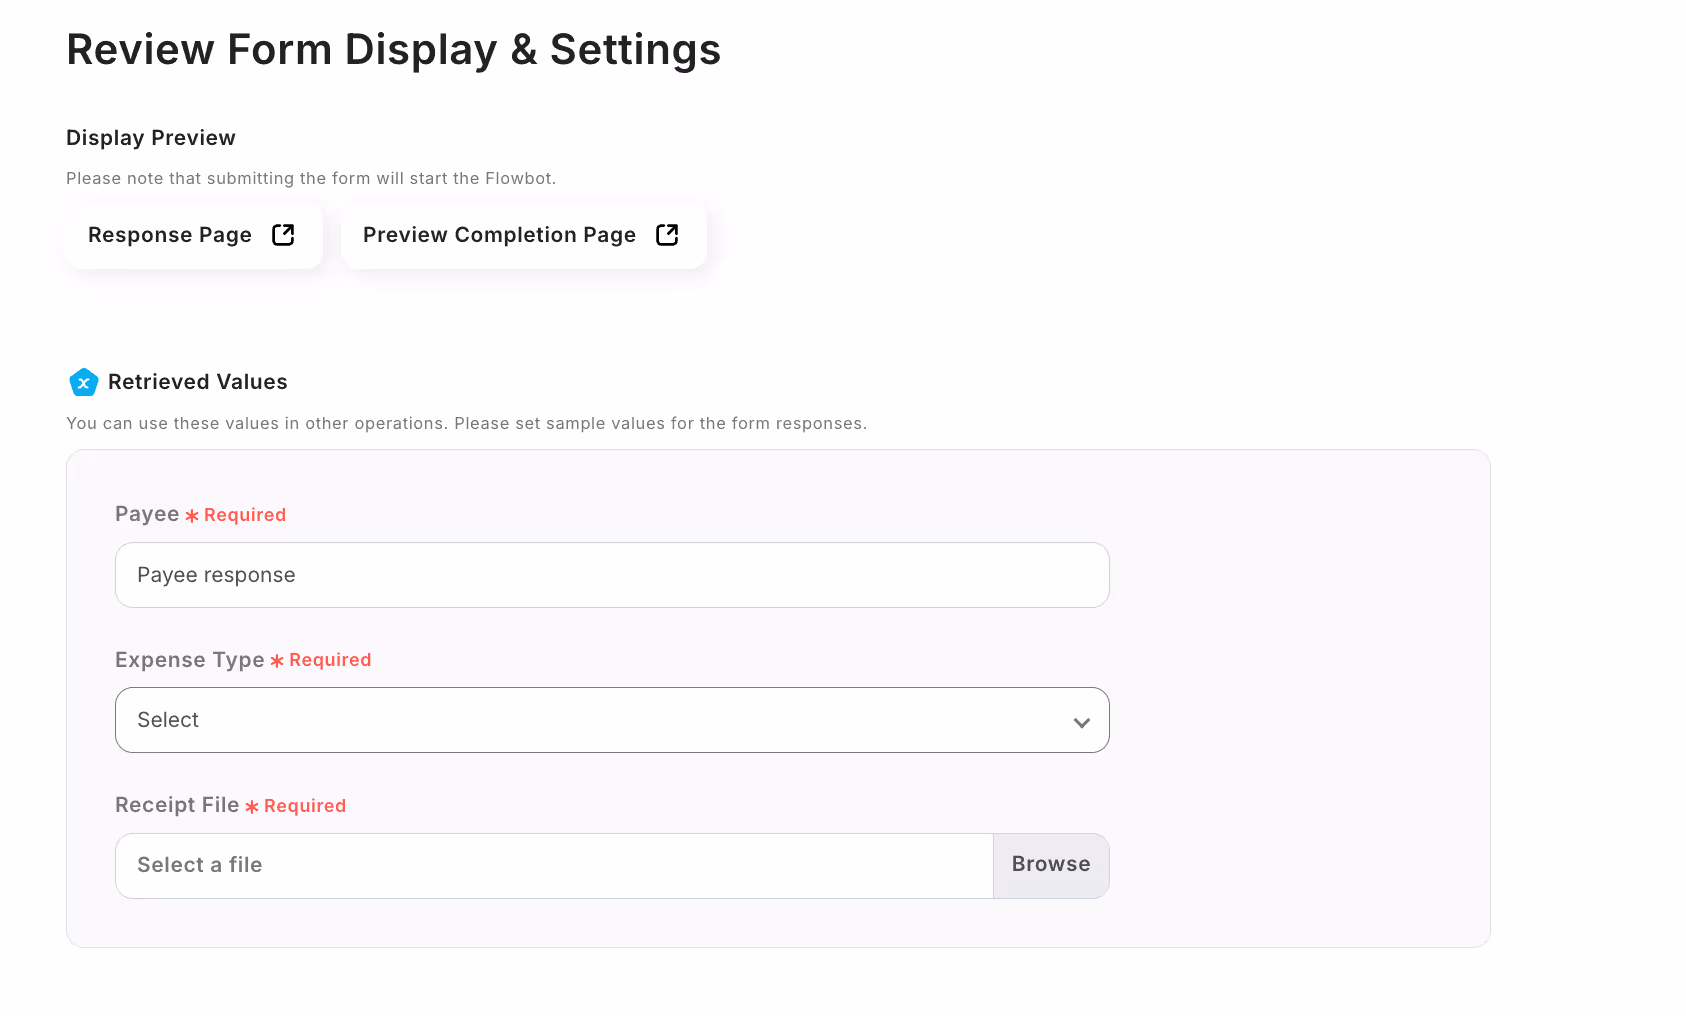
Acquired Value: Set sample values for the input form responses. These values can be used in other operations.
Click "Save".
Step 3: Read Text from Image/PDF
Click on "Read Text from Image/PDF".
Set up the action.
No need to change the title. select "[v2] Read Qualified Invoice (5 Tasks)".

Set the details.
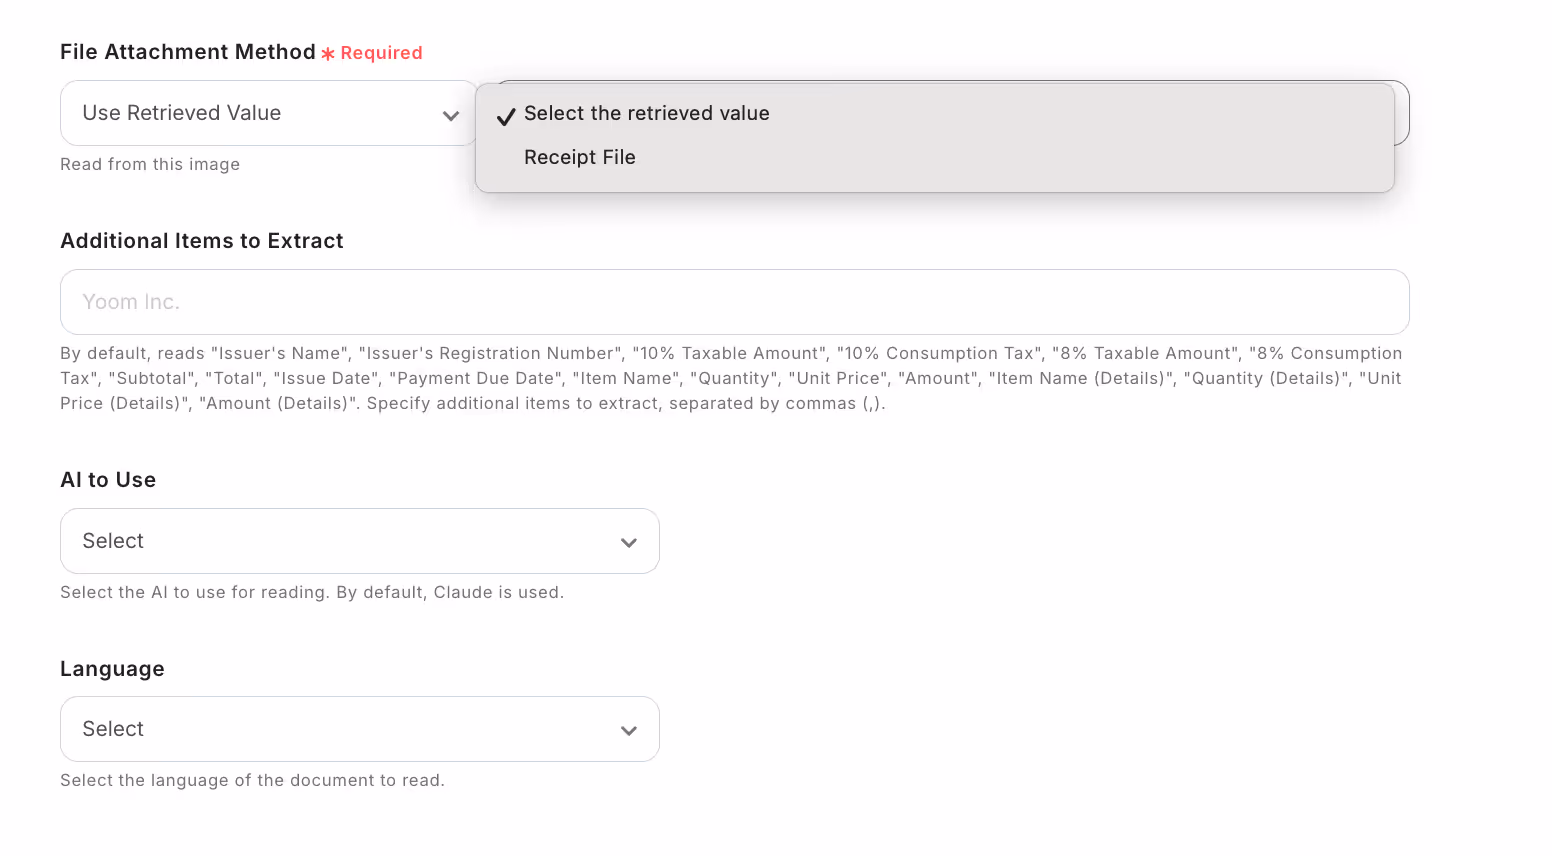
File Attachment Method: From the dropdown, select "Use Acquired Value" and "Receipt File".
Conduct a test, and if successful, click "Save".
For operations on reading text information from images/PDFs, please also check this page.
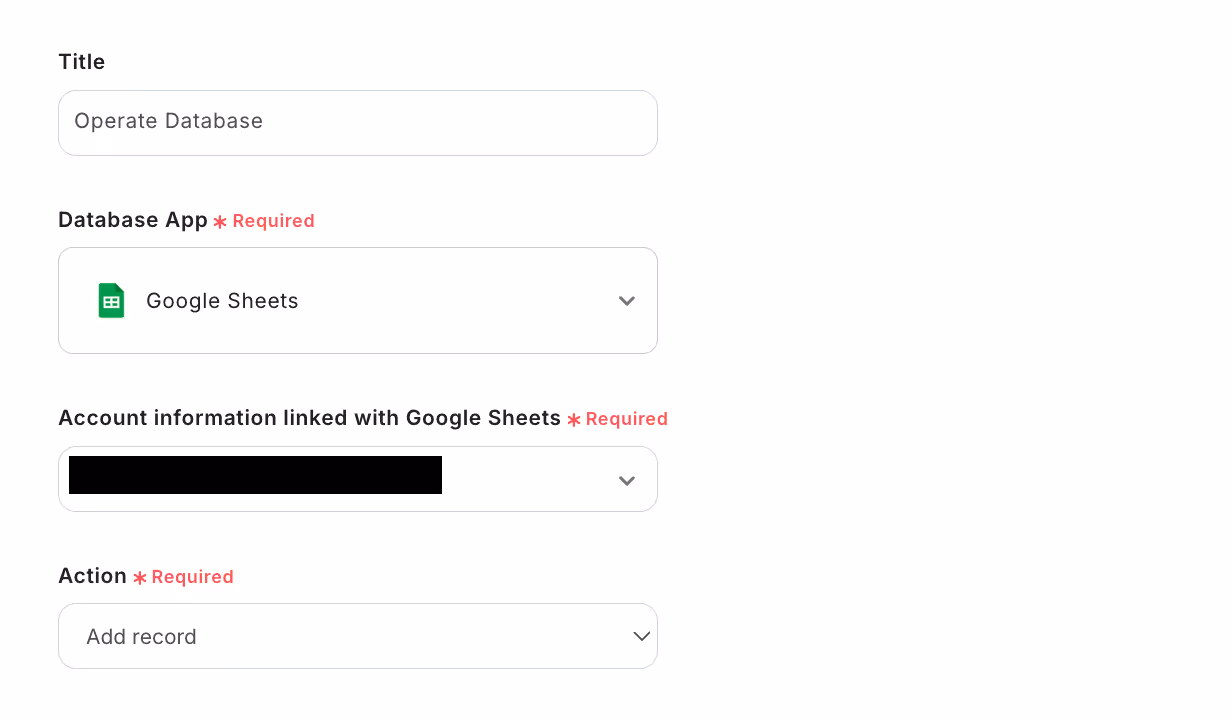
Step 4: Transfer Read Receipt Content to Google Spreadsheet
Click on "Transfer Read Receipt Content to Spreadsheet".
Set up the linked account and action.
Title: Optional
Account Information for Linking with Google Spreadsheet: Select and link any account.
Action: Always select "Retrieve Record".
Spreadsheet ID: After linking the account, select from the candidates. The part "/spreadsheets/d/****/edit" in the Google Spreadsheet URL is the Spreadsheet ID.
Spreadsheet Tab Name: Enter the tab name such as "Sheet1".
Table Range: Specify the table range according to the content of the Google Spreadsheet.
※Note: For details on how to specify the table range, please see here.
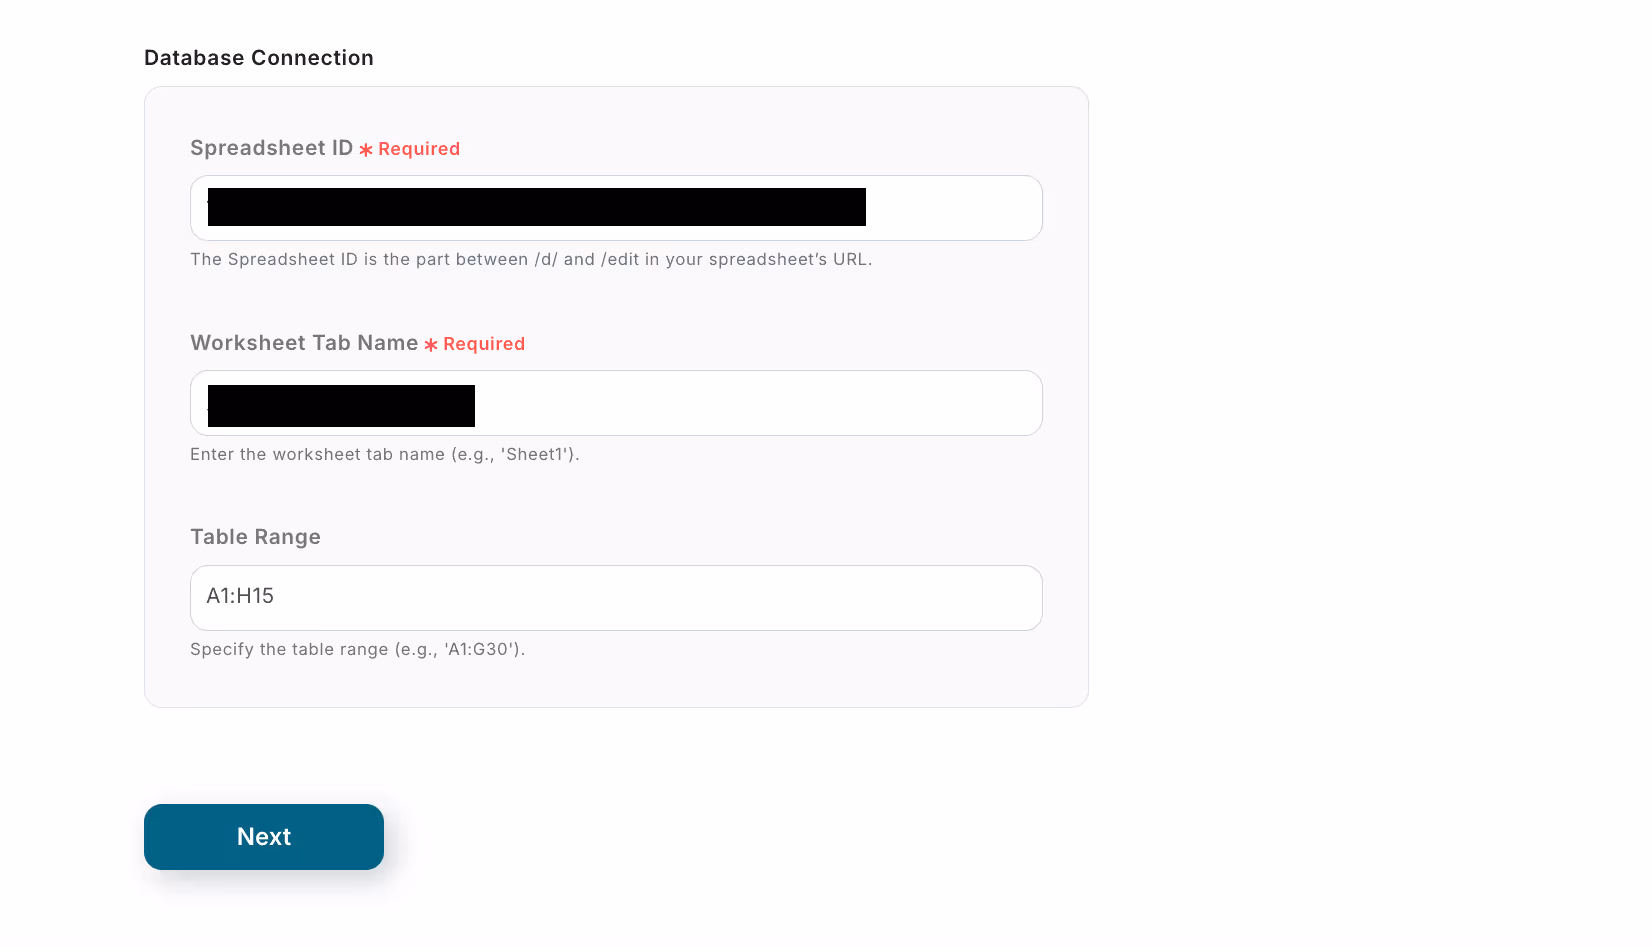
Click "Next" to set the details of the database operation.
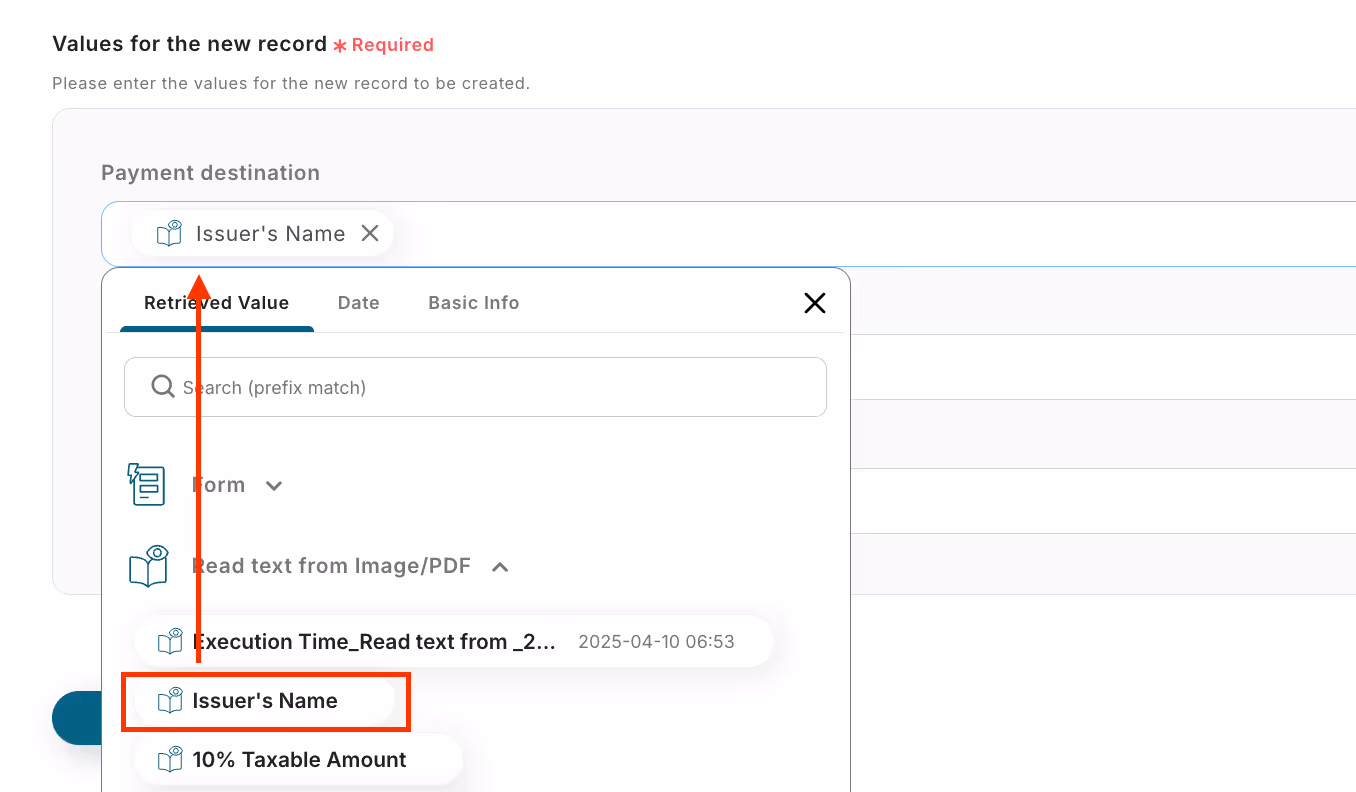
Value of the Record to be Added: Click "Read Text from Image/PDF" in the output, and click the same tag for each item.
※Explanation: By setting it this way, the read text information can be automatically reflected in the Google Spreadsheet.
Conduct a test, and if successful, click "Save".
Well done! This completes the flow of "Reading Receipts with OCR and Recording in Google Spreadsheet"!!


.avif)
.avif)
.avif)


