How to integrate Airtable with Misoca to automatically create quotes in Misoca based on data from Airtable
How to Integrate Applications
・
2024/12/19
How to integrate Airtable with Misoca to automatically create quotes in Misoca based on data from Airtable
y.matsumoto
By effectively integrating multiple IT tools, you can automate data entry and speed up information sharing, which is expected to improve business efficiency. In particular, by linking Airtable and Misoca, you can significantly reduce the effort required to create estimates and prevent human errors. Utilizing the data registered in Airtable makes the creation of estimates in Misoca smoother. In this blog, we introduce the process of automatically creating estimates by linking Airtable and Misoca, along with specific examples of its benefits. This content is useful for those aiming to improve business efficiency or facing challenges in creating estimates, so please read to the end.
Recommended for
Those who want to improve business efficiency using APIs but are looking for specific implementation examples
Those who have introduced Airtable and Misoca and feel burdened by the estimate creation process
Those facing challenges with data entry errors or efficiency when creating estimates
Those who want to streamline team communication and improve the speed and accuracy of invoice creation
Benefits and Examples of Integrating Airtable and Misoca
Benefit 1: Reduction of Human Errors
By integrating Airtable and Misoca, you can reduce manual data entry tasks. This automation not only improves business efficiency but also prevents human errors associated with manual work. For example, when creating an estimate, you no longer need to manually enter all items, unit prices, quantities, and units. You can transfer the information registered in Airtable to Misoca's estimates, preventing input errors and omissions. This system allows for smooth and error-free estimate creation even during busy periods, thus improving business efficiency.
Benefit 2: Time Reduction in Estimate Creation
By linking Airtable and Misoca, you can quickly complete estimate creation in Misoca using the data registered in Airtable. Implementing this system can significantly reduce the time usually spent on collecting and entering purchased product information. As a result, staff can reduce the time spent on invoice creation, allowing them to focus on other tasks and potentially contributing to increased productivity. The ability to shorten the time for estimate creation may also enable quick responses to sudden estimate requests.
Benefit 3: Reduction of Data Entry Tasks
By integrating Airtable and Misoca, you can automatically register product information managed in Airtable into Misoca, eliminating the need for manual data entry. For example, when creating an estimate, there is no need to manually enter purchased product information, as you can directly use the data from Airtable in Misoca. This improves business efficiency, allowing staff to focus on other tasks and contributing to increased productivity. Additionally, it becomes easier to maintain data accuracy, reducing the time required for corrections and thus lightening the workload.
From here, we will explain how to create estimates in Misoca from Airtable using the no-code tool Yoom.
[What is Yoom]
How to Reflect Content Added to Airtable in Misoca Estimates
By using a Chrome extension to receive the destination ID linked to a specific client in Airtable via Airtable's API, and creating estimates in Misoca using Misoca's provided API, automation can be achieved.
Generally, programming knowledge is required to achieve this, but with the no-code tool Yoom, it can be easily accomplished without programming knowledge.
The integration process follows these steps.
Register Airtable and Misoca as My Apps
Copy the template
Set up triggers in Airtable and operations in Misoca
Turn on the trigger and start the flow
If you are new to Yoom, please register for free from here. If you are already registered, please log in!
Step 1: Integration of My Apps with Airtable and Misoca
1. How to Register with Airtable
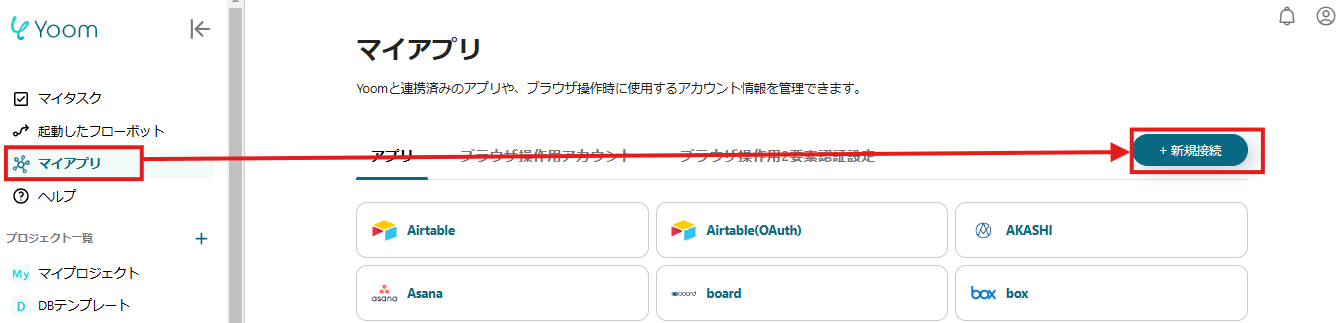
Click on "My Apps" and select Airtable from "New Connection".
Sign in to Airtable using any method.
Click "+ Add a base" at the bottom of the page and select a workspace. Click "Grant access" to complete the integration.
2. How to Register with Misoca Next, select Misoca from "New Connection".
The above screen will be displayed, so log in with the ID you want to integrate, and the integration will be complete.
This concludes the registration of My Apps with Airtable and Misoca. Press the "Try it" button on the banner below and let's start creating the flow right away!
Step 2: Setting Up the Trigger from the Airtable Record Detail Page
First, click on the item "Launch from Record Detail Page".
Please install the Chrome extension from the screen above.
This item is pre-configured, so please check for any errors and click "Next".
Enter the Base ID, Table ID, and Sample URL of the Launch Page.
Once you have finished entering, click "Test", and if there are no issues, click "Save".
Enter the above items again.
Let's test and save the settings.
Step 3: Obtain the Destination ID Linked to a Specific Client in Misoca
Next, click on the item "Obtain the Destination ID Linked to a Specific Client".
This page is pre-configured, so no changes are needed. Let's proceed to the next page as is.
Set the "Client ID" as shown in the screen above. By setting it this way, you can automatically obtain the "Client ID" from the Airtable URL set in Step 2.
Once the setup is complete, test it, and if there are no issues, click "Save".
Step 4: Create a Quotation in Misoca
Next, let's set up the item "Create Quotation".
This page is pre-configured, so no changes are needed. Let's proceed to the next page as is.
The issue date can be freely set, such as today, yesterday, end of the month, or beginning of the month. For example, if you want to specify "today" as the issue date, set it as shown in the screen above.
Set the "Destination ID" as shown in the screen above.
Set the items, unit price, quantity, and unit from "Launch from Record Detail Page". By setting it this way, you can automatically obtain the "items, unit price, quantity, unit" from the Airtable URL set in Step 2 and transfer them to the Misoca quotation.
Click "Test" and save the settings.
Step 5: Turn ON the Trigger
Finally, click "Turn ON Trigger" to check if the flow bot starts correctly. This completes the flow of "Creating a Quotation in Misoca from Airtable".
Introduction to Other Automation Examples Using Misoca and Airtable
1. This is a flow to automatically create invoices in Misoca from Airtable. By utilizing this flow, you can reduce manual input tasks and shorten working time. Additionally, it decreases the risk of input errors and omissions, enabling accurate invoice creation.
2. This is the flow to add clients from Airtable to Misoca. By utilizing this flow, you can streamline the process of adding clients and reduce working time. Since you can automatically add clients to Misoca based on the information registered in Airtable, it is possible to avoid duplicate data entry.
3. This is a flow where an invoice is created in Misoca and automatically sent via Gmail when the status is updated in Airtable. By utilizing this flow, you can automatically create and send invoices by detecting status updates in Airtable, reducing manual work. This helps prevent human errors and allows for the issuance of highly accurate invoices, which is expected to lead to improved customer satisfaction.
Summary
We introduced a method to automatically create quotes in Misoca based on Airtable data by integrating Airtable with Misoca. By utilizing this method, you can automate the manual data entry process, saving time and effort. Furthermore, you can automatically create accurate quotes in Misoca based on the information registered in Airtable, preventing human errors. As a result, you may improve operational efficiency and provide quotes to customers more quickly. Yoom, which was used to create the flowbot this time, allows integration with various apps. Please make use of it to improve your business efficiency.
The person who wrote this article
y.matsumoto
Until now, I have experienced sales and sales office work in the human resources industry.
Based on my experience in my previous job, I feel that the problems faced by various companies can be reduced by “automating operations.”
Through Yoom, we will continue to send out information on a daily basis so that we can solve your problems even a little bit!
Conventional RPA can only automate simple repetitive tasks, and the setup process was very complicated. With “hyperautomation,” which combines various technologies such as AI, API, RPA, and OCR, it is possible to automate many tasks that could not be realized until now more easily than before.
Most tools simply connect one app to another, leaving the complex tasks to you. Yoom goes much further: From document creation and browser automation to OCR and generative AI, Yoom handles it all seamlessly in one platform.
Why settle for basic integrations? Streamline your entire workflow with Yoom’s powerful hyperautomation.


.avif)


.avif)

.avif)
.avif)


