[No Programming Required] How to Automatically Integrate ChatGPT Data into WordPress
How to Integrate Applications
・
2025-05-20
[No Programming Required] How to Automatically Integrate ChatGPT Data into WordPress
t.aizawa
"It's such a hassle to post new articles on WordPress every day..." "Wouldn't it be convenient if I could use ChatGPT to post articles?" Have you ever thought about this? Especially when managing an owned media or blog, there are many tasks to handle, such as SEO optimization, creating and updating articles, and responding to comments.
This is where the integration of ChatGPT and WordPress comes in handy! For example, you can organize responses from a form using ChatGPT and save them as drafts in WordPress, or when a comment is posted on WordPress, you can summarize it with ChatGPT and create a draft in WordPress. This will allow you to save the trouble of manually creating articles and reduce working time.
This time, we will explain what you can do by integrating ChatGPT with WordPress and how to set up automation!
For those who want to try it quickly
By using Yoom, you can easily integrate ChatGPT with WordPress without any coding. Yoom provides templates for integrating ChatGPT with WordPress, so you can achieve integration immediately just by registering, even without API knowledge.
What You Can Do by Integrating ChatGPT with WordPress
By integrating ChatGPT with the WordPress API, you can automatically connect ChatGPT data to WordPress! For example, you can automatically perform data integration like the following without human intervention.
By clicking "Try it out" on the automation example you're interested in and registering an account, you can immediately experience the integration of ChatGPT and WordPress. Registration takes just 30 seconds, so feel free to give it a try!
Organize Form Content with ChatGPT and Create a Draft in WordPress
By utilizing this flow, you can automate the entire process from organizing form content to creating a draft in WordPress, thereby reducing the effort required for content creation. Additionally, using ChatGPT makes it easier to maintain a consistent style in your articles.
Regularly Summarize and Automatically Update Existing WordPress Articles with ChatGPT
This flow is recommended for blog operators who want to provide their readers with the latest information! By automating the process, ChatGPT can regularly summarize and automatically update WordPress articles. Additionally, it eliminates the hassle of manually summarizing and updating, which can be considered a benefit.
When a new comment is posted, summarize the content with ChatGPT and create a draft in WordPress
ChatGPT can automatically summarize comments from users and reflect the content in WordPress. This allows site administrators to quickly understand the content of the comments. Additionally, automation can save time on tasks!
Let's Create a Workflow to Integrate ChatGPT with WordPress
Now, let's actually create a workflow that integrates ChatGPT with WordPress! This time, we'll use Yoom to proceed with the integration of ChatGPT and WordPress without any coding. If you don't have a Yoom account yet, please issue one from this registration form.
[What is Yoom]
This time, we will create a workflow to organize form content with ChatGPT and create a draft in WordPress! The creation process is broadly divided into the following steps.
Integrate ChatGPT and WordPress into My Apps
Copy the template
Set up the app trigger
Collaborate with ChatGPT to generate text
Collaborate with WordPress to create a new post
Set the trigger to ON and complete the preparation for workflow operation
Step 1: Integrate ChatGPT and WordPress with My App
(1) After logging into Yoom, select "My App" from the left column and click "+ Add". From the app list in My App, click on ChatGPT. ※ To run actions using ChatGPT (OpenAI), you need to subscribe to OpenAI's paid API plan. Make sure your subscription details are in order so you can make payments smoothly when API usage fees occur! https://openai.com/ja-JP/api/pricing/
(2) From the "ChatGPT Registration" screen, enter the account name and access token, and click "Add". Please refer to the following site for how to obtain the account name and access token.
(3) Next, integrate WordPress. Similarly, click on WordPress from the app list in Yoom. From the "WordPress Registration" screen, check the red line, enter the account name, domain, username, and password, and click "Add".
Once the integration is complete, ChatGPT and WordPress will be registered in Yoom's My App.
This completes the My App registration. Next, let's set up triggers using templates!
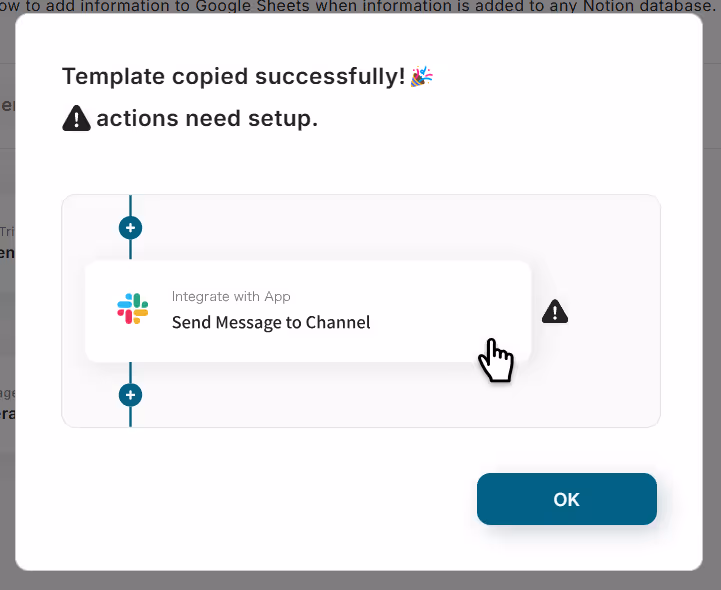
Step 2: Copy the Template
We will use the template introduced earlier. Click "Try it" on the banner below to copy it. Once copied, the template will be copied to your Yoom management screen as shown below, so press OK to proceed with the setup.
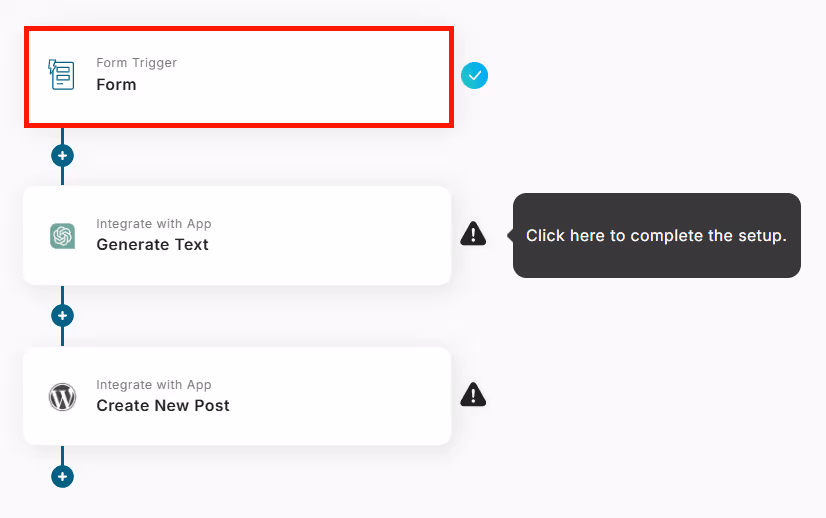
Step 3: Set Up App Trigger
(1) Use Yoom's form trigger to set up the WordPress draft creation form. Click on "Form" in the form trigger.
(2) From the "Create a Form" screen, select the question content and response method from the dropdown.
Scroll down and enter the completion message title and completion message description for the completion page. The entered content will be automatically sent to the respondent. Once the input is complete, click "Next" at the bottom.
(3) From the "Review Form Display & Settings" screen, check the form display. By clicking on preview form and preview completion page in the red frame, you can see how it will appear to the respondents.
Preview Form
Completion Page
If there are no issues with the form content, click "Save".
Step 4: Integrate with ChatGPT to Generate Text
(1) Next, integrate with ChatGPT to generate text. Click "Generate Text".
(2) From the "Select Linked Account and Action" screen of ChatGPT, check that there are no errors in the account information to be integrated with ChatGPT, keep the action as "Generate Text", and click "Next".
(3) From the "API Connection Settings" screen, use the retrieved value to select "Content Details" in the "Message Content". By using the retrieved value, you can reference the information obtained from the form trigger!
The following are not required fields. Please enter the necessary items. The role determines the position from which ChatGPT outputs responses when interacting with users.
Role: Select from "User", "System", "Assistant"
Temperature, Maximum Tokens: Check the red line and enter directly
Model: Select from options
Once the input is complete, click "Test" at the bottom, and if no errors occur, click "Save". The value of the Retrieved data obtained here will be used in the next step!
Note: Inthis case below, the test isn't conducted, so there isn't any text generated by ChatGPT in the response content frame.
Step 5: Integrate with WordPress to Create a New Post
(1) Next, integrate with WordPress to create a new post. Click "Create New Post".
(2) From the "Select linked Account and Action" screen of WordPress, check that there are no errors in the account information to be integrated with WordPress, keep the action as "Create New Post", and click "Next".
(3) From the "API Connection Settings" screen, check the red frame and configure the WordPress plugin settings.
Slug: Select from retrieved value
Status: Select from dropdown
Password: Check the red line and enter directly
Title: Select from retrieved value
Scroll down and use the retrieved value to enter the title and content. By including the "Response Content" obtained in Step 4 (3) in the content, you can reflect the response content generated by ChatGPT in WordPress!
The following fields are not required. Please enter the necessary items. Once the input is complete, click "Test" at the bottom, and if no errors occur, click "Save".
Step 6: Set Trigger to ON and Prepare for Flow Operation
Congratulations! All settings are now complete. Once the settings are complete, a menu like the one below will be displayed, so turn the trigger ON.
Try actually starting the flow bot to see if the form content is organized by ChatGPT and a draft is created in WordPress!
If You Want to Integrate WordPress Data with ChatGPT
This time, we introduced how to integrate data from ChatGPT to WordPress, but if you want to integrate data from WordPress to ChatGPT, please also use the template below.
Automatically Summarize New WordPress Posts with ChatGPT and Append the Summary to WordPress
By utilizing this flow, when you make a new post on your blog or website, ChatGPT will automatically summarize the article and reflect the summarized text in WordPress. This will reduce the effort of manual input and prevent input errors.
Automatically Generate SEO Meta Descriptions by Analyzing WordPress Articles with ChatGPT
This flow involves ChatGPT automatically analyzing articles published on WordPress to generate optimal Meta Descriptions. By automating this process, it can help improve rankings in search engines. Additionally, automatic generation is expected to reduce the workload of the person in charge.
Other Automation Examples Using ChatGPT and WordPress API
It is possible to automate various tasks using ChatGPT and WordPress API. If you find something interesting, please give it a try!
Automation Examples Using ChatGPT
You can automatically categorize inquiries with ChatGPT and send notifications via Slack. Based on data from Google Sheets, you can generate guidance emails with ChatGPT and send them.
Examples of Automation Using WordPress
It is possible to notify chat tools or email when a WordPress article is published. You can use the content of the submitted form to create a new post in WordPress.
Conclusion
With the integration of ChatGPT and WordPress, creating and managing blogs will become easier. You can automatically organize articles based on form responses using ChatGPT and create drafts in WordPress, or summarize existing articles with ChatGPT and update them in WordPress. <span class="mark-yellow">By implementing this automation, you should be able to reduce manual effort and provide the latest data!</span> Additionally, it is possible to achieve advanced automation by analyzing articles published on WordPress with ChatGPT to automatically generate SEO Meta Descriptions.
If you are interested in automation using Yoom, please create a free account here. Registration is simple and can be completed in about 30 seconds, so you can set it up during your work! This automation is especially recommended for those who want to streamline their daily blog posts!
The person who wrote this article
t.aizawa
We aim to make your daily work easier! We will be sharing information on how to improve work efficiency using Yoom!
Conventional RPA can only automate simple repetitive tasks, and the setup process was very complicated. With “hyperautomation,” which combines various technologies such as AI, API, RPA, and OCR, it is possible to automate many tasks that could not be realized until now more easily than before.
Most tools simply connect one app to another, leaving the complex tasks to you. Yoom goes much further: From document creation and browser automation to OCR and generative AI, Yoom handles it all seamlessly in one platform.
Why settle for basic integrations? Streamline your entire workflow with Yoom’s powerful hyperautomation.


.avif)


.avif)


.avif)


