


The template will be copied to my project.
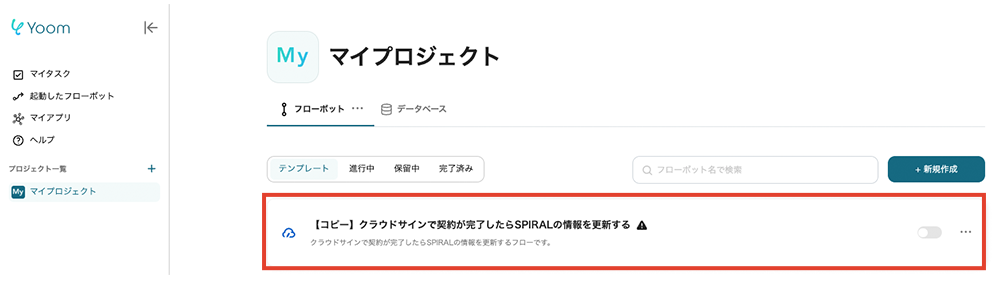
Click the title in the red frame to transition to the settings screen.
Step 3 App Trigger "When Document Signing is Completed"

Please click the first process. Set the flow bot to activate when the document signing is completed in CloudSign, and extract the output.
(1/2) Select Integration Account and Action
The following are pre-configured, so no operation is required.
- Title
- Database App
- Account Information Linked with CloudSign
- Execute Action
→ Click Next
(2/2) API Connection Settings for App Trigger

- Trigger Activation Interval
- You can select from 5 minutes, 10 minutes, 15 minutes, 30 minutes, or 60 minutes.
*The shortest activation interval varies depending on your subscription plan.
→ Click Test → Success, Document ID, etc., have been extracted from the output.

→ Click Save
Step 4 Extract Data Using Regular Expressions from Text Data

Here, we will extract the customer name from the document title.
(1/1) Set Operation Conditions

- Extraction Target
- Click the edit field to open a dropdown showing the output obtained from the previous process. Select the document title from there. Clicking it will automatically embed the citation code.

- Specify Extraction Location with Regular Expression
- Enter 【 (?<=_)(.*) 】 to extract the customer name from the document title.
- >Help: List of Help Pages on Regular Expressions
- >Help: How to Set "Extract Data from Text"
- This corresponds to a title structure like 〇〇_▲▲ Corporation. If the title structure is different, you need to change the regular expression.
→ Click Test → Success, the customer name was extracted from the document title in the output.

→ Click Save
Step 5 "Search Records" to Integrate with App

Click the third process of the template. Search for the record to update from the contract information managed in SPIRAL.
(1/2) Select Integration Account and Action
The following are pre-configured, so no operation is required.
- Title
- Database App
- Account Information Linked with SPIRAL
- Execute Action
→ Click Next
(2/2) API Connection Settings

You will need the information of the database to update, so please open the SPIRAL management screen.

- App ID
- Click the edit field to open a dropdown showing candidates. Selecting one will quote the ID.
- Alternatively, from the SPIRAL management screen, select "App Management" or "Application Management" from the top menu. A list of apps will be displayed, so select the target app. The app ID is displayed on the app details page or included at the end of the URL.
- Database ID
- Click the edit field to open a dropdown showing candidates. Selecting one will quote the ID.
- Alternatively, access "Database Management" in the SPIRAL management screen. A list of databases linked to the app will be displayed, so select the target database. The database ID can be confirmed on the database details page or when the database is opened. This is often displayed at the end of the URL as well.
- Field Identifier Name
- Fields (items) managed within the database will be displayed. Check which field corresponds to the information you want to add from this list.
- Each field is displayed with a "Identifier Name" or "Field Name," which is the name used in the database. This is the field identifier name.
The field identifier name is treated as a unique ID within the SPIRAL database and is required when specifying which field to map data from Webflow to.
- Search Value
- This is pre-configured. The citation code for the customer name obtained in the second process is embedded.
→ Click Test → Success, the output can obtain record ID, etc.

→ Click Save
Step 6 "Update Records" to Integrate with App

Click the fourth process. Here, we will operate the SPIRAL database to update.
(1/2) Select Integration Account and Action
The following are pre-configured, so no operation is required.
- Title
- Database App
- Account Information Linked with SPIRAL
- Execute Action
→ Click Next
(2/2) API Connection Settings

- App ID
- Enter the same value as the ID entered in the previous setting.
- Database ID
- Enter the same value as the ID entered in the previous setting.
- Record ID
- Click the edit field to open a dropdown showing candidates. Alternatively, it can be obtained by the following method.
- Open the Database: Open the form or database where the data you want to obtain the record ID is stored.
- Display Records: Display the list of records in the database. In SPIRAL, each record is automatically assigned a unique ID (record ID).
- Confirm Record ID: The record ID is displayed by default for each record. If you cannot find the record ID column, you need to enable the record ID column in the display settings.
◆ Record Information

- Field Identifier Name
- Click the edit field to open a dropdown showing candidates. Alternatively, it can be obtained by the following method.
- Move to Field Settings Screen: Enter the edit mode of the form or database and display the list of fields. From the management screen, move to the "Field Settings" or "Item Settings" section of the target form or database.
- Check Field Details: Each field has a user-friendly "Display Name" and "Identifier Name" (field ID or internal name). When you open the field edit screen, the identifier name is displayed. The identifier name (internal name) is the name used internally by the system and is used when integrating with APIs or other systems.
- Value
- This is pre-configured. The citation code for the signing date is embedded.
→ Click Test → Success
→ Click Save
Step 7 Turn the App Trigger [ON]
Once all processes are configured, a completion screen will pop up.

Turn the Trigger [ON] to complete the setup. The integration work is complete here! Integration was achieved in a short time without using programming. Here is the template used this time.


.avif)
.avif)
.avif)


