

.avif)

1. Hover over the banner and click "View Details"
2. Click "Try this template" on the page you navigated to
3. Register for Yoom
※ If you have already registered, the login screen will be displayed, so please log in.
Step 2: Set a trigger to activate when an email is received in Outlook
※ If you copied the template, proceed to "7".
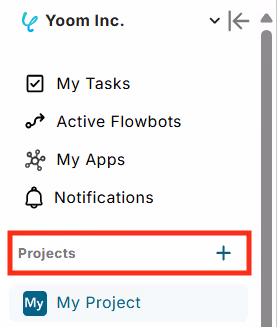
3. Select any project from the project list.
4. Select "+Create" and click "Create from Scratch".

5. Enter any title and select "Trigger from an app event" as the trigger condition for starting the flow bot.

6. Select Outlook from the app list.

7. Configure "Select Your Account".
・App Trigger Title: Set it as you like. (Example: "When mail is received")
・Account information connected to Outlook: Set any account.
・Trigger Action: Select "When an email is received".

8. Set the trigger interval and mail folder ID, then perform a test.
Once confirmed successful, click "Save".
※ The trigger interval can be selected from 5, 10, 15, 30, or 60 minutes. The shortest trigger interval varies depending on the plan. Generally, a shorter setting is recommended.

Step 3: Set an action to retrieve information from email attachments
9. Click the "+" button below the app trigger created in Step 2.

10. Search for Outlook.

11. Select Outlook.

12. Configure "Select Linked Account and Action".
・Title: Set it as you like. (Example: "Get Email Attachment Information")
・Linked Account: Select as you like.
・Action: Select "Get Email Attachment Information".

13. Click "Next".
14. Configure API connection settings.
・Email ID: Refer to the retrieved value from Step 2 - Procedure 8 as noted.

15. Perform a test and if successful, click "Save".
Step 4: Set an action to download email attachments
16. Click the "+" button below the operation created in Step 3.

17. Search for Outlook.
18. Select Outlook from the app list.
19. Configure "Select Linked Account and Action".
・Title: Set it as you like. (Example: "Download Email Attachments")
・Account information to integrate with Outlook: Select as you like.
・Action: Select "Download Email Attachments".

20. Click "Next".
21. Configure API connection settings.
・Email ID: Refer to the retrieved value from Step 2 - Procedure 8 as noted.
・File ID: Refer to the retrieved value from Step 3 - Procedure 15 as noted. (Assuming there is one attachment here)

22. Perform a test and if successful, click "Save".
Step 5: Set an action to upload files to OneDrive
23. Click the "+" button below the operation created in Step 4.

24. Search for OneDrive.
25. Select OneDrive from the app list.

26. Configure "Select linked Account and Action".
・Title: Set it as you like. (Example: "Upload File")
・Linked Account: Select as you like.
・Action: Select "Upload File".

27. Click "Next".
28. Configure API connection settings.
・Drive ID: Select from the options. (This is an identifier that cannot be obtained on OneDrive.)
・Destination Folder Name: Select from the options.
※ If the folder name is not in the options, enter it directly.
・Destination Folder Item ID: Select from the options.
※ The options will change if you enter the above "Destination Folder Name".
・File Name: Set it as you like.
※ It can be referenced from the retrieved value of Step 3 - Procedure 15.
・File Attachment Method: Select "Use retrieved value" and "Downloaded Files".

29. Perform a test and if successful, click "Save".
Finally, switch the trigger of the saved flow to "ON" to activate it.

This completes the flow of "Automatically uploading attachments received in Outlook to OneDrive".


.avif)
.avif)


