【Easy Setup】How to Automatically Link Microsoft Excel Data to Box
How to Integrate Applications
・
2025-05-20
【Easy Setup】How to Automatically Link Microsoft Excel Data to Box
h.hamada
If there are additions or changes to the data in Microsoft Excel, there are times when the corresponding Box folders or file data also need to be newly added or updated. However, isn't it often the case that managing such cloud storage tends to be put off? You might think, "I'll organize it when I have time..." and end up not knowing which files are linked to the Microsoft Excel data, leading to a frustrating search.
If you want to avoid such situations as much as possible, it's recommended to integrate Microsoft Excel with Box! By utilizing API-based app integration, you can automatically link Microsoft Excel data to Box!
When you hear about API integration, it might sound difficult, but with Yoom, which allows app integration without programming, there's no problem even without specialized knowledge. We provide a step-by-step guide with images on how anyone can easily integrate apps, so take this opportunity to experience automation!
For those who want to try it quickly: By using Yoom, you can easily integrate Microsoft Excel and Box with no code. Yoom offers templates for integrating Microsoft Excel and Box, so even without API knowledge, you can achieve integration immediately just by signing up.
What You Can Do by Integrating Microsoft Excel and Box
By integrating Microsoft Excel with Box's API, you can automatically sync Microsoft Excel data with Box! For example, you can automate data synchronization like the following without any manual intervention.
Simply click "Try it out" for the automation example you're interested in and register an account to immediately experience the integration of Microsoft Excel and Box. Registration takes just 30 seconds, so feel free to give it a try!
When content including files is submitted from a form, add the information to Microsoft Excel and upload the files to Box
This flow is recommended for those who want to centrally manage data collected from forms in Microsoft Excel and efficiently save submitted files to Box.
Regularly back up specific Microsoft Excel files and save them to Box
This flow is recommended for those who find the backup process of regularly updated Microsoft Excel files cumbersome, as it allows you to automatically store Microsoft Excel data in the cloud.
Determine the type of received emails with Gemini and add them to the target Google Document
This flow is recommended for those who receive a large number of emails daily in their mail app and wish to organize the content smoothly.
Let's Create a Flow to Integrate Microsoft Excel and Box
Let's get started by creating a flow that integrates Microsoft Excel and Box! We will use Yoom to proceed with the integration of Microsoft Excel and Box without any coding. If you do not have a Yoom account yet, please create one using this registration form.
[What is Yoom]
This time, we will create a flow bot that adds information to Microsoft Excel and uploads files to Box when content, including files, is submitted from a form! The creation process is broadly divided into the following steps.
Integrate Microsoft Excel and Box with My Apps
Copy the template
Set up triggers in Microsoft Excel and actions in Box
Turn on the trigger and complete the preparation for flow operation
Step 1: Integrate My App
Here, we will integrate Yoom with each app to enable operations. First, after logging into Yoom, click on My Apps in the left menu and then click the Add button on the right.
Integrate Microsoft Excel 1. Search Enter Microsoft Excel in the search box and click on the Microsoft Excel icon.
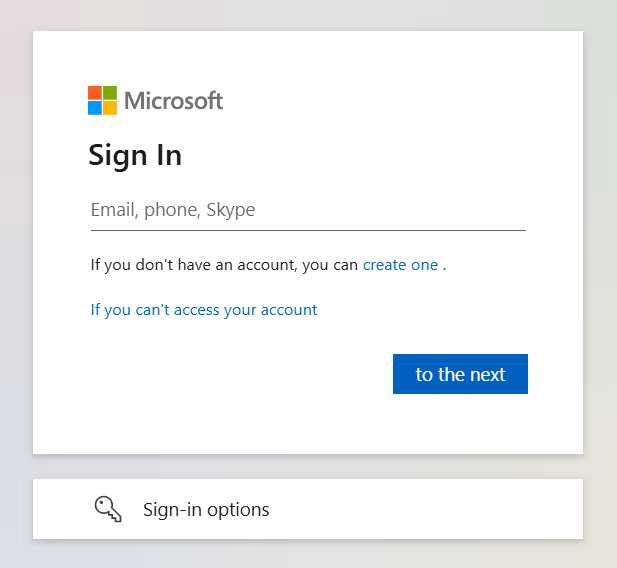
2. Sign in to an Account
Enter your account information and sign in.
Return to the Yoom screen, and if the following display appears, the integration is complete!
[Note] There are personal and business plans (Microsoft 365 Business) for "Microsoft 365 (formerly Office 365)." If you do not have a business plan, authentication from Yoom may not work properly, so please be careful.
Integrate Box
1. Search Enter Box in the search box and click on the Box icon.
2. Grant Access To integrate with My Apps, you need to grant permissions to Yoom. Select "Allow access to Box."
Return to the Yoom screen, and if the following display appears, the integration is complete!
Step 2: Copy Template
Next, please copy the template to be used this time from below.
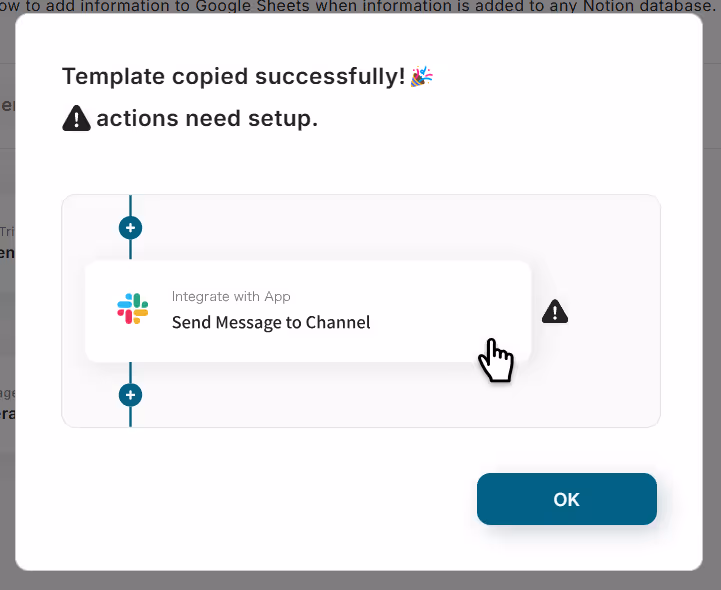
1. Click "View Details" on the banner above 2. When the screen switches, click "Try this template" 3. If you haven't registered with Yoom yet, please register * If you have already registered, the login screen will be displayed, so please enter your login information. 4. The template will be copied to your Yoom management screen as shown below, so press OK to proceed with the settings.
Step 3: Form Trigger Settings
1. Select the inquiry form in the red frame
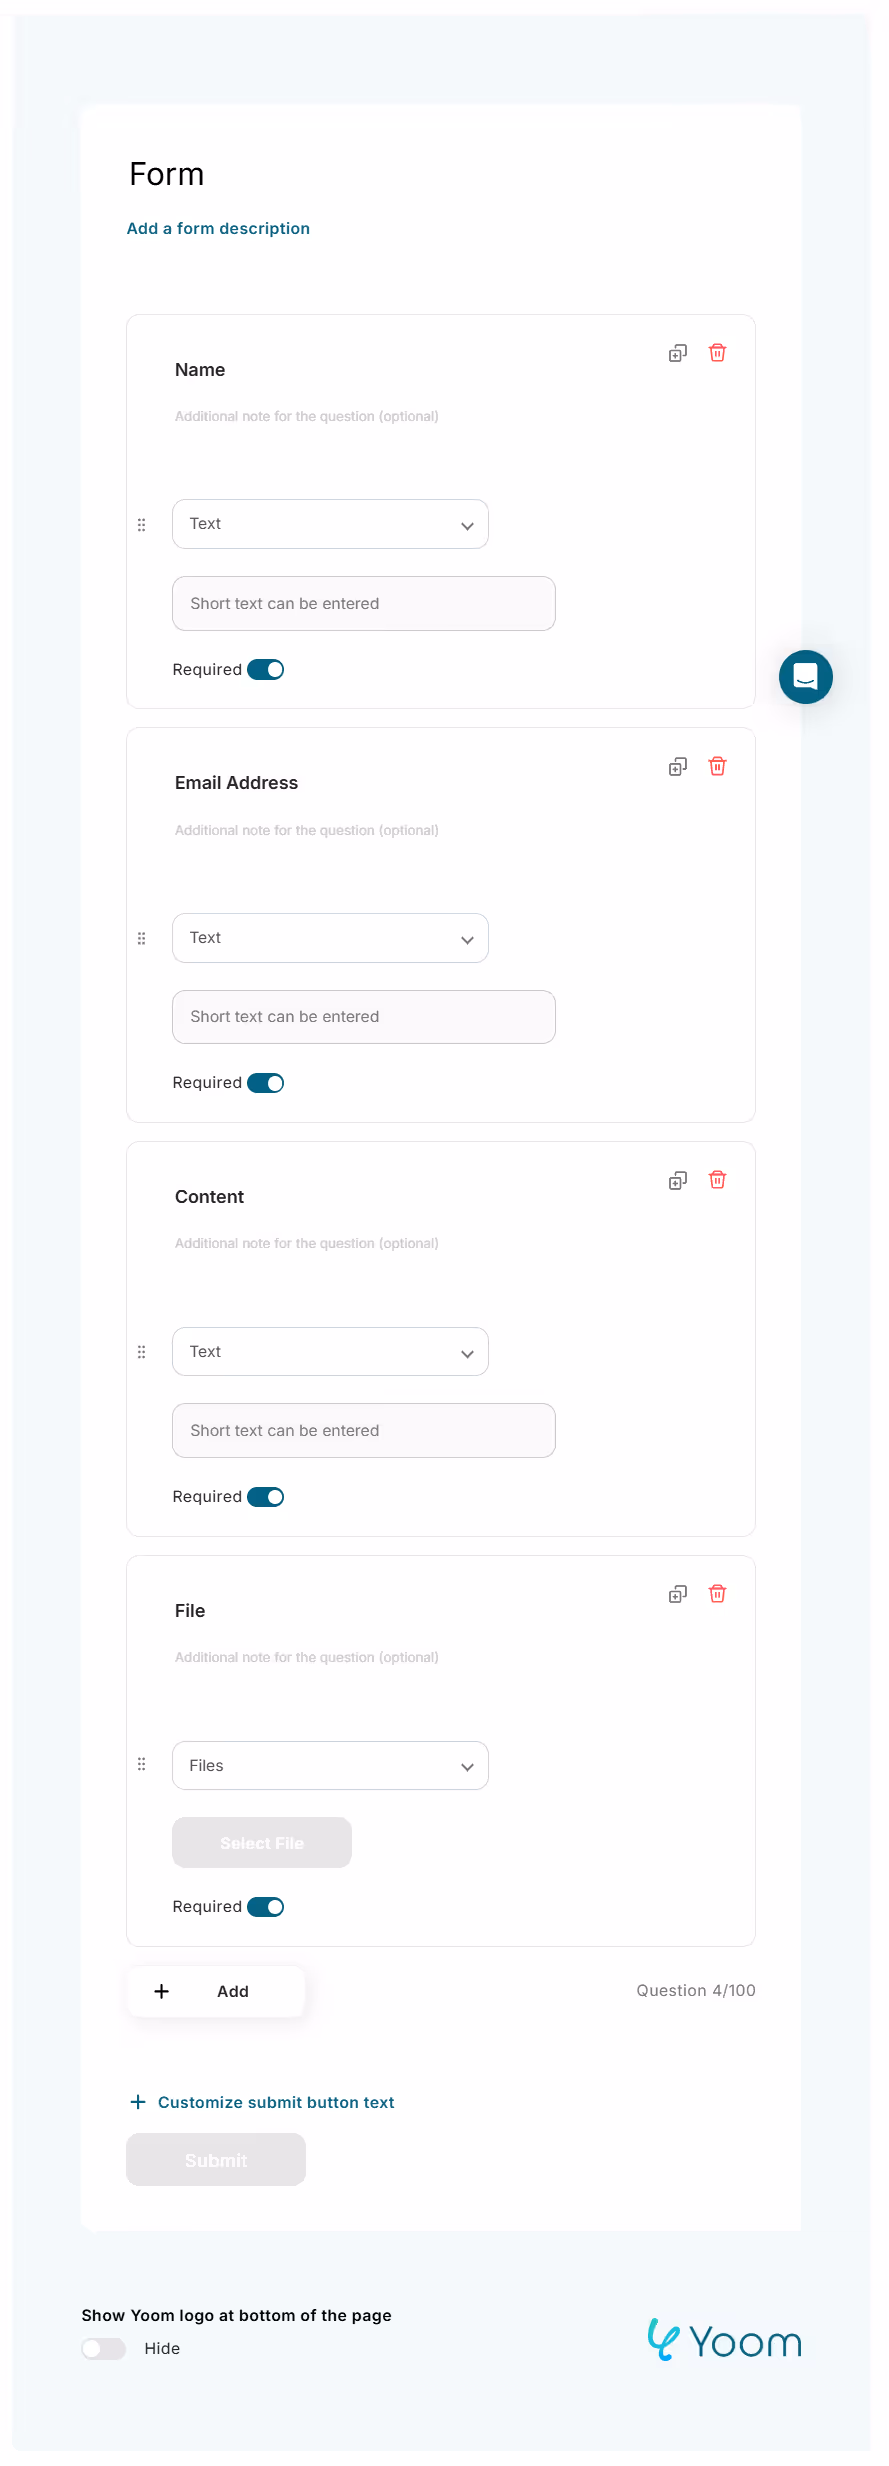
2. Create a form Create the content of the inquiry form. This time, we created a form with the content shown in the image below. You can delete questions with the trash can icon or add new questions with the "Add Question" button. Customize it to your liking.
As you scroll down the page, you will find the settings for the completion page. This is an optional input field, but you can set the content of the page that will be displayed after the inquiry is completed. This time, we entered the content as shown below, but if you don't have any particular preferences, leaving it blank is fine.
Once you have completed the input, please press "Next" to proceed.
3. Confirm form display and detailed settings Let's check the display content of the form you just set by pressing the red frame below.
A preview page of the form content will be displayed as shown in the image below, so please check if there are any errors in the content. If you want to make corrections, please go back to the previous screen using the back button in the upper left corner and make the corrections.
Preview page
Completion page
If there are no issues with the preview, let's enter the acquired value items at the bottom of the page. This time, for test operations, we entered the content as shown below. File attachment is also required, so please prepare an appropriate file and enter it.
Once the input is complete, select "Save" and proceed to the next step.
Step 4: Microsoft Excel Database Operation Settings
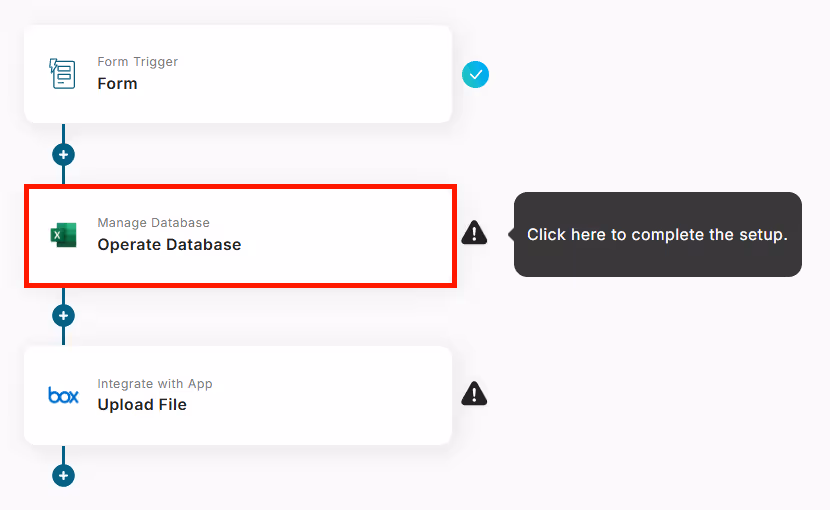
1. Select "Add Record" in the red frame
2. Database Integration After this, there will be an item to select the Microsoft Excel database, so if you haven't created the Microsoft Excel where you want to add records, please create it at this time. This time, we created it with the content shown below. Please save it to OneDrive or SharePoint.
Return to the Yoom screen and enter the database integration items. When you click on the input items, there are items where suggestions will be displayed as shown below. You can enter them easily, so please make use of them.
File storage location: You can choose either OneDrive or SharePoint. Please select the location where you saved the Microsoft Excel you created earlier.
Drive ID: Click on the input item and select the drive where you saved the Microsoft Excel.
Item ID: Click on the input item and select the Microsoft Excel file you created.
Sheet name: Click on the input item and select the sheet name of the Microsoft Excel.
Table range: If you want to specify the table range within the Microsoft Excel file, please enter it. If you don't have any particular preferences, leaving it blank is fine.
Once the input is complete, please press "Next".
3. Detailed settings for database operations Here, we will set the records to be added to Microsoft Excel. When you click on the input fields as shown in the image below, the output will be displayed, so please select and enter each item. * For more details on the output, please refer to here. * For more details on how to add output, please refer to here.
Name: We selected to add the name provided in the inquiry form to the record.
Email address: We selected to add the email address provided in the inquiry form to the record.
Inquiry content: We selected to add the content provided in the inquiry form to the record.
Once the input is complete, please press "Test". If the test is successful, the output will be displayed as shown below. Please check if the record content you set earlier is reflected.
Just in case, let's also check if the record has been added to Microsoft Excel. If you can confirm that the data has been reflected as shown in the image below, it's OK. Return to the Yoom screen and press "Save" to proceed to the next step.
Step 4: Microsoft Excel Database Operation Settings
1. Select "Upload File" in the red frame Click on the file upload with the BOX icon. The screen will transition, and the content you entered in Step 1 will be reflected. If no corrections are needed for the title, etc., click "Next" as is.
2. API Connection Settings We will set up to save the file attached in the inquiry form to BOX.
File name: When you click on the input field, the output will be displayed, so please select the file.
Content ID of the storage folder: The content ID is the part at the end of the URL displayed when you open the folder in Box where you want to save it. For example, in the image below, the blacked-out part is the content ID.
File attachment method: This time, we will use the output to save the file, so it's fine to leave it unchanged.
Once the input is complete, please select "Test". If the test is successful, the output will be displayed as shown below. If the data is reflected in the uploaded content ID, it's OK.
Just in case, let's check if the file is saved in Box. If you can confirm that the file registered from the inquiry form is saved as shown in the image below, it's OK. Finally, return to the Yoom screen and select "Save".
Step 5: Turn on the Trigger and Check Operation
Now that the settings are complete, let's turn the trigger "ON" and check the operation.
If You Want to Link Box Data to Microsoft Excel
This time, we introduced how to link data from Microsoft Excel to Box, but if you want to link data from Box to Microsoft Excel, please also use the template below.
When a File is Uploaded to Box, Add Metadata to Microsoft Excel
This flow is recommended for those who manage many files using Box and are spending time organizing data, or for those who want to streamline data management with Microsoft Excel.
Periodically retrieve a list of files stored in a specific folder on Box and add them to Microsoft Excel
This flow is recommended for those who use Box and find file management within folders time-consuming, or for those who want to manage file lists in Microsoft Excel but find manual updates cumbersome.
Other Automation Examples Using Microsoft Excel and Box API
By leveraging the APIs of Microsoft Excel and Box, various automations can be achieved! How about the following automations, for example?
Automation Examples Using Microsoft Excel
Automatic data entry becomes possible, reducing the effort required for input!
Automation Example Using Box
In addition to notifying you when a file is uploaded, it can also synchronize between cloud storages!
In Conclusion
By integrating Microsoft Excel data with Box, managing and creating files and folders will become smoother! This will reduce the effort of editing Microsoft Excel every time there is an addition to Box data, potentially improving work speed and preventing creation errors. If tasks that used to take a lot of time can be completed quickly, it may reduce the workload and lead to business improvement.
The key point of this integration is that it is possible to achieve without programming knowledge! With Yoom, such app integration becomes easy. Even beginners in app integration can easily implement it and try out automation in their spare time!
I have approximately eight years of experience in sales and administration at an insurance agency. While handling customer interactions, I have coordinated operations across various branches, striving for efficiency and standardization. In addition to my primary responsibilities, I will continue to disseminate various content using company-designated tools to contribute to the operational efficiency of all stakeholders.
Conventional RPA can only automate simple repetitive tasks, and the setup process was very complicated. With “hyperautomation,” which combines various technologies such as AI, API, RPA, and OCR, it is possible to automate many tasks that could not be realized until now more easily than before.
Most tools simply connect one app to another, leaving the complex tasks to you. Yoom goes much further: From document creation and browser automation to OCR and generative AI, Yoom handles it all seamlessly in one platform.
Why settle for basic integrations? Streamline your entire workflow with Yoom’s powerful hyperautomation.


.avif)


.avif)
.avif)


