Google スプレッドシートとGmailの連携イメージ
How to Integrate Applications

2025-04-18

How to scan a business card, save it to Google Sheets, and send a thank-you email via Gmail

n.watanabe

When there are many opportunities for exchanging business cards, manual data management can become cumbersome. Are you struggling with input errors and the complexity of management?

This is where the integration of Google Sheets and Gmail using the no-code tool Yoom comes in handy.Scan business card data, automatically read and save it with OCR. Furthermore, by sending thank-you emails via Gmail, you can ensure smooth follow-ups.

This article introduces the steps for managing business cards using Yoom. If you want to reduce effort and manage business cards efficiently, please refer to this guide.

Recommended for

  • Sales representatives who want to utilize Google Sheets to create a database without manually entering business card information
  • Corporate information managers who want to centrally manage business card data in Google Sheets and share and utilize information across the team
  • Sales managers who want to integrate with Gmail to automatically register business card information into customer lists and streamline email sending
  • IT department personnel who want to combine OCR and Gmail to automatically notify stakeholders of business card scan results
  • Administrative staff who want to stop managing paper business cards and transition to cloud management with Google Sheets

For those who want to try it immediately

This article introduces the integration method using the no-code tool "Yoom".
No complicated settings or operations are required, and even non-engineers can easily achieve this.
You can start immediately using the template below, so please give it a try!

[What is Yoom]

Now, let's explain how to use the no-code tool Yoom to "read business card data with AI-OCR, store it in Google Sheets, and send Gmail."

How to scan business card data, save it to Google Sheets, and send a thank-you email via Gmail

To digitize business card information and streamline management, you can build a flow that automatically reads business card data using OCR and stores it in Google Sheets. By using OCR, you can extract the text information from business cards as text data and organize and save it in specific columns of Google Sheets.

Generally, implementing such a flow requires programming knowledge, but with the no-code tool Yoom, you can easily achieve it without programming knowledge.

The general flow is as follows:

  • Integrate Yoom with the apps you use
  • Copy the template
  • Configure the flow details
  • Turn on the trigger

If you are not using Yoom, please register for free here. If you are already using Yoom, please log in.

Step 1: Integrate Google Sheets and Gmail with My Apps

After logging into Yoom, click "New Connection" from the "My Apps" menu on the left.

When the search window appears, enter the app name and search.

Since both integrations are Google-related, please refer to the following Google Sheets integration steps for Gmail integration as well.

Google Sheets My Apps Integration

Before integrating Google Sheets with My Apps, prepare the sheet you will use.
If you prepare the sheet after integration, information retrieval may not work well. (There is no problem if you change the sheet content later.)

To integrate Google Sheets, you need to log in with your Google Account.

After searching for Google Sheets in "New Connection," click "Sign in with Google" as shown in the image above.
Then, select your Google account and proceed to the "Log in to Yoom" screen, and click "Next."

When you proceed, a screen will appear asking Yoom for permission to access your Google account, so click "Continue."

Click "Continue," and you will automatically return to the Yoom My Apps list page, completing the integration.

Make sure it is added to the My Apps list.

This completes the preparation.
Next, move on to configuring the flow details, and click "Try it" from the banner below to copy the template.

Step 2: Form Trigger Settings

The first setting is "Upload Business Card Data." Prepare test business card data and start setting up.
First, configure the form content for uploading business card data.

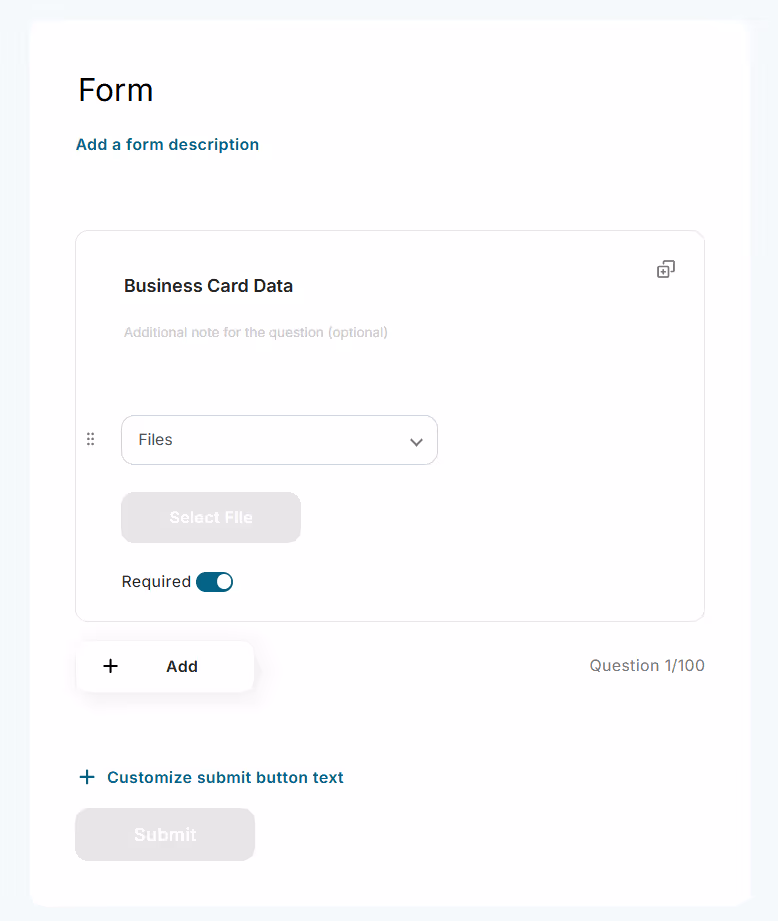
If there is any information needed other than what is on the business card, set it up here for input.

You can also set up the message displayed on the completion screen after form submission. Enter it if necessary.

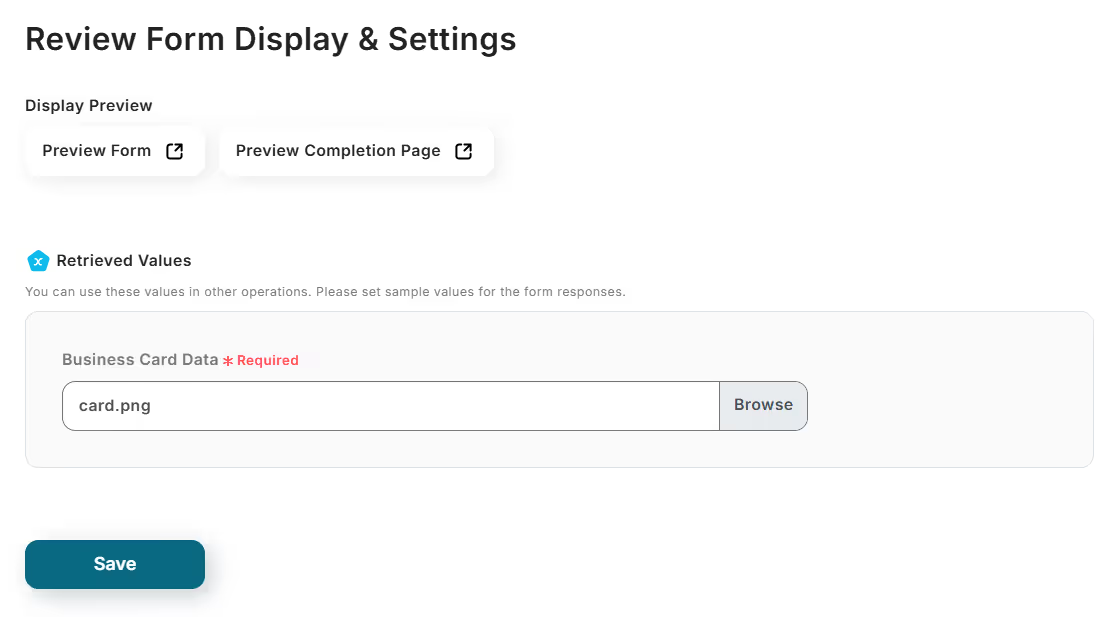
On the next page, confirm the form content and upload the business card data.
Normally, business card data is extracted from the information submitted in the form, but since it's before the flow is activated, upload the data manually.

Once the settings are complete, click "Save" to finish the trigger settings.

Step 3: Text Recognition Settings

Next, set up the text recognition from the business card data.

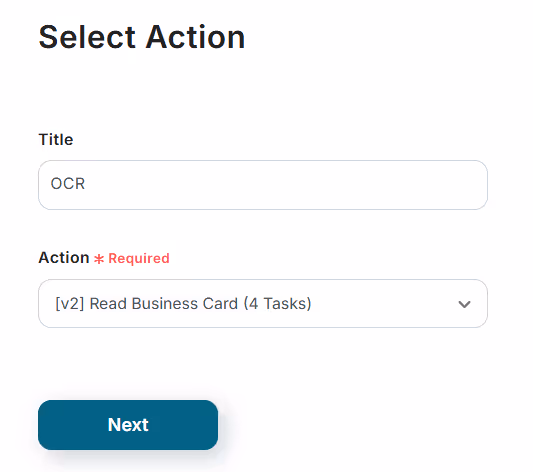
Set up the actions for reading the business card.
・OCR or AI operations for transcribing audio to text are available only in the Team Plan and Success Plan. For Free Plan and Mini Plan, the operations set in the flow bot will result in an error, so please be careful. Paid plans like Team Plan and Success Plan offer a 2-week free trial. During the free trial, you can use restricted apps and AI features (operations).

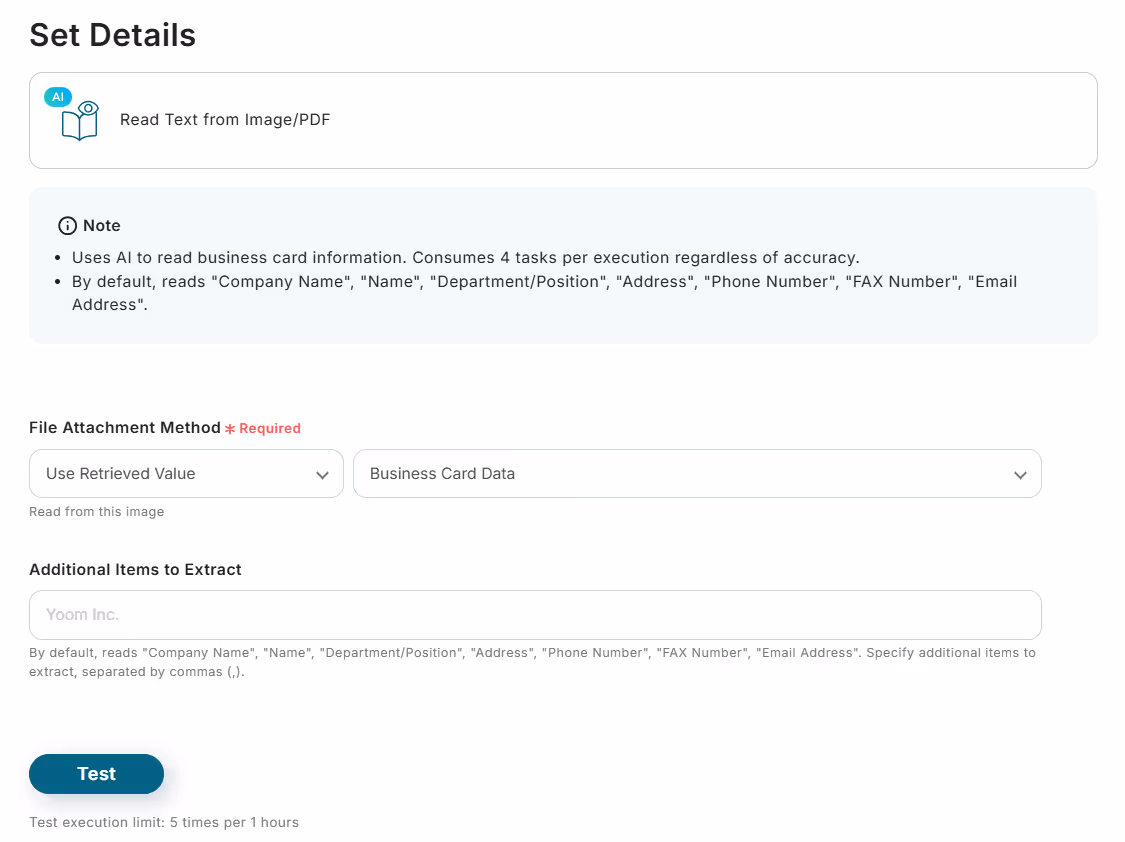
Next, set up the content to be read from the business card. If there is any information needed other than the default settings, configure it and then click "Test."

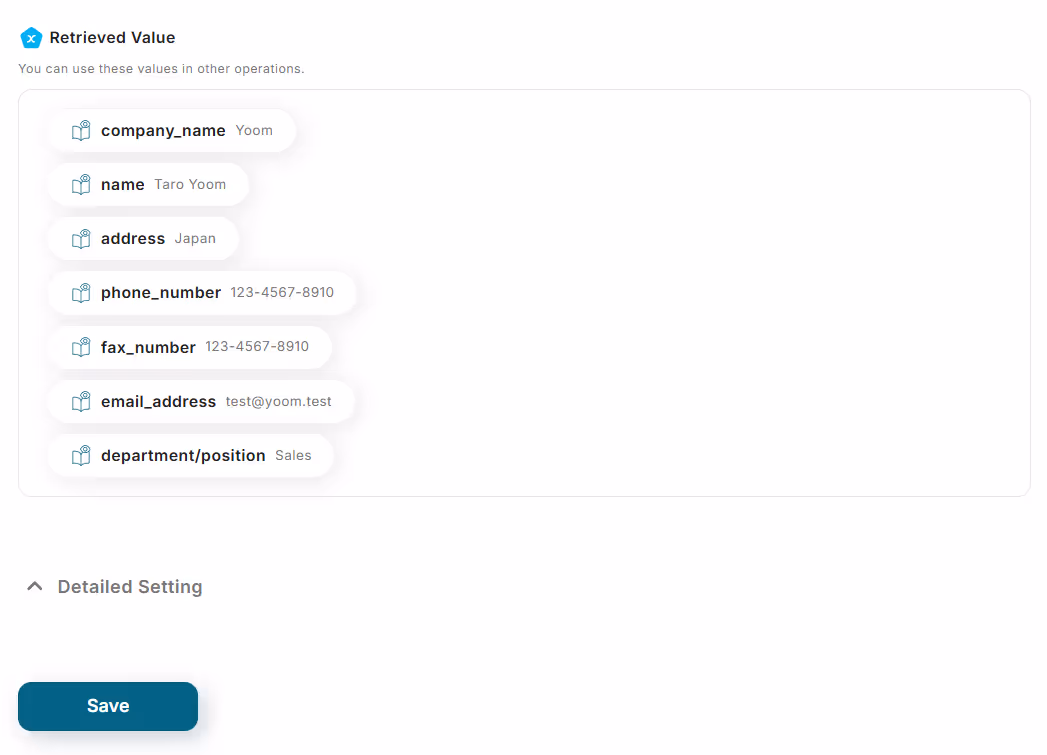
Once the test is successful, you can obtain the business card information.
After confirmation, click "Save" to complete the text recognition settings.

Step 4: Setting to Add Records to Google Sheets

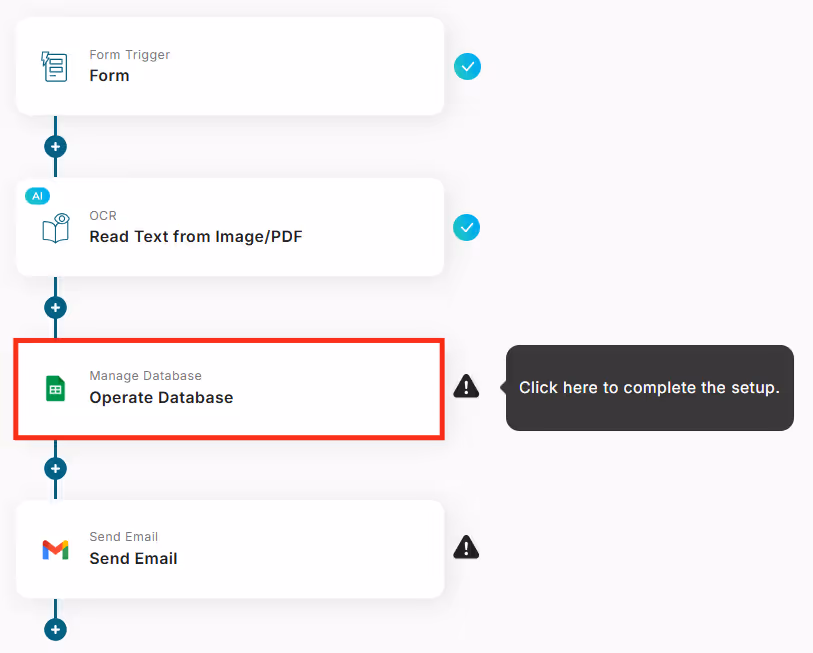
Next, in the "Add Record" settings, configure it so that the obtained information can be added to Google Sheets.
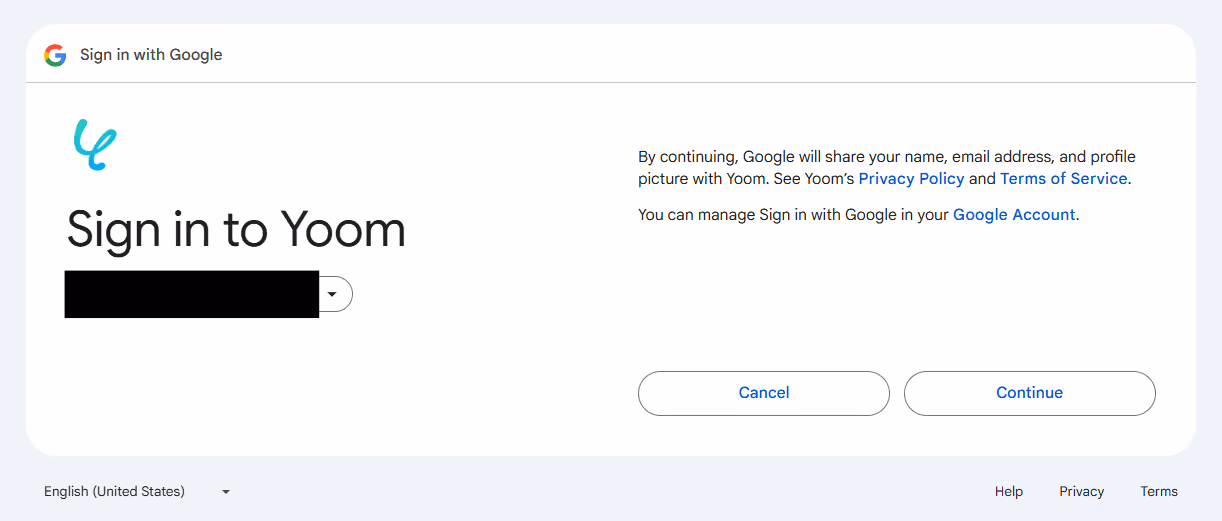
On the first page, after verifying account information and correcting the title, enter the necessary information for database integration.

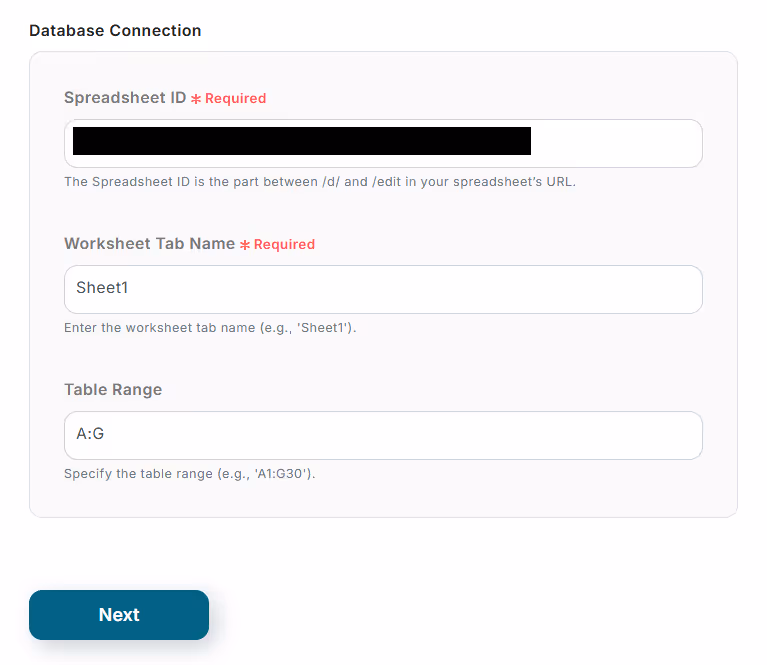
After entering the information of the sheet created with the linked account, click "Next" to confirm the integration.
Next, set it up so that business card information is reflected in each item of Google Sheets.

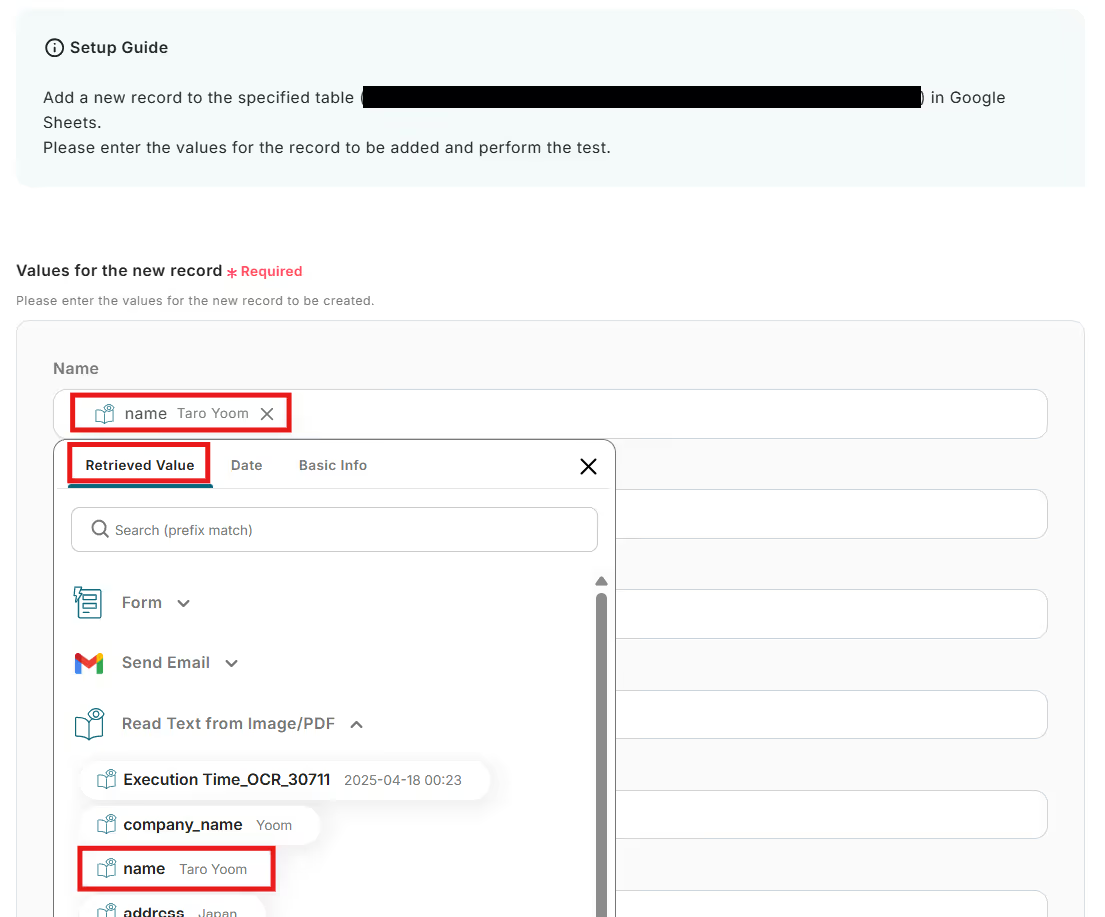
Use the output to assist with input.
Once all inputs are complete, click "Test" to verify if the information is reflected in the specified sheet.

Once the test is successful and the information, including the email address, is reflected, click "Save" to complete the Google Sheets settings.

Step 5: Setting to Send Thank You Emails

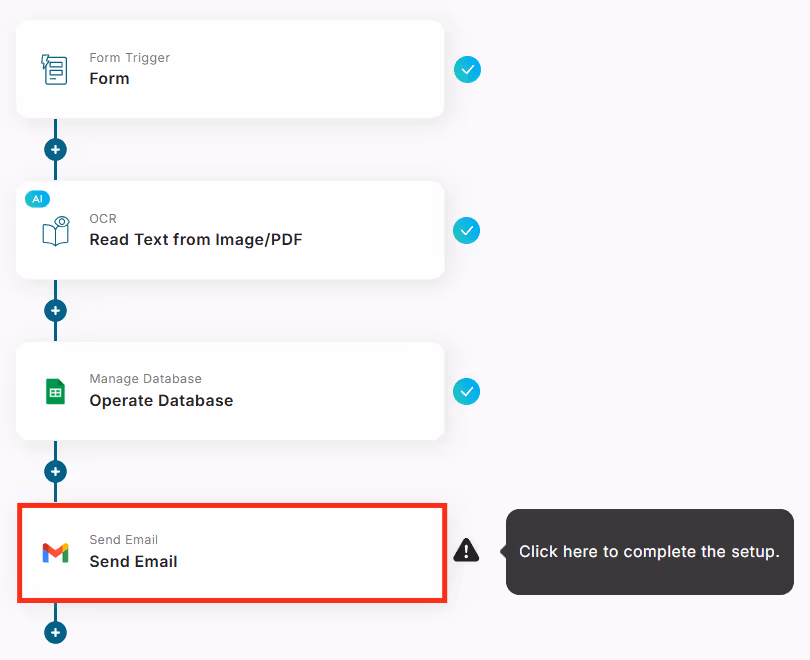
The final setting is "Send Thank You Emails." Create a template based on the obtained information and set it up to send emails.

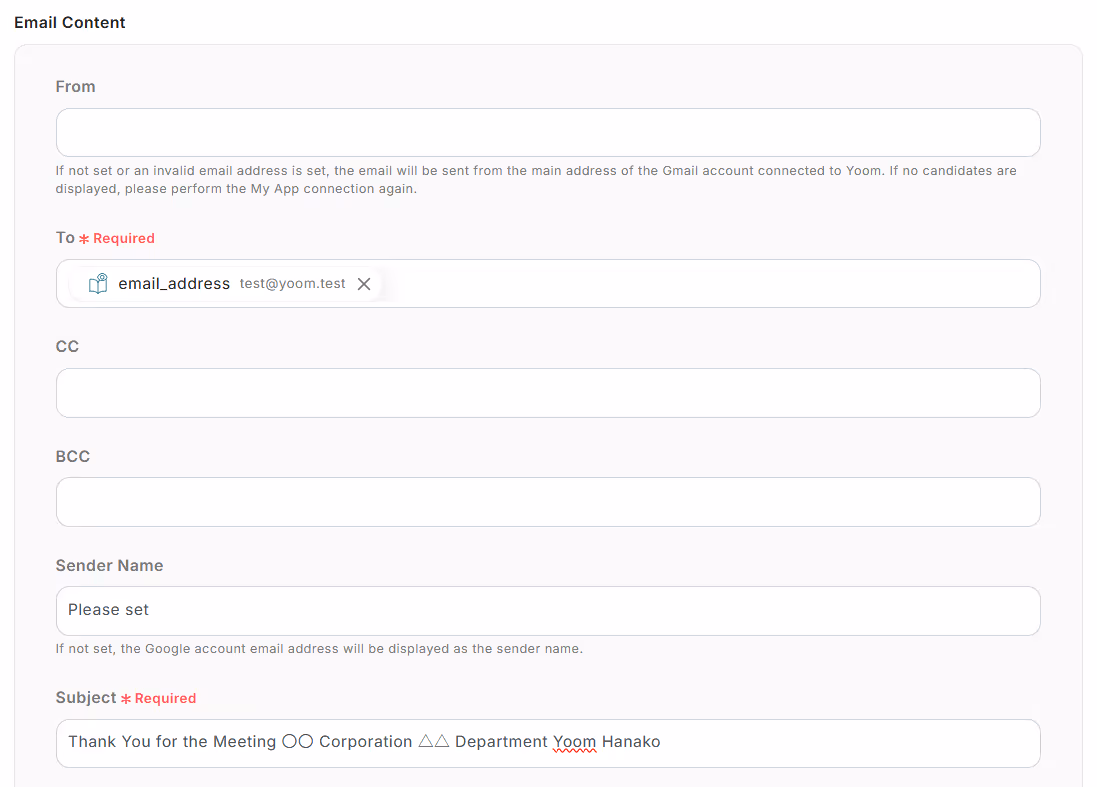
The output is already reflected in the recipient. Enter the sender's email address, subject, etc.
Create the email body using the output to assist with the text.

By utilizing the output, you can make use of the information obtained from the business card.
Once all settings are complete, check the email content on the next screen, click "Test," and verify if the email is delivered as specified.

Once the email is successfully delivered, click "Save" to complete all settings.

Finally, turn on the trigger to activate the flow.

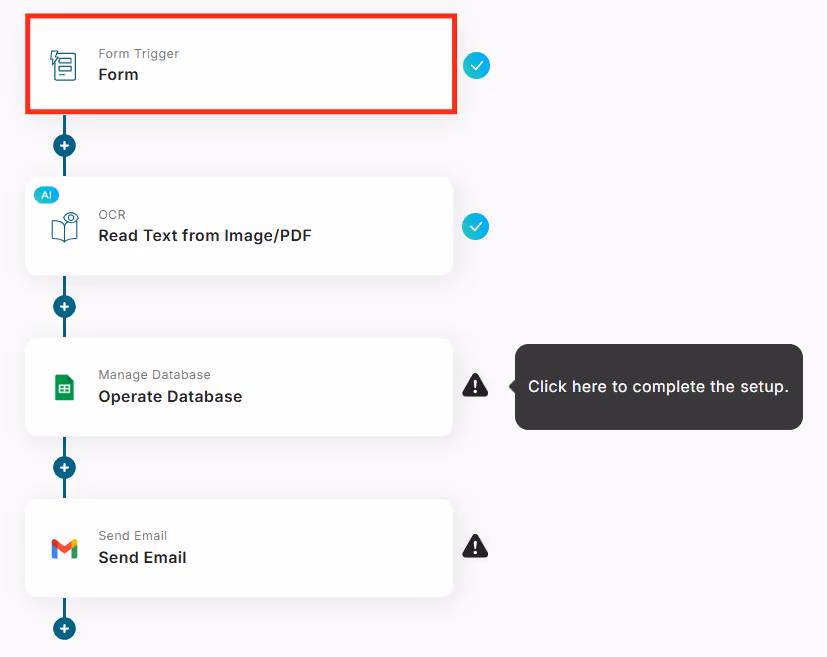
The flow has now started. The flow you set up is as follows.

To Further Automate

Branching Based on Form Content

You can specify where to save in Google Sheets or whether to send an email based on the submitted form content.

For example, after exchanging business cards, you can ask the other party to choose whether they want a meeting within a week, and based on that, change the information storage location and whether to send an email.

You can quickly access information on clients that need follow-up, allowing you to work more efficiently.
You can also change the branching conditions based on the form content, so try setting it according to your business needs!

Receive Notifications After Sending Emails

You can also receive notifications after sending a thank-you email.
It's important to keep track of this information as it can lead to the next approach.

Additionally, receiving notifications can strengthen your support system, such as "approaching again after a certain number of days."

Other Automation Examples Using Google Sheets and Gmail

Besides the integrations introduced today, various automations can be achieved by utilizing the APIs of Google Sheets and Gmail.

If there's something you're interested in, please give it a try!

Automation Examples Integrating Google Sheets and Gmail

It is possible to issue invoices based on customer information in Google Sheets and send them via Gmail, or to add survey results received in Gmail to Google Sheets.
Additionally, you can notify information from Google Sheets via Gmail when a specific schedule is reached.

Automation Example Using Google Sheets

Notify Chat Tools When a Row is Added in Google Sheets

Automatically notify Slack, Discord, etc., when a row is added in Google Sheets.

Add the content registered in the database to Google Sheets

Automatically add the content registered in Airtable, Salesforce, etc., to Google Sheets.

Issue documents based on information from Google Sheets

Automatically create documents such as freee invoices and Google Docs based on the content registered in Google Sheets.

Examples of Automation Using Gmail

Forwarding Files Received in Gmail to Chat Tools

Automatically forward files received in Gmail to Slack, Discord, etc.

Send a Template Email via Gmail from the Lead Details Page

Send a template email with one click from customer management pages like Salesforce or HubSpot.

Save documents received in Gmail to cloud storage

Automatically save documents received in Gmail to services like DropBox or OneDrive.

Benefits and Specific Use Cases of Integrating Google Sheets and Gmail

Benefit 1: Streamlining Data Entry Tasks

<span class="mark-yellow">By utilizing OCR, the need for manual entry of business card information is eliminated, leading to increased efficiency in operations.</span> Traditionally, managing business card information required entering data manually for each card, but with automatic processing through OCR, this task can be reduced.

For example, if a sales representative receives numerous business cards at a trade show, they can simply scan them to digitize the data, which is then organized and stored in Google Sheets.
This not only reduces the time spent on data entry but also minimizes errors that can occur with manual input.

Benefit 2: Easier Search and Utilization of Business Card Information

Storing business card information in Google Sheets makes searching and utilizing it easier. When business cards are kept in physical form, finding a specific client's card requires flipping through files, but <span class="mark-yellow">by digitizing them, you can instantly find the relevant data by searching for names or company names in Google Sheets.</span>

For instance, if you want to create a list of clients in a specific industry based on past interactions, you can quickly extract business card data that meets your criteria using Google Sheets' filter function.
This can lead to more efficient planning and execution of sales activities and marketing strategies.

Benefit 3: Smoother Information Sharing Within Teams

Since Google Sheets is managed in the cloud, information can be shared in real-time with multiple members. <span class="mark-yellow">This allows the entire team to share the latest customer information, rather than individual sales representatives managing business card information separately.</span>

For example, if the entire sales team needs to be aware of new client information, using Google Sheets allows the business card information entered by the representative to be quickly shared within the team. This makes it easier to understand who is interacting with which customers, potentially improving the quality of customer interactions.

Conclusion

To streamline business card management, integrating Google Sheets and Gmail while utilizing AI with Yoom is recommended. By using OCR, scanned business card data is automatically saved in Google Sheets, and thank-you emails can be sent from Gmail, enabling hassle-free customer interactions.

It's easy to implement without any coding, so no special skills are required. If you want to streamline your operations, why not start by registering for a free trial with Yoom?

The person who wrote this article
n.watanabe
I have been an SEO writer for 5 years and have continued to write under the motto “easy to read” and “easy to convey.” I want to bring the convenience of Yoom, which can be linked to apps without programming knowledge, to many people!
Tags
Automation
Integration
Google Sheets
Gmail
OCR
Related Apps
App integration
No items found.
What is Yoom hyperautomation?
Conventional RPA can only automate simple repetitive tasks, and the setup process was very complicated.
With “hyperautomation,” which combines various technologies such as AI, API, RPA, and OCR, it is possible to automate many tasks that could not be realized until now more easily than before.
Don't Just Connect Apps—Automate Everything
Most tools simply connect one app to another, leaving the complex tasks to you. Yoom goes much further: From document creation and browser automation to OCR and generative AI, Yoom handles it all seamlessly in one platform.

Why settle for basic integrations? Streamline your entire workflow with Yoom’s powerful hyperautomation.
Learn more about Yoom
Helpful Materials
I understand Yoom! 3-piece set of materials
Download materials
Understand in 3 minutes! Yoom service introduction materials
Download materials
Find out by Before After! Yoom Case Study Collection
Download materials
See a list of useful materials