How to Integrate Applications

2024/10/16

How to update Microsoft Excel information when a contract is completed in GMO Sign by integrating GMO Sign with Microsoft Excel

t.aizawa

With the integration of GMO Sign and Microsoft Excel, information from GMO Sign is automatically reflected in Microsoft Excel once a contract is completed.
By combining GMO Sign, which allows for easy electronic signing of contracts, with Microsoft Excel, which excels in data management, you can achieve automatic updates of contract information and real-time progress tracking. Furthermore, centralizing data enables accurate analysis.
This article introduces the specific benefits and methods of integrating GMO Sign with Microsoft Excel.

Benefits of Integrating GMO Sign with Microsoft Excel

Benefit 1: Reduction of Human Error Risk

Once a contract is completed with GMO Sign, the information can be automatically reflected in Microsoft Excel. This eliminates the need for manual data entry, reducing the risk of human error.
For example, once a contract is signed, the contract date and signer information are automatically entered into specified cells in Microsoft Excel, facilitating smooth contract management and contributing to operational efficiency and error prevention.

Benefit 2: Easy Data Analysis and Report Creation

By integrating GMO Sign with Microsoft Excel, you can consolidate contract information.
This allows you to utilize the information from GMO Sign and the analytical capabilities of Microsoft Excel to visualize contract trends and performance, or automatically generate periodic reports. For instance, by graphing the trends in the number of contracts or changes in contract amounts, you can quickly obtain the information necessary for decision-making.

[About Yoom]

How to Create a Flow for Integrating GMO Sign with Microsoft Excel

Now, let's create a flow together using a template to "update Microsoft Excel information when a contract is completed with GMO Sign"!

You can copy the template we will use by clicking "Try it" on the banner below.

Before Getting Started

If you do not have a Yoom account, please create one from the "Yoom Account Creation Page" below.
For basic operations of Yoom, please check "Getting Started with Yoom."

Yoom Account Creation Page

Getting Started with Yoom

Now, let's get started!

Step 1: Integrate GMO Sign and Microsoft Excel with My Apps

(1) After logging into Yoom, select "My Apps" from the left menu and click "+ New Connection."

(2) From the list of new connections in My Apps, click on GMO Sign.
(3) On the "New Registration for GMO Sign" screen, enter the account name and access token.
For detailed instructions on registering GMO Sign with My Apps, please refer to the site below.

About Integration with GMO Sign

Once the input is complete, click "Add."
(4) Next, register Microsoft Excel with My Apps. Similarly, click on Microsoft Excel from the list of new connections in Yoom.
※ Microsoft365 (formerly Office365) has plans for home use and general business use (Microsoft365 Business). If you are not subscribed to the general business plan, authentication may fail.
(5) A sign-in screen will appear. After entering your account, click "Next."

Once the integration is complete, GMO Sign and Microsoft Excel will be registered in Yoom's My Apps.

This completes the registration of My Apps.
Next, let's set up triggers using a template!

Step 2: Setting Up Signatures in GMO Sign

(1) We will use the template introduced earlier. Click "Try it" on the banner below.

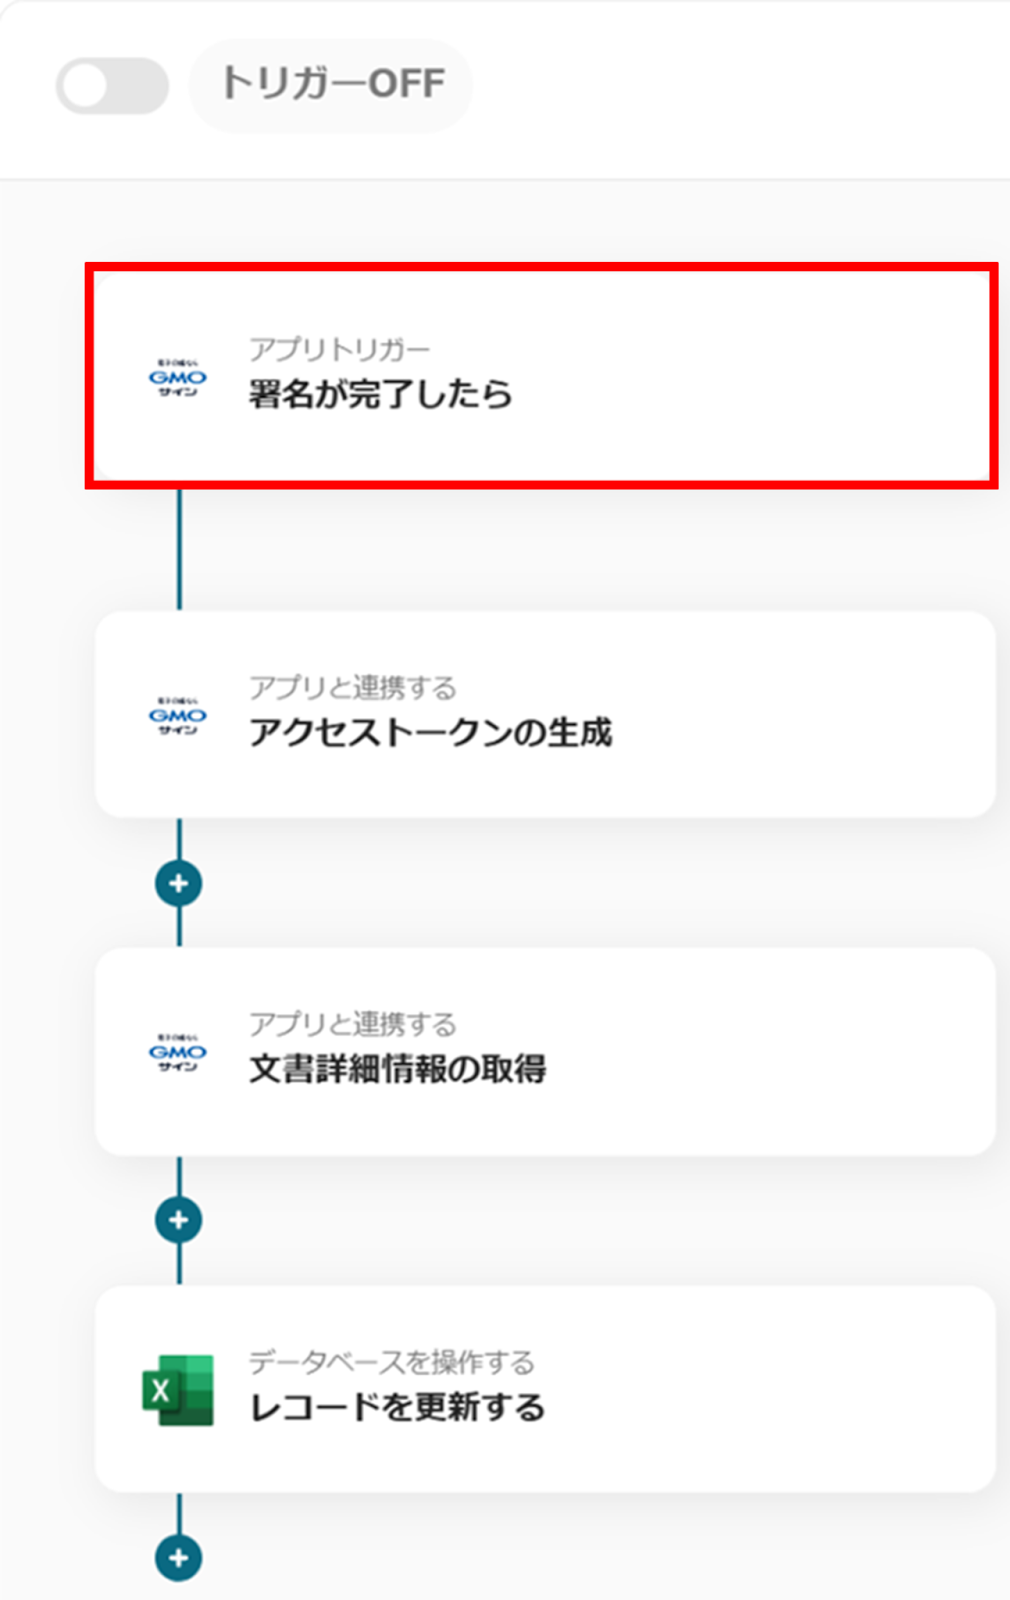
Click on "When the signature is completed" in the app trigger.

(2) From the "Select Linked Account and Action" screen of GMO Sign, check if there is any error in the account information linked with GMO Sign, keep the trigger action as "When the signature is completed" and click "Next".

(3) From the "App Trigger Webhook Event Reception Settings" screen, copy the Webhook URL and configure it in the GMO Sign management screen.

Once the setup is complete, click "Test" and if no error occurs, click "Save".

Step 3: Generate Access Token by Linking with GMO Sign

(1) Next, generate an access token by linking with GMO Sign.
Click "Generate Access Token".

(2) From the "Select Linked Account and Action" screen, check if there is any error in the account information linked with GMO Sign, keep the action as "Generate Access Token" and click "Next".

(3) From the "API Connection Settings" screen, enter the secret key and customer ID.

Once the input is complete, click "Test" and if no error occurs, click "Save".

Step 4: Retrieve Document Details

(1) Next, retrieve the document details from GMO Sign.
Click "Retrieve Document Details".

(2) From the "Select Linked Account and Action" screen, check if there is any error in the account information linked with GMO Sign, keep the action as "Retrieve Document Details" and click "Next".

(3) From the "API Connection Settings" screen, enter the secret key, customer ID, and access token.
Select the access token and transaction ID from the output.

Once the input is complete, click "Test" and if no error occurs, click "Save".

Step 5: Update Microsoft Excel Records

(1) Next, set up to update Microsoft Excel records.
Click "Update Records".

(2) From the "Database Integration" screen of Microsoft Excel, check if there is any error in the account information linked with Microsoft Excel, and keep the execution action as "Update Records".

Scroll down and enter the file storage location, site ID, file name (optional), item ID, sheet name, and table range.
・File Storage Location: Select from the dropdown
・Site ID: Select from the options
・File Name (Optional): Select from the options or enter directly
・Item ID: Select from the options
・Sheet Name: Select from the options
・Table Range: Enter directly

(3) From the "Database Operation Detailed Settings" screen, enter the conditions for the records you want to update.
By clicking "Add Trigger Condition", you can add conditions.

Scroll down and select the values for the updated records from the output.

Once the input is complete, click "Test" at the bottom, and if no error occurs, click "Save".
(4) Finally, click "Turn on Trigger".

This completes the flow bot "Update Microsoft Excel information when the contract is completed with GMO Sign".

Other Automation Examples Using GMO Sign and Microsoft Excel

At Yoom, there are many other examples of automation using GMO Sign and Microsoft Excel, so let me introduce a few.

1. Create a contract with GMO Sign from Google Form information and send a signature request

Based on the information from Google Forms, a contract is automatically created with GMO Sign, and a signature request is sent to the person in charge. This can help eliminate errors and the hassle of corrections. This flow is recommended for those who want to reduce contract creation time.

2. Once the document signing is completed with GMO Sign, store the file in Google Drive

By integrating with Google Drive, you can automatically store files in Google Drive once the document signing is completed with GMO Sign. Automation is expected to prevent human errors such as incorrect storage locations or omissions.

3. Create documents in Microsoft Excel based on responses to Google Forms

By integrating with Google Forms, you can automatically create various documents such as estimates, application forms, and request forms when responses are submitted to Google Forms. This is expected to prevent errors caused by manual input. It is recommended for clerks who frequently create estimates, application forms, and request forms.

For those who want to check templates using GMO Sign and Microsoft Excel, please visit the following site.

List of Flowbot Templates Using GMO Sign

List of Flowbot Templates Using Microsoft Excel

Summary

The integration of GMO Sign and Microsoft Excel seems to enhance the efficiency of contract management!
By automatically updating data upon contract completion, it prevents operational errors and makes it easier to grasp the progress in real-time.
Additionally, by utilizing Microsoft Excel's analysis functions based on GMO Sign information, it will become easier to create reports and perform data analysis based on contract information.
If you are interested after reading this article, let's aim to improve work efficiency by using this integration!

The person who wrote this article
t.aizawa
I hope everyone's everyday work will be much easier! We will continue to send out information on improving work efficiency using Yoom!
Tags
GMO Sign
Microsoft Excel
Automation
Integration
App integration
No items found.
What is Yoom hyperautomation?
Conventional RPA can only automate simple repetitive tasks, and the setup process was very complicated.
With “hyperautomation,” which combines various technologies such as AI, API, RPA, and OCR, it is possible to automate many tasks that could not be realized until now more easily than before.
Don't Just Connect Apps—Automate Everything
Most tools simply connect one app to another, leaving the complex tasks to you. Yoom goes much further: From document creation and browser automation to OCR and generative AI, Yoom handles it all seamlessly in one platform.

Why settle for basic integrations? Streamline your entire workflow with Yoom’s powerful hyperautomation.
Learn more about Yoom
Helpful Materials
I understand Yoom! 3-piece set of materials
Download materials
Understand in 3 minutes! Yoom service introduction materials
Download materials
Find out by Before After! Yoom Case Study Collection
Download materials
See a list of useful materials