[No Code Required] How to Automatically Integrate Google Drive File Data into Salesforce
How to Integrate Applications
・
2025-05-20
[No Code Required] How to Automatically Integrate Google Drive File Data into Salesforce
r.suzuki
"Manually saving inquiry details to a file and then registering them as leads in Salesforce"— are you repeating such tasks every time? This can lead to input errors and missed follow-ups, and many people may feel burdened by the work.
On the other hand, when trying to integrate Google Drive and Salesforce, it often seems like knowledge of APIs and programming is necessary, which can cause hesitation in implementation.
In this article, we introduce an automated workflow using the no-code tool Yoom to add files to Google Drive based on form responses and register leads in Salesforce. We provide a clear step-by-step explanation of a system that enhances work accuracy and improves response speed, so if you're looking to streamline integration with minimal effort, be sure to read to the end!
For those who want to try it quickly
By using Yoom, you can easily integrate Google Drive and Salesforce without any code. Yoom offers pre-prepared templates for integrating Google Drive and Salesforce, allowing you to achieve integration immediately upon registration, even without API knowledge.
What You Can Do by Integrating Google Drive and Salesforce
By integrating the APIs of Google Drive and Salesforce, you can automatically sync data from Google Drive to Salesforce! For example, you can perform data synchronization like the following automatically, without human intervention.
Add Files to Google Drive Using Form Responses and Register Leads in Salesforce
This flow automatically saves files to Google Drive based on form responses and registers leads in Salesforce. <span class="mark-yellow">It streamlines inquiry handling and customer management, leading to smoother sales activities.</span>
Let's Create a Google Drive and Salesforce Integration Flow
Now, let's actually create a flow that integrates Google Drive and Salesforce!
This time, we will use Yoom to proceed with the integration of Google Drive and Salesforce without any coding. If you do not have a Yoom account yet, please register through this form to create an account.
[What is Yoom]
This time, we will create a flow bot that adds files to Google Drive using form responses and registers leads in Salesforce!
The creation process is broadly as follows:
Integrate Google Drive and Salesforce with My Apps
Copy the template
Set up Google Drive triggers and Salesforce actions
Set the trigger to ON and complete the flow operation preparation
Step 1: Connect Google Drive and Salesforce with My Apps
[Preparation Salesforce] When connecting Salesforce with Yoom, some settings are required on the Salesforce side as well. After logging in, click the settings button in the upper right corner and proceed with the settings. Please refer to this for detailed information. How to Register My Apps in Salesforce | Yoom Help Center
1)After logging into your Yoom account, register the app you will use next. Click "My Apps" and select "+ Add".
2)A list of apps that can be connected with Yoom will be displayed, and you can search for each app one by one from the search window.
[Google Drive My Apps Connection]
Once you can select Google Drive, log in with your Google account.
[In the Case of Salesforce]
Once you can select Salesforce, log in with the account name you will use. ※ If you are already connected with other services, the API connection with Yoom may not work properly. Please be careful.
On the access confirmation screen, click "Allow". 3)Once registration is complete, an icon will be displayed in My Apps. Check if the icon of the registered app is displayed.
Step 2: Copy the Template
Now, let's explain using the template.
1) First, click on the "Try it" icon.
2) The following confirmation screen will appear, click "OK".
Once displayed as below, the template has been copied.
The title and details can be edited by clicking on them. Additionally, the copied template is saved in My Projects, so you can also open it from there.
Step 3: Set a trigger to activate when the form is answered
Click on the icons with "!" displayed on the right in order from the top to set the operations. 1) First, let's click on "Form"!
2) Create a response form. This time, we are creating a form to collect information such as name, address, and phone number. Edit according to the information you want to obtain. Click on "Review Page" at the top right to check the actual display.
Once the form is created, click "Next".
3) Enter the obtained values. This will be displayed as a sample response in the flow. Once the input is complete, "Save".
Step 4: Set an action to upload files to Google Drive
1) Return to the flow and click on the icon "Integrate with apps Upload files".
2) Ensure the action "Upload files" is selected and click "Next".
3) Enter the required fields.
Select the folder ID to store by clicking the box, and choose the ID you want to use from the linked IDs.
You can select the output from the response form obtained earlier for the file name input. Select the relevant item from the output. About Output | Yoom Help Center
Ensure the file attachment method is "Use Output" and the file is "Attachment", then click "Test".
Once the file ID is obtained, click "Save" to complete the settings up to this point.
Step 5: Set an action to add a record to Salesforce
1) Return to the flow and click on the icon "Add Record".
Salesforce is an app available for Team Plan and Success Plan. Please note that errors may occur with Free Plan and Mini Plan.
Paid plans offer a 2-week free trial, during which you can also try the integration with Salesforce. Please take advantage of it.
2) As with the Google Drive settings, check the title and account information, then click "Next".
The "API Reference Name of the Object" can be selected after setting the My Domain URL.
3) Enter the required fields.
You can select the output from Stripe obtained earlier for the value input of the record to be added. Select the relevant item from the output.
Once the input is complete, click "Test". After the test is complete, click "Save".
Step 6: Set an action to upload a file linked to a record in Salesforce
1) Return to the flow and click on the icon "Integrate with apps Upload a file linked to a record".
2) Ensure the action "Upload a file linked to a record" is selected and click "Next".
3) Enter the required fields.
You can select the output from the response form obtained earlier for the file name input. Select the relevant item from the output.
Ensure the file attachment method is "Use Output" and the file is "Attachment", then click "Test". After the test is complete, click "Save".
Step 7: Set an action to obtain the content ID of the file uploaded to Salesforce
1) Return to the flow and click on the icon "Integrate with app Get Uploaded File Content ID".
2) Ensure the action "Get Uploaded File Content ID" is selected and click "Next".
3) Enter the required fields.
You can select the output from Salesforce obtained earlier for the content version ID input. Select the relevant item from the output.
Once the input is complete, click "Test". After the test is complete, click "Save".
Step 8: Set an action to link the file uploaded to Salesforce with the record
1) Return to the flow and click on the icon "Integrate with app Associate File with Record".
2) Ensure the action "Associate File with Record" is selected and click "Next".
3) Enter the required fields.
You can select the output from Salesforce obtained earlier for the content version ID input. Select the relevant item from the output.
Once the input is complete, click "Test". After the test is complete, click "Save".
This completes the flow of [Adding files to Google Drive using form responses and registering leads in Salesforce].
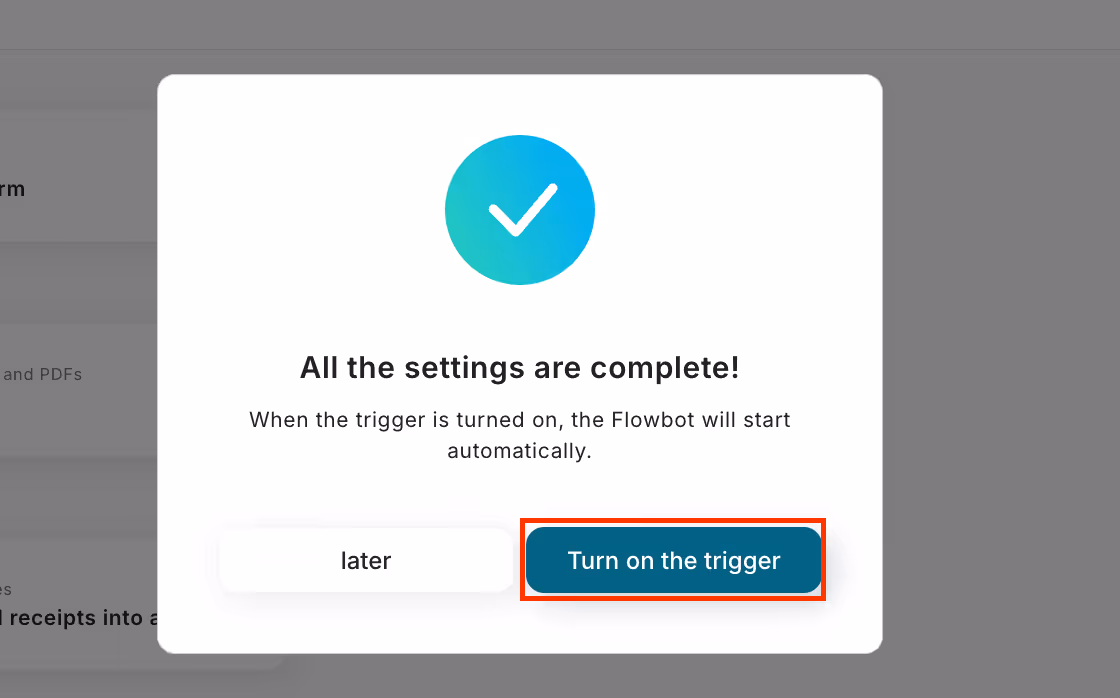
Step 9: Test and Verify
Once the setup is complete, the following display will appear, click "Turn on the trigger". Start the flow bot and verify it works correctly.
If you want to integrate Salesforce information with Google Drive
This time, we introduced how to register inquiries from Google Drive to Salesforce, but if you want to integrate Salesforce information with Google Drive, please also use the following template.
Save to Google Drive when a file is uploaded in Salesforce
This flow automatically saves to Google Drive when a file is uploaded in Salesforce. You can centrally manage files related to customers and projects, and expect smooth access and sharing within the team.
Create a Folder in Google Drive When an Account is Registered in Salesforce
This flow automatically creates a corresponding folder in Google Drive when a new account is registered in Salesforce. It helps organize related documents for each account, facilitating smooth information sharing and management within the team.
Other Automation Examples Using Google Drive and Salesforce APIs
Beyond integration with Google Drive, you can automate various business processes without code by leveraging Salesforce APIs.
If you want to make your daily operations smoother, be sure to check out the examples below!
Convenient Automation Examples Using Google Drive
You can automatically categorize files into folders or change sharing settings when files are uploaded. Additionally, you can notify your team when new files are added to specific folders.
<span class="mark-yellow">By integrating with other tools, you can achieve efficient document management and workflow optimization!</span>
Convenient Automation Examples Using Salesforce
You can automatically register and update lead and opportunity data, and send follow-up notifications under specific conditions.
Integration with other marketing tools and customer support systems is also possible.
Conclusion
By integrating Google Drive and Salesforce, you can manage files and register lead information smoothly. Even without difficult programming knowledge, anyone can easily create an automation system using Yoom! Organizing files based on form responses and efficiently handling data useful for sales activities are significant advantages.
"Why not start by registering for Yoom for free and try out the perfect flow for your tasks?"
The person who wrote this article
r.suzuki
While exploring ways to improve operational efficiency in a small to medium-sized enterprise in a region with limited human resources, we discovered Yoom. I was amazed at how much efficiency could be achieved by implementing Yoom, something I had casually wished for. Even without any knowledge or experience in systems or programming, our operations have significantly transformed, and I am writing to share this experience with many others who might feel the same way.
Conventional RPA can only automate simple repetitive tasks, and the setup process was very complicated. With “hyperautomation,” which combines various technologies such as AI, API, RPA, and OCR, it is possible to automate many tasks that could not be realized until now more easily than before.
Most tools simply connect one app to another, leaving the complex tasks to you. Yoom goes much further: From document creation and browser automation to OCR and generative AI, Yoom handles it all seamlessly in one platform.
Why settle for basic integrations? Streamline your entire workflow with Yoom’s powerful hyperautomation.


.avif)
.avif)


