

.avif)


If the following display appears, the template copy was successful.

Step 2: Setting up a trigger to activate when a row is added in Google Sheets
This time, since we are using Google Sheets as an app trigger, please refer to the following link.
Precautions when using Google Sheets as an app trigger
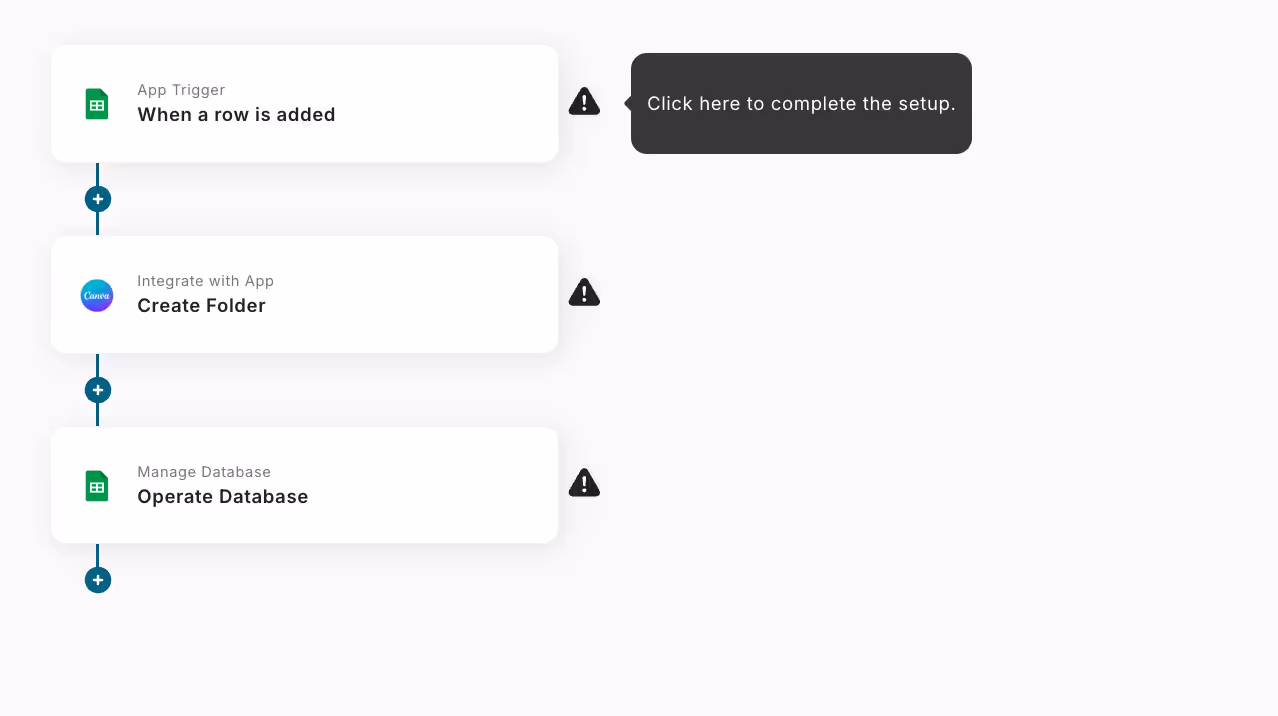
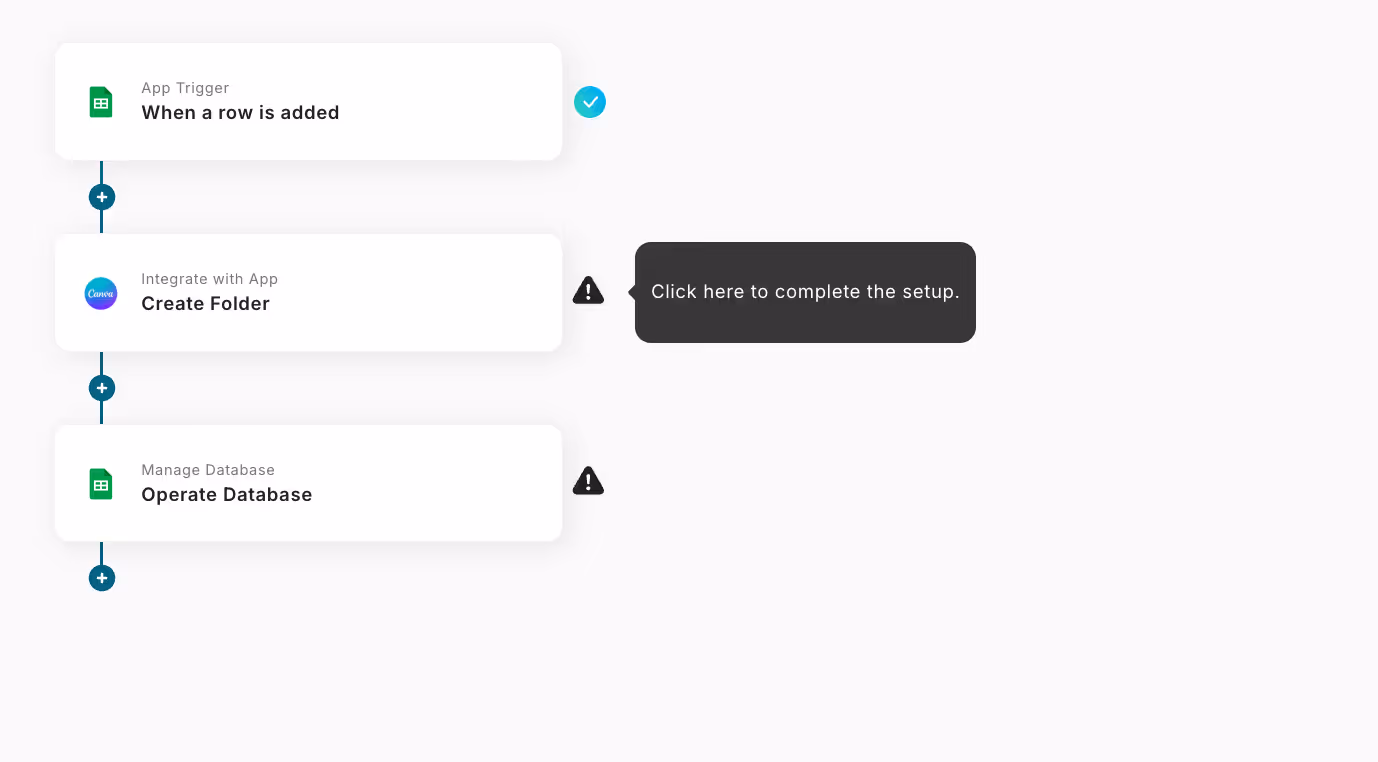
1. First, click on "When a row is added" at the top.
2. Set the title freely.
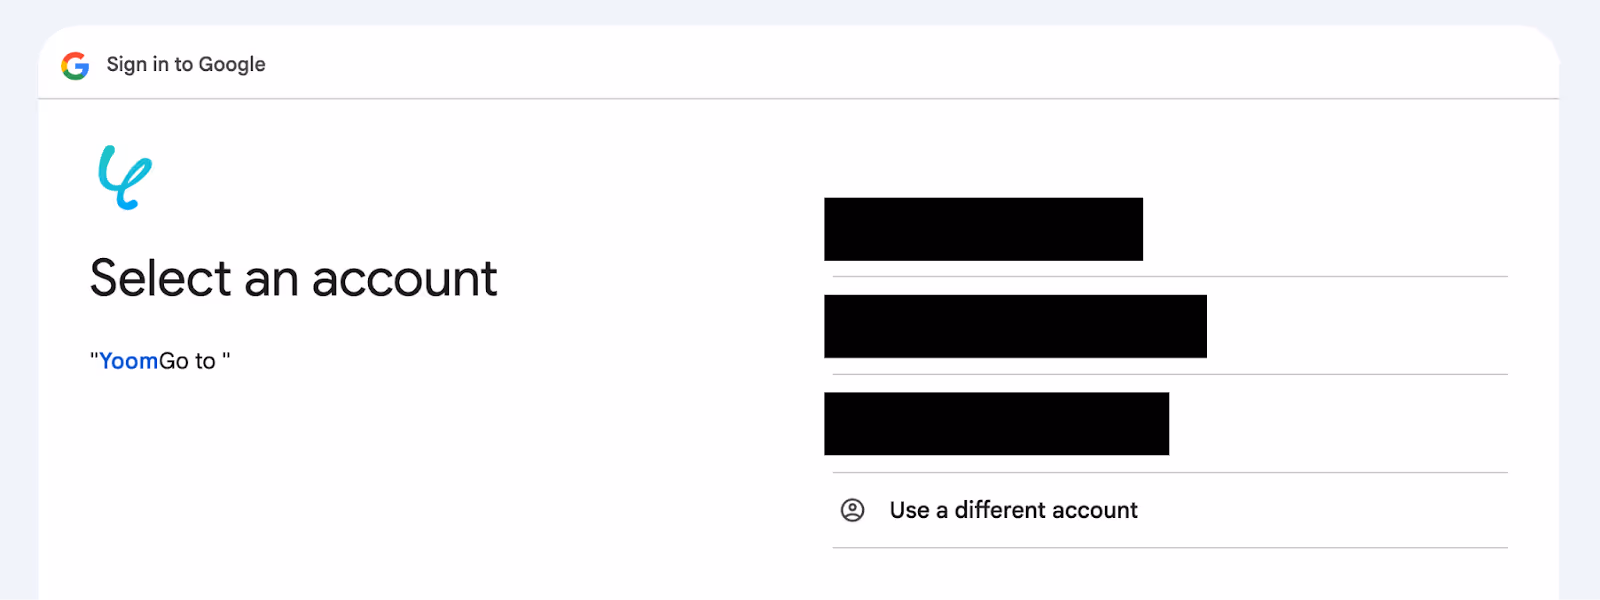
Enter the account information to link with Google Sheets.
Select "When a row is added" as the trigger.
Once the input is complete, click "Next".

3. Set each item.
The trigger activation time can be selected at intervals of 5 minutes, 10 minutes, 15 minutes, 30 minutes, or 60 minutes.
*Please check as the shortest activation interval varies depending on the plan.
Spreadsheet ID, Sheet ID will display suggestions when you click the input field, so please select from them.
Once the setup is complete, click "Test", and if there are no issues, click "Save".

Step 3: Setting up folder creation in Canva
1. Return to the flow. Next, click the "Create Folder" icon.
2. Enter the account information to link with Canva.
Select "Create Folder" as the action.
Once the input is complete, click "Next".
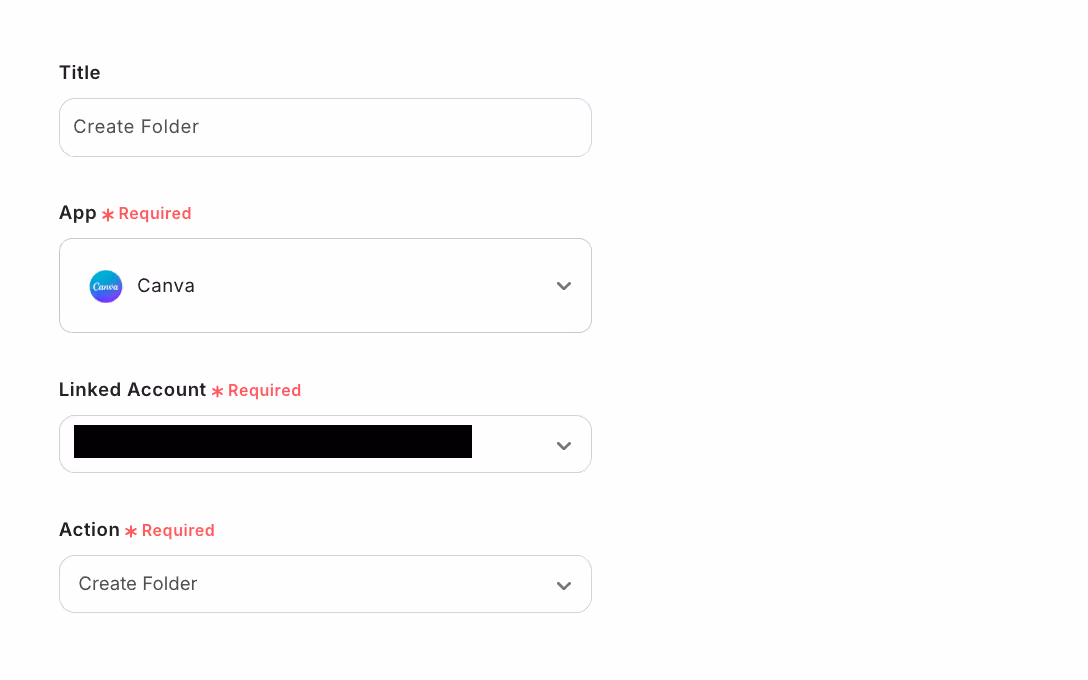
3. Set each item. Please make sure to enter all required fields.
When you click the input field, the previously obtained output and suggestions will be displayed, so please make use of them as needed.
For example, in the screen below, you can use information from Google Sheets to name the folder after the client's name.
Once the setup is complete, click "Test", and if there are no issues, click "Save".

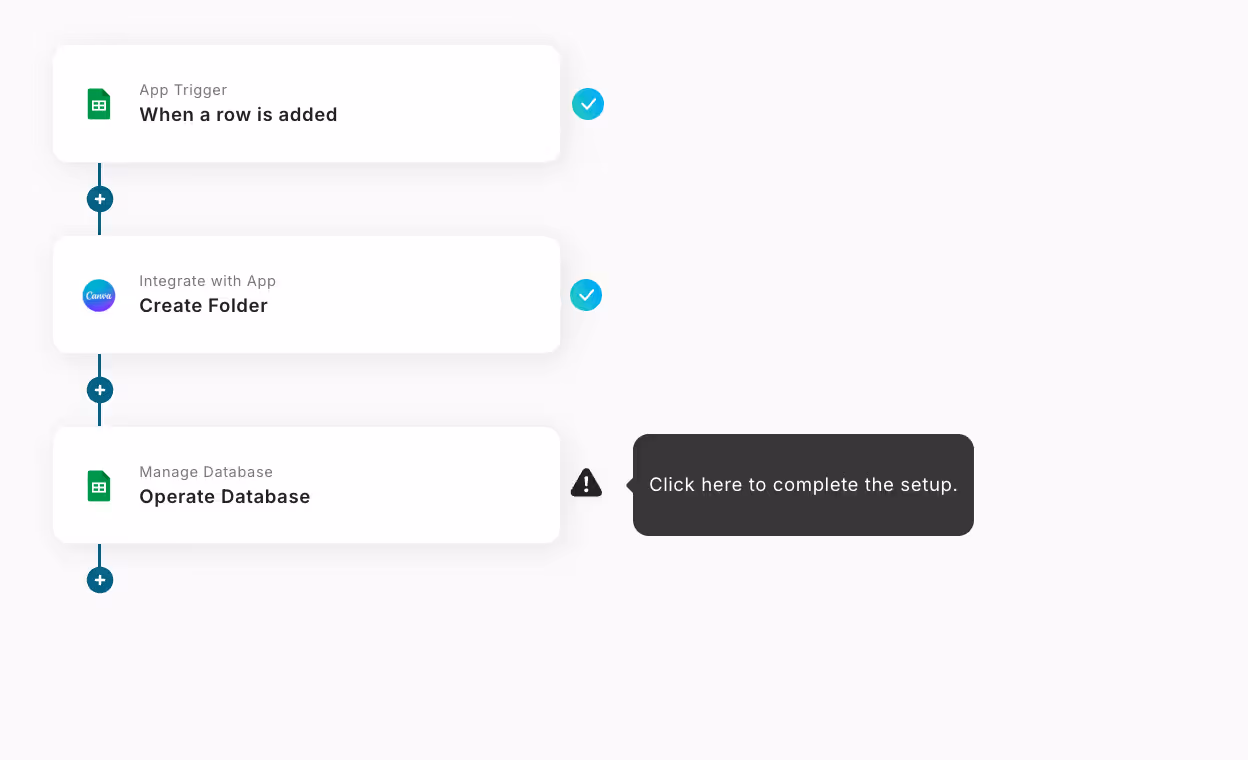
4. Finally, click the "Update Record" icon.
5. Enter the account information to link with Google Sheets.
Select "Update Record" as the action.
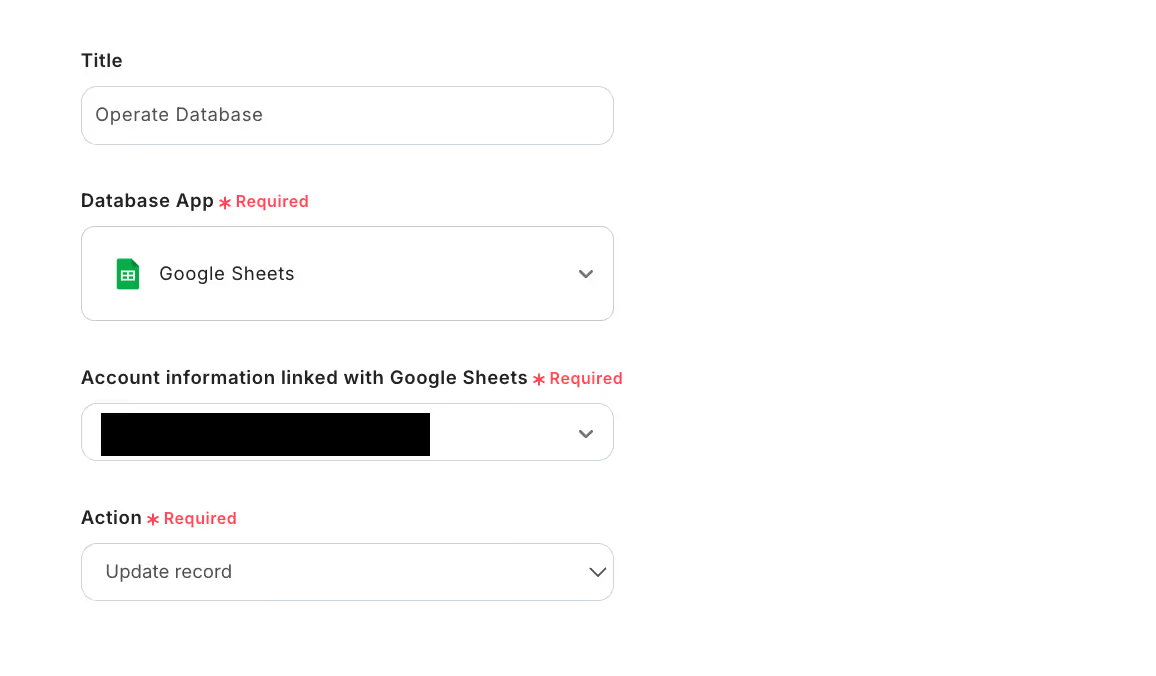
6. Set up the database linkage.
When you click the input field for Spreadsheet ID and tab name, suggestions will be displayed, so please select from them.
Once the setup is complete, click "Next".

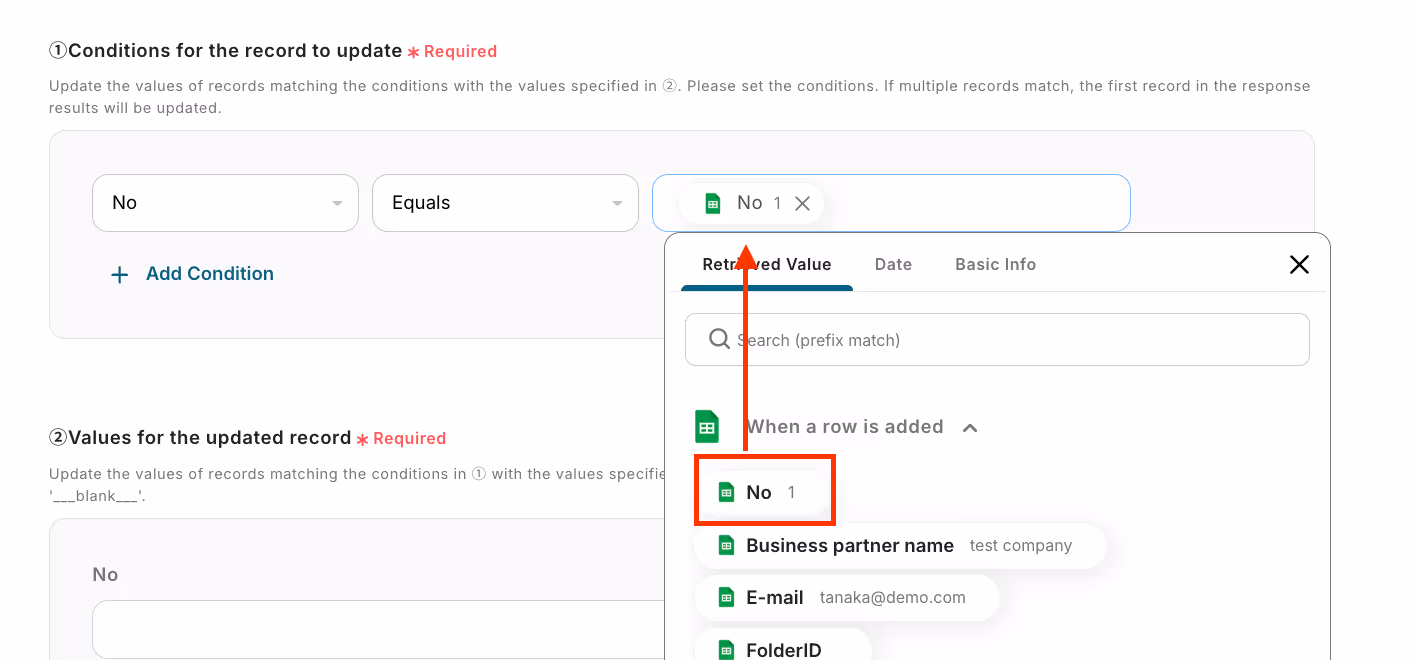
7. Set the values for the record you want to update.
When you click the input field, the output will be displayed, so please make use of it as needed.
In the following case, the No. obtained from Google Sheets is inserted.
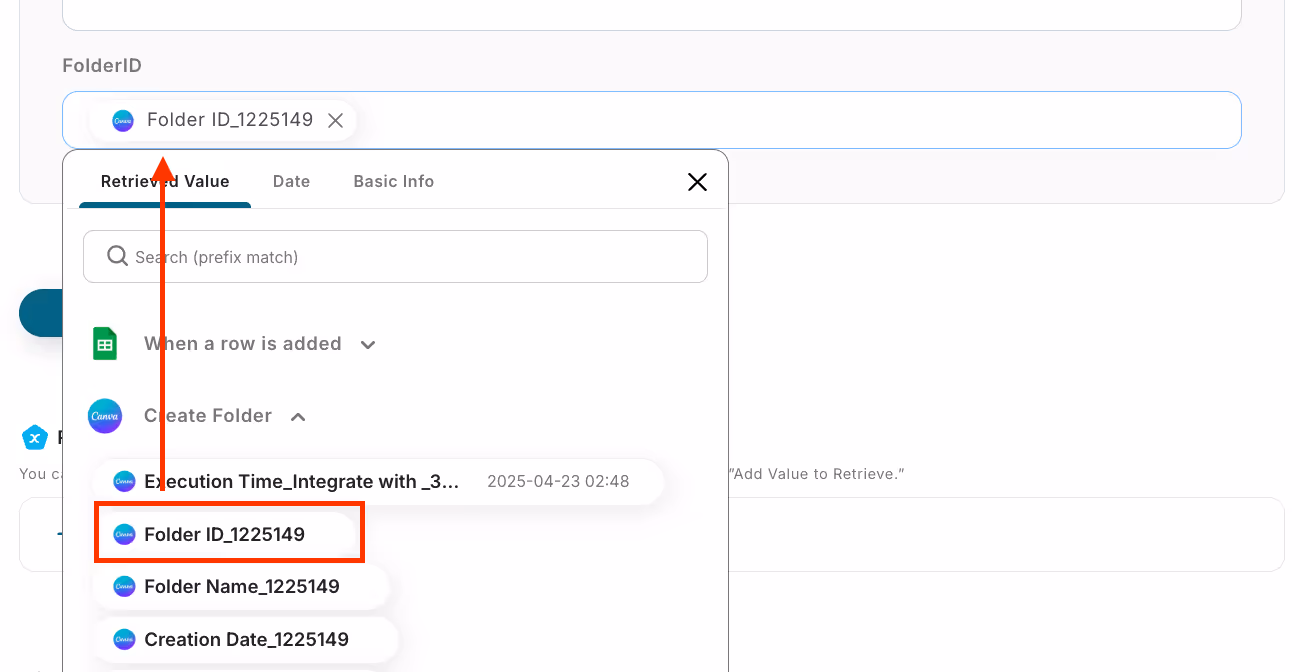
8. Set the values for the updated record.
In the following case, the folder ID obtained from Canva is inserted into Google Sheets.
Once the setup is complete, click "Test", and if there are no issues, click "Save".
9. With this, the flow of [When a row is added in Google Sheets, create a folder in Canva] is complete.
Step 4: Testing and Confirmation
Once the setup is complete, the following screen will be displayed.
Click the "Turn on Trigger" button to activate the flow bot.

With Yoom, you can complete the setup without programming.
Try this convenient flow from the link below.


.avif)
.avif)
.avif)


