Google スプレッドシートとKeapの連携イメージ
How to Integrate Applications

2024/12/17

How to integrate Google Sheets with Keap to create a task in Keap when a row is added in the sheet

k.hieda

"Managing customer information with Google Sheets but finding it tedious to manually input updated data into the CRM" "Want to prevent task management oversights, but systematizing it seems challenging." Are you facing such issues?
By integrating Keap with Google Sheets, task creation can be automated, making task management smoother. Reducing manual workload may help prevent task oversights and make management more efficient.
Traditionally, API integration required programming skills, but with our Flowbot template, it can be achieved without coding. This article clearly explains the setup method without coding and its specific benefits. Please read to the end.

Recommended for

This Flowbot is especially recommended for those facing the following issues:

  • Spending too much time on manual task registration, leading to sharing oversights or delays
  • Wanting to prevent response oversights or work delays amidst increasing inquiries and correction requests
  • Wanting to streamline data transfer and update tasks between multiple tools to reduce the burden

Benefits and Specific Use Cases of Creating Tasks in Keap When a Row is Added in Google Sheets

We considered the use cases of this automation from the perspectives of project leaders, web directors, and system administrators.

1. Reduce Workload and Create an Environment to Focus on Important Tasks

By integrating Keap with Google Sheets, tasks are automatically created whenever a new row is added. This automation improves task distribution and progress management within the project team, helping to prevent errors.

For example, when a project leader registers a task in the sheet, Keap automatically creates the task and registers the specified deadline and priority. This allows the leader to prevent task oversights and manage progress centrally on Keap, reducing the burden of individual checks. Furthermore, clarifying task deadlines and priorities will likely smooth the overall project progress.

2. Strengthen Trust with Speedy Customer Response

When a correction request is entered into Google Sheets, a task is automatically generated in Keap. This automation improves the speed of customer response and reduces the burden on the director in charge of the contact point.
For example, when a web project director records inquiry details in Google Sheets, tasks like "Inquiry Confirmation" or "Follow-up Contact" are immediately created in Keap. This system not only prevents response oversights but also facilitates smooth instructions to the responsible staff. It helps maintain customer trust while ensuring smooth project progress.

3. Simplify Information Sharing Between Teams and Smoothen Collaboration

Implementing a system where follow-up tasks are automatically created in the sales department based on data recorded by the marketing department will smoothen inter-departmental collaboration. As a system administrator, introducing such automation is an important step towards solving information-sharing challenges.
For instance, when lead information obtained from a marketing campaign is registered in Google Sheets, Keap automatically generates a "Follow-up" task for the sales department. This integration eliminates the need for data transfer and manual notifications, reducing time lags and human errors. Additionally, system administrators can enhance overall operational efficiency by ensuring that each department can share information in real-time using Keap and Google Sheets.

From here, we will explain the steps to build the flow of creating tasks in Keap when a row is added in Google Sheets without programming.

[About Yoom]

How to Create a Flow to Create Tasks in Keap When a Row is Added in Google Sheets

Set up so that when new data is entered into Google Sheets, tasks are automatically created in Keap based on that information. For example, when "Customer Name," "Contact," "Task Details," etc., are added to the spreadsheet, the task name is linked to the "Title" field in Keap, and the corresponding customer ID is linked to the "Contact ID," generating the necessary tasks. At the end of this flow, add a unique key like "Update Time" to the sheet when task creation is completed to record the completion of the entire flow. This mechanism ensures the next actions or updates are seamlessly connected. Generally, programming knowledge is required to achieve this, but using the no-code tool Yoom makes it easy to achieve without programming knowledge.

Integration Process

  • Register My App with Yoom for Google Sheets and Keap
  • Copy the template
  • Set up app triggers and integrate apps
  • Turn on the trigger button and start integration

Items to Prepare in Advance

Google Spreadsheet

  • Google account information (email address and password)
  • Please create the sheet to be updated. This time, we created a table according to the output items extracted from Keap.

Keap

  • Login information (email address and password)

Step 1: Setting Up My App Integration

Register the app information to be integrated with Yoom. Log in to the Yoom workspace and click + New Connection on the My Apps screen.

A list of apps that can be connected with Yoom and a search window will be displayed. Search for the app to be integrated from the search window and proceed with My App registration.
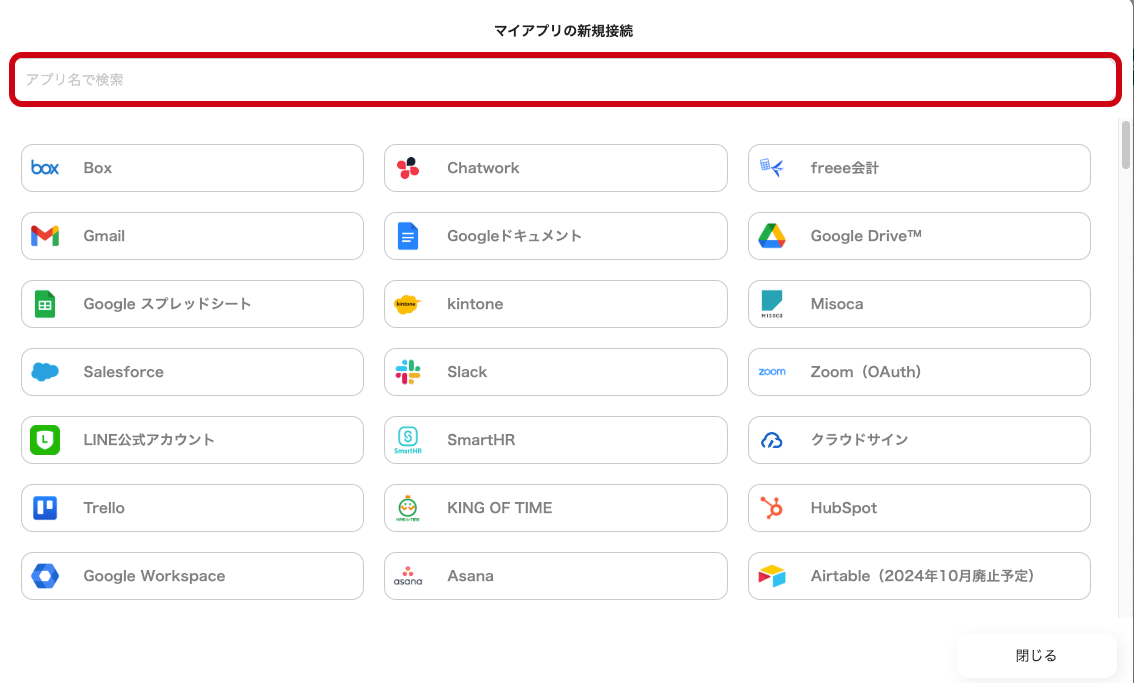
Google Spreadsheet

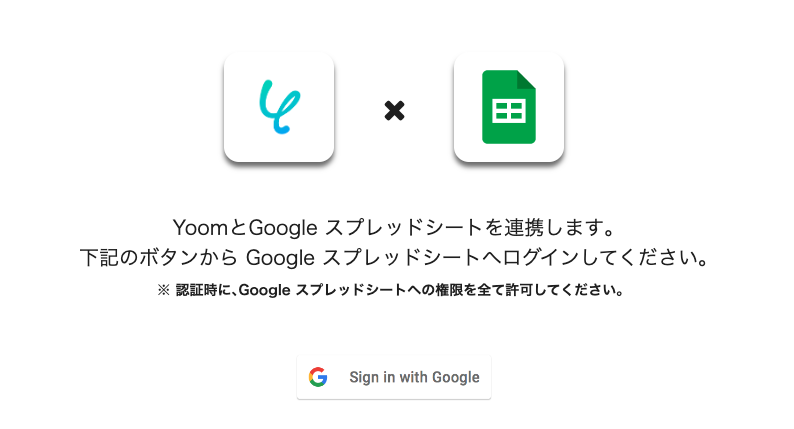
Click on the app name that appears. Once this screen is displayed, proceed with the integration by clicking the sign-in button for the Google account.
A screen to log in to your Google account will be displayed. Enter your email address and password.
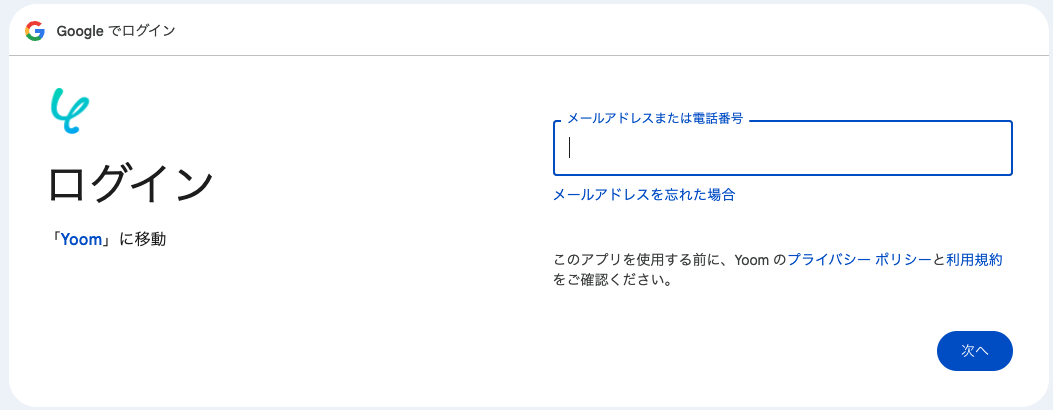
Once logged in, proceed to grant permissions.
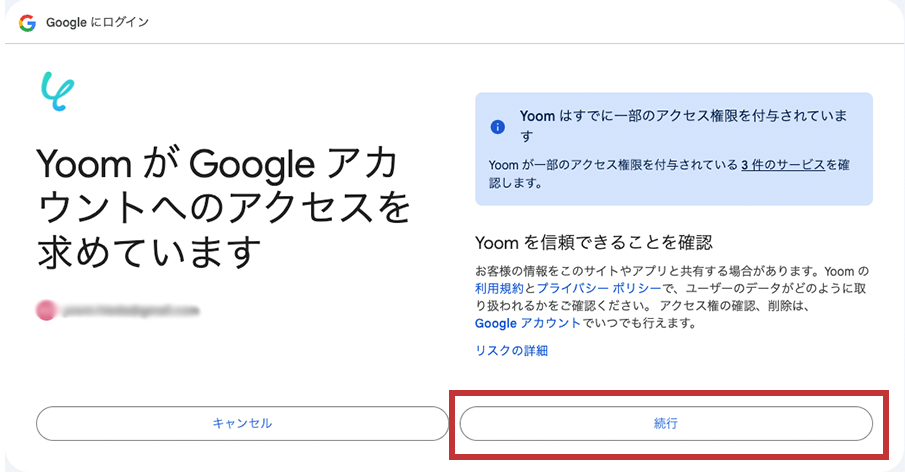
Once permissions are granted, My App registration is complete.

Keap

Search for the app name from the search window. Click on the app name that appears. You will be taken to the Keap sign-in screen.
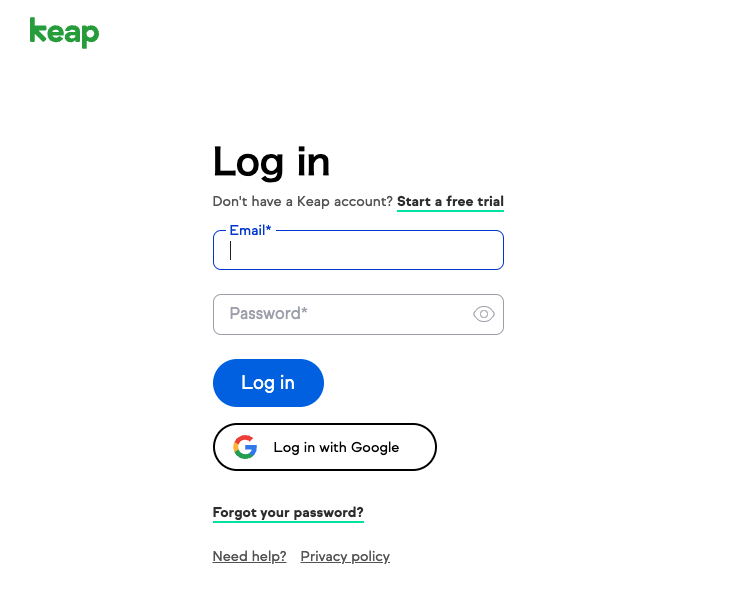
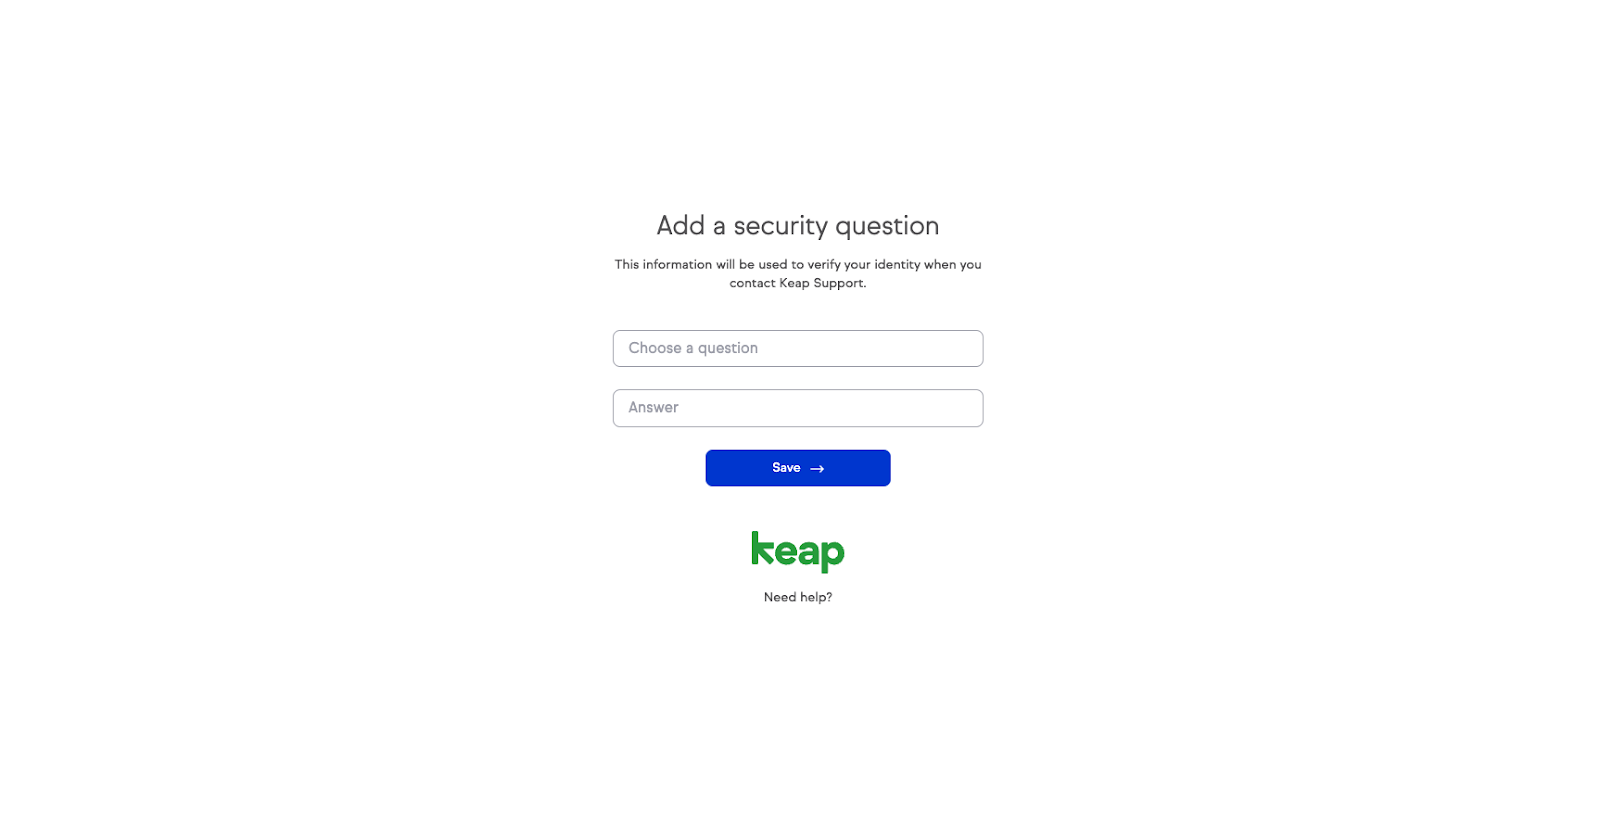
Log in with an existing account, and you will be taken to a screen to select a security question. Choose a memorable question, such as the name of your first pet, and enter your answer.
Next, you will be taken to the Yoom integration screen.
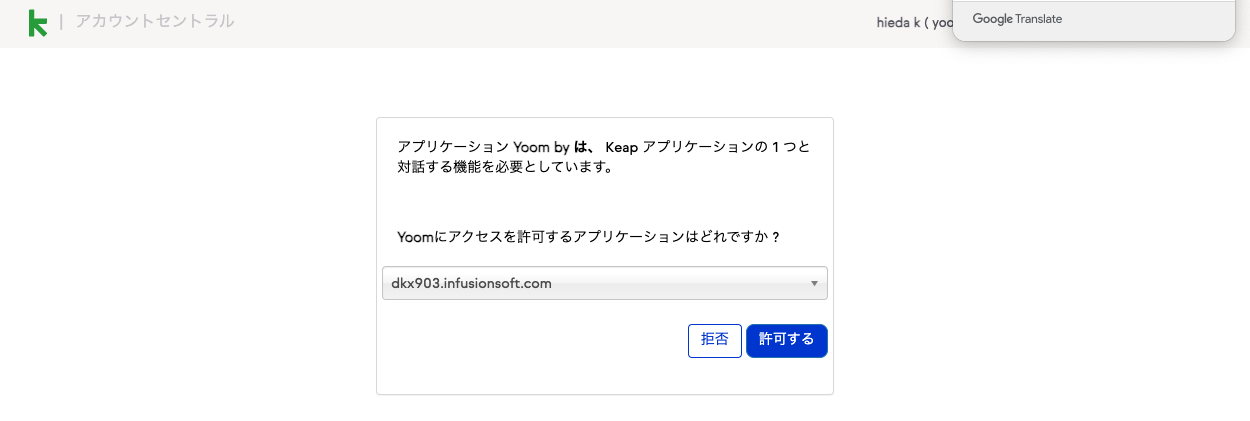
Only this app can be selected, so click [Allow] to complete My App registration.

Step 2: Copy Yoom's Flowbot Template to My Project

Click on this banner.

The template will be copied to My Project. You can access My Project from the left menu bar.

Step 3: App Trigger "When a Row is Added"

Click on the first step of the template.

Here, you will set up to retrieve information added in Google Sheets.

(1/2) Select Linked Account and Action

This item is already pre-configured.

  • App Trigger Title
  • App
  • Account information linked with Google Sheets
  • Trigger Action

→ Click Next.

(2/2) API Detailed Settings for App Trigger

  • Trigger Interval
    • Set the interval for the flowbot to trigger.
    • You can choose from 5 minutes, 10 minutes, 15 minutes, 30 minutes, or 60 minutes. *The shortest trigger interval may vary depending on your plan.
  • Spreadsheet ID
    • Click the edit field to pick up sheets linked with the account.
  • Selecting the sheet to use will quote the ID.

  • Sheet ID
    • Enter the ID of the tab of the sheet to use. Click the edit field to display candidates and select one.
  • Table Range (Start)
    • Enter the value of the first column of the table. In the sample table, it is A.
  • Table Range (End)
    • Enter the value of the last column of the table. In the sample, it is S.
  • Column with Unique Values
    • Select the column that contains unique values.

→ Click Test. → Success. The item names and test values from the sheet have been retrieved.

→ Click Save.

Step 4: "Create Task" to Integrate with App

Click on the second step of the template.

Here, you will set up to create tasks in Keap.

(1/2) Select Linked Account and Action

This is already pre-configured.

  • App Trigger Title
  • App
  • Account information linked with Keap
  • Trigger Action

→ Click Next.

(2/2) API Connection Settings

  • Title (Required)
    • Embed the item corresponding to the task title. Click the edit field to display values retrieved from Google Sheets (referred to as output). Select one to embed the quote code.

For subsequent items, link the corresponding items in Google Sheets to Keap's items.

→ Click Test. → Success. New task details are displayed in Keap.

→ Click Save.

Step 5: "Update Record" to Operate Database

Click on the third step of the template.

Here, you will set up to update rows in the linked Google Sheets where tasks have been created in Keap.

(1/2) Select Linked Account and Action

This is already pre-configured.

  • App Trigger Title
  • App
  • Account information linked with Google Sheets
  • Trigger Action
Database Integration

Link the sheet to use. It is the same content as the sheet linked first.

Click the edit field to display candidate names and values, then select them.

→ Click Next.

(2/2) Detailed Settings for Database Operation

  • ① Conditions for the Record to Update
    • Set the arbitrary No of the sheet to update the task as a condition.

② Enter the Task ID that can be obtained from Keap's output as the value of the record after updating.

→ Click Test. → Success

→ Click Save. This concludes the steps.

Step 6: Turn ON the App Trigger

Once all steps are configured, a completion screen will be displayed.

Turn ON the Trigger to start the flowbot. You can toggle it in the upper left corner of the template.

<span class="mark-yellow">The flowbot setup is complete without programming.</span> The template used this time is here.

Expand More! 3 Examples of Expanding Automation Possibilities with Keap and Google Sheets Integration

Integrating Keap with Google Sheets allows for not only task creation but also other automations.

1. Automatically Reflect Task Information with Google Sheets Updates

When data in Google Sheets is updated, tasks in Keap are automatically updated as well. This reduces the effort of manual corrections and makes it easier to manage tasks with the most up-to-date information.

2.  Automatically Delete Keap Tasks When Google Sheets Rows Are Deleted

You can set it up so that when a row in Google Sheets is updated, the related task in Keap is automatically deleted. This helps prevent forgotten deletions and duplicate tasks, improving the accuracy of task management.

3.  Automatically Update Product Information When Google Sheets is Updated

When the product information in Google Sheets is updated, the data in Keap is automatically reflected. By reducing the time spent on manual input and quickly sharing the latest information, you can expect more accurate responses and improved customer satisfaction.

Summary

By integrating Google Sheets with Keap, you can reduce the burden of duplicate tasks and manage task progress more smoothly. With Yoom's Flowbot, you can easily implement this without any programming. Why not use this Flowbot to further optimize your company's processes?

You can try it out by checking the banner below.

Well, see you again!

The person who wrote this article
k.hieda
10 years as a web planner and director. When I worked for a web production company, my main focus was on proposing modifications and operation plans to clients and proceeding with production. I'm currently a parallel worker. We produce blogs in Yoom's content division, and receive external public relations projects for companies in our individual business. Since we are starting a private lodging, we aim to thoroughly improve the efficiency of routine work!
Tags
Google Sheets
Integration
Automatic
Automation
Related Apps
App integration
No items found.
What is Yoom hyperautomation?
Conventional RPA can only automate simple repetitive tasks, and the setup process was very complicated.
With “hyperautomation,” which combines various technologies such as AI, API, RPA, and OCR, it is possible to automate many tasks that could not be realized until now more easily than before.
Don't Just Connect Apps—Automate Everything
Most tools simply connect one app to another, leaving the complex tasks to you. Yoom goes much further: From document creation and browser automation to OCR and generative AI, Yoom handles it all seamlessly in one platform.

Why settle for basic integrations? Streamline your entire workflow with Yoom’s powerful hyperautomation.
Learn more about Yoom
Helpful Materials
I understand Yoom! 3-piece set of materials
Download materials
Understand in 3 minutes! Yoom service introduction materials
Download materials
Find out by Before After! Yoom Case Study Collection
Download materials
See a list of useful materials