How to integrate Google Sheets with Microsoft SharePoint to create a folder in Microsoft SharePoint when a row is added in Google Sheets
How to Integrate Applications
・
2025/01/10
How to integrate Google Sheets with Microsoft SharePoint to create a folder in Microsoft SharePoint when a row is added in Google Sheets
k.noguchi
We introduce automation methods that dramatically improve work efficiency for those who utilize Google Sheets and Microsoft SharePoint in business settings. This method automatically creates a folder in Microsoft SharePoint every time a new row is added in Google Sheets. This eliminates manual effort and simplifies information organization.
Recommended for
Those who use Google Sheets and Microsoft SharePoint separately
Those who use Google Sheets and Microsoft SharePoint in their daily work but find creating information cumbersome
Those aiming to improve work efficiency by integrating Google Sheets and Microsoft SharePoint
Benefits and Examples of Integrating Google Sheets and Microsoft SharePoint
Benefit 1: Streamlining Business Processes
By integrating Google Sheets and SharePoint, you can build a system that automatically creates folders when new data is entered. This is particularly beneficial for those managing projects. For example, every time a new project is added to the spreadsheet, a corresponding folder is automatically generated in SharePoint, making it easier to organize related materials. As a result, manual work is reduced, and business processes are streamlined.
Benefit 2: Smoother Information Sharing Among Teams
When collaborating across multiple teams or departments, the speed of information sharing is crucial. By centrally managing data in spreadsheets and automatically organizing related files in SharePoint, each team can quickly access the necessary information. For example, when the sales department enters new customer information into the spreadsheet, the customer support department can access the dedicated folder for that customer and respond accordingly.
Benefit 3: Enhanced Compliance and Audit Response
In industries where strict data management is required, this automation is particularly effective. As folders corresponding to data entries in spreadsheets are created simultaneously in SharePoint, you can clearly track data storage locations and update histories. For example, in healthcare or financial institutions, proper management of customer data is required. By implementing this system, compliance and audit response become easier, achieving highly reliable data management.
[About Yoom]
How to Create a Folder in Microsoft SharePoint When a Row is Added in Google Sheets
This can be achieved by using the Google Sheets API to receive notifications of added rows and using the Microsoft SharePoint API to create folders in SharePoint based on the record information of the added rows. Generally, programming knowledge is required to achieve this, but with the no-code tool Yoom, it can be easily accomplished without programming knowledge. This time, we will create it using the following process.
Integrate Google Sheets and Microsoft SharePoint with My Apps
Copy the template
Set the trigger for Google Sheets, which serves as the starting point of the flow, and configure the subsequent operations in Microsoft SharePoint
Turn on the trigger button and verify the operation of the integration flow between Google Sheets and Microsoft SharePoint
If you are not using Yoom, please register for free here. If you are already using Yoom, please log in.
Step 1: Integrate Google Sheets and Microsoft SharePoint with My Apps
Register My Apps to connect Google Sheets and Microsoft SharePoint to Yoom. By completing the My Apps registration first, you can proceed with the automation settings smoothly.
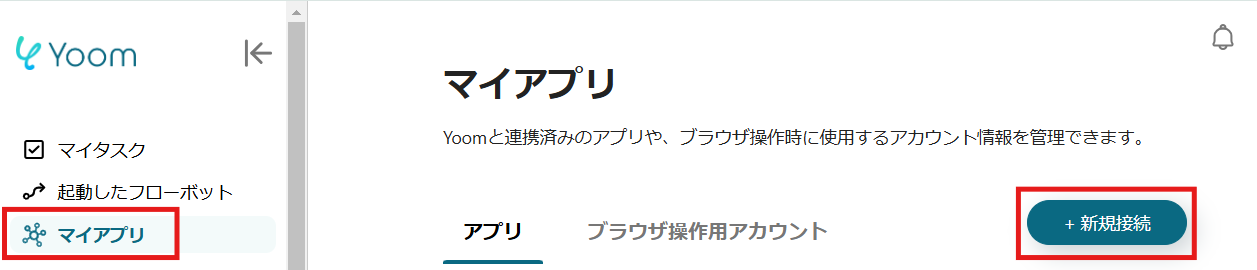
1. Click on My Apps on the left side of the Yoom page and select "New Connection."
2. Enter "Google Sheets" in the search box at the top right and select Google Sheets from the displayed search results. Click "Sign in with Google."
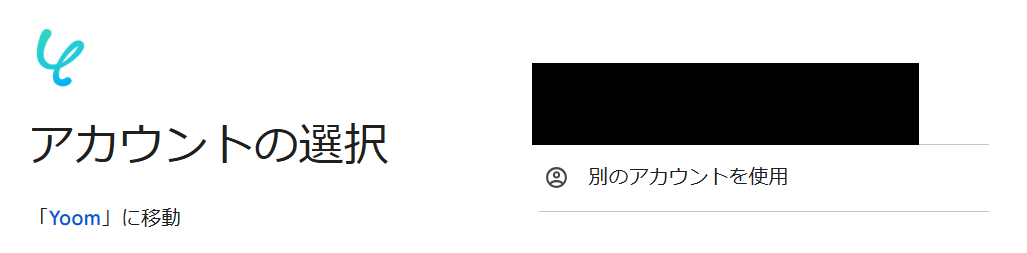
3. On the account selection screen, select your account, and if there are no issues after logging in, click "Continue" on the displayed screen.
4. Next, register Microsoft SharePoint with My Apps. Similar to the Google Sheets registration, click on My Apps on the left side of the Yoom page and select "New Connection." Enter "Microsoft SharePoint" in the search box and select Microsoft SharePoint from the search results. Then, enter your account on the displayed screen and click "Next." Enter your password on the next screen.
If both Google Sheets and Microsoft SharePoint are displayed in My Apps, the registration is complete.
Step 2: Copy the Template
Open the template page below and click 'Try this template.'
The template will be automatically copied to your workspace. Next, click "OK" on the displayed screen.
Step 3: Set the trigger for the Google Spreadsheet that serves as the starting point of the flow, and configure the subsequent Microsoft SharePoint operations
1. Click "OK" on the previous screen, then click the app trigger "When a row is added" on the displayed screen. ※ This screen is displayed when you click "【Copy】Create a folder in Microsoft SharePoint when a row is added in Google Spreadsheet" in the Flowbot under "My Projects" on the left side of the Yoom page.
2. Enter the required fields on the displayed screen and click "Next".
3. Configure the details on the displayed screen. Select the "Trigger Interval". ※ You can choose the trigger interval from 5 minutes, 10 minutes, 15 minutes, 30 minutes, or 60 minutes. Please note that the shortest trigger interval varies depending on the plan.
4. Select the "Spreadsheet ID" and "Sheet ID" from the options. When you click the input field, the options for the linked account will be displayed automatically. Selecting an option will complete the input.
5. Once the input is complete, execute the "Test" and if successful, click "Save". The displayed output can be used in the next settings, as indicated by "This value can be used in other operations."
Next, let's configure Microsoft SharePoint. 6. Click "Create a folder" to link with the app, and the following screen will be displayed. Configure the settings below. Once the input is complete, click "Next".
Next, configure the API connection settings. 7. The output for each item set in Google Spreadsheet will be retrieved. Click the input field to display the output options and input each one. ※ Use the output obtained from Google Spreadsheet for the folder name. Once the input is complete, execute the "Test" and if successful, click "Save".
8. Finally, register the values issued by Microsoft SharePoint in Google Spreadsheet. On the screen displaying the template content, click "Update Record" to operate the database. Check the account linked with Google Spreadsheet on the displayed screen.
9. Register the values obtained from Microsoft SharePoint in Google Spreadsheet. Set the Spreadsheet ID, tab name of the spreadsheet, and table range, then click "Next". ※ The Spreadsheet ID and tab name can be set from the "options" displayed when you click the frame.
10. Set the conditions for the record you want to update. Set the item of the column with a unique value in Google Spreadsheet in the left frame. In the right frame, select the corresponding item from the output "When a row is added". Based on the conditions set here, Yoom will search for the project registered in Google Spreadsheet. ※ This time, it was set as shown in the image below.
11. Next, set the values for the updated record. ※ Since you are updating with the values obtained from Microsoft SharePoint, use the Microsoft SharePoint output "Create a folder" for the settings.
Once the settings are complete, click "Test" and then click the "Save" button.
Step 4: Turn on the trigger button and verify the operation of the integration flow between Google Spreadsheet and Microsoft SharePoint
Click the "Turn on Trigger" button in the red frame on the screen below to automatically start the Flowbot.
The template used this time is as follows.
Other Automation Examples Using Google Sheets and Microsoft SharePoint
Yoom also offers templates using Google Sheets and Microsoft SharePoint, so here are a few examples.
1. Create a Folder in Microsoft SharePoint When an Account is Registered in Salesforce This flow creates a folder in Microsoft SharePoint when an account is registered in Salesforce. Salesforce is an essential tool for customer relationship management, but manually creating a folder in Microsoft SharePoint every time an account is registered is an inefficient and time-consuming task. By implementing this flow, a corresponding folder is automatically created in SharePoint when an account is registered in Salesforce, freeing the responsible person from the task of folder creation and allowing them to focus on more important tasks such as customer service and sales activities.
2. Create a folder for each employee in Microsoft SharePoint when an employee is registered in SmartHR When an employee is registered in SmartHR, a folder for each employee is automatically created in Microsoft SharePoint, eliminating the need to manually create folders and reducing work time. Additionally, with centralized folder management, necessary documents and information can be quickly searched and shared. By using this flow, work efficiency will improve, and employee information management will be smoother.
3. Once the document signing is completed with CloudSign, upload the agreement completion certificate to Microsoft SharePoint This flow automatically uploads the agreement completion certificate to Microsoft SharePoint once the document signing is completed with CloudSign. By automating the upload of the agreement completion certificate to Microsoft SharePoint, you can expect improved operational efficiency. Additionally, automating file uploads helps prevent human errors such as incorrect storage locations or missed uploads.
Summary
In this article, we introduced a method for automatically generating folders by integrating Google Sheets and Microsoft SharePoint. This automation is expected to improve the efficiency of daily tasks and simplify information organization. Additionally, it can reduce the effort of manual work and prevent human errors such as input mistakes or forgetting to create folders. The storage locations for various documents and reports are unified, leading to more efficient file management. Take this opportunity to try setting up the integration and use it to improve your business processes. Let's aim to enhance productivity and work quality by leveraging technology.
The person who wrote this article
k.noguchi
I have experience in a wide variety of jobs, such as an SE programmer, new graduate recruitment assistant, and theme park actor.
Among them, SE programmers built corporate systems and worked to improve work efficiency.
Using Yoom, we will carefully disseminate practical approaches to reduce the burden of work in an easy-to-understand manner.
Conventional RPA can only automate simple repetitive tasks, and the setup process was very complicated. With “hyperautomation,” which combines various technologies such as AI, API, RPA, and OCR, it is possible to automate many tasks that could not be realized until now more easily than before.
Most tools simply connect one app to another, leaving the complex tasks to you. Yoom goes much further: From document creation and browser automation to OCR and generative AI, Yoom handles it all seamlessly in one platform.
Why settle for basic integrations? Streamline your entire workflow with Yoom’s powerful hyperautomation.


.avif)


.avif)


.avif)


