How to create a new customer in Paddle when a row is added in Google Sheets by integrating Google Sheets with Paddle
How to Integrate Applications
・
2024/12/23
How to create a new customer in Paddle when a row is added in Google Sheets by integrating Google Sheets with Paddle
k.ueno
If you are managing customer information using Google Sheets, combining it with the online payment tool Paddle can help streamline your customer management tasks. However, managing information in each app doesn't guarantee that data entry errors won't occur. By integrating apps using Yoom, you can reduce the occurrence of such errors and lessen the workload on staff, contributing to improved operational efficiency. This article explains how to set up an automated flow to create new customers in Paddle when a row is added in Google Sheets, and the benefits of implementing it. By incorporating it into your operations, you can achieve centralized management of highly accurate data, so please take a look.
Recommended for
Those using Google Sheets and Paddle together
Business owners looking to streamline the customer registration process
Those aiming to reduce errors in data entry and registration tasks
IT personnel looking to improve the speed of information sharing
Those considering data integration across multiple tools using APIs
Benefits and Examples of Integrating Google Sheets and Paddle
1. Reduce the hassle of registration tasks
By automatically registering customer data entered in Google Sheets into Paddle, the burden of manual work is reduced. For example, when the sales team adds new lead information to Google Sheets, that information is automatically reflected in Paddle's database, eliminating the need for separate transcription work. This reduces the time spent on data entry and verification tasks, allowing team members to focus on core tasks. When handling a large amount of customer data in a new project, registering data in bulk in Google Sheets reduces the time spent manually registering each entry, making it easier to handle large volumes of data smoothly.
2. Minimize input errors
Automating manual input prevents incorrect entries and information omissions, improving the accuracy of customer data. For example, when the customer support team records new customer information in Google Sheets, a new customer is created in Paddle based on that information, preventing contact misentries and duplicate registration errors. Registering and managing accurate data can help maintain customer trust.
3. Speed up information sharing
With information from Google Sheets being quickly reflected, the entire team can easily grasp the latest information. For example, when the marketing team adds customer information for a new campaign to Google Sheets, the information is quickly reflected in Paddle. Based on that information, the support team can effectively follow up with the relevant customers, making inter-departmental collaboration smoother.
Let's create a flow bot using the template "Create a new customer in Paddle when a row is added in Google Sheets."
[About Yoom]
How to Create a New Customer in Paddle When a Row is Added in Google Sheets
This can be achieved by receiving the addition of a row in Google Sheets using the Google Sheets API and creating a new customer in Paddle based on the data added in Google Sheets using Paddle's API. Generally, programming knowledge is required to achieve this, but using the no-code tool Yoom allows you to easily achieve it without programming knowledge.
The work until the flow is completed proceeds as follows:
Integrate Google Sheets and Paddle with My Apps
Copy the template
Set triggers in Google Sheets and configure Paddle
Turn the trigger ON
If you are not using Yoom, please register for free here. If you are already using Yoom, please log in.
・Integrate Google Sheets and Paddle with My Apps
(1) First, connect Google Sheets to My Apps. After logging into your Yoom account, click "My Apps" on the left panel and search for Google Sheets from "New Connection".
Search for the Google Sheets app icon and click on it.
(2) Click "Sign in with Google" to move to the account selection screen, and choose the account you want to integrate from the management accounts on the right. After selection, proceed to the sign-in screen and complete the authentication. The first Google Sheets connection is now complete.
(3) Next, integrate the Paddle app. Select Paddle in the same way as registering Google Sheets with My Apps.
(4) Enter the "Account Name" and "Access Token" for the Paddle you want to integrate, and click [Add].
After clicking, you will be taken to the My Apps screen of your Yoom account with the two apps added. Now, the two apps are connected to your Yoom account.
・Copy the Template
After confirming that the new connection of the target app is complete in your Yoom account, click the icon for "Try this template" below.
The template will be copied, so click the "OK" button.
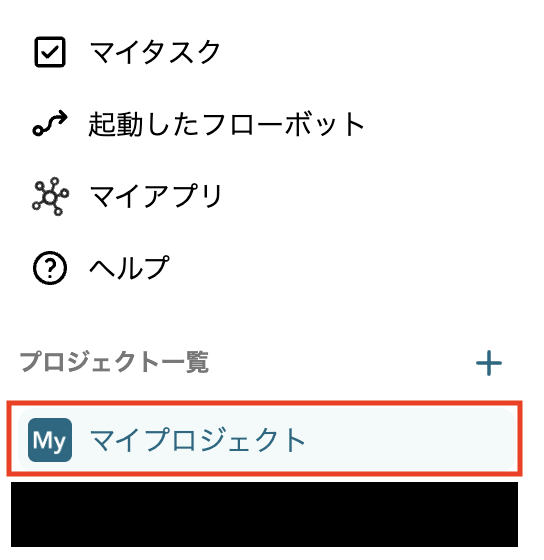
Move to the "My Projects" screen of your Yoom account and check the template content.
There are three setup flows.
・Google Sheets Trigger Setup
(1) First, set up the Google Sheets app trigger.
From the My Projects on the left side of your Yoom account screen, click "【Copy】When a row is added in Google Sheets, create a new customer in Paddle".
After clicking, the template content will be displayed as shown in the screen below.
This time, as an example, we will use the following Google Sheets with test data inserted to set up. We assume that the process will proceed to "Copy Paddle information to Google Sheets 【Customer ID (Paddle)】" after the step 3 "Update Record".
(2) First, click "When a row is added" which will be the trigger. (3) Enter the account information to be linked and click [Next].
(4) On the next screen, enter information such as "Trigger Interval" and "Spreadsheet ID". Select any of the options for "Trigger Interval" from 5 minutes, 10 minutes, 15 minutes, 30 minutes, or 60 minutes. *Note that the trigger interval varies depending on the plan.
(4) For the "Spreadsheet ID" and "Sheet ID" fields, click the input bar to expand the information obtained from the account as "candidates" as shown in the screen below. Utilize these references as well.
(5) After entering the information, click [Test], and if there are no issues, click [Save]. In this step, you can obtain the following information as output. As noted, "This value can be used in other operations," you can reference and utilize it in subsequent steps.
Regarding the behavior during testing when setting Google Sheets as an app trigger, please check this page in advance.
・Paddle Setup
(1) Next, click the second action "Create New Customer".
(2) Enter the account information to be linked and click [Next].
(3) On the next screen, enter information in fields such as "Email" and "Custom Data". Click the input bar to reference the output obtained from the previous step. (The image below shows an example where the output 【Address】 obtained from the previous step is referenced.)
(4) After entering the information, click [Test], and if there are no issues, click [Save].
(5) Finally, click the third action "Update Record".
(6) On the next screen, confirm that the Google Sheets account information is entered. Scroll down to find the "Database Integration" section and enter the relevant information. You can expand the information obtained from the linked account as "candidates", so utilize this as well.
(7) After entering the information, click [Next].
(8) On the next screen, set up to retrieve records that match the conditions from the specified table in Google Sheets and update the value of the top record in the response results. The following is an example where the condition for "① Record to be updated" is set to specify 'ID' for the record to be updated, with the condition as 'Equal', and the information matching the condition as 'ID' (utilizing output).
(9) Next, set the "② Value of the record after update". The value set in "① Record to be updated" will be updated in the record hit here. Click the input bar and set the relevant information. As shown in the screen below, you can also utilize the output. (As an example, the 【Customer ID】 obtained in the second action is set in the "Customer ID (Paddle)" section.)
This time, we are setting it up with the assumption that information will be copied to "Customer ID", so other fields will be left as 'blank' to prevent updates.
(10) After entering the information, click [Test], and if there are no issues, click [Save]. This completes the setup.
・Turn ON the Trigger
By clicking the red frame part "Turn ON the Trigger" on the screen below, the flow bot will start automatically.
Here is the template used this time
Other Automation Examples Using Google Sheets and Paddle
There are other examples of automation using Google Sheets and Paddle on Yoom, so let me introduce a few.
Create a Product in Paddle When a Row is Added in Google Sheets
This flow is recommended for those who manage product information in Google Sheets. By simply adding a row in Google Sheets, a product is automatically created in Paddle, reducing the effort of data entry and preventing errors from manual input.
Create a new transaction in Paddle when a row is added in Google Sheets
Automating the creation of new transactions saves the effort of manually entering data, improving operational efficiency. With transaction information added quickly, staff will be able to perform their tasks promptly.
Update Paddle Subscription When a Row is Updated in Google Sheets
By automating tasks, you can ensure that the latest information is reflected, helping to avoid issues based on incorrect data. This can lead to smoother business operations and improved customer satisfaction.
Summary
By implementing the automation flow introduced this time, automatic reflection of information can be realized, leading to efficient management of customer information and reduced workload for staff. Furthermore, it minimizes data entry errors and speeds up information sharing between departments. In particular, it will contribute to improving operational efficiency and customer satisfaction for sales, customer support, and marketing teams.
Please refer to this article and experience automation through app integration using Yoom.
The person who wrote this article
k.ueno
Until now, as customer support, we have made efforts to resolve users' questions and concerns.
I was moved to learn that by using Yoom, tasks that are becoming increasingly complicated on a daily basis will progress quickly!
From now on, we will continue to distribute content with easy-to-understand content so that people who aim to improve work efficiency can use the service smoothly.
Conventional RPA can only automate simple repetitive tasks, and the setup process was very complicated. With “hyperautomation,” which combines various technologies such as AI, API, RPA, and OCR, it is possible to automate many tasks that could not be realized until now more easily than before.
Most tools simply connect one app to another, leaving the complex tasks to you. Yoom goes much further: From document creation and browser automation to OCR and generative AI, Yoom handles it all seamlessly in one platform.
Why settle for basic integrations? Streamline your entire workflow with Yoom’s powerful hyperautomation.


.avif)


.avif)


