

.avif)


Step 2: Set Triggers and Actions
This time, we will use the template provided above.
Once you open the template page, click Try this template.
If you are using Yoom, please log in, and if you are new, please register.
As you proceed, the template will be copied to your workspace.
You can also change the name of the template.
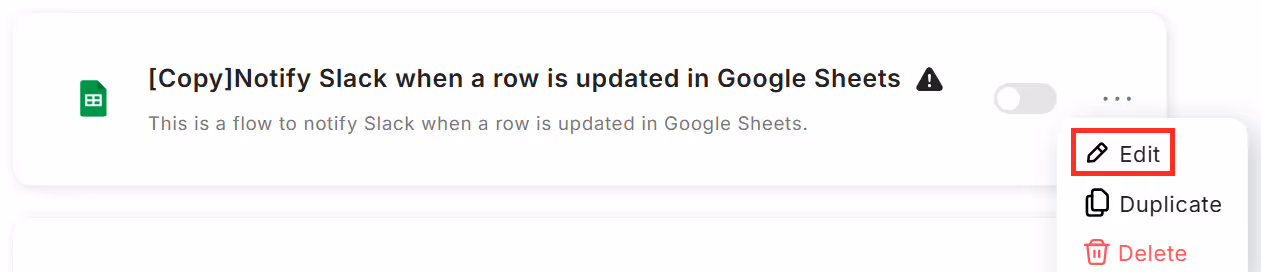
Click on My Projects on the left to see the template you just copied.
Click the ellipsis (...) on the right and select Edit.
This time, there are two steps.
Let's set it up together!
First, let's prepare the Google Spreadsheet.
This time, we have prepared the following items and responses.
It's an image of managing the progress of application content.

Now, let's set up the app trigger.
Select "When a row is updated".
Check the account information to be linked.
Keep the action as it is and proceed to the next step.
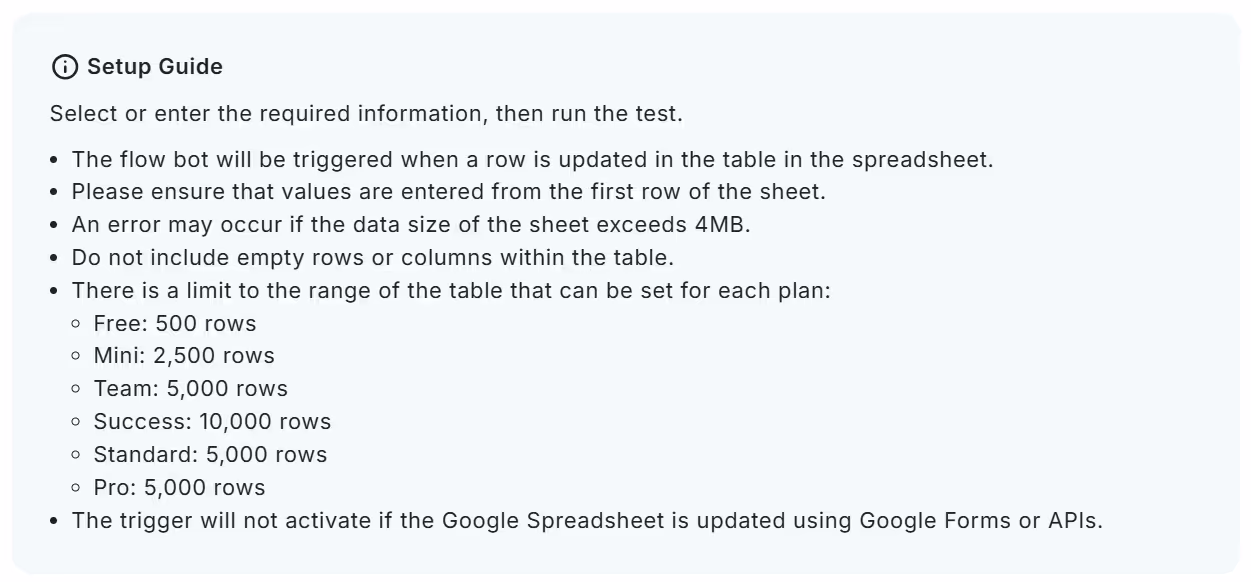
On the next screen, set the following items.
Please note that there is a limit to the range of tables that can be set for each plan.
For details, please refer to the setting method in the image.
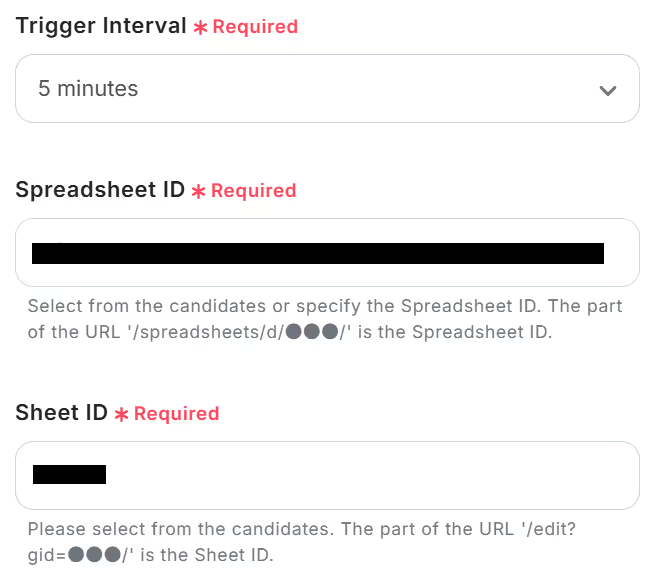
- Trigger Interval: You can choose from intervals of 5 minutes, 10 minutes, 15 minutes, 30 minutes, and 60 minutes.
※ The selection of intervals varies depending on the plan. - Spreadsheet ID and Sheet ID: Please select from the candidates.
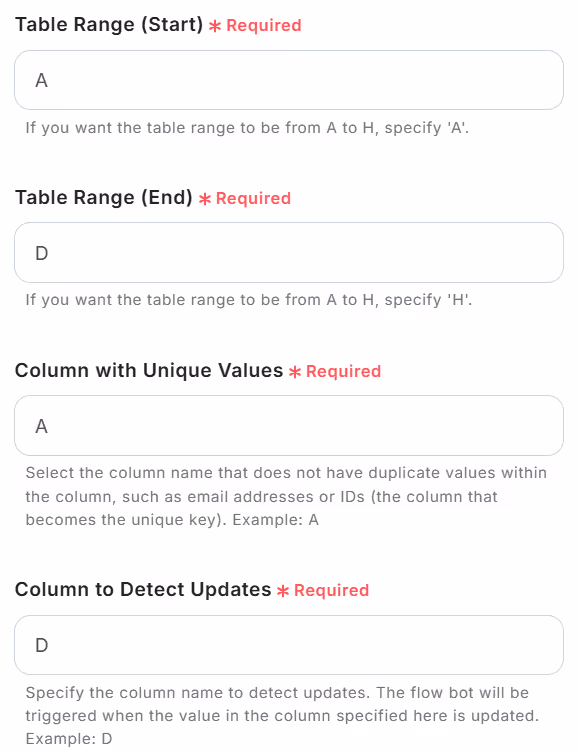
- Table Range (Start): If you want the table range to be from A to H, specify "A".
- Table Range (End): If you want the table range to be from A to H, specify "H".
- Column with Unique Values: Select the column name that contains unique values, such as email addresses or IDs, which do not duplicate within the column (the column that becomes the unique key). Example: A
- Column to Detect Updates: Specify the column name to detect updates.
When the value in the specified column is updated, the flow bot will be activated. Example: D
Test → Save if the test is successful.
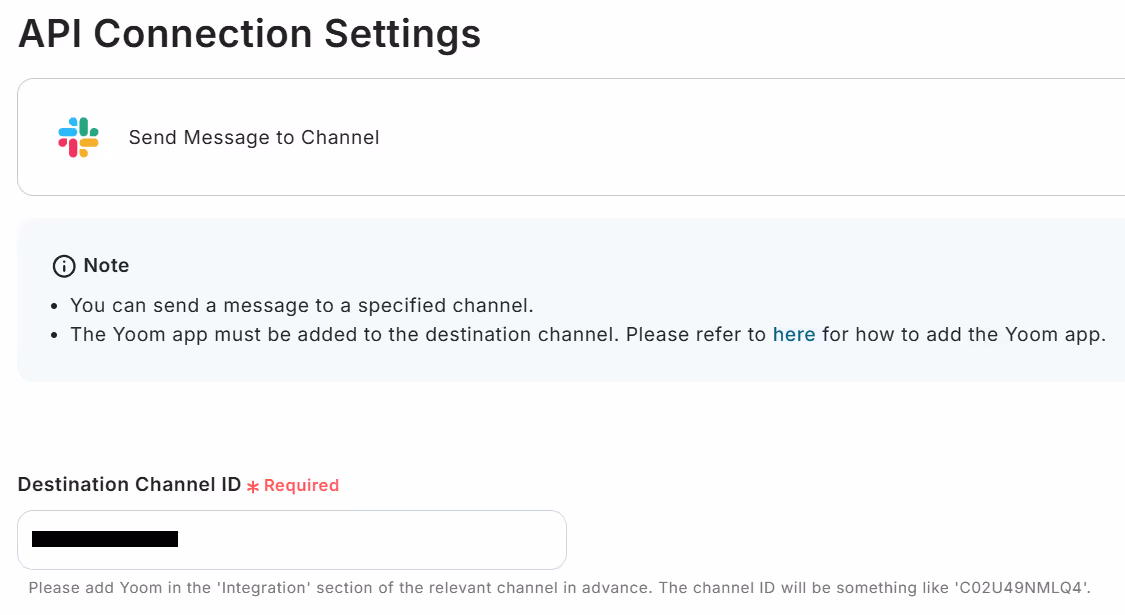
Next, click Send a message to the channel.
Again, check the account information to be linked.
Keep the action as it is and proceed to the next step.
On the next screen, set the following items.
- Channel ID to Post: You can select from the candidates.
The channel ID will be something like "C02U49NMLQ4".
※ Please refer to here to add Yoom in the "Integration" section of the relevant channel in advance.
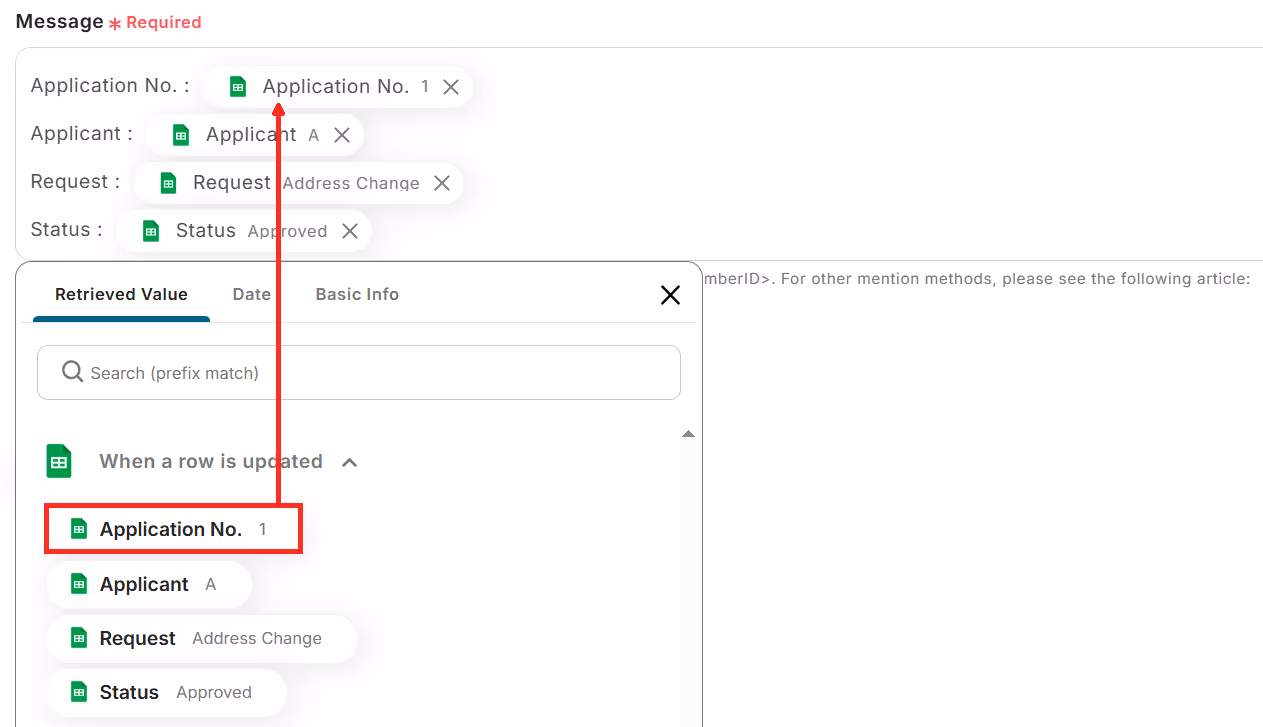
- Message: This time, we quoted the output and set it as follows.
By writing <@Member ID>, you can also add a mention.
Once selected, test it.
Let's take a look at Slack.

You can see the message properly!
Finally, turn on the app trigger to complete.
Thank you for your hard work.
Even I, who am not familiar with programming, was able to do it!


.avif)
.avif)
.avif)


