The template will be copied to my project.

Click the title within the red frame to navigate to the settings screen.
Step 3: App Trigger "When Credit Limit Review is Completed"

Click the first process to proceed to the next screen. After the credit limit review is completed in Money Forward Kakebarai, the flow bot will be activated, and the output will be extracted.
(1/2) Select Linked Account and Action
The following is pre-configured, so no operation is required.
- Title
- Database App
- Account information linked with Money Forward Kakebarai
- Execute Action
→ Click Next
(2/2) API Connection Settings

Copy the Webhook URL. From here, configure the settings in the Money Forward Kakebarai management screen.

Click the account name from the Money Forward Kakebarai menu. A further menu will appear, hover over "For Developers" to display the Webhook button, then click it.

Click "New Endpoint" at the top right.

- URL
- Paste the Webhook URL copied from the Yoom screen into the URL field.
- Secret
- Enter a 10-character string of uppercase, lowercase letters, and numbers at your discretion.
- Event Type
- Check the box for Preliminary Review.
→ Click Add
A list of endpoints will be displayed, and the newly added endpoint will be at the top. Click on it.

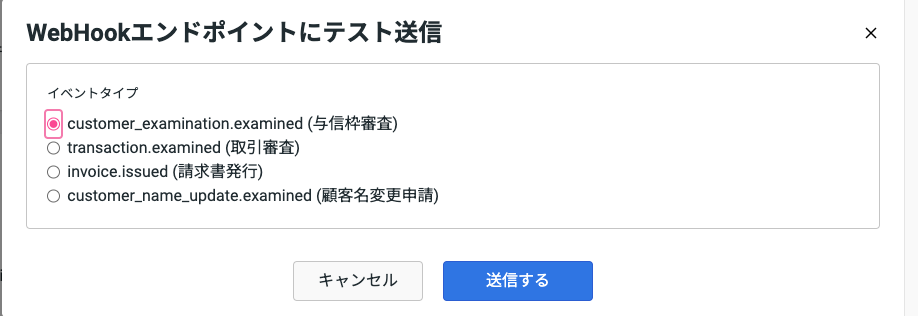
Click "Test Send" at the top right.

Select "Credit Limit Review" and click Send. This will be the test trigger.
Return to the Yoom screen,
→ Click Test. → Success. The output extracted includes the results of the credit limit review.

→ Click Save
Step 4: Integrate with App "Retrieve Customer Information"

Here, detailed customer information is extracted using the customer ID.
(1/2) Select Linked Account and Action
The following is pre-configured, so no operation is required.
- Title
- Database App
- Account information linked with Money Forward Kakebarai
- Execute Action
→ Click Next
(2/2) API Connection Settings

- Customer ID
- The reference code from the previous output is pre-embedded.
- Switch to Sandbox
- Select "Switch to Sandbox Environment".
→ Click Test! → Success. The following items were extracted in the output.

→ Click Save
Step 5: Integrate Database "Add Record"

Click the third process of the template. Set the information to be added to Google Sheets.
(1/2) Database Integration
The following is pre-configured.
- Title
- Database App
- Account information linked with Google Sheets
- Execute Action
◆ Database Integration
Proceed to Database Integration at the bottom of the same screen.

- Spreadsheet ID
- Click the edit field to pick up candidate sheets from the linked Google account. Select the relevant sheet to quote the ID.

- Spreadsheet Tab Name
- Click the edit field to pick up candidate tab names from the linked Google account. Select the relevant tab to quote the ID.
- Table Range
- Set it in the format "A1:G30". In this case, since A to L is the table range, enter A1:L1.
→ Click Next!
(2/2) Detailed Database Operation Settings

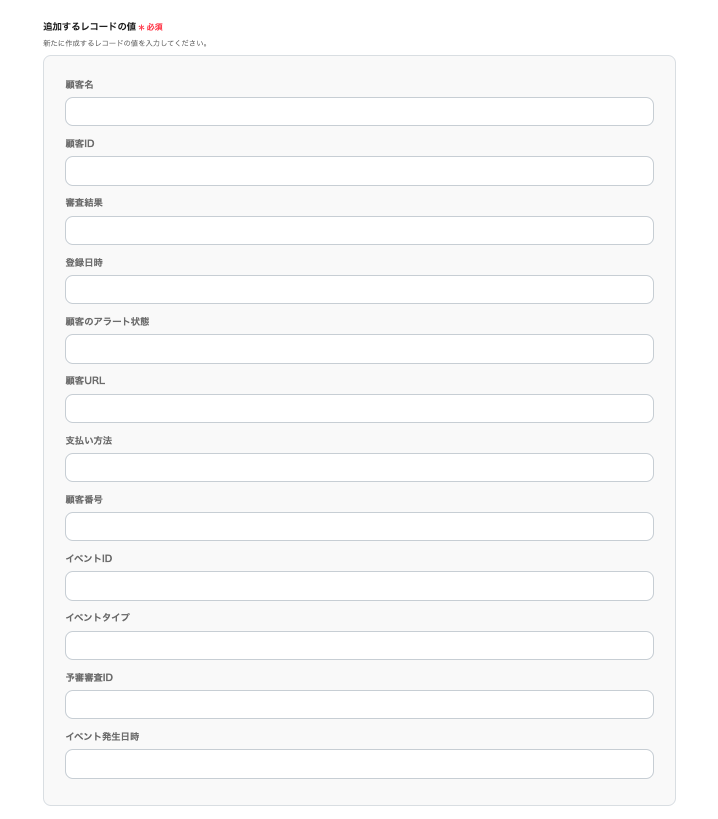
Link the output extracted by Money Forward Kakebarai to the items in the sheet where the record will be added.

The headers of the linked sheet will be extracted. The first and second output items have been reflected in the headers. Link the output here.

Click the edit field to open a dropdown where the previously extracted output is displayed as candidates. When selected, the reference code is automatically embedded.
→ Click Test → Success
→ Click Save!
Step 6: Turn the App Trigger [ON]
Once all processes are configured, a complete screen will pop up.

Turning the Trigger [ON] completes the setup.

The integration work is complete! Integration was achieved in a short time without using programming. Here is the template used this time.


.avif)
.avif)
.avif)


