How to Integrate Applications

2024/10/03

How to Automatically Transfer Page Information When Integrating NotePM with Microsoft Excel

k.hieda

NotePM is an excellent tool for managing information within a company, and it becomes even more convenient when integrated with Microsoft Excel. For example, by automatically transferring information from pages created in NotePM to Microsoft Excel, you can manage tasks and check progress in one place, making it easier to get an overview of the entire project. Sharing information with other teams and departments becomes easier, and collaboration proceeds smoothly. In the past, programming was required for such automation, but with our Flowbot template, you can easily set it up without programming.

In this article, we will explain in detail how to set up the addition of information to Microsoft Excel when a new page is created in NotePM. Please read to the end.

Two Benefits of Adding Information to Microsoft Excel When a Page is Created in NotePM

For project leaders and executives, efficient information management is essential. We will explain how to reduce manual work and utilize accurate data by integrating NotePM with Microsoft Excel.

Benefit 1: Centralized Information Management Without Hassle

When pages created in NotePM are automatically added to Microsoft Excel, information centralization progresses. This eliminates the need for manual input, reduces update omissions and errors, and allows efficient management of multiple projects. Furthermore, since information is reflected in real-time, the entire team can work based on the latest data, making it easier to check overall progress.

Benefit 2: Ensure Reliability with Data Accuracy

By automatically adding accurate information to Microsoft Excel, executives and managers can timely grasp the progress, prevent manual input errors and delays, and manage the entire project in real-time. Providing accurate data prevents judgment errors and delays, resulting in smoother decision-making.

[About Yoom]

From here, we will introduce how to create a Flowbot for "adding information to Microsoft Excel when a page is created in NotePM" using Yoom's template.

You can try it with a free plan.

Register for free on Yoom

How to Create a NotePM and Microsoft Excel Integration Flow Without Programming

Things to Prepare in Advance

Here is a list of items used in the integration process.

NotePM

  • Login information (for operations in NotePM)
  • Access token

>Official site: How to create an API access token

Microsoft Excel

Integration with Microsoft Excel is done using Microsoft SharePoint or OneDrive.

  • Microsoft365 login information
  • Please prepare a test environment for Microsoft SharePoint as we will introduce a method using Microsoft SharePoint.
    • Create a site
    • Upload the Microsoft Excel file to add records
      • Since the table recognizes the first row as the header, please create items in the columns of the first row.
      • Insert a unique key into the items. If there are duplicate values, please set it so that the system can identify which value it is, such as by assigning serial numbers to the values.

Step 1: Setting Up My App Integration

Here, we will set up the app to be integrated with Yoom. Log in to Yoom's workspace and click on new connection from the My Apps section!

A list of apps that can be connected with Yoom will be displayed. Search for the app to be connected from the search window at the top and proceed with My App registration.

NotePM

Search for "NotePM" and click on the app name that appears to display this screen.

  • Account name
    • Enter any string (such as an email address)
  • Access token
    • From the NotePM management screen, click on Personal Settings/API Access Token/New Creation at the top right.
  • On the API Access Token details page, enter a token name (any string), check the scope, and click the New Creation button.

  • The API access token will pop up. Copy the string and return to the Yoom settings screen. Paste it into the access token and click the Add button to complete the integration.
    >Official site help: How to create an API access token

Microsoft  Excel

Search for "Microsoft  Excel" and click on the app name that appears to display this screen.

The registration of My Apps to be used in this integration is complete.

Step 2: Copy Yoom's Template to My Project

After registering with Yoom, click on this banner to copy the template to "My Project" in the Yoom workspace.

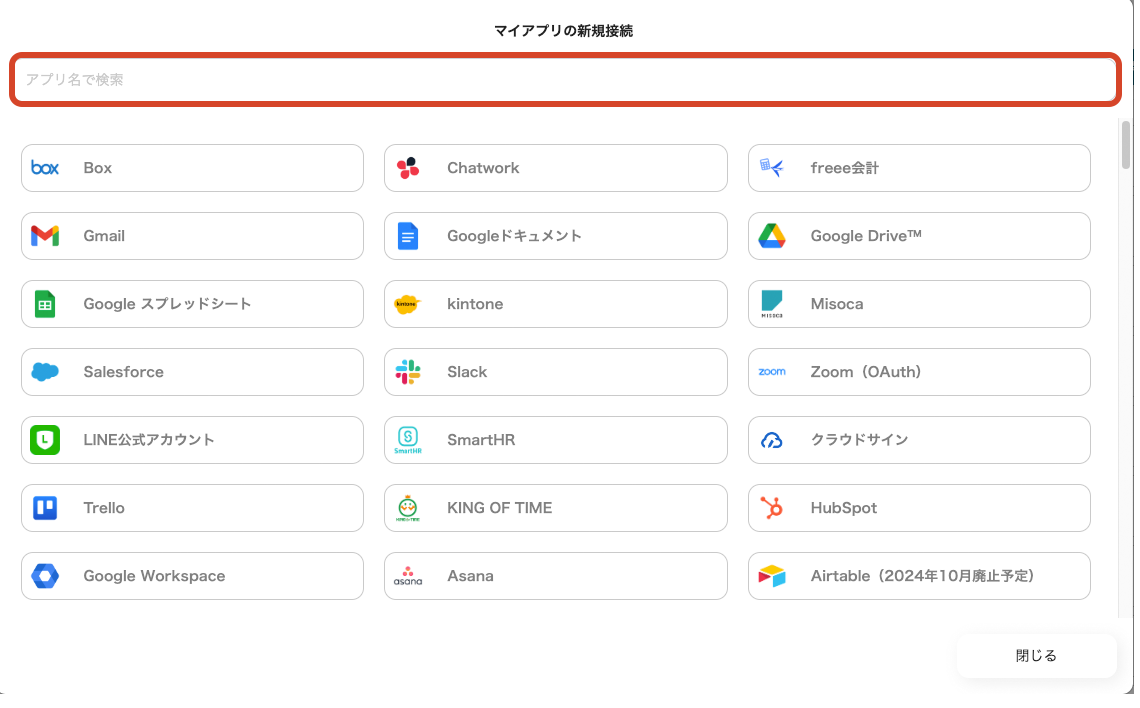
Click on the title within the red frame from My Projects to proceed to the integration operation.

Step 3: App Trigger "When a Page is Created"

Click on the first process of the template.

(1/2) Select Integration Account and Action

The following items are pre-configured.

  • Title of the App Trigger
  • App
  • Account information linked with NotePM
  • Trigger Action

→ Click Next

(2/2) App Trigger Webhook Event Reception Settings

Copy the Webhook URL and link it to a NotePM note. This time, link it to an existing note and use the creation of a new page as a trigger.

Scroll down to the "Service Integration" section.

Click the Add button and select Webhook.

On this screen, paste the Webhook URL copied from the Yoom screen. You can proceed without setting the Secret. Check the notification condition, and click Test Connection and Register. Once registered, create a new page within the note.

A page was created for testing. After adding the page in NotePM, return to the Yoom screen.

→ Click Test → Success. The content of the page, etc., was extracted in the output.

※ If an error occurs

There may be a possibility that the event (page addition) is not registered after setting the Webhook URL in the NotePM management screen. Please test again after adding.

→ Click Save

Step 3: Operate the Database "Add Record"

Click on the second process of the template.

(1/2) Database Integration "Add Record"

The following are pre-configured.

  • Title
  • Database App
  • Account information linked with Microsoft Excel
  • Execution Action

Database integration requires configuration.

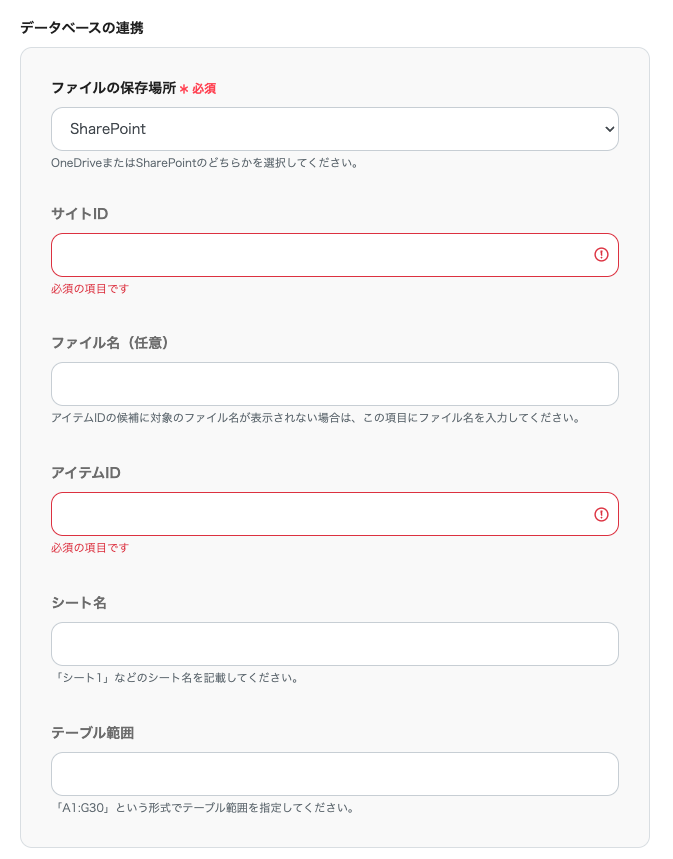
  • File Storage Location
    • This time, since we are using Microsoft SharePoint, open the dropdown and select Microsoft SharePoint.
  • Site ID
    • Click the edit field, and the sites linked to the integrated account will appear as candidates. Selecting one will quote the ID.
  • File Name
    • This setting is optional.
  • Item ID
    • Click the edit field to open a dropdown, and the file names of Microsoft Excel within the selected site will be displayed. Selecting one will quote the ID.
  • Table Range
    • Set in the format "ColumnRow:ColumnRow". This time, since A to H is the table range, enter A1:G1.

Once the database integration is complete, proceed to the next step.

→ Click Next

(2/2) Detailed Settings for Database Operations

The headers of the sheet integrated in the previous screen are extracted and displayed as input fields.

Fill in each edit field. Clicking an edit field will open a dropdown, displaying the output extracted from NotePM.

When you select an item to link to a sheet column, a reference code is embedded in the edit field. Once all items have the output embedded,

→ Click Test → Success

→ Click Save

Step 5: Turn the App Trigger [ON]

Once all processes are configured, a completion screen will pop up.

Turning the trigger [ON] completes the setup. Page information was added to Microsoft Excel on the Microsoft SharePoint site.

<span class="mark-yellow">Integration was achieved without using programming</span> Here is the template used this time.

3 Automation Tips for Better Utilization of NotePM and Microsoft Excel

NotePM and Microsoft Excel offer many other automation templates.

1. Automatically Manage Information by Integrating NotePM and Notion Databases

When a page is created in NotePM, it is automatically added to the Notion database. This eliminates the need for manual data entry, allowing both tools to share the latest information at any time. For teams using multiple tools, this makes it easier to centralize information and reduces the risk of errors in operations.

2. Automatically Send NotePM Comment Notifications to Chatwork

When a comment is added to NotePM, a notification is automatically sent to Chatwork. This allows the entire team to quickly grasp information and not miss any progress updates or important changes. Smooth information sharing ensures that all team members can work based on the same information.

3. Automatically Add Jooto Tasks to Microsoft Excel

When a task is created in Jooto, it is automatically added to Microsoft Excel. This integration makes it easier to centrally manage task progress in Excel and prevents manual transcription errors. It will enable smoother team status tracking and task management.

Summary

This time, we found that integrating NotePM with Microsoft Excel can be easily implemented without programming knowledge by using Yoom's templates. This automation allows project leaders and coordinators to eliminate manual data entry and manage information in real-time. Furthermore, for executives and managers, it enables decision-making based on accurate and reliable data. This integration will make the entire team's operations more efficient.

<span class="mark-yellow">Yoom is a tool that allows easy automation without programming knowledge. Please utilize it to improve your work efficiency.</span>

Start integrating with Yoom for free

See you next time!

The person who wrote this article
k.hieda
10 years as a web planner and director. When I worked for a web production company, my main focus was on proposing modifications and operation plans to clients and proceeding with production. I'm currently a parallel worker. We produce blogs in Yoom's content division, and receive external public relations projects for companies in our individual business. Since we are starting a private lodging, we aim to thoroughly improve the efficiency of routine work!
Tags
NotePM
Microsoft Excel
Automation
Automatic
Integration
App integration
No items found.
What is Yoom hyperautomation?
Conventional RPA can only automate simple repetitive tasks, and the setup process was very complicated.
With “hyperautomation,” which combines various technologies such as AI, API, RPA, and OCR, it is possible to automate many tasks that could not be realized until now more easily than before.
Don't Just Connect Apps—Automate Everything
Most tools simply connect one app to another, leaving the complex tasks to you. Yoom goes much further: From document creation and browser automation to OCR and generative AI, Yoom handles it all seamlessly in one platform.

Why settle for basic integrations? Streamline your entire workflow with Yoom’s powerful hyperautomation.
Learn more about Yoom
Helpful Materials
I understand Yoom! 3-piece set of materials
Download materials
Understand in 3 minutes! Yoom service introduction materials
Download materials
Find out by Before After! Yoom Case Study Collection
Download materials
See a list of useful materials