SalesforceとOutlookの連携イメージ
How to Integrate Applications

2025-04-08

How to Send Standard Emails in Outlook Based on Salesforce Contact Information

t.aizawa

In sales activities, smooth communication with customers is a crucial factor that can determine success.
However, for those managing multiple clients, manually creating emails each time can be time-consuming and labor-intensive.

Why not solve this issue by using the integration of Salesforce and Outlook?

By integrating the apps, you may be able to handle customer interactions more smoothly.
Reducing manual tasks can lead to less operational hassle and shorter working hours.

In this article, we explain how to integrate Salesforce and Outlook and the specific benefits of doing so.
If you aim to improve work efficiency, please take a look!

Recommended for

  • Those who use Salesforce and Outlook
  • Those considering integrating Salesforce and Outlook to improve work efficiency
  • Those aiming for quick follow-ups by integrating Salesforce and Outlook
  • Those aiming to enhance the accuracy of sales activities by integrating Salesforce and Outlook

For those who want to try it immediately

This article introduces the integration method using the no-code tool "Yoom".
No complicated settings or operations are required, and even non-engineers can easily achieve it.
You can start right away with the template below, so please give it a try!

[What is Yoom]

How to Create a Salesforce and Outlook Integration Flow

Let's create a flow together using a template to "send a standard email in Outlook based on Salesforce contact information."

This time, we will use a trigger with a Chrome extension. With the Chrome extension, you can easily start the flow with just one click from Salesforce, which is very convenient!
If you're wondering, "What is a Chrome extension?" please check the site below.

Automate your tasks with one click from your service! Chrome Extension

For basic operations of Yoom, please check Getting Started with Yoom.

Step 1: Register Salesforce and Outlook in My Apps!

(1) After logging into Yoom, select "My Apps" from the left column and choose "+ New Connection."

(2) Click on Salesforce from the new connection list in My Apps.
(3) The Salesforce login screen will appear. Enter your account's "Username" and "Password" and click login.


(4) Click "Allow" on the access confirmation screen.
For detailed My Apps registration in Salesforce, please refer to the site below.

How to Register My Apps in Salesforce

(5) Next, register Outlook in My Apps. Click Outlook from the new connection list in Yoom, just like in (1).
(6) Log in with your account from the sign-in screen.

If Salesforce and Outlook are in My Apps, the integration is complete!
Next, let's set up the trigger using a template.

Step 2: Set Up the App Trigger!

(1) We will use the template introduced earlier. Click "Try it" on the banner below.

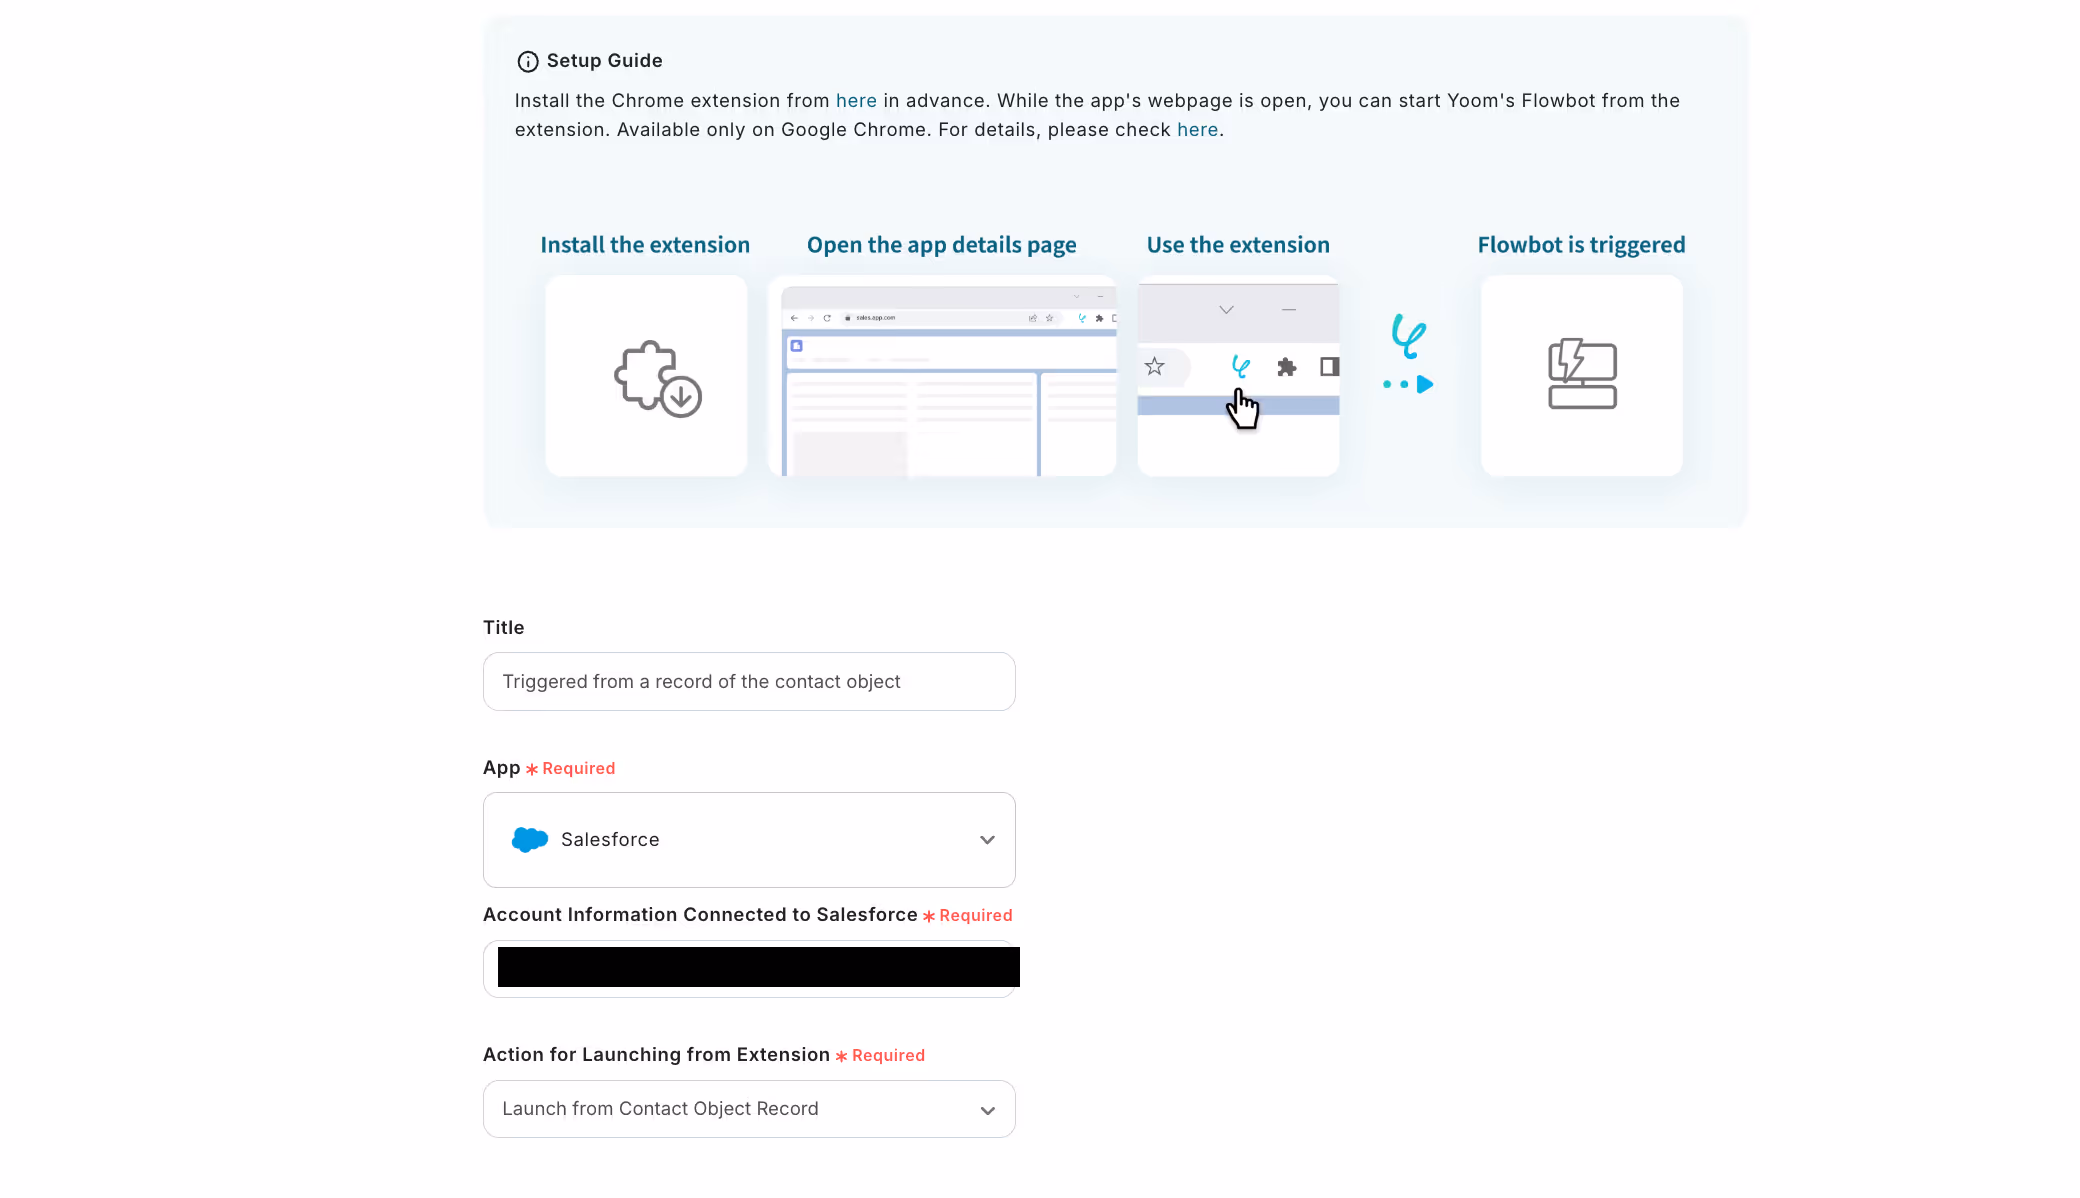
Click on "Launch from the record of the Contact Object" for the Chrome extension trigger.

(2) From the screen to select the integration account and action for the app launched by the Salesforce extension, confirm the account information integrated with Salesforce, keep the action as "Launch from the record of the Contact Object" when launching from the extension, and click "Next".
※ Please refer to the following site for how to set up triggers using the Chrome extension.

How to set up triggers using the Chrome extension

(3) From the API connection settings screen of the app launched by the extension, enter the My Domain URL and the sample URL for the launch page.

Once the input is complete, click "Test", and if no errors occur, click "Save".

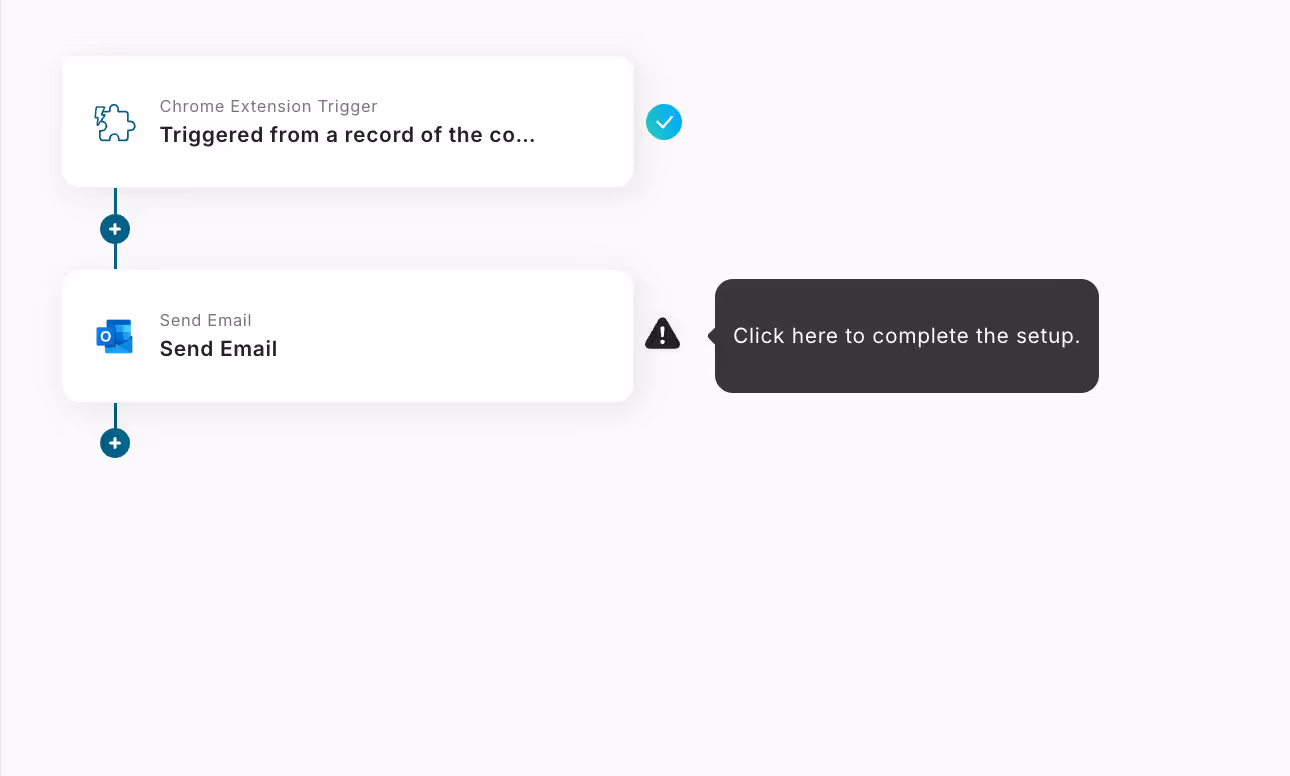
Step 3: Send an Email

(1) Next, set up sending emails from Outlook.
Click "Send Email".

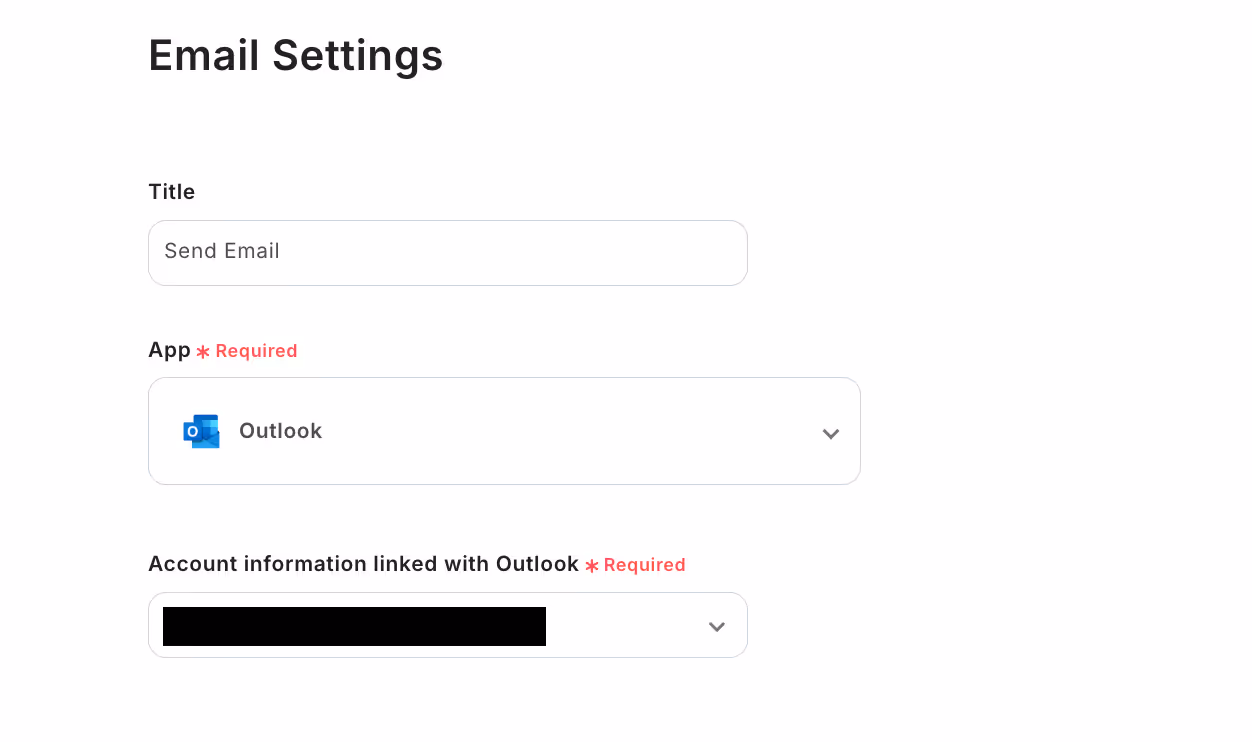
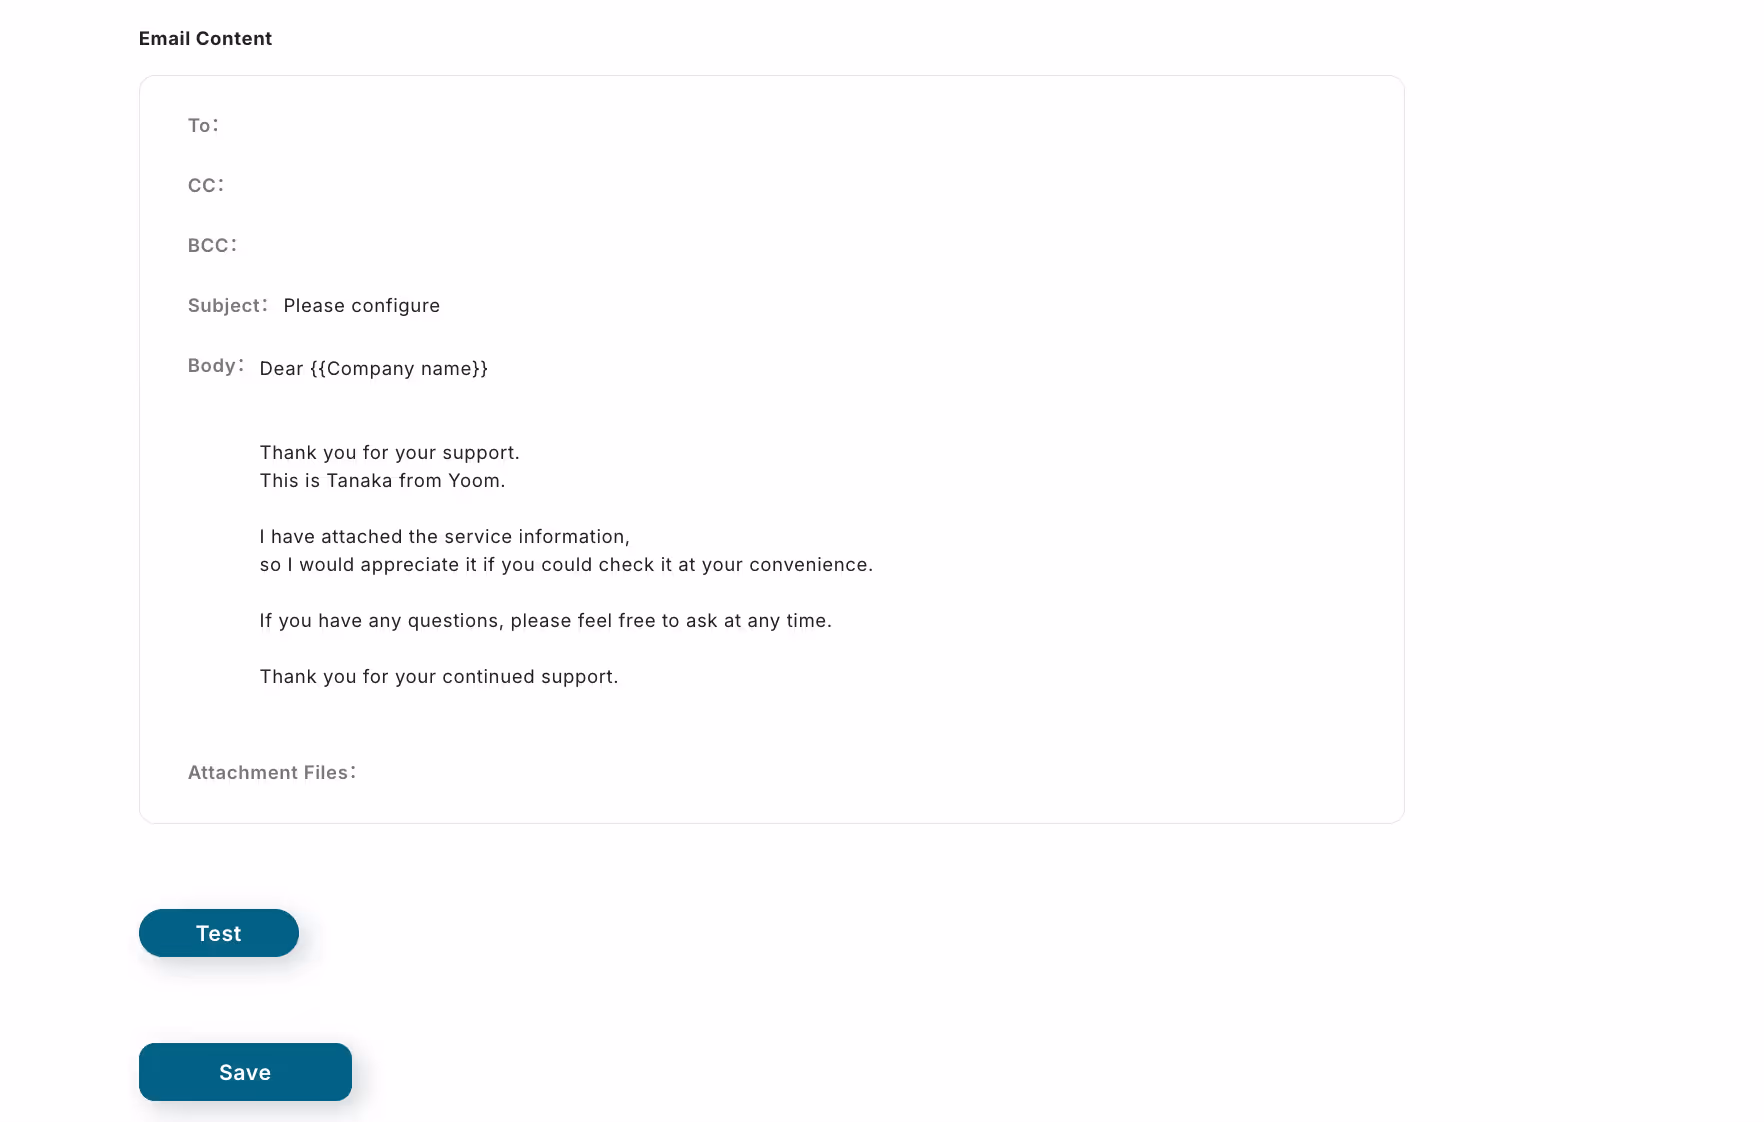
(2) From the Outlook email settings screen, confirm the account information integrated with Outlook.


Scroll down further and enter the email content.
By clicking "Add Attachment", you can upload files.

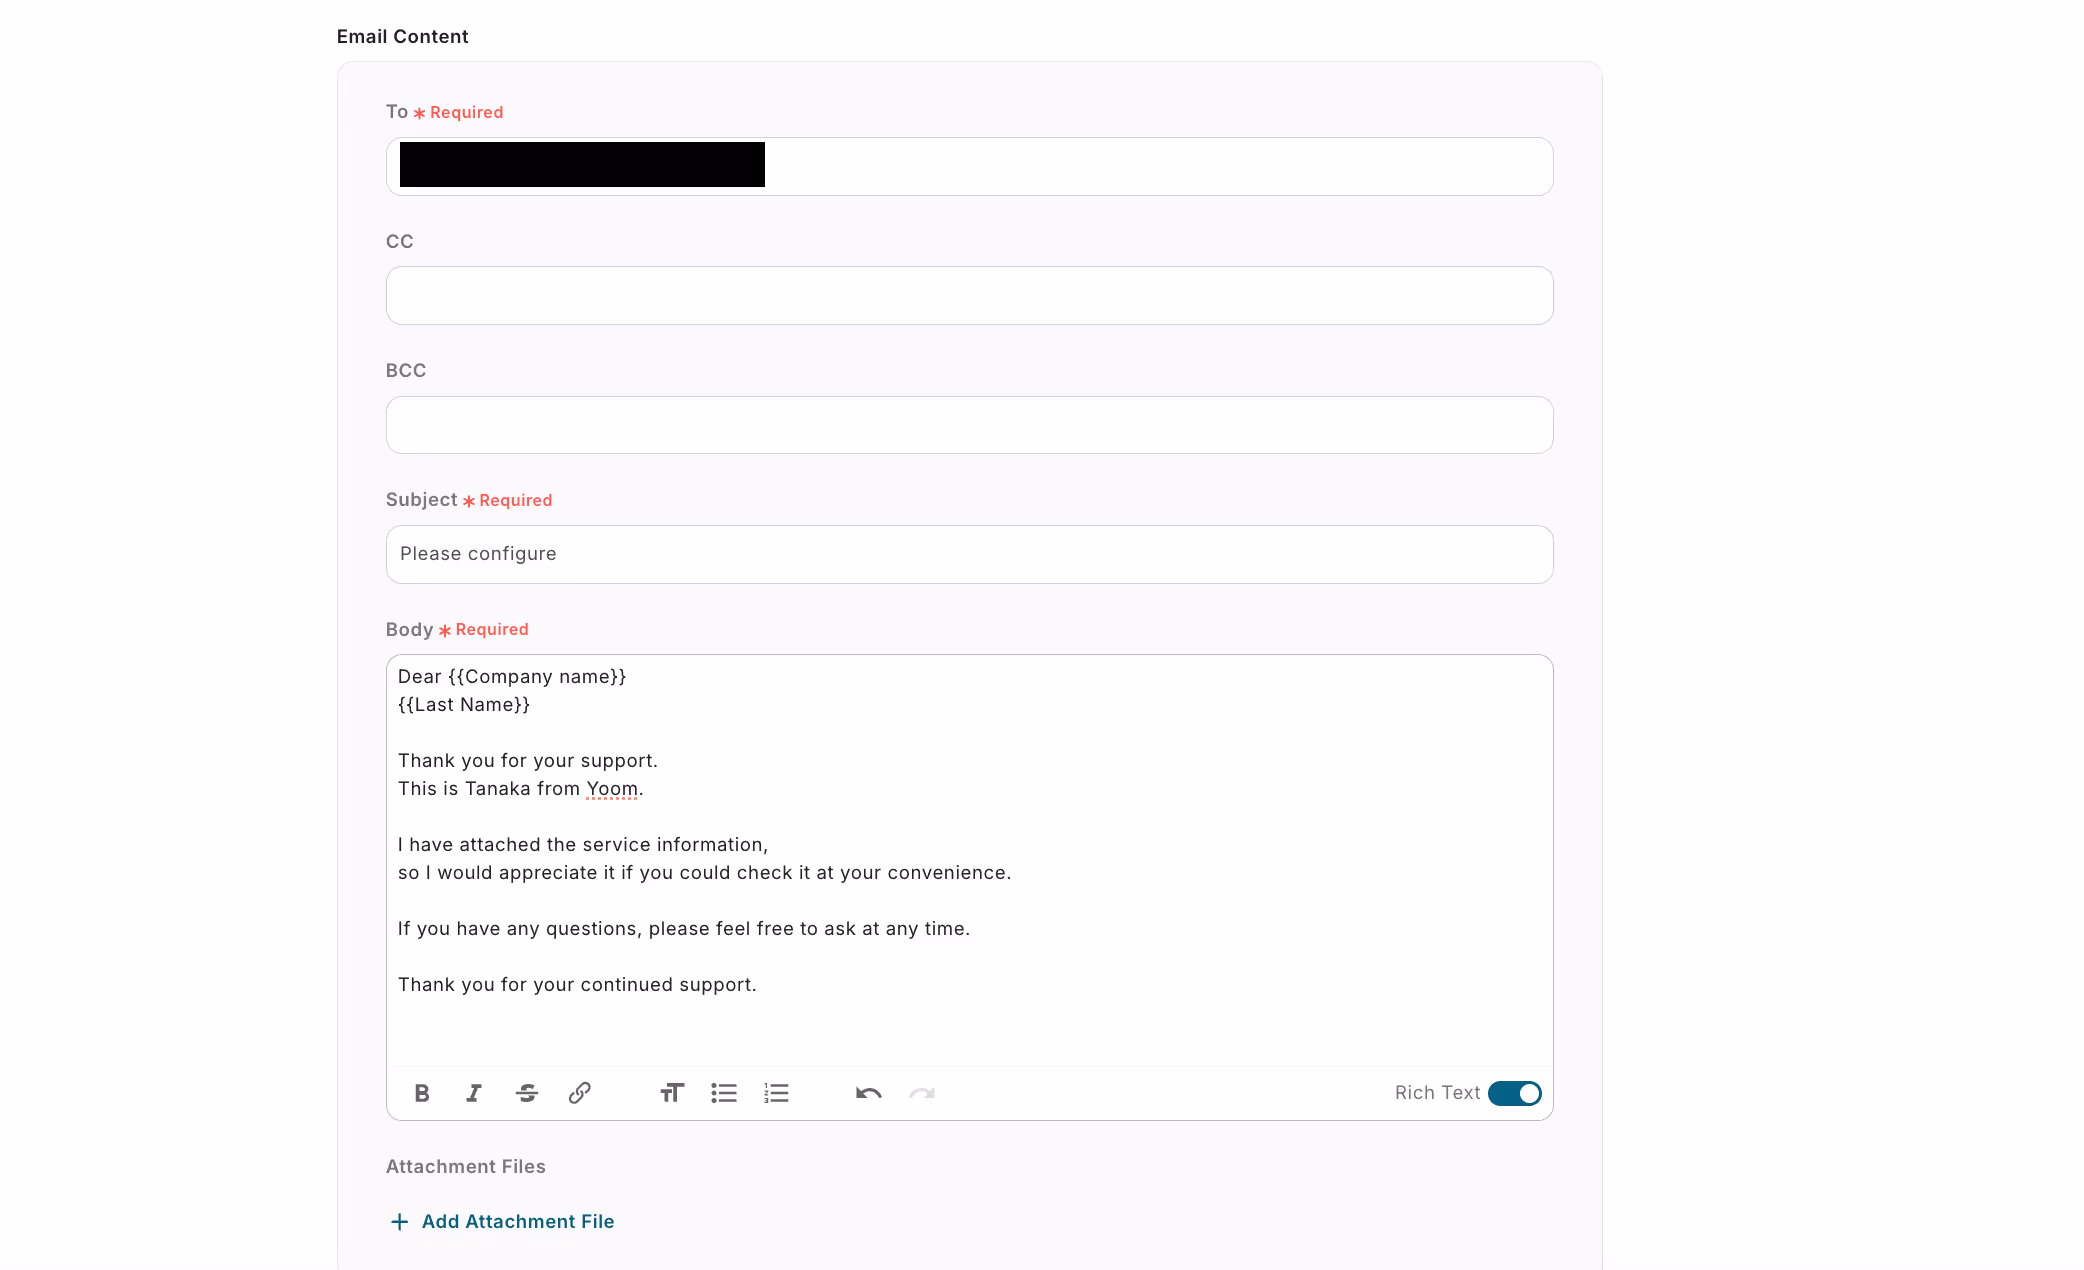
Once the input is complete, click "Next" at the bottom.
(3) From the email sending test screen, confirm the content, click "Test", and if no errors occur, click "Save".

(4) Finally, change the email trigger from OFF to ON.

With this, the flow bot "Send a template email from Outlook based on Salesforce contact information" is complete.

Using the Chrome extension allows you to easily launch flows from within Salesforce, saving you the hassle of manually searching each time and making your work more efficient!

Other Automation Examples Using Salesforce and Outlook

In addition to the flow introduced this time, you can achieve various business automations by using the APIs of Salesforce and Outlook.
All of them can be used with simple settings, so if you find something interesting, please give it a try!

Other Automation Examples with Salesforce and Outlook

When the opportunity object is updated to a specified status, you can issue a quote and send it via Outlook, or create a support request email received in Outlook as a case in Salesforce.
Furthermore, when the opportunity status in Salesforce becomes "Closed Won," you can also create a follow-up in the Outlook calendar.

Examples of Automation Using Salesforce

Create a Folder When an Account is Registered in Salesforce

Since the folder is created automatically, it is possible to reduce human errors such as forgetting to create a folder or errors in the folder name.

Add when a ToDo object is registered in Salesforce

When a ToDo object is registered in Salesforce, the ToDo information is automatically added to another tool, potentially freeing you from the redundant task of manual input.

Notify when Salesforce opportunity information is registered

Since the registered opportunity information can be automatically notified, it will help prevent any oversight in information management.

Automation Example Using Outlook

Automatically Reply to Emails from Outlook When a Specific Action is Taken

By sending a detailed email notification of the action performed to a specified email address via Outlook, you should be able to respond promptly to customer inquiries.

Register information from signature details of emails received in Outlook

By performing the registration process accurately, concerns about incorrect input are eliminated, and a reduction in working time can be expected.

Benefits of Integrating Salesforce with Outlook

Benefit 1: Improved Customer Response Speed

Detailed communication with customers is one of the most important tasks. By integrating Salesforce with Outlook, you can automatically send template emails from Outlook based on the information registered in Salesforce, which can lead to faster follow-ups. For example, when a sales representative sends a contract renewal email to a customer, the effort and time can be reduced, allowing for quick and detailed responses that may impress the recipient. It should also help in building relationships with customers!

Benefit 2: Improved Work Efficiency for Support Teams

The integration of Salesforce and Outlook can be a useful tool for people other than sales representatives. Imagine a scenario where you conduct a campaign to send a large number of emails. With this integration, the sending of template emails is automated, allowing you to complete tasks with minimal operations. By reducing the time spent on simple tasks, you may be able to increase the time available to focus on other tasks.

Summary

By integrating Salesforce with Outlook, you should be able to automate email distribution and share timely customer information in your sales activities. You will be able to use your time more effectively and facilitate smooth interactions with customers.

Salesforce is an app available only with the Team Plan and Success Plan, but you can use restricted apps by signing up for a two-week free trial. Please give it a try!

Free Registration for Yoom

The person who wrote this article
t.aizawa
I hope everyone's everyday work will be much easier! We will continue to send out information on improving work efficiency using Yoom!
Tags
Salesforce
Outlook
Automation
Integration
What is Yoom hyperautomation?
Conventional RPA can only automate simple repetitive tasks, and the setup process was very complicated.
With “hyperautomation,” which combines various technologies such as AI, API, RPA, and OCR, it is possible to automate many tasks that could not be realized until now more easily than before.
Don't Just Connect Apps—Automate Everything
Most tools simply connect one app to another, leaving the complex tasks to you. Yoom goes much further: From document creation and browser automation to OCR and generative AI, Yoom handles it all seamlessly in one platform.

Why settle for basic integrations? Streamline your entire workflow with Yoom’s powerful hyperautomation.
Learn more about Yoom
Helpful Materials
I understand Yoom! 3-piece set of materials
Download materials
Understand in 3 minutes! Yoom service introduction materials
Download materials
Find out by Before After! Yoom Case Study Collection
Download materials
See a list of useful materials