How to Integrate Applications

2024/10/02

How to create a folder in Microsoft SharePoint when a client is registered in SPIRAL

t.aizawa

How do you manage client data?
You want to manage the ever-increasing data efficiently, right?
In such cases, you can use Yoom to integrate multiple tools and centralize information.
This article introduces the method and benefits of integrating SPIRAL with Microsoft SharePoint, so that when you register client information in SPIRAL, a related folder is automatically created in Microsoft SharePoint.
This integration can streamline customer management and speed up operations.

Benefits of Integrating SPIRAL with Microsoft SharePoint

Benefit 1: Centralized Folder Management

By integrating SPIRAL with Microsoft SharePoint, you can centrally manage client information and related folders. Data registered in SPIRAL is automatically saved in Microsoft SharePoint folders, eliminating the need to navigate multiple systems or folders. This prevents information duplication and oversight, improves overall operational efficiency, and makes data management simple and clear. Especially for sales teams and project managers, centralized information management ensures smooth operations.

Benefit 2: Timely Information Sharing

Integrating SPIRAL with Microsoft SharePoint allows the entire team to share the latest client information in a timely manner. Since Microsoft SharePoint is a cloud-based platform, it is accessible from anywhere, and this automation ensures that information from SPIRAL is immediately reflected, making verification tasks easier.
This reduces communication loss and is expected to speed up operations.
Timely information sharing is particularly beneficial for remote work or operations across multiple locations.

[What is Yoom]

How to Create a SPIRAL and Microsoft SharePoint Integration Flow

Now, let's create a flow together using a template to "create a folder in Microsoft SharePoint when a client is registered in SPIRAL"!

The template we will use can be copied by clicking "Try it" on the banner below.

Before Getting Started

If you do not have a Yoom account, please create one from the "Yoom Account Creation Page" below.
For basic operations of Yoom, please refer to "Getting Started with Yoom."

Yoom Account Creation Page

Getting Started with Yoom

Now, let's get started!

Step 1: Connect SPIRAL and Microsoft SharePoint to My Apps

(1) After logging into Yoom, select "My Apps" from the left column and click "+ New Connection."

(2) From the list of new connections in My Apps, click SPIRAL.
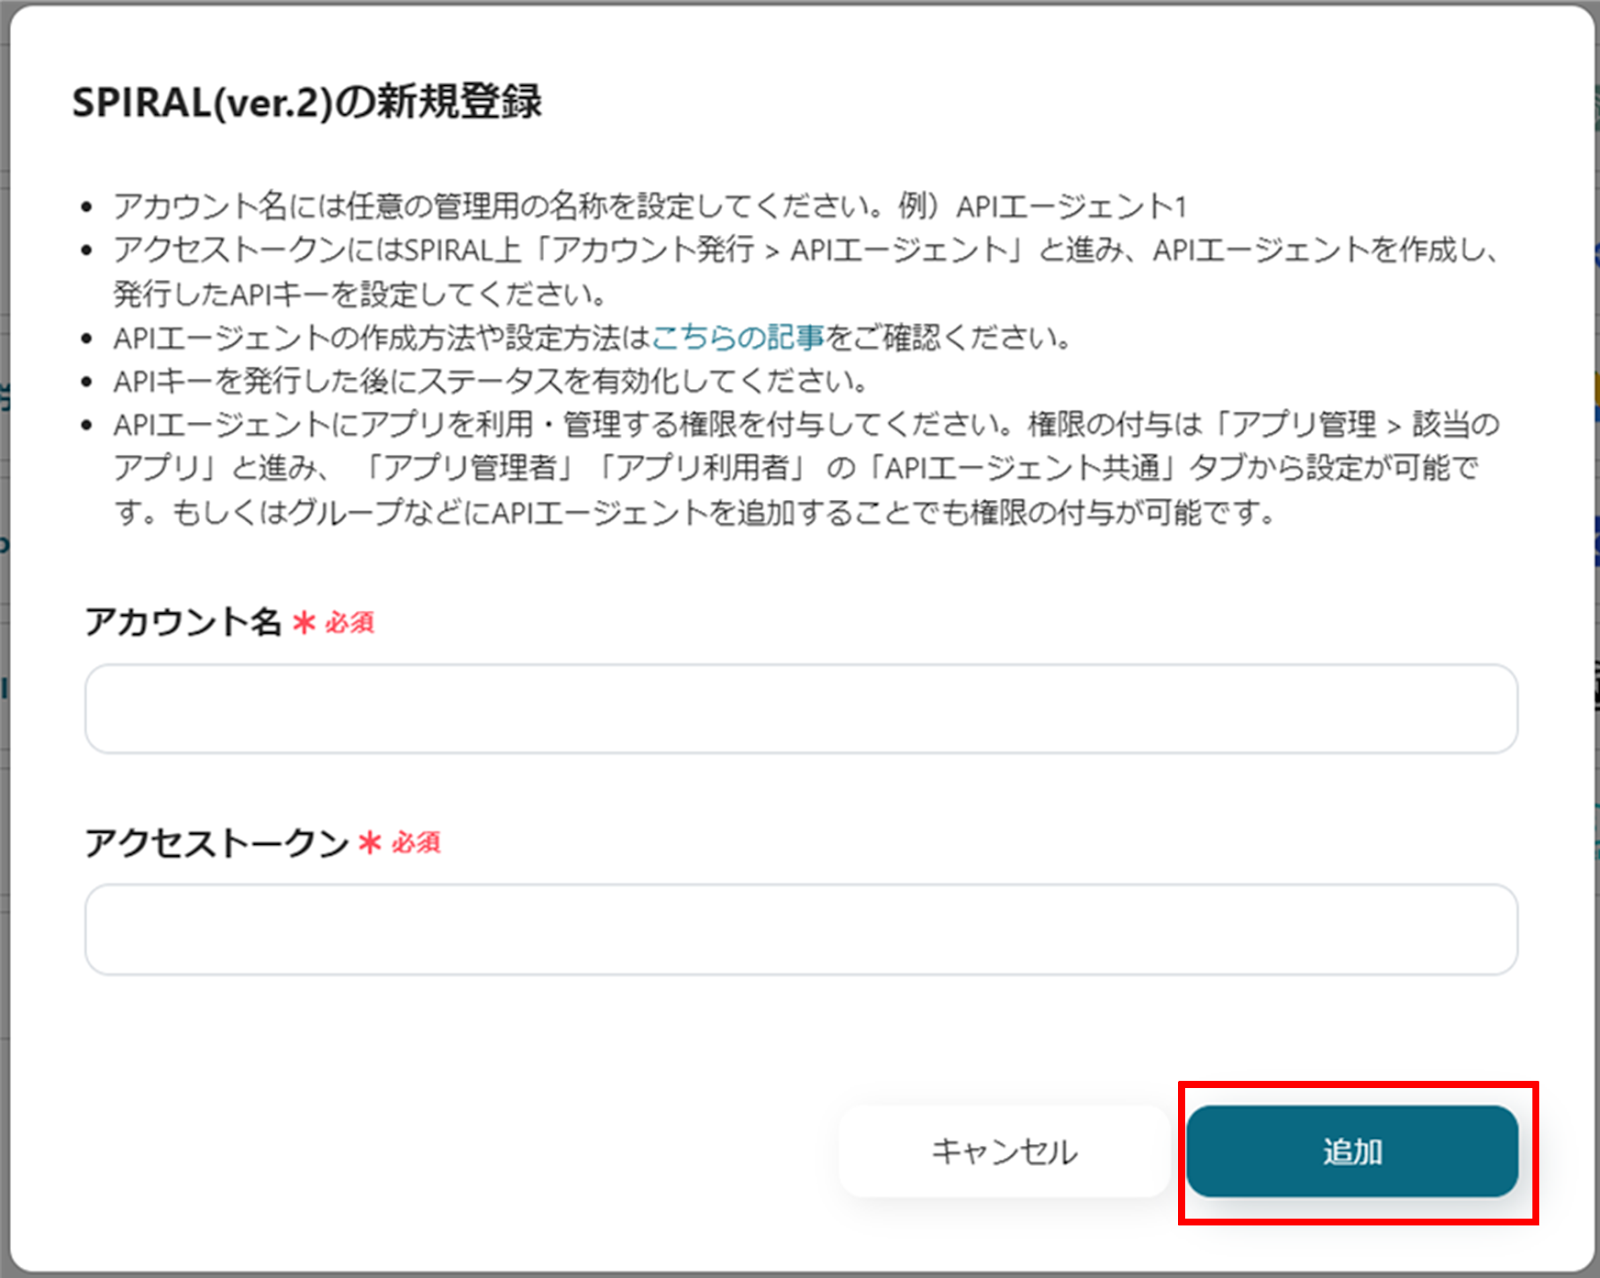
(3) On the SPIRAL registration screen, enter the account name and access token.
For instructions on creating an API agent, please refer to the site below.
API Agent Management

Once the input is complete, click "Add."
(4) Next, connect Microsoft SharePoint. Similarly, click Microsoft SharePoint from the list of new connections in Yoom.
※ Microsoft365 (formerly Office365) has plans for home use and general business use (Microsoft365 Business). If you are not subscribed to the general business plan, authentication may fail.
(5) The sign-in screen will appear. After entering your account, click "Next."

Once the connection is complete, SPIRAL and Microsoft SharePoint will be registered in Yoom's My Apps.

This completes the My Apps registration.
Next, let's set up triggers using templates!

Step 2: Setting When a Record is Created

(1) We will use the template introduced earlier. Click "Try it" on the banner below.

Click on "When a record is created" in the app trigger.

(2) From the "Select Integration Account and Action" screen in SPIRAL, verify that there are no errors in the account information linked with SPIRAL (ver.2), keep the trigger action as "When a record is created," and click "Next."


(3) From the "App Trigger API Connection Settings" screen, select the trigger interval from the dropdown menu.
※ The trigger interval can be selected from 5 minutes, 10 minutes, 15 minutes, 30 minutes, or 60 minutes.
※ Please note that the shortest trigger interval varies depending on the plan.

Select the App ID and Database ID from the candidates.
Once the selection is complete, click "Test," and if no errors occur, click "Save" at the bottom.

Step 3: Integration with Microsoft SharePoint

(1) Next, integrate with Microsoft SharePoint.
Click "Create Folder."

(2) From the "Select Integration Account and Action" screen in Microsoft SharePoint, verify that there are no errors in the account information linked with Microsoft SharePoint, keep the action as "Create Folder," and click "Next."

(3) From the "API Connection Settings" screen, enter the following information.
・Site ID: Select from candidates
・Drive ID: Select from candidates
・Parent Folder Name: Select from output
・Parent Folder Item ID: Select from candidates
・Folder Name: Select from output

Once the input is complete, click "Test" at the bottom, and if no errors occur, click "Save."
(4) Finally, click "Turn on Trigger."

This completes the flowbot "Create a folder in Microsoft SharePoint when a client is registered in SPIRAL."

Other Automation Examples Using SPIRAL and Microsoft SharePoint

At Yoom, there are many other examples of automation using SPIRAL and Microsoft SharePoint, so let me introduce a few.

1. Add a Record to SPIRAL When a Row is Added in Google Sheets

By using this flow, information is automatically reflected in SPIRAL when a row is added to Google Sheets. This is recommended for those who utilize Google Sheets in their work or want to manage tasks using shared sheets.

2. Update SPIRAL records when a row is updated in Google Sheets

The flow introduced above was for "adding records," but by using this flow, you can also automate the update process.
Automating both addition and updates can help reduce manual input into Google Sheets.

3. When a form is answered, download a document template from Microsoft SharePoint and send it to Outlook

By integrating Microsoft SharePoint and Outlook, a document template is automatically created and sent to Outlook when a form is answered. This ensures a seamless automation from document creation to email sending, helping to prevent any information omissions or leaks.

Additionally, if you want to check out templates using SPIRAL and Microsoft SharePoint, please visit the following sites.

List of Flowbot Templates Using SPIRAL

List of Flowbot Templates Using Microsoft SharePoint

Summary

By integrating SPIRAL and Microsoft SharePoint, it seems that managing client information and centralizing files will become smoother!
This integration can speed up folder creation automation and information sharing, and also enhance security. Moreover, eliminating the hassle of navigating multiple systems and simplifying data management can lead to more accurate and effective business operations.
Be sure to leverage this integration to optimize your business operations!

The person who wrote this article
t.aizawa
I hope everyone's everyday work will be much easier! We will continue to send out information on improving work efficiency using Yoom!
Tags
SPIRAL
Microsoft SharePoint
Automation
Integration
App integration
No items found.
What is Yoom hyperautomation?
Conventional RPA can only automate simple repetitive tasks, and the setup process was very complicated.
With “hyperautomation,” which combines various technologies such as AI, API, RPA, and OCR, it is possible to automate many tasks that could not be realized until now more easily than before.
Don't Just Connect Apps—Automate Everything
Most tools simply connect one app to another, leaving the complex tasks to you. Yoom goes much further: From document creation and browser automation to OCR and generative AI, Yoom handles it all seamlessly in one platform.

Why settle for basic integrations? Streamline your entire workflow with Yoom’s powerful hyperautomation.
Learn more about Yoom
Helpful Materials
I understand Yoom! 3-piece set of materials
Download materials
Understand in 3 minutes! Yoom service introduction materials
Download materials
Find out by Before After! Yoom Case Study Collection
Download materials
See a list of useful materials