


Integration of Webflow and SPIRAL with My Apps
After copying the template, first register Webflow and SPIRAL from Yoom's "My Apps" as a preliminary step.
※If you have already registered, please proceed to "Step 1: Setting Up the App Trigger".
<Procedure>
1. After logging into Yoom, click "+ New Connection" from the "My Apps" menu on the left side.
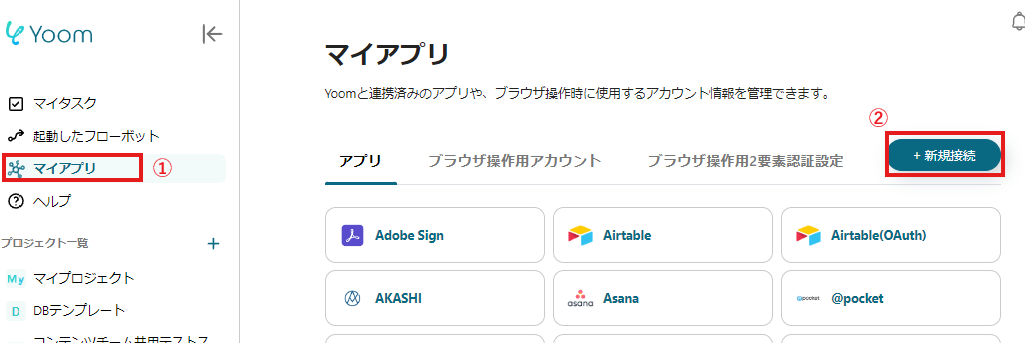
2. Search for the app name, enter the required information, and register the app.

If Webflow and SPIRAL are displayed in the My Apps list, you are ready!
Let's proceed to the detailed settings!
Step 1: Setting Up the App Trigger
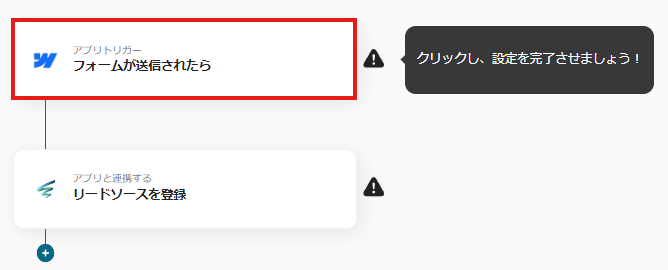
First, click on the app trigger "When the form is submitted".
On the first page, check the pre-linked account information.
If there are no issues, click "Next".
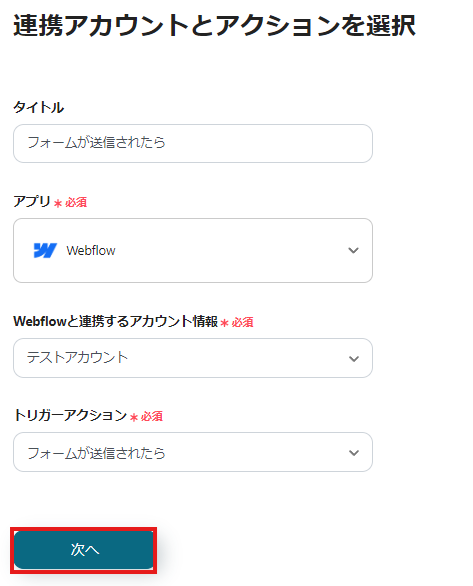
On the next page, set up the API connection with Webflow.
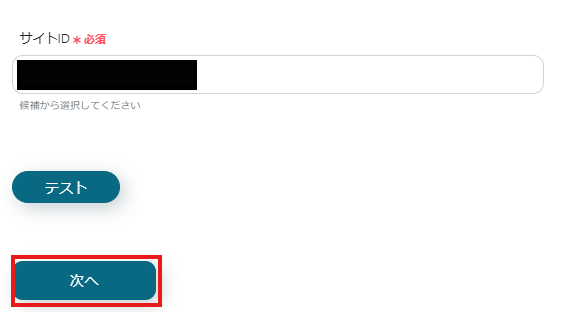
Specify the site ID, and if there are no errors in the "Test", click "Next".
On the next page, send a Webhook event or execute a trigger event, and click "Test".

If there are no issues up to this point, click "Save" to complete the trigger setup.
Step 2: Register Lead Source
Next, click "Register Lead Source".

On the first page, just like in Step 1, check only the account information, and if there are no issues, click "Next".
On the second page, set up the registration of the lead source.
Enter "App ID", "Database ID", and "Record Information" respectively.
For the value of the record information, use the information output from Webflow as shown below.
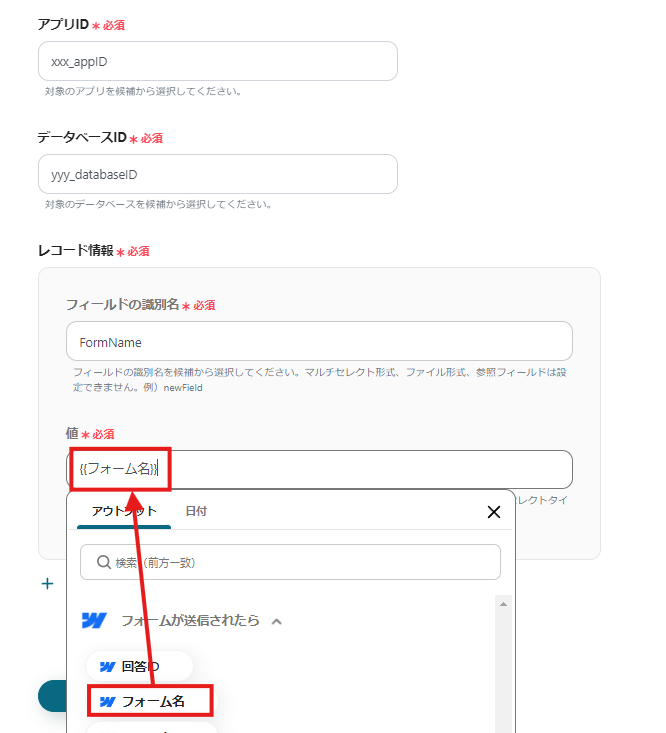
Click "Test", and if there are no errors, click "Save".
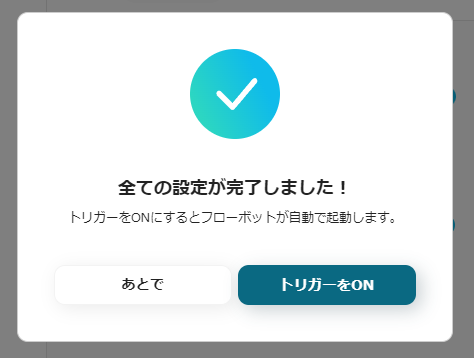
If a popup like the one below appears, all settings are complete.
Other Automation Examples Using Webflow and SPIRAL
Yoom offers many automation examples using Webflow and SPIRAL.
Here are some representative examples.
1. Add to Google Sheets when a Webflow form is submitted
The automation introduced this time had SPIRAL as the data output destination, but it is also possible to link Google Sheets as the output destination.
Recommended for those who want to aggregate and analyze data in Google Sheets.


.avif)
.avif)
.avif)


