


The template will be copied to my project.

Click the title within the red frame to navigate to the settings screen.
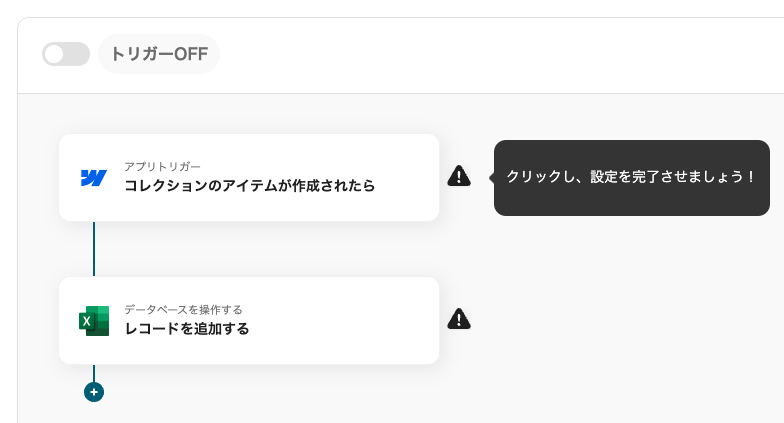
Step 3: App Trigger "When a Collection Item is Created"
Click the first process. Set up the integration with the relevant site in Webflow and configure the output to be extracted.
(1/3) Select Integration Account and Action
The following are pre-configured, so no action is required.
- Title
- Database App
- Account Information for Integration with Webflow
- Execute Action
→ Click Next
(2/3) API Connection Settings for App Trigger
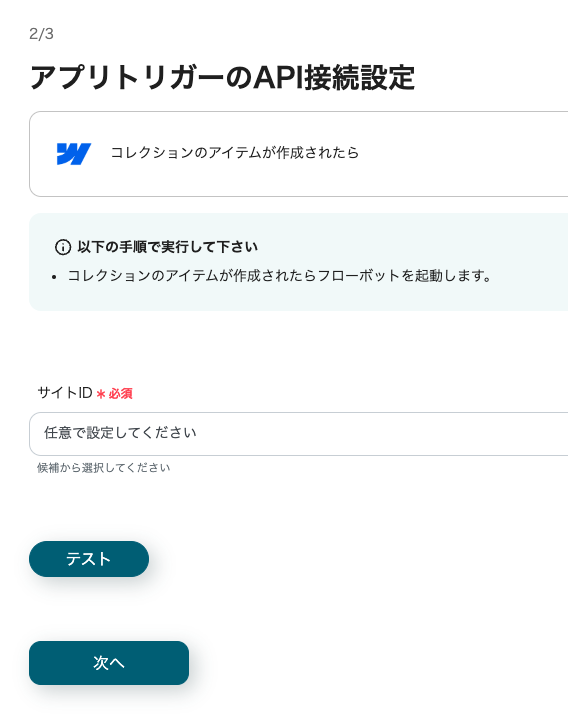
Click the edit field for the Site ID to open a dropdown, where candidates are displayed. Selecting a candidate will automatically quote the ID. Alternatively, you can obtain it using the following method.
- In the Webflow dashboard, select the target site.
- Proceed to "Site Settings" and open the "General" tab.
- Scroll down the page to find the "Site ID" displayed, where you can check and copy it.
→ Click Test → Success
→ Click Next
(3/3) API Connection Settings for App Trigger

- What is a Webhook Event
- It occurs when a collection item is created or updated on Webflow.
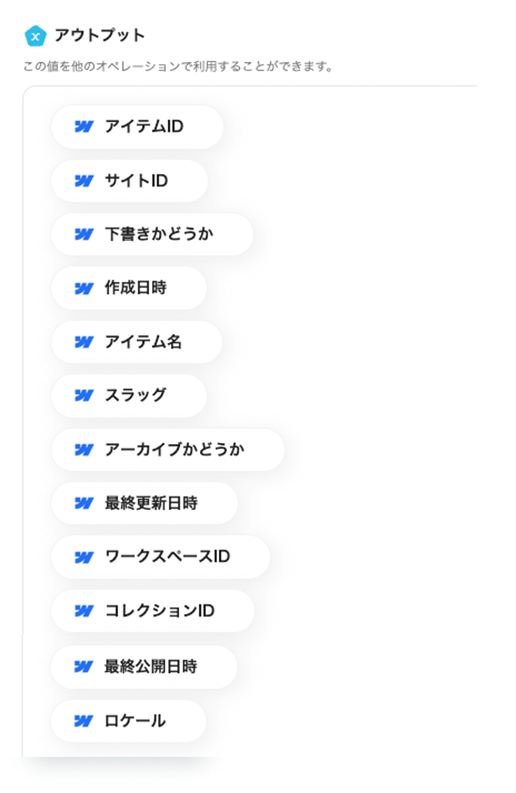
→ Click Test → Success. In the output, this item can be obtained. In the next process, it will be linked to a Microsoft Excel table.
→ Click Save
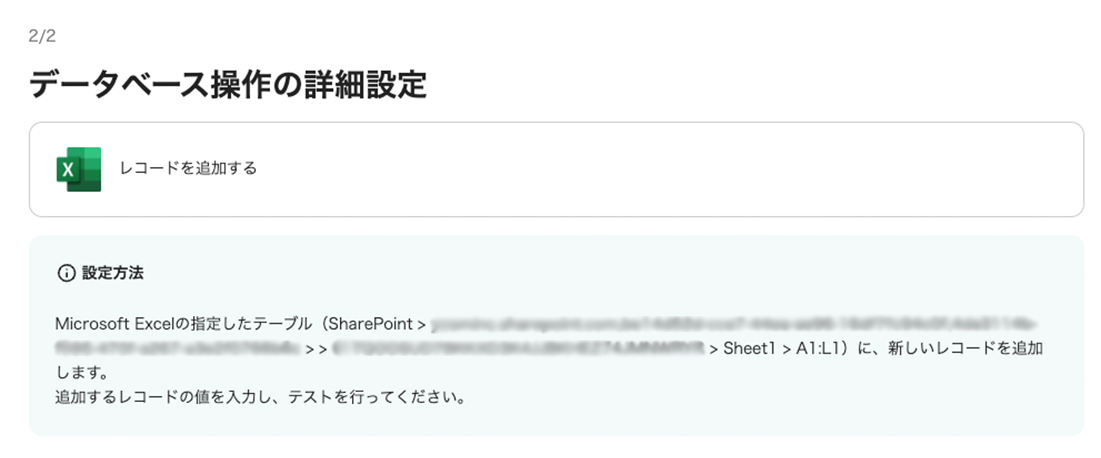
Step 4: Operate the Database "Add Record"

Click the second process. Here, you will link the Microsoft Excel database and the information to be added.
(1/2) Select Integration Account and Action
The following are pre-configured, so no action is required.
- Title
- Database App
- Account Information for Integration with Microsoft Excel
- Execute Action
Proceed to Database Integration at the bottom of the same screen.

By default, the file save location is OneDrive. Since we are using Microsoft SharePoint this time, switch from the dropdown to display the items.
- Site ID
- Click the edit field to pick up candidate sites. Selecting the relevant site will quote the ID.

- File Name (Optional)
- Enter an optional file name.
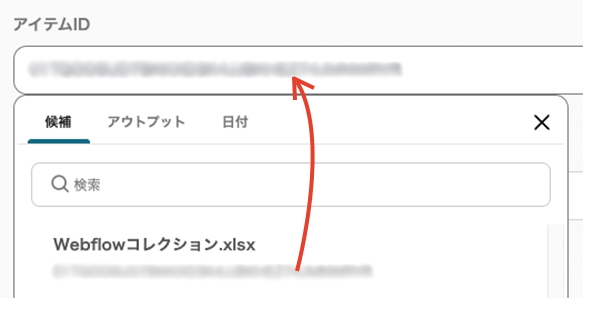
- Item ID
- Click the edit field to pick up candidate item names. Selecting the relevant item will quote the ID.
- Sheet Name
- Click the edit field to pick up candidate sheet names. Selecting the relevant sheet name will quote the ID.
- Table Range
- Set it in the format "A1:G30". This time, since the table range is A to H, we entered A1:H.
→ Click Next
(2/2) API Connection Settings
The headers of the integrated database have been extracted as items.
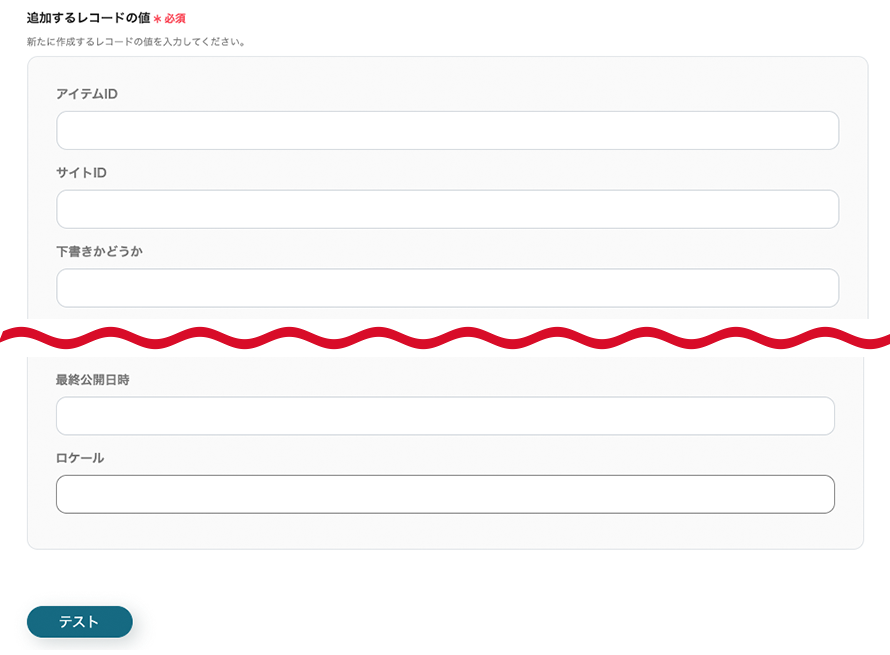
Click the edit field to open a dropdown, displaying the output obtained from Webflow.
> Learn more: Regarding the Operation Settings for "Operate Database" in Excel
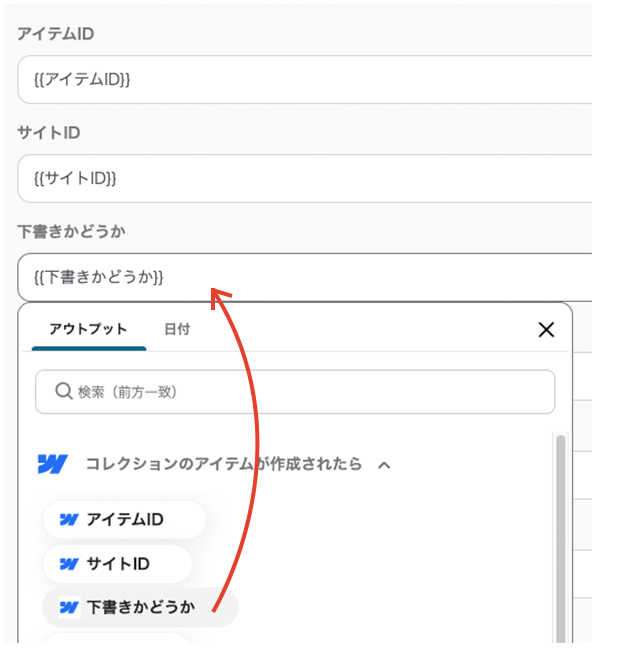
Selecting it will embed the quote code. Once all are embedded,
→ Click Test → Success
→ Click Save!
Step 5: Turn the App Trigger [ON]
Once all processes are configured, a complete screen will pop up.
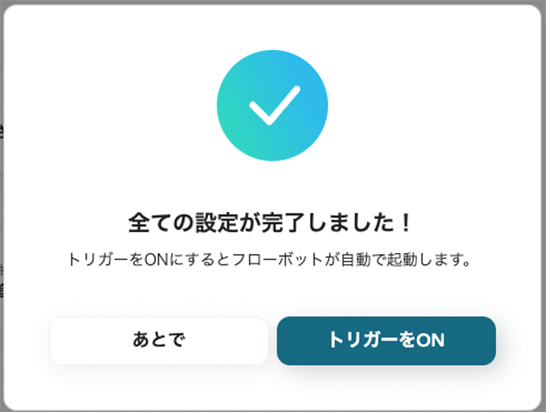
Turn the Trigger [ON] to complete the setup.

The integration work is complete! Integration was achieved in a short time without using programming. Here is the template for this time.


.avif)


