・
TimeRexとGoogle スプレッドシートを連携して、TimeRexに登録された予定を自動的にGoogle スプレッドシートに追加する方法

面談の予約情報を共有しやすいGoogle スプレッドシートなどで管理している方もいらっしゃると思います。
その際に発生する、入力業務が手間だと感じることはありませんか?
この記事では「TimeRexに登録された予定をGoogle スプレッドシートに自動追加する」方法をご紹介します。
これにより、事務作業の負担が軽減され、業務の効率化を図れるかもしれません。
さらにノーコードでアプリ連携やフローボットを作成できるYoomを活用する手順をご紹介します。
ぜひ、ご覧ください。
こんな方におすすめ
・TimeRexでスケジュール管理していて、情報共有の効率化を検討している方
・チームでGoogle スプレッドシートを活用していて、予定の管理や共有方法に課題を感じている方
・手作業でスケジュールを登録していて、ヒューマンエラーを防ぎたい方
・複数のツールで予定を確認している手間を削減して、業務の効率化を検討中の方
・APIを活用してITツールの連携を行い、業務の自動化を進めたい方
TimeRexとGoogle スプレッドシートの連携メリットと具体例
メリット1: 人的エラーの防止できる
手動でTimeRexの予定をGoogle スプレッドシートに追加する際の入力ミスや漏れを防げるでしょう。
例えば、採用チームがTimeRexで採用面接の予定を管理し、Google スプレッドシートで情報を共有していたとしましょう。
手作業の場合、予約情報の入力ミスや追加漏れによるダブルブッキングなどが発生するかもしれません。
そこで、TimeRexとGoogle スプレッドシートを連携すると、重要な予定を漏らすリスクを軽減できるでしょう。
その結果、業務を円滑に行える環境が整うので、業務の効率が向上するかもしれません。
メリット2: 手作業を軽減できる
TimeRexとGoogle スプレッドシートを連携することで、手入力でGoogle スプレッドシートに予定を追加する業務の軽減ができます。
例えば、月1開催される面談をTimeRexで行い、Google スプレッドシートで管理しているとしましょう。
手入力していると、手間と労力がかかり、事務作業の負担が大きいと思います。
入力を自動化できれば、時間を節約でき、他の業務に集中できるかもしれません。
メリット3: スケジュール共有を簡素化できる
TimeRexの予定をGoogle スプレッドシートに自動追加できると、予定管理を一元管理することが期待できます。
また手作業で発生する入力タイミングのズレを軽減し、最新情報をGoogle スプレッドシートで管理できるでしょう。
例えば、拠点が地方にもある企業で採用活動を行っていたとしましょう。
複数のデバイスからアクセスできるGoogle スプレッドシートを活用し、面談の状況を把握できれば、採用チームで情報共有がしやすくなります。
これにより、採用活動をスムーズに進められるかもしれません。
以上、TimeRexとGoogle スプレッドシートを連携するメリットを3つご紹介しました。
次にYoomについてご説明します。
[Yoomとは]
TimeRexとGoogle スプレッドシートの連携フローの作り方
それではYoomを活用して「TimeRexに登録された予定をGoogle スプレッドシートに自動追加する」設定手順を解説します。
まずは下のバナーの「試してみる」をクリックして、テンプレートをコピーしましょう。
■概要TimeRexでの日程調整後、顧客情報を手作業でGoogle スプレッドシートに転記する作業は、手間がかかる上に転記ミスも起こりがちではないでしょうか。このような定型的な作業に時間を取られ、本来の業務に集中できないという課題も少なくありません。このワークフローを活用すれば、TimeRexで新しい予定が登録されると、自動でGoogle スプレッドシートに情報が追加されるため、こうした入力作業の手間とミスを削減できます。
■このテンプレートをおすすめする方- TimeRexとGoogle スプレッドシートで日程調整と顧客管理を行っている営業担当者の方
- 手作業による情報転記を減らし、チームの業務効率を改善したいと考えているマネージャーの方
- 日程調整後のリスト作成を自動化し、より正確なデータ管理を実現したいと考えている方
■このテンプレートを使うメリット- TimeRexで予定が登録されると自動でGoogle スプレッドシートに情報が追加されるため、これまで手作業で行っていた転記業務の時間を短縮できます。
- 手作業でのコピー&ペーストが減るため、名前や連絡先の入力間違いや転記漏れといったヒューマンエラーの防止に繋がります。
■フローボットの流れ- はじめに、TimeRexとGoogle スプレッドシートをYoomと連携する
- 次に、トリガーでTimeRexを選択し、「Webhookを受信したら」というアクションを設定する
- 最後に、オペレーションでGoogle スプレッドシートの「レコードを追加する」アクションを設定し、TimeRexから受け取った情報を指定のスプレッドシートに追加する
※「トリガー」:フロー起動のきっかけとなるアクション、「オペレーション」:トリガー起動後、フロー内で処理を行うアクション
■このワークフローのカスタムポイント- Google スプレッドシートのオペレーション設定では、レコードを追加する対象のスプレッドシートやシートを任意で設定してください。
- TimeRexから受け取った情報(氏名、会社名、メールアドレスなど)のうち、どの情報をスプレッドシートのどの列に追加するかも自由に設定が可能です。
■注意事項- TimeRex、Google スプレッドシートのそれぞれとYoomを連携してください。
- TimeRexとGoogle スプレッドシートで日程調整と顧客管理を行っている営業担当者の方
- 手作業による情報転記を減らし、チームの業務効率を改善したいと考えているマネージャーの方
- 日程調整後のリスト作成を自動化し、より正確なデータ管理を実現したいと考えている方
- TimeRexで予定が登録されると自動でGoogle スプレッドシートに情報が追加されるため、これまで手作業で行っていた転記業務の時間を短縮できます。
- 手作業でのコピー&ペーストが減るため、名前や連絡先の入力間違いや転記漏れといったヒューマンエラーの防止に繋がります。
- はじめに、TimeRexとGoogle スプレッドシートをYoomと連携する
- 次に、トリガーでTimeRexを選択し、「Webhookを受信したら」というアクションを設定する
- 最後に、オペレーションでGoogle スプレッドシートの「レコードを追加する」アクションを設定し、TimeRexから受け取った情報を指定のスプレッドシートに追加する
■このワークフローのカスタムポイント
- Google スプレッドシートのオペレーション設定では、レコードを追加する対象のスプレッドシートやシートを任意で設定してください。
- TimeRexから受け取った情報(氏名、会社名、メールアドレスなど)のうち、どの情報をスプレッドシートのどの列に追加するかも自由に設定が可能です。
- TimeRex、Google スプレッドシートのそれぞれとYoomを連携してください。
テンプレートがコピーされましたと表示が出るので「OK」をクリックしてください。
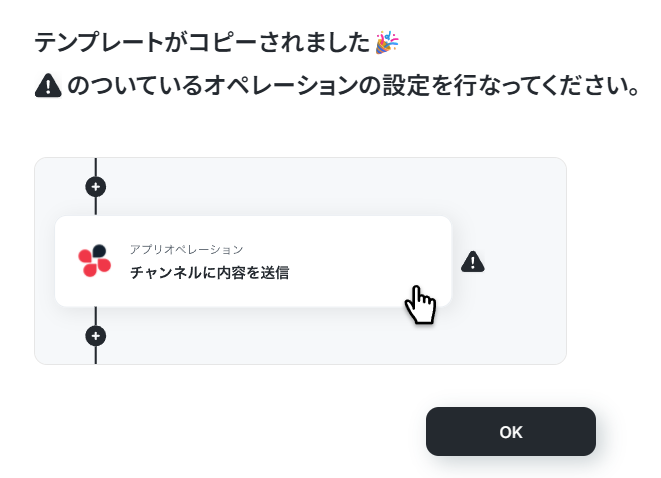
コピーしたテンプレートはYoomのマイプロジェクトに保存されています。
ステップ1:TimeRexとGoogle スプレッドシートをマイアプリ連携
次にYoomとアプリを連携する作業を行います。
マイアプリ登録することで、アプリ連携してフローボットを作成できるようになります。
1.TimeRexのマイアプリ登録
まずはTimeRexを連携します。
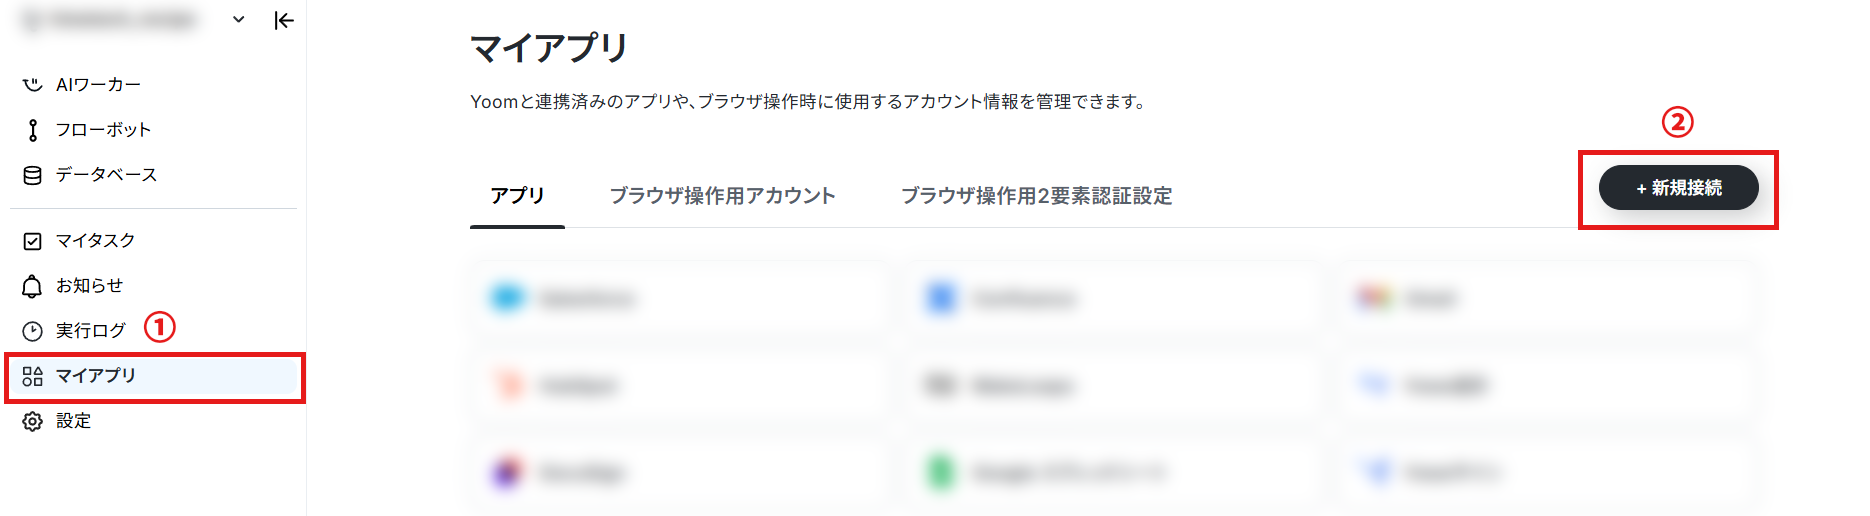
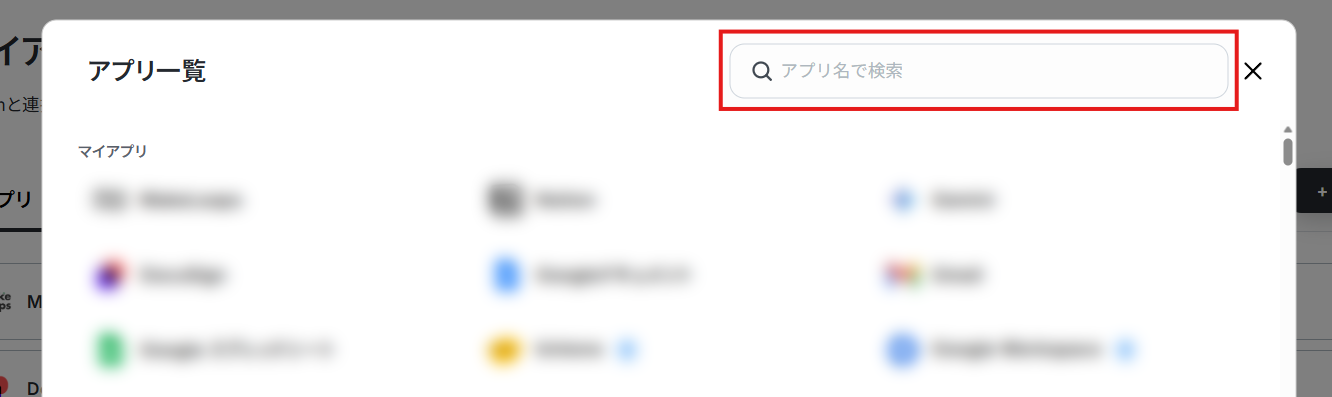
Yoomのワークスペースにログインしたら、マイアプリを選択して、新規接続をクリックしましょう。
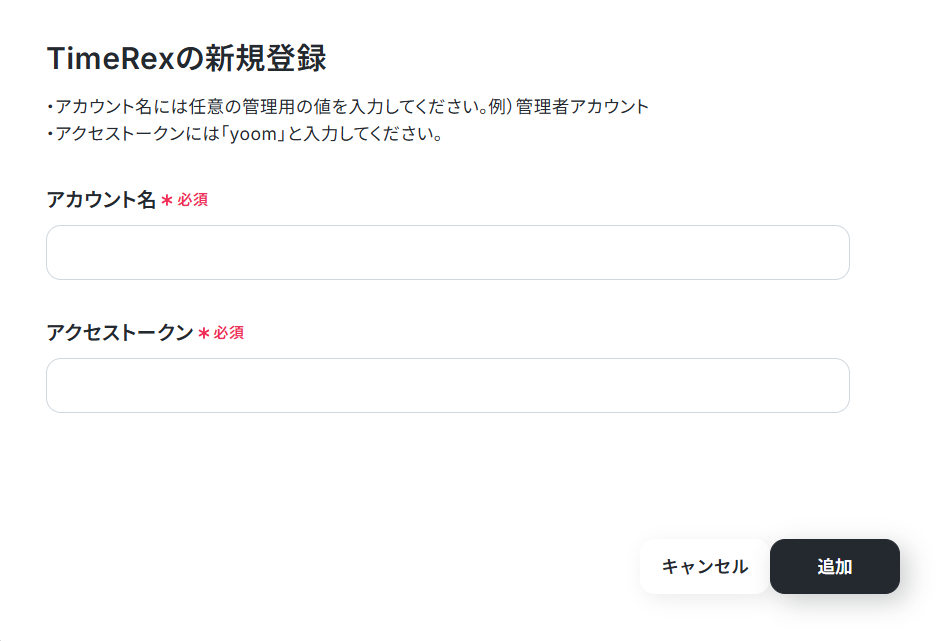
アカウント名を入力しましょう。
アクセストークンには「yoom」と記入してください。
2.Google スプレッドシートのマイアプリ登録
次に、Google スプレッドシートを連携しましょう。
先ほどの手順と同様に、Yoomのワークスペースからマイアプリを選択後、新規接続をクリックしてください。
そこからの流れは以下の解説ナビをご覧ください!
ステップ2:TimeRexのトリガーを設定
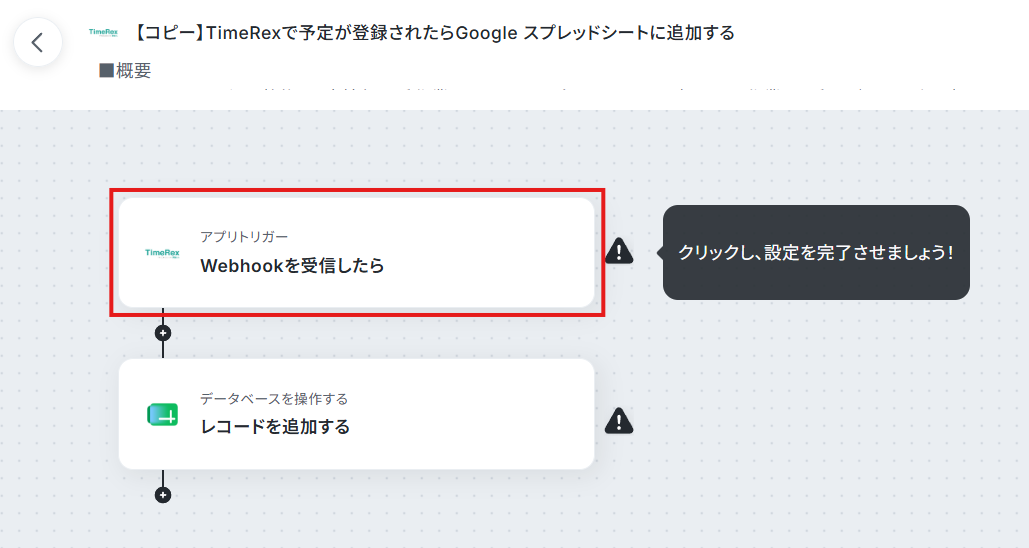
次にフローボットを設定していきます。
「Webhookを受信したら」をクリックしましょう。
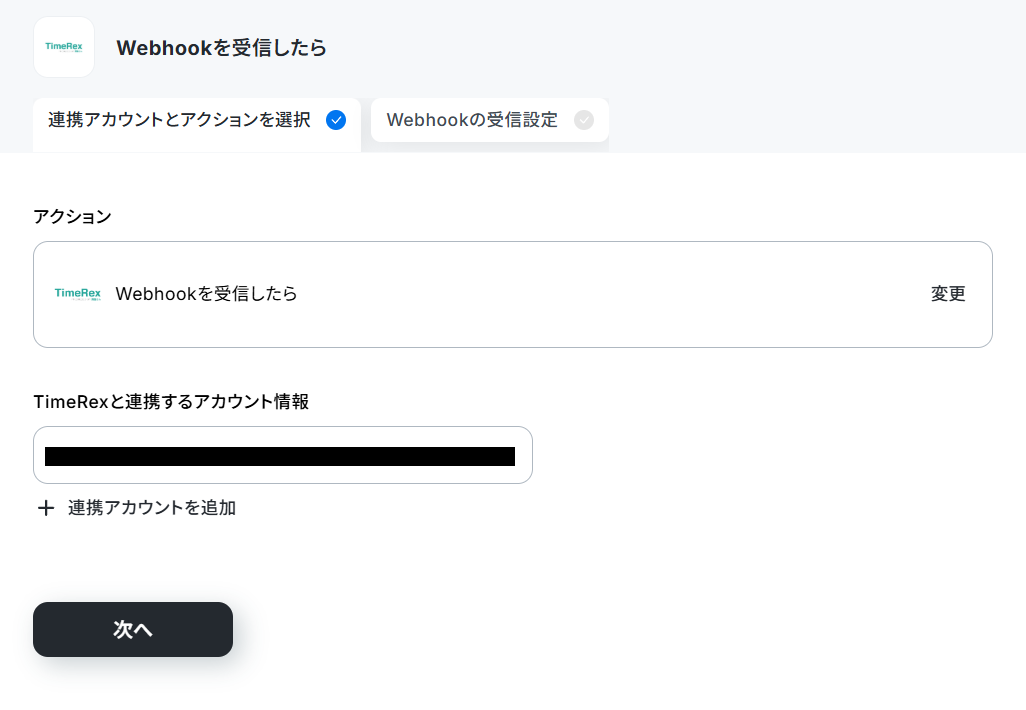
1.連携アカウントとアクションを選択
・タイトルは変更できますので、入力してください。
・TimeRexと連携するアカウント情報に間違いがないか確認しましょう。
・トリガーアクションは「Webhookを受信したら」を選択してください。
・設定できたら、「次へ」をクリックします。
2.アプリトリガーのWebhookイベント受信設定
・WebhookURLをコピーして、TimeRexの管理画面で設定しましょう。
・Webhookイベント(予定を登録)を送信した後、テストを実行します。
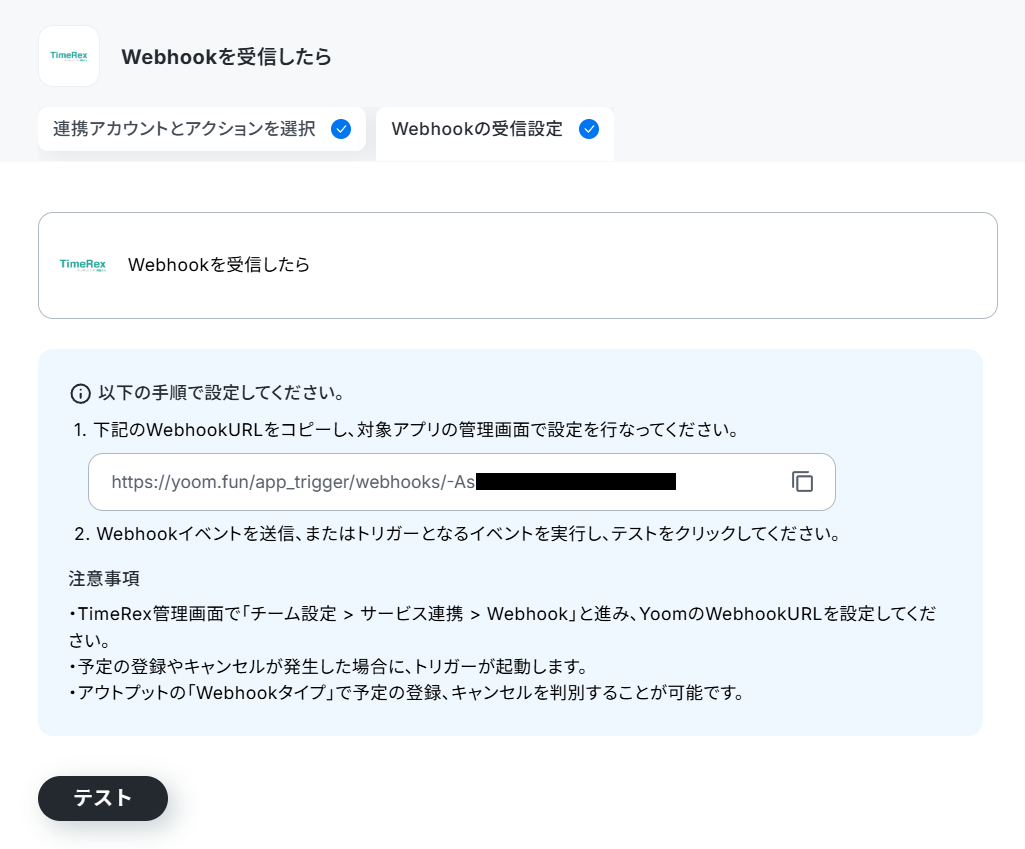
・テストが成功し、TimeRexの情報が取得できたら完了をクリックしましょう。
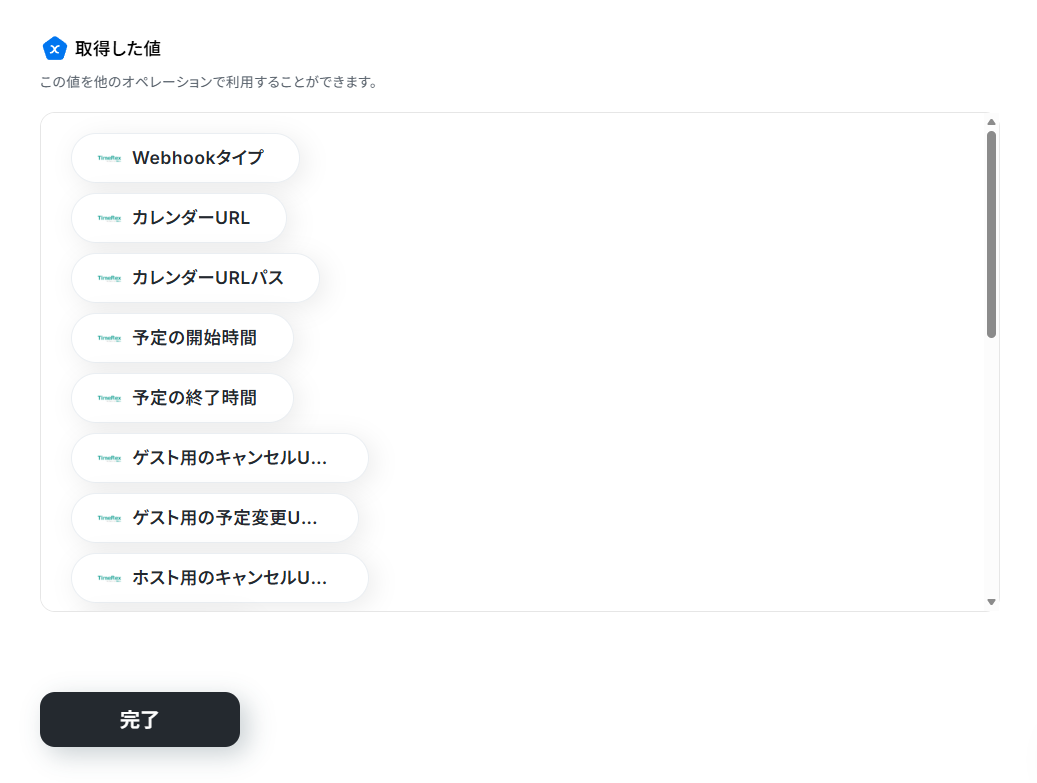
※以下の画像はテスト前の状態です。テストに成功すると「Webhookタイプ ○○」のように抽出された値が表示されます。
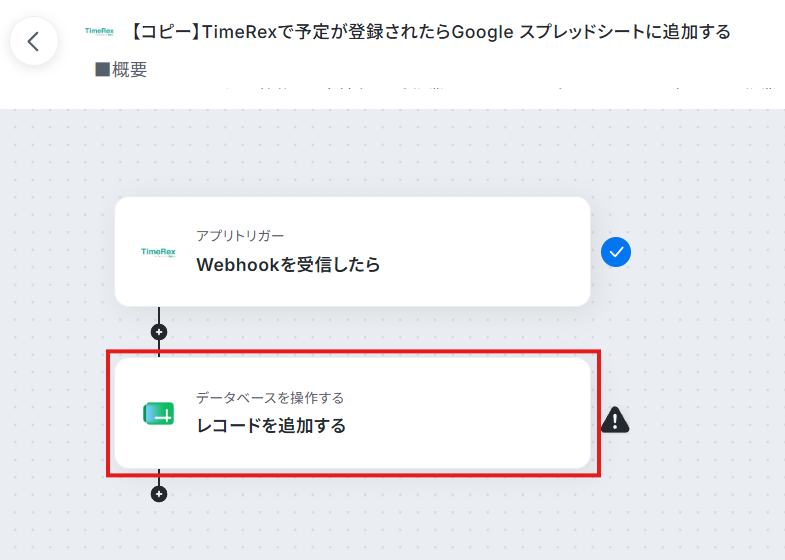
ステップ3:アクションを設定
最後の項目です!
「レコードを追加」をクリックして設定を完成させましょう。
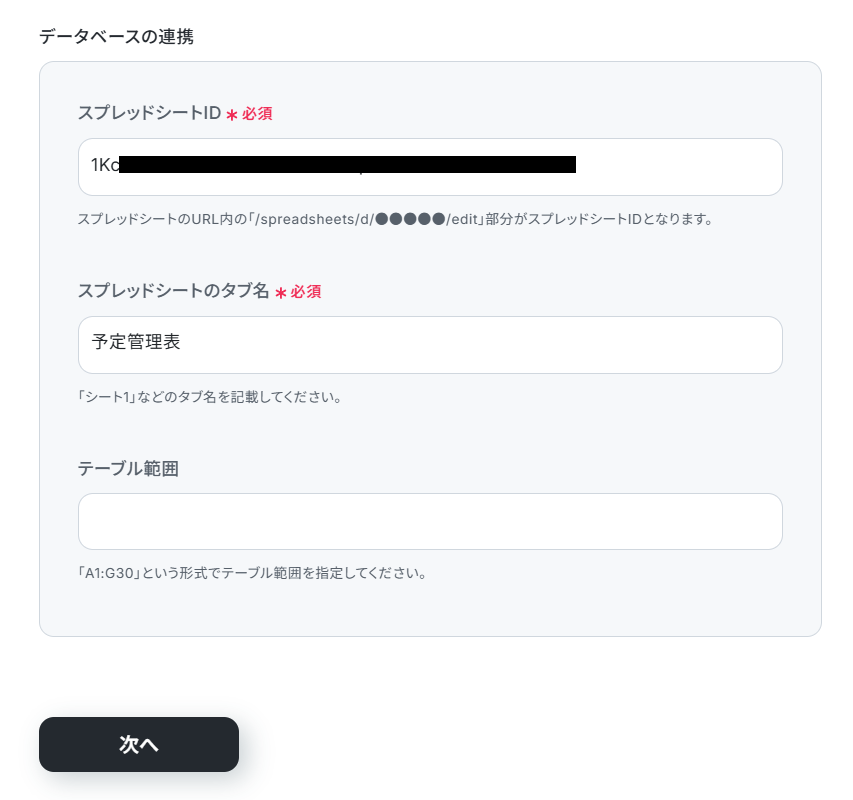
1.データベースの連携
・タイトルの内容は任意です。
・Google スプレッドシートと連携するアカウント情報を確認してください。
・実行アクションは「レコードを追加する」を選択しましょう。

・スプレッドシートID、スプレッドシートのタブ名、テーブル範囲を設定しましょう。
・設定できたら、「次へ」をクリックしてください。
2.データベース操作の詳細設定
・追加するレコードの値を入力します。
・入力方法は添付画像のようにTimeRexのアウトプット項目から選択しましょう。
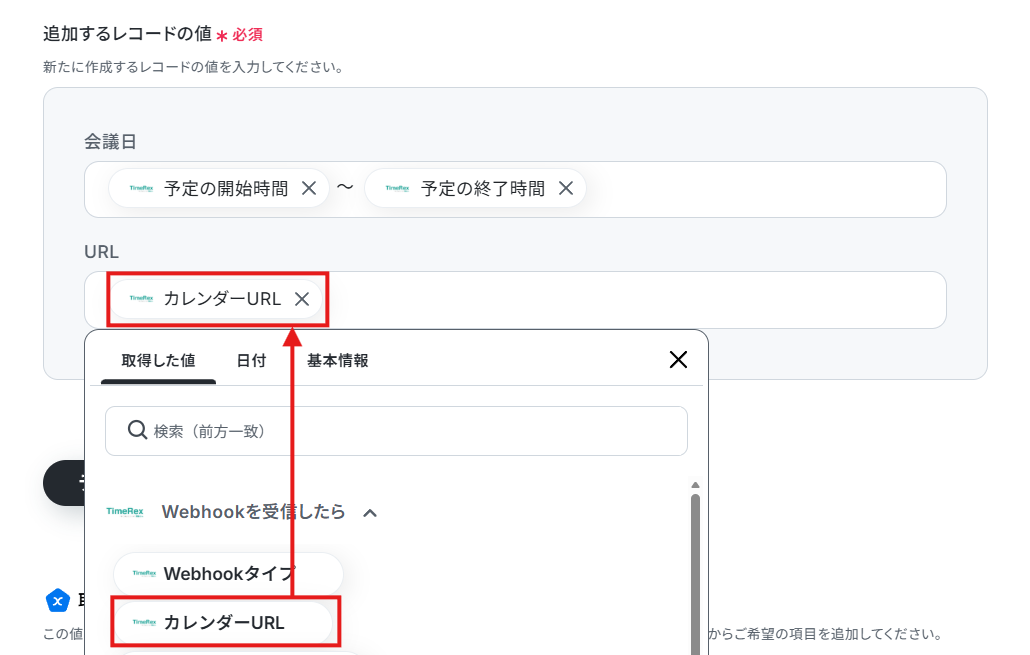
・入力できたら、テストをクリックしてください。
・Google スプレッドシートにTimeRexの情報が追加できたら完了をクリックしましょう。
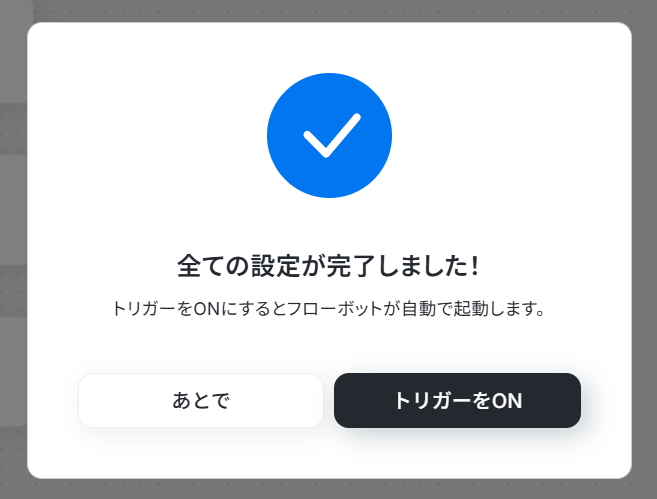
全ての設定が完了したと表示されるので、「トリガーをON」をクリックしてください。
■概要TimeRexでの日程調整後、顧客情報を手作業でGoogle スプレッドシートに転記する作業は、手間がかかる上に転記ミスも起こりがちではないでしょうか。このような定型的な作業に時間を取られ、本来の業務に集中できないという課題も少なくありません。このワークフローを活用すれば、TimeRexで新しい予定が登録されると、自動でGoogle スプレッドシートに情報が追加されるため、こうした入力作業の手間とミスを削減できます。
■このテンプレートをおすすめする方- TimeRexとGoogle スプレッドシートで日程調整と顧客管理を行っている営業担当者の方
- 手作業による情報転記を減らし、チームの業務効率を改善したいと考えているマネージャーの方
- 日程調整後のリスト作成を自動化し、より正確なデータ管理を実現したいと考えている方
■このテンプレートを使うメリット- TimeRexで予定が登録されると自動でGoogle スプレッドシートに情報が追加されるため、これまで手作業で行っていた転記業務の時間を短縮できます。
- 手作業でのコピー&ペーストが減るため、名前や連絡先の入力間違いや転記漏れといったヒューマンエラーの防止に繋がります。
■フローボットの流れ- はじめに、TimeRexとGoogle スプレッドシートをYoomと連携する
- 次に、トリガーでTimeRexを選択し、「Webhookを受信したら」というアクションを設定する
- 最後に、オペレーションでGoogle スプレッドシートの「レコードを追加する」アクションを設定し、TimeRexから受け取った情報を指定のスプレッドシートに追加する
※「トリガー」:フロー起動のきっかけとなるアクション、「オペレーション」:トリガー起動後、フロー内で処理を行うアクション
■このワークフローのカスタムポイント- Google スプレッドシートのオペレーション設定では、レコードを追加する対象のスプレッドシートやシートを任意で設定してください。
- TimeRexから受け取った情報(氏名、会社名、メールアドレスなど)のうち、どの情報をスプレッドシートのどの列に追加するかも自由に設定が可能です。
■注意事項- TimeRex、Google スプレッドシートのそれぞれとYoomを連携してください。
- TimeRexとGoogle スプレッドシートで日程調整と顧客管理を行っている営業担当者の方
- 手作業による情報転記を減らし、チームの業務効率を改善したいと考えているマネージャーの方
- 日程調整後のリスト作成を自動化し、より正確なデータ管理を実現したいと考えている方
- TimeRexで予定が登録されると自動でGoogle スプレッドシートに情報が追加されるため、これまで手作業で行っていた転記業務の時間を短縮できます。
- 手作業でのコピー&ペーストが減るため、名前や連絡先の入力間違いや転記漏れといったヒューマンエラーの防止に繋がります。
- はじめに、TimeRexとGoogle スプレッドシートをYoomと連携する
- 次に、トリガーでTimeRexを選択し、「Webhookを受信したら」というアクションを設定する
- 最後に、オペレーションでGoogle スプレッドシートの「レコードを追加する」アクションを設定し、TimeRexから受け取った情報を指定のスプレッドシートに追加する
■このワークフローのカスタムポイント
- Google スプレッドシートのオペレーション設定では、レコードを追加する対象のスプレッドシートやシートを任意で設定してください。
- TimeRexから受け取った情報(氏名、会社名、メールアドレスなど)のうち、どの情報をスプレッドシートのどの列に追加するかも自由に設定が可能です。
- TimeRex、Google スプレッドシートのそれぞれとYoomを連携してください。
Google スプレッドシートを活用したその他自動化例
Yoomではテンプレートを日々増産しています。
今回はGoogle スプレッドシートを活用したテンプレートを3つ、ご紹介します。
1.Google スプレッドシートで行が追加されたら、自動的にSlackに通知するテンプレートです。
Google スプレッドシートの情報を手作業でSlackに通知していると、手間がかかります。
入力ミスなどが発生することもあるかもしれません。
通知を自動化できれば、事務作業の負担や人的ミスを軽減し、他の業務に時間を活用できそうです。
■概要Google スプレッドシートで管理している情報を更新するたびに、手作業でSlackへ通知をしていませんか?このような定型的な報告業務は、手間がかかるだけでなく、通知の遅れや漏れといったミスに繋がる可能性もあります。このワークフローを活用すれば、Google スプレッドシートの行追加をトリガーとして、指定したSlackチャンネルへ自動でメッセージを送信し、情報共有の効率化を実現します。
■このテンプレートをおすすめする方- Google スプレッドシートでの情報更新を、都度Slackでチームに報告している方
- 手作業による通知のタイムラグや、報告漏れなどのヒューマンエラーを防ぎたい方
- チームや部署内の情報共有プロセスを自動化し、業務効率を改善したいと考えている方
■このテンプレートを使うメリット- Google スプレッドシートに行が追加されると自動でSlackに通知されるため、これまで手作業での報告に費やしていた時間を他の業務に充てることができます
- 手作業による通知漏れやコピー&ペーストの間違いといったヒューマンエラーを防ぎ、正確でスムーズな情報共有を実現します
■フローボットの流れ- はじめに、Google スプレッドシートとSlackをYoomと連携します
- 次に、トリガーでGoogle スプレッドシートを選択し、「行が追加されたら」というアクションを設定します
- 最後に、オペレーションでSlackを選択し、「チャンネルにメッセージを送る」アクションを設定し、任意のチャンネルにメッセージを送信します
※「トリガー」:フロー起動のきっかけとなるアクション、「オペレーション」:トリガー起動後、フロー内で処理を行うアクション
■このワークフローのカスタムポイント- Google スプレッドシートのトリガー設定では、監視の対象としたいスプレッドシート、シート、およびテーブルの範囲を任意で指定することが可能です
- Slackへの通知メッセージは、固定のテキストだけでなく、トリガーで取得したGoogle スプレッドシートの各列のデータを変数として埋め込み、カスタマイズできます
- Slackへの通知先は、プロジェクトやチームごとなど、任意のパブリックチャンネルやプライベートチャンネルに設定できます
■注意事項- Google スプレッドシート、SlackのそれぞれとYoomを連携してください。
- Google スプレッドシートをアプリトリガーとして使用する際の注意事項は「【アプリトリガー】Google スプレッドシートのトリガーにおける注意事項」を参照してください。
- トリガーは5分、10分、15分、30分、60分の間隔で起動間隔を選択できます。
- プランによって最短の起動間隔が異なりますので、ご注意ください。
■このテンプレートをおすすめする方
- Google スプレッドシートでの情報更新を、都度Slackでチームに報告している方
- 手作業による通知のタイムラグや、報告漏れなどのヒューマンエラーを防ぎたい方
- チームや部署内の情報共有プロセスを自動化し、業務効率を改善したいと考えている方
■このテンプレートを使うメリット
- Google スプレッドシートに行が追加されると自動でSlackに通知されるため、これまで手作業での報告に費やしていた時間を他の業務に充てることができます
- 手作業による通知漏れやコピー&ペーストの間違いといったヒューマンエラーを防ぎ、正確でスムーズな情報共有を実現します
■フローボットの流れ
- はじめに、Google スプレッドシートとSlackをYoomと連携します
- 次に、トリガーでGoogle スプレッドシートを選択し、「行が追加されたら」というアクションを設定します
- 最後に、オペレーションでSlackを選択し、「チャンネルにメッセージを送る」アクションを設定し、任意のチャンネルにメッセージを送信します
■このワークフローのカスタムポイント
- Google スプレッドシートのトリガー設定では、監視の対象としたいスプレッドシート、シート、およびテーブルの範囲を任意で指定することが可能です
- Slackへの通知メッセージは、固定のテキストだけでなく、トリガーで取得したGoogle スプレッドシートの各列のデータを変数として埋め込み、カスタマイズできます
- Slackへの通知先は、プロジェクトやチームごとなど、任意のパブリックチャンネルやプライベートチャンネルに設定できます
■注意事項
- Google スプレッドシート、SlackのそれぞれとYoomを連携してください。
- Google スプレッドシートをアプリトリガーとして使用する際の注意事項は「【アプリトリガー】Google スプレッドシートのトリガーにおける注意事項」を参照してください。
- トリガーは5分、10分、15分、30分、60分の間隔で起動間隔を選択できます。
- プランによって最短の起動間隔が異なりますので、ご注意ください。
2.Backlogで課題が登録されたらGoogle スプレッドシートにも自動的に追加するテンプレートです。
BacklogとGoogle スプレッドシートを連携すれば、タスク情報を一元管理できます。
手作業では、両ツールの情報にズレが発生する可能性があります。
自動化できれば、安定した情報をチームで共有することができ、業務の生産性向上が期待できます。
■概要
Backlogで課題が登録されたらGoogle スプレッドシートにも追加するフローです。
■このテンプレートをおすすめする方
1.課題管理をBacklogで行っている方
・プロジェクトの課題をBacklogで管理しているチーム
・Backlogでプロジェクトの課題を一元管理している方
2.情報共有のツールとしてGoogle スプレッドシートを使用している方
・Google スプレッドシートを使用して社内外の関係者と情報共有を行う方
・プロジェクトの課題状況をGoogle スプレッドシートで分析している方
■このテンプレートを使うメリット
Backlogはプロジェクトの課題を可視化できるため、管理業務を効率化できるツールです。
しかし、Google スプレッドシートを使用してプロジェクトの課題状況を共有する場合、都度Backlogの情報をGoogle スプレッドシートに転記する必要があり、非効率的だと感じているかもしれません。
このテンプレートは、Backlogで追加された課題をGoogle スプレッドシートに自動で追加することができるため、手動による作業が不要になります。
Google スプレッドシートへの課題追加を自動化することで、共有資料の作成を効率化することができるため、業務の効率化を図ることができます。
また、異なるチーム間での課題共有もスピーディーに行うことができ、進捗状況や課題分析をスムーズに行うことが可能です。
■注意事項
・Backlog、Google スプレッドシートのそれぞれとYoomを連携してください。
3.Google スプレッドシートで従業員情報が追加されたら、自動的にAKASHIに登録するテンプレートです。
Google スプレッドシートとAKASHIを連携すると、都度の情報入力作業を軽減できます。
事務作業の負担が減るので、オリエンテーションなど、他の業務に時間を使うことが可能になります。
これにより、新入社員は初日の業務をスムーズに進められるでしょう。
■概要
Google スプレッドシートで従業員情報が追加されたらAKASHIに登録するフローです。
■このテンプレートをおすすめする方
1.Google スプレッドシートを業務で活用している方
・チームの進捗管理に使用している管理者
・シートにコメントを残してコミュニケーションを行う経営者
2.AKASHIを使用し、勤怠管理などを行う企業
・店舗のシフト表を作成する支店長
・従業員の勤怠管理を行う人事部門の担当者
■このテンプレートを使うメリット
Google スプレッドシートは従業員のあらゆる情報を管理するのに有効的なツールです。
その情報を基にしてAKASHIで従業員の勤怠管理を行うことで、人事部門の業務効率化を促進します。
しかし、Google スプレッドシートへ登録された従業員情報を改めてAKASHIに手入力することは、チーム全体の生産性にも悪影響を及ぼす可能性があります。
手作業などの手間のかかる業務を自動化したいと考える方にこのフローは有効的です。
Google スプレッドシートに入力された従業員情報を引用し、AKASHIへもデータを登録するため、手作業の時間を短縮し、チームの生産性を高く保ちます。
■注意事項
・Google スプレッドシート、AKASHIのそれぞれとYoomを連携してください。
・AKASHIのマイアプリ連携方法はこちらをご参照ください。
まとめ
TimeRexとGoogle スプレッドシートを連携すると、手作業を軽減し、ヒューマンエラーを防止することも可能です。
また最新情報をチームで共有しやすくなり、業務をスムーズに進行することが期待できます。
さらにYoomを活用すれば、ノーコードでアプリ連携やフローボット作成が可能です。
今回のようにテンプレートを使用すれば、それに沿って設定するだけで完成できます。
それ以外にはじめから作成することもでき、自由にカスタマイズして設定が可能です。
この機会にTimeRexとGoogle スプレッドシートを活用して、スケジュール管理を簡素化してみませんか?
プログラミング知識なしで手軽に構築できます。