Connect board with Gmail, and when there is a response to the form, link it to the board to register the customer and send an email via Gmail.
How to Integrate Applications
・
2024-12-23
Connect board with Gmail, and when there is a response to the form, link it to the board to register the customer and send an email via Gmail.
e.koyama
What tasks can be automated and what benefits can be gained by integrating board with Gmail?
board is a service that allows you to create forms such as estimates and invoices, as well as manage costs and payments. Many people find it valuable because it allows them to manage forms and information for each project.
With board, there are workflows that can be automated by integrating with Gmail. We will share specific examples of automated workflows and the benefits of increased efficiency.
Example 1: Register customers in board based on form responses and share the details via Gmail
This flow is made possible by integrating board and Gmail with a web form. Customer registration is performed in board based on the information collected from the form, and the details are notified via Gmail. The web form can be set up for customers to fill out for reservations or applications, or for internal staff to input information for registration purposes. This allows for efficient registration and management of customer information.
Example 2: Share project registration or updates in board via Gmail
In addition to customer information, you can also set up automatic email notifications for new project registrations or updates. If there are emails that must be sent when registering or updating project information, such as task requests to team members or reports to managers, pre-setting these emails is recommended.
Example 3: Retrieve an invoice list from board at a specified time and request confirmation or document creation via Gmail
At the specified schedule, you can automatically retrieve the invoice list from board and send emails regarding its contents. By automating regular tasks such as monthly billing, you can prevent omissions in your work.
Benefits of Integration
As shown in the three examples above, integrating board with Gmail facilitates smooth sharing of various types of information. The scope of tasks covered by board is very broad, and the types of forms and information handled are diverse. Integration with Gmail allows you to send emails for notifications, approval requests, and reminders regarding registered or updated information.
By automatically synchronizing information, there is no need to re-enter data for information sharing. This helps prevent input errors and omissions, reduces the time spent on verification and re-entry, and leads to increased efficiency. Additionally, the rapid sharing of accurate information ensures smooth subsequent processing.
You can implement it without code using Yoom!
For those who want to try the automation examples and benefits introduced so far, here is some good news! By using Yoom, you can achieve integration and automation without programming skills or knowledge, thanks to its no-code capabilities.
If you haven't registered with Yoom, please issue an account from here. If you want to check the user experience, you can start with a free plan or try a paid plan.
Once you have completed account registration, try using Yoom to create integration and automation flows. We will explain in detail how to create a workflow using templates for the task of registering a customer in board when there is a form response and sending an email via Gmail, which was the first example introduced.
Creating a workflow is even easier with templates. First, click "Try it" on the link below to copy the template. Note that since this web form is for Yoom, there is no need to integrate additional tools.
How to Register a Customer on the Board and Send an Email via Gmail When a Form is Answered
*Step 1 is the procedure for app integration. If already integrated, proceed to Step 2.
Step 1: Integrate Board and Gmail with My Apps
1. After logging into Yoom, select "My Apps" from the left menu and click "+ New Connection" on the right side of the screen.
2. From the list of new connections in My Apps, select both Board and Gmail, and integrate the apps. *For information on registering Board with My Apps, please see here.
Step 2: Create a form to input information of registered companies and use it as a trigger to start
1. Open the copied template. (If you want to change the title, please modify the red-framed part in the diagram below.) To open the template manually, select the relevant template from My Projects and click "Edit" at the top right of the screen to open it.
2. Click "Form Trigger Registered Company Name" from the Flowbot.
3. Create the form. Modify the items according to the content you want to register on the board and the information required for future transactions. ※The diagram below shows part of the creation screen.
4. Once the form content is ready, click "Next".
5. Confirm the form display and perform detailed settings. Check the display content of the response page and completion page, and set sample values for each item when referring to the output, then click "Save". ※The diagram below is an example of input.
Step 3: Set actions to register customers on the board
1. Click "Integrate with App Customer Registration" from the Flowbot.
2. Set "Select Integration Account and Action". Change the title as needed and click "Next".
3. Set the API connection. For each item, refer to the notes at the bottom of the field for input and selection. ※API Key, Customer Name, Customer Abbreviation, and Default Payment Terms ID are required fields. ※Information can be referenced from the output obtained in Step 2. ※The diagram below shows part of the items. Also, the words and outputs in the input fields of the diagram are examples.
※Reference: The API Key is displayed on the board as shown in the diagram below.
4. Conduct a test and if successful, click "Save".
Step 4: Set actions to send emails
1. Click "Send Email Send Email" from the Flowbot.
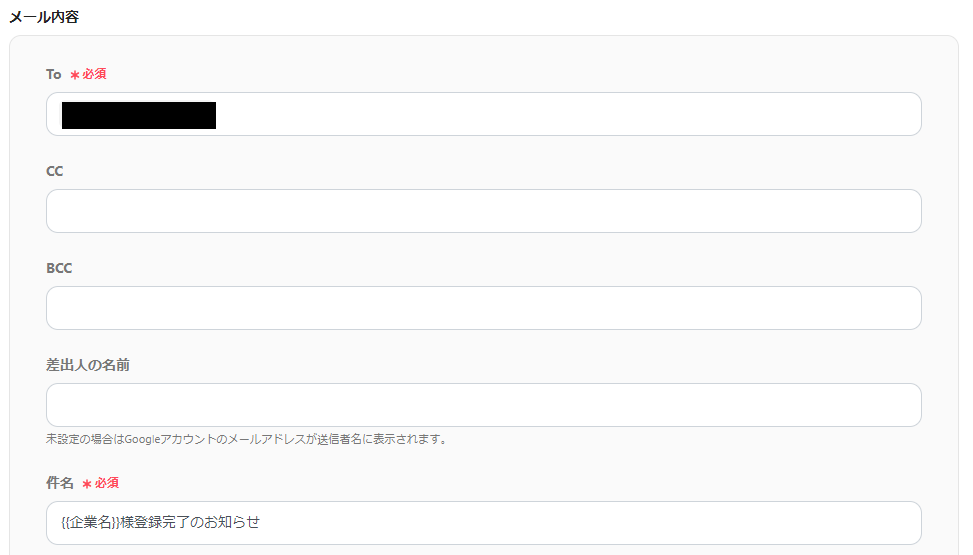
2. Set up the email. Title: Can be changed. Email Content: Enter the necessary information for each item. To, Subject, and Body are required fields. ※Information from the outputs obtained in Step 2 and Step 3 can be referenced in the email content. ※The diagram below is an example of input.
4. Click "Next".
5. Conduct a test of the email sending. After confirming the sending content, conduct the test, and if successful, click "Save".
Finally, switch the trigger of the saved flow to "ON" to activate it.
With this, the flow to register customers on the board and send emails via Gmail when there is a response to the form is complete.
When operating, please inform the form link to the form inputter. The link can be copied from the form trigger (click the red-framed part in the diagram below).
Many More! Introducing Automatable Flows with board and Gmail
In addition to what we've shared so far, there are many integration flows related to board and Gmail. Here, we introduce two templates for business flows that can be automated as an advanced application.
Register an Order in board When kintone Status is Updated
This is a business flow that can be automated through the integration of kintone and board. When the status of the kintone database is updated, you can register an order in board based on the update details.
This is useful when managing detailed order data in kintone, and can also be applied to the registration of project or customer information. After registering the information in board, you can add a flow to notify via Gmail.
Create a ticket in HubSpot when a case is registered on the board
This flow is made possible by integrating the board with the CRM platform HubSpot. When a new case is registered on the board, you can automatically create a ticket in HubSpot by reflecting information such as the case name and the customer name associated with the case.
By automatically synchronizing information between tools and keeping data up-to-date, it is useful for sales activities, customer support, and project progress management.
As in the example where the procedure was introduced earlier, it is also possible to make case data entry form-compliant and share registration information via Gmail.
Summary
With the integration of board and Gmail, we have found that the previously manual task of project registration can now be automated. In board, simply entering the estimate details allows all content to be reflected in delivery notes and invoices. Although it is already a tool adept at automation, you may have realized how much more convenient it can be when integrated with other apps.
We highly recommend trying it out for accounting, project managers, and sales personnel.
In Yoom, you can also customize templates. Challenge yourself to create more complex workflows that are committed to your business operations. By customizing templates and incorporating databases, you can create workflows that exclude duplicate company names, making management easier.
Want to create your ideal workflow but finding it a bit difficult? No worries! Consult the Yoom team. We will meet your needs. Start with our free plan and give it a try!
Yoom will help you create free time and lead a fulfilling life!
The person who wrote this article
e.koyama
Until now, I have experienced office work at specialized trading companies and in the EC industry.
The work I was in charge of covered a wide range of tasks, such as sales office work, accounting, general affairs, human resources, and legal affairs.
We worked to improve the efficiency of individual tasks, but I think the work could proceed more conveniently by using various support tools and Yoom...
I would be happy if I could send out an introduction article on Yoom that makes use of my work experience and help everyone proceed smoothly with their work.
Conventional RPA can only automate simple repetitive tasks, and the setup process was very complicated. With “hyperautomation,” which combines various technologies such as AI, API, RPA, and OCR, it is possible to automate many tasks that could not be realized until now more easily than before.
Most tools simply connect one app to another, leaving the complex tasks to you. Yoom goes much further: From document creation and browser automation to OCR and generative AI, Yoom handles it all seamlessly in one platform.
Why settle for basic integrations? Streamline your entire workflow with Yoom’s powerful hyperautomation.


.avif)


.avif)
.png)


