How to Set Up Gemini Gmail Integration for Automated Email Categorization and Assignment
How to Integrate Applications
・
2025-07-22
How to Set Up Gemini Gmail Integration for Automated Email Categorization and Assignment
y.katagiri-
Are you struggling to manage all the emails in your inbox every day?
It's easy to miss important emails or spend too much time on low-priority messages. But what if you can automate this process and focus on your key tasks?
<span class="mark-yellow">This common challenge can be solved by integrating Gmail and Gemini!</span> By integrating these two apps, you can automatically analyze incoming emails, helping you prioritize responses and avoid missed communications.
In this article, we will show you the step-by-step guide on how to set up Gmail Gemini integration. If you're someone looking to improve your daily email tasks, keep reading and learn now!
✔️ For Those Who Want to Try It Quickly
Yoom offers ready-made templates for easy setup in integrating Gemini and Gmail. Click the "Try it" button to get started now!
We'll also walk you through the step-by-step process of creating this automation flow in the following section of this article.
Meet Yoom: No-Code Automation
Yoom is a next-generation no-code automation that lets you connect and automate tasks between your favorite apps. Connecting different apps can be challenging for non-engineers, but <span class="mark-yellow">Yoom makes automation accessible to everyone</span>.
🌐 Connect with apps like Gmail, Gemini, and more.
📖 Use automation templates - no technical setup required
📈 Boost productivity and reduce human errors
You don't need to go through a complex setup and IT jargon, you can build your automation workflows with just a few clicks :) It's designed for those who want to streamline their daily work and save hours of time and stress from repetitive work.
In this guide, you'll learn the step-by-step process of how to use Yoom to connect Gmail and Gemini to <span class="mark-yellow">create a Flowbot that automatically categorizes the email priority and assigns it to a responsible person.
🚀 Let's Create a Flowbot to Integrate Gmail & Gemini!
Let's walk through how to set up a flow that automatically categorizes the email priority and assigns it to a responsible person using Gmail and Gemini.
⏱️ Setup time: 10 minutes
🔧 What You’ll Need
A free Yoom account
Access to Gmail & Gemini
If you don’t have a Yoom account yet, register now from thisregistration form!
Setup Overview
Register Gmail and Gemini in Yoom
Copy the template
Set up the trigger action for Gmail and the action for Gemini
Activate the Flowbot
Step 1: Register Gmail & Gemini in My Apps
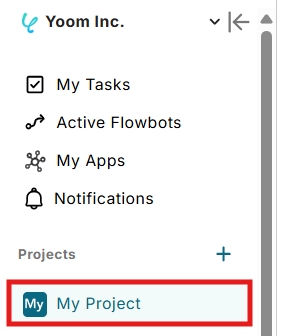
Go to "My Apps" from the left side menu and click "+ Add".
Connect with Gmail
Search "Gmail" from the app list, and select it.
Click "Sign in with Google".
Select the account you want to connect to.
Click "Continue".
If the below notification appears, the integration is complete.
Connect with Gemini
Search for "Gemini" and click on it to connect the app.
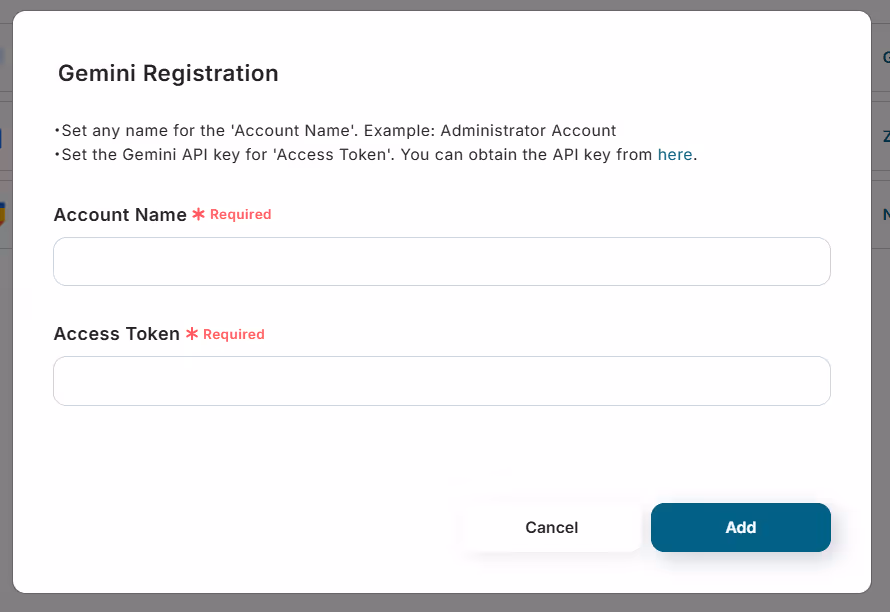
Enter the account name.
Use a name that's easy to recognize, such as your company name or the person responsible for the account.
To get your access token, go to the Gemini API acquisition page. Review the content and agree to the terms by checking the box. Click the "Continue" button at the bottom right.
Click on the "Get API key" button.
Click on "Create an API key".
Your new API key will appear. Copy it.
Return to Yoom, and paste the copied API key into the access token field.
Once all the required fields are filled in, click "Add" to complete registration.
If the below display appears, the integration is complete.
Step 2: Copy Template
Click the "Try It" button to copy the pre-built template into your project.
Click "Try this template".
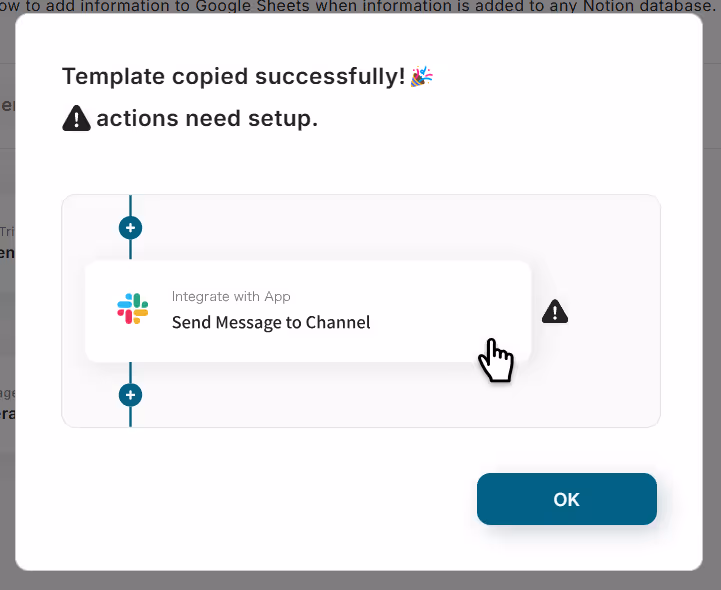
Click "OK" and give the Flowbot a name to recognize.
This template will be copied to your “My Project”.
Step 3: Set Up Gmail Trigger Action
Click on the trigger action labeled "When an email with a specific label is received".
Give your trigger a title (optional) and select your Google account. Then click "Next".
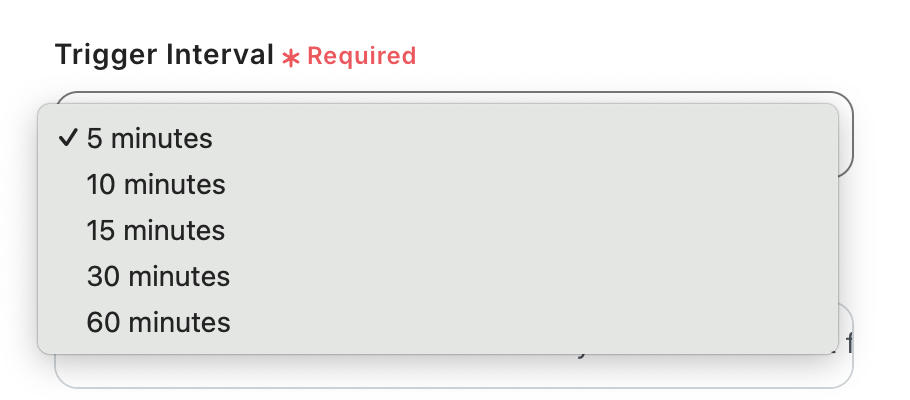
Set your trigger interval (frequency of sync) of how frequently Yoom checks Gmail for updates. It can be set to 5 minutes, 10 minutes, 15 minutes, 30 minutes, or 60 minutes. We recommend setting the trigger to the shortest activation interval available for your plan.
⚠️ Note: The trigger interval varies depending on your Yoomplan. Be sure to check your current plan’s limit.
Next, set the trigger condition based on labels. The trigger will activate when an email with the specified label is received. Choose the label for the emails you want to prioritize and have Gemini process.
Then, send a test email with the specified label to your Gmail account and click "Test".
If the test is successful, click "Save".
Step 4: Set Up Gemini Action
Click on the Gemini action labeled "Generate Content".
Give your action a title (anything you like), and select your account. Make sure the action "Generate Content" is selected and click "Next".
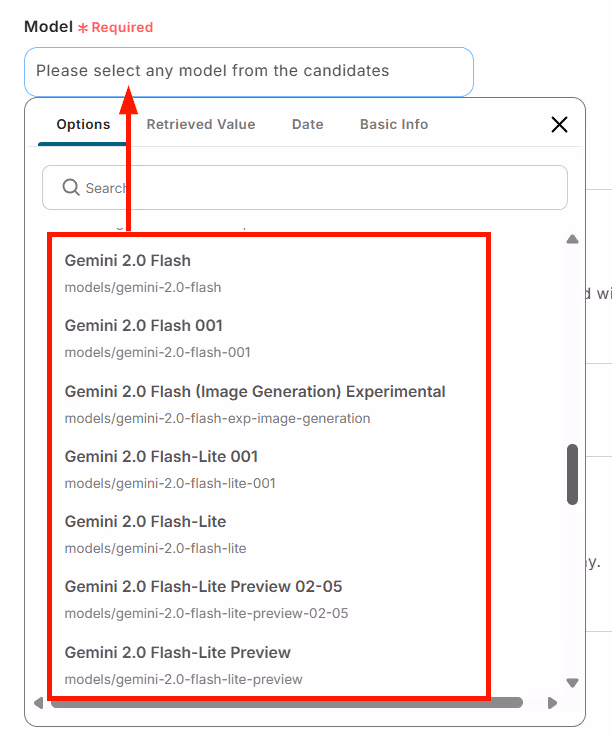
Select the Gemini model you want to use.
You can find the model information by clicking the top left of the Gemini page.
Enter "Prompt" based on the provided example settings below. Select the "body" from the test email data sent from the previous step.
By setting it as shown below, you can automatically share the email received in Gmail to Gemini.
Enter "System Instruction" based on the example input provided below. If you're not a customer representative, you can use a phrase like AI Assistant in place of it.
Step 5: Configure Switch Action
⚠️ Note: The Switch Command is only available on Yoom’s paid plans. If you’re using the Free plan, the Flowbot may face errors due to limited access. But don’t worry - all plans have a 2-week free trial! You can try all features without restrictions. For more info about Yoom and its plans, visit our Yoom Help Center.
Click on the action labeled "Command Operation".
The switch conditions are pre-configured, so no changes are needed. You can leave it as it is, but if you want to modify the conditions, you can update it.
Step 6: Configure Action Request Setting
Click on the action labeled "Request Response to Person in Charge" boxed in red.
This screen is pre-configured, so you don't need to make any changes. Change the title of the action (optional) if necessary.
You can enter the details of the action request based on the example input provided below. It's recommended to specify the email body clearly, so select the "Body" from the first trigger action.
Similarly, set the middle (Priority: Medium) and right (Priority: Low) in the same way. The key is to adjust the details of the action request based on the priority level.
Step 7: Activate the Flowbot
Toggle the "Trigger On" button to activate your flow! Check if the Flowbot you set up is working properly.
That’s it!
Your Flowbot is complete!
💡 Other Automation Examples Using Gmail & Gemini
You can try out more automations by utilizing Gmail and Gemini with Yoom. Here are some more examples you can explore for your next automation!
Automation Examples Using Gmail
You can automate tasks like automatically forwarding emails to chat tools, saving attachments, and setting up automated email replies by connecting with CRM tools!
Automation Examples Using Gemini
You can automate social media posts and integrate with video-sharing platforms to enhance your content management!
📖 Summary
Now you know how to integrate Gmail with Gemini to automatically categorize email priority and assign it to a responsible person. <span class="mark-yellow">By integrating these two apps, you can boost productivity with automated email sorting, replying, translation, and summarization!</span>
These kinds of task automations can be especially useful for customer support teams handling high volumes of inquiries and sales representatives who need to communicate frequently with clients. Best of all, no special knowledge is required and anyone can easily set it up!
Ready to simplify your workflows? Sign up for Yoom and try it today!
Conventional RPA can only automate simple repetitive tasks, and the setup process was very complicated. With “hyperautomation,” which combines various technologies such as AI, API, RPA, and OCR, it is possible to automate many tasks that could not be realized until now more easily than before.
Most tools simply connect one app to another, leaving the complex tasks to you. Yoom goes much further: From document creation and browser automation to OCR and generative AI, Yoom handles it all seamlessly in one platform.
Why settle for basic integrations? Streamline your entire workflow with Yoom’s powerful hyperautomation.


.avif)
.avif)
.avif)
.avif)


