How to read the registration number from a receipt received in Gmail, verify the registration status of the business in the Qualified Invoice Issuer Public System, and notify Microsoft Teams
How to Integrate Applications
・
2025-02-03
How to read the registration number from a receipt received in Gmail, verify the registration status of the business in the Qualified Invoice Issuer Public System, and notify Microsoft Teams
k.ueno
Manually checking receipts received in Gmail and verifying each business's registration status using the Qualified Invoice Issuer Public System is time-consuming and carries the risk of oversight. By utilizing Yoom, you can automatically read the registration number from receipts received in Gmail and verify the business's registration status using the Qualified Invoice Issuer Public System. Furthermore, by notifying the results of the business's registration status to Microsoft Teams, you can expect a smooth transition to subsequent tasks and improved work speed after the verification process. This article provides a detailed explanation of how to read the registration number from receipts received in Gmail, verify the business's registration status using the Qualified Invoice Issuer Public System, and notify Microsoft Teams. By incorporating this into your workflow, you can achieve time savings in verification tasks and reduce human error, so please take a look.
Recommended for
Companies using Gmail, the Qualified Invoice Issuer Public System, and Microsoft Teams
Those who are using Gmail, the Qualified Invoice Issuer Public System, and Microsoft Teams separately but find it cumbersome to link information
Personnel who want to accurately and quickly perform registration verification tasks by linking Gmail, the Qualified Invoice Issuer Public System, and Microsoft Teams
Those considering whether they can streamline their operations by linking Gmail, the Qualified Invoice Issuer Public System, and Microsoft Teams
Now, let's create a flowbot using the template "Read the registration number from receipts received in Gmail, verify the business's registration status using the Qualified Invoice Issuer Public System, and notify Microsoft Teams".
[What is Yoom]
How to read the registration number from receipts received in Gmail, verify the business's registration status using the Qualified Invoice Issuer Public System, and notify Microsoft Teams
First, use Gmail's API to receive the receipt in Gmail and utilize AI functions to read the registration number from the received receipt. Then, you can verify the business's registration status using the API of the Qualified Invoice Issuer Public System. Furthermore, you can also notify the results of the business's registration status verification using the API provided by Microsoft Teams. Generally, programming knowledge is required to achieve this, but with the no-code tool Yoom, it can be easily accomplished without programming knowledge.
The workflow to complete the flow is as follows:
Integrate Gmail, the Qualified Invoice Issuer Public System, and Microsoft Teams with My Apps
Copy the template
Set up Gmail activation and data extraction using AI, followed by setting up the Qualified Invoice Issuer Public System to verify the business's registration status from the registration number and setting up Microsoft Teams for notifications
Turn on the trigger and verify the operation
If you are not using Yoom, please register for free from here. If you are already using Yoom, please log in.
・Connect Gmail, Qualified Invoice Issuer Publication System, and Microsoft Teams to My Apps
(1) First, connect Gmail to My Apps. After logging into your Yoom account, click on "My Apps" in the left column and search for Gmail from "New Connection".
(2) The Gmail app icon will appear, so click on it.
(3) You will be taken to the account selection screen, so choose the account you want to connect from the management accounts on the right. After selection, you will proceed to the sign-in screen, so complete the authentication. The first Gmail connection is now complete.
(4) Next, connect the Qualified Invoice Issuer Publication System app. Select the Qualified Invoice Issuer Publication System in the same way as registering Gmail to My Apps.
(5) Enter the "Account Name" and "Access Token", and click [Add]. This completes the connection to the Qualified Invoice Issuer Publication System.
(6) With the connection to the Qualified Invoice Issuer Publication System app complete, proceed to connect the third app, Microsoft Teams. Search for and click the Microsoft Teams app icon in the same way.
(7) After clicking the Microsoft Teams app icon, you will proceed to the sign-in screen, but no further action is needed, and the connection will be completed instantly.
・Microsoft365 (formerly Office365) has plans for home use and general business use (Microsoft365 Business), and if you are not subscribed to the general business plan, authentication may fail.
If the setup is successful, you will be taken to the My Apps screen of your Yoom account with the three apps added. Now, the three apps are connected to your Yoom account.
・Copy Template
After confirming that the new connection of the target app to your Yoom account is complete, click the icon for "Try this template" in the template below.
The template will be copied, so click the "OK" button.
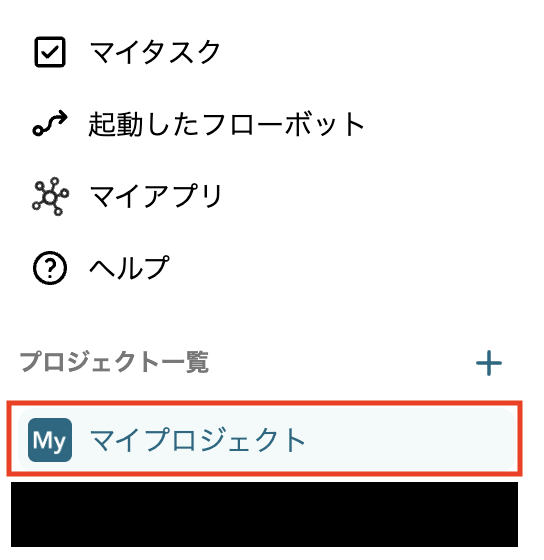
Please move to the "My Projects" screen of your Yoom account and check the template content.
The setup flow includes 5 actions, including branching actions.
・Gmail Launch Settings
(1) First, set up the Gmail app trigger.
From the "My Projects" on the left side of your Yoom account screen, click "【Copy】Read the registration number from the receipt received in Gmail, check the registration status of the business in the Qualified Invoice Issuer Public System, and notify Microsoft Teams."
After clicking, the template content will be displayed as shown in the screen below.
(2) Click on the first action "When an email with a specific label is received."
(3) Enter the account information to be linked and click [Next].
(4) On the next screen, set the "Trigger Activation Interval." Choose any interval from 5 minutes, 10 minutes, 15 minutes, 30 minutes, or 60 minutes. *Note that the trigger activation interval varies depending on the plan.
(5) When you click the input bar for "Label," the content based on the linked account will be displayed as 'candidates,' so select the information that suits your operation.
(6) After entering the information, click [Test] and if there are no issues, click [Save]. Additionally, you can obtain the following output in this step.
・AI Operation Confirmation
(1) Next, click on the second action "Read text from image/PDF" to check the content.
(2) Check the content on the post-migration screen and click [Next].
(3) On the next screen, for "File Attachment Method," select [Use Retrieved Value] from the dropdown for this flow, and select [Attachment File 1] for the right item. For "Additional Items to Extract," enter the information you want to extract from the uploaded file other than the default (such as "Payee," "Date," "Total Amount," "Tax Rate," "Consumption Tax Amount," "Qualified Invoice Issuer Registration Number") according to your operational situation.
・Please note that OCR data may not be readable if it exceeds 6,500 characters or if the text is small.
(4) After entering the information, click [Test] and if there are no issues, click [Save]. For operations that read text information from images/PDFs, please also check this page.
・AI operations are only available in the Team Plan and Success Plan. In the case of the Free Plan and Mini Plan, the operation of the flow bot set will result in an error, so please be careful. ・Paid plans such as the Team Plan and Success Plan can be tried for free for two weeks. During the free trial, you can use restricted apps and AI features (operations).
・Setting to Obtain Public Information from the Registration Number in the Qualified Invoice Issuer System
(1) Next, click on the third action "Obtain public information from the registration number."
(2) Enter the account information to be linked and click [Next].
(3) On the next screen, enter the information in the "Registration Number" field. As shown in the screen below, clicking the input bar will display the information obtained in the previous step, allowing you to quote the content. (Below is an example of quoting the "Qualified Invoice Issuer Registration Number" information obtained in the previous step.)
(4) After entering the information, click [Test] and if there are no issues, click [Save].
・Branch Action Confirmation
(1) Next, click on the already set fourth action "Command Operation" to check the content.
(2) As shown in the screen below, the output for branching is specified as "Operation: Obtain public information from the registration number" → "Output: Registration Number."
(3) Set "Output" and "Branch Conditions" as needed according to the situation. (In this case, it is set so that branching occurs when the output item of the registration number is not empty.)
(4) After confirming the settings or changing them as needed, click [Save].
・Setting Microsoft Teams for Notification
(1) Finally, click on the fifth action "Send a message to the channel."
(2) Enter the account information to be linked and click [Next].
(3) On the next screen, enter information such as "Team ID" and "Channel ID." Clicking the input bar will display content based on the linked account as 'candidates,' allowing you to select information from there.
(4) In "Message," enter the information you want to include in the notification content. Clicking the input bar allows you to quote the output. The image below is an example of entering and setting the output [Registration Number] obtained in the previous step. (If you want to break a line in the message, enter <br> at the end of the sentence.)
(5) Scroll down and fill in the fields for "Mention Information" and "Attachment Information." If you want to attach a file when notifying, you need to upload it to OneDrive in advance and enter the string enclosed in {} of the obtained eTag.
(6) After entering the information, click [Test] and if there are no issues, click [Save]. This completes the setup.
・Turn on the Trigger and Check Operation
By clicking the red frame part "Turn on Trigger" on the screen below, the flow bot will start automatically.
Here is the template used this time
Examples of Other Automations Using the Qualified Invoice Issuer Publication System and Gmail
There are other examples of automation using the Qualified Invoice Issuer Publication System and Gmail on Yoom, so here are a few introductions.
Read the Registration Number from Invoices Received in Gmail, Check the Registration Status of the Business in the Qualified Invoice Issuer Publication System, and Notify Microsoft Teams
This flowbot is recommended for those who want to streamline invoice processing and reduce errors. By automatically checking the registration status of qualified invoice issuers, you can expect to improve work efficiency and prevent human errors.
Read the registration number from receipts received in Gmail, check the registration status of the business in the Qualified Invoice Issuer Publication System, and notify Google Chat
By reading the registration number from receipts received in Gmail, checking the registration status of the business in the Qualified Invoice Issuer Publication System, and notifying Google Chat, it is expected to reduce the workload. Necessary information may be automatically retrieved, allowing for a speedy confirmation of the business's registration status.
Automatically Check the Registration Status of Qualified Invoice Issuers When a Client is Registered in Airtable
When a client is registered in Airtable, you can automatically check the registration status of qualified invoice issuers, which is expected to streamline the process of confirming registration status. By utilizing the information registered in Airtable, manual input and verification tasks become unnecessary, potentially allowing for smoother business operations.
Benefits and Examples of Integrating Gmail, the Qualified Invoice Issuer Public System, and Microsoft Teams
1. Reducing the Effort of Verification Tasks
By utilizing AI operations to automatically read registration numbers from receipts received in Gmail, it may eliminate the need for manually verifying the registration status of businesses. Automating the verification process can potentially reduce the effort involved, as staff would no longer need to extract registration numbers from receipt images one by one and access another system to check registration status. Furthermore, by notifying the results to Microsoft Teams, it becomes possible to grasp only the information you want to know (whether registered or not), thus improving work efficiency.
2. Preventing Oversights in Verification
Manual verification tasks carry the risk of number discrepancies or oversights. By reading documents received in Gmail, automatically verifying the registration status of businesses in the Qualified Invoice Issuer Public System, and reliably notifying the results to Microsoft Teams, the likelihood of preventing verification oversights increases. If the verification process is automated, it may help prevent issues where businesses that have accurately registered are mistakenly overlooked. This will also contribute to improving the accuracy of operations.
3. Standardizing the Series of Tasks
When verifying the registration status of businesses in the Qualified Invoice Issuer Public System, there were instances where different staff members performing the tasks resulted in inconsistencies in responses and shared content. By automating the process from receiving receipts in Gmail to notifying Microsoft Teams, it may allow any staff member to complete the tasks in a standardized process. Building an easy-to-understand flow for staff performing the tasks for the first time also contributes to creating an environment where they can work with confidence.
Conclusion
By incorporating the integration of Gmail, the Qualified Invoice Issuer Public System, and Microsoft Teams into your operations, you can automatically verify the registration status of businesses from receipts received in Gmail, leading to improved efficiency in registration verification tasks. The introduction of this automated flow also contributes to reducing the effort and errors in verification tasks, thus enhancing operational accuracy. Additionally, by swiftly sharing information via Microsoft Teams, subsequent tasks may be carried out more smoothly. We encourage you to experience automation through app integration using Yoom.
The person who wrote this article
k.ueno
Until now, as customer support, we have made efforts to resolve users' questions and concerns.
I was moved to learn that by using Yoom, tasks that are becoming increasingly complicated on a daily basis will progress quickly!
From now on, we will continue to distribute content with easy-to-understand content so that people who aim to improve work efficiency can use the service smoothly.
Conventional RPA can only automate simple repetitive tasks, and the setup process was very complicated. With “hyperautomation,” which combines various technologies such as AI, API, RPA, and OCR, it is possible to automate many tasks that could not be realized until now more easily than before.
Most tools simply connect one app to another, leaving the complex tasks to you. Yoom goes much further: From document creation and browser automation to OCR and generative AI, Yoom handles it all seamlessly in one platform.
Why settle for basic integrations? Streamline your entire workflow with Yoom’s powerful hyperautomation.


.avif)


.avif)

.avif)
.avif)


