[No-Code Solution] How to Automatically Integrate Gmail Data with Todoist
How to Integrate Applications
・
2025-05-01
[No-Code Solution] How to Automatically Integrate Gmail Data with Todoist
Have you ever thought, "Isn't there a smarter way to create tasks?" when you need to access Todoist every time you receive an email in Gmail to create a task based on the received content? If both tools are managed by a team, you might assume "someone must have created the task..." and end up missing important emails without converting them into tasks.
The solution to this issue is automating tasks through data integration between Gmail and Todoist! By utilizing the API, you can automatically sync the content received in Gmail with Todoist!
Additionally, by specifying emails with certain labels or keywords, you can automatically create tasks, preventing any important notifications from being missed or overlooked.
In this article, we will specifically introduce the method of integrating Gmail and Todoist, as well as the automation flow that can be achieved through this integration. If you are considering improving work efficiency, be sure to check it out!
For those who want to try it out quickly
By using Yoom, you can easily integrate Gmail and Todoist without any coding.
Yoom provides templates for integrating Gmail and Todoist in advance, so even without API knowledge, you can achieve integration immediately just by signing up.
What You Can Do by Integrating Gmail with Todoist
By integrating the APIs of Gmail and Todoist, you can automatically sync Gmail data with Todoist! For example, you can automatically perform data synchronization like the following without any manual intervention.
Create Tasks in Todoist Based on Content Received in Gmail
Tasks are automatically created in Todoist based on the content received in Gmail, saving you the trouble of manual data entry. By ensuring that tasks from emails received in Gmail are added to Todoist, you can prevent any omissions in task registration.
Create a task in Todoist when an email meeting specific conditions is received in Gmail
With this integration, a task is automatically added to Todoist every time an email that meets the specified conditions is received, facilitating smooth task management. This flow is recommended for those who want to streamline the process of transferring tasks from emails!
Let's Create a Gmail and Todoist Integration Flow
Let's get started on creating a flow that integrates Gmail and Todoist! This time, we'll use Yoom to proceed with the integration of Gmail and Todoist without any code. If you don't have a Yoom account yet, please create one using this registration form.
[What is Yoom]
This time, we will create a flow bot that "creates a task in Todoist based on the content received in Gmail"! The creation process is broadly divided into the following steps:
Integrate Gmail and Todoist with My Apps
Copy the template
Set the Gmail trigger and Todoist action
Set the trigger to ON and complete the preparation for flow operation
Step 1: Register Gmail and Todoist as My Apps
1. Please register Gmail and Todoist as My Apps to connect them to Yoom. Completing the My Apps registration in advance will allow for smoother automation settings.
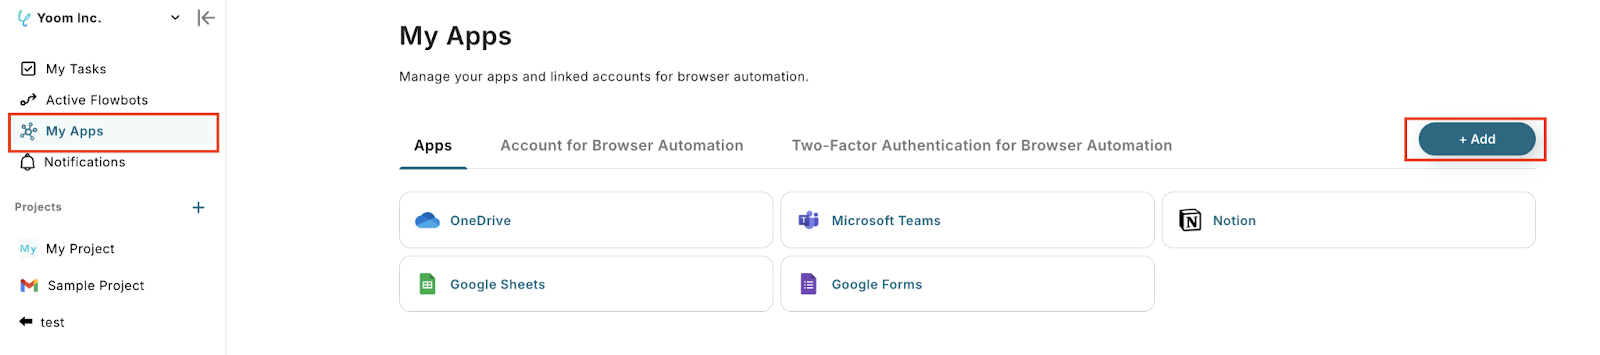
First, let's register Gmail as My App. Click on "My Apps" → "+ Add" on the left side of the Yoom screen. Find Gmail from the list of apps or use the search function to search for it.
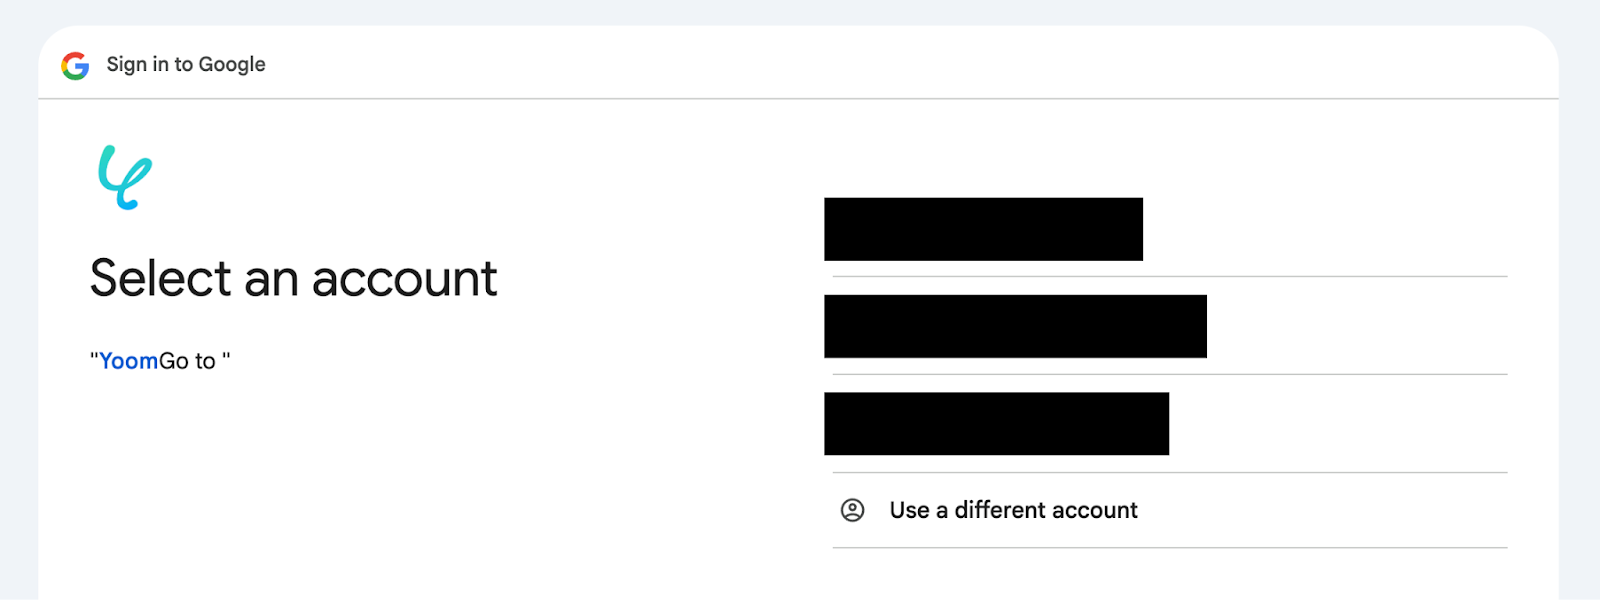
2. Select your Google account and click "Next".
3. When the following screen appears, click "Continue".
4. Next, register Todoist as My App. Click on Todoist from the new connection list in Yoom and sign in, just like in step (1). Enter your "Email Address" and "Password" on the screen below to log in.
Once both are registered in Yoom's My Apps, the integration is complete!
Step 2: Copy the Template
1. To set up automation, click "Try it" on the banner below.
2. Read the following screen display and click "OK".
Step 3: Setting up Gmail Trigger Action
1. Let's start setting up the flow! First, click "When an email matching specific keywords is received".
2. The following screen will be displayed, so check the settings and press "Next".
"Title" → Can be changed freely
"App" → Gmail
"Account information linked with Gmail" → Check for any discrepancies in the account
"Trigger Action" → When an email is received
3. Set the trigger interval from the dropdown according to your needs. ※ The shortest trigger interval varies depending on your plan.
4. Enter an optional "keyword" according to your needs. (This will filter emails that match the specified keyword.)
5. Move to the Gmail screen and send a test email.
6. After sending the message, execute the "Test"!
Scroll down to see the output as shown below. This will be used in the Todoist settings, so check the data.
2. The following screen will be displayed, so check the settings and proceed to "Next".
"Title" → Can be changed freely
"Conversion Type" → GPT-4o mini | Extract text from data within 3,500 characters (2 tasks)
4. Scroll down and set the "items to extract" from the Gmail message. The following is an example, so set it as you like.
5. After setting, execute the "Test"!
Scroll down to see the output as before.
This will also be used in the Todoist settings, so check the data.
Once confirmed, click "Save".
Step 5: Setting to Create a Task in Todoist
1. Next, click "Create Task".
2. The following screen will be displayed, so check the settings and press "Next".
"Title" → Can be changed freely
"App" → Todoist
"Account information linked with Todoist" → Check for any discrepancies in the account
"Action" → Create Task
3. You will transition to a screen like the one below, so complete the input while checking the supplementary information below the input field.
Clicking the input field allows you to easily set it using the output! This time, let's try entering the following items ↓
4. After entering, click "Test" → "Test Successful" → "Save"!
Then, a task like the image below will actually be created on Todoist.
Step 6: Set Trigger to ON and Complete Flow Operation Preparation
Finally, click "Turn on the trigger" to complete the automation setup. Let's check if the flow bot is working correctly.
Thank you for your hard work on the setup!
If you want to retrieve overdue tasks in Todoist and notify Gmail
This time, we introduced how to link data from Gmail to Todoist, but if you want to link data from Todoist to Gmail, please also use the template below!
Periodically retrieve overdue tasks in Todoist and notify Gmail
When the deadline for a task set in Todoist is exceeded, a notification is automatically sent to Gmail, preventing important tasks from being overlooked. By utilizing this, deadline management becomes more reliable, supporting the smooth progress of work.
Every day, retrieve tasks due today from Todoist and notify via Gmail
Automatically pick up tasks due today from Todoist every day and send email notifications through Gmail. This helps ensure that important deadlines and priority tasks are not missed, allowing for smooth workflow management.
Other Automation Examples Using Gmail and Todoist APIs
By leveraging the APIs of Gmail and Todoist, various automations can be achieved! How about the following automations, for example?
Automation Examples Using Gmail
By integrating Gmail with other apps, it is possible to automate sending emails from Gmail. For instance, you can automatically create and send invoices or contracts via Gmail, or automatically respond to inquiries.
Automation Examples Using Todoist
By integrating Todoist with other apps, you can automate various tasks. For example, you can automatically add tasks to Todoist or extract tasks with approaching deadlines on Todoist and send daily notifications to Slack.
In Conclusion
By integrating Gmail with Todoist, it is expected that managing and creating tasks that should be shared with the team will become smoother! Not only can you convert the contents of received Gmail directly into tasks, but you can also create tasks only when specific content is included, making it easier to effectively visualize only the truly necessary tasks.
Additionally, Yoom offers many templates beyond the automation introduced this time! If you can easily implement the integration of the apps you regularly use, a stress-free workflow might be achievable...!
Furthermore, since no programming is required for integration, it's easy to implement, and you can set it up smoothly even without specialized knowledge, which is a great point! Take this opportunity to reduce your workload and create a comfortable working environment by registering with Yoom now and implementing automation!
Conventional RPA can only automate simple repetitive tasks, and the setup process was very complicated. With “hyperautomation,” which combines various technologies such as AI, API, RPA, and OCR, it is possible to automate many tasks that could not be realized until now more easily than before.
Most tools simply connect one app to another, leaving the complex tasks to you. Yoom goes much further: From document creation and browser automation to OCR and generative AI, Yoom handles it all seamlessly in one platform.
Why settle for basic integrations? Streamline your entire workflow with Yoom’s powerful hyperautomation.


.avif)
.png)
.png)


