・
How to Streamline Review Management by Auto-Transferring Google Business Profile Reviews to Google Sheets

- ✨ Recommended for
- ✔️ For Those Who Want to Try It Now
- 🚀 Let’s Set Up a Flowbot To Log Reviews in Google Sheets Upon Posting on Google Business Profile
- 💡 Other Automation Examples Using Google Business Profile and Google Sheets
- 👏 Benefits of Integrating Google Business Profile with Google Sheets
- 📖 Summary
Sharing reviews from Google Business Profile in Google Sheets allows you to easily gather customer feedback and use it to shape your business development strategies. But manually transferring each review from Google Business Profile to Google Sheets can be time-consuming and tedious.
In this article, we’ll show you how to automate the process by integrating Google Business Profile with Google Sheets. This integration will help you streamline review management and make it much easier to analyze customer feedback.
Meet Yoom: No-Code Automation
Yoom is a next-generation no-code automation that lets you connect and automate tasks between your favorite apps. Connecting different apps can be challenging for non-engineers, but Yoom makes automation accessible to everyone.
- 🌐 Connect with apps like Google Sheets, Google Business Profile and more.
- 📖 Use automation templates - no technical setup required
- 📈 Boost productivity and reduce human errors
You don't need to go through a complex setup and IT jargon, you can build your automation workflows with just a few clicks :) It's designed for those who want to streamline their daily work and save hours of time and stress from repetitive work.
👉 Sign Up for Yoom Here – Quick and Easy in Just 30 Seconds!
In this guide, you'll learn the step-by-step process of how to use Yoom to automatically sync Google Business Profile reviews to Google Sheets.
✨ Recommended for
- Anyone looking to centrally manage review data
- Teams that want to analyze reviews from Google Business Profile effectively
- Those who want to automate the process of transferring reviews from Google Business Profile to Google Sheets
✔️ For Those Who Want to Try It Now
Yoom offers ready-made templates for easy setup. Click the "Try it" button to get started now!
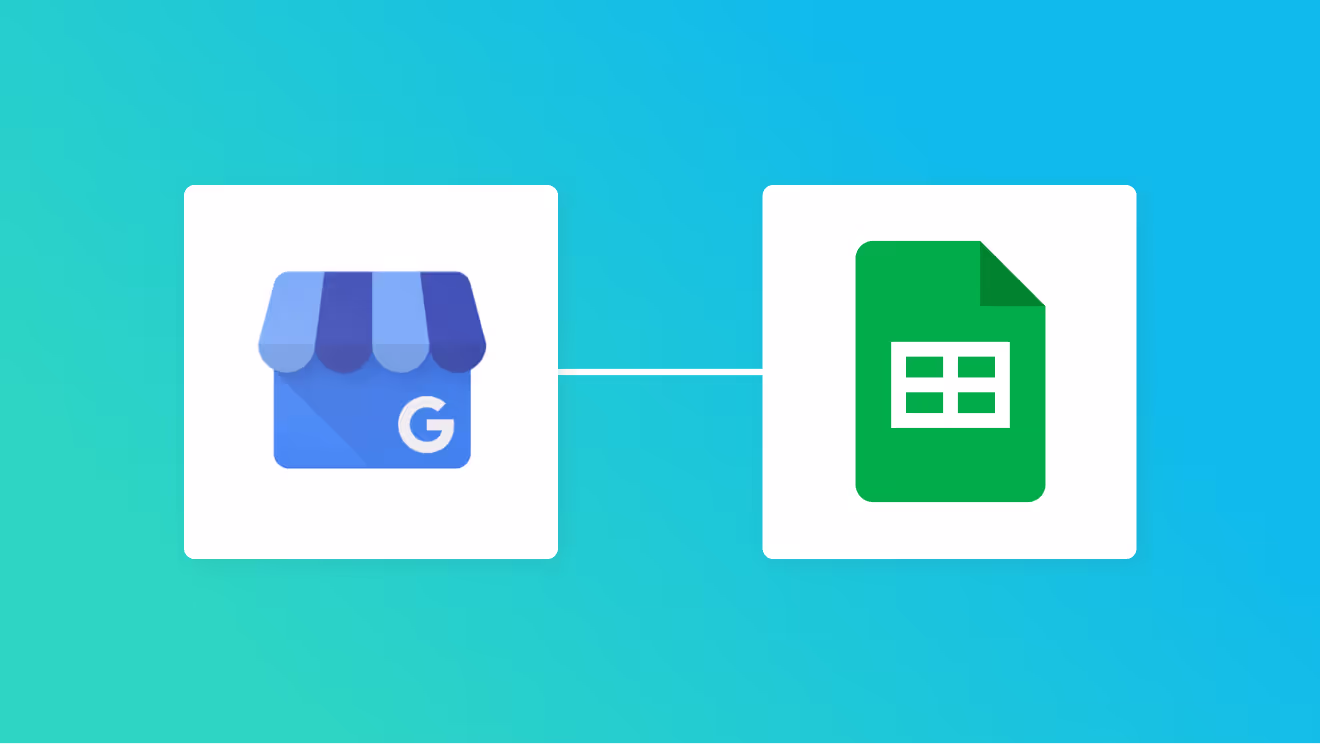
■Overview
This is a flow that adds reviews to a Google Spreadsheet when they are posted on a Google Business Profile.
■Recommended for
1. Those who want to analyze customer feedback
・For those who want to understand customer trends and improve services by accumulating and analyzing review data on Google Spreadsheets
2. Departments managing reviews on Google Spreadsheets
・For those who want to improve work efficiency by automatically adding reviews to Google Spreadsheets, eliminating the need for manual input
■Benefits of using this template
Customer feedback on Google Business Profile is a valuable data collection, but managing it manually when reviews increase can be labor-intensive and may lead to delayed responses.
By implementing this flow, reviews are automatically added to the Google Spreadsheet database when posted.
This allows the person in charge to immediately share and respond to the review content with the team without missing any reviews, enabling them to focus on providing higher quality services and improving work efficiency.
■Notes
・Please link both Google Business Profile and Google Spreadsheets with Yoom.
・You can select the trigger activation interval from 5, 10, 15, 30, or 60 minutes.
・Please note that the shortest activation interval varies depending on the plan.
🚀 Let’s Set Up a Flowbot To Log Reviews in Google Sheets Upon Posting on Google Business Profile
Let's walk through how to set up a flow that automatically add reviews to Google Sheets when posted on Google Business Profile.
⏱️ Setup time: 5 minutes
🔧 What You’ll Need
- A free Yoom account
- Access to Google Sheets and Google Business Profile.
If you don’t have a Yoom account yet, register now from this registration form!
Step 1: Register Apps in Yoom
After logging into Yoom, go to "My Apps" from the left side menu and click "+ Add".

Connecting Google Business Profile
Search for Google Business Profile and click on it.
Log in using your Google account to link with Yoom.

On the next page, Yoom will request additional access to your Google account. Click "Continue" and, on the authentication screen, select “Allow all permissions”.
Connecting Google Sheets with Yoom
Since Google Sheets and Google Business Profile are both part of the Google ecosystem, they can be integrated using the same procedure. Therefore, you can follow the same steps to integrate Google Docs and Google Business Profile as well.
☝️ Tip: To test the flow settings, you'll need to prepare a Google Sheet database in advance. While the content entered can be temporary, it’s important to create the necessary columns and fields in the sheet to ensure that the data can be properly processed.
The following review data can be extracted from Google Business Profile.
- Review ID
- Profile Picture URL
- Reviewer Name
- Star Rating
- Comment
- Creation Date
- Update Date
- Resource Name
The recommended fields to include are Review ID, Reviewer Name, Star Rating, Comment, and Creation Date. Feel free to add any additional data that you’d like to track by adjusting the settings accordingly.
Step 2: Copy the Template
Click the "Try It" button to copy the pre-built template into your project.
■Overview
This is a flow that adds reviews to a Google Spreadsheet when they are posted on a Google Business Profile.
■Recommended for
1. Those who want to analyze customer feedback
・For those who want to understand customer trends and improve services by accumulating and analyzing review data on Google Spreadsheets
2. Departments managing reviews on Google Spreadsheets
・For those who want to improve work efficiency by automatically adding reviews to Google Spreadsheets, eliminating the need for manual input
■Benefits of using this template
Customer feedback on Google Business Profile is a valuable data collection, but managing it manually when reviews increase can be labor-intensive and may lead to delayed responses.
By implementing this flow, reviews are automatically added to the Google Spreadsheet database when posted.
This allows the person in charge to immediately share and respond to the review content with the team without missing any reviews, enabling them to focus on providing higher quality services and improving work efficiency.
■Notes
・Please link both Google Business Profile and Google Spreadsheets with Yoom.
・You can select the trigger activation interval from 5, 10, 15, 30, or 60 minutes.
・Please note that the shortest activation interval varies depending on the plan.
Click "Try this template".

Click "OK" and give the Flowbot a name to recognize.

The template will be copied to your "My Project".

Step 3: Set Up Google Business Profile Trigger Action
Click on the trigger action with the Google Business Profile icon.

The next screen is pre-configured. You can change the title if you want.
Then, set your trigger interval (how often you want Yoom to check Google Business Profile for new updates).
It can be set to 5 minutes, 10 minutes, 15 minutes, 30 minutes, or 60 minutes. We recommend setting the trigger to the shortest activation interval available for your plan.
⚠️ Note: The trigger interval varies depending on your Yoom plan. Be sure to check your current plan’s limit.


Fill out the Account ID and Location ID.
Copy and paste each Google Business Profile ID as outlined in the instructions at the bottom of the box or select from the displayed options.

Once set, click “Test”.
If the test succeeds, the retrieved value will get updated. Check if it's correct, and click “Save”.

Step 4: Add Record to Google Sheets
Click on the action with the Google Sheets icon.

Select Spreadsheet ID:
Choose the Spreadsheet ID from the displayed options.

Select Tab Name:
Choose the Tab Name where the data will be stored.

Define Table Range (Optional):
You can optionally specify the Table Range where data will be saved.
📚 Reference: For more details on table range settings, check this guide.

Map the Data:
Click on each item field and assign the corresponding data from the retrieved value to each field.


The data from Google Business Profile will appear in a list. Select the data that matches the name of the corresponding box item. For example, if the box item name is “Star Rating” choose “Star Rating” from the Google Business Profile data.

The data can be inserted as shown in the image below. ⬇️

Test the Setup:
After setting the data, click Test to check if everything is configured correctly.
Once you confirm the test is successful, click "Save".
Step 5: Activate the Flowbot
Toggle the "Trigger On" button to activate your flow!
Check if the Flowbot you set up is working properly.

That’s it! 🎉 The Flowbot is now complete!
■Overview
This is a flow that adds reviews to a Google Spreadsheet when they are posted on a Google Business Profile.
■Recommended for
1. Those who want to analyze customer feedback
・For those who want to understand customer trends and improve services by accumulating and analyzing review data on Google Spreadsheets
2. Departments managing reviews on Google Spreadsheets
・For those who want to improve work efficiency by automatically adding reviews to Google Spreadsheets, eliminating the need for manual input
■Benefits of using this template
Customer feedback on Google Business Profile is a valuable data collection, but managing it manually when reviews increase can be labor-intensive and may lead to delayed responses.
By implementing this flow, reviews are automatically added to the Google Spreadsheet database when posted.
This allows the person in charge to immediately share and respond to the review content with the team without missing any reviews, enabling them to focus on providing higher quality services and improving work efficiency.
■Notes
・Please link both Google Business Profile and Google Spreadsheets with Yoom.
・You can select the trigger activation interval from 5, 10, 15, 30, or 60 minutes.
・Please note that the shortest activation interval varies depending on the plan.
💡 Other Automation Examples Using Google Business Profile and Google Sheets
By using Google Business Profile and Google Sheets, you can unlock a wide range of automation possibilities that simplify your workflows. Here are some examples you can explore for your next automation!
Automation Examples with Google Business Profile and Google Sheets
Managing Local Posts on Google Business Profile via Google Sheets
■Overview
This is a flow to create a local post on Google Business Profile when the status is updated in Google Sheets.
With Yoom, you can easily achieve this flow without any programming, as it allows for integration between apps.
■Recommended for
1. Those who share or confirm information using Google Sheets
・Those managing local posts on Google Business Profile
2. Stores utilizing Google Business Profile
・Those providing the latest store information or event details through local posts
■Benefits of using this template
Local posts on Google Business Profile can display the latest store information or upcoming event details.
This allows you to efficiently provide store information to customers, making it effective for increasing foot traffic.
With this flow, you can automatically create local posts when the status in Google Sheets is updated.
It enables you to manage local posts from Google Sheets, facilitating smooth sharing and confirmation of post content among team members, and preventing posts with incorrect information.
■Notes
・Please integrate both Google Sheets and Google Business Profile with Yoom.
・Branching is a feature available with the Mini Plan or higher (operation). If you are on the Free Plan, the operation of the flow bot you set will result in an error, so please be careful.
・Paid plans like the Mini Plan offer a 2-week free trial. During the free trial, you can use restricted apps and AI features (operations).
・Triggers can be set to activate at intervals of 5, 10, 15, 30, or 60 minutes.
・Please note that the shortest activation interval varies depending on the plan.
Automation Examples Using Google Sheets
Automate Invoice Creation
■Overview
This is a flow for sending documents from MakeLeaps when a row is updated in Google Sheets.
By using Yoom, you can easily integrate apps without the need for programming.
■Recommended for
1. Those who manage data using Google Sheets
・If you manage various data such as customer information and sales data in Google Sheets but find manual processing time-consuming
・If you want to automatically trigger related actions when data is updated
2. Those who create and send documents using MakeLeaps
・If you create invoices and quotes in MakeLeaps but want to eliminate the hassle of sending them manually
・If you want to send documents quickly and respond to customers promptly
■Benefits of using this template
By integrating Google Sheets and MakeLeaps, document sending is automated every time a row is updated.
This eliminates the need for manual sending tasks, improving operational efficiency.
Additionally, since updated data is immediately reflected, you can respond to clients quickly.
As a result, it may also lead to improved customer satisfaction.
Furthermore, automation reduces the manual work, decreasing the risk of human error and enhancing data accuracy.
■Notes
・Please integrate both Google Sheets and MakeLeaps with Yoom.
・You can select the trigger interval from 5, 10, 15, 30, or 60 minutes.
・Please note that the shortest trigger interval varies depending on the plan.
■Overview
This is a flow that sends an invoice from Xero via email when a row is updated in Google Sheets.
By using Yoom, you can easily connect apps without the need for programming.
■Recommended for
1. Those who manage data using Google Sheets
・Those who manage data daily with Google Sheets but find manual updates and checks cumbersome
・Those who want to automatically proceed with subsequent tasks when data is updated
2. Those who issue invoices using Xero
・Those who want to issue invoices smoothly with Xero
・Those who want to improve work efficiency by automatically sending emails after issuing invoices
■Benefits of using this template
By linking Google Sheets and Xero, the invoice sending process can be streamlined.
This eliminates the hassle of manually creating and sending invoices, saving work time.
Invoices are automatically sent promptly every time Google Sheets is updated, preventing delays in invoice processing.
Additionally, reducing manual operations lowers the risk of human error, enabling accurate invoice management.
■Notes
・Please connect both Google Sheets and Xero with Yoom.
・You can select trigger intervals of 5 minutes, 10 minutes, 15 minutes, 30 minutes, or 60 minutes.
・Please note that the shortest trigger interval varies depending on the plan.
■Overview
This is a flow to create invoices in Harvest when a row is updated in Google Sheets.
With Yoom, you can easily achieve this flow without any programming, as it allows for integration between apps.
■Recommended for
1. Those who use Google Sheets for business
・Those who manage project expenses and billing information in Google Sheets
・Those who want to link registered information to other tools and utilize it for subsequent tasks such as report creation
2. Those who use Harvest for business
・Those who want to reduce the hassle and errors of manual data entry
・Those who want to streamline invoice issuance using Harvest's time management features
■Benefits of using this template
By implementing this flow, when the status of project expenses or billing is updated in Google Sheets, invoice creation in Harvest is automatically completed.
Invoices are automatically issued just by updating the status at necessary times, such as project completion or interim closing, preventing delays or omissions in issuance.
Additionally, since manual input at the time of issuance is not required, the risk of human errors such as transcription mistakes can be minimized.
■Notes
・Please link both Google Sheets and Harvest with Yoom.
・Triggers can be set to activate at intervals of 5, 10, 15, 30, or 60 minutes.
・Please note that the shortest activation interval varies depending on the plan.
■Overview
This is a flow for sending documents from MakeLeaps when a row is updated in Google Sheets.
By using Yoom, you can easily integrate apps without the need for programming.
■Recommended for
1. Those who manage data using Google Sheets
・If you manage various data such as customer information and sales data in Google Sheets but find manual processing time-consuming
・If you want to automatically trigger related actions when data is updated
2. Those who create and send documents using MakeLeaps
・If you create invoices and quotes in MakeLeaps but want to eliminate the hassle of sending them manually
・If you want to send documents quickly and respond to customers promptly
■Benefits of using this template
By integrating Google Sheets and MakeLeaps, document sending is automated every time a row is updated.
This eliminates the need for manual sending tasks, improving operational efficiency.
Additionally, since updated data is immediately reflected, you can respond to clients quickly.
As a result, it may also lead to improved customer satisfaction.
Furthermore, automation reduces the manual work, decreasing the risk of human error and enhancing data accuracy.
■Notes
・Please integrate both Google Sheets and MakeLeaps with Yoom.
・You can select the trigger interval from 5, 10, 15, 30, or 60 minutes.
・Please note that the shortest trigger interval varies depending on the plan.
■Overview
This is a flow that sends an invoice from Xero via email when a row is updated in Google Sheets.
By using Yoom, you can easily connect apps without the need for programming.
■Recommended for
1. Those who manage data using Google Sheets
・Those who manage data daily with Google Sheets but find manual updates and checks cumbersome
・Those who want to automatically proceed with subsequent tasks when data is updated
2. Those who issue invoices using Xero
・Those who want to issue invoices smoothly with Xero
・Those who want to improve work efficiency by automatically sending emails after issuing invoices
■Benefits of using this template
By linking Google Sheets and Xero, the invoice sending process can be streamlined.
This eliminates the hassle of manually creating and sending invoices, saving work time.
Invoices are automatically sent promptly every time Google Sheets is updated, preventing delays in invoice processing.
Additionally, reducing manual operations lowers the risk of human error, enabling accurate invoice management.
■Notes
・Please connect both Google Sheets and Xero with Yoom.
・You can select trigger intervals of 5 minutes, 10 minutes, 15 minutes, 30 minutes, or 60 minutes.
・Please note that the shortest trigger interval varies depending on the plan.
■Overview
This is a flow to create invoices in Harvest when a row is updated in Google Sheets.
With Yoom, you can easily achieve this flow without any programming, as it allows for integration between apps.
■Recommended for
1. Those who use Google Sheets for business
・Those who manage project expenses and billing information in Google Sheets
・Those who want to link registered information to other tools and utilize it for subsequent tasks such as report creation
2. Those who use Harvest for business
・Those who want to reduce the hassle and errors of manual data entry
・Those who want to streamline invoice issuance using Harvest's time management features
■Benefits of using this template
By implementing this flow, when the status of project expenses or billing is updated in Google Sheets, invoice creation in Harvest is automatically completed.
Invoices are automatically issued just by updating the status at necessary times, such as project completion or interim closing, preventing delays or omissions in issuance.
Additionally, since manual input at the time of issuance is not required, the risk of human errors such as transcription mistakes can be minimized.
■Notes
・Please link both Google Sheets and Harvest with Yoom.
・Triggers can be set to activate at intervals of 5, 10, 15, 30, or 60 minutes.
・Please note that the shortest activation interval varies depending on the plan.
Automate User Deletion
■Overview
The "Remove Users from Zoom When a Row is Updated in Google Sheets" workflow automates user management in Zoom based on data changes in a spreadsheet. This eliminates the need for manual user removal tasks, improving management efficiency. This workflow is particularly useful in environments with frequent team member turnover or where large-scale user management is required.
■Recommended for
- Team leaders who use Google Sheets and Zoom regularly
- IT administrators who spend time on manual user management tasks
- Business operators looking to streamline user removal processes in Zoom
- Those who want to automate business processes using data integration
■Benefits of Using This Template
- Improved operational efficiency: Automatically executing user removal based on updates in Google Sheets reduces the time spent on manual tasks.
- Error-free management: Automation prevents human errors, enabling accurate user management.
- Centralized management: Integration of Google Sheets and Zoom consolidates data management in one place, simplifying operations.
■Overview
This is a flow to delete a user from Microsoft Entra ID when a row is updated in Google Sheets.
■Recommended for
1. Those who use Google Sheets for business
・Data managers who manage user information in Google Sheets
2. Those who manage business operations with Microsoft Entra ID
・IT administrators who manage accounts
■Benefits of using this template
The advantage of Microsoft Entra ID is that it allows centralized management of access rights for registered users.
However, when user deletion is necessary, it requires individual handling, which may lead to management errors due to missed deletions.
This template allows automatic user deletion based on updates in Google Sheets.
If you manage users with Google Sheets, you no longer need to manually delete users, making management tasks easier.
■Notes
・Please integrate both Google Sheets and Microsoft Entra ID with Yoom.
・Microsoft365 (formerly Office365) has both a home plan and a general business plan (Microsoft365 Business). If you are not subscribed to the general business plan, authentication may fail.
・Microsoft Entra ID is an app available only with the Team Plan and Success Plan. If you are on the Free Plan or Mini Plan, the operations and data connections of the flow bot you set will result in errors, so please be careful.
・Paid plans such as the Team Plan and Success Plan offer a two-week free trial. During the free trial, you can use apps that are subject to restrictions.
■Overview
This flow deletes a Confluence page when a row is updated in Google Sheets.
With Yoom, you can easily achieve this flow without any programming, enabling seamless integration between applications.
■Recommended for
1. Those who use Google Sheets for work
・Those who manage updates of other applications' data using Google Sheets
・Those who frequently update information and want to prevent any oversight
2. Those who use Confluence for information sharing
・Those who handle a large amount of information and need to regularly delete pages
・Those who want to automate page deletion to reduce workload
■Benefits of using this template
By implementing this flow, you can automatically delete a Confluence page just by updating specific items in Google Sheets.
This helps reduce workload and prevent forgetting to delete pages.
It is useful for deleting unnecessary pages such as information on canceled projects, dormant cases for a certain period, or unused guidelines.
■Notes
・Please integrate Yoom with both Google Sheets and Confluence.
・You can select the trigger interval from 5, 10, 15, 30, or 60 minutes.
・Please note that the shortest trigger interval varies depending on the plan.
■Overview
The "Remove Users from Zoom When a Row is Updated in Google Sheets" workflow automates user management in Zoom based on data changes in a spreadsheet. This eliminates the need for manual user removal tasks, improving management efficiency. This workflow is particularly useful in environments with frequent team member turnover or where large-scale user management is required.
■Recommended for
- Team leaders who use Google Sheets and Zoom regularly
- IT administrators who spend time on manual user management tasks
- Business operators looking to streamline user removal processes in Zoom
- Those who want to automate business processes using data integration
■Benefits of Using This Template
- Improved operational efficiency: Automatically executing user removal based on updates in Google Sheets reduces the time spent on manual tasks.
- Error-free management: Automation prevents human errors, enabling accurate user management.
- Centralized management: Integration of Google Sheets and Zoom consolidates data management in one place, simplifying operations.
■Overview
This is a flow to delete a user from Microsoft Entra ID when a row is updated in Google Sheets.
■Recommended for
1. Those who use Google Sheets for business
・Data managers who manage user information in Google Sheets
2. Those who manage business operations with Microsoft Entra ID
・IT administrators who manage accounts
■Benefits of using this template
The advantage of Microsoft Entra ID is that it allows centralized management of access rights for registered users.
However, when user deletion is necessary, it requires individual handling, which may lead to management errors due to missed deletions.
This template allows automatic user deletion based on updates in Google Sheets.
If you manage users with Google Sheets, you no longer need to manually delete users, making management tasks easier.
■Notes
・Please integrate both Google Sheets and Microsoft Entra ID with Yoom.
・Microsoft365 (formerly Office365) has both a home plan and a general business plan (Microsoft365 Business). If you are not subscribed to the general business plan, authentication may fail.
・Microsoft Entra ID is an app available only with the Team Plan and Success Plan. If you are on the Free Plan or Mini Plan, the operations and data connections of the flow bot you set will result in errors, so please be careful.
・Paid plans such as the Team Plan and Success Plan offer a two-week free trial. During the free trial, you can use apps that are subject to restrictions.
■Overview
This flow deletes a Confluence page when a row is updated in Google Sheets.
With Yoom, you can easily achieve this flow without any programming, enabling seamless integration between applications.
■Recommended for
1. Those who use Google Sheets for work
・Those who manage updates of other applications' data using Google Sheets
・Those who frequently update information and want to prevent any oversight
2. Those who use Confluence for information sharing
・Those who handle a large amount of information and need to regularly delete pages
・Those who want to automate page deletion to reduce workload
■Benefits of using this template
By implementing this flow, you can automatically delete a Confluence page just by updating specific items in Google Sheets.
This helps reduce workload and prevent forgetting to delete pages.
It is useful for deleting unnecessary pages such as information on canceled projects, dormant cases for a certain period, or unused guidelines.
■Notes
・Please integrate Yoom with both Google Sheets and Confluence.
・You can select the trigger interval from 5, 10, 15, 30, or 60 minutes.
・Please note that the shortest trigger interval varies depending on the plan.
Automate Daily Report Retrieval and Notifications

 Every day, automatically retrieve the latest ad reports from Meta Ads (Facebook), add them to a Google Spreadsheet, and send a notification on Slack.
Try it
Every day, automatically retrieve the latest ad reports from Meta Ads (Facebook), add them to a Google Spreadsheet, and send a notification on Slack.
Try it
■Overview
This flow retrieves the latest ad reports from Meta Ads (Facebook) daily, automatically adds them to a Google Spreadsheet, and notifies Slack.
With Yoom, you can easily achieve this flow without any programming, as it allows for integration between apps.
■Recommended for
- Marketing professionals who are checking ad performance on Meta Ads (Facebook)
- Those who want to add Meta Ads (Facebook) reports to Google Spreadsheets and share them within the team
- Those who want to streamline daily routine tasks
■Benefits of using this template
By checking the latest ad reports on Meta Ads (Facebook), you can utilize them for data analysis and improvement strategies.
However, manually obtaining reports and managing data can be time-consuming and require a lot of effort.
With this flow, you can automate the retrieval of the latest ad reports from Meta Ads (Facebook) at a set time every day, as well as their addition to Google Spreadsheets and notification to Slack.
Since you can add the contents obtained from the ad reports to Google Spreadsheets, efficient data analysis is possible.
Additionally, since the added contents are notified to Slack, report sharing within the team can be done smoothly.
 Retrieve the latest information from Google Analytics event reports daily, automatically add it to Google Sheets, and notify on Slack.
Try it
Retrieve the latest information from Google Analytics event reports daily, automatically add it to Google Sheets, and notify on Slack.
Try it
■Overview
This is a flow that automatically retrieves the latest information from Google Analytics event reports daily, adds it to Google Sheets, and notifies Slack.
With Yoom, you can easily achieve this flow without the need for programming, as it allows for integration between apps.
■Recommended for
- Those who check Google Analytics event reports daily for website management
- Those who want to automate the addition of event report data to Google Sheets to streamline analysis work
- Those who want to quickly consider and implement improvement measures
■Benefits of using this template
By checking Google Analytics event reports, you can monitor changes on your website.
However, if you are managing and accumulating Google Analytics event reports, you might find the manual work each time to be cumbersome.
In this flow, the latest Google Analytics event report is retrieved at a set time every day, and the addition to Google Sheets and notification to Slack are automated.
With the automation of adding to Google Sheets, you can accumulate daily event report information, making it possible to streamline sharing and analysis work within your team.
Additionally, since tasks based on event reports can be advanced quickly, improvement measures based on numerical changes can also be smoothly implemented.
■Overview
This flow retrieves the latest ad reports from Meta Ads (Facebook) daily, automatically adds them to a Google Spreadsheet, and notifies Slack.
With Yoom, you can easily achieve this flow without any programming, as it allows for integration between apps.
■Recommended for
- Marketing professionals who are checking ad performance on Meta Ads (Facebook)
- Those who want to add Meta Ads (Facebook) reports to Google Spreadsheets and share them within the team
- Those who want to streamline daily routine tasks
■Benefits of using this template
By checking the latest ad reports on Meta Ads (Facebook), you can utilize them for data analysis and improvement strategies.
However, manually obtaining reports and managing data can be time-consuming and require a lot of effort.
With this flow, you can automate the retrieval of the latest ad reports from Meta Ads (Facebook) at a set time every day, as well as their addition to Google Spreadsheets and notification to Slack.
Since you can add the contents obtained from the ad reports to Google Spreadsheets, efficient data analysis is possible.
Additionally, since the added contents are notified to Slack, report sharing within the team can be done smoothly.
■Overview
This is a flow that automatically retrieves the latest information from Google Analytics event reports daily, adds it to Google Sheets, and notifies Slack.
With Yoom, you can easily achieve this flow without the need for programming, as it allows for integration between apps.
■Recommended for
- Those who check Google Analytics event reports daily for website management
- Those who want to automate the addition of event report data to Google Sheets to streamline analysis work
- Those who want to quickly consider and implement improvement measures
■Benefits of using this template
By checking Google Analytics event reports, you can monitor changes on your website.
However, if you are managing and accumulating Google Analytics event reports, you might find the manual work each time to be cumbersome.
In this flow, the latest Google Analytics event report is retrieved at a set time every day, and the addition to Google Sheets and notification to Slack are automated.
With the automation of adding to Google Sheets, you can accumulate daily event report information, making it possible to streamline sharing and analysis work within your team.
Additionally, since tasks based on event reports can be advanced quickly, improvement measures based on numerical changes can also be smoothly implemented.
Automation Examples Using Google Business Profile
Automate Review Notifications to Chat Tools When a Review is Posted
■Overview
This is a flow that notifies Discord when a review is posted on Google Business Profile.
■Recommended for
1. Those who use Google Business Profile for their stores
・Those who use Google Business Profile to introduce store information and menus
・Those who announce business hours and holidays on Google Business Profile
2. Those who use Discord for communication
・Members who use Discord as a means of communication within the team
・Those who want to quickly grasp the posting of reviews
■Benefits of using this template
Google Business Profile allows you to display store information in Google search, contributing to the acquisition of new customers.
In addition to store information, users can also post reviews, so quick response is important depending on the content.
This template notifies Discord when a review is posted on Google Business Profile, allowing you to quickly grasp review information.
If the posted review contains negative content, you can promptly consider and implement appropriate responses, thereby streamlining customer service.
Additionally, by automating notifications to Discord, you no longer need to check review information each time, allowing you to proceed with your work seamlessly.
■Notes
・Please link both Google Business Profile and Discord with Yoom.
・You can select the trigger interval from 5 minutes, 10 minutes, 15 minutes, 30 minutes, or 60 minutes.
・Please note that the shortest trigger interval varies depending on the plan.
■Overview
This is a flow that notifies Slack when a review is posted on Google Business Profile.
■Recommended for
1. Those who utilize Google Business Profile
・Those who set up and publish store information on Google Business Profile
・Staff who handle and manage reviews
2. Those who use Slack as a means of communication within the team
・Team members who use Slack for business communication
・Those who want to automatically notify Slack of review posts
■Benefits of using this template
Google Business Profile allows store information to be displayed in Google search, contributing to attracting new customers.
However, if you manually handle and manage reviews on Google Business Profile, there is a risk of delayed responses.
This template automatically notifies Slack when a review is posted on Google Business Profile, allowing you to quickly grasp the content of the reviews.
It eliminates the need for manual review checks, facilitating smooth responses and potentially improving customer satisfaction.
Additionally, you can set the members to be notified on Slack at your discretion, which can streamline information sharing and improve work speed.
■Notes
・Please integrate both Google Business Profile and Slack with Yoom.
・You can select the trigger interval from 5 minutes, 10 minutes, 15 minutes, 30 minutes, or 60 minutes.
・Please note that the shortest trigger interval varies depending on the plan.
■Overview
This flow sends a notification to Google Chat when a review is posted on Google Business Profile.
■Recommended for
1. Managers of stores or companies utilizing Google Business Profile
・Those who want to quickly check and respond to customer reviews to enhance customer satisfaction
2. Teams handling reviews with multiple members
・Those who want to share reviews on Google Chat to ensure team-wide information sharing and prevent missed responses
3. Those who want to use customer feedback to improve services
・Those who want to analyze review content to help improve products or services
■Benefits of using this template
Google Business Profile is a tool to increase customer touchpoints and disseminate business information, but if you fail to notice posted reviews and respond late, it may lead to customer dissatisfaction and potentially harm your business reputation.
By utilizing this flow, when a review is posted on Google Business Profile, a notification is automatically sent to Google Chat, allowing the person in charge to check and respond promptly without missing any reviews.
■Notes
・Please integrate both Google Business Profile and Google Chat with Yoom.
・Integration with Google Chat is only possible with Google Workspace. Please refer to the link below for details.
https://intercom.help/yoom/en/articles/6647336
・You can select the trigger interval from 5, 10, 15, 30, or 60 minutes.
・Please note that the shortest trigger interval varies depending on the plan.
■Overview
This is a flow that notifies Discord when a review is posted on Google Business Profile.
■Recommended for
1. Those who use Google Business Profile for their stores
・Those who use Google Business Profile to introduce store information and menus
・Those who announce business hours and holidays on Google Business Profile
2. Those who use Discord for communication
・Members who use Discord as a means of communication within the team
・Those who want to quickly grasp the posting of reviews
■Benefits of using this template
Google Business Profile allows you to display store information in Google search, contributing to the acquisition of new customers.
In addition to store information, users can also post reviews, so quick response is important depending on the content.
This template notifies Discord when a review is posted on Google Business Profile, allowing you to quickly grasp review information.
If the posted review contains negative content, you can promptly consider and implement appropriate responses, thereby streamlining customer service.
Additionally, by automating notifications to Discord, you no longer need to check review information each time, allowing you to proceed with your work seamlessly.
■Notes
・Please link both Google Business Profile and Discord with Yoom.
・You can select the trigger interval from 5 minutes, 10 minutes, 15 minutes, 30 minutes, or 60 minutes.
・Please note that the shortest trigger interval varies depending on the plan.
■Overview
This is a flow that notifies Slack when a review is posted on Google Business Profile.
■Recommended for
1. Those who utilize Google Business Profile
・Those who set up and publish store information on Google Business Profile
・Staff who handle and manage reviews
2. Those who use Slack as a means of communication within the team
・Team members who use Slack for business communication
・Those who want to automatically notify Slack of review posts
■Benefits of using this template
Google Business Profile allows store information to be displayed in Google search, contributing to attracting new customers.
However, if you manually handle and manage reviews on Google Business Profile, there is a risk of delayed responses.
This template automatically notifies Slack when a review is posted on Google Business Profile, allowing you to quickly grasp the content of the reviews.
It eliminates the need for manual review checks, facilitating smooth responses and potentially improving customer satisfaction.
Additionally, you can set the members to be notified on Slack at your discretion, which can streamline information sharing and improve work speed.
■Notes
・Please integrate both Google Business Profile and Slack with Yoom.
・You can select the trigger interval from 5 minutes, 10 minutes, 15 minutes, 30 minutes, or 60 minutes.
・Please note that the shortest trigger interval varies depending on the plan.
■Overview
This flow sends a notification to Google Chat when a review is posted on Google Business Profile.
■Recommended for
1. Managers of stores or companies utilizing Google Business Profile
・Those who want to quickly check and respond to customer reviews to enhance customer satisfaction
2. Teams handling reviews with multiple members
・Those who want to share reviews on Google Chat to ensure team-wide information sharing and prevent missed responses
3. Those who want to use customer feedback to improve services
・Those who want to analyze review content to help improve products or services
■Benefits of using this template
Google Business Profile is a tool to increase customer touchpoints and disseminate business information, but if you fail to notice posted reviews and respond late, it may lead to customer dissatisfaction and potentially harm your business reputation.
By utilizing this flow, when a review is posted on Google Business Profile, a notification is automatically sent to Google Chat, allowing the person in charge to check and respond promptly without missing any reviews.
■Notes
・Please integrate both Google Business Profile and Google Chat with Yoom.
・Integration with Google Chat is only possible with Google Workspace. Please refer to the link below for details.
https://intercom.help/yoom/en/articles/6647336
・You can select the trigger interval from 5, 10, 15, 30, or 60 minutes.
・Please note that the shortest trigger interval varies depending on the plan.
Automatically Add Reviews to Database Apps
■Overview
This is a flow that adds reviews to Microsoft Excel when they are posted on Google Business Profile.
■Recommended for
1. Those who want to analyze customer feedback by converting it into data
・Those who want to understand customer trends and improve services by accumulating and analyzing review data in Microsoft Excel
2. Departments managing reviews in Microsoft Excel
・Those who want to improve work efficiency by automatically adding reviews to Microsoft Excel, eliminating the need for manual input
■Benefits of using this template
Customer feedback on Google Business Profile is a valuable data resource, but as reviews increase, managing them manually can be very labor-intensive and may lead to delayed responses.
By implementing this flow, reviews are automatically added to the Microsoft Excel database when posted.
This allows the person in charge to immediately share and respond to review content with the team without missing any reviews, enabling them to focus on providing higher quality services.
■Notes
・Please link both Google Business Profile and Microsoft Excel with Yoom.
・Microsoft365 (formerly Office365) has both a home plan and a general business plan (Microsoft365 Business), and if you are not subscribed to the general business plan, authentication may fail.
・Triggers can be set to activate at intervals of 5, 10, 15, 30, or 60 minutes.
・Please note that the shortest activation interval varies depending on the plan.
■Overview
This is a flow that adds reviews to Airtable when they are posted on Google Business Profile.
■Recommended for
1. Those who use Google Business Profile for store information dissemination
・Store operators who want to strengthen customer attraction to their stores
・Those aiming to increase store awareness
2. Those who manage review information with Airtable
・Those who accumulate information in Airtable's database for analysis and report creation
・Those who want to streamline data integration into Airtable
■Benefits of using this template
Google Business Profile allows you to publish store hours and location, enhancing the store's credibility.
However, if you are aggregating store review information in Airtable, you may find it cumbersome to input data every time a review is posted.
This template is suitable for those who want to streamline data entry into Airtable.
With this template, reviews can be automatically added to Airtable when they are posted on Google Business Profile, streamlining data entry.
Automating data entry into Airtable can also prevent missed review registrations, improving analysis accuracy and aiding in improvements.
■Notes
・Please link both Google Business Profile and Airtable with Yoom.
・You can select the trigger interval from 5, 10, 15, 30, or 60 minutes.
・Please note that the shortest trigger interval varies depending on the plan.
■Overview
This is a flow that adds reviews to a Google Spreadsheet when they are posted on a Google Business Profile.
■Recommended for
1. Those who want to analyze customer feedback
・For those who want to understand customer trends and improve services by accumulating and analyzing review data on Google Spreadsheets
2. Departments managing reviews on Google Spreadsheets
・For those who want to improve work efficiency by automatically adding reviews to Google Spreadsheets, eliminating the need for manual input
■Benefits of using this template
Customer feedback on Google Business Profile is a valuable data collection, but managing it manually when reviews increase can be labor-intensive and may lead to delayed responses.
By implementing this flow, reviews are automatically added to the Google Spreadsheet database when posted.
This allows the person in charge to immediately share and respond to the review content with the team without missing any reviews, enabling them to focus on providing higher quality services and improving work efficiency.
■Notes
・Please link both Google Business Profile and Google Spreadsheets with Yoom.
・You can select the trigger activation interval from 5, 10, 15, 30, or 60 minutes.
・Please note that the shortest activation interval varies depending on the plan.
■Overview
This is a flow that adds reviews to Microsoft Excel when they are posted on Google Business Profile.
■Recommended for
1. Those who want to analyze customer feedback by converting it into data
・Those who want to understand customer trends and improve services by accumulating and analyzing review data in Microsoft Excel
2. Departments managing reviews in Microsoft Excel
・Those who want to improve work efficiency by automatically adding reviews to Microsoft Excel, eliminating the need for manual input
■Benefits of using this template
Customer feedback on Google Business Profile is a valuable data resource, but as reviews increase, managing them manually can be very labor-intensive and may lead to delayed responses.
By implementing this flow, reviews are automatically added to the Microsoft Excel database when posted.
This allows the person in charge to immediately share and respond to review content with the team without missing any reviews, enabling them to focus on providing higher quality services.
■Notes
・Please link both Google Business Profile and Microsoft Excel with Yoom.
・Microsoft365 (formerly Office365) has both a home plan and a general business plan (Microsoft365 Business), and if you are not subscribed to the general business plan, authentication may fail.
・Triggers can be set to activate at intervals of 5, 10, 15, 30, or 60 minutes.
・Please note that the shortest activation interval varies depending on the plan.
■Overview
This is a flow that adds reviews to Airtable when they are posted on Google Business Profile.
■Recommended for
1. Those who use Google Business Profile for store information dissemination
・Store operators who want to strengthen customer attraction to their stores
・Those aiming to increase store awareness
2. Those who manage review information with Airtable
・Those who accumulate information in Airtable's database for analysis and report creation
・Those who want to streamline data integration into Airtable
■Benefits of using this template
Google Business Profile allows you to publish store hours and location, enhancing the store's credibility.
However, if you are aggregating store review information in Airtable, you may find it cumbersome to input data every time a review is posted.
This template is suitable for those who want to streamline data entry into Airtable.
With this template, reviews can be automatically added to Airtable when they are posted on Google Business Profile, streamlining data entry.
Automating data entry into Airtable can also prevent missed review registrations, improving analysis accuracy and aiding in improvements.
■Notes
・Please link both Google Business Profile and Airtable with Yoom.
・You can select the trigger interval from 5, 10, 15, 30, or 60 minutes.
・Please note that the shortest trigger interval varies depending on the plan.
■Overview
This is a flow that adds reviews to a Google Spreadsheet when they are posted on a Google Business Profile.
■Recommended for
1. Those who want to analyze customer feedback
・For those who want to understand customer trends and improve services by accumulating and analyzing review data on Google Spreadsheets
2. Departments managing reviews on Google Spreadsheets
・For those who want to improve work efficiency by automatically adding reviews to Google Spreadsheets, eliminating the need for manual input
■Benefits of using this template
Customer feedback on Google Business Profile is a valuable data collection, but managing it manually when reviews increase can be labor-intensive and may lead to delayed responses.
By implementing this flow, reviews are automatically added to the Google Spreadsheet database when posted.
This allows the person in charge to immediately share and respond to the review content with the team without missing any reviews, enabling them to focus on providing higher quality services and improving work efficiency.
■Notes
・Please link both Google Business Profile and Google Spreadsheets with Yoom.
・You can select the trigger activation interval from 5, 10, 15, 30, or 60 minutes.
・Please note that the shortest activation interval varies depending on the plan.
👏 Benefits of Integrating Google Business Profile with Google Sheets
Benefit 1: Easy Review Sharing
With this integration, new reviews posted on Google Business Profile are automatically added to Google Sheets. This makes it easier to track and verify reviews in one place.
Manually transferring reviews each time they are posted can be inefficient, and waiting until a certain number of reviews accumulate can delay your responses. This integration eliminates that delay, allowing you to interact with customers more quickly and efficiently.
Benefit 2: Saving Time & Less Manual Work
Manually transferring reviews can be time-consuming, and since reviews can be posted at any time, you need to frequently check your Google Business Profile.
By automating this process, you no longer need to constantly check for new reviews or manually update Google Sheets. This saves you time and helps prevent tasks from piling up, ensuring that reviews are analyzed promptly and consistently.
Benefit 3: Simplified Review Management
When reviews are transferred to Google Sheets, you get not only the review comments but also star ratings, reviewer names, and review IDs. This data can be easily filtered in Google Sheets to help you search and review specific reviews.
For example, you can quickly identify reviews from regular customers or find reviews with low ratings that need attention. With easier access to review data, you can make more informed decisions and drive improvements in your business.
📖 Summary
Integrating Google Business Profile with Google Sheets provides a powerful way to quickly understand and address customer feedback. By automatically collecting and organizing reviews, you can efficiently manage customer insights and use them to drive future business growth.
Best of all, no technical expertise is needed, and anyone can easily set it up! Ready to simplify your workflows? Sign up for Yoom and try it today!