

.avif)

My App Settings
Once registration is complete, you will be redirected to a page called "My Projects".
Next, let's integrate Google Drive and Google Sheets with Yoom.
This is called "My App Integration"!
Select "My Apps" from the menu on the left side of the screen!
↓
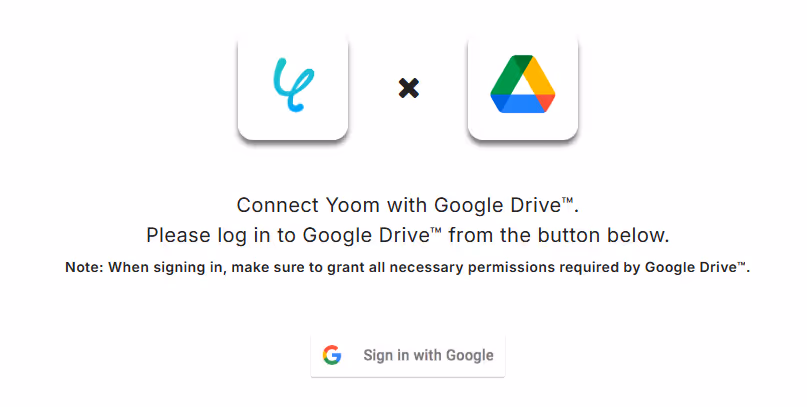
Let's start with integrating Google Drive with My Apps!

From the new connection button at the top right, enter "Google Drive" in the search box, and click when the Google Drive icon appears!

On the page titled Select Account, press the Google account of the Gmail address you want to integrate with Yoom.
Next, you will be redirected to a page titled Login to Yoom, so click Next.
Finally, if a page titled Yoom is requesting additional access to your Google Account appears, press Continue to proceed!
If the above screen appears, press the red frame below.
Next, you will be redirected to the authentication screen, so make sure to allow all permissions.
Next, we will integrate Google Sheets, but since it is also a Google service like Google Drive, the steps for My App Integration are the same.
Search for "Google Sheets" in the search box and register!
Once both Google Drive and Google Sheets are integrated with Yoom, the next step is to configure the contents of the Flowbot!
The setup process for this Flowbot consists of 4 steps!
Google Drive Trigger Settings
First, since it will be necessary when setting up the Flowbot, create a folder in Google Drive to store business cards and upload the business cards.
↓
Once you have uploaded the business cards to the folder, open the Yoom screen and click "Copy: When a business card is uploaded to Google Drive, read the business card information and add it to Google Sheets" from My Projects on the left side of the screen!
Press Edit at the top right.
↓
Press the Google Drive icon for "When a new file or folder is created in a specific folder".
Since the necessary fields are already filled in using the template, check if the Google Drive account information is correct and click Next!
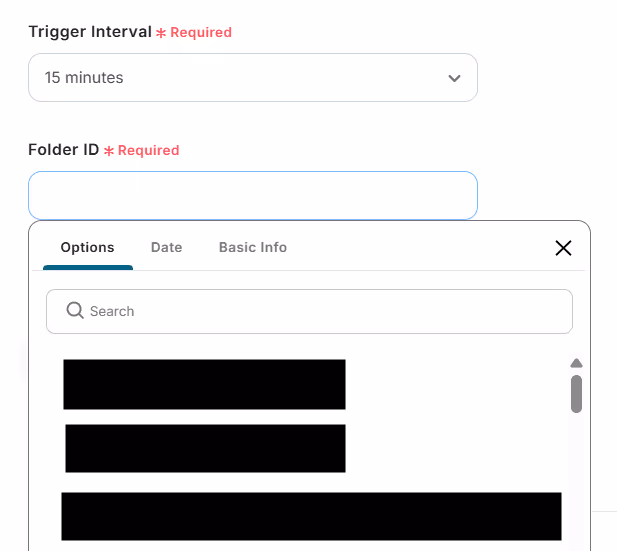
Enter the folder ID.
When you click inside the box, a list of folders will be displayed, so select the folder where you uploaded the business cards.
Once selected, there is a "Test" button just below, so click it. If it displays "Test Successful" in blue, you're good to go, so save it!
Google Drive Settings
Press the Google Drive icon for "Download File".
Again, since the necessary fields are already filled in using the template, check if the Google Drive account information is correct and click Next.
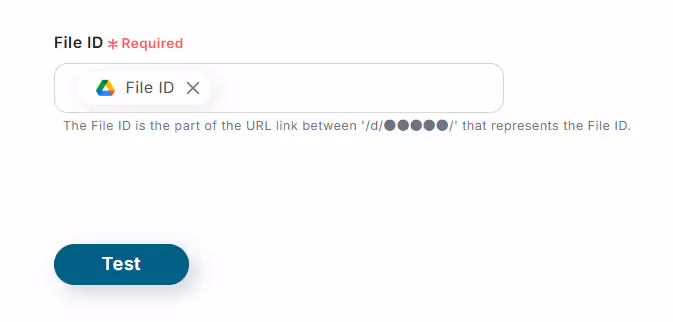
Enter the file ID, but since you are using a template, it is already set up.
Therefore, as before, press the test button, and if it displays "Test Successful" in blue, you're good to go!
Don't forget to save it.
Read Images/PDFs
Press the book icon for "Read Text from Image/PDF".
Again, since the necessary fields are already filled in, check if the account information is correct and click Next!
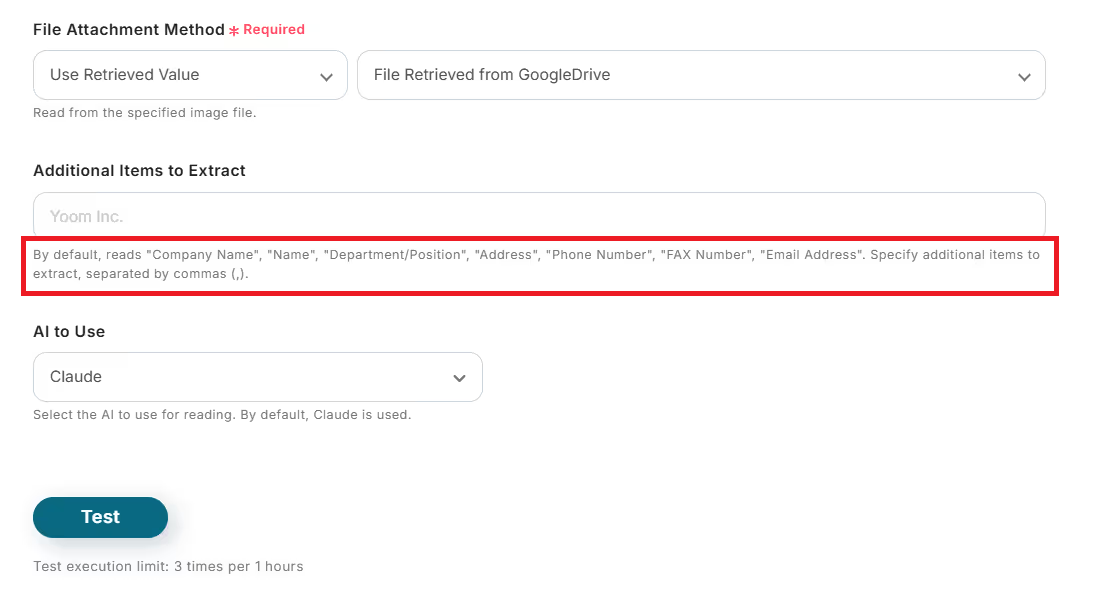
Set what content to extract from the business card.
However, since you are using a template, no input is required...!
The items to be recognized are already set as shown in the red frame.
If there are other strings you want to recognize, you can input them in the box, and they will be reflected, so set them as needed.
As before, press the test button. If it displays "Test Successful" in blue, save it.
*The AI operations for OCR or transcribing audio to text are only available in the Team Plan and Success Plan. If you are on the Free Plan or Mini Plan, the operations set in the Flowbot will result in an error, so please be careful. Paid plans like the Team Plan and Success Plan offer a 2-week free trial. During the free trial, you can use restricted apps and AI features (operations).
Google Sheets Settings
Next is the Google Sheets setting, but a sheet to add the read business card information is required.
Therefore, create it at this stage.

I created it as shown in the image this time!
Once the Google Sheet is created, proceed to the next step.
↓
Press the Google Sheets icon for "Add Record".
Check if the account information to be linked is correct and scroll down.
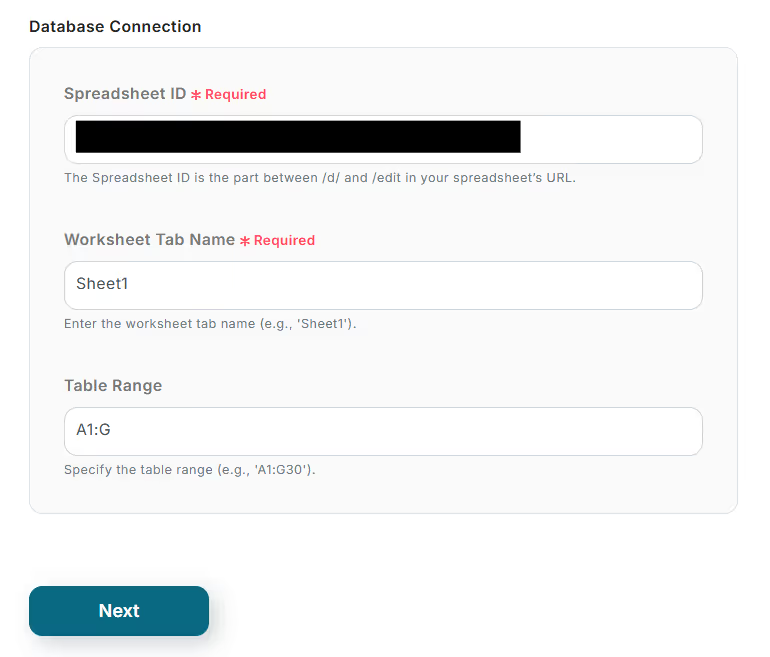
Select the spreadsheet ID and tab name. First, enter the spreadsheet ID.
When you click inside the box, a list will be displayed as shown in the image, so select the Google Sheet where the business card information will be accumulated.
Set the tab name in the same way, and you're good to go!
↓
For other fields, they depend on the prepared Google Sheet, so input according to the content of the Google Sheet.
Once input is complete, press Next.
↓
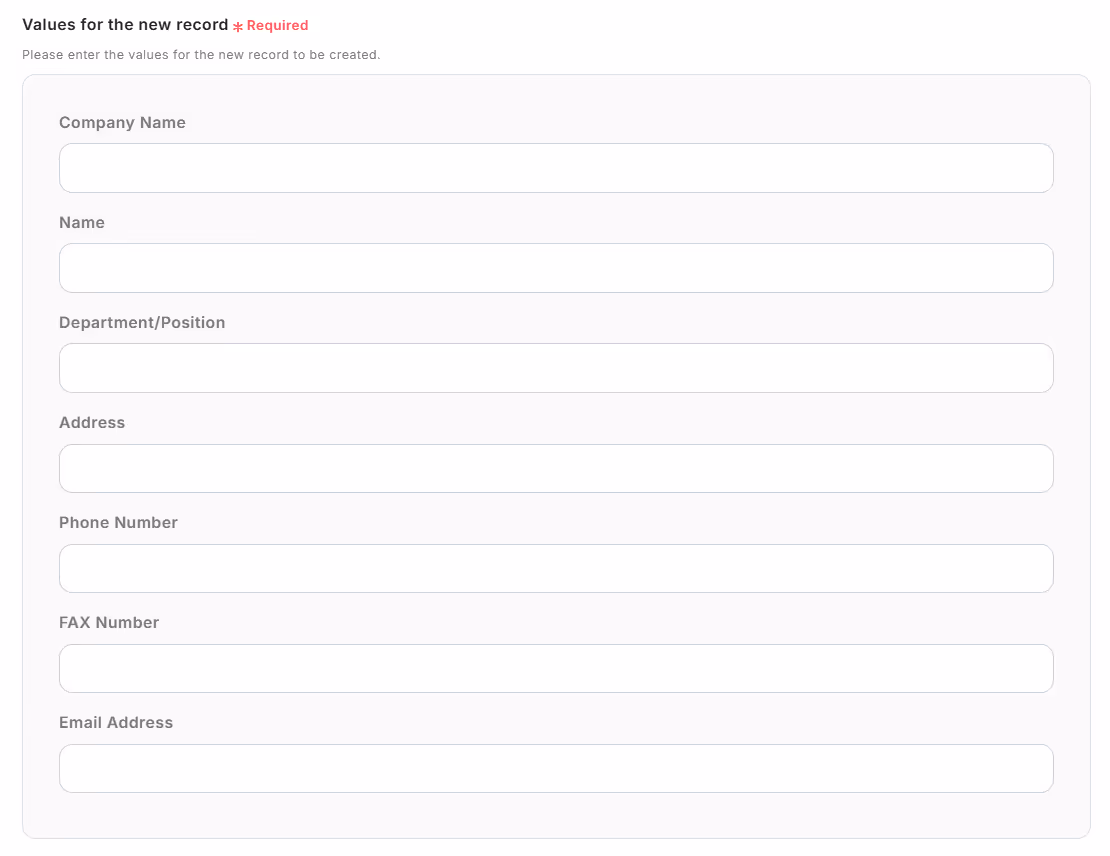
Next is the final setting! Set the values for the records to be added!
The box names displayed on this page depend on the Google Sheet you linked earlier.
Therefore, the display may differ from the image, but the setup method is the same.
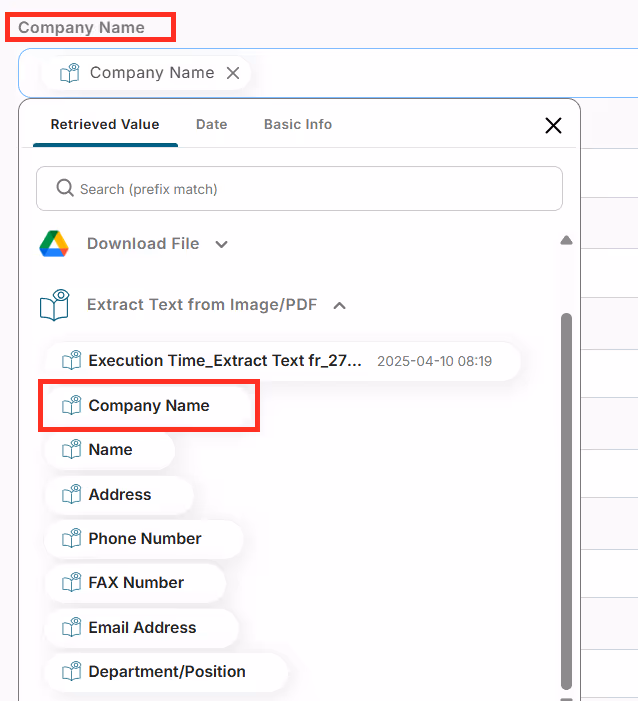
Click inside the box and select "Read Text from Image/PDF", and the information from the business card you uploaded earlier will be displayed in a list as shown in the image.
Just choose the content that matches the box name, and you're good to go!
In the image, the company name box is selected, so the business card information also selects the company name.
↓
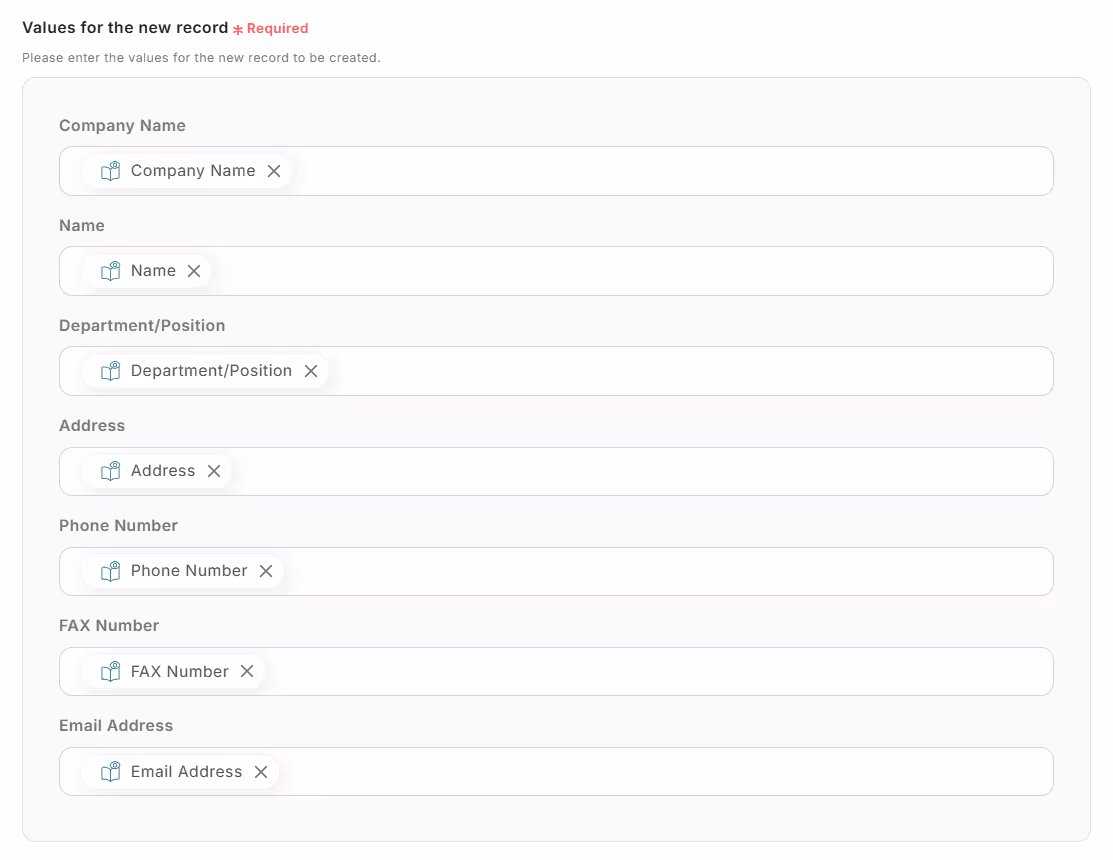
Once you fill in the boxes as shown in the image, press the test button just below, and if it displays "Test Successful" in blue, press Save.
This completes the integration of Google Drive and Google Sheets!
Yoom has many other Flowbot templates available, so be sure to check them out.


.avif)
.avif)
.avif)


