How to integrate Google Forms with CloudSign to create and send contracts using information submitted through Google Forms
How to Integrate Applications
・
2024/12/23
How to integrate Google Forms with CloudSign to create and send contracts using information submitted through Google Forms
s.ougitani
For HR and general affairs personnel, contract creation is one of the important tasks. However, if done manually, it involves data entry, which can be time-consuming and labor-intensive. How about linking Google Forms and CloudSign to "create contracts with information submitted via Google Forms and automatically send them via CloudSign"? If you can automate contract creation, you can reduce the time spent on data entry, potentially streamlining your operations. Furthermore, by utilizing Yoom, you can create app integrations and flow bots without coding. We will also explain the detailed integration methods, so please take a look.
Recommended for
If you fall into any of the following categories, consider integrating Google Forms and CloudSign!
Those who are using Google Forms and CloudSign and want to automate contract operations
Those who want to automate the contract creation and sending process to reduce manual work and prevent errors
Those interested in improving work efficiency through IT tools and API integration
Benefits and Examples of Integrating Google Forms and CloudSign
Benefit 1: Automate Manual Work
By integrating Google Forms and CloudSign, you can automate the flow from contract creation to sending. This can potentially reduce the time and effort spent on manual creation. For example, consider issuing contracts for fixed-term employees. Manually, you might find it cumbersome to create each time. By automating the contract creation flow, you can reduce the work time compared to manual work. As a result, you can allocate time to other important tasks, potentially improving work efficiency.
Benefit 2: Reduce Errors
When creating contracts manually, there might be creation errors or omissions. For example, consider a scenario where many new employees are joining. Manually, there are risks such as "forgot to create" or "name entry errors". If automated, you can prevent such human errors, potentially leading to improved work efficiency.
Benefit 3: Visualize Contract Status
You can check the contract creation process with CloudSign. This makes it easier to verify history, potentially improving the transparency of contract management. For example, consider a situation where there is an error in the contract content. If Google Forms and CloudSign are integrated, you can quickly grasp the situation, making it easier to identify causes and respond to issues. In any situation, you can smoothly proceed with operations, potentially improving team productivity.
Now, let's introduce how to use the no-code tool Yoom to "create contracts with information submitted via Google Forms and send them via CloudSign".
[What is Yoom]
How to Reflect Added Content in Google Forms into Contracts with CloudSign
By utilizing this flow bot, you can automate the task of creating contracts manually. This reduces manual work, potentially saving time and effort, and preventing human errors. We will proceed with the following processes broadly.
Register My Apps for Google Forms, CloudSign, and Google Docs
Copy the template
Set triggers and actions
Turn on the trigger and check the operation
You can issue a Yoom account from here. If you already have an account, please log in!
Step 1: Connect Google Forms and CloudSign with My Apps
First, let's connect Yoom with the app.
1. Register Google Forms with My Apps
After logging into Yoom, select My Apps and click on New Connection. Then, select Google Forms.
Click on "Sign in with Google".
Select the account you want to connect with.
Click on "Next".
Click on "Continue".
You have now registered Google Forms with My Apps.
2. Register CloudSign with My Apps
Similarly, click on My Apps on the left side of Yoom's workspace, then New Connection, and select CloudSign.
Enter the account name and client ID. For detailed instructions on registering CloudSign with My Apps, please check here.
3. Register Google Docs with My Apps
Since we will use Google Docs to issue documents, let's also register Google Docs with My Apps. Similarly, click on My Apps, then New Connection, and select Google Docs. Next, click on "Sign in with Google".
Select the account you want to connect with.
Click on "Next".
Click on "Continue".
You have now registered Google Docs with My Apps.
Step 2: Copy the Template
Next, let's copy the template you will use. Click on the banner below.
Click to move to Yoom's template site. Click "Try this template" on that screen.
Then, the screen will switch to Yoom's workspace, and it will display that it has been copied, so click "OK".
Now you have copied the template.
Step 3: Set Google Form Trigger
Let's proceed to the Flowbot settings. Click on the "When a response is submitted to the form" of the template you just copied.
1. Select Linked Account and Action
The title is already entered but can be changed. Check the account information linked with Google Forms. Select the trigger action as "When a response is submitted to the form". Once set, click Next.
2. Set API Connection for App Trigger
Set the trigger activation interval. The shortest activation interval varies depending on the subscription plan. Enter the Form ID. Once set, click Test.
If the test is successful and the Google Form output is obtained, save it.
Step 4: Set Google Docs Action
Next, click "Issue Document".
1. Document Integration
The title can be changed. Check the account information linked with Google Docs.
Enter the document file ID, the folder ID in Google Drive where it will be stored, and the output file ID. Once everything is entered, click Next.
2. Set Replacement Conditions
Select from the Google Form output for the replacement string. After entering, click Test.
If the test is successful and the output is obtained, save it.
Step 5: Set CloudSign Action ①
Next, click "Create Document".
1. Select Linked Account and Action
The title can be changed. Check the account information linked with CloudSign. Select the action as "Create Document". Once everything is done, click Next.
2. API Connection Settings
Enter the document title. Set other items you want to enter. Once set, click Test.
If the test is successful and the output is obtained, save it.
Step 6: Set CloudSign Action ②
The title can be changed. Check the account information linked with CloudSign. Select the action as "Attach File to Document". Once set, click Next.
2. API Connection Settings
For the document ID, select "Document ID" from the document creation output.
For the file attachment method, select "Use Output" and "Issued Document". Once set, click Test.
If the test is successful and the output is obtained, save it.
Step 7: Set CloudSign Action ③
Next, click "Add Recipient".
1. Select Linked Account and Action
The title can be changed. Check the account information linked with CloudSign. Select the action as "Add Recipient". Once set, click Next.
2. API Connection Settings
Select the document ID from the document creation output.
Select the email address and recipient name from the Google Form output. Once set, click Test.
If the test is successful and the output is obtained, save it.
Step 8: Set CloudSign Action ④
This is the final step! Click "Send Document / Remind".
1. Select Linked Account and Action
The title can be changed. Check the account information linked with CloudSign. Select the action as "Send Document / Remind". Once set, click Next.
2. API Connection Settings
Select "Document ID" from the document creation output. Once set, click Test. If the test is successful, save it.
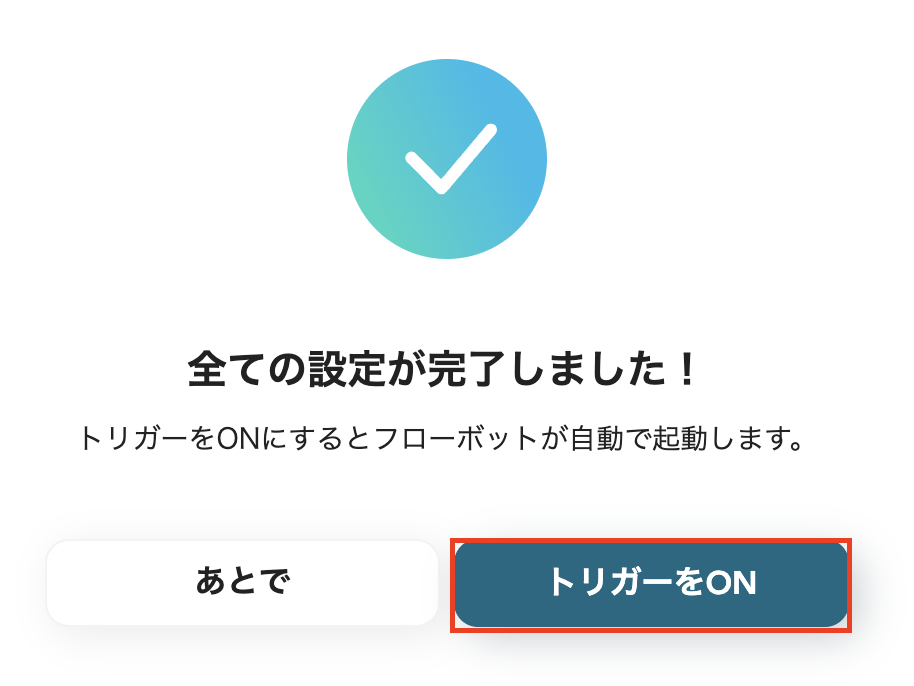
After saving, it will display that all settings are complete, so click "Turn on Trigger".
This completes the creation of the Flowbot!
Other Automation Examples Using CloudSign
Yoom offers a variety of templates. This time, we will introduce three templates that utilize CloudSign.
1. A template that updates information in Google Sheets once a contract is completed with CloudSign.
You can automatically transfer information from CloudSign to Google Sheets. This reduces the burden of administrative tasks, potentially improving work efficiency. Additionally, it seems possible to prevent human errors that often occur manually.
2. This is a template for creating a document in CloudSign and sending an email when the status is updated in kintone.
Based on the status change in kintone, you can automatically create and send contracts using CloudSign. Manually, it may take time to create, and there might be errors or omissions. By utilizing this template, you can automate the creation process and reduce human errors.
3. This is a template for notifying Slack when the document signing is completed with CloudSign.
By notifying your regularly used Slack, you are less likely to miss information about contract signings. Additionally, you can check the status of the contract signing without opening CloudSign, saving you effort. This will shorten the time spent on confirmation tasks and lead to increased productivity in your work.
Summary
By integrating Google Forms with CloudSign, you can automate contract creation, reducing input tasks and minimizing human errors. Additionally, it becomes easier to check contract status, allowing for smoother business operations. Moreover, by using Yoom, you can integrate apps and create flow bots without the need for programming. Utilizing templates allows for easier setup, making it accessible even for beginners. Why not take this opportunity to integrate Google Forms with CloudSign and automate your contract creation flow?
The person who wrote this article
s.ougitani
After being in charge of sales and CA at a human resources company for about 5 years, I have been involved in jobs such as creating job advertisements and scouting sentences at companies that hire engineers.
I'm fascinated by Yoom's revolutionary service of “automating office work.”
I would like to write so that I can send out information that can be useful to everyone, even a little bit.
Conventional RPA can only automate simple repetitive tasks, and the setup process was very complicated. With “hyperautomation,” which combines various technologies such as AI, API, RPA, and OCR, it is possible to automate many tasks that could not be realized until now more easily than before.
Most tools simply connect one app to another, leaving the complex tasks to you. Yoom goes much further: From document creation and browser automation to OCR and generative AI, Yoom handles it all seamlessly in one platform.
Why settle for basic integrations? Streamline your entire workflow with Yoom’s powerful hyperautomation.


.avif)


.avif)
.avif)
.avif)
.avif)


