

.avif)


STEP1 Setting Up Google Sheets
1. Click on "When a row is added" in the app trigger.
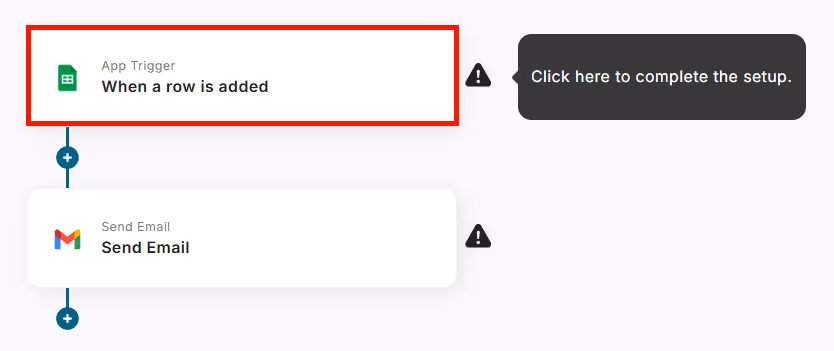
2. On the page to select the linked account and action, change to any title and select "When a row is added" as the trigger action.
Click Next.
3. On the API connection settings for the app trigger page, configure the following items.
※Spreadsheet ID and Sheet ID can be selected from the options.
※Please manually enter the column name for the table range and the column with unique values.
・Trigger interval: Select any time from 5 minutes, 10 minutes, 15 minutes, 30 minutes, 60 minutes ※The selectable time varies depending on the plan.
・Spreadsheet ID
・Sheet ID
・Table range (start)
・Table range (end)
・Column with unique values ※Be sure to enter a unique column. It may not work correctly if values are duplicated.
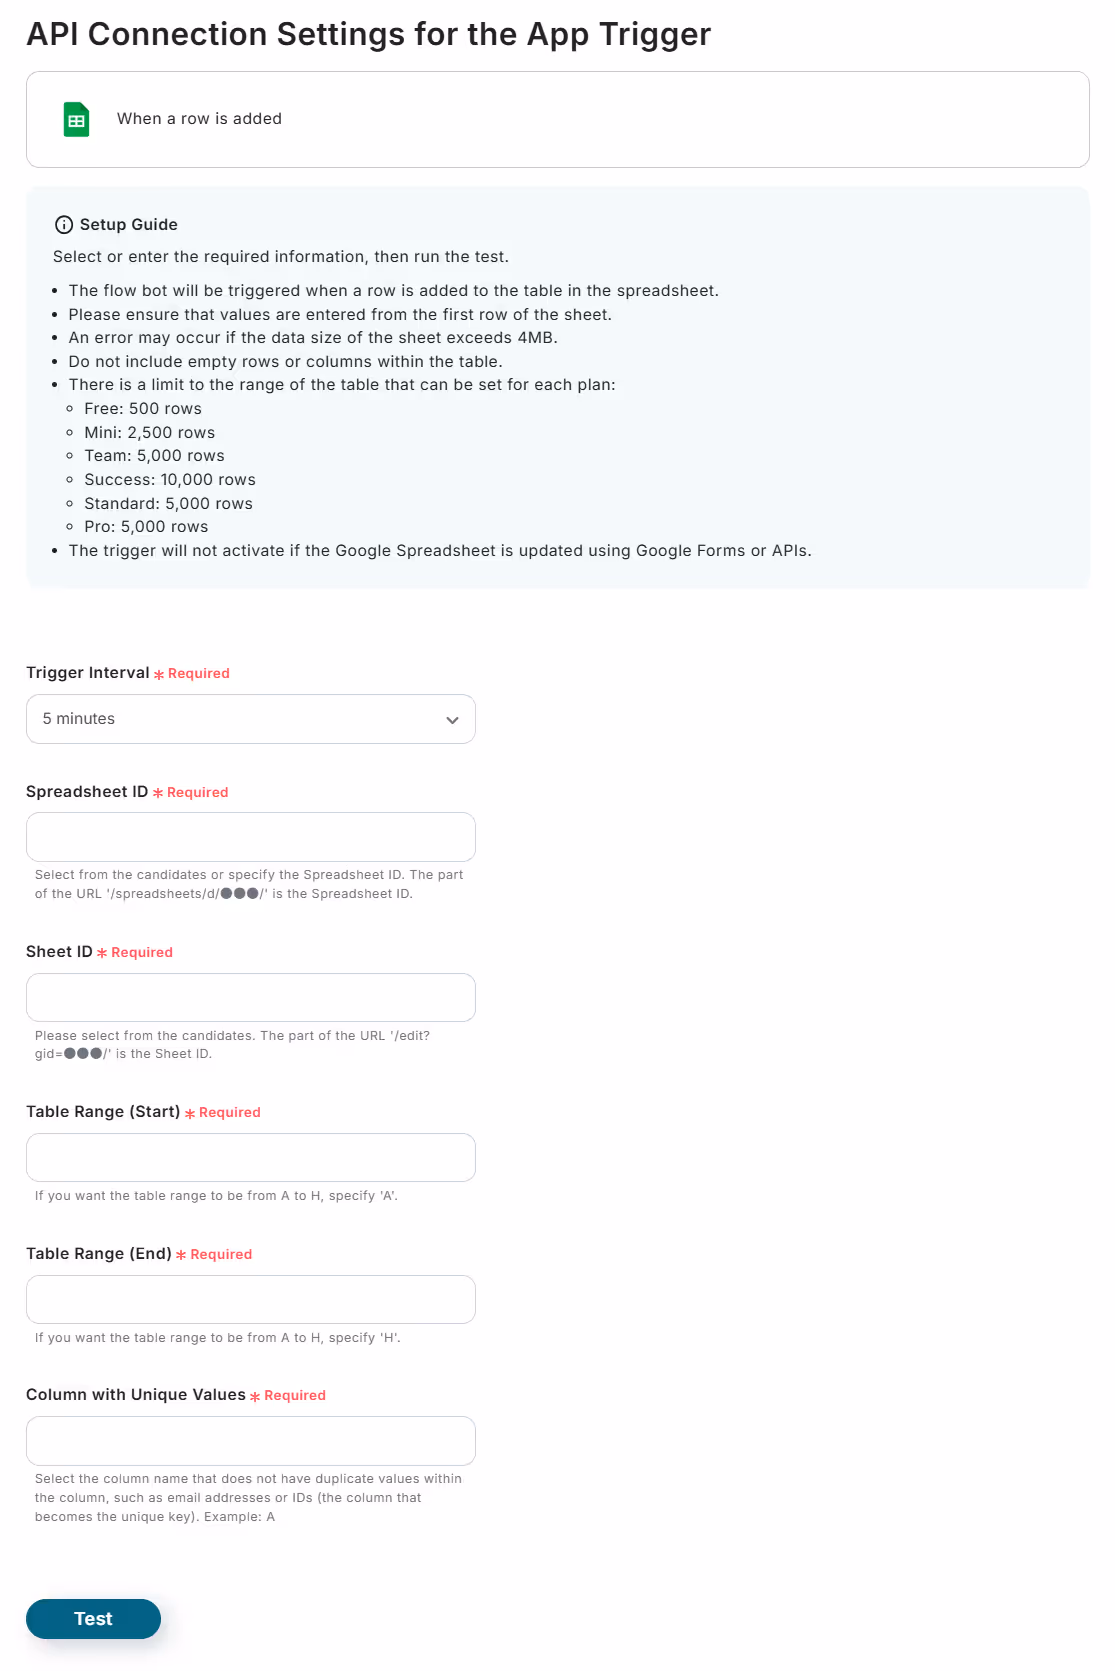
Click Test.
Once you confirm "Test successful," click Save.
STEP2 Setting Up Gmail
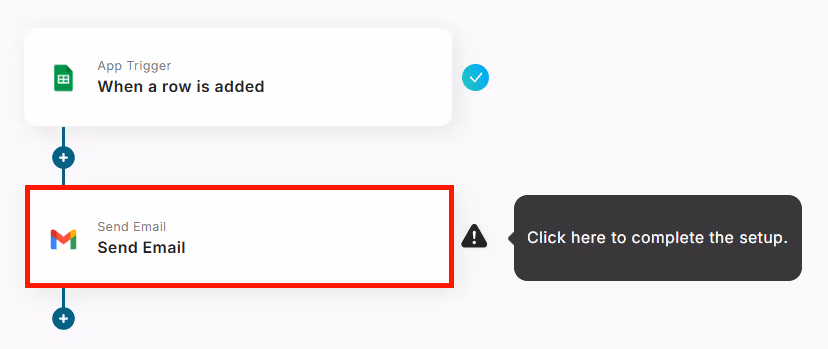
1. Click on "Send Email."
2. On the email settings page, change to any title and set the email content. ※Be sure to fill in the required fields.
・To: Enter the email address of the recipient
・Subject: Enter the email title
・Body ※Use manual input and retrieved values to enter the content you want to notify.
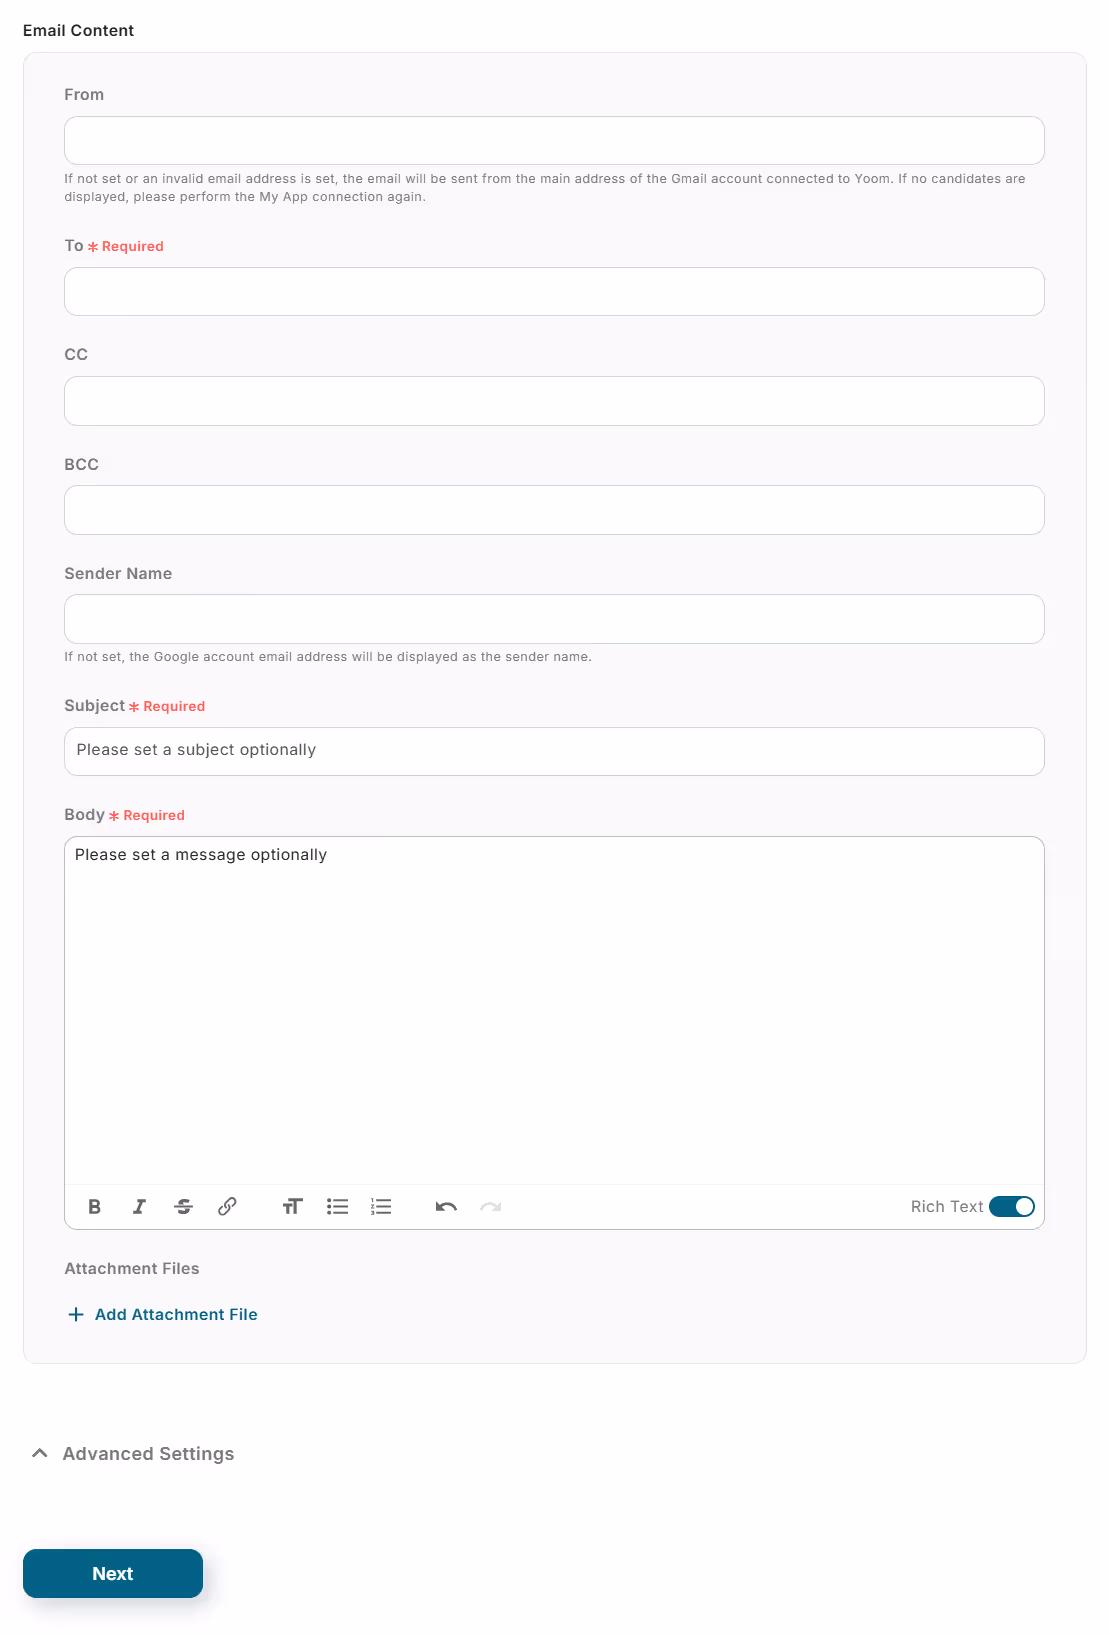
Click Next.
3. On the email sending test page, you can check the configured email content.
If there are no issues, click Test.
Confirm "Test successful" and click Save.
The Flowbot setup is complete.
Finally, turn on the trigger to ensure the flow is active!


.avif)
.avif)
.avif)


