

.avif)

Preparation
Before starting the actual setup, connect Yoom with Google Sheets and Miro.
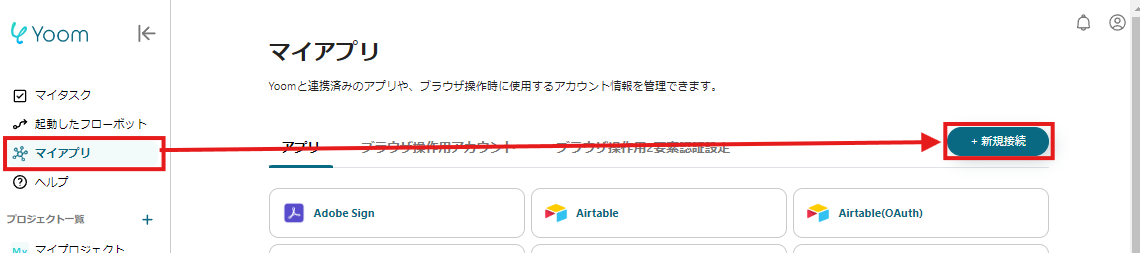
After logging into Yoom, click "+ New Connection" from the "My Apps" menu on the left.
Search for each app by name and enter the necessary information for login.
Once the app connection is complete, it will appear in the My Apps list, so make sure to check it.
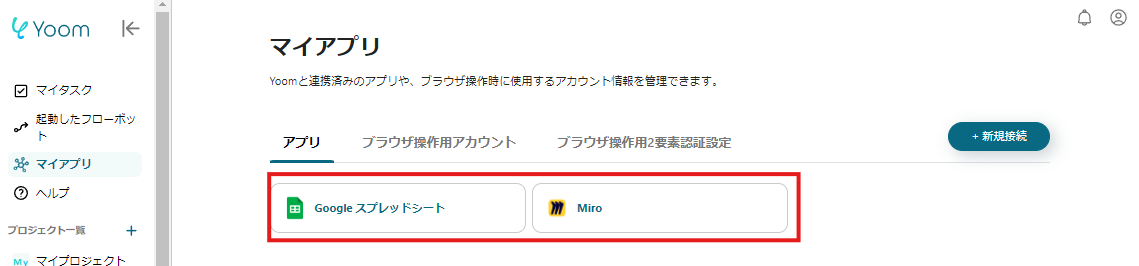
If Google Sheets and Miro are displayed in the list as shown in the image above, the preparation is complete.
Let's proceed to the detailed settings.
App Trigger Settings
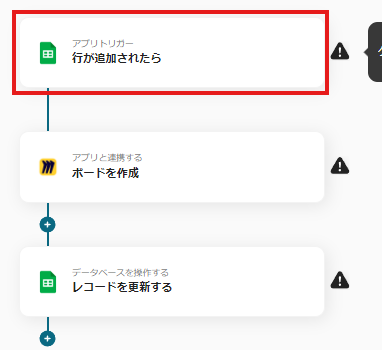
First, click on the initial setting "When a row is added". On the first page, verify the account information that has been pre-linked.
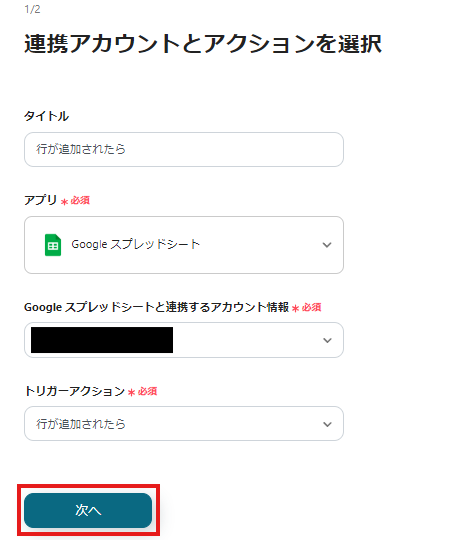
No changes are needed for other items, so click "Next".
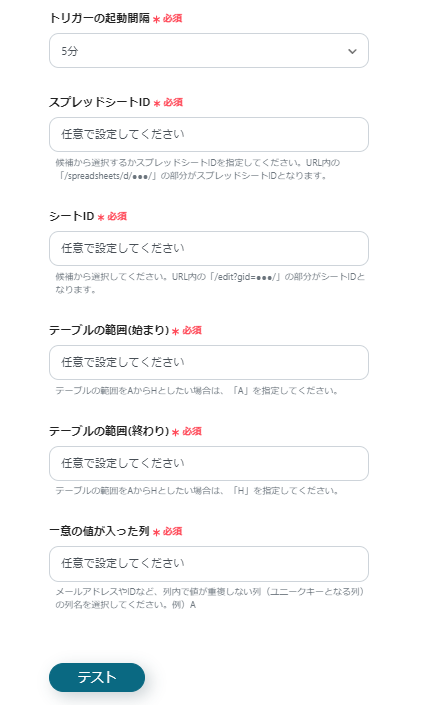
On the next page, set the Google Sheets ID and range. Be sure to set the "Column with Unique Values" to a column with unique values. If there are duplicate values within the column, it may not function correctly.
Once all items are entered, click "Test" to check for errors.
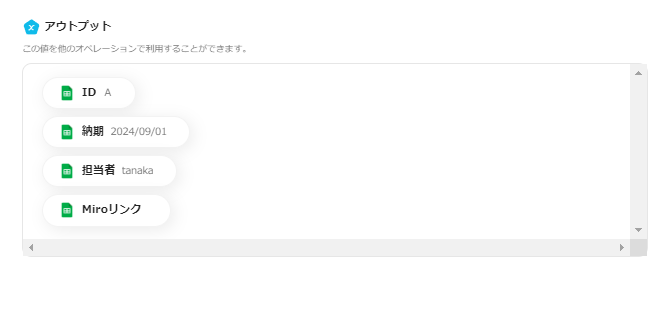
If the test is successful, the specified Google Sheets items will be reflected as output.

If there are no issues up to this point, click "Save" to complete the trigger settings.
Miro Settings
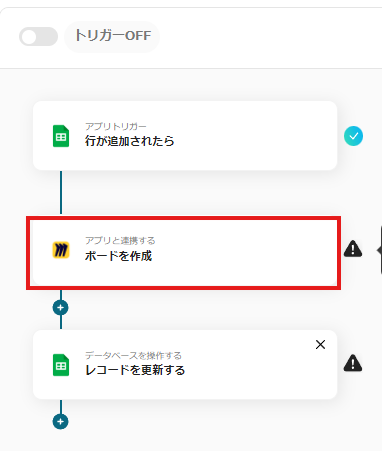
Next, click "Create Board".
On the first page, just verify the account information like with Google Sheets and select "Next".
On the next page, set the details for creating the board.
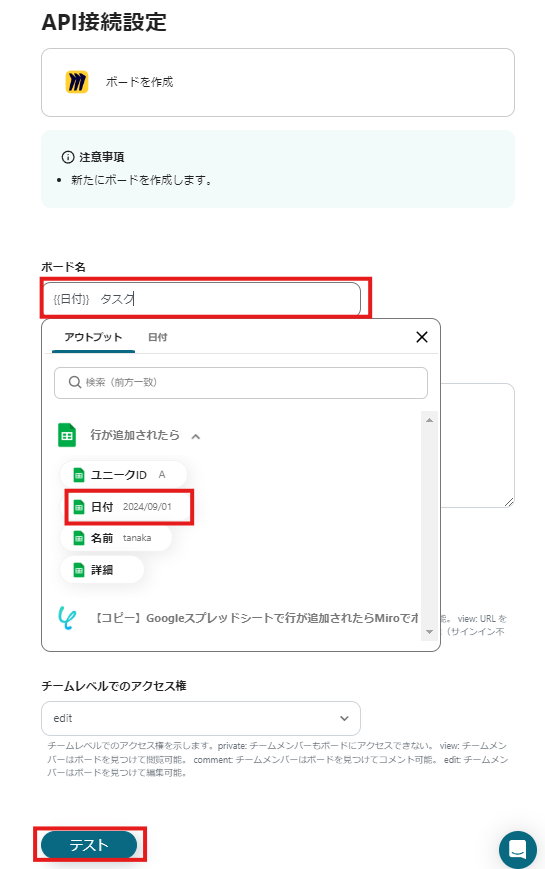
For example, if you select a date in the board name field as shown in the image above, the date value from the spreadsheet will be automatically retrieved when the board is created, and it will be displayed as the board name in Miro. (In the image, the board name becomes "2024/09/01 Task")
Once you have set this up, click "Test" to verify.
If there are no errors, click "Save" to complete the Miro settings.
Google Sheets Update Settings
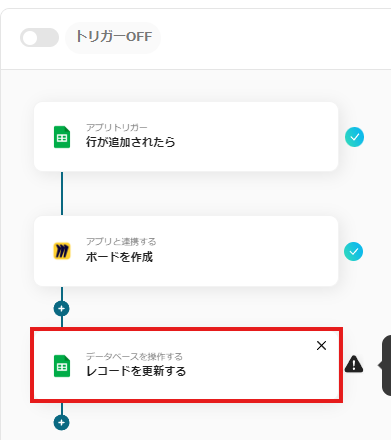
Finally, click "Update Record".
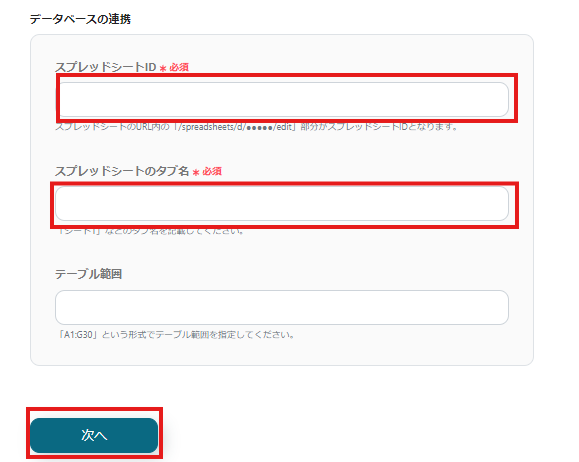
On the first page, verify the account information. Then, enter the Google Sheets information needed to update the record in the database linkage section.
Click "Next" to check for errors.
On the next page, set the details for the update.
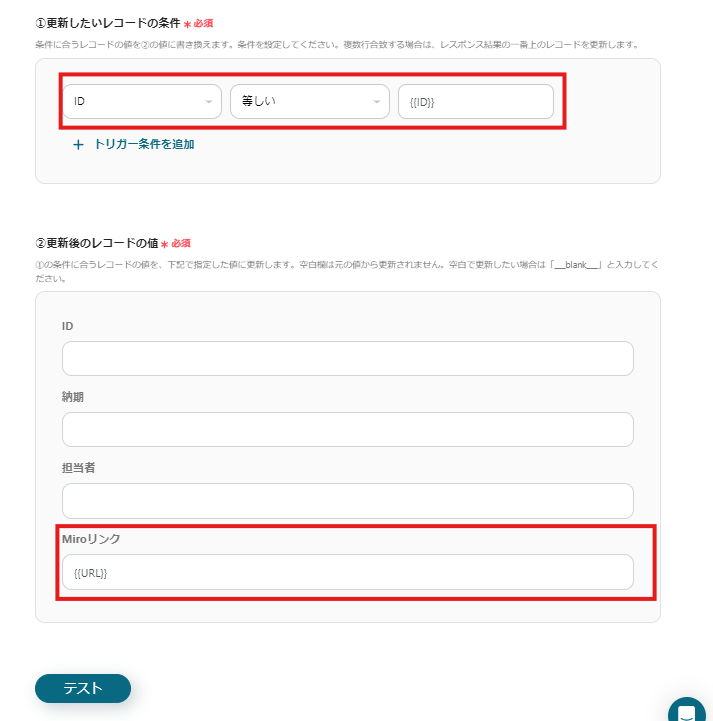
This page is for "Updating the row that matches condition ① to value ②", so use the output information to set it up.
For example, if you set it up as shown in the image above, when a new row is added to the spreadsheet, the URL of the automatically created board will be automatically pasted into the "Miro Link" column.By doing so, you can open the target board by clicking the link on the spreadsheet without directly accessing Miro, reducing management effort.
Once you have completed the necessary fields, click "Test" to check for errors. If there are errors, correct them according to the content.
Once all errors are resolved, click "Save" to complete all settings!
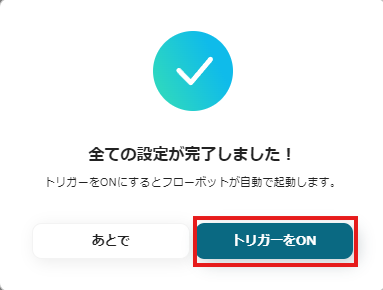
Once all settings are complete, a popup like the image above will appear.
When you turn on the trigger, the flow will be executed.
Other Automation Examples Using Google Sheets and Miro
Yoom has many automation examples using Google Sheets and Miro. Here are some representative examples.
1. A flow that creates a line on a Miro board when a row is updated in Google Sheets.


.avif)
.avif)
.avif)


