


Clicking will take you to the Yoom template site.
Please click "Try this template" displayed on the screen.

Then, you will move to Yoom's workspace, and a message will appear indicating that the template has been copied. Please click "OK".

Now the template has been copied to Yoom's My Projects.
Step 1: Connect Jira Software and Chatwork to My Apps
Next, let's proceed with connecting Yoom and the apps.
By registering My Apps in Yoom, you can connect apps and create flow bots.
1. Register My App for Jira Software
First, let's connect Jira Software with Yoom.
After logging into Yoom's workspace, select My Apps and click on New Connection.

Next, click on Jira Software in the New Connection for My Apps.

Enter your account name and access token.
For detailed instructions on registering My App for Jira Software, click here.

Now, the registration of My App for Jira Software is complete.
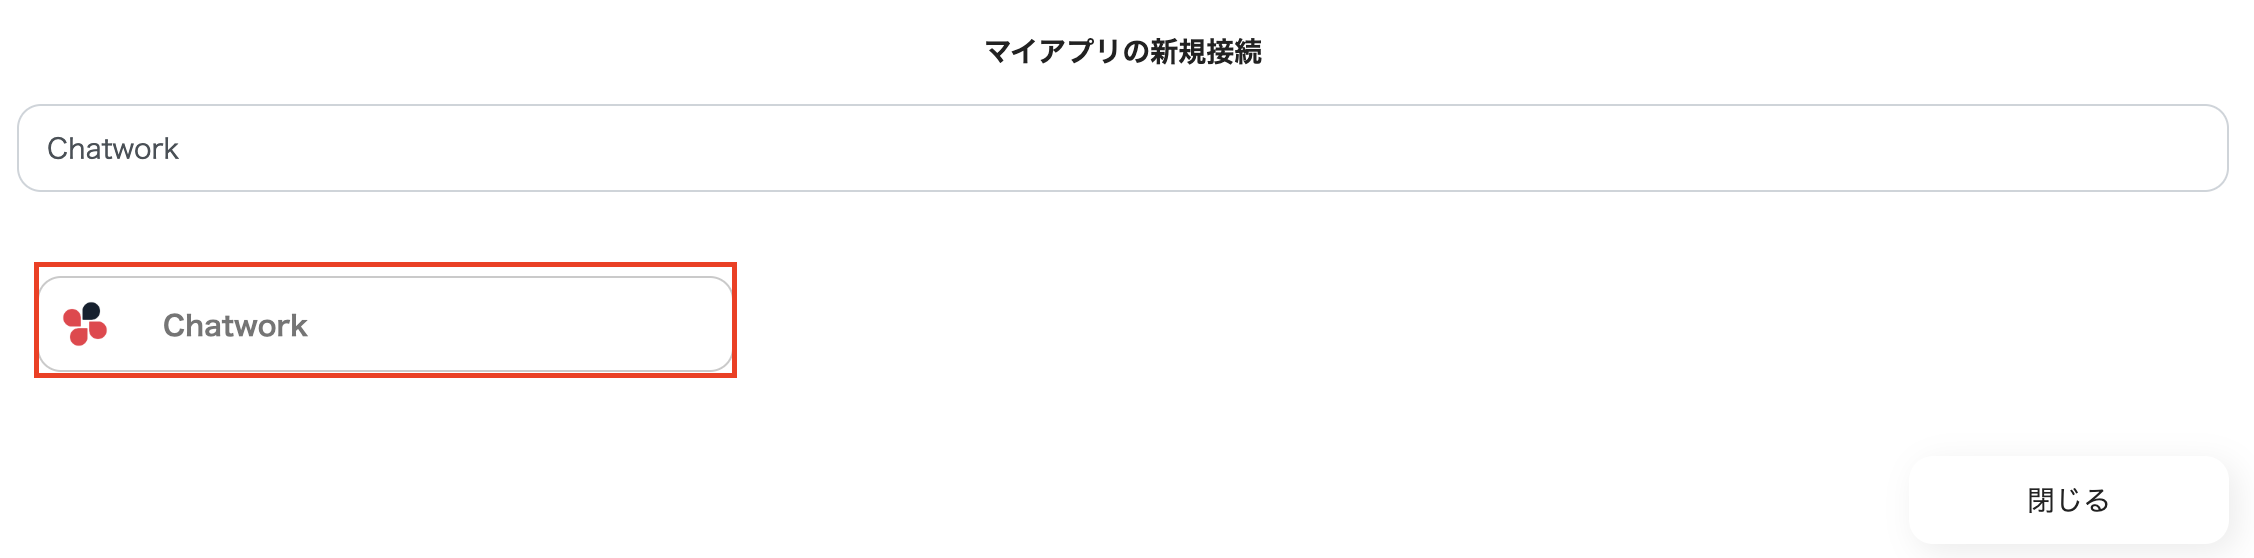
2. Register My App for Chatwork
Next, let's connect Chatwork with Yoom.
As before, select My Apps and click on New Connection.
Next, select Chatwork in the New Connection for My Apps.
Please enter your email address.

Enter your password and click Login.

On the screen requesting permission for Yoom, click "Allow".

Now, the registration of My App for Chatwork is complete.
Step 2: Set Trigger for Jira Software
Next, let's proceed with the flow bot settings.
Click "When an issue is created".

1. Select Linked Account and Action
・The title can be changed.
・Check the account information linked with Jira Software.
・Select the trigger action "When an issue is created".
・Once set, click "Next".

2. API Connection Settings for App Trigger
・Select the trigger activation interval.
・Triggers can be set to activate at intervals of 5, 10, 15, 30, or 60 minutes.
・Please note that the shortest activation interval varies depending on the plan.
・Enter the subdomain.
・Select the project key from the options.
・Once set, execute the test.

If the test is successful and you can retrieve information from Jira Software, save it.

Step 3: Set Chatwork Action
Finally, set the action.
Click "Send a message".

1. Select Linked Account and Action
・The title can be changed.
・Check the account information linked with Chatwork.
・Select the action "Send a message".
・Once entered, click "Next".

2. API Connection Settings
・Set the room ID.
・Enter the message content by selecting from Jira Software's output.
・Once set, click Test and save.

Click Save, and a message will appear indicating that all settings are complete. Click 'Turn on Trigger'.
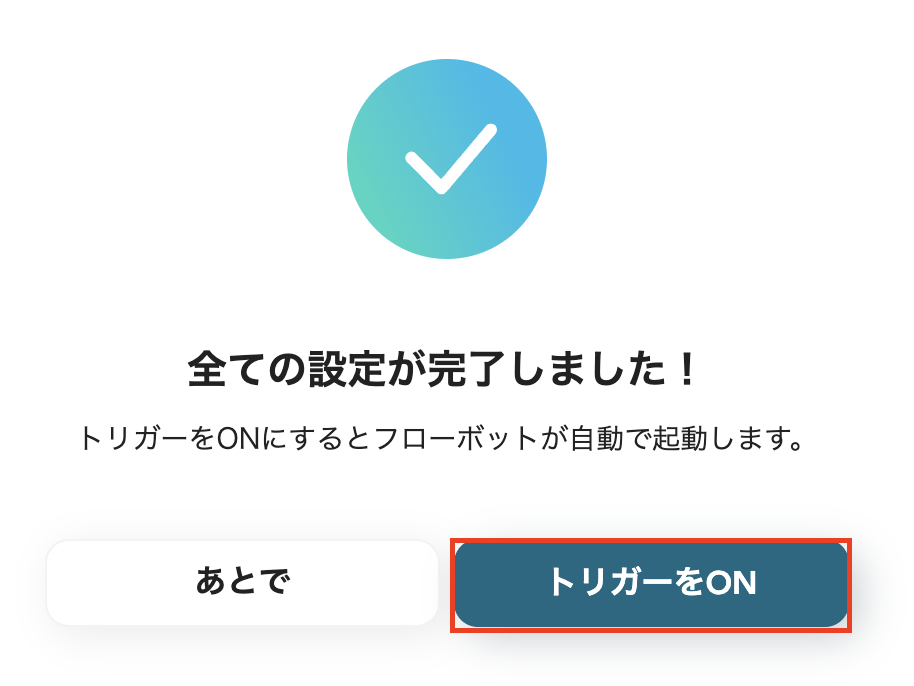
Now, the flow bot setup is complete.


.avif)

.avif)
.avif)


