

.avif)
バナーをクリックすると、Yoomのテンプレートサイトに移ります。
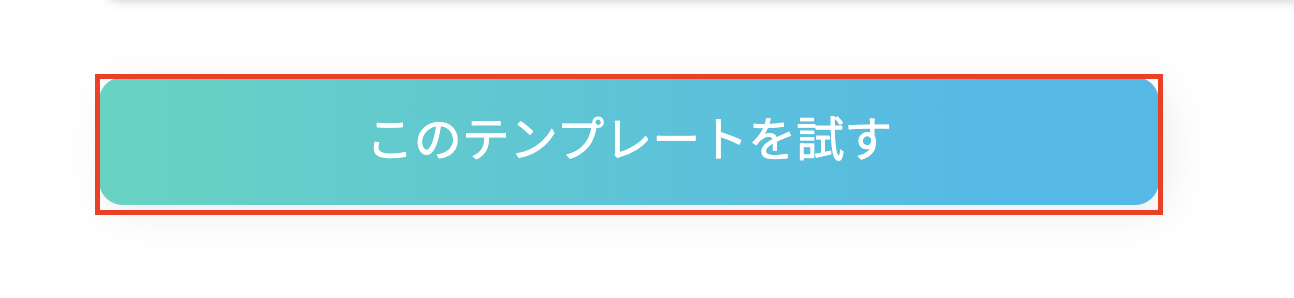
画面をスクロールして、「このテンプレートを試す」をクリックしましょう。
すると、テンプレートがコピーされました、と表示されるので、OKをクリックしてください。
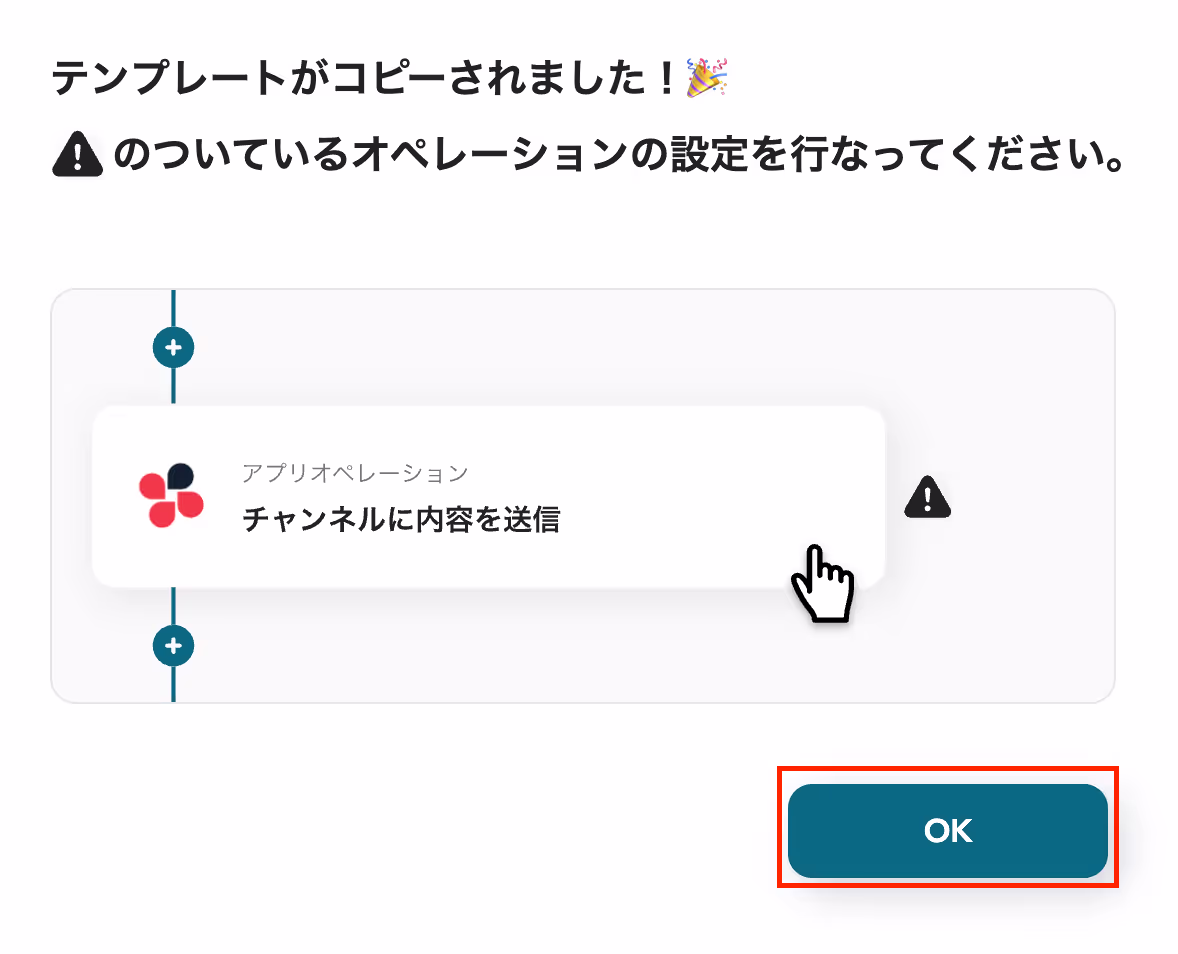
以上でテンプレートのコピーが完了しました。
ステップ1:kintoneとカオナビをマイアプリ連携
次にYoomとアプリを連携します。
この連携で、登録したアプリを使って自由にフローボットが作成できるようになります。
1.kintoneとYooomを連携する
まずはkintoneを連携しましょう。
Yoomのワークスペース左に表示されているマイアプリ登録を選択し、新規接続をクリックしましょう。

マイアプリの新規接続でkintoneを検索して、クリックしましょう。

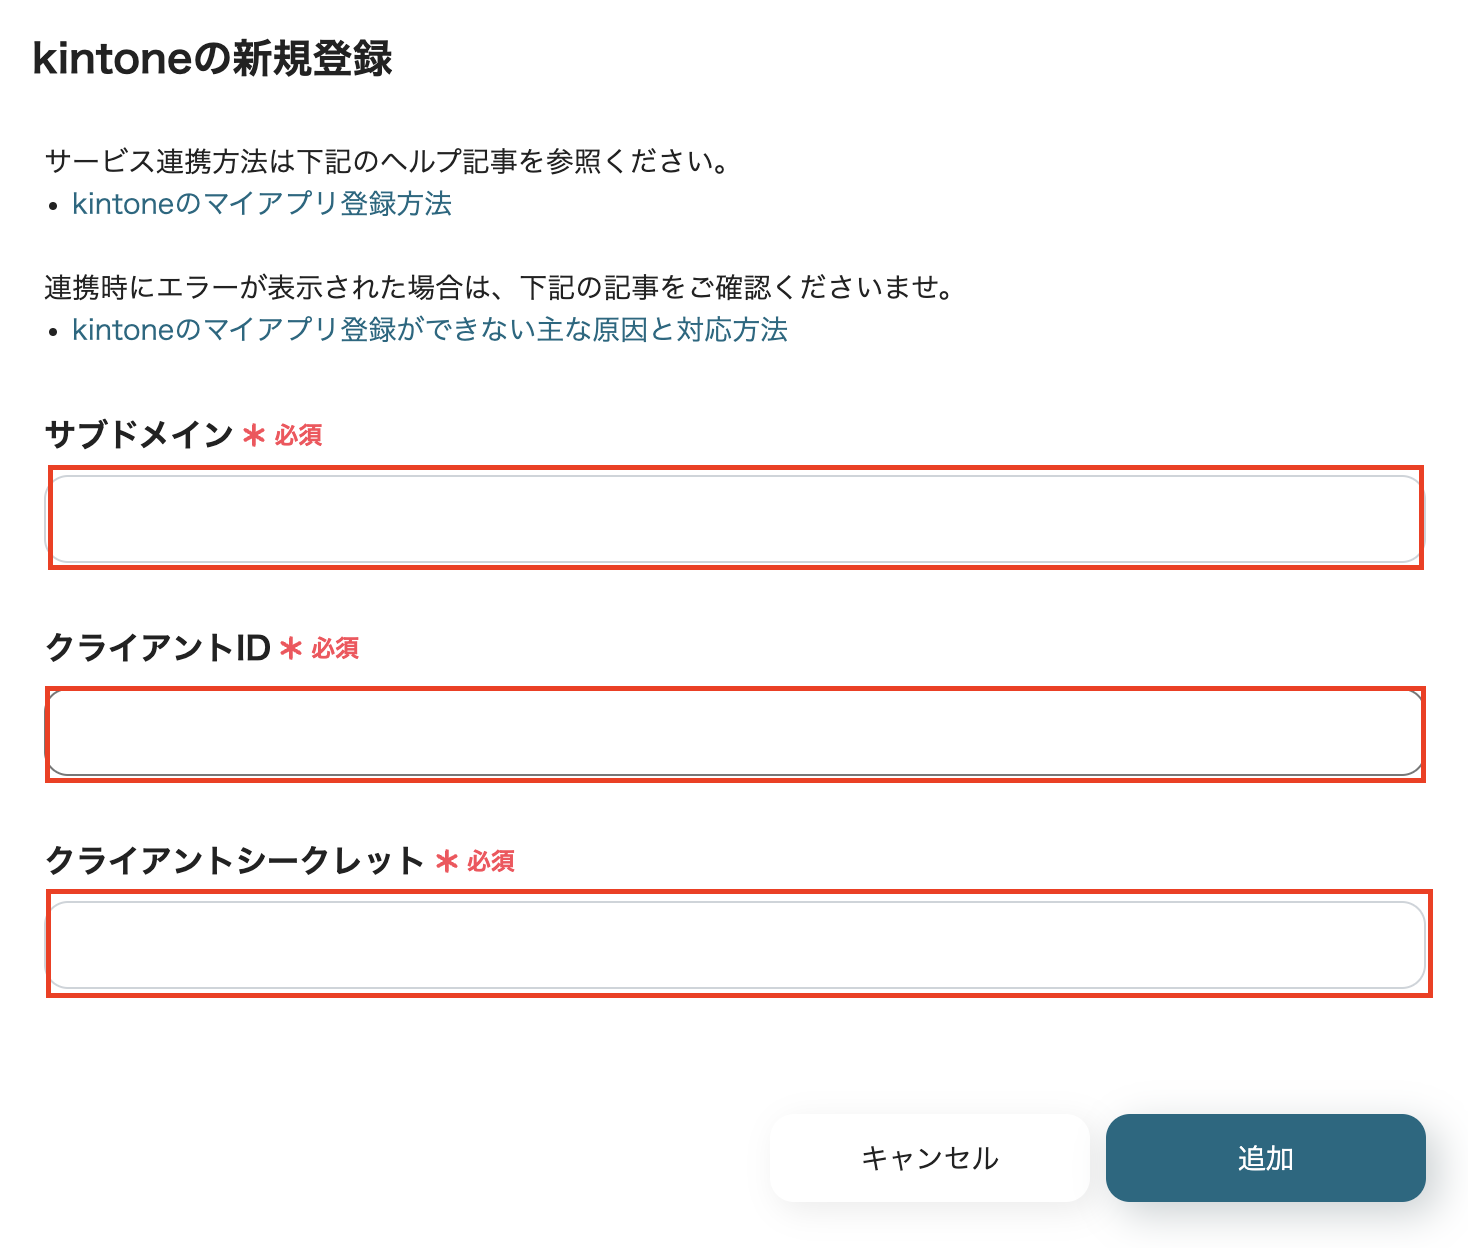
サブドメイン、クライアントID、クライアントシークレットを入力しましょう。
kintoneの詳しいマイアプリ登録方法はこちらをご確認ください。
kintoneのマイアプリ登録がうまくいかない時は、こちらをご確認ください。
以上でkintoneのマイアプリ登録が完了しました。
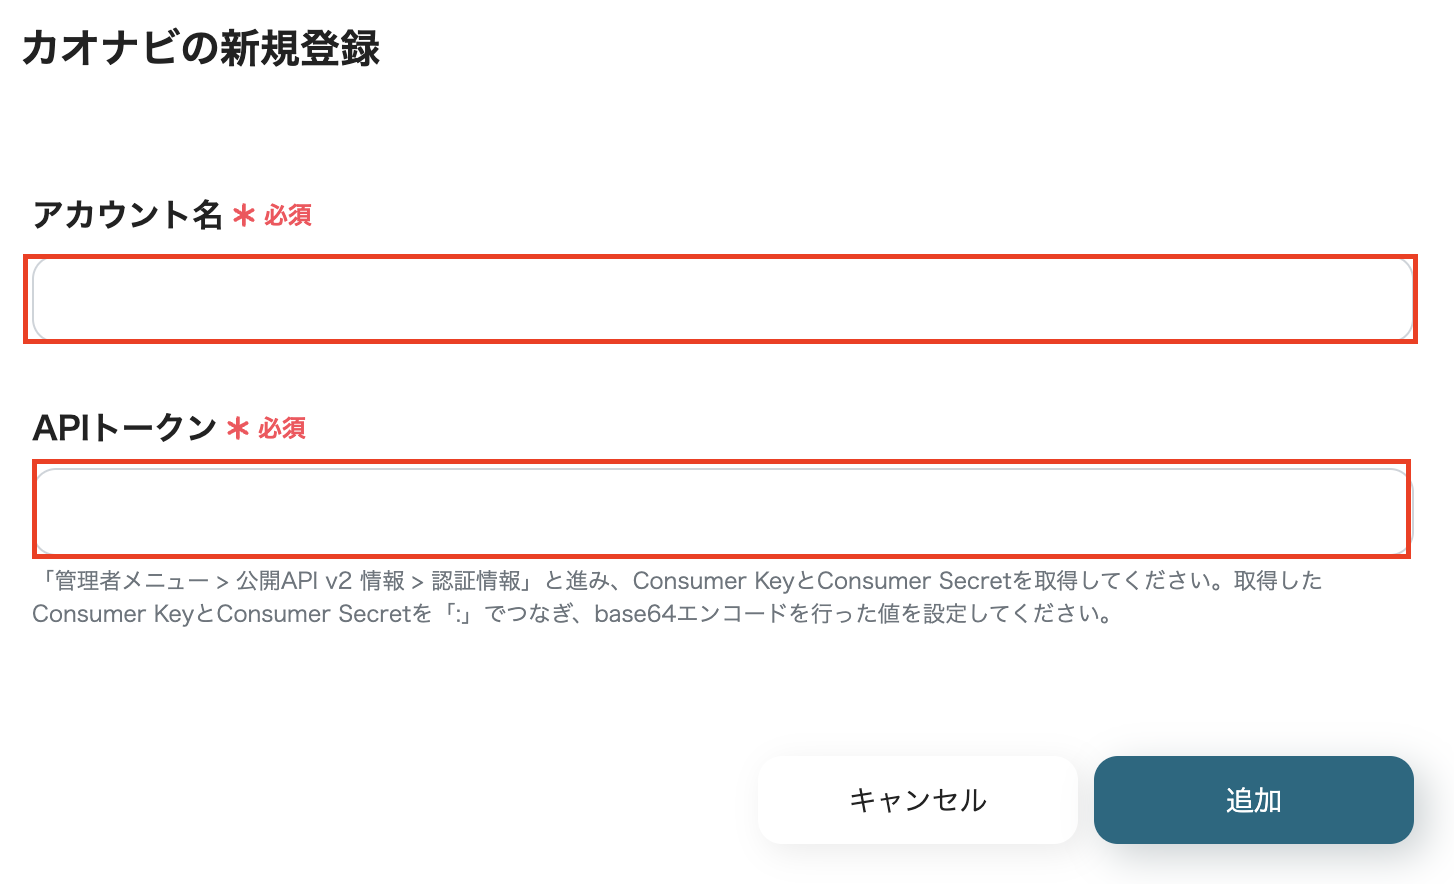
2.カオナビとYoomを連携する
次にカオナビを連携しましょう。
先程と同様に、マイアプリ→新規接続の順でクリックしましょう。
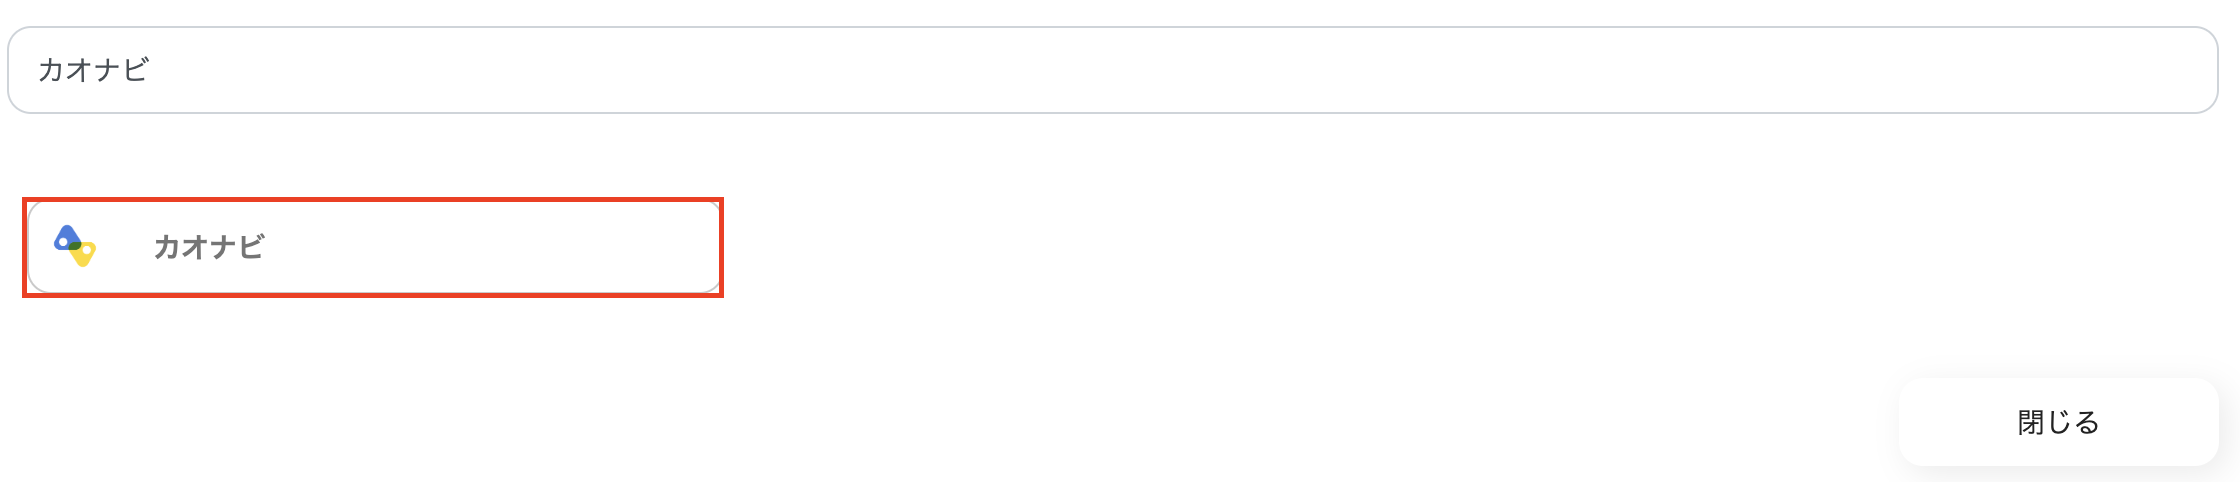
マイアプリ新規接続ではカオナビと検索し、アプリ名をクリックしましょう。
アカウント名、APIトークンを入力しましょう。
base64エンコードについてはこちらの記事を参考にしてください。
以上ですべてのマイアプリ登録が完了しました。
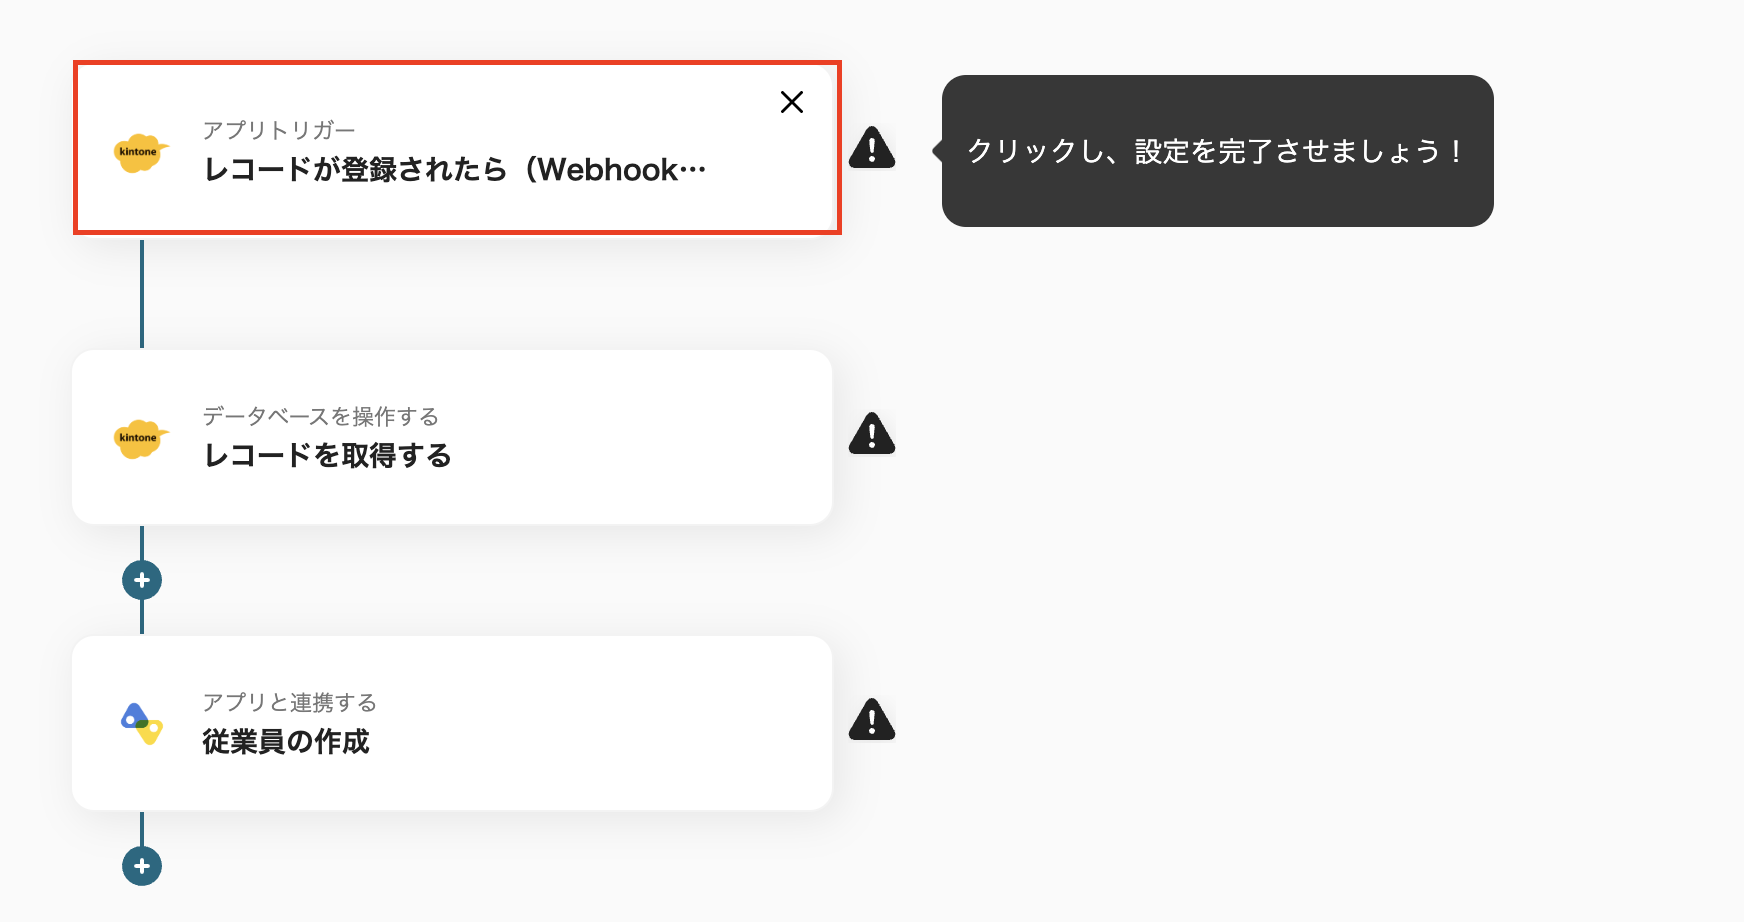
ステップ2:kintoneのアプリトリガー設定
それでは、実際にフローボットの設定を行いましょう!
「レコードが登録されたら」の項目をクリックしてください。
1.連携アカウントとアクションを選択
・タイトルは変更できます。
・kintoneと連携するアカウント情報を確認し、次へをクリックしましょう。

2.アプリトリガーのWebhookイベント受信設定
・webhookURLをコピーして、kintoneの管理画面で設定しましょう。
・webhookイベント(レコードを登録)を実行して、テストをクリックしてください。
・kintoneでの設定方法はこちらをご覧ください。
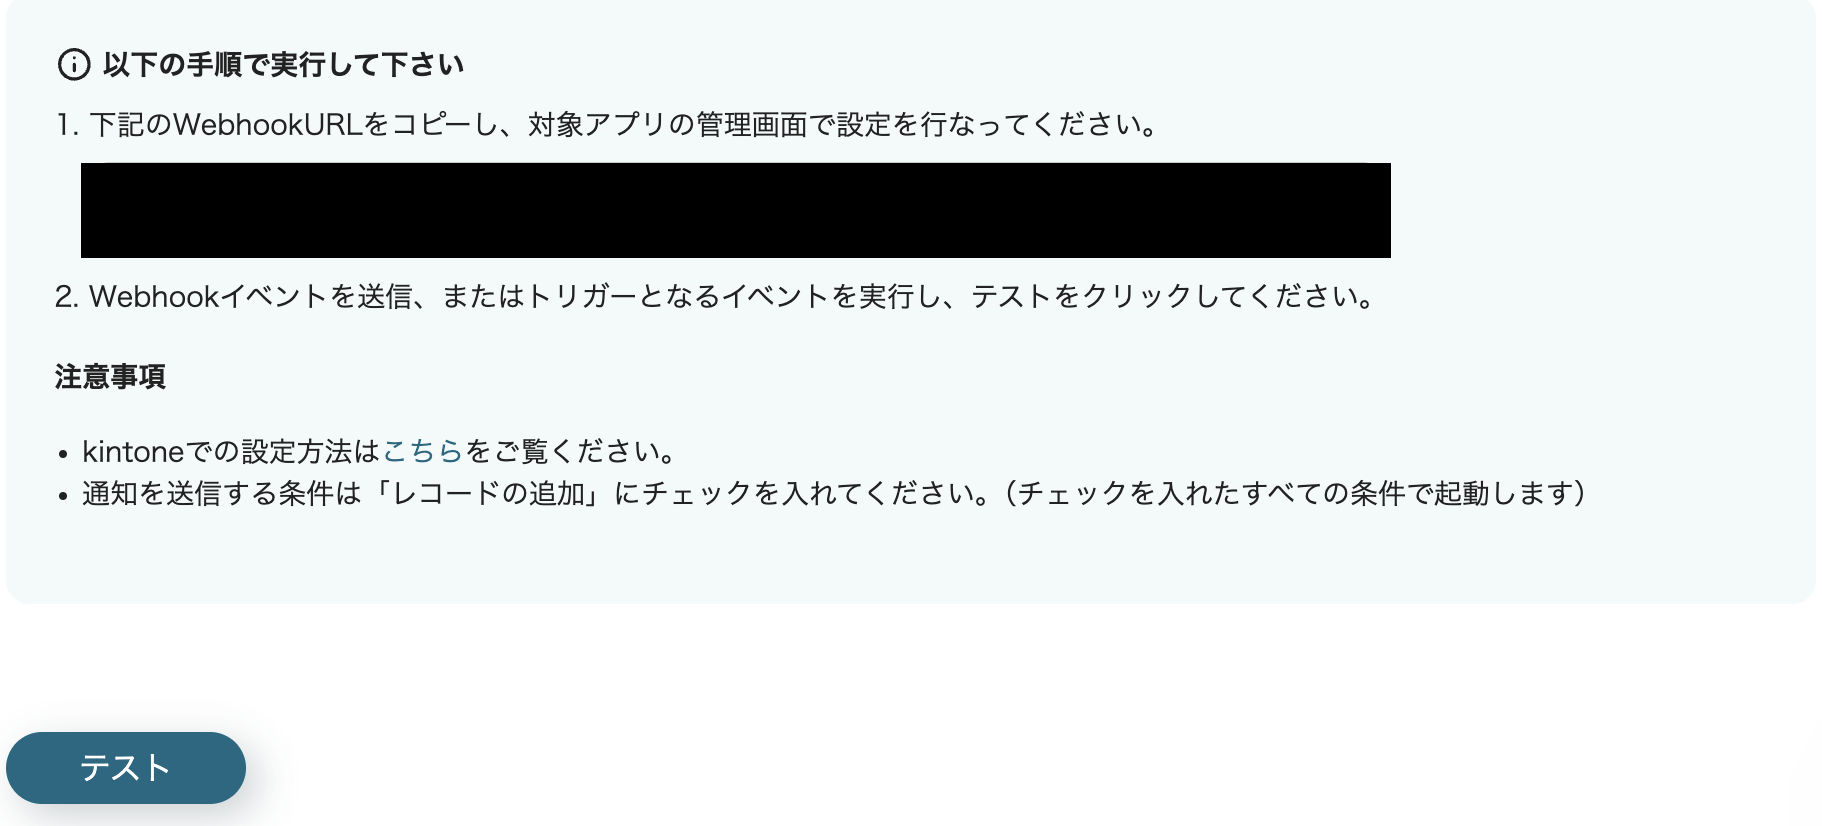
・テストが成功したら保存しましょう。
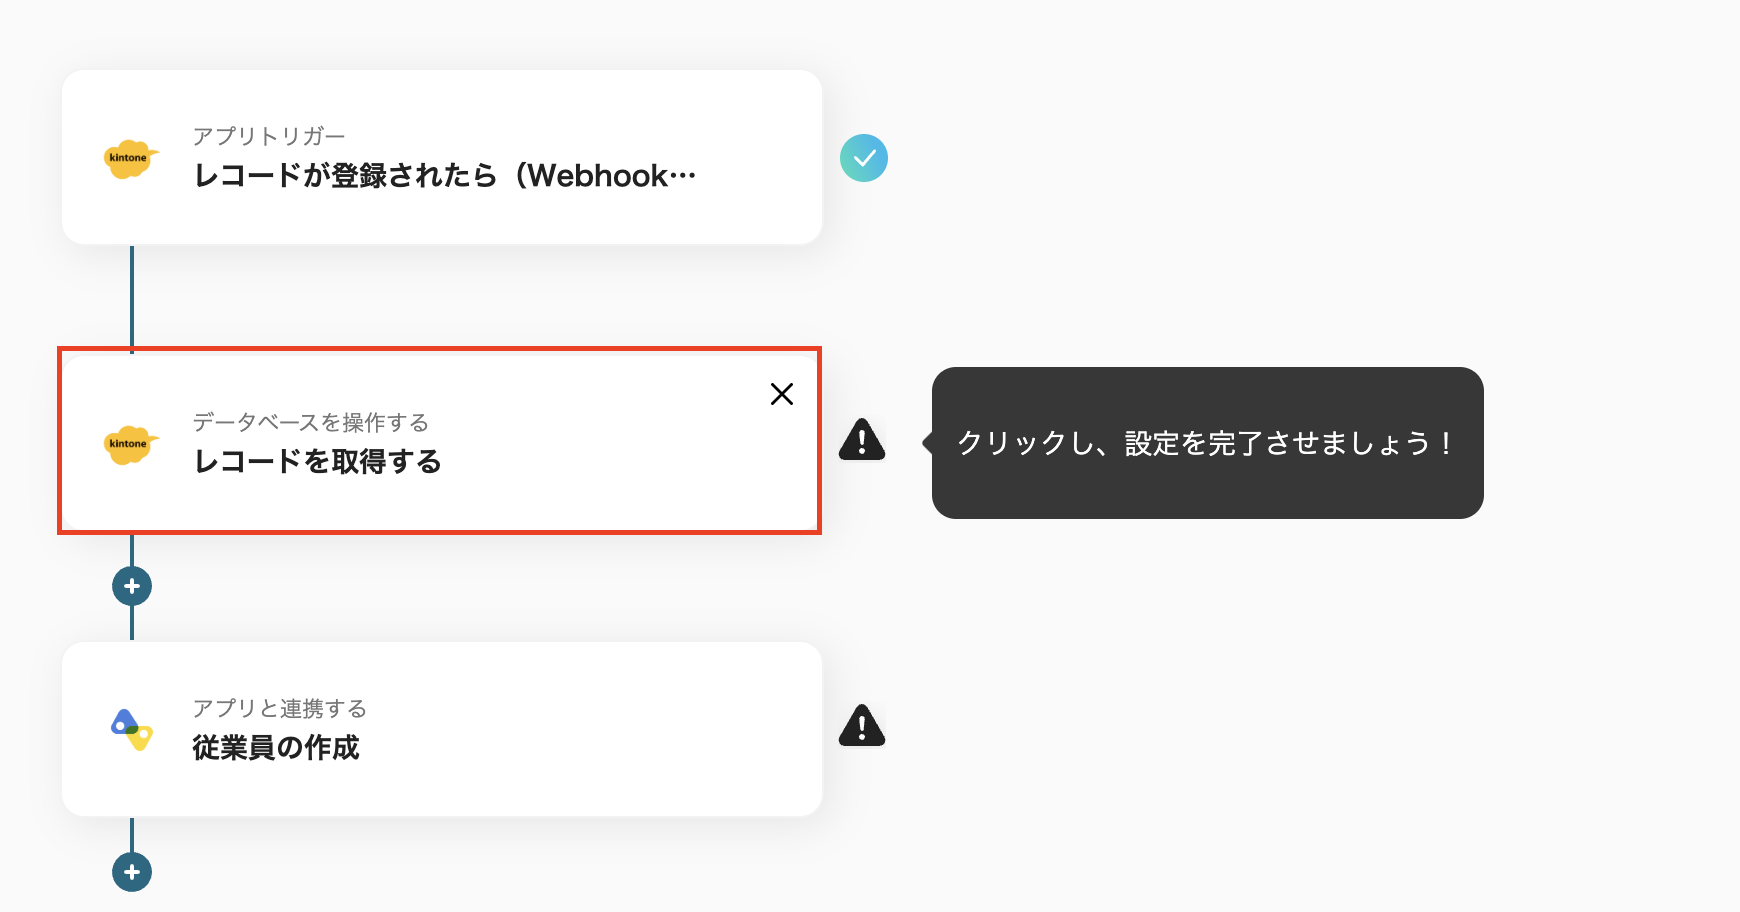
ステップ3:kintoneのアクションを設定
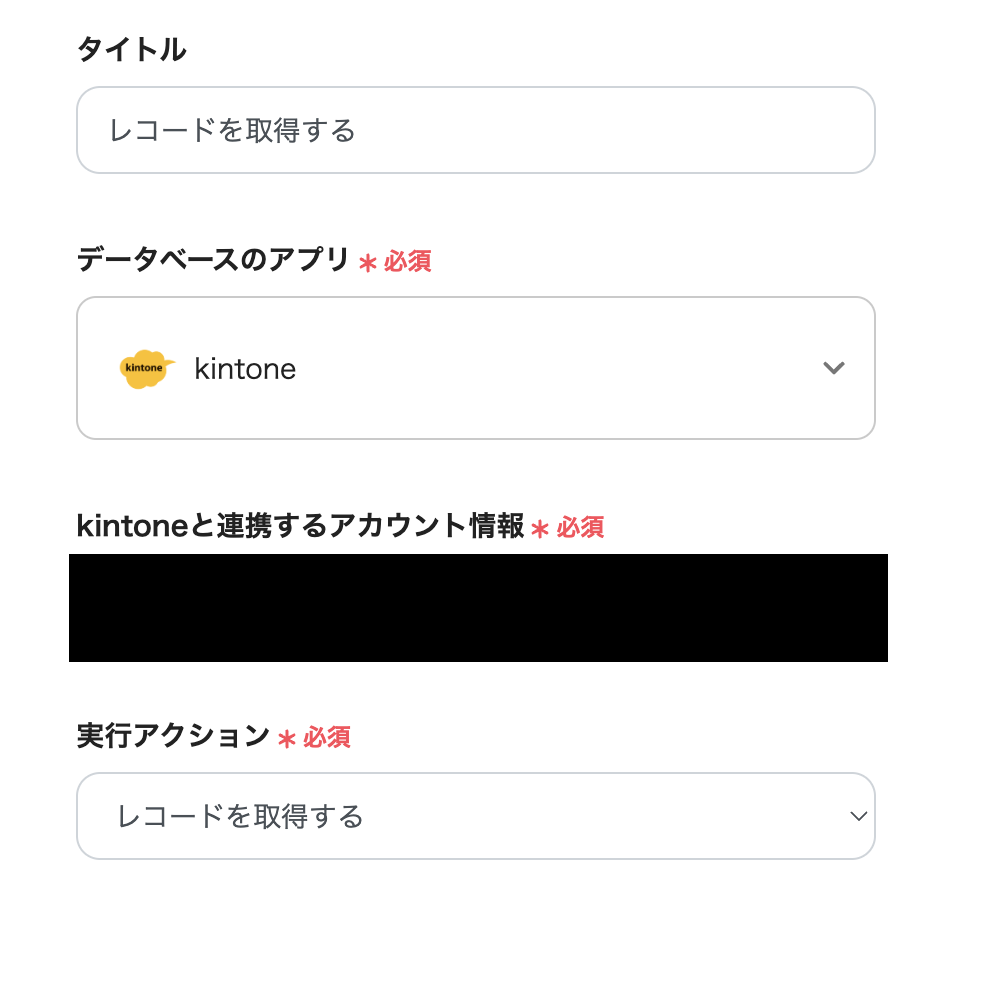
次にkintoneのレコード情報を取得するアクションを設定しましょう。
「レコードを取得」をクリックしてください。
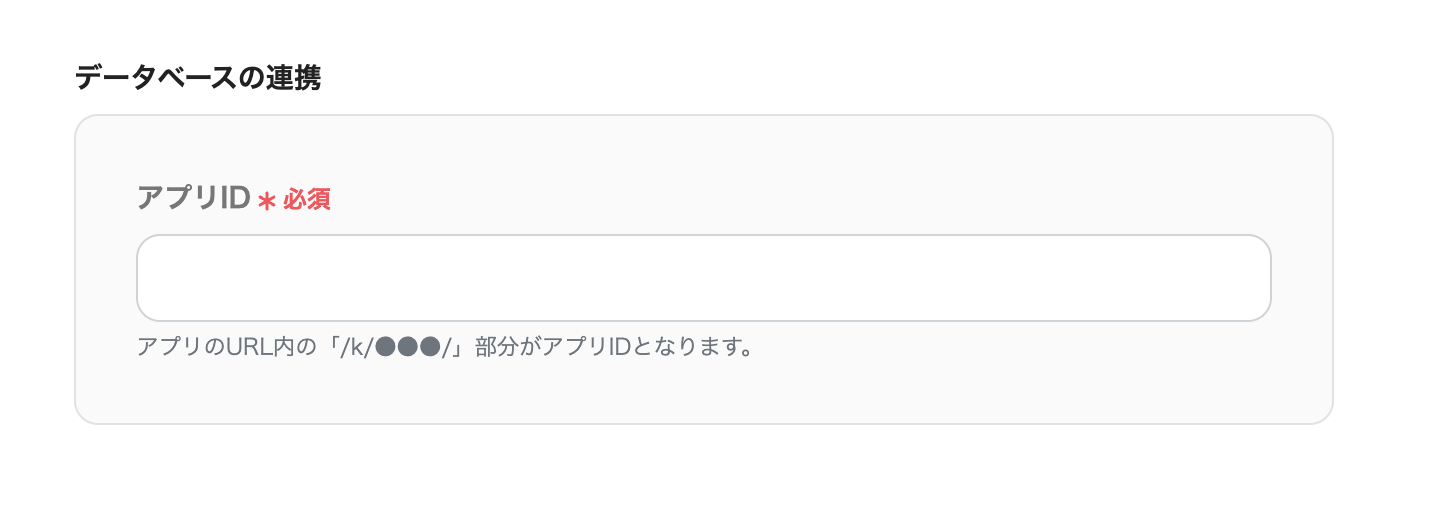
1.データベースの連携
・タイトルは変更できます。
・kintoneと連携するアカウント情報を確認しましょう。
・アプリIDを入力しまし、次へをクリックしましょう。
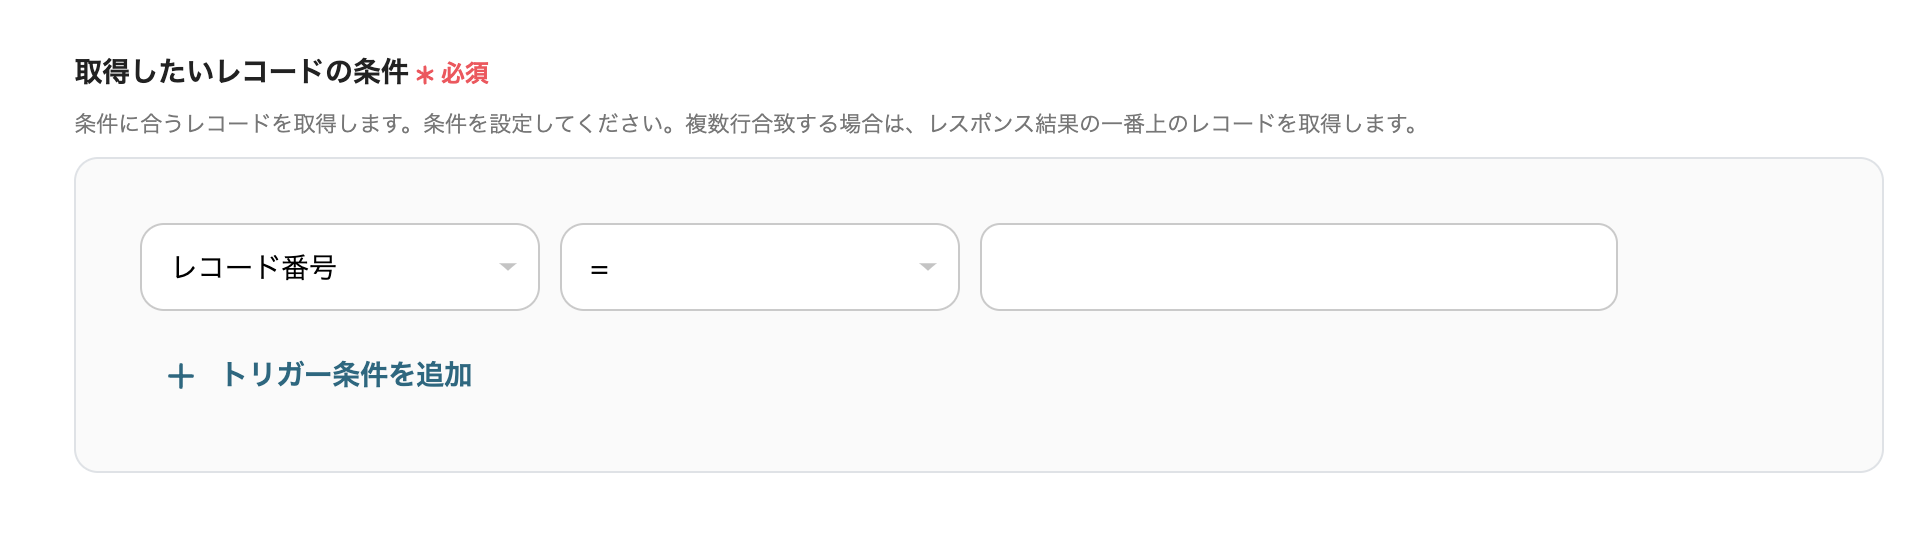
2.データベース操作の詳細設定
・取得したいレコードの条件を設定し、テストを実行しましょう。
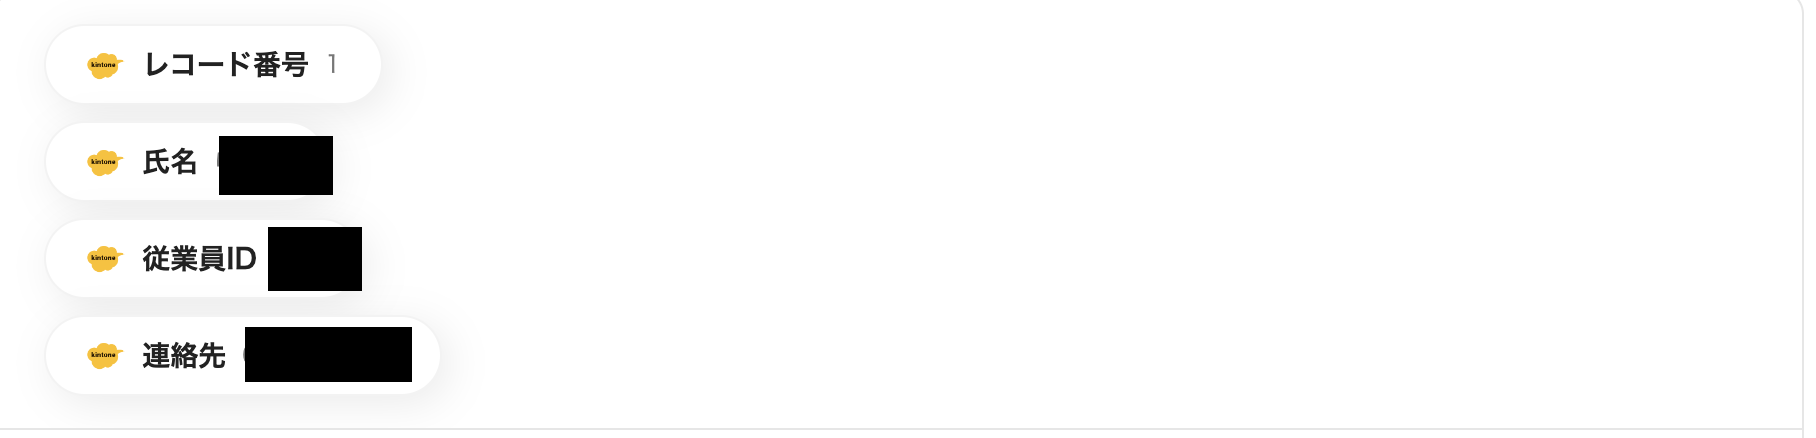
・テストが成功したら、kintoneのレコード情報がアウトプットとして取得されます。
・ここまでできたら、保存しましょう。
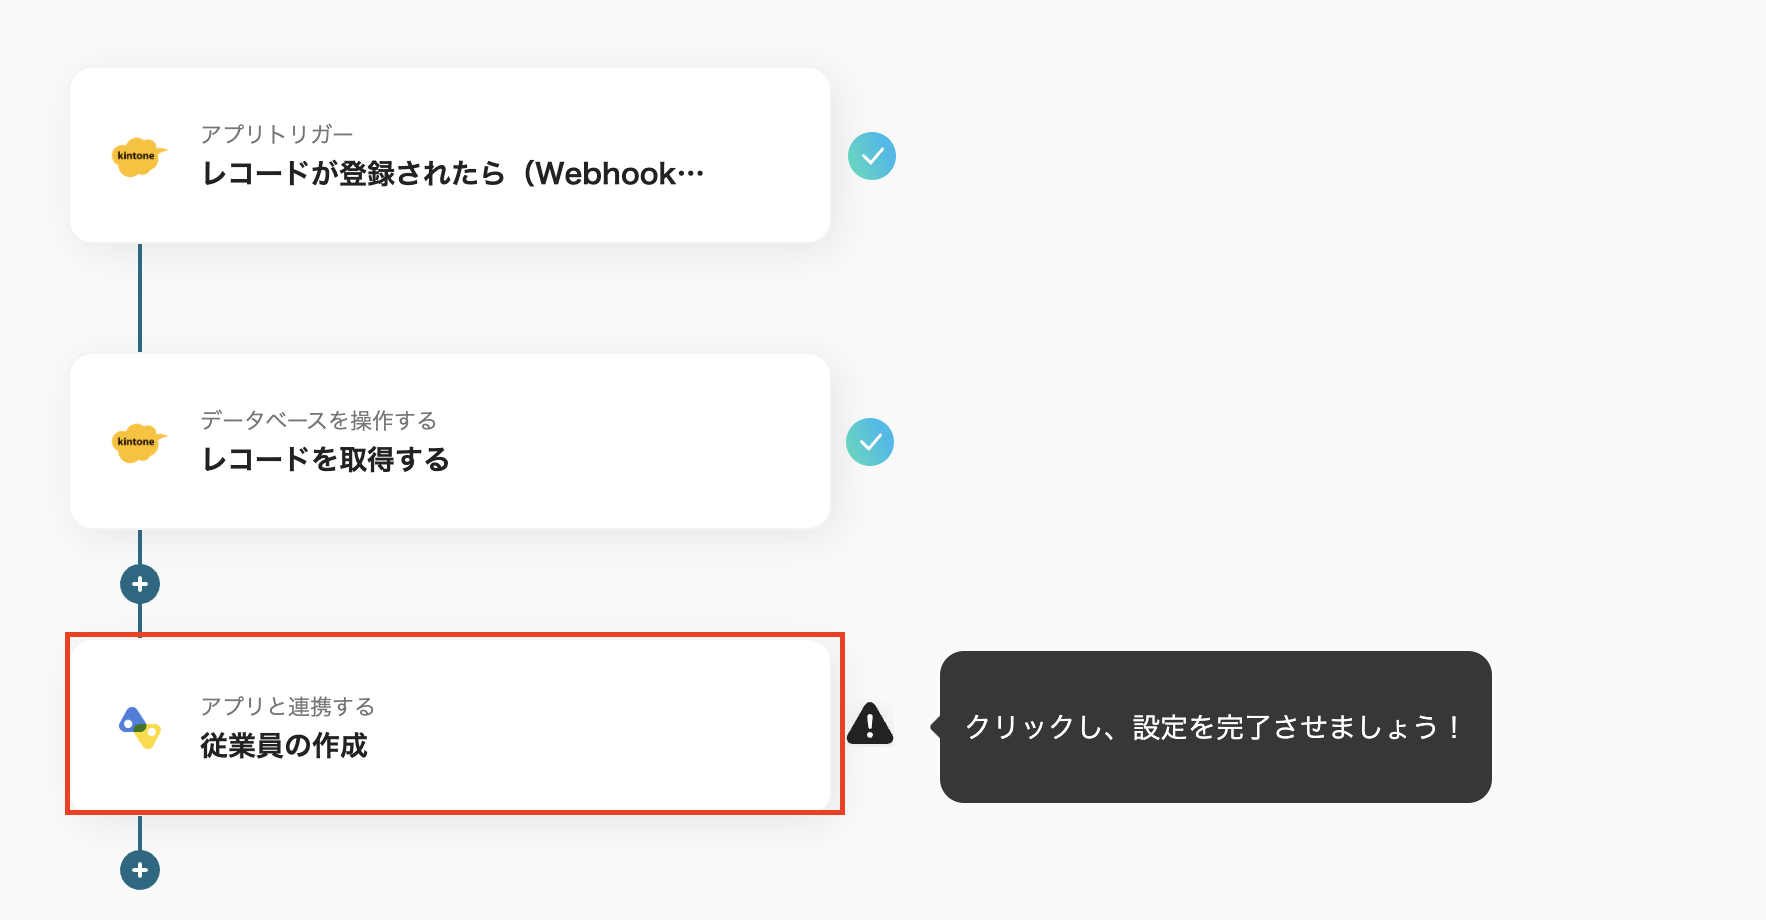
ステップ4:カオナビのアクションを設定
最後のステップとなりました!
「従業員の作成」をクリックしましょう。
1.連携アカウントとアクションを選択
・タイトルは変更可能です。
・カオナビと連携するアカウント情報を確認して、次へをクリックしてください。
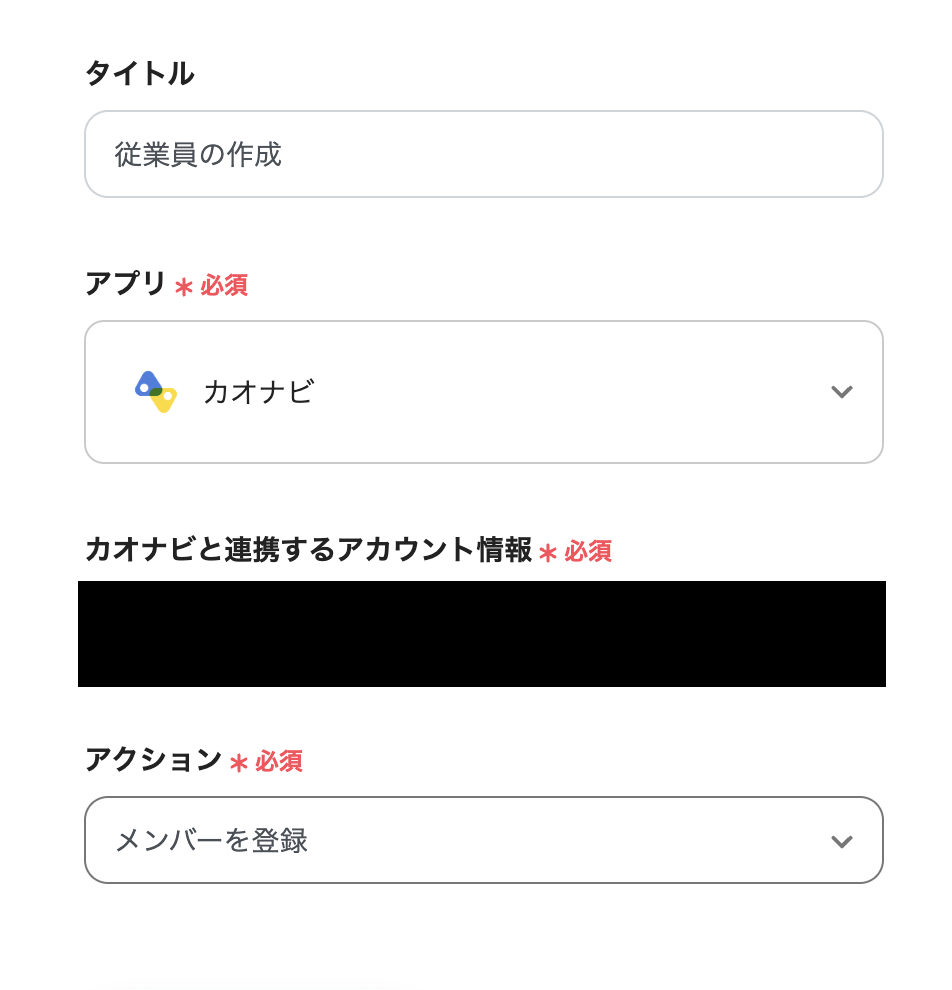
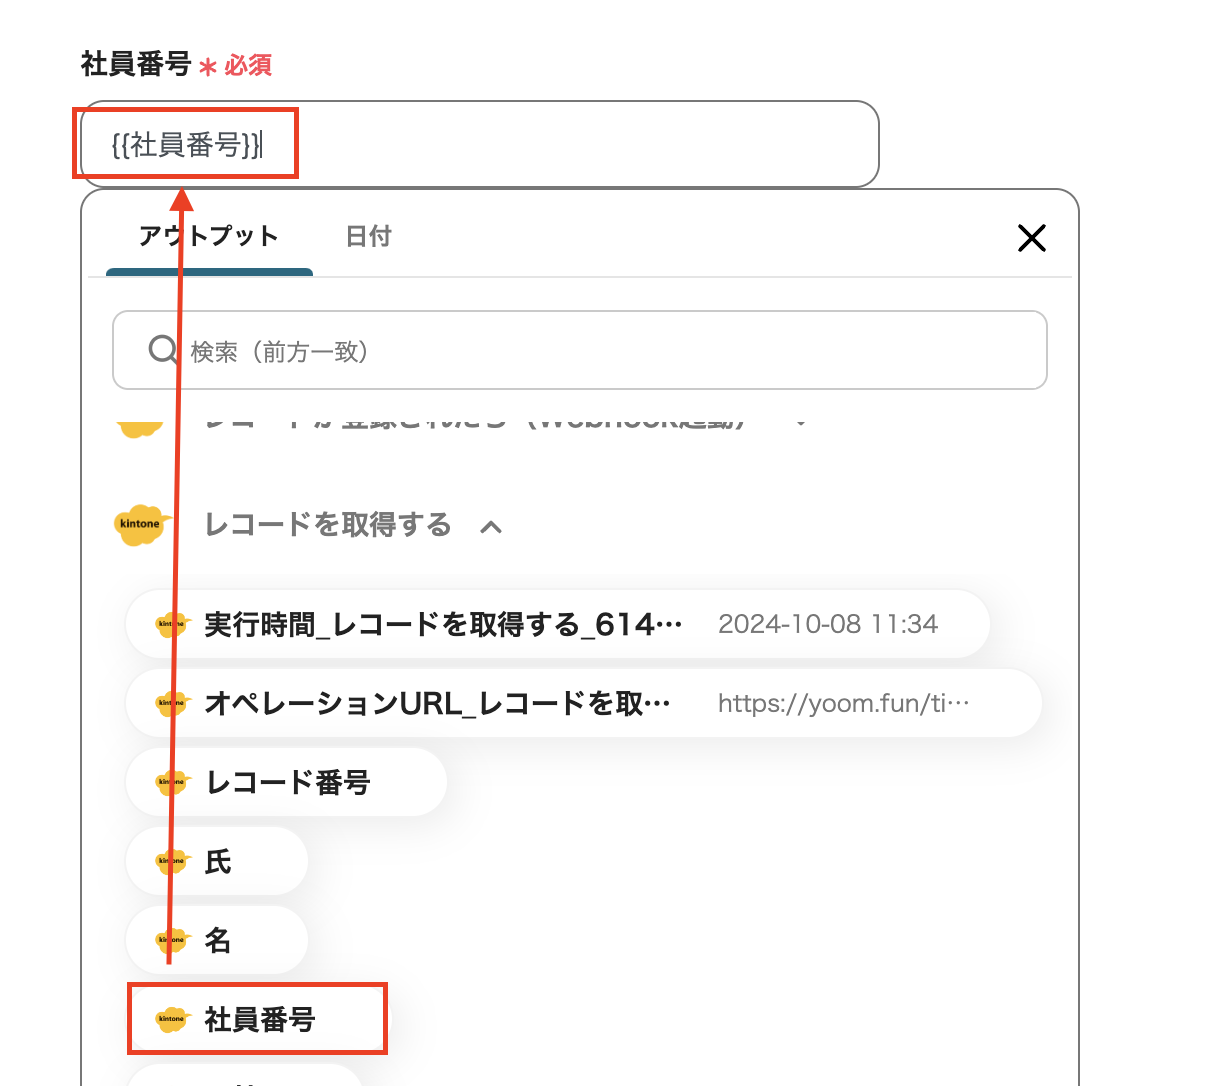
2.API接続設定
・社員番号と氏名は、「kintoneのレコードを取得する」のアウトプットから選択しましょう。
・その他入力したい項目を設定し、テストしましょう。
・カオナビにkintoneの情報が追加できたら保存してください。
保存をクリックしたら、すべての設定が完了しました!と表示されるので「トリガーをON」をクリックしましょう。
以上でフローボットが完成しました!


.avif)
.avif)
.avif)
.avif)


