


(2) Next, select any project from the workspace list.
The copied template is stored in "My Projects" in the project list, so please check there.
(3) Once the following screen is displayed, let's proceed to Step 2.
Step 2: Setting Up Google Sheets
Next, proceed to the Google Sheets settings. This will prepare you to integrate with Yoom.
(1) Click "My Apps" on the left side of the screen.
(2) Then, click "+New Connection" displayed on the right side of the screen.

(3) Select Google Sheets from the list of apps.
(4) Click "Sign in with Google".
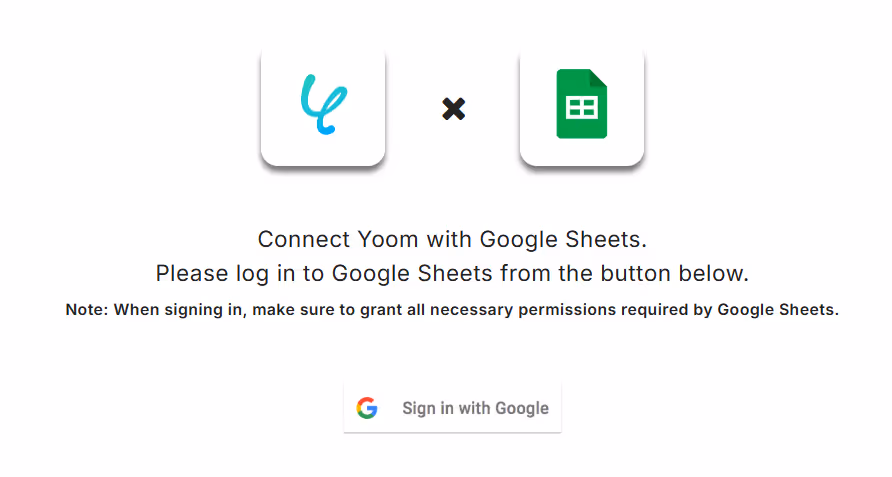
(5) Select and click the account you want to link on the account selection screen.
(6) On the Yoom login screen, verify that the account information to be linked is correct and click "Next".
(7) Finally, on the "Yoom is requesting additional access to your Google Account" screen, click "Continue" to complete the Google Sheets setup!
Once you reach this point, return to the copied template!
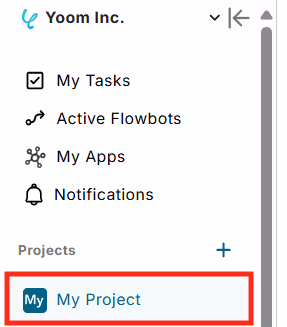
(8) Click "My Projects" from the project list.
(9) Click the copied template.
(10) Click "Edit" in the upper right corner of the flow list screen and proceed to Step 3.
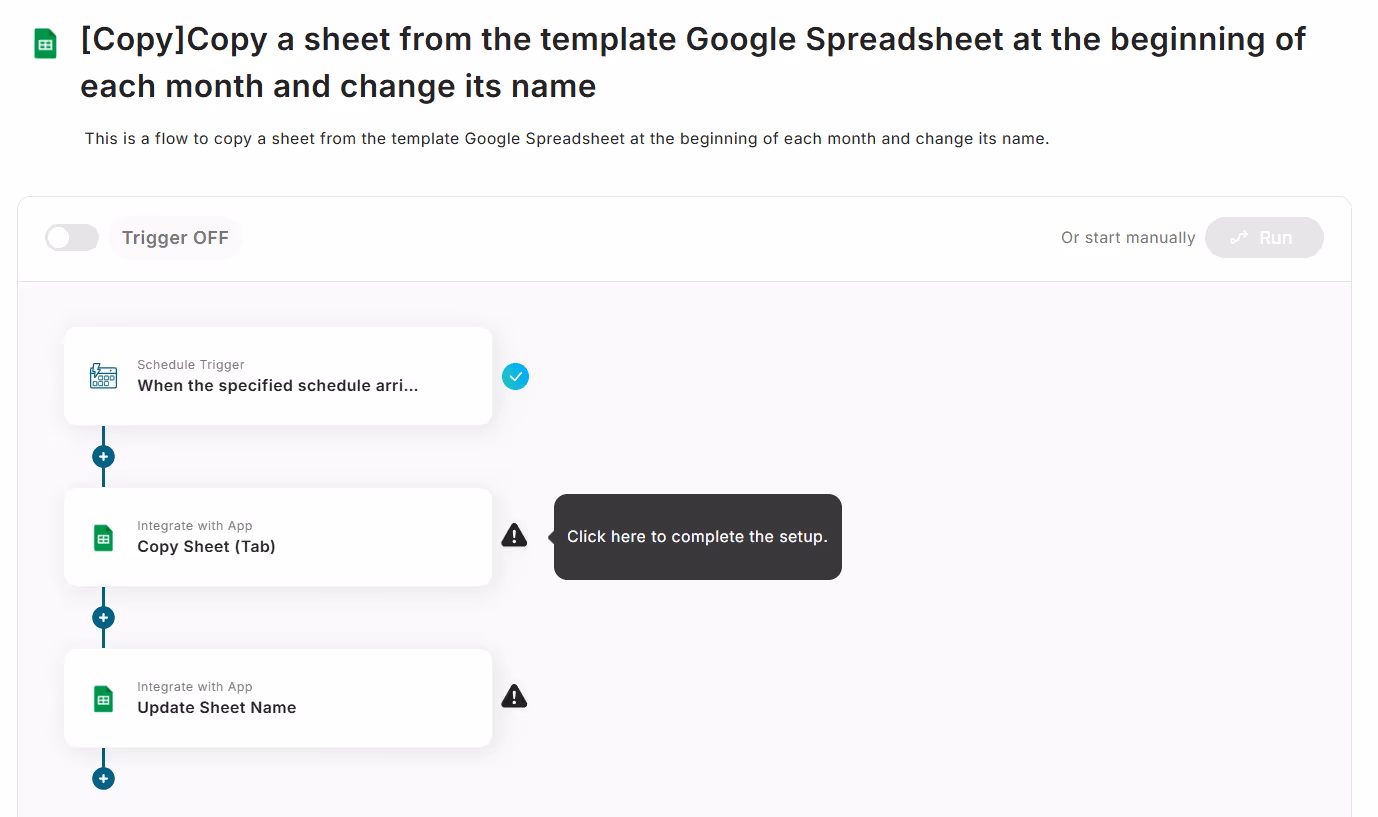
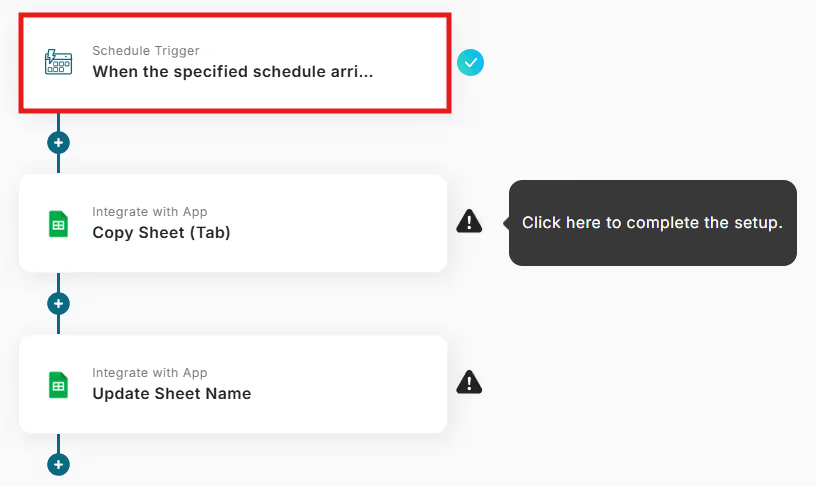
Step 3: Setting Triggers and Actions
(1) Click "Schedule Trigger" from the flow list screen.
(2) Set the title for the schedule trigger.
*You can use the already set title as it is.
(3) In the schedule settings, set the day and time you want to activate the flow bot.
This time, we will keep the existing settings of the copied template, but you can set specific days of the week or more flexible settings.
For schedule settings, please refer to How to Set Up a Schedule Trigger.
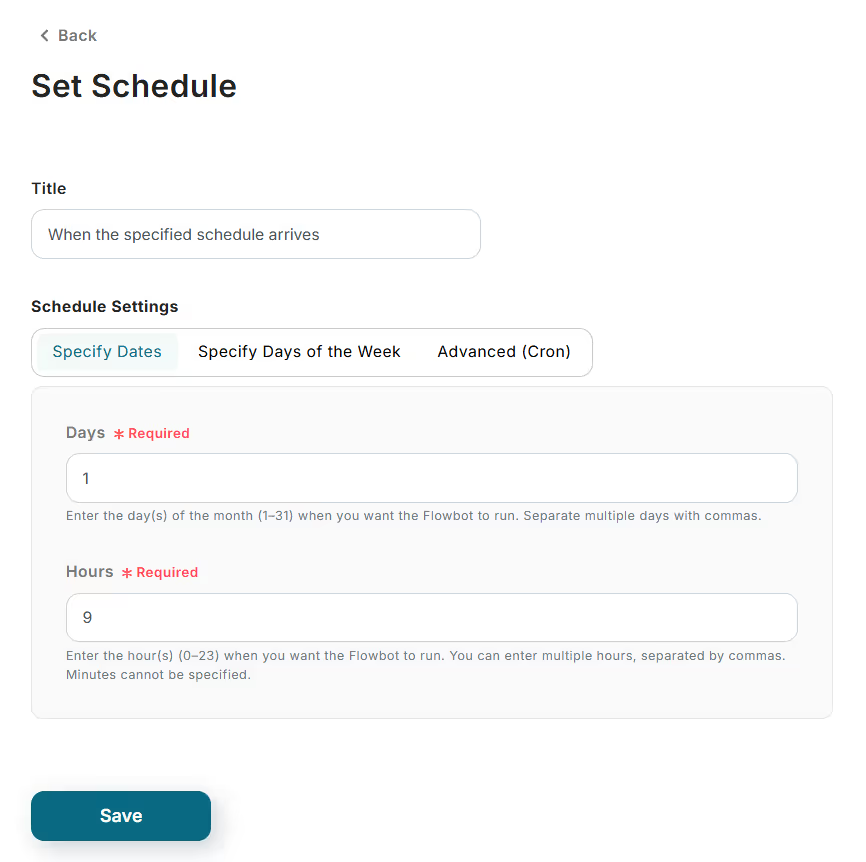
(4) Click "Save".
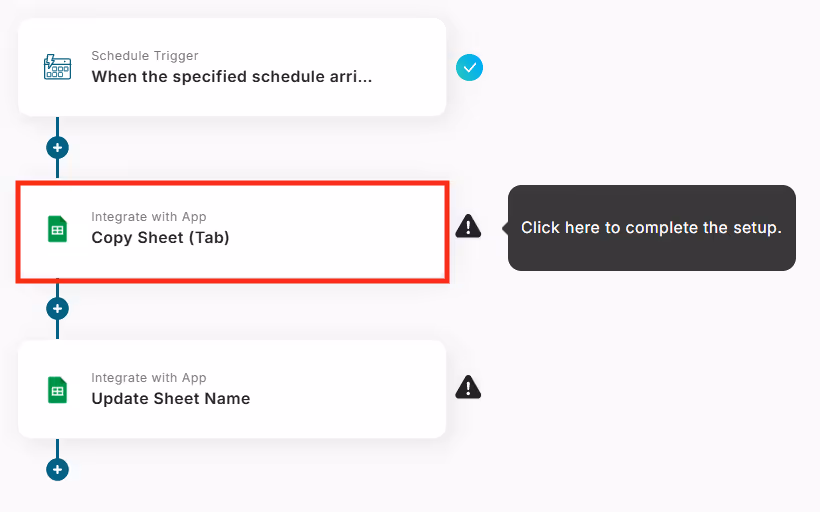
(5) Click "Integrate with App" displayed under the schedule trigger you just set.
(6) Set the title.
*You can use the already set title as it is.
(7) Verify that the account information linked with Google Sheets is correct.
*If the information is not displayed, please click "+Add Linked Account" to register.
(8) Select "Copy Sheet (Tab)" as the action.
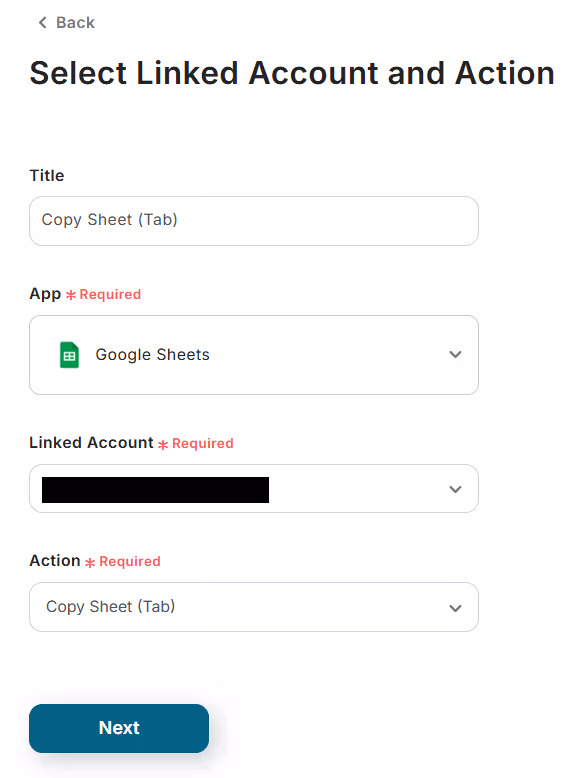
(9) Click "Next".
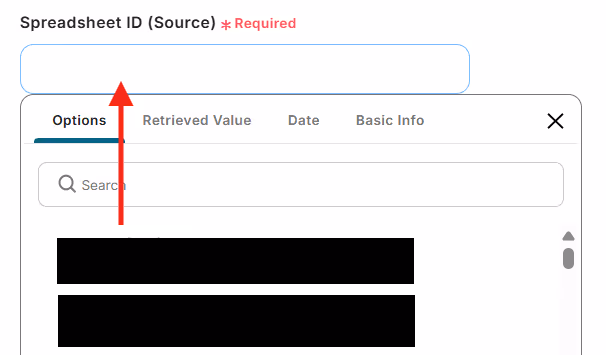
■API Connection Settings
(10) Select the Spreadsheet ID (Source) from the candidates.
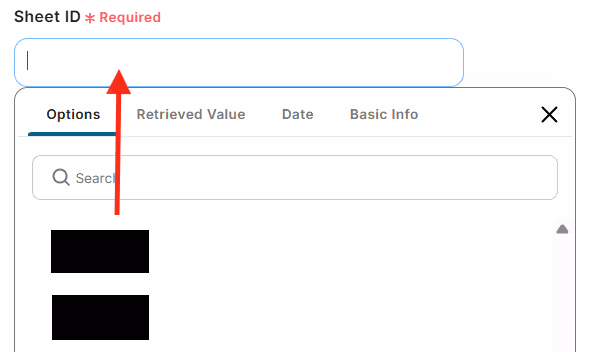
(11) Also select the Sheet ID from the candidates.
(12) Also select the Spreadsheet ID (Destination) from the candidates.
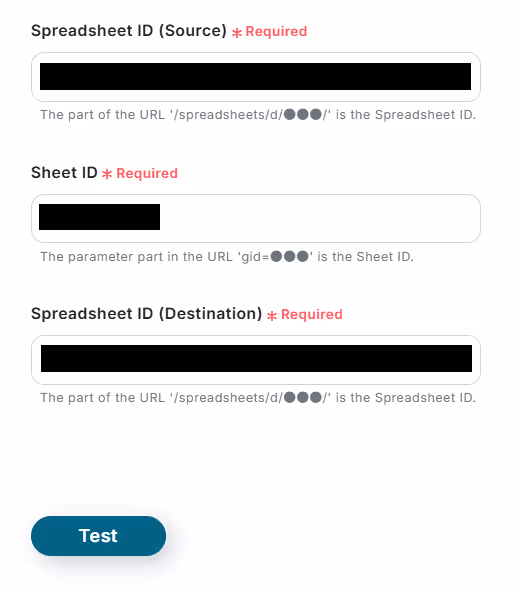
(13) If there are no errors in the test, click "Save".
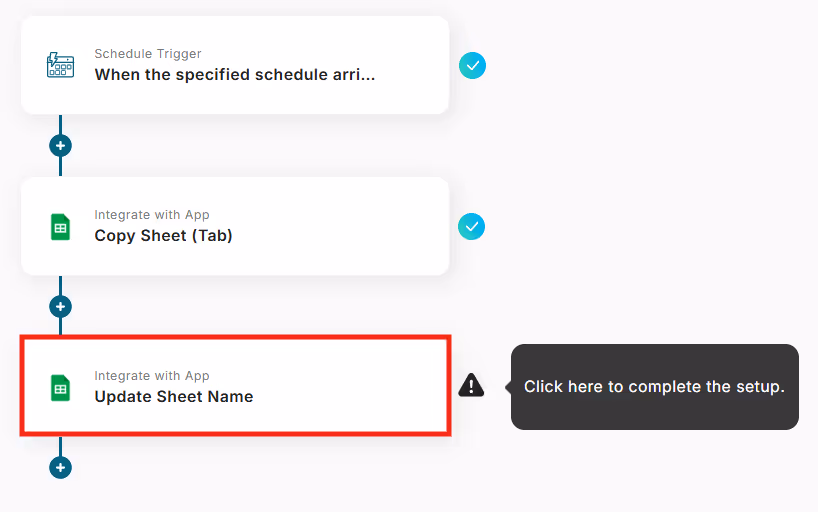
<span class="mark-yellow">Just one more step to complete!</span>
(14) Click "Integrate with App" at the bottom.
(15) Set the title.
*You can use the already set title as it is.
(16) Verify that the account information linked with Google Sheets is correct.
(17) Select "Update Sheet Name" as the action.
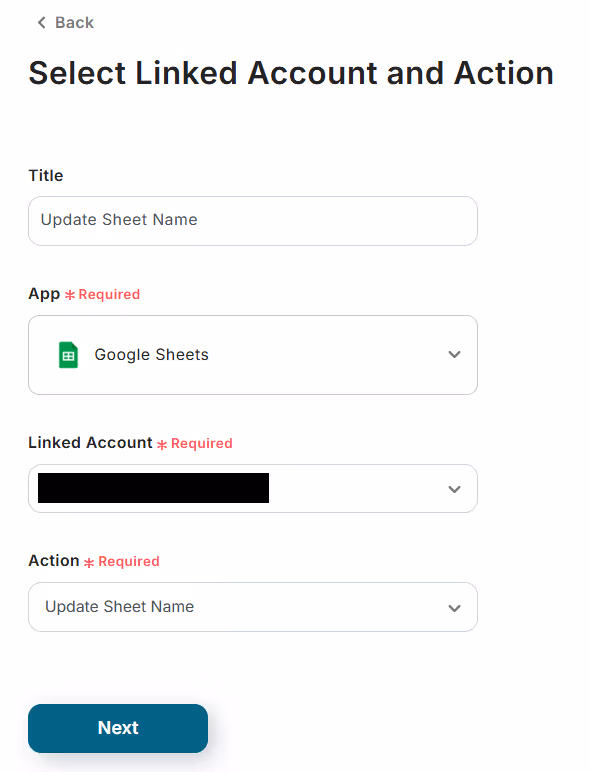
(18) Click "Next".
■API Connection Settings
(19) Select the Spreadsheet ID from the candidates.
(20) Set the Sheet ID from the output of "Copy Sheet (Tab)".

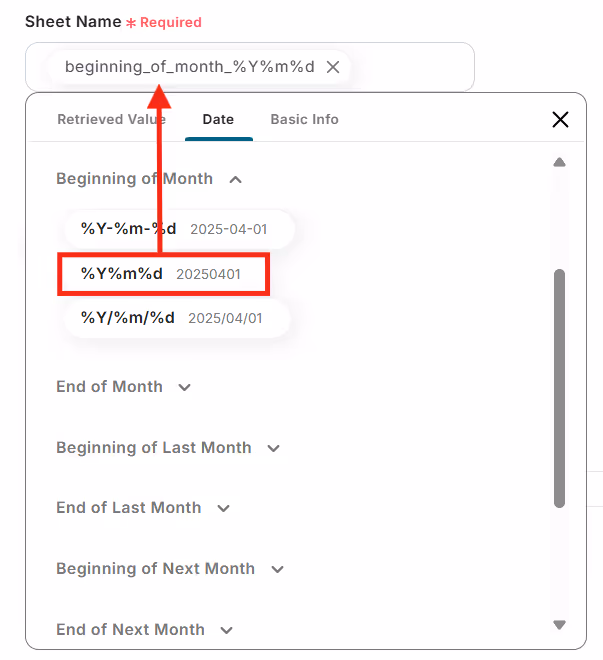
(21) Set the sheet name to any name you want after copying the template sheet.
This time, we will set First Day of the Month from the date.
(22) If there are no errors in the test, click "Save".
(23) Return to the flow list screen and change App Trigger to ON to complete the flow settings!
This completes the Google Sheets setup. Good job!


.avif)
.avif)
.avif)


