

.avif)


Step 2: Set Up Form Trigger
First, set up the "Health Check Form Submission" form.

Since this is a form for submitting health check reports, make sure to set up the necessary fields.
Depending on the input, you can also use dropdowns or checkboxes.
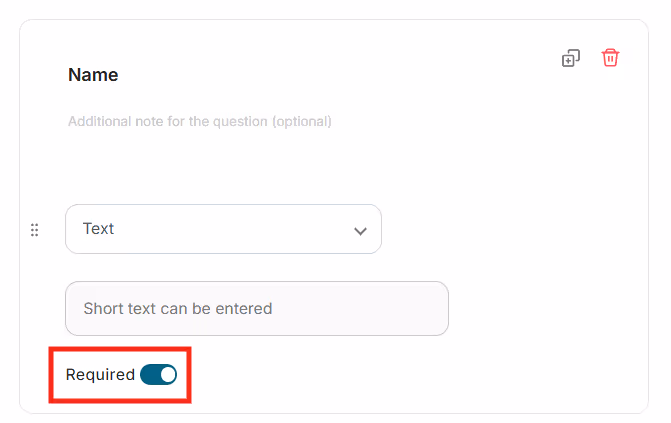
For some input fields, make sure to turn on the "Required" option.
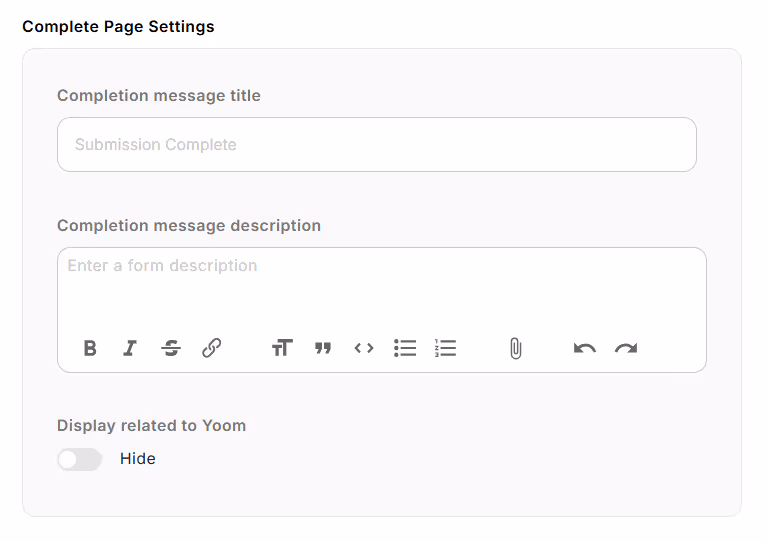
You can also set up the completion screen that appears after submitting the report.
Once you've entered the information, click "Next".
Next, enter the output for testing in the flow.
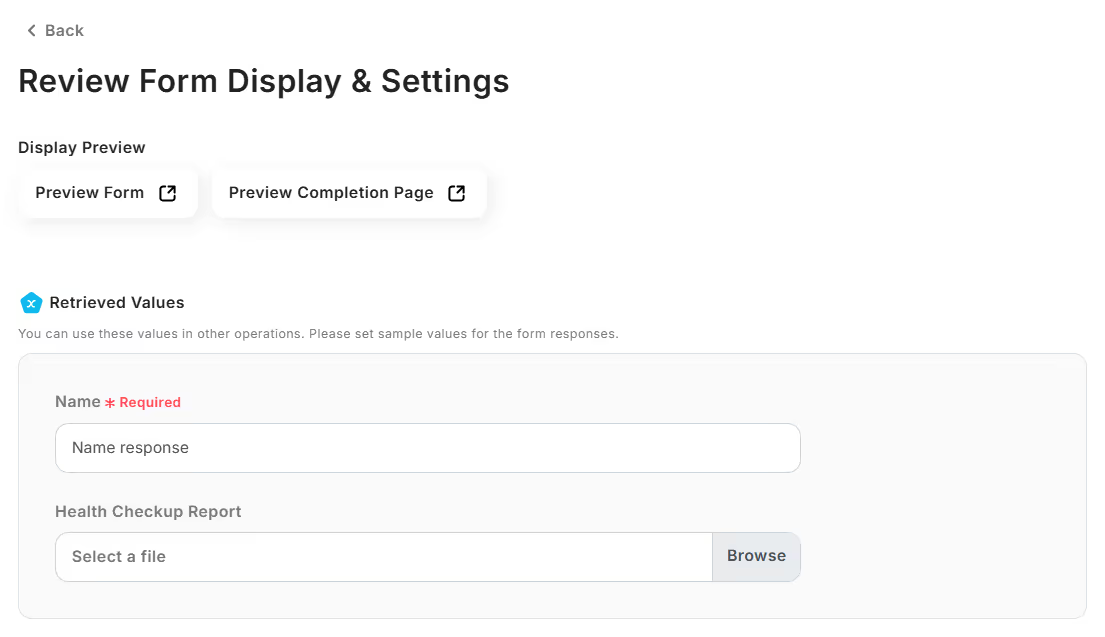
The "Retrieved Values" are usually automatically read and reflected from the submitted form.
In this flow, since the form submission is the trigger, you will enter it manually.
Once you've entered the information, click "Save" to complete the trigger setup.
Step 3: Set Up Data Extraction
Next, set up "Read Text from Image/PDF".
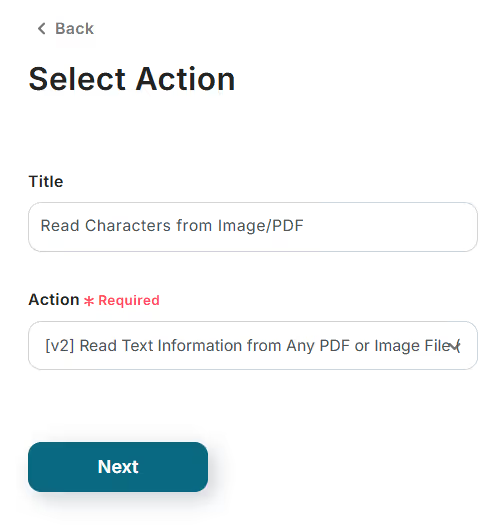
On the first screen, there are no necessary settings other than title modification, so click "Next".
On the next page, set up the information to be read.
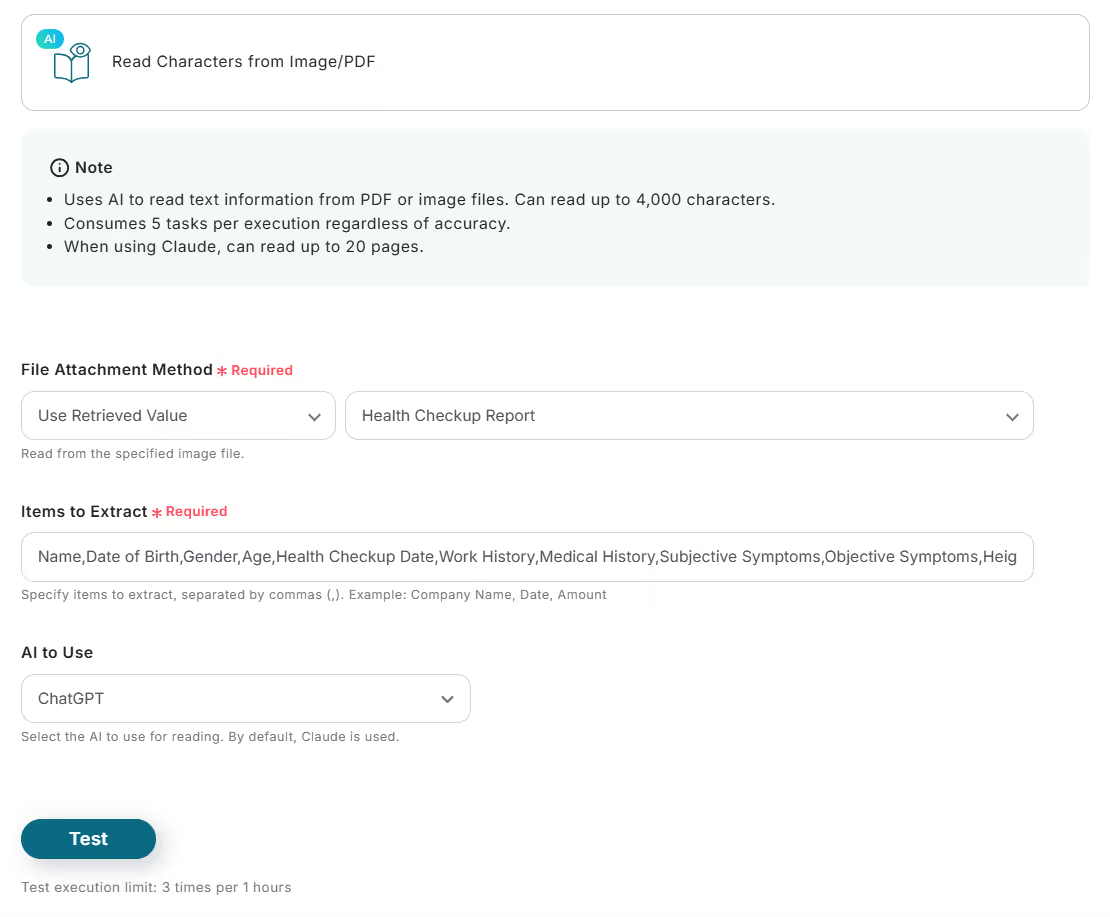
Set up the items you want to extract from the health check form obtained from the form.
Once you've entered the information, click "Test".
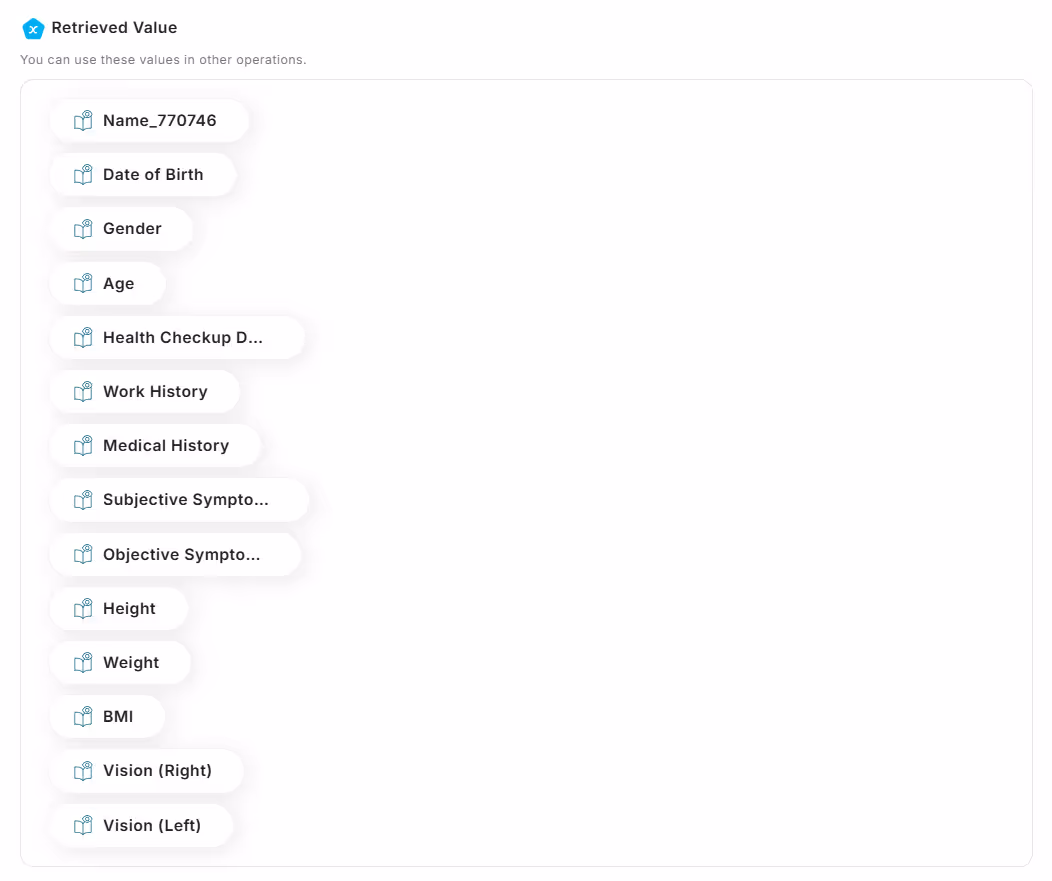
The content of the health check form attached in the form settings has been reflected and obtained in the output.
Once confirmed, click "Save" to complete the text reading setup.
Step 4: Set Up Addition to Google Sheets
The final setup is "Add Record".
On the first page, the account information of the Google Sheets linked with My App is reflected.
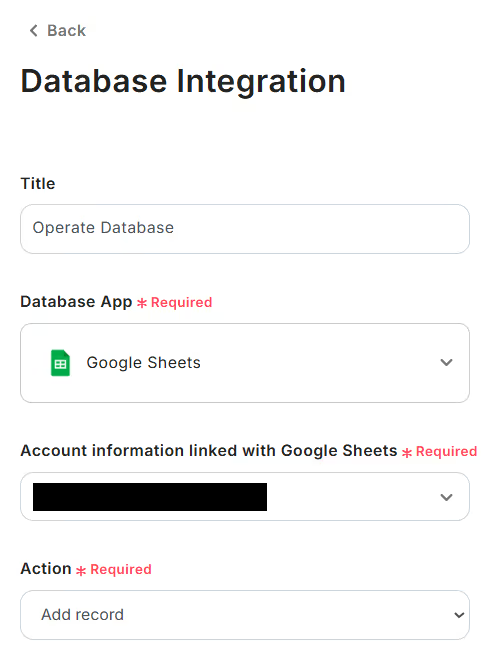
If necessary, modify the title.
Next, select the sheet (tab) from the candidates where you want to reflect the obtained information for Google Sheets database integration.

Enter the table range in alphanumeric characters.
Once set up, click "Next" to verify the database connection.
On the next page, set up the content to be reflected in the specified sheet.
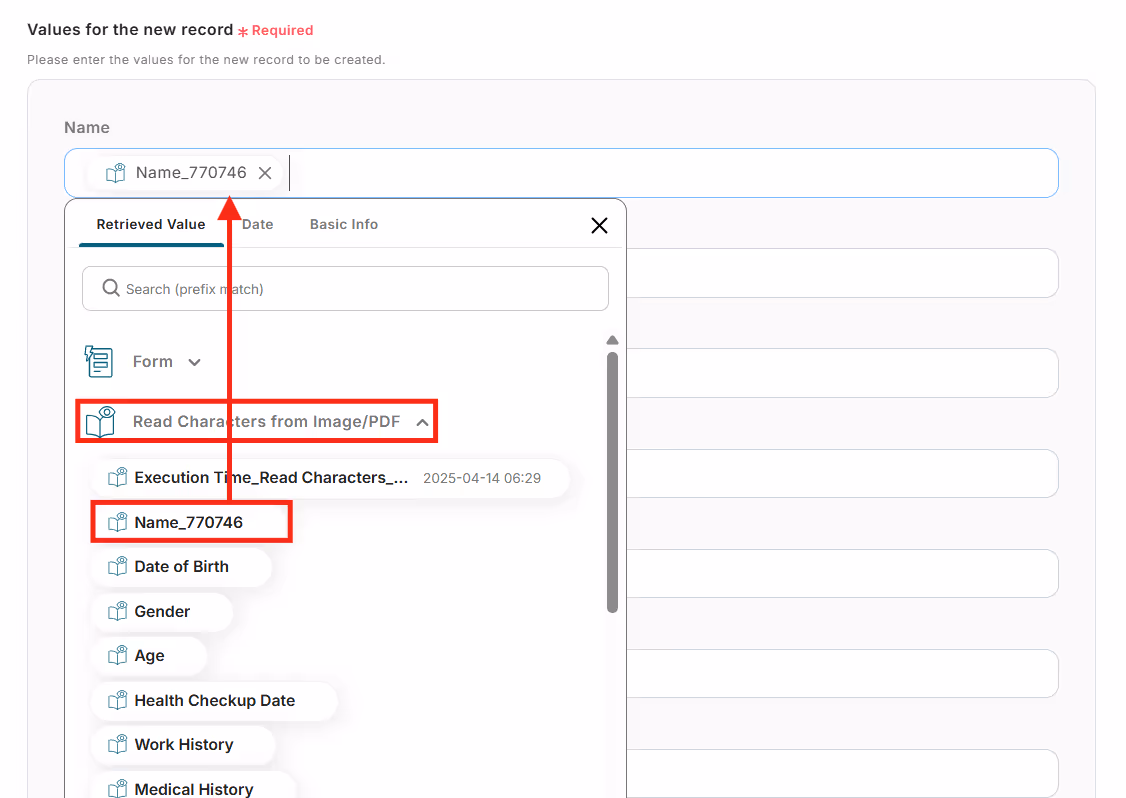
Enter the items that match each field from the output.
Once all entries are made, click "Test".
When the test is successful, the same information is automatically reflected in the specified Google Sheets.

Once confirmed, click "Save" to complete all settings.
Finally, turn on the trigger.

Now, the information from the health check form submitted through the form is automatically reflected in Google Sheets.
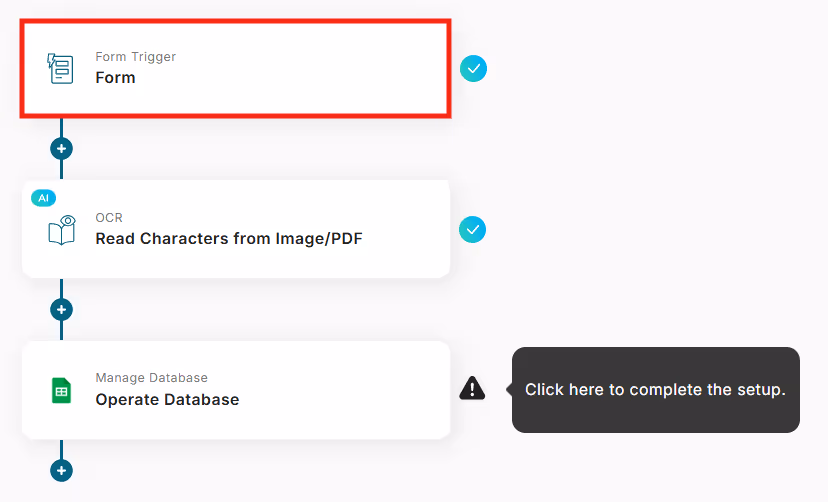
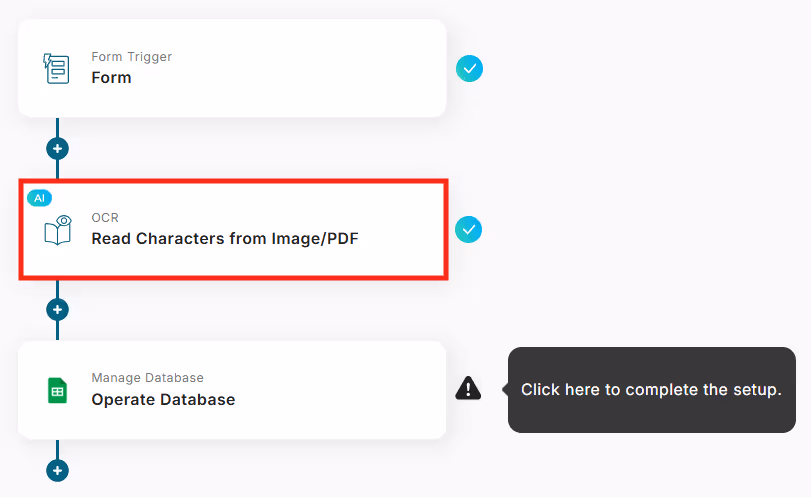
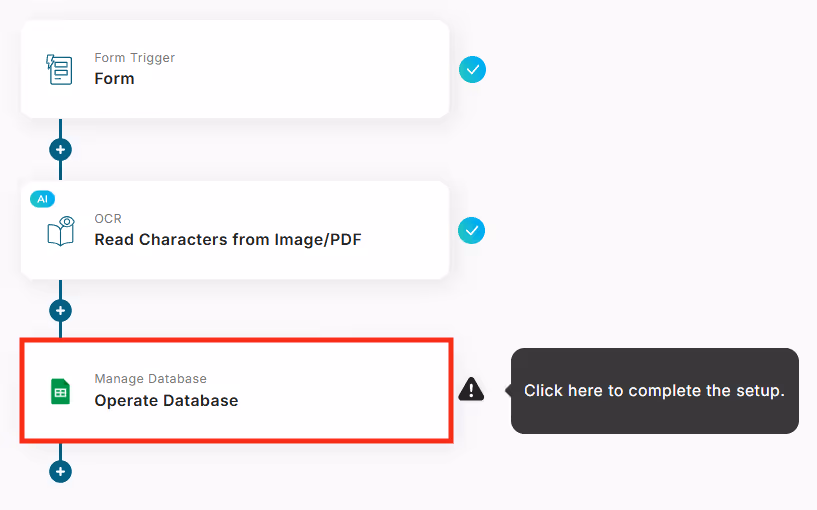
The flow set up this time is as follows.


.avif)
.avif)
.avif)


