How to create a contract based on Rakuraku Sales information and send it using GMO Sign by integrating Rakuraku Sales with GMO Sign
How to Integrate Applications
・
2024-12-20
How to create a contract based on Rakuraku Sales information and send it using GMO Sign by integrating Rakuraku Sales with GMO Sign
m.i
Are you, as a sales assistant or similar role, finding that creating and sending contracts manually has become routine? Especially for companies with a high volume of transactions, efficient and accurate contract creation is essential. Even though mistakes are not an option, the constant influx of creation requests can be overwhelming. By integrating Rakuraku Sales and GMO Sign, you can automate the process from contract creation to sending, significantly improving operational efficiency. This article will explain in detail the benefits of integrating Rakuraku Sales and GMO Sign, as well as the specific setup methods.
Benefits of Integrating Rakuraku Sales and GMO Sign
Here, we will introduce the benefits of integration.
Benefit 1: Automate from Contract Creation to Sending to Save Time and Costs
By automating the entire flow of contract creation, sending, and signing, you can achieve significant time and cost savings compared to traditional manual work. Not only does it eliminate the hassle of manual document creation and mailing, but it also enables electronic signatures, resulting in faster contract completion compared to manual processes. It is also unaffected by postal circumstances.
Benefit 2: Secure Contract Management
With the introduction of electronic contracts, the reduction in paper document management decreases the risks of contract loss and task omissions. Additionally, GMO Sign provides legally valid electronic signatures, allowing for safe and highly reliable contract management while ensuring compliance.
Integrate Rakuraku Sales and GMO Sign with Yoom
API integration can be a challenging task for non-engineer users. With Yoom, you can easily integrate app APIs without any code. Didn't the traditional API integration methods require programming knowledge and incur high costs for setup and troubleshooting? However, by using Yoom, integration is completed with just drag-and-drop operations, and flowbot settings can be done intuitively. By using the templates we provide, you can challenge even more advanced automation.
How to Create an Integration Flow for Rakuraku Sales and GMO Sign
So far, we have introduced the benefits. Let's quickly integrate the apps we will use this time with Yoom! Before that, if you do not have a Yoom account, please issue one from the Yoom account issuance page. You can start in 30 seconds! For basic Yoom operations, please refer to Getting Started with Yoom. Note: Rakuraku Sales is an app available only on the Team Plan and Success Plan. For Free Plan and Mini Plan, the operations and data connections of the configured flowbot will result in errors, so please be careful. Once registration is complete, try creating the "Create a contract based on Rakuraku Sales information and send it with GMO Sign | Yoom" flowbot.
Step 1: Connect My App
First, let's connect RakuRaku Sales and Yoom that you are using. Select My App → New Connection → RakuRaku Sales from the left side of the Yoom page. Search from the app list or search by app name. The following screen will appear, so please refer to it for settings. ※You will need to contract the API connection option with RakuRaku Sales and register Yoom's IP address. Please check Yoom's IP addresshere.
Scroll down to see the following screen. Account Name: Any management name, e.g., Administrator Account Access Token: Proceed within RakuRaku Sales to "Administrator Settings > User Settings Tab > User Management > Settings" and click the "Generate" link in the API Token field to generate the API token ※Customers using "SSL Client Authentication" should enter "Client Certificate File" and "Client Certificate File Password".
Next, connect GMO Sign. Please refer to this guide for settings. The API connection option for GMO Sign is required for the connection. ※For details, please refer to here or contact GMO Sign.
We will also connect Google Docs. Once the three apps are displayed in My App, the setup is complete.
Step 2: Set Triggers and Actions
This time, we will use the available template. Once you open the template page, click on "Try this template". If you are using Yoom, log in, and if you are new, register as a member. As you proceed, the template will be copied to your workspace. If necessary, you can change the name of the template. Click on "My Projects" on the left, and the copied template will appear. Click on the ellipsis (...) on the right and select "Edit".
This time, there are five steps. Let's set them up together!
Let's start with the app trigger. Select "Execute HTTP transmission in automatic processing settings". Check the account information to be linked. Proceed to the next step with the action as it is. If the following screen appears, please refer to this article for settings on the RakuRaku Sales side. Save it once the test is successful.
Next, click on "Issue a contract". Prepare the template document by referring to this. Check the account information to be linked. Select the Google Drive folder ID for the template document's linkage and storage destination from the candidates. Set the output file name as desired.
Specify the replacement conditions. The string enclosed in {} within the template document is automatically acquired as the "string to be replaced". Enter the "string after replacement" for each target. If there are no issues with the displayed conditions, test and save.
Now, let's proceed with the GMO Sign settings. Select "Generate Access Token". Secret Key and Customer ID: Please contact GMO Sign. Save it once the test is successful.
Select "Register Document for Envelope". Proceed to the next step with the action as displayed. Secret Key and Customer ID: Enter the same as in the previous section Select the access token from "Generate Access Token" in the output File attachment method: Use output and issued documents Once these settings are complete, test and save.
Finally, select "Request Signature for Envelope (Recipient Signature Only)". The action remains the same. Now, proceed with the required settings. Secret Key, Customer ID, and Access Token: Enter the same as in the previous section Envelope Name: Any desired name
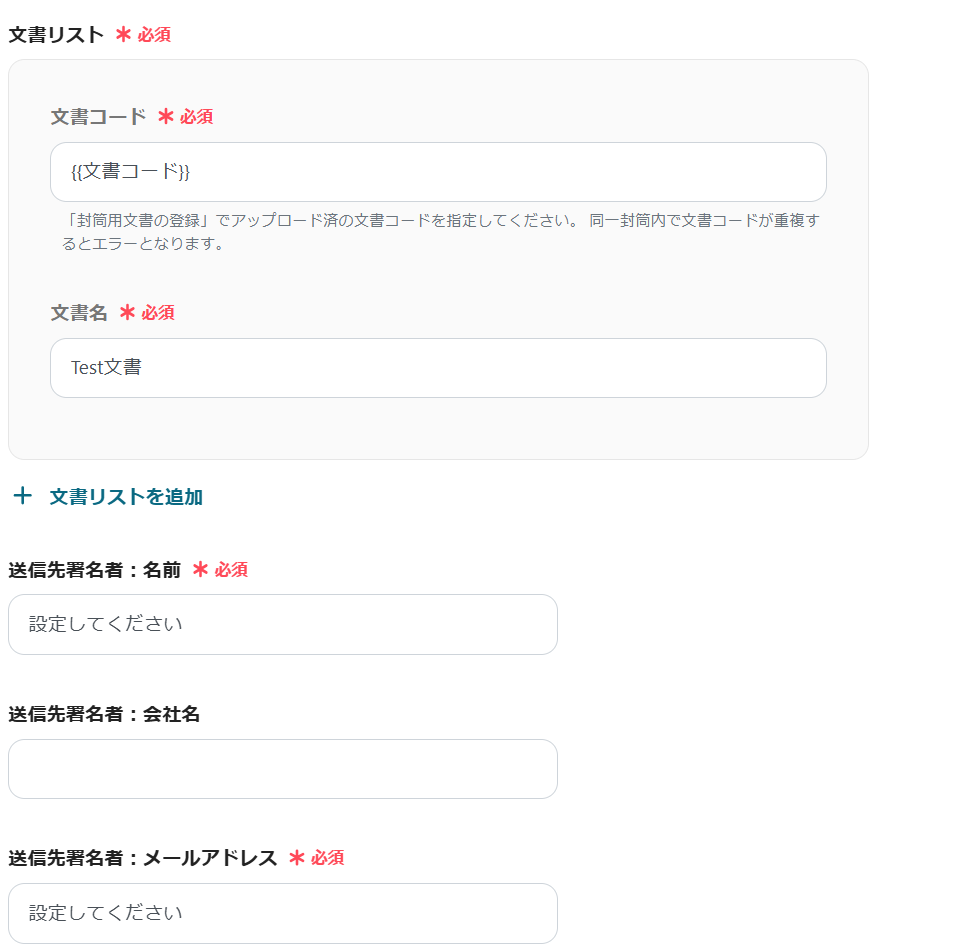
Set up the document list. Document Code: {Document Code} in "Register Document for Envelope" in the output Document Name: Any desired name
Let's set up the recipient signature information. Document Code: Select from the output as before Test → Save once the test is successful. Turn on the app trigger to complete. Thank you for your hard work! There were many settings, but even I, who am not familiar with programming, could do it! The template used this time is here↓
Summary
This time, we introduced a "flowbot that creates contracts based on information from RakuRaku Sales and sends them via GMO Sign." By integrating RakuRaku Sales with GMO Sign, you can automate the process from contract creation to sending, significantly improving operational efficiency. In particular, by utilizing Yoom, you can achieve integration without code, and by using templates, you can easily challenge business automation with simple settings. Reduce errors from manual work and proceed quickly to contract conclusion.
Please refer to this article and try to improve your business efficiency.
The person who wrote this article
m.i
I have experienced finance-related work for about 3 years since I graduated as a new graduate.
Due to the industry, there are so many tasks that are done manually, and I came across Yoom when I thought that if automated, I could do more other work.
I'm impressed every day by the convenience of Yoom while writing a blog.
I try to make the structure easy to understand.
Conventional RPA can only automate simple repetitive tasks, and the setup process was very complicated. With “hyperautomation,” which combines various technologies such as AI, API, RPA, and OCR, it is possible to automate many tasks that could not be realized until now more easily than before.
Most tools simply connect one app to another, leaving the complex tasks to you. Yoom goes much further: From document creation and browser automation to OCR and generative AI, Yoom handles it all seamlessly in one platform.
Why settle for basic integrations? Streamline your entire workflow with Yoom’s powerful hyperautomation.


.avif)

.avif)
.avif)


