StripeとHubSpotの連携イメージ
How to Integrate Applications

2025-04-16

How to integrate Stripe with HubSpot to automatically create a ticket in HubSpot when a new customer is created in Stripe

y.matsumoto

As the number of customers increases, it is important to maintain the speed of customer service and consistency in information management.
However, transferring information between multiple systems can be cumbersome and may lead to human errors.
In this article, we will introduce a method to automatically create a ticket in HubSpot whenever a new customer is created in Stripe by integrating Stripe with HubSpot.
This automation can speed up customer service and maintain data consistency, thereby improving operational efficiency!
We will explain the integration steps in an easy-to-understand manner.

Recommended for

  • Those who are already using Stripe and HubSpot and want to streamline customer management
  • Those looking for ways to maintain data consistency between different systems
  • Sales representatives who want to respond quickly through business automation

From here, we will explain how to use the no-code tool Yoom to "create a ticket in HubSpot when a new customer is created in Stripe."

[What is Yoom]

How to Automatically Create a Ticket in HubSpot When a New Customer is Created in Stripe

This can be achieved by receiving the creation of a new customer in Stripe using Stripe's API and creating a ticket in HubSpot using HubSpot's API.
Generally, programming knowledge is required to achieve this, but with the no-code tool Yoom, it can be easily accomplished without programming knowledge.

You can create the flow in the following four processes!

  • Integrate Stripe and HubSpot with My Apps
  • Copy the template
  • Set the trigger in Stripe and then set the action in HubSpot
  • Turn the trigger ON

If you are not using Yoom, please register for free from here. If you are already using Yoom, please log in.

Step 1: Integration of My App with Stripe and HubSpot

1. How to Register with Stripe

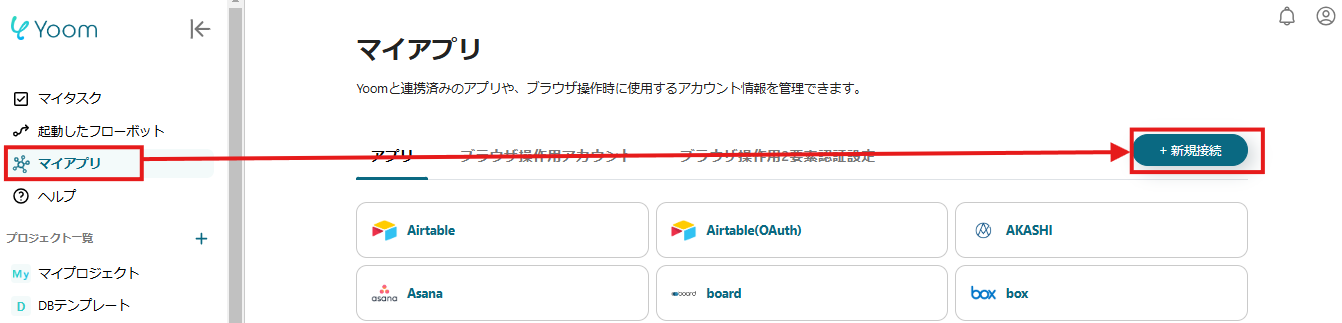
Click on "New Connection" in "My App".
Enter Stripe and select Stripe from the search results.

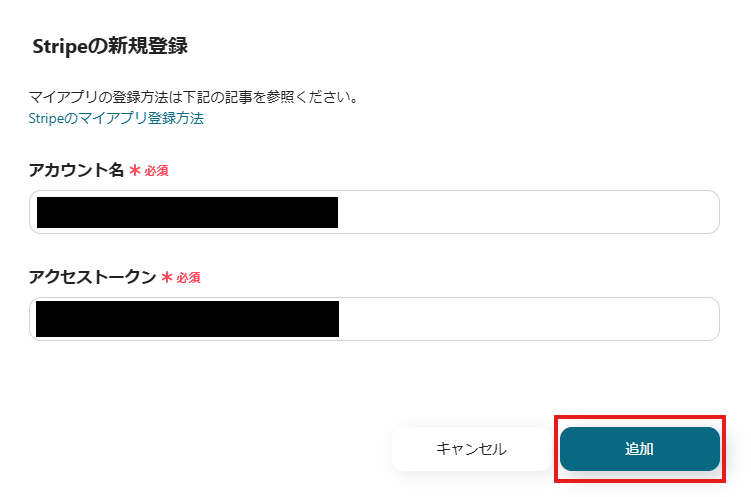
On the new Stripe registration screen, enter "Account Name" and "Access Token", then click "Add" to complete.
Reference: For detailed setup instructions, please see How to Register My App with Stripe.
Note: Stripe is an app available only on some paid plans, with a 2-week free trial available.

2. How to Register with HubSpot
Similarly, click "New Connection" and enter HubSpot.

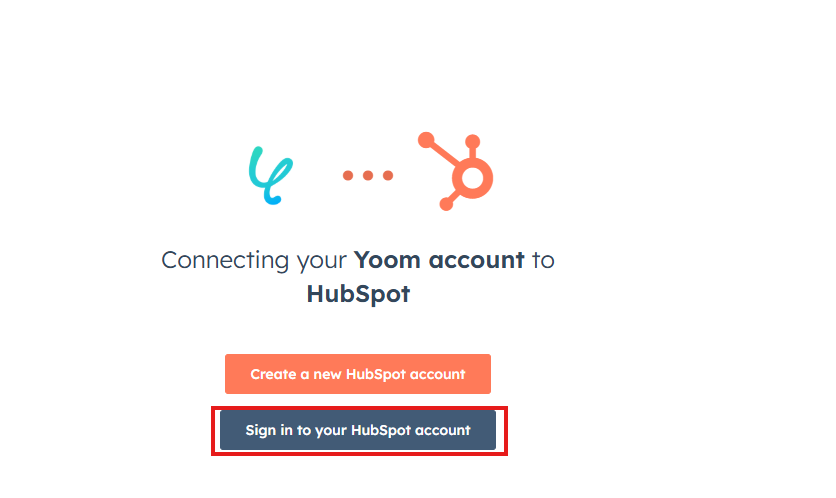
Click "Sign in to your HubSpot account" on the screen above.
Enter the required information and sign in.

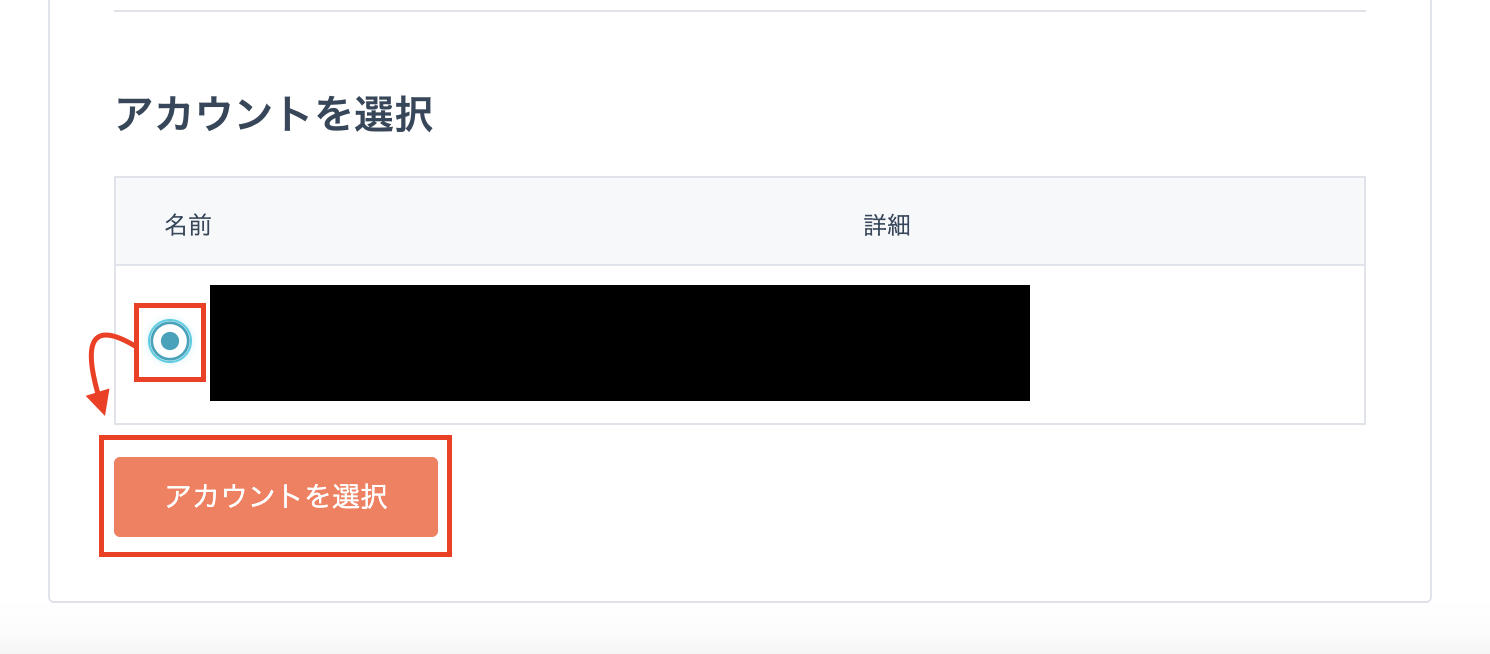
Select the relevant account and press "Select Account" to complete the integration.

Step 2: Copy the Template

Next, let's copy the template.
Open the link below.

Click "Try this template" on the destination screen.
Let's start creating the flow right away!

Step 3: Set the trigger to activate when a new customer is created in Stripe

First, click "When a new customer is created" to set it up.

The next page is pre-configured.
Check for any errors in the "Account information to link with Stripe" and click "Next".

Select the trigger activation interval from the dropdown.
Note: Depending on the plan, you may not be able to select the activation interval.

Once you have set the activation interval, create a new test customer in Stripe.


Once the test is successful, the new customer information in Stripe will be obtained as output, so check it and click "Save".

Step 4: Create a ticket in HubSpot

Next, click on the "Create a ticket" item.


This page is pre-configured.
Check for any errors in the "Account information to link with HubSpot" and click "Next".

Set the ticket name as desired.

You can freely set the ticket description according to your needs.
For example, if you set it as shown in the above screen, when a new customer is created in Stripe, you can automatically create a ticket in HubSpot by obtaining the "Customer Name" and "Email Address".

Click "Test" and if the test is successful, save the settings.

Step 5: Turn on the trigger


Finally, when the above screen is displayed, click "Turn on trigger".
This completes the flow of "Create a ticket in HubSpot when a new customer is created in Stripe".

To Further Automate

Yoom offers convenient features that can further promote automation.
This time, we will introduce two application examples of the flow we created earlier!

Application Example 1: Notify

By utilizing Yoom's notification feature, you can be notified when a ticket is automatically created.
Click on the ellipsis at the top right of the flow creation page.
By turning on "Notify on Workflow Completion," you will receive a notification to the email address registered with Yoom when the flow is completed.

Application Example 2: Add to Database

By clicking the + button at the bottom of the flow you created earlier, you can add an action.
For example, by adding an action to transfer data to Google Sheets, you can dataize the newly registered customer information.

Introduction of Other Automation Examples Using Stripe and HubSpot

From here, we will introduce some other automation examples using Stripe and HubSpot.

1. This is a flow where when a new company is registered in HubSpot, it is linked to Stripe to automatically create a customer by quoting the registration details.
By utilizing this flow, you can reduce the hassle of manual input and improve work efficiency.
Since the transcription work can be automated, it is possible to reduce human errors such as transcription mistakes and registration omissions.

2. This is a flow that automatically creates a payment link from HubSpot for Stripe and sends it via Gmail.
By utilizing this flow, you can automate the creation and notification of Stripe payment links, thereby streamlining transaction operations.

3. This is a flow that allows you to automatically create contracts in Google Docs from HubSpot deal information.
By utilizing this flow, there is no need to manually transfer data from HubSpot.
This enables efficient contract creation, which is expected to facilitate smooth transactions with customers.

Benefits and Examples of Integrating Stripe and HubSpot

1: Streamlining Operations and Reducing Human Error

By integrating Stripe and HubSpot, you can automate the ticket creation process when a new customer is created in Stripe, leading to improved operational efficiency.
Additionally, it reduces human errors such as transcription mistakes and omissions that occur with manual entry.
This automation allows for efficient operations while preventing errors, potentially reducing the burden on staff and enabling them to focus on more important tasks.
This can lead to improved accuracy and productivity in operations.

2: Faster Customer Response

Integrating Stripe and HubSpot allows for automatic ticket creation in HubSpot when a new customer is created in Stripe.
Previously, manual ticket creation was necessary, but this automation shortens response times.
With this automation, sales and customer support representatives can quickly grasp customer information and begin responding.
This automation smooths customer interactions and enables quick responses, potentially improving service quality and customer satisfaction.

3: Maintaining Data Consistency

By integrating Stripe and HubSpot, customer information created in Stripe is automatically and accurately reflected in HubSpot, maintaining data consistency across multiple systems.
For example, it can prevent confusion caused by differing information between Stripe and HubSpot when the sales team checks new customer information.
This can improve the accuracy of information and enhance the quality of decision-making.

Conclusion

In this article, we introduced how to automatically create a ticket in HubSpot when a new customer is created in Stripe by integrating the two! What did you think?
By automating transcription tasks, you can reduce human errors and ensure that the latest information is shared seamlessly across all teams.
Automating routine tasks allows you to focus on more valuable work, potentially improving operational efficiency.
With Yoom, you can easily create such automated workflows without coding!
If you're aiming for efficient business operations, take this opportunity to leverage Yoom.

The person who wrote this article
y.matsumoto
Until now, I have experienced sales and sales office work in the human resources industry. Based on my experience in my previous job, I feel that the problems faced by various companies can be reduced by “automating operations.” Through Yoom, we will continue to send out information on a daily basis so that we can solve your problems even a little bit!
Tags
Stripe
HubSpot
Automation
Automatic
Integration
Related Apps
App integration
What is Yoom hyperautomation?
Conventional RPA can only automate simple repetitive tasks, and the setup process was very complicated.
With “hyperautomation,” which combines various technologies such as AI, API, RPA, and OCR, it is possible to automate many tasks that could not be realized until now more easily than before.
Don't Just Connect Apps—Automate Everything
Most tools simply connect one app to another, leaving the complex tasks to you. Yoom goes much further: From document creation and browser automation to OCR and generative AI, Yoom handles it all seamlessly in one platform.

Why settle for basic integrations? Streamline your entire workflow with Yoom’s powerful hyperautomation.
Learn more about Yoom
Helpful Materials
I understand Yoom! 3-piece set of materials
Download materials
Understand in 3 minutes! Yoom service introduction materials
Download materials
Find out by Before After! Yoom Case Study Collection
Download materials
See a list of useful materials