.avif)


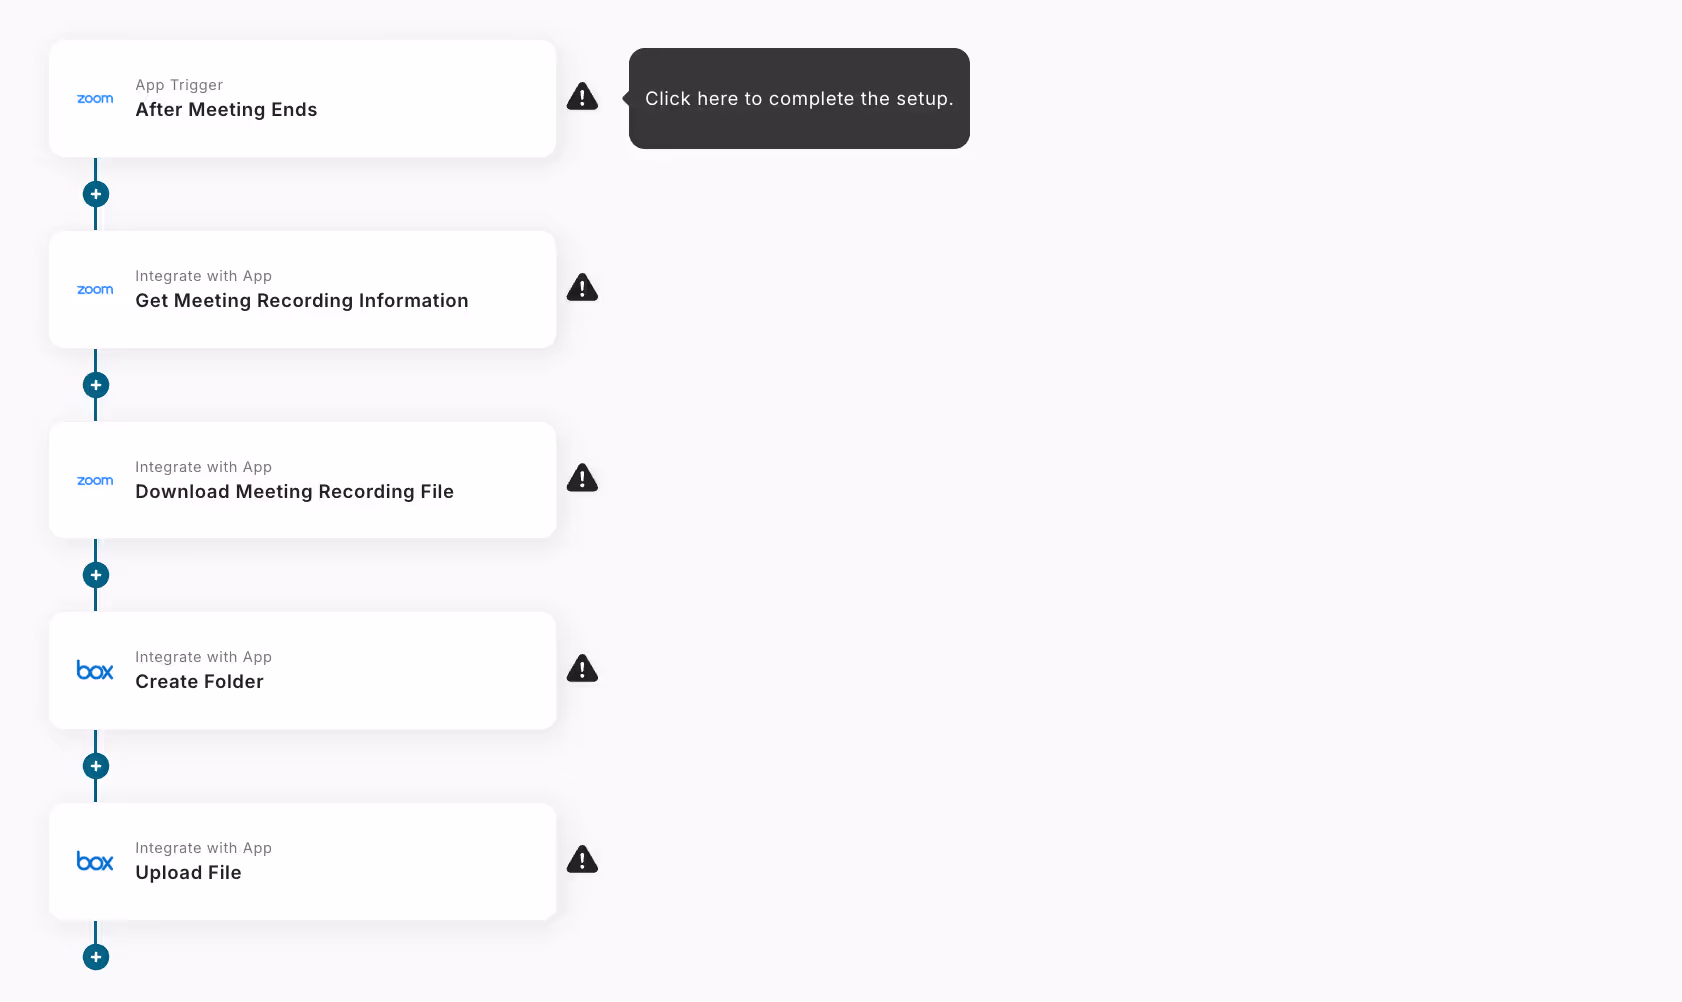
Step 2: Set a Trigger to Activate When a Zoom Meeting Ends
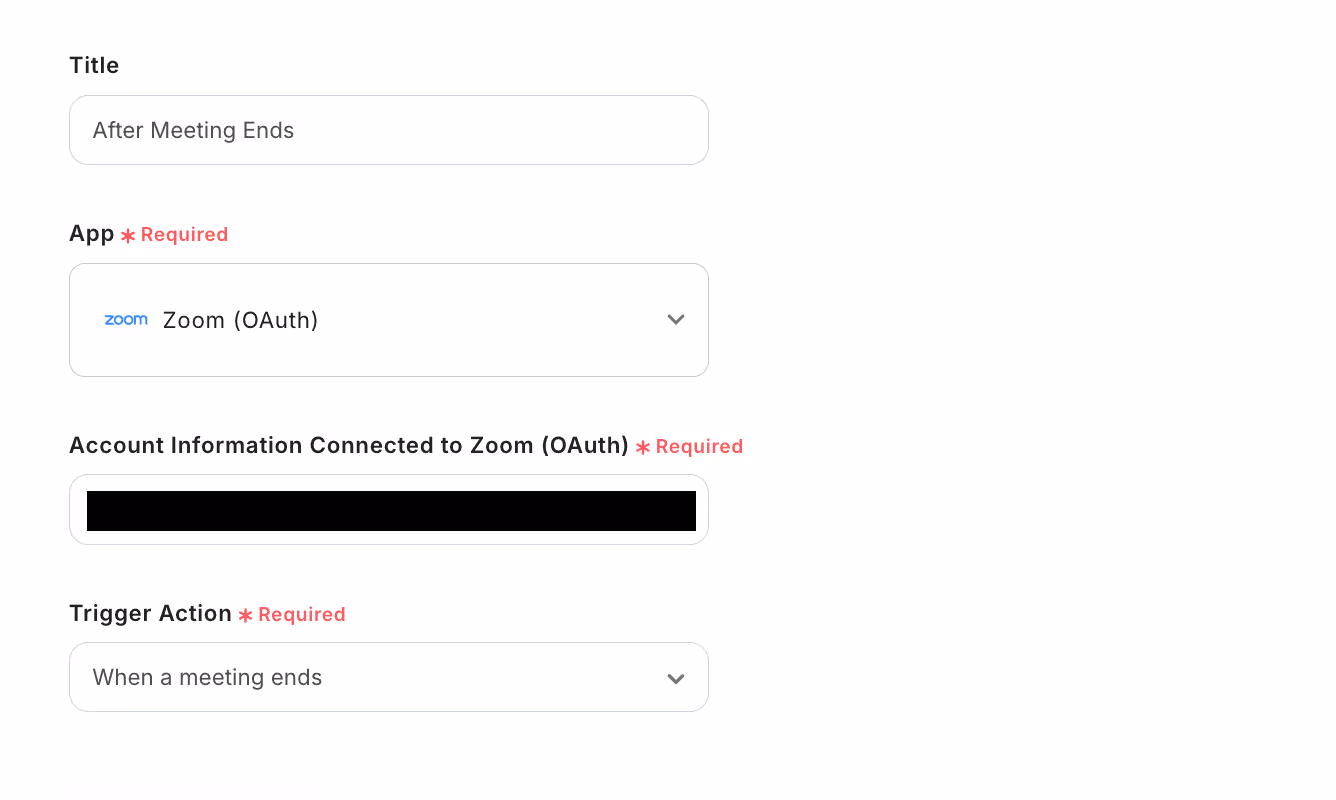
3. Configure "Select Linked Account and Action".
・App Trigger Title: Can be set as desired. (Example: "After Meeting Ends")
・Trigger Action: Select "When the meeting ends".
4. Click "Next".
5. Configure the API connection settings for the app trigger.
・Trigger Activation Interval: Select an appropriate time.
・Email Address: Specify the email address of the Zoom account.

6. Conduct a test, confirm success, and click "Save".
Step 3: Set an Action to Retrieve Zoom Meeting Recording Information
7. Click the "+" button below the app trigger created in Step 2.
8. Select "Integrate with App" from the operation type.
9. Select Zoom (OAuth) from the app list.
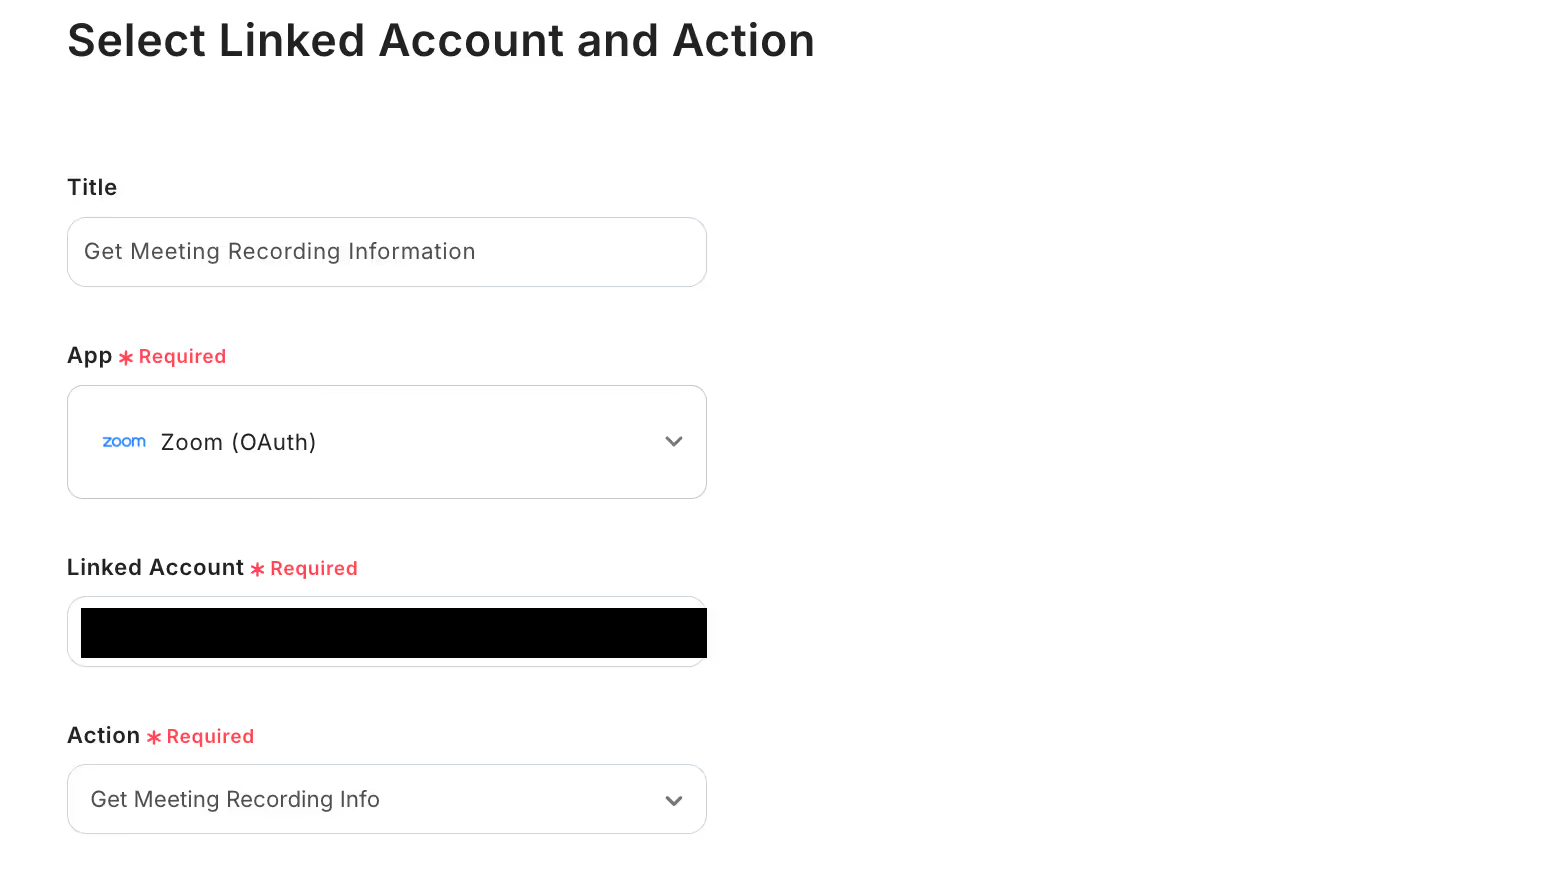
10. Configure "Select Linked Account and Action".
・Title: Can be set as desired. (Example: "Retrieve Meeting Recording Information")
・Action: Select "Retrieve Meeting Recording Information".
11. Click "Next".
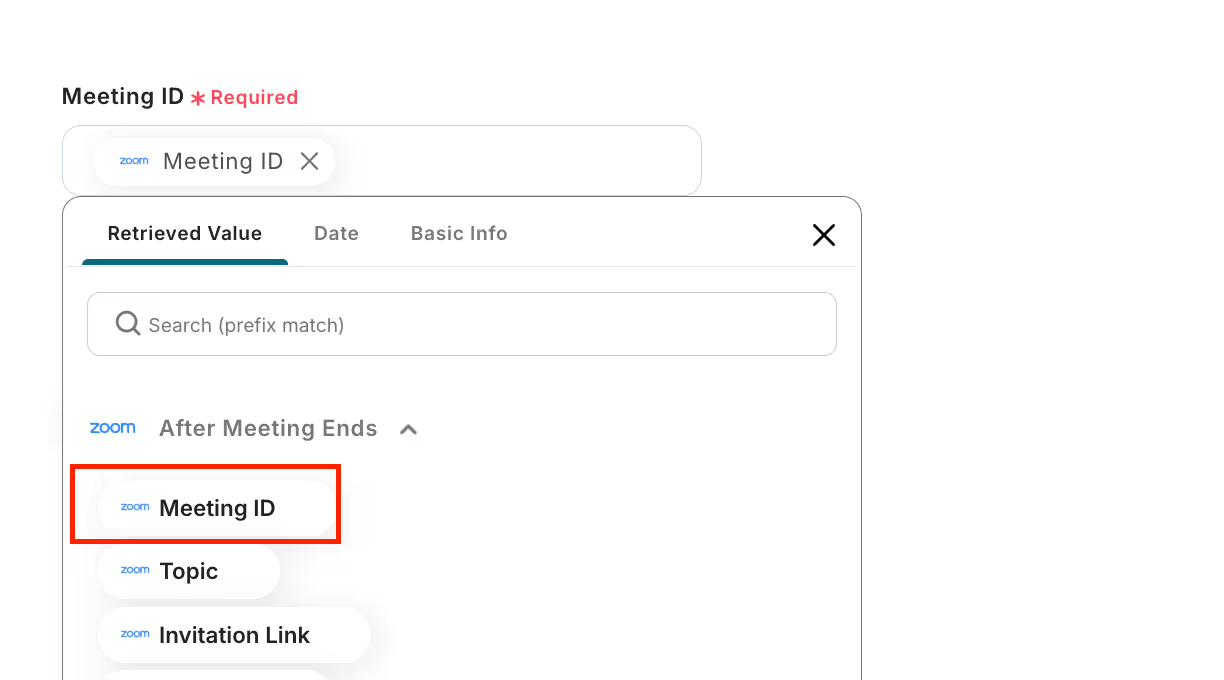
12. Configure the API connection settings.
・Meeting ID: Refer to the output as follows.
13. Conduct a test, confirm success, and click "Save".
Step 4: Set an Action to Download Zoom Meeting Recording Files
14. Click the "+" button below the action created in Step 3.
15. Select "Integrate with App" from the operation type.
16. Select Zoom (OAuth) from the app list.
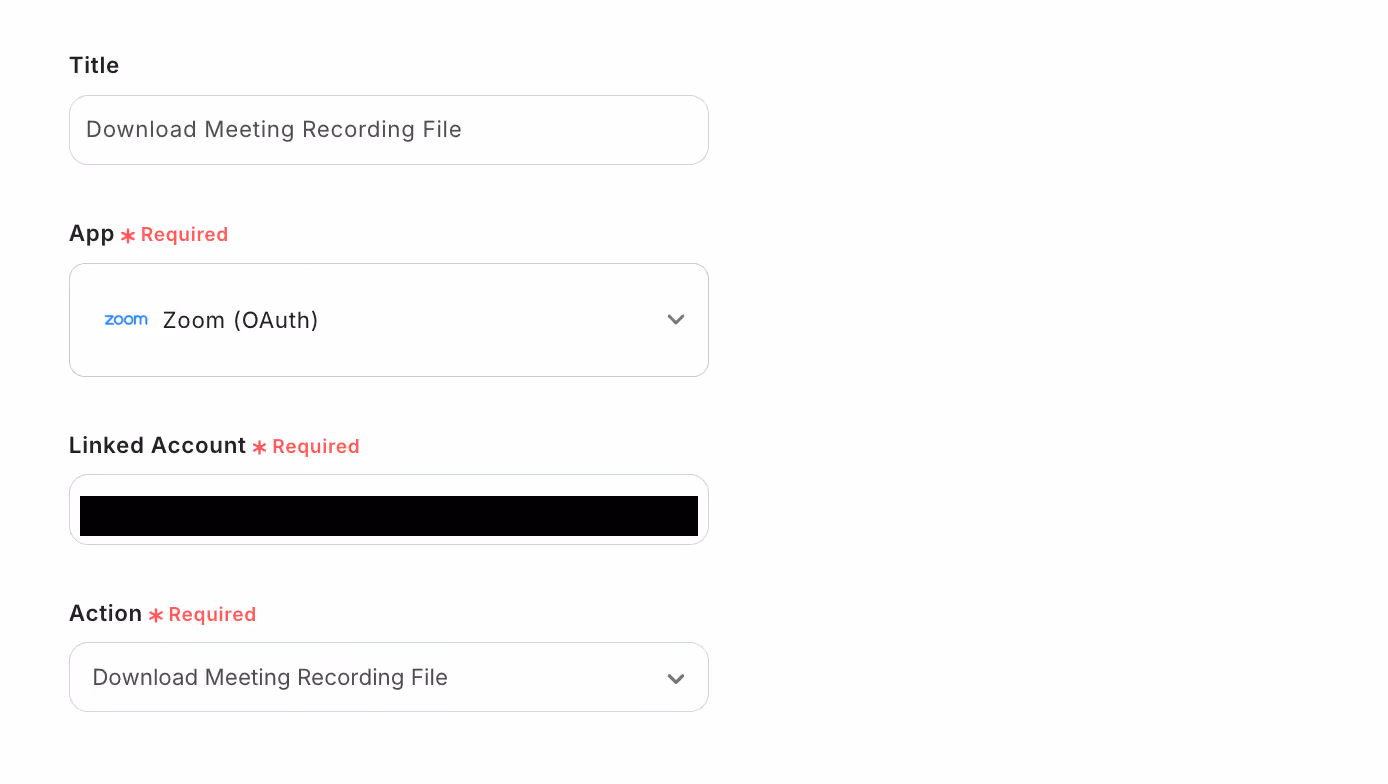
17. Configure "Select Linked Account and Action".
・Title: Can be set as desired. (Example: "Download Meeting Recording Files")
・Action: Select "Download Meeting Recording Files".
18. Click "Next".
19. Configure the API connection settings.
Download URL: Refer to the output from Step 3 - Procedure 17.

20. Conduct a test, confirm success, and click "Save".
Step 5: Set an Action to Create a Folder in Box
21. Click the "+" button below the operation created in Step 4.
22. Select "Integrate with App" from the operation type.
23. Select Box from the app list.
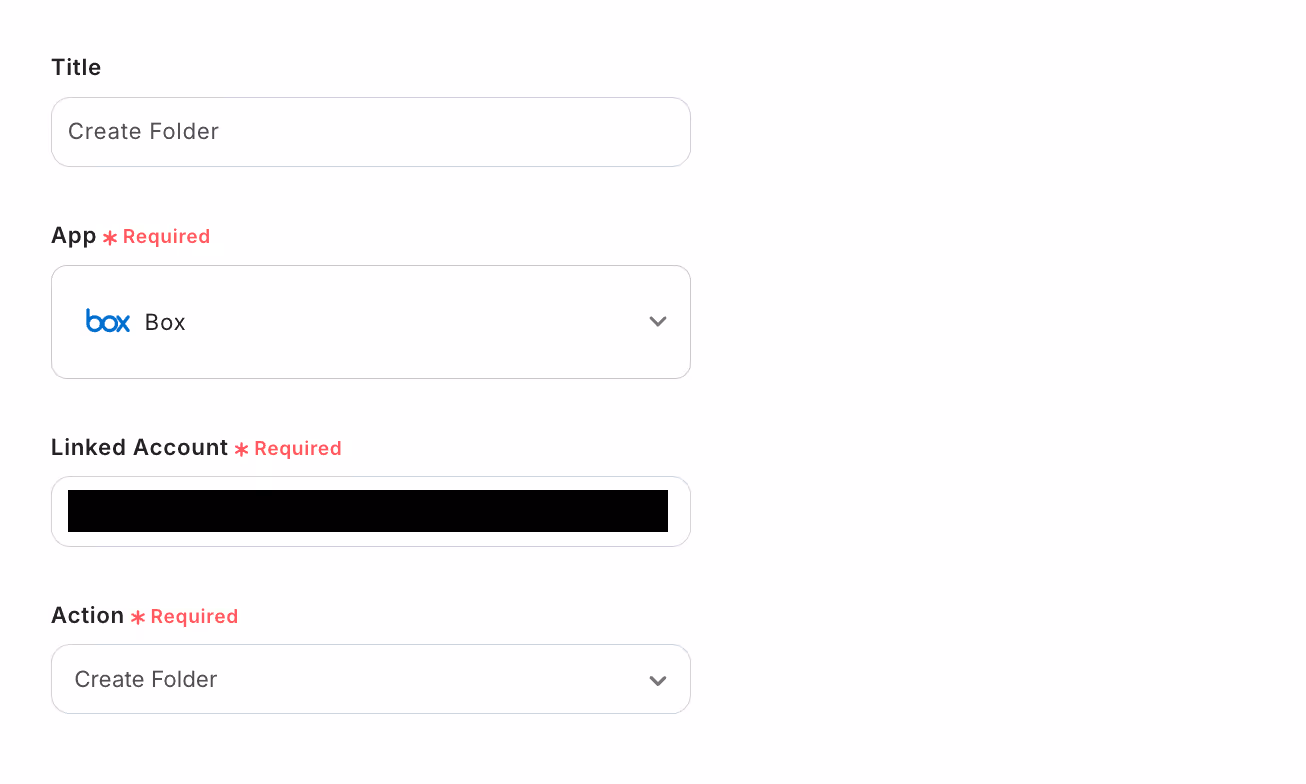
24. Configure "Select Linked Account and Action".
・Title: Set as desired. (Example: "Create Folder")
・Action: Select "Create Folder".
25. Click "Next".
26. Configure the API connection settings.
・Folder Name: Can be set as desired.
Referring to the meeting date and time or meeting ID from previous outputs can help centralize file management.
・Parent Folder Content ID: Open the relevant folder in Box and refer to the last number sequence in the URL.

27. Conduct a test, confirm success, and click "Save".
Step 6: Set an Action to Upload Files to Box
28. Click the "+" button below the operation created in Step 5.
29. Select "Integrate with App" from the operation type.
30. Select Box from the app list.
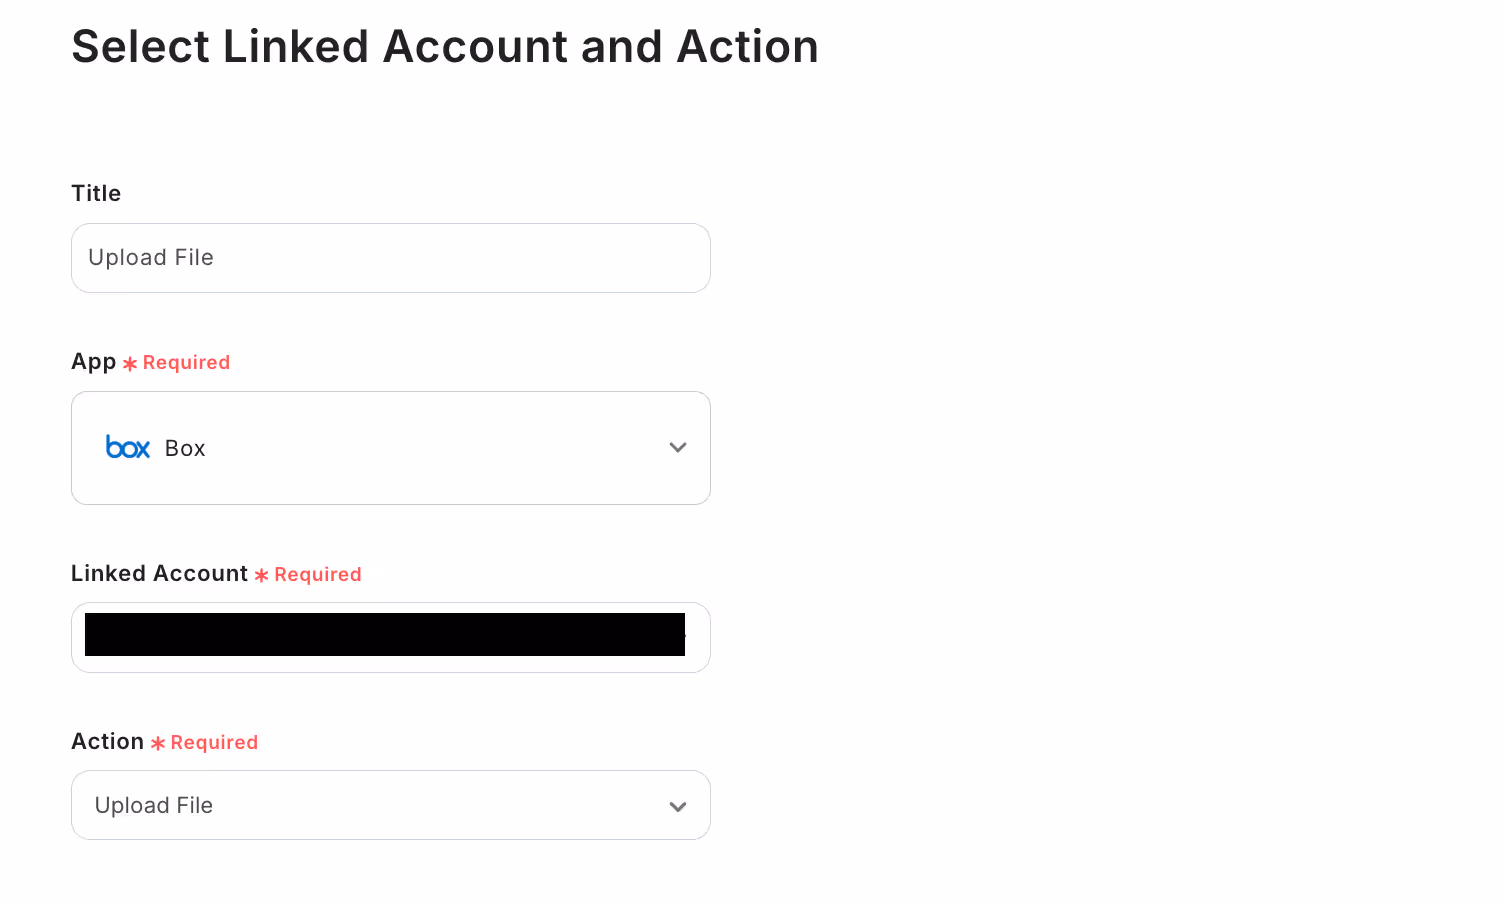
31. Configure "Select Linked Account and Action".
・Title: Set as desired. (Example: "Upload File")
・Action: Select "Upload File".
32. Click "Next".
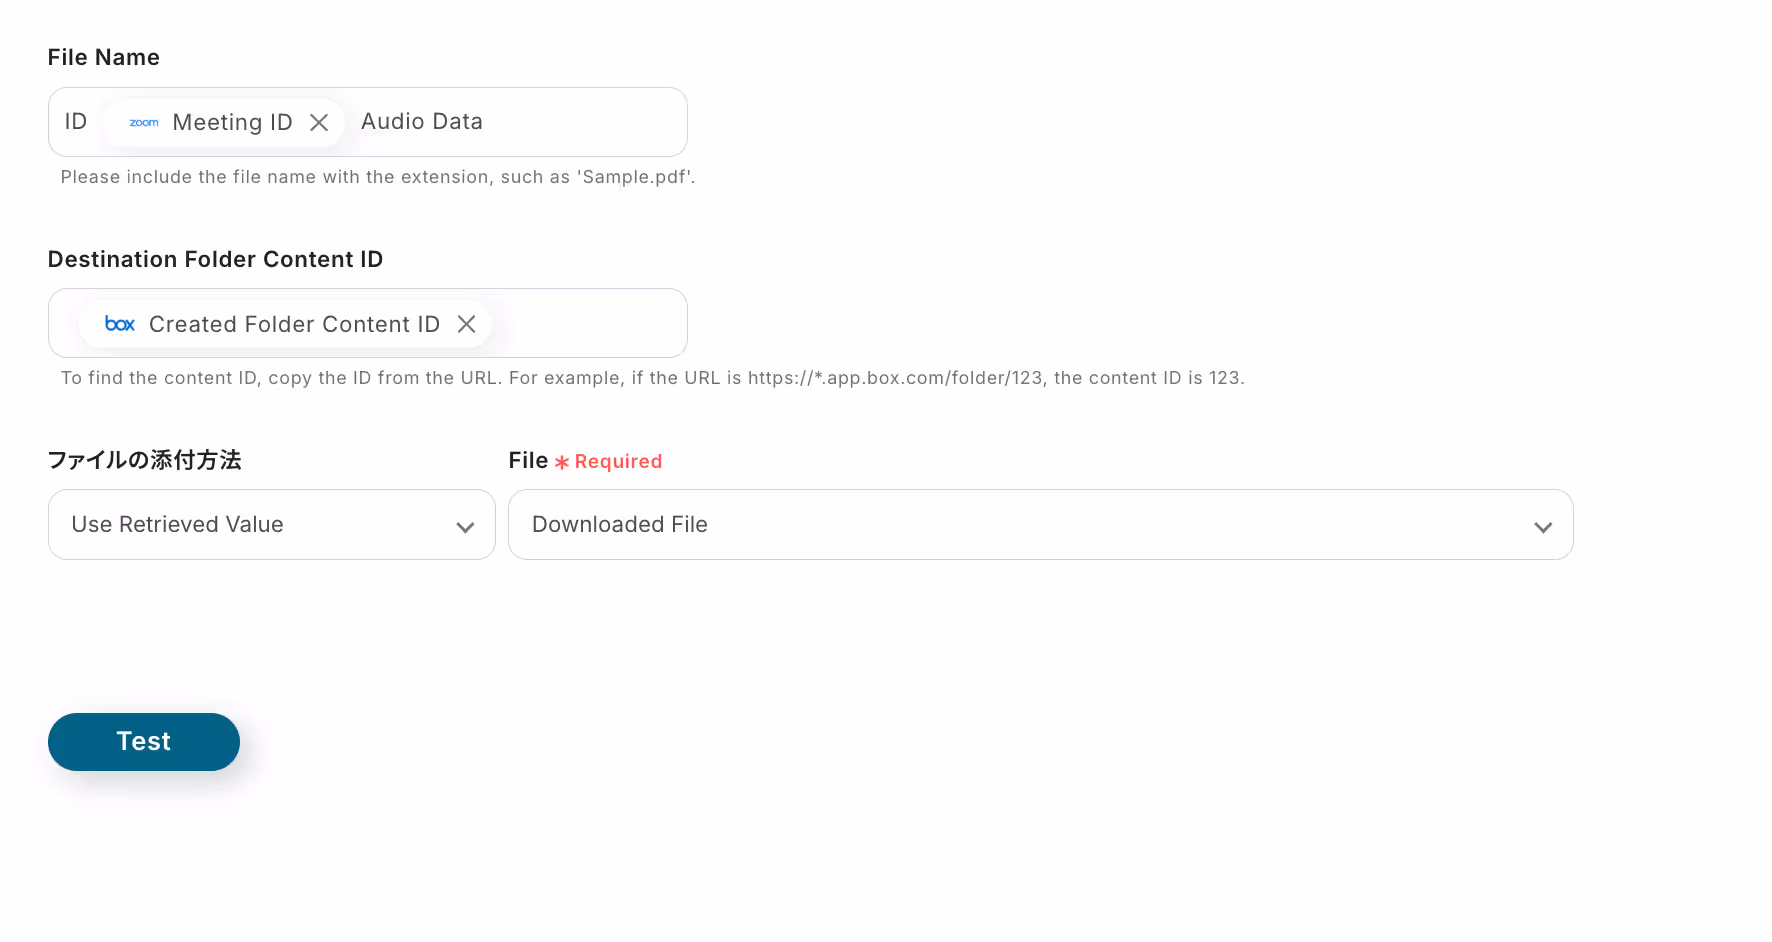
33. Configure the API connection settings.
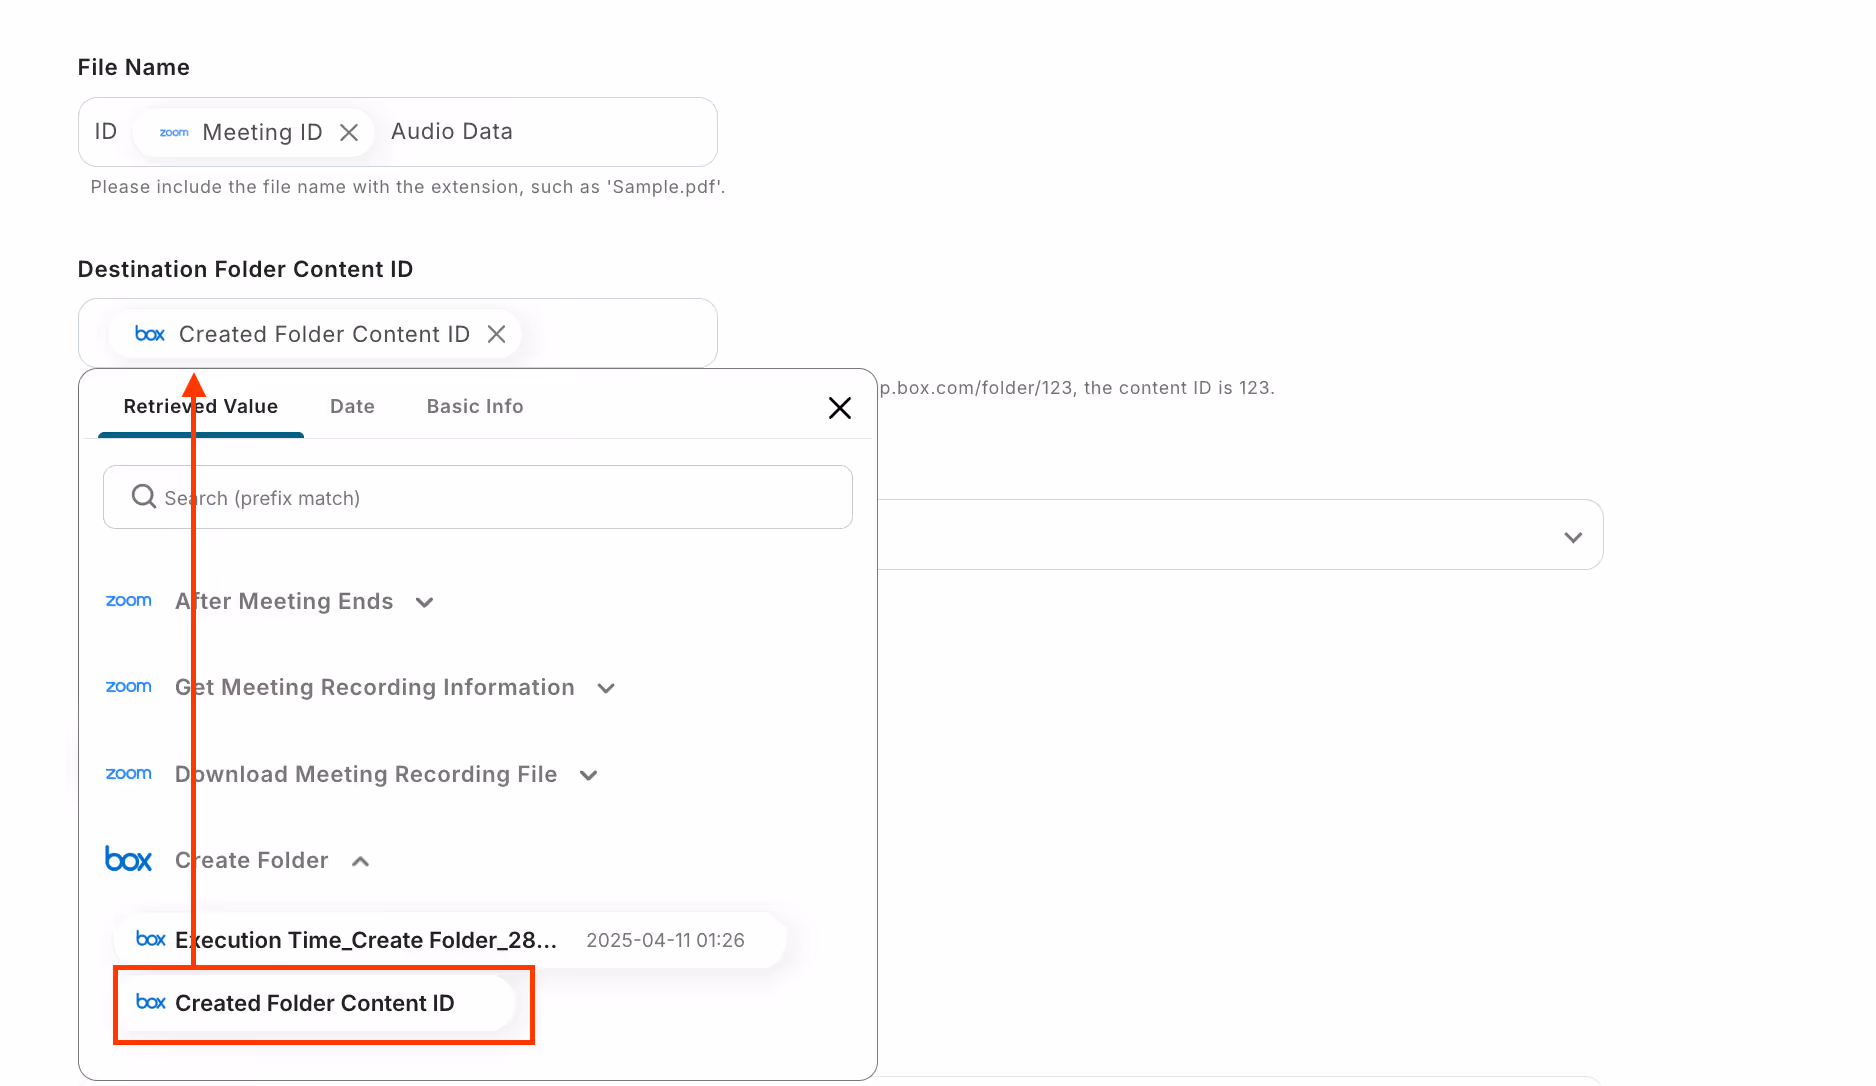
・File Name: Can be set as desired. Be sure to include the file extension.
You can refer to the meeting ID, etc., from previous outputs.
・Destination Folder Content ID: Can be referred from the output of Step 5 - Procedure 31.
・File Attachment Method: Select "Use Output" and "Downloaded File".
34. Conduct a test, confirm success, and click "Save".
Finally, switch the trigger of the saved flow to "ON" to activate it.

This completes the flow of "Saving the recording file to Box when a Zoom meeting ends"!


.avif)